The Legend of Zelda: Ocarina of Time #2 Location: Walkthrough
Gameplay & Walkthrough
The Legend of Zelda: Ocarina of Time #2
The Legend of Zelda: Ocarina of Time - Walkthrough
Kokiri Forest
The game starts when Navi, Link's lifelong fairy companion, visits his cozy wooden abode. The Great Deku Tree has requested an audience with the young Kokiri, an honor that is rarely granted. Head out and talk to Link's childhood friend Saria.
Take Up Sword and Shield
Mido has rudely blocked off the entrance to the Deku Tree's sanctuary, but will grant you entry on the condition that you immediately equip yourself with a (Kokiri) Sword and (Deku) Shield. Since you do not start the game with these items, this becomes your first quest.
The Kokiri Sword is a little tricky to find.There's a small fenced in area called the Forest Training Center,which is in the southwestern area of the village (bottom left of your map). Head up there and you will find a small hole in the wall next to a sign. Step up to the hole and press A to crawl in, then just hold forward until you pop out on the other side. In this area, round the corner and gather the Blue Rupee (5), then turn around and wait for the giant boulder to pass. Quickly follow it and take the first right to find another Blue Rupee (5). Wait for the boulder again if you like or continue on if you are quick enough. The next alcove holds a giant chest with the Kokiri Sword! Equip the sword by selecting it on the equipment subscreen of your start menu. It will be your trusty survival tool for your entire childhood, though most immediately, it can be used to cut grass in order to get more Rupees. Ahh, so much better. Now, work your way back to the hole and crawl back through. Back outside the Forest Training Center, you can check out the signs and talk to the dude with the ninja moves to learn how to use the sword. Target a rock and try it out if you like.
Next up is the Deku Shield. The shield costs 40 Rupees, which is quite steep, especially if all you are doing is cutting grass! Be sure to explore the entire village, including the house with the circle of rocks in front, to amass this amount. Hopping the three platforms leading to the Kokiri shop (the building with the red roof) gets you a Blue Rupee as well -- you can keep doing this if you enter a house or shop and then return here! Equip the Shield by selecting it on the equipment subscreen of your start menu.
Once both items have been acquired and equipped, speak to Mido to let you through to the Great Deku Tree. En route, Deku Baba emerge from the ground. Killing these supply you with Deku Sticks that you can use later to light torches and do basic attacks.
Inside the Deku Tree
Find the Dungeon Map
In order to save the Great Deku Tree, you will need to break the curse that lies inside of him. Once inside, take note of the web in the center; it will be useful to you in the future. The malignant Deku Baba in here are dangerous so use your shield to deflect their attacks and strike them right after to defeat them.
Climb the vines up to the next platform; you can then either go left for a heart on the edge of the log or right to the big treasure chest with a Dungeon Map inside.
Find the Fairy Slingshot
With the Skulltulas hanging from the vines above the treasure chest, you will not be able to reach the top without being knocked down. Instead, proceed past the treasure chest until you reach a door and go through it. After the door locks behind you, defeat the Deku scrub by deflecting the nuts he shoots at you off your Shield.
Once you hit him, talk to him and he will scuttle away shortly after, allowing you to move on to the next room.
The platform in the middle collapses upon contact, so move quickly to reach the other side. The treasure chest contains your first auxiliary item: the Fairy Slingshot. The slingshot is powered by Deku Seeds, which can sometimes be found in cut grass or bought from the Korkiri Forest shop.
Assign the Slingshot to a button and climb up the vine to the left of the treasure chest to get a heart from a smaller treasure chest. If you did not jump on the platform on your way in, jump across it to go back to the other side. If you jumped on the platform, simply use your Slingshot on the ladder hanging above the exit to drop it down.
Find the Compass
Now equipped with the Slingshot, those Skulltulas blocking your path are no problem. One shot from the Slingshot is enough to send each plummeting to its death. Climb up the vines once the path is cleared and drop down onto the catwalk to the right.
Head through the door here, which locks behind you. Not to worry though, as this can easily be corrected, but first step on the gold ground switch and hop across the raised platforms to the big treasure chest on the other side. Inside you will get your hands on the Compass.
Gold Skulltula: Your first Gold Skulltula Token (1/100) can be found in a side wall pocket, on the wall behind the larger Skulltula. Avoid jumping straight at the platform, or you will be hit by the dastardly Skulltula. Destroy the Gold Skulltula to grab the Golden Skull Token.
To leave the room, use the Deku Stick and light it using the existing torch in the room. Transfer the flame to the unlit brazier in the room to unlock the door. A good tip for conserving Deku Sticks is to put them away if you are not using them; stand still until the option appears over your action button, or swing your Sword.
To the Bottom
Gold Skulltulas: There are two Gold Skulltulas (2&3/100) in the room where you initially landed. One on the metal gate and another on the vines. Eliminate both to claim their Golden Skull Tokens.
After grabbing the Compass, and after you leave the room, you will see that Skultallas on the ceiling of the chamber are blocking the paths down to the web at ground level. Destroy one or more of the Skultallas, and then jump down onto the web, which will cause it to stretch and break. Be careful, though, as you can miss, and the fall can cause two hearts of damage. Once you have broken through, you will be on floor B1.
The gold ground switch will light the torch and burn the web around it. you will find a heart in the adjacent chest. The point here is to light another Deku Stick and carefully walk across the shallow water to the side with the spider web blocking the door. Burn away the web with the stick and then go through the door. In the next room, beat the Deku Scrub to get a quick lesson on how to defeat his brothers. Aim the Slingshot at the silver eye above the locked door to unlock it.
Getting to the Boss
Hit the underwater switch by floating above it and hold down the "A" button to dive until you hit it. The switch is located next to the second cage on the left side from the previous room. After lowering the water level, rush back to the other side and ride the floating platform to the opposite side. If the water rises back up before you make it, simply repeat the process. Kill the Skulltula hanging around the box and pull the box so that you can reach the ledge to the next room. Quickly light both unlit braziers to proceed into the room thereafter.
Once you walk through the door, watch the Skulltula hanging from above the ceiling. There are some incubating eggs on the ceiling. These eggs hatch into Gohma Larvae and will descend upon you if you wait around long enough. You can destroy the eggs by shooting them with the Slingshot before they hatch, but the Larvae are easy enough to handle. Light a Deku stick with the torch and burn the spider web on the right side (the other is a dead end). Crawl through the small hole into the next room. Push the block over the ledge and light the torch from the other side, using the block to return to this platform and slash down with the stick to light the web on fire.
You will fall into a small room with hearts and three Deku Scrubs. Bounce nuts off each scrub in the proper order (2-3-1) to unlock the next door to the boss of the Deku Tree.
Dungeon Boss: Queen Gohma
Once inside the Queen's lair, look up at the spider wandering around on the ceiling to grab her attention. The fight properly starts when she lands. Thankfully, the kind Scrubs outside betrayed their queen and gave us a hint, but it is not enough. We still do not know how to stun her. The ultimate weapon against her is the Slingshot.
Target Queen Gohma with Z-target ("L") and wait for her eye to turn red. When it does, use your Slingshot to send a seed into her eye, which immediately stuns her, allowing you to deliver several blows before she recovers. Alternatively, you can use Deku Nuts to stun her when she's on the ground. She will retreat to the ceiling where you can either fight off the baby eggs she shoots down at you or take another shot at her open, red eye to stun her again. If you run low on ammo, you can cut the grass located all along the edge of the room. Repeat these steps until the Queen is dead. Collect the Heart Container and walk into the portal that takes you back outside.
Kokiri Forest
It is now time to leave the safe confines of the village and make the journey to Hyrule Castle. Exit Kokiri Forest through the now unguarded doorway on the west side. On your way out, you will talk to Saria who gives you the Fairy Ocarina.
Hyrule Castle
After exiting Kokiri Forest, take a right and head north towards Hyrule Castle. If it turns dark, fight off the re-appearing Stalchildren until the drawbridge lowers in the morning.
Hyrule Market
Gold Skulltula: Immediately after crossing the drawbridge, enter the door next to the guard to find a room full of jars. Break the crates by rolling into them, to reveal a Gold Skulltula (4/100). Defeat it to receive a Golden Skull Token.
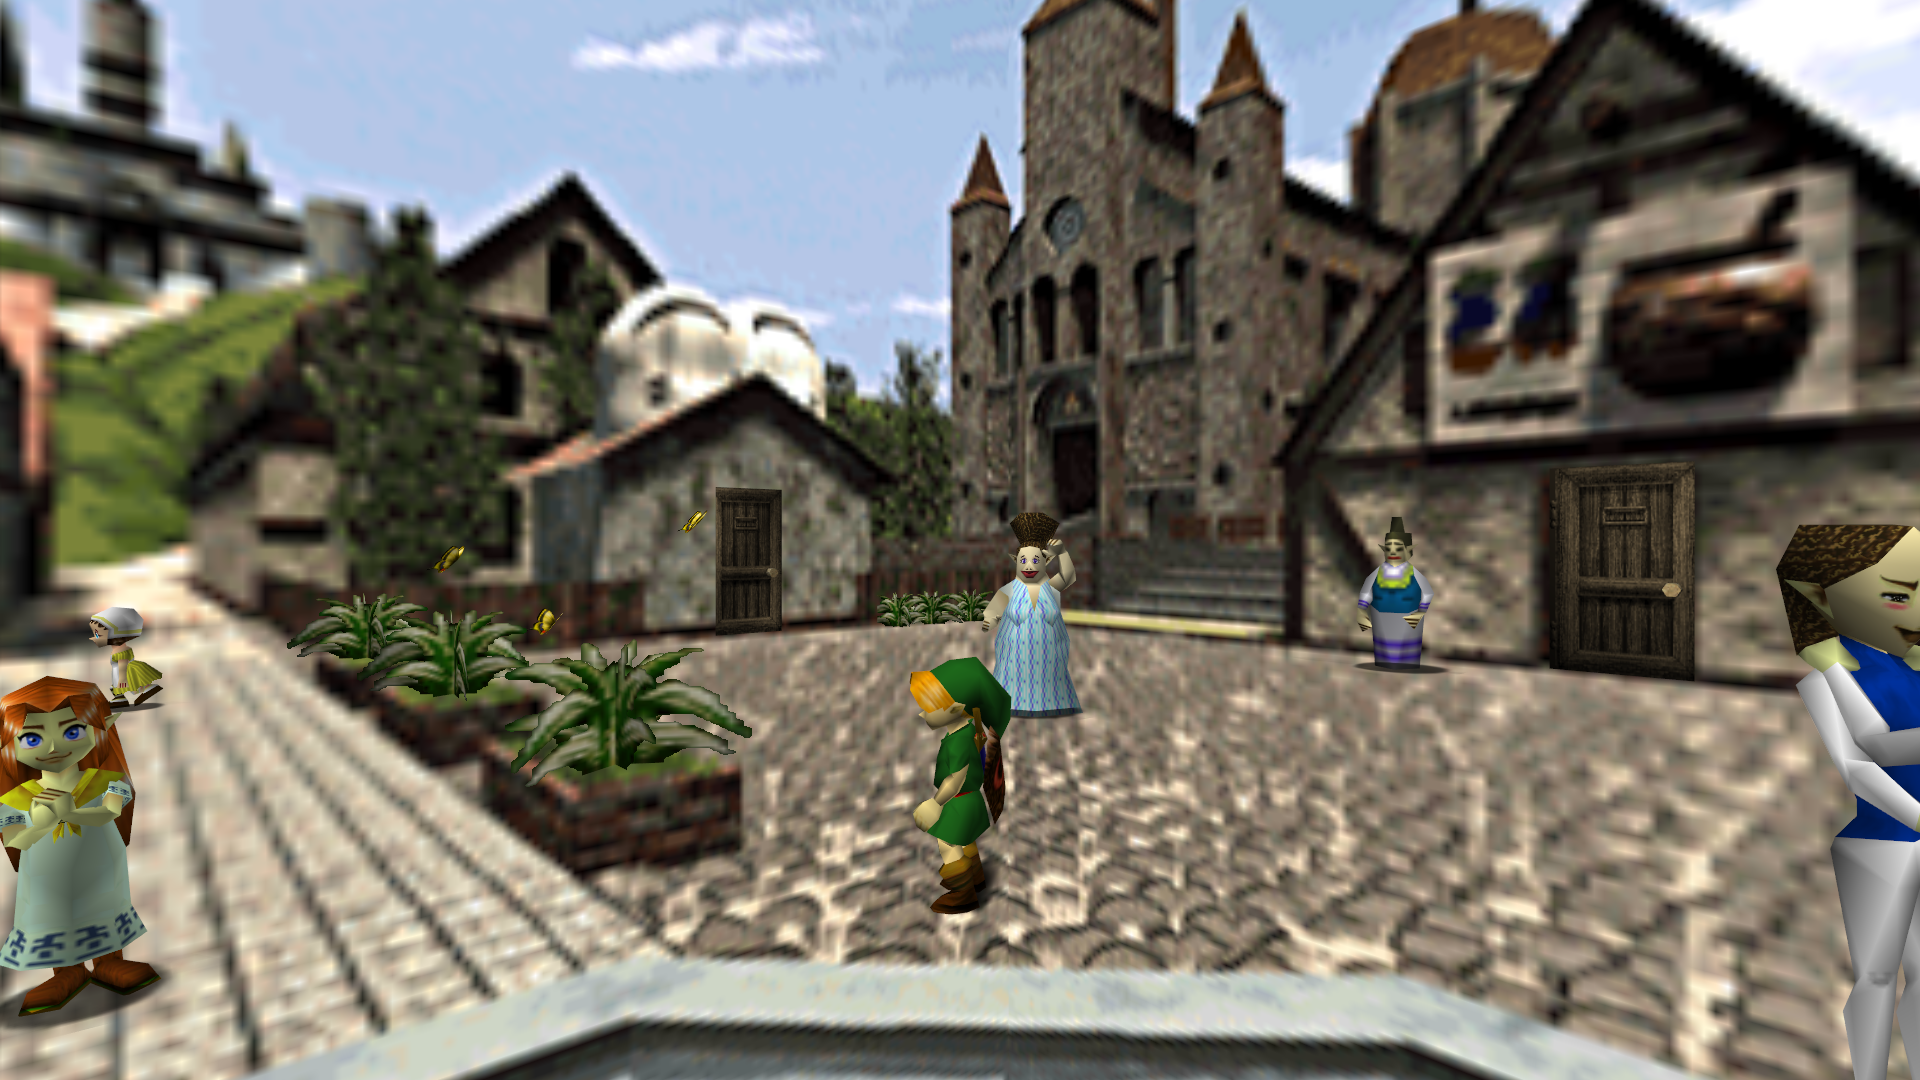 Hyrule Market is full of activity and people. While you can slowly explore the bustling town, you should speak to Malon (redheaded girl in a white dress) near the center to discover her that father went to deliver milk to the castle and has since gone missing. While you have good intentions, the castle guards are keen on keeping you out. Leave the castle foregrounds and re-enter to find Malon magically standing next to some green vines on the wall. Talk to her twice, and she will give you a Weird Egg
Gold Skulltulla: Ram into the nearby tree to shake loose a Gold Skulltula (5/100) and cream it for its Golden Skull Token.
You won’t be able to enter the castle through the gate, so you’ll need to sneak around the guards. Climb the vines directly next to Malon and work your way across the cliff, then simply jump off the top of the gate to the ground below. As you work your way up the dirt path, cut through the hilly pastures between the stationed guards and run along the grass towards stairs leading to the castle. Do not attempt to go up the stairs! Instead, climb the vines on the wall to the left and then dive into the castle moat. Swim towards the far corner.
Clamber out of the moat and head towards the end of the path, where you will find a man sleeping on the ground. This is Malon's father, Talon. The egg you received from Malon will have probably hatched into a cucco by now (if it hasn't, just wait until the next sunrise). Since Talon is blocking your way, you need to wake him up. Stand next to him and use your recently hatched cucco. Talon will wake up with a start and, after you talk to him, run off after Malon. With Talon out of the way, push and pull the Lon Lon Ranch milk crates into the moat. Use the stacked crates as a platform and jump to the small opening in the castle wall with the Triforce symbol above it. Crawl through the opening.
Castle Courtyard
 The next area requires you to remain out of sight of the guards as you navigate the castle courtyard. The guards follow very scripted patrol patterns, so with little patience you will be able to sneak past them. You can even run behind them as long as you do not get too close. If you are ever caught, you will have to start over from the area where you met Talon. Some of the guards move faster as you get deeper into the courtyard, so pay attention and be careful.
When you actually reach the courtyard, the music changes. Approach the young girl at the window to meet the princess of Hyrule. Zelda thrusts the fate of Hyrule upon your tiny shoulders, tasking you with finding the other two Spiritual Stones. Zelda will then give you Zelda's Letter. After talking to Zelda, you will encounter her personal bodyguard Impa. Impa will teach you the song Zelda's Lullaby, which you will need to play countless times throughout the rest of the game. After learning the song, Impa will take you directly to the draw bridge in front of Castle Town and instruct you to go to Death Mountain for the next Spiritual Stone. But before heading off to Kakariko Village, you need to revisit Kokiri Forest.
Big Deku Seed Bullet Bag
Before heading back to Kokiri Forest, you can upgrade your Deku Seed Bullet Bag. In the town square, go to the Shooting Gallery located just to the left of the path leading up to Hyrule Castle. The Shooting Gallery minigame consists of shooting ten rupee targets with your slingshot, and costs 20 rupees per play. If you hit all ten targets, you will be awarded with the Big Deku Seed Bullet Bag, which increases to amount of Deku Seeds you can carry to 40. If you hit 8 or 9 targets, you get to try again for free. If you hit 8 or fewer targets, you lose and will have to pay to try again.
Hyrule Marketplace Heart Pieces
First Heart Piece: At night, go to the white dog running around the Bazaar and touch him. The dog will follow you (unless another dog already is). Take the dog to the alley to the right of the exit leading to the drawbridge, and enter the second door you see. Talk to the lady inside to receive a Heart Piece.
 Second Heart Piece: (This can only be accomplished after talking to the Fairy of Power on the summit of Death Mountain) After the bombchu bowling alley in Hyrule Marketplace opens, go in and pay 30 rupees for a turn, each with a different prize. If you successfully win three turns, you will get a heart piece on the third turn. If you lose the third turn, winning two more will bring the prize back to the heart piece.
Lost Woods
The Lost Woods is called such for a reason. There are multiple pathways and going the wrong way transports you straight back to the entrance. Basically, follow the sound of the music. If it starts to dim, then you are going the wrong way.
Go right, left, right, left, straight, left, right. The correct order takes you to Sacred Forest Meadow, where you must navigate a maze-like area from a top-down view. Most corners are occupied by Mad Scrubs, so keep the shield at the ready.
Head up the stairs at the very end and meet up Saria. She teaches you Saria's Song. The ladder allows you to forgo navigating the maze again, but there's a Fairy Fountain under here! Fall down the first hole after climbing the ladder. You can bottle up fairies which revive you automatically when you fall.
Deku Seed Bullet Bag Upgrade
From the Lost Woods entrance, take a right. Straight ahead you will see a wooden target hanging from a tree branch. If you make three bullseyes with your slingshot, a Deku Scrub will reward you with the Biggest Deku Seed Bullet, Bag, which increases the number of seeds you can carry by an additional 10, brining the total to 50.
Carry More Deku Sticks
From the Lost Woods entrance, take a left and then another left. Jump off the ledge and go to the far side of the room, where you will encounter a Business Scrub. After you defeat him, he will offer to increase the number of Deku Sticks you can carry from 10 to 20 for a measly 40 rupees.
Some Heart Pieces
There are two Heart Pieces to nab at this point. Return to the Lost Woods entrance by going the wrong way. From the entrance, head left and stand on the smaller stump, in front of the Skull Kid. Play Saria's Song to win his friendship and acquire a heart piece.
Return yet again to the entrance, this time heading right. Stand on the stump in the grotto of the next area and pull out your ocarina to initiate a memory game. Beat the Skull Kids' challenge by replaying their songs. This can be tricky, but you will get a heart piece after completing the third song.
Out of the Way Heart Pieces
In Gerudo Valley to the west you can easily obtain two heart pieces with a simple cucco. Go over there, pick up the bird and fly to the ledge on the other side of the bridge to the west. Roll into the crate for the first Heart Piece. If you then fly east, you will get to a platform beside a waterfall. Go behind the falls and up the ladder, where the other Heart Piece lies.
Kakariko Village
The long stairway to Kakariko Village is located across the bridge to the east of the castle drawbridge. While you can skip Kakariko Village and head straight to Death Mountain, you would miss out on a bunch of cool side activities, including getting the Hylian Shield and an Empty Bottle. It is highly recommended you take the time to tackle a few of these right now.
Obtain a Bottle
The super convenient bottle item is a must — it is handy and lets you carry potions, fairies, and other things. To obtain it, you need to help the distressed woman standing in front of the entrance to the Kakariko Graveyard round up her errant chickens. Gather each individual crazy chicken, bring it to the pen, and chuck it in there. Keep in mind that by holding a chicken in your hands when you jump off from a height, the chicken's frantic flapping will slow down your fall — handy stuff. Here are the locations of the seven chickens:
- Directly in front of you when you first walk into Kakariko Village.
- In the wooden crate in front of the house by the stairs. Roll into it by pressing forward and "A" at the same time.
- At the top of the second set of stairs near the entrance to the Death Mountain Trail.
- Grab chicken number three and run off the red roof next to the big tower. Climb up the stairs in front of the well and turn the corner up to the next set of steps. Jump off the ledge to the other side where the chicken is next to the house.
- Inside the crate in front of the stairs. use a bomb to break it a grab the chicken.
- Grab a chicken from the pen and walk up the nearby steps. Get as close to the fence as you can and jump to the other side. You need to get at a diagonal angle and take the shortest distance to jump the fence. Throw your chicken over the fence and pick him up later. Jump down below and get the chicken in front of the ladder. Go up the stairs and throw him to the other side.
- Go up the ladder where you got chicken number six from and get the chicken from the top.
Once all seven chickens have been safely returned to the pen, speak to the woman to receive a Bottle.
House of Skulltula
If you have wondered what exactly all the Golden Skull Tokens you have been collecting are for, then visit this seemingly abandoned house along the right side of Kakariko Village to discover that the entire family has been cursed. You must collect the Tokens in increments of 10 to return one member of the family to normalcy. At each milestone, you will be given a unique prize with a Heart Piece at 50.
- 10 Skulltulas - Adult's Wallet (Carry 200 Rupees)
- 20 Skulltulas - Shard of Agony (Reveals Hidden Secrets)
- 30 Skulltulas - Giant's Wallet (Carry 500 Rupees)
- 40 Skulltulas - Bombchus (The Moving Bombs)
- 50 Skulltulas - Piece of Heart
100 Skulltulas - One Gold Rupee (Worth 200 Rupees)

Gold Skulltulas
 Speaking of Gold Skulltulas, there are a bunch of nocturnal Gold Skulltulas in the village. Search the village at night for these:
- This one appears only at night on the wall outside the House of Skulltula (6/100).
- Roll into the first tree to dislodge this Gold Skulltula (7/100) from the tree.
- Search the red brick building that's still currently under construction (8/100).
- Use the slingshot to slay the Skulltula (9/100) on the ladder of the tall structure in front of the Death Mountain entrance.
- The last Skulltula (10/100) can be found on the side of the house facing the Death Mountain entrance.
Kakariko Graveyard
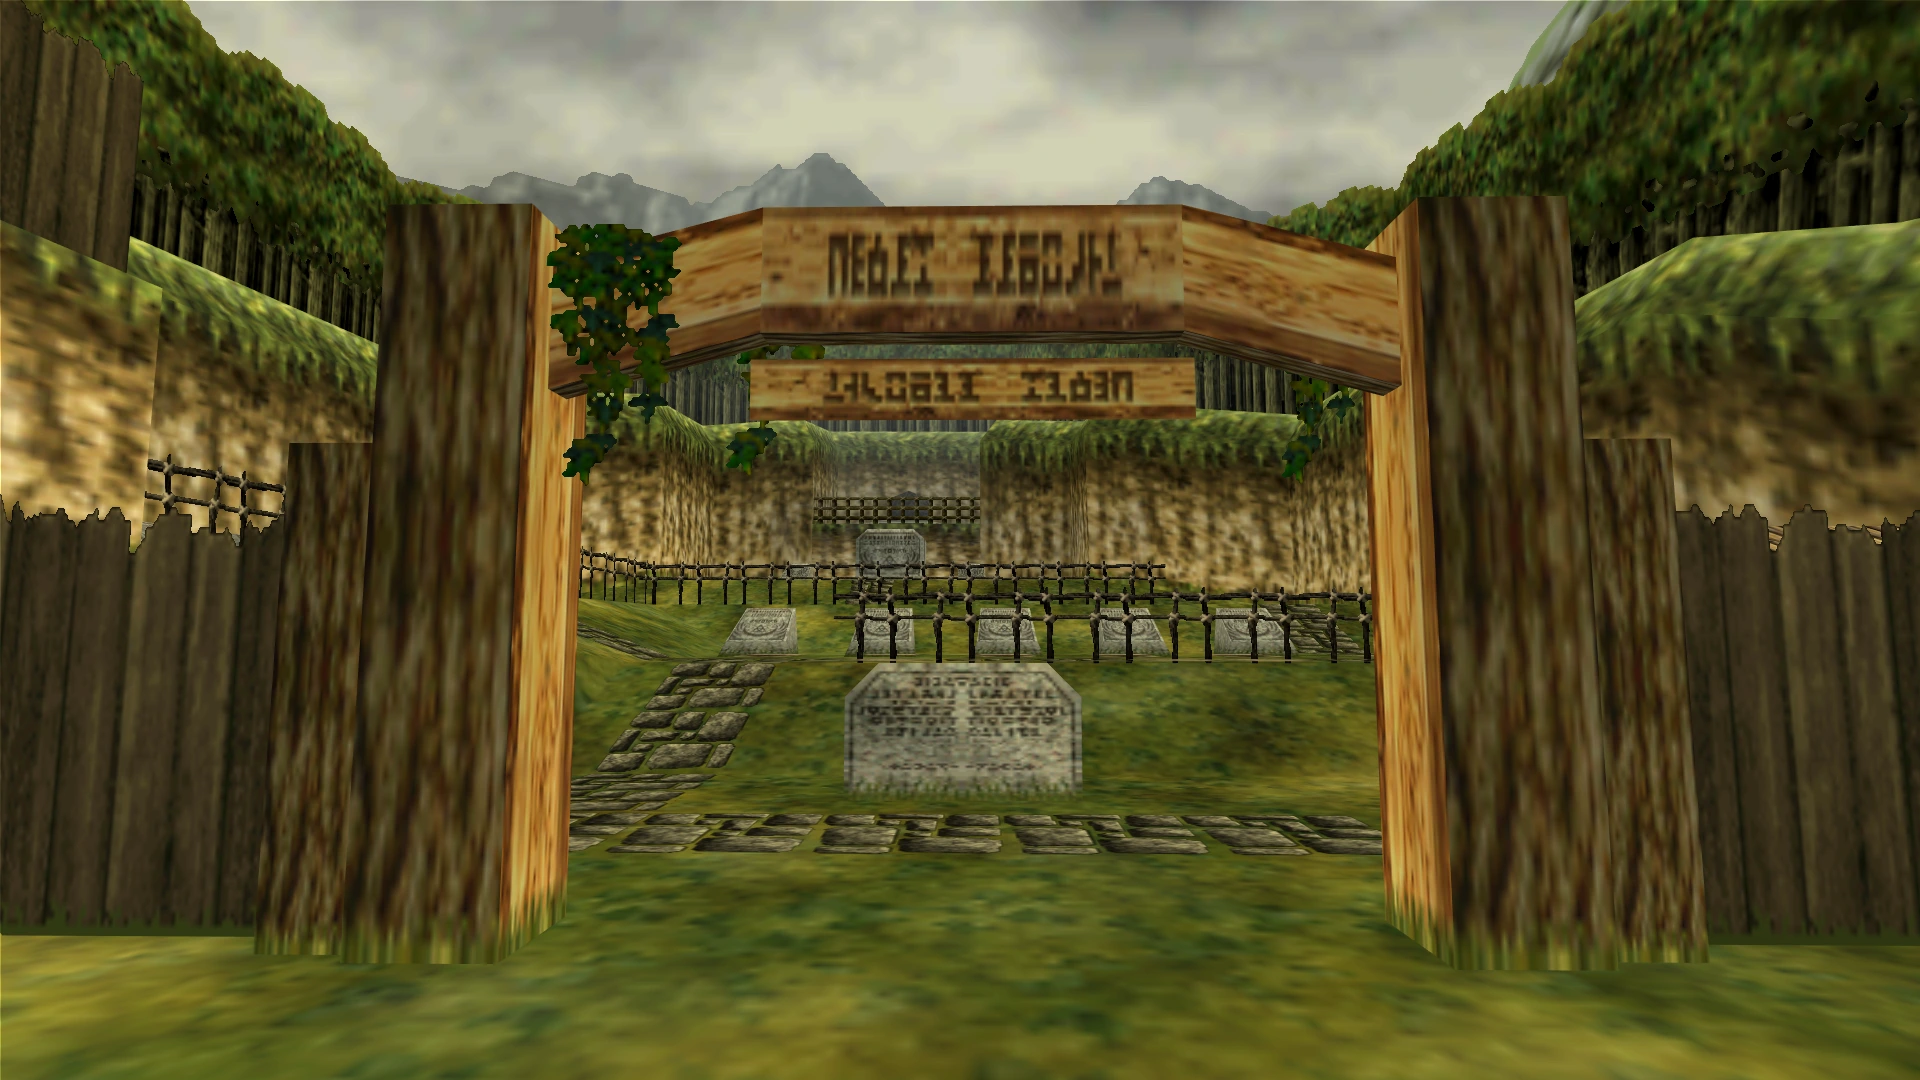 Now for the Hylian Shield. The shield can normally be bought from the Bazaar in Hyrule Marketplace for a hefty sum of 80 rupees, but why pay for it when you can get it for free? Wait until nightfall and visit the Kakariko Graveyard in the back of the village. Go behind the second grave from the left, the one with flowers growing in front of it, and pull it back to reveal a hole. Fall in and open the chest to obtain the Hylian Shield. This shield is too big for Link to use during combat, but can be used like a shell to protect from falling objects.
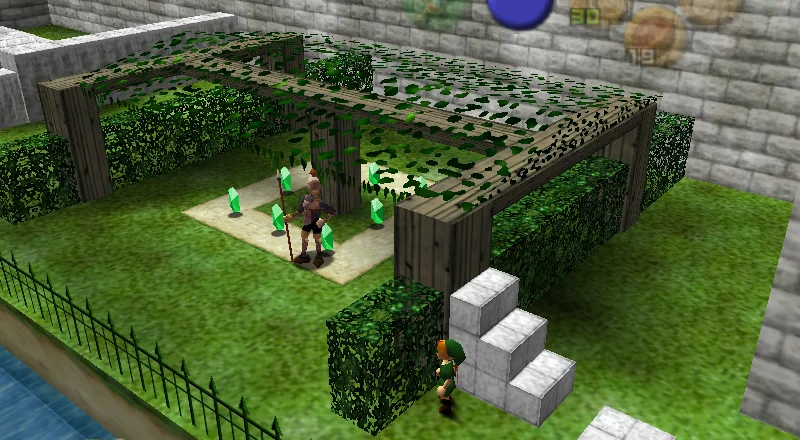
In the back of the graveyard is a bigger tombstone with the Triforce symbol as its epitaph. Stand on the Triforce tile in front of it and play Zelda's Lullaby to enter the Royal Family's Tomb.
Slay all the Keese (bats) in the room to unlock the doors. The next room is filled with ReDeads, zombie-like creatures that are difficult to kill and can freeze you if you get to close. Avoid them and the poison pits, and head to the next room. Inspect the engraving to learn the Sun's Song, a song used to calm the dead and turn night into day and day into night. Playing it in front of a ReDead will temporarily immobilize it.
There's a Heart Piece to be gotten in the graveyard now that you have the Sun's Song. Pull back the fourth tombstone from the right on the top row of smaller tombstones to reveal a hole. Enter and play the Sun's Song near the ReDead to simultaneously cause the ReDead to freeze and also spawn a treasure chest. Open the chest for a Heart Piece.
Gold Skulltula: One last thing. Bottle up some bugs found underneath a rock to the right of the graveyard entrance. There's a soft square patch of soil that you can release the bugs into, after which a Gold Skulltulla (11/100) pops out. There's one other here, but you cannot yet reach it until you get the boomerang item.
Death Mountain Trail
When you are ready to scale Death Mountain, visit the soldier guarding the gate and show him Zelda's Letter to get him to open it. (Additionally, the soldier hints at the start of the happy mask shop side quest, which you can check in the Side Quests section). Head through the gate and start your ascent. The trail is clogged with jumpy little Red Tektites. Follow the trail up to the entrance to Goron City.
Goron City
 This multi-leveled haven is home to the lovable, rock-eating Gorons. The leader of the tribe, Darunia, has locked himself in his lair at the very bottom level, but playing Zelda's Lullaby on the mat in front of the door opens it right up. He's not very kind to strangers. If you have Saria's Song, play it in front of him. If not, there's a shortcut to the Lost Woods from Goron City. Simply use a Deku stick on the bomb flower to prod it along. Then follow the Lost Woods walkthrough here: Lost Woods.
Saria's Song instantly brightens the glum-looking Darunia, who immediately bestows you the Goron's Bracelet after his dance session. Use it to pluck bomb flowers from their bed. Bomb flowers work off a timer, which initiates once it is removed from its bed of leaves. After exploding, bomb flowers grow back in a few seconds.
You might notice the giant urn in the center surrounded by a bunch of unlit braziers. Head into Darunia's room and borrow his flame to light these four braziers to cause the urn in the middle to start spinning. Throw a well-timed bomb flower into the top of the jar, after which the urn proceeds to spin and stop on a "face." If it stops on the happy face (or something that looks like happiness), a Heart Piece pops out.
With the new bracelet in your possession, go back up to the top of Goron City and exit the same way you came in.
Dodongo's Cavern
Opening Dodongo's Cavern
The entrance to Dodongo's Cavern is currently blocked by a large boulder. After leaving Goron City, go to the right and you will find a bomb flower next to a Goron. Pick up the bomb flower and toss it over the fence toward the large boulder below. If you threw it the right way, it will destroy the boulder. If it does not work the first time, keep trying until it does. Run down the mountain and enter the newly opened cave. Once inside, you have one more wall to break with a bomb flower before you are in the cavern.
Getting the Map
If Link comes in contact with any fire it will destroy his Deku Shield, so now would be a good time to equip the Hylian Shield, if you have one. Heed Navi's warning about avoiding the lava. This first, primary cavern features a main central platform that can be reached by way of the surrounding fluctuating platforms. They do not ever fully dip into the lava, so you are safe on the platform. Throughout you will also come across a immobile enemy called a Beamos; this enemy simply rotates around, but if you stand in its line of sight it shoots a beam at you until you completely leave its line of sight. Beamos can be destroyed with a bomb flower/bomb. Grab the Dungeon Map from the chest located behind the cracked wall on the left side of the room, by using the adjacent bomb flower to blast through it.
Unlocking the Gated Door
You noticed the door that was barred off right? The next step involves a long-winded way to get it unlocked. Hop across to the opposite side of the room, get rid of the Beamos using the bomb flower, and note your surroundings: a cracked wall, a switch in a room above that can’t be reached, and another cracked wall on the right. The left wall only contains a gossip stone so skip over it and blow up the cracked wall on the right. Baby Dodongos will appear from the ground. With one swipe of your sword, these weak enemies become active time bombs.
Gold Skulltula: Lure a baby Dodongo over to the cracked wall to batter down the wall, behind which is a Gold Skulltula (12/100). Kill it and the Keese, and then jump slash to reach the Golden Skull Token.
Once you get to the blue switch, move one of the Armos statues onto it to hold it down and unlock the door above. After heading through the next two doors, you will be locked in a room with a twin pair of Lizalfos. Not to worry though, they switch off like a tag-team to take turns throwing punches. You need some proper swordplay to best these overgrown reptilians: Defend and retaliate. You could also use the slingshot to defeat them, as you can keep your distance from their sword attacks. Make sure to also avoid the lava pits. There are hearts in two of the pots if you need them and the other two pots contain blue rupees. Go through the unlocked door after they are taken care of.
There’s a bomb flower at the end of the hall that you can use on the cracked wall. The Business Scrub behind the wall isn’t of much use unless you are out of Deku sticks (which you will need for the next part). The Dodongos in the next room can be troublesome if not handled properly. Don’t get in front of their mouths and watch out for their long tails when they spin around. Your tiny sword is no match for its armored body, but its soft tail is more prone to a cutting. Do a strong sword attack on the tail and back off as it spins around. Walk back around to the tail and attack again. Like its much younger kin, the Dodongo explodes upon being defeated.
The three unlit braziers in the room must be lit in order for you to proceed through the locked door. Run and hit the switch that will unlock the door on the other side. Jump down and cross over to the unlocked door. This leads back to the high alcove with the switch back in the main room. Stepping on this switch unlocks the door clear on the other side, to the right of the dungeon map.
Getting the Compass
The next room features a seemingly never-ending line of bomb flowers. Pluck the bomb flower from the ground and place it on the vacant space at the front to set off a violent chain reaction that causes the giant staircase to collapse. Before moving on, however, blow apart the weak wall here and head through to find three Armos statues guarding a treasure chest; one is alive. Throw a bomb flower at the center Armos and then dodge it when it comes at you. Keep hitting it with bomb flowers until it flashes red, indicating that it is going to blow up. Retrieve the Compass from the treasure chest and then go back out to the staircase. Climb the stairs and go left or right (does not matter which) around the room and through the door.
Gold Skulltula: Look up at the vines at the top of the stairs to find a Big Skulltula and a Gold Skulltula(13/100). Hit them both with your handy slingshot and collect your Golden Skull Token.
You may also see another Gold Skulltula in an alcove above the staircase. Sadly, you will be unable to retrieve it with your current equipment.
Getting the Bomb Bag
If you have not yet, you might want to equip the Hylian Shield. Your Deku Shield is highly flammable and the Fire Keese in the room have no qualms about incinerating it. Once it is lost, the only way to replace it is by buying another. The room also features a circle of Armos statues. All of them are real Armos except for the one blocking the ladder. Pull the statue in front of the ladder out of the way and climb up to reach the switch. Head through the door to end up back in the main room, except this time on a bridge suspended far above it. Cross the bridge, but watch out for Fire Keese.
You are brought to a room with sliding floor spikes called Blade Traps. Simply jump over the first one from the ladder, then wait for the next one to move before crossing to the opposite ladder. Now use the block to jump onto the ladder and climb up to the platform above you. Pick up the bomb flower and time your throw so that it explodes right next to the cracked wall, it may take a few tries. Head through the opening. The circle of fire blocking your path can be extinguished by hitting the eye above with the slingshot. Go down the hallway to the next room, carefully avoiding the Baby Dodongos. Fight off the Lizalfos brothers again in the room ahead. There are hearts on the last platform across from the door you just came through. This is also the best place to fight them so they can only approach from one direction, but one word of warning: if you fall off this platform, you will plummet to the room below.
Through the door is more fire platforms to cross and more eyes to shoot: the eye above and straight ahead and a second one located in the niche on the left wall. Head over and cross to the other side. Open the treasure chest on the right to get the Bomb Bag, which can hold 20 bombs. Now you do not have to rely on bomb flowers and can toss bombs at any time. Note that bombs detonate faster than bomb flowers. Don’t waste your time blowing up the cracked wall below; you’ll only find a few business scrubs trying to rip you off. Go through the open doorway.
Getting to the Boss
The switch you encounter will cause the moving platform below to extend all the way the the top of the room, giving you easy access to the upper level of Dodongo’s Cavern from the central room. Turn right and go to the wooden bridge that's suspended directly over the giant Dodongo skull. The bridge itself has two gaps in it; drop/throw bombs down these gaps until the Dodongo's eyes turn blood red and its mouth opens. Drop down to the lower level and head through the Dodongo's mouth into a room with a switch in the middle that won’t stay down without something holding it down. Climb up the small ledge to the right and work your way down the hall. Two Fire Keese are flying around in this large room, so try and take them out with your slingshot.
Gold Skulltula: On the north side of the room, blast open the cracked wall to find an Armos slightly obscuring the Gold Skulltula(14/100). A single bomb will take out both so that you can easily claim the Golden Skull Token.
In order to get to the the doorway in the north-west corner of the room, you must climb up the blocks on the east side of the room and walk along the top of the wall. One of the two jars next to the doorway contains a fairy, which you can capture in an empty bottle. Go through the doorway and follow the path until you come to a block sitting near the edge of the ledge. Push it down into the room below and drag it to the hole with the switch in the center of the room. Once the door has been unlocked, set a bomb on the discolored square in the ground to unveil a large hole leading to the dungeon boss. Refill your supply of bombs from the chest and jump in the hole.
Dungeon Boss: King Dodongo
This infernal reptile is huge, mean, and ready to eat. Make sure your Hylian Shield is equipped. King Dodongo usually opens up by inhaling a deep breath before getting ready to spout a plume of fire. Toss a bomb into his mouth as he takes a breath, which immediately stuns him. Take a slash at King Dodongo, which prompts him to curl up into a ball and go on a rolling rampage. Simply move to the side, very close to the edge of the lava without actually going in to side-step King Dodongo. This pattern repeats about three more times before he bites the dust. Collect your Heart Container and teleport out.
You are greeted by Darunia outside, who is eternally grateful for your efforts and shows it by offering you their prized Goron's Ruby, a.k.a. the Spiritual Stone of Fire.
Upgrade the Bomb Bag
There's a large Goron rolling around on the third floor of Goron City. He pays no heed to any bystanders in the way; be careful about running into him, you will take damage. A well-timed bomb explosion or a straight-shot with a Bombchu will stop him in his tracks, and if he happens to stop near the sign or inside the tunnel, he'll reward you with the Bigger Bomb Bag.
Gold Skulltula: On the top floor of Goron City, use bombs to break the three boulders and access the room in the northwest corner. You will enter a room full of boulders. Bomb the one on the right, from there bomb the one on the left, then left again, then finally the north most rock. you will find two chests containing purple rupees, and a crate. Break the crate to reveal a Gold Skulltula (15/100).
To the Summit of Death Mountain
While you got what you came for, there's still a couple things left to do around these parts. First, you will need to make sure you have the Hylian Shield. Ascend the mountain until you reach a steep area near a red flag. Those pesky boulders blocking the path to the summit of Death Mountain can now be removed with your bombs. If you do not mind losing a half-heart, for the last boulder you can pull a bomb out, wait until the fuse is almost gone, then jump at the boulder. If done correctly, you will land on the platform with only a half-heart missing. The big lone boulder at the top of the ridge can also be eradicated to reveal a hole, inside which is a cow that gives up Lon Lon Milk when you play Epona's Song. Traverse the perilous path of falling lava rocks by hiding under the Hylian Shield during the rockfall. Eventually, you reach a tall wall that you can climb up, but make sure to eliminate the Skulltulas first.
When you finally reach the top, the owl here speaks in strange rhymes, hinting at a Great Fairy residing nearby. Take a bomb to the discolored chunk of wall to the left of the owl to reveal a hidden entrance. Inside is a pristine-looking fountain with a Triforce symbol at the end. Stand on it and play Zelda's Lullaby. At the behest of this royal tune, the Great Fairy emerges from her den and blesses you with new power: a magic meter and a spin attack!
Gold Skulltula: Enter the opening to the right of the Fairy Fountain. it is too hot for you in here, so be sure to exit before the timer expires. Smash the first crate you see to uncover a Gold Skulltula (16/100).
Exit and speak to the owl to catch a scenic ride down the mountain. He props you right atop the house in Kakariko Village. do not fall off just yet! Move towards the back rock wall and head to the left toward the graveyard entrance. Peer down to find a platform and drop down to it. Head through the opening into the house to find a Heart Piece beside a cow.
Gold Skulltula: Before leaving Kakariko Village, there is one more Gold Skulltula you can find. Climb the stairs and enter Death Mountain Trail. Near the second Red Tektite you will notice a strange looking portion of the wall on the right. Destroy it with a bomb to reveal a Gold Skulltula(17/100). Kill the Skulltula with you slingshot and climb the wall to retrieve a Golden Skull Token.
Things to note:
- A few new shops in Hyrule market have opened up to the public: Bombchu Bowling Gallery and Bombchu shop.
- Go around Hyrule blowing up boulders that look out of place. Often times this rewards you with a hidden treasure!
The Easiest Heart Piece in the Game
Right now there's only one worthwhile spot to bomb, and it is in the center of the fenced-in area that leads to Lake Hylia. Bomb there and enter the hole, where you will find a business scrub. After defeating him, he'll sell you a Heart Piece for a mere 10 rupees.
Lon Lon Ranch
Lon Lon Ranch, located in the center of Hyrule Field is home to owner Talon, Talon’s Daughter Malon, and his coworker Ingo. It is also home to your future horse Epona! Other key items found here are; a Bottle, a Heart Piece, a song for your Ocarina, and a few of Gold Skulltulas.
Getting the Bottle
Enter the ranch during the day and head into the barn on the left. The place is filled with cuccos! The snoozing Talon instantly recognizes you and offers to let you play a little game for 10 rupees. He's going to toss three of his super cuccos into the throng of normal cuccos. Your task is to sort them out by picking them up within the allotted time. The trick here is to speak to Talon from an angle that lets you see where the super cuccoos will land when the mini-game begins. If you succeed, Talon will reward you with a Bottle full of Lon Lon Milk. Lon Lon Milk restores 5 hearts, and contains two servings per bottle.
Heart Piece
There's a heart piece to be found in the silo in the very back of the ranch, during the night. A single cow sleeps in there among hay and many Lon Lon Ranch crates. Shift these crates around until you can access the corner wall where there is a crawl space. The Heart Piece comes into view as you crawl through.
Making New Friends
Malon stands in the very center of the corral with a foal named Epona. Speak to her once, then while standing in front of her whip out the Fairy Ocarina. She will teach you Epona's Song. The song can be used to summon Epona later on in the game and also lets you get Lon Lon Milk from cows.
Gold Skulltulas
There are two Gold Skulltulas here you can reach right now. Two other will be accessible after you receive the boomerang item. Enter the ranch during the night to find one hanging out in the tree just next to the barn house -- roll into it to knock the Gold Skulltula out of the tree. The other one is behind the brown structure as part of the corral fence. Head toward the silo in the back of the ranch and then look on along the corral.
Getting Epona
Hyrule is a huge place to explore and simply far too vast and time-consuming for you to explore on foot. This is where your ever-so-faithful steed, Epona, is extremely useful.
You need to be an adult to be able to ride Epona. She can be recruited as soon as you first leave the Temple of Time as an adult.
Step 1: As child Link, after you meet with Princess Zelda, Malon will appear in the middle of the corral in Lon Lon Ranch. Talk to her three times, and then pull out your Ocarina. She will teach you Epona's Song.
Step 2: As adult Link, collect 70 Rupees and go talk to Ingo at Lon Lon Ranch. Pay him 10 rupees to ride a horse; instead of using the provided horses, call Epona using Epona's Song. Get some practice with Epona until time is expired (you can collect two hidden blue rupees by jumping over the fences). Pay 10 more rupees to return to the corral and ride Epona, but talk to Ingo while you are riding her this time. He challenges you to a race with 50 rupees as the wager.
Step 3: When racing against Ingo, stay on the inside of the track to travel the shortest distance all the way to the finish line. If Ingo tries to cut you off, go around him on the other side. Use your carrots, but never use all of them (always leave at least one carrot). If you use them all, it takes longer for them to regenerate.
Step 4: If you beat him, he will challenge you to another race. The wager this time will be for ownership of Epona. Win the second time around and you will have your horse. This race is trickier. Stay on the inside, but do not let Ingo push you into the fence or Epona will slow down. Instead, push against Ingo and pull ahead, then ride in front of him. If you block him like this, he cannot get by and you will definitely win.
Step 5: Although Ingo is a man of his word, he refuses to allow you to leave Lon Lon Ranch. Build up Epona's speed and jump over the gate to escape the Ranch (you can also jump over the fences along the outer edge of the ranch). If you do not hit the gate head on, Epona will not jump it so avoid hitting it at an angle.
Return as an Adult and follow instructions found in the link above. (Make sure you have some rupees handy for this one.)
Zora's Domain
Follow the river outside Kakariko Village to find the entrance to Zora's River. After talking to Kaepora Gaebora, use bombs to blow up the rocks obstructing your path.
Gold Skulltula: Roll into the tree to the left of the boulders to knock down a Gold Skulltula.
you will find a chicken and a bean-chomping glutton who sells Magic Beans for 10 rupees initially. The price goes up incrementally with every purchase until it caps at 100 rupees a pop. These magic beans can be planted in the soil and later blossom into magic platforms that take you to hidden and out of reach places. Right now, the only place you should worry about planting a bean is in the Graveyard at Kakariko. Buy two more beans for two Heart Pieces later on in the game.
River Heart Pieces
There are two Heart Pieces to grab while en route to Zora's Domain. They are attainable only with the help of the lone cucco near the Magic Bean. Grab the cucco and jump to the other side of the river. Walk until you hit a wall, then make a short jump across the water to the left. Keep going higher by jumping across the small gap to the left. Take a right after the gap and keep walking. you will see the heart piece sitting on a platform off to the right. Use the cucoo to flutter you over to the high platform in front of you, but when you are about to hit the ledge, toss the cucoo in order to make Link grab onto the ledge and pull himself up. Then make a daring leap toward the heart piece and Link will just barely latch on to the edge. Hoist him up to obtain this Heart Piece.
Retrieve your cucco friend. If you cannot find him, exit and re-enter the area; he will return to his original location. With chicken in hand, work your way up along the river, watching out for Octoroks. When you get to the large waterfall, walk up as high as you can and look around. You should spot a Heart Piece on a ledge protruding from a wall. Jump and hover to it to receive another Heart Piece.
Gold Skulltula: During the night, there is a Gold Skulltula located on a ladder near the water below where you found the last Heart Piece (If it is daytime, just play the Sun's Song). Kill it to receive a Golden Skull Token.
Climb the ladder and walk up to the Triforce icon in front of the waterfall. Play Zelda's Lullaby to make the waters part and reveal the entrance to Zora's Domain.
Zora's Domain
Walk along the path and take the first left up to King Zora’s chamber. Go through the entrance to the left and talk to the Zora near the edge of the waterfall. This Zora will ask you if you want to play a diving game for 20 rupees — do not worry, though, you will get your rupees back. Accept his offer and dive down the waterfall and collect every rupee before time is up. Swim over a rupee and press and hold 'A' to dive down to get it. Once you collect the rupees, go back up and talk to the Zora and he will reward you with the Silver Scale, a piece of gear that allows you to dive much deeper into the water.
Heart Piece From King Zora's chamber, light a Deku Stick on fire and ignite the torch at the bottom of the stairs. Put that Deku Stick away, and light a new one. Quickly, keep running along the path, taking a left at each fork in the road. With out stopping, light the torch in front of the Zora Shop, and then head across the shallow water to the torch near the circle of rocks. From there, walk along the wall to the alcove behind the waterfall and light the two torches. If you were fast enough, a chest will appear containing a Heart Piece. This may take a few tries.
Lake Hylia
Go to the area where you dove for the rupees. If you look around you will see an underwater tunnel that leads to Lake Hylia. Dive down and enter it. Once you are in the lake, grab the Bottle that you see underwater nearby, inside of which is a letter from the missing Princess Ruto. But first, there are a few parts of Lake Hylia you may want to explore.
Towards the east side of the lake, there is a hut devoted entirely to satisfying your fishing needs. Fishing costs 20 rupees. If you catch a real lunker (10 pounds) and have the fisherman weigh it, you will receive a Heart Piece. The lunker hangs out around the curved log in the center of the pond. He will probably take several attempts to catch.
Scarecrow's Song: There are also two scarecrows near the fishing hut. One in particular, named Bonooru, promises to remember any song you play to him. This becomes the Scarecrow Song, and is very helpful later on in the game. The song must be eight notes long and cannot feature one repeating note. Try to make it something easy to remember, like A-X-A-X-A-X-A-X, or R-R-L-L-R-R-L-L, and be sure to write it down in your 3DS Game Notes. If you do forget the song, talk to Bonooru and he will play it for you.
Gold Skulltula: At night, there is a Gold Skulltula climbing on the side of the Professor's Laboatory facing the lake. From the very start of the rope bridge, kill the Skulltula with your Slingshot. Carefully climb up onto the side of the bridge and jump to collect the Golden Skull Token.
Now take the tunnel back to Zora's Domain.
Zora's Fountain
Back in Zora's domain, show the letter to King Zora by standing on the platform and pulling out the bottle. He’ll, very slowly, move out of the way to give you access to Zora's Fountain, home of Lord Jabu-Jabu.
Farore's Wind
Before entering Jabu-Jabu, swim around behind him until you find a piece of land with a tree and a Gossip Stone on it. Place a bomb next to the boulder to reveal a hidden fairy fountain. After playing Zelda's Lullaby, the fairy will give you Farore's Wind, an item that lets you create return points in dungeons.
Gold Skulltula: Roll into the tree outside the fairy fountain, to knock down a Gold Skulltula. Kill it to receive a Golden Skull Token.
Before you can enter Jabu-Jabu you’ll need to snatch up a fish in a bottle. You can find fish in the shallow waters of the lower levels of Zora's Domain, and can capture them with an empty Bottle. Release the helpless flopping fish in front of Jabu-Jabu, to coax him into opening his mouth and sucking you in.
Inside Jabu-Jabu's Belly
The Zora Princess
First off, equip the Deku shield - it will be helpful for deflecting projectiles to kill off the Octoroks. Eliminate the Octoroks and Shaboms, bubble creatures, in this first room and hit the white bulbous switch to remove the protective membrane from the door.
The Biri (jellyfish) can be ignored mostly; if you touch it while it channels electricity (which is pretty much all the time), you will receive a very unpleasant jolt. Continue into the next room to meet the insolent Princess Ruto. Not watching her step, she will fall through a hole to the floor below. Follow her down and talk to her until she allows you to carry her around. This is a bit of a pain, as you cannot do anything useful while she is in your hands. In order to attack enemies or solve puzzles, you will need to put her down, which you can do quickly by tapping the "R" button. Note the two Gold Skulltulas in the room, which you cannot get to quite yet.
Careful! do not leave Princess Ruto behind in a room. If you do, she will return to the original spot she fell to, and you will have to go back and get her.
Getting the Boomerang
Walk through the nearby door and put Ruto down to pop the Shaboms (bubbles). Jump down into the water (avoiding the Stingers) and, before hitting the switch, throw Princess Ruto up to the other side. Then hit the switch to make the water level rise and join her.
Gold Skulltula: There's a Gold Skulltula along the right wall on the vine. Simply climb up when the water level rises.
Watch out for the Shaboms as you walk down the next tunnel and shoot the switch on the ceiling with your slingshot. Enter the next room and kill the Octorok. Wait for a platform to lower down. This platform takes you up a floor to a room you were in prior to meeting Ruto.
Return to the room where you met Princess Ruto, the one with all the holes. Cross the room to the door on the opposite side, carefully avoiding all the holes and watching out for the Bari (larger form of Biri) that drop from the ceiling. This leads to a room that splits off into three branching pathways; head right first and step on the switch while holding onto Ruto.
Once inside the room, set the princess down and kill the stingers by coaxing them out of their subterranean shelter. Get close and eventually they leap out, at which point fire off slingshot shots to ground them. The prize for defeating all three is the Boomerang. The boomerang allows you to defeat most of the dungeons enemies more quickly than before. It also let's you retrieve items, such as Golden Skull Tokens, from a distance.
Destroying the Tentacles
Next, take Ruto with you to the opposite branching pathway (the only one not blocked by a tentacle). Set the princess on the switch to hold it down and go through the door without her.
L-target the Parasitic Tentacle at its narrowest point and assault it with the boomerang. Get close and continuously strafe around it to avoid its swinging attack. If you are too far away, the tentacle will retract into the ceiling, making it temporarily unhittable. Once it is defeated, a chest with the Dungeon Map will appear.
Return to the room with the branching paths. Ruto does not appreciate being left behind, but stays with you none the less. Head into the door on the left and burst all the Shaboms. The boomerang makes this task very simple. Defeating all the enemies wins you the Compass.
Take Princess Ruto down the hall to the opposite side where you got the boomerang. The red tentacle blocking it previously has now been eliminated. Inside is a blue-colored Parasitic Tentacle that requires the same extermination process as the previous one.
The final center pathway is now freed from the blue tentacle. Head through the door to face the final Parasitic Tentacle, though this time it is accompanied by an army of Biri. The Biri are also highly susceptible to and easily disposed of by the boomerang.
Defeat the Mini-Boss
After defeating the tentacle, return to the room with all the holes and fall through the hole on the west side of the room, which was previously occupied by a blue tentacle.
Gold Skulltulas: Remember those Gold Skulltulas in the room that Ruto fell into earlier? You can retrieve them both using the boomerang.
Take the Princess through the door and throw her on the platform to get the spirit stone. The platform will rise up and an octopus (Bigocto) will come down in place of Princess Ruto.
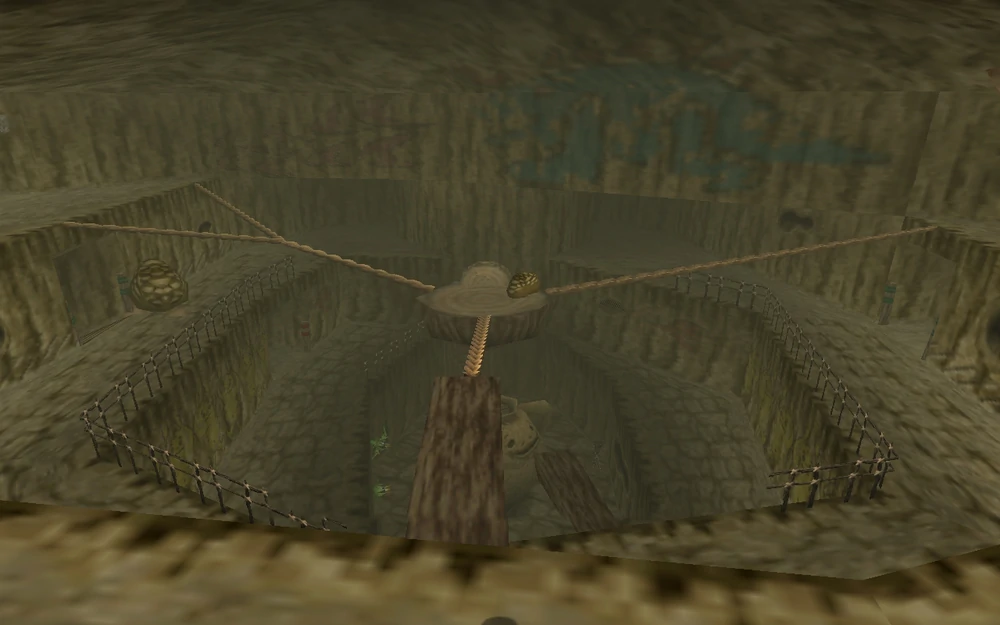
Mini-Boss: Bigocto
The spiked platform in the center starts spinning, which prompts Bigocto to start shuffling in one direction. He's a pretty fast enemy and can only be hurt from behind. The trick is to always run opposite of the direction the platform is spinning and stick as closely as you can to the spikes without touching them. This will allow you to catch up to Bigocto.
Once you have closed enough distance between you and Bigocto, quickly L-target and throw the boomerang to stun him. Hit the green jewel on his back. After a few hits, Bigocto will mix it up and switch directions periodically. Just keep an eye on the spinning platform.
Once you defeat him, step into the center of the room and ride the elevator up.
Getting to the Boss
Go through the door to the next room. Kill the Octorok with your slingshot, and the throw the boomerang at the jelly-like platforms to petrify them, allowing you to use them as stepping stones to cross to the door. In the next room, jump over to the platform to make it lower.
You don’t have princess Ruto to hold the switch down this time around so take a box from the other side of the ledge and place it on the switch and enter the next room. Use the boomerang to kill all of the Biri floating around and climb the vines to the top. There is glass in front of the switch preventing you from being able to hit it straight on. L-target the switch, take a couple steps back, then throw your boomerang at it. This should unlock the door on the north side of the room.
Gold Skulltula: There's a Gold Skulltula kicking back on a wall vine here.
Boss: Barinade
Circle around Barinade in order to avoid an electric shock from his tentacles. Lock onto the tendons connecting him to the ceiling, and take them out with you boomerang.
After disconnecting the tendons, the jellyfish will swing out from his body. Throw the boomerang at his central body until you stun him, then take out the jellyfish using your boomerang. The jellyfish will grow back eventually, so you may have to do this more than once. With all the jellyfish gone, it’s just you versus the central part of the Barinade. Stun him and slice him with your sword. Repeat this until Barinade is defeated.
Be sure to collect your Heart Container.
Outside Jabu-Jabu
The teleporter takes you back outside Jabu-Jabu, where Princess Ruto bequeaths you the last of the Spiritual Stones, the Zora's Sapphire, a.k.a the Spirtual Stone of Water.
Gold Skulltula: At night, on a wall near where Ruto gives you the Spiritual Stone is a Gold Skulltula. Kill it and retrieve the Golden Skull Token with your boomerang.
Temple of Time
Head toward Hyrule castle to trigger a cut-scene. Zelda and Impa race out of the castle on a horse and Zelda throws the Ocarina of Time into the water near the drawbridge. Ganondorf appears and, after a short conversation, races off after Zelda. Retrieve the Ocarina of Time from the moat where Zelda threw it. You will also learn the Song of Time. Now that you have the Ocarina of Time and the three Spiritual Stones you can enter the Temple of Time and retrieve the Master Sword. But there are a few more things you should do first.
do not worry! If you choose to go straight to the Temple of Time and grab the Master Sword, you can still return to your child form, but only after completing the first dungeon as an adult.
Din's Fire
Head north from the market back into the castle grounds. After you climb the vines and sneak past the gate, look for a lone boulder on the right side. Blow it up to reveal the entrance to another Great Fairy's Fountain. Play Zelda's Lullaby on the Triforce symbol to receive Din's Fire, a spell that creates a wall of fire around you that can hurt enemies and light torches.
Bombchu Bowling Alley
You can find the Bombchu Bowling Alley in Hyrule Marketplace, opposite the Bazaar and Potion Shop. For 30 rupees a round, you are give ten tries to take out three targets. The prize is chosen randomly, and you won't know what you are playing for until after you pay. The prizes include: a Heart Piece, the Biggest Bomb Bag, a Purple Rupee, Bombchus and Bombs.
Magic Beans
From Hyrule Marketplace, enter the castle grounds and pickup the rock around the first tree you see. One of these rocks is hiding a few bugs, capture two bugs with empty Bottles. If you do not have any Magic Beans, go buy at least two from the Magic Bean Dealer near Zora's River. Now go to Kakariko Graveyard. In the northwest corner, to the left of the graves, you will find a small patch of soft soil. Drop some bugs on it to uncover a Gold Skulltula, then plant a Magic Bean. When you are an adult, this bean will sprout and give you access to a Heart Piece. (At night, there is another Gold Skulltula climbing on the wall in the southeast corner of the graveyard.) Now enter Death Mountain Trail. You will find some soft soil on the ground in front of the entrance to the Dodongo's Cavern. Drop some bugs on the soil to reveal another Gold Skulltula, then plant a Magic Bean.
Lon Lon Ranch Gold Skulltulas
Now that you have the Boomerang, you can retrieve two more Gold Skulltulas from Lon Lon Ranch. These Skulltulas only appear at night.
- You can find the first fairly high up on the outside of the building where you played the Cucco finding game. <
- The second can be found on the wall to the right of the silo on the far side of the ranch.
If you have not learned Epona's Song yet, now would be a good time to do that.
Temple of Time
Return to Hyrule Marketplace and enter the path to the right of the Happy Mask Shop. Once you are in the Temple of Time, play the Song of Time in front of the altar to open the door to the Master Sword. Stand in front of the pedestal and draw the sword. In a cutscene you will meet Rauru the Sage, who will explain why you have aged, and charge you with finding the remaining Sages. You will then be returned to the Temple of Time, only this time as Adult Link
The Hero of Time
After only taking a few steps Sheik will appear, initiating a cutscene. Sheik is the last surviving Sheikah. He will tell you that you are missing an item essential to entering the Forest Temple.
Kakariko Village
Head to Kakariko Village as instructed and visit the graveyard. If you planted a Magic Bean as a child, you can ride the floating bean platform to reach a ledge with a crate on it. Break the crate to reveal a Heart Piece.
On the north side of of the graveyard, pull back the tombstone that has flowers in front of it. Inside you will find the spirit of Dampe, who challenges you to a race. Keep up with him as he hovers through a labyrnthine race course. Dampe is kind of a cheater, as he throws fire in front of you that can slow you down if you run into too many of them. Keep up with Dampe all the way to the end to receive his ultimate prize: the Hookshot.
After claiming the Hookshot, you will find that the exit is obstructed by some strange new blocks that bear the symbol from the Temple of Time. Play the Song of Time to dissolve them and leave, taking you straight to the inside of the windmill. Before jumping down, fire you newly acquired Hookshot at the platform the Heart Piece is resting on.
Talk to the disgruntled bald guy and he'll tell you about kid who played an Ocarina and messed up the Windwill. Whip out your own Ocarina to learn the Song of Storms.
Activate the Scarecrow's Song: If you played a song for Bonooru the scarecrow as a child, return to Lake Hylia and play the same song for him again. Doing so will activate the Scarecrow Song, allowing you to summon a Scarecrow Hookshot target in specific areas of the game. Note that you cannot get to Lake Hylia via Zora's Domain now as it will be frozen. To get to Lake Hylia find the ladder near the Hyrule Field entrance, jump the fence with Epona, or ride the river from Gerudo Desert.
Head towards Kokiri Forest.
Getting to the Forest Temple
Climb up the vines behind Mido's house and enter the Lost Woods. Go right, left, right. Mido is blocking the way. Get him to leave his post by playing Saria's Song. Head straight, left and then right to arrive at the Sacred Forest Meadow.
Scarecrow's Song: If you activated the Scarecrow's Song, play it in front of the entrance to the maze to summon Pierre the scarecrow. Use him as a Hookshot point. This allows you to cross over the maze, completely avoiding the fearsome Moblins. If you have any empty Bottles, be sure to visit the fairy fountain towards the center of the maze.
If you did not activate the Scarecrow's Song, you will have to navigate the maze the old-fashioned way, The old Mad Scrubs have been replaced by hulking Moblins that impale you if you get in their way. Approach them only when their back is turned; you can use your Hookshot to kill them.
Upon exiting the maze, you run into an even bigger guard who sends shockwaves. Simply move from side to side, avoiding the shockwaves, until you reach him and dispose of him with your sword. Head to the large open area ahead to encounter Sheik and learn the Minuet of Forest, which allows you to teleport quickly back to this area. Following the scene, aim the Hookshot at the tree branch above the platform to reach the entrance to the Forest Temple.
Forest Temple
The Entrance
When you first enter the dungeon you will be ambushed by two Wolfos. Wait until they attack, dodge, and then stab them in the back to kill them instantly. Go up the vines to the right (if you are facing the door) and Hookshot to the chest on the other side of the room to get your very first Small Key.
Gold Skulltula: There's a Gold Skulltula up high on the vines. Use your hookshot to kill it and also retrieve the Golden Skull Token it drops.
Enter the door, kill the Skulltula in the hallway with the Hookshot (you can shoot it on either side with the Hookshot to kill it) and enter the main room of the dungeon. Four Poes steal the light from the torches in the room. This makes the elevator inactive; you must defeat the four Poes hidden in the Temple to light all of the torches, and regain use of the elevator.
Getting the Map
Go to the room straight ahead, where there's a Gold Skulltula on the wall to the right of the door. Go through the door, kill the Blue Bubble (as long as it is surrounded by flames, it cannot be harmed. Touch it with your shield or use the Hookshot to ground it and then slash away with the sword to dispatch it.) In the next room a pair of Stalfos is your opponent. Keep your shield up at all times, as they are powerful foes. The Stalfos take very broad swings, opening up part of their body for damage. Slash at them as soon as you see them get ready to attack. The prize for victory is a Small Key.
Head back into the main room, heading to the blue block in the corner to your right, and play the Song of Time. Go through the door into the next room and climb the vines on the right all the way to the top, making sure to free the path of the Skulltulas with your Hookshot beforehand. To reach the very last one, stand right next to the wall and look straight up at it. Go through the door and slay the lone Blue Bubble to make a treasure chest with the Dungeon Map appear. Enter the next room.
You arrive on a balcony on the other side of the door. Fire your Hookshot at the target just above the balcony to the left. Step on the red switch to drain the water from the nearby well. Jump off the balcony to the ground below.
Gold Skulltula: In this room, there is a small chest (containing a measly Recovery Heart) on the elevated platform. Target it with you Hookshot to reach the Gold Skulltula on the wall.
Climb the ladder down into the well and follow the short tunnel to a chest containing a Small Key. Climb the vines and return once again to the main room. Unlock the locked door up the stairs to your right (it is the only locked door in the room). Defeat the Skulltula and enter the next room.
After eliminating the Blue Bubble, climb the ladders to the second floor. Follwing the direction of the arrows painted on the ground, move the blue block as close as you can to the large square indentation on the ground (first by pulling it, then by pushing it). When you cannot push it anymore, circle around by heading through the tunnel where the box was and take a right to locate the block. Continue to push the block until it fits into the indentation.
Find the ladder in the hallway where you originally found the blue box and climb up. Push the red block until it hits the wall. Return to the blue block and use it to hoist yourself up to the next level, where you can continue pushing the red box down the hall until it locks into place. Use it to climb up and take a right at the end of the hall. Climb the ladder and defeat the two Blue Bubble. Unlock the door (ignore the eye for now) and walk down the twisted corridor. In the next room, watch out for Wall Masters, shadowed hands that can grab you and take you back to the entrance of the temple. They appear only if you linger in one spot for too long. Quickly jump over the platforms and unlock the door. Walk down the stairs and enter the door.
This next room pits you against a lone Stalfos, who only gets replaced by two more Stalfos upon his death. Be careful not to fall down into the room below. Dispatch these guys the same way as you did previously; the only difference is that if you don’t kill the third Stalfos fast enough, the second Stalfos will piece itself back together. If you are having trouble killing them fast enough, try changing targets after each successful blow. If you do this, once the second Stalfos is dead, the last Stalfos will only take one hit to kill. You will earn the Fairy Bow from this fight.
The Blue Poe Sister
Exit to the opposite side of where you entered and find the three paintings along the steps. Two of the paintings are black and the other has a picture of a Blue Poe in it. The Poe is very shy and will quickly migrate to another painting if you get too close. Shoot each picture with the Poe in it until the Poe is released from the last picture. Go downstairs and fight the first Poe sister. Lock onto her and shoot her with your bow (or slash her with your sword) only when she is visible. Block or avoid her spinning attack and patiently wait for her body to appear to cause damage to her. You can use a Deku Nut to make her reappear immediately. With her death, one of the flames is returned to the central chamber and a treasure chest containing the Compass appears.
The Red Poe Sister
Go back to the room where you fought the Stalfos and enter the door on the opposite side, where you will find another three paintings, this time housing a Red Poe. Repeat the strategy you used against the Blue Poe Sister. Get the Small Key from the treasure chest that appears. Go back upstairs, jump across the platforms, and cross the twisted hallway. In the room with the two Blue Bubbles, correct the alignment of the hallway by shooting the eye above the door with your recently acquired bow.
Cross the now level hallway and enter the room to see the gold and blue colored treasure cheston the ground below, which contains the Boss Key. Be careful not to fall into the hole in the center of the room before getting the key. Retrieve the key, then jump down the nearby hole and eliminate the enemies to unlock the door. you will wind up on a ledge above a room you have visited previously. Be careful not to fall. Head through the dungeon door in the aclove by the wooden door and kill the Floormaster. Once defeated, the Floormaster will split into three tiny Floormasters. Be careful, if a mini-floormaster grabs onto you, it will drain a signifcant amount of your life and regrow into a full sized Floormaster. Once the room is free of enemies, open the treasure chest that appears to get a Small Key.
The Green Poe Sister
Exit and go through the door on your right to return to a familiar-looking room. Climb up to the entrance to the twisted hallway. Hit the eye once more to contort the hallway again, and head through it. Return to where you fought the Blue Poe and continue through the locked door.
Leap towards the opening to the hallway on the right to encounter a stationary variation of the Bubble monsters, which can be quickly eliminated with arrows. Go through the locked door, jump across the spinning platforms, and use Din’s Fire on the frozen eye. If you don’t have Din’s Fire, circle around the platform, line your arrow up with the flame and the frozen eye, and shoot an arrow to melt the ice. Either way, the eye will close and the hallway will become twisted. Run through the hallway and jump down the hole in the northeast corner of the room.
You’ll land in a room with a tiled floor. The ceiling above falls down periodically, so you won’t be able to cross over to the other side in one move. Look at the ceiling and note the holes in it. Let the ceiling drop once and then immediately run to the tile with the switch on it, carefully avoing the Skulltulas that drop down from the ceiling (you may want to take them out with arrows ahead of time). Then run to the tile to the left of the chest, which contains arrows. Let the ceiling drop one more time, and then run to the door.
Shoot the painting with the green Poe in it. Blocks will fall from the ceiling and you’ll have one minute to push them all together. One of the blocks (colored blue) is extra so push or pull it off to the side. Use the big painting as reference. The blocks are all already in the right corners so just bring them all together evenly.
After you piece the blocks together, the Green Poe appears. Defeat it the same way you defeated the others and go through the door. Shoot down the Skulltula on the ceiling and go through the door. Jump off the balcony to battle the final Poe Sister.
The Final Poe Sister
This Poe fights differently from her kin. She clones herself and surrounds you, in an attempt to prevent you from attacking the real Poe. The dead giveaway, though, is that the real Poe does a twirl each time she appears. L-target this Poe and fire an arrow at her. Repeat this process five times to kill her. With all the flames returned to their proper place, the elevator in the center of the room returns. Use it to enter the room below.
Before you can fight the boss, you have to go through one more puzzle. The room is divided up in a series of pillars, cages, and switches. Push a pillar counter-clockwise one to reveal a switch. Press the switch, then rotate the room counter-clockwise again, to reveal another switch. Press it and rotate the room in the same direction as before, to open up a room with a Skulltula, a chest containing some arrows, and a Gold Skulltula climbing on the wall. Push the pillar counter-clockwise one more time to gain access to the final switch. Press it to open the gate on the opposite side of the room, leading to the Boss's Chamber. Go through the large locked door.
Dungeon Boss: Phantom Ganon
Walk up the stairs and move to the center of the room. Make an attempt to walk back to the stairs; the gate will close in front of you. Link turns around to a very big surprise: Phantom Ganon. Phantom Ganon gallops off into one of the paintings. Stand in the very center of the room with your bow and arrow drawn and keep panning the room to see which painting Ganon will pop out of. Two Phantom Ganons run down from two different paintings; one is real, the other is not. The fake one turns around (and is a bit lighter colored than the real one), while the real one starts to emerge from the painting. Unleash an arrow into the real one before he can leave the painting. If you cannot hit him in time, rush to the sides to avoid his attack.
After the third hit, Phantom Ganon abandons this tactic and dismounts from his horse. Phantom Ganon will then float around the room and shoot a single projectile, which you must slash at to deflect it back at him. The taste of his own medicine brings him down to the ground, where you can proceed to stab and slash him as many times as you can before he returns to the air. As the fight wears on, Phantom Ganon becomes aware of your strategy, deflecting back your deflected shots in a furious ping-pong match until one of you loses. Eventually, Phantom Ganon crumbles before your might and leaves behind a Heart Container. Enter the blue portal.
Saria gives you the Forest Medallion. You are transported back to where the Great Deku Tree stands. In front of it springs the cheerful Deku Tree Sprout.
Gold Skulltula: Visit Kokiri Village at night. Between the two trunks of the twins house is a lone Gold Skulltula. Kill it and get the Golden Skull Token with the Hookshot.
A Whole Lotta Rupees
If you are in real need of some rupees, go to the Lost Woods and immediately head left, to where your Skull Kid friend resides. He does not like you too much now that you are an adult. do not do any fancy attacks, stick with horizontal swipes and stabs. After several hits the Skull Kid will go down and surrenders a Huge Rupee, worth 200 rupees. Exit the room and come back for as much money as you need.
Back to the Temple of Time
Go see Sheik at the Temple of Time to learn the Prelude of Light, a song that warps you back to the Temple of Time. Plus, you can now travel back and forth in time by returning the Master Sword to its pedestal.
Fire Temple
Kakariko Village
Many of the stores from Hyrule Market have relocated to Kakariko Village.
Big Quiver
Enter the brick building near the well, which now houses the shooting gallery. The game cost 20 rupees a play, and is the same as it was when you were a kid, except now the targets are in a random order. If you hit all ten, you will be rewarded with the Big Quiver, which increases the quantity of arrows you can carry to 40.
Continue to the Death Mountain Trail, which not only has Red Tektites but also dangerous rolling boulders. Use the immobile boulders scattered along the trail to protect yourself from these tumbling threats. If you planted a Magic Bean in front of the entrance to Dodongo's Cavern as a child, you can now use the floating bean platform to collect a Heart Piece. Make your way to Goron City.
Goron City
The city in its present state stands in stark contrast to its former glory: everyone but a lone Goron rolling around on the floor below is gone. This Goron will only stop to a well-timed bomb explosion, or a direct hit with a Bombchu. The young Goron shares the same name as you and tells you what happened to Darunia and the rest of the Gorons. He gives you the Goron Tunic and opens the door to Darunia's room, as well as the Goron Shop.
Gold Skulltula: On the central platform at the top of the city (where the Goron Ruby should be) is a gold skulltula. Use the hookshot to get it (it is on the back side).
Giant's Knife
As a side note, you are able to buy the Giant's Knife from a large Goron hidden in Goron City. To find him, go to the same level where you met Darunia's son, and destroy the multiple cracked walls with bombs or bomb flowers. For 200 rupees he will sell you the powerful, yet poorly crafted, blade, which breaks when you hit something solid. it is best to skip this purchase and wait until you can acquire the Biggoron's Sword.
Head into Darunia's room and pull the statue from its resting position to reveal a hidden passageway that leads right into the smoldering Death Mountain Crater. Immediately equip the Goron Tunic to withstand the heat.
Death Mountain Crater
Make your way to the broken bridge and use the Hookshot to traverse the gap. Note that if you entered the crater from the top of Death Mountain you may not be able to get to the bridge - you need to take the secret passage from Darunia's room in Goron City the first time (see above). Sheik stops you in your path to impart more wisdom and teach you a new song: Bolero of Fire, which allows you to quickly teleport to the crater. Head down the long ladder to your left and enter the Fire Temple.
Inside the Fire Temple
Free the Gorons
The first room is pretty tame, with only two Fire Keese fluttering about. The room up the stairs and to the left is your only option thus far. Head through to be reunited with Darunia, who wanders off to face the evil dragon himself, though not before tasking you with freeing his caged brethren.
Make your way to the left corner, jumping from platform to platform, and step on the switch to free the trapped Goron inside. Talk to the Goron to get some advice about reaching the Boss room, then pop open the chest behind him for a Small Key. On the other side there are some pots containing bombs and fairies. Now backtrack and exit this section from the way you came in.
Go through the locked door straight ahead to enter a large room. First, go to the south side of the room (on your right) where you will find a discolored piece of wall. Bomb it and enter the door to get another Small Key and free another Goron.
Leave this room and go to directly to the opposite side of the large room. Head through the door with the blue block above it to find another Goron and a Small Key.
Gold Skulltula: After getting the Small Key, return to the previous big room, target the blue block above and play the Song of Time to relocate it. Now you can go to the room above where you just were. This room holds some animated floor tiles -- simply use your shield to block them. The Gold Skulltula is on the wall in the back, beside the Like-Like. Avoid getting too close to the Like-Like or you will get your shield eaten! Use bombs or arrows to kill it.
Getting the Dungeon Map
Follow the bridge to the locked door. Enter to find a flame geyser that fires straight up. Slide down the board, turn right, and climb up the chain wall to the platform above. Take out the the two Keese and jump down to the platform holding a block. Push the block down on the flame geyser, creating a makeshift elevator to transport you to the next level. Ride the block up and unlock the door to enter a new section of the temple. Use your Small Key on the locked door to head into the next room.
The goal in this room is to ascend to another level of the temple. Climb up the platforms to the left and kill the Torch Slugs with a few swipes of your sword. Then jump across to the platform with a diamond switch and a large block. Push the huge block over the edge and drag it across to the indentation. Using the huge block as a platform, jump across and climb the chain covered wall to reach the platforms above. The chain-link wall on top is currently inaccessible due to the ring of fire at the base. Drop down to the ledge just above the diamond switch. Hit the switch with your Hookshot to temporarily extinguish the flames. Quickly climb up the the chain-link wall and go through the door into the next room.
The next room features rolling boulders, which you must navigate around from an interesting top-down angle. Avoiding the boulders, go right and follow the wall until you see another trapped Goron. Step on the switch to free the Goron, and then collect the Small Key. Exit this cage and continue to follow the wall in the same direction as before, past a locked door, until you find an alcove containing another door. Enter to find another trapped Goron and Small Key. Continue to follow the wall in the same direction until you can head North again. You can get a Gold Skulltula by dropping a bomb near the wall. Now turn around and go through that locked door you passed earlier. Be careful not to fall down into the room below. The barred door can be unlocked by shooting the silver eye above the door. This leads to the Dungeon Map.
Getting the Compass
Head back to the previous room, and go through the locked door to enter a room with a series of chain platforms suspended over the lava. As soon as you step on the platform, a wall of fire starts to chase after you. Dash to the exit on the other side of the room to end up back in the previous room with the rolling boulders, except this time you are on the floor above.
Scarecrow's Song: As soon as you enter this room, turn to the right and play the Scarecrow's Song. Hookshot up to the scarecrow, turn around and Hookshot to the small platform. Ride the platform up, and go through the door. Climb up the chain-link walls to the next door, killing the Gold Skulltula and collecting its token along the way. Enter the next room, and use your Hookshot to defeat the Gold Skulltula, who resides on the wall over the large hole. There is a Huge Rupee in the chest at the top of this room. To get it, step on the switch to temporarily lower the flames. Hookshot up the the post and then run up the chest. Return to the room containing the scarecrow.
Hop to the platform with the Torch Slug on it and blow open the cracked floor. it is a huge drop to the bottom, so be careful. Free the Goron here and nab the Small Key from the chest.
Climb back up, get to the platform with a switch on it, and push the switch. This opens another cell with a Goron and a Small Key on the right side of the room (facing away from the door you entered). Return to the room with the moving wall of flame and enter the locked door on the high platform.
Be very careful when navigating this room. Fire walls will appear on both sides of the room, creating a maze. Also watch out for Fire Keese and rolling boulders. Follow the wall on the right side of the room to a door, which leads to the Compass. Next, navigate through the fire-wall maze on the south side of the room until you reach a locked door. The walls of fire and rolling boulders force you to go a specific way, so maneuvering around in this fiery maze can be tricky. Enter the door.
The Megaton Hammer
Pass the Goron in this room, and go through the door to get to the other half of the previous room. Get to the switch, hit it, and hurry across the fire curtain that just disappeared. Remember to be careful for the fire walls. This door is actually a fake that needs to be hit by a bomb. Doing so reveals the real door.
The next room boasts a fire mini-boss that prances about and looks a lot more intimidating than it really is. The trick is to simply use your Hookshot to pull out the shrimpy core and slash at it. The alternative is to bomb it, but that's a little trickier (and wastes bombs). The core sprouts legs and tries to run away from you, but simply cut it off by going in the opposite direction and keep slashing. The core returns to the flames to regenerate its body. Repeat this strategy until it dies.
Take the activated platform to the fourth floor. There's another diamond switch that deactivates another fire around the base of the chain-link fence. The timer on this one is much shorter, so it is better to gain a bit of time by hitting the switch from the top, near the fence. In the next room, step on the switch to temporarily remove the flames from around the treasure chest at the top. Be careful about running too wildly up the narrow steps lest you fall off and have to start over. Reach the treasure chest before time runs out to get your hands on the Megaton Hammer. Return to where you entered this room and use the Megaton Hammer on the square platform. Drop down into the newly revealed room.
Creating a Path to the Boss
The statue blocking the door can be beaten away with the hammer (be sure to hit it from the side). Smash the pillar in the next room to create a set of stairs, leading down to a blue switch. Pick up a crate and set it down on switch to keep it depressed to head through the door.
Smash the block with the hammer to reach the fiery maze room again. Nail the rusty switch, go through the door and jump the gap to reach the blue block. Play the Song of Time to move the blue block and hit the switch it reveals. Now you can free another Goron and obtain another Small Key. Climb up blue block to go back out the door you came in through.
Back in the fiery maze room, jump to the platform immediately in front of you and hammer it to make it drop. Jump down after it to return to the room you met Darunia in. you have now successfully bridged the gap between the boss door and the existing platforms, but you still lack a boss key.
Getting the Boss Key
Return to the entrance of the Fire Temple and head down stairs to the tribal statue on the right-hand side below. Whack away each tier to unveil a locked door, to which you have the key. Destroy the enemies within (a few Fire Keese and Torch Slugs) to unlock the door to next room. This room has a Like-Like, flying tiles, and a Gold Skulltula in the back. Enter the door on the left. You have just one more thing to do before you can get the boss key, kill another dancing flame mini-boss.
The battle is the same as before, so employ the same tactics and you should encounter no trouble. The little chest in this room contains some bombs. Go into the next room and hit the rusty with the Megaton Hammer to free the last Goron. Grab the Boss Key, then head back to the room where you met Darunia and enter the door to the Boss's Chamber.
Dungeon Boss: Volvagia
The almighty fire dragon is no match for the Megaton Hammer, your go-to weapon for this battle. Volvagia burrows underground and will emerge from one of numerous holes in the ground. You can see where it will emerge from the lava being kicked up from one of the holes (as the fight continues, Volvagia will kick up lava in several different spots before appearing).When Volvagia initially peeks out, it whips its fiery tendrils around. Avoid this and answer back with a hammer to its face. This stuns it, allowing you to take another swipe at it with the Megaton Hammer (or your sword). Be sure not to let too much time pass before hitting it, or Volvagia will make a second attack. Not pleased with being abused, it leaves the safety of its hole and either chases you while breathing fire, or sends rocks plummeting down from the cavern ceiling. Watch for the shadows of falling rocks to avoid them. Volvagia repeats this pattern a few more times before it is defeated. Grab the Heart Container and take the transporter to meet the Fire Sage, Darunia, and to receive the Fire Medallion.
Death Mountain Crater
Before leaving Death Mountain Crater, there are a few things you should do.
Enhance your Magic Meter
Cross the broken bridge with your Hookshot. Go left, past the doorway to Goron City and across the short bridge. Smash the boulders on your right with the Megaton Hammer (they will each take two hits) to reveal the entrance to the Great Fairy's Fountain. Play Zelda's Lullaby while standing on the Triforce icon, and the Great Fairy will double the size of your Magic Meter.
Heart Piece
After exiting the fountain, use your Hammer to smash the boulder to your right. Jump the gap and climb the ladder. Walk slowly off the wall facing the Fire Temple entrance, so as to grab onto the ledge. You will notice that the wall is a climbable surface. Climb down to an alcove containing a Heart Piece.
Gold Skulltula: There is a boulder outside the entrance to Goron City, near where you threw the bomb flower that opened up the Dodongo's Cavern as a child. At night, smash the boulder to reveal a Gold Skulltula.
Return to Zora's Domain
Gold Skulltula: In Zora's River at night, there is a Gold Skulltula high up on the wall towards the center of the map. To access it, ride the floating bean platform and jump off onto the platform with a boulder surrounded by small rocks, or climb the ladder in the crevice.
Before you can go to the Water Temple, you will have to traverse a mini-dungeon, the Ice Cavern, which is located in Zora's Fountain (where Lord Jabu-Jabu used to be). Zora's Domain has frozen over, with floating icebergs taking the place of Lord Jabu-Jabu. Run across the icebergs to the left to access the entrance to the mini-dungeon.
Heart Piece: When jumping across the icebergs, go to the right across the spinning ice blocks to reach a Heart Piece.
Ice Cavern
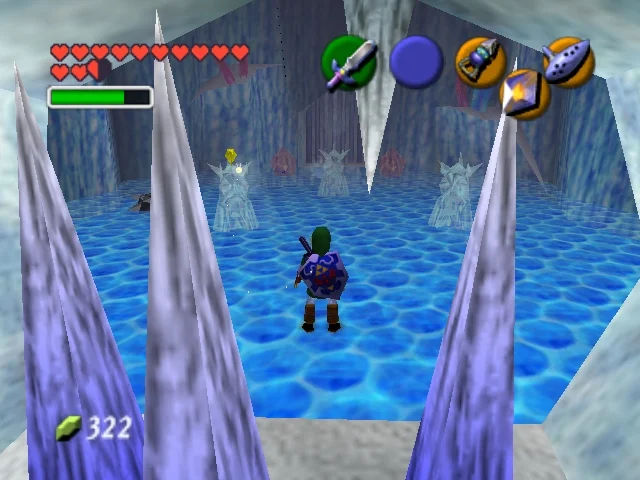 Ice Cavern is filled with falling icicles and frost bearing foes. This is a pretty small, straightforward area, and won't take to long to navigate. You cannot do anything about the red ice right now, but you can get rid of the stalagmites with your sword (to avoid the falling stalactites, keep moving). In the first room, you face off against three Freezard enemies, which can freeze you with their breath. Take them out from afar with your sword or Din's Fire, and continue to the next room. Collect the silver rupees while avoiding a giant spinning blade in the center, in order to open the next room.
Gold Skulltula: On the west wall of this room is a Gold Skulltula, which you can easily defeat with your Hookshot.
Continue to collect the rupees, rolling to avoid taking damage from the blade (remember to get the one hidden behind three stalagmites in the corner). Another can be obtained by jumping off the ledge of the barred door. Once all the rupees have been collected, proceed through the unlocked passage.
Blue Fire
The next cavernous area features a series of high platforms with Freezards perched upon them and Ice Keese flying above. These Keese variants can encase you in a block of ice for a few seconds.
Hop the platforms to the Blue Fire, which can be stored in any empty bottles. This Blue Fire is designed to melt the red ice, including the red ice draped over the treasure chest. Use the blue fire to melt the different objects in the room to get a purple rupee from the pot and the Dungeon Map from the treasure chest.
Bottle up some more blue fire, return to the previous room with the blades and use the blue fire to open up the passage to the east. In here, you will find another Blue Fire pit, a treasure chest with the Compass, and a Heart Piece.
Gold Skulltula: Look above where you got the Heart Piece to find a Gold Skulltula spinning around on the stalactite.
Ice Block Puzzle
 Fill at least two bottles with Blue Fire, return once more to the spinning blade room and melt the ice barricade to a new area. There's an ice block that slides around when you push it. Due to the frictionless surface, once the block is pushed it does not stop sliding until it hits a stalagmite. There's another Blue Fire pit here, if you need it. Collect all the silver rupees.
Gold Skulltula: In the room with the big movable ice block, there is a Gold Skulltula on the wall in the southeast corner of the room. Use the Hookshot to reach it.
Push the ice block west, then north to reach a silver rupee encased in red ice. Reset the ice block's position by pushing it into an abyss. Push the block west, south, and west again to reach the Blue Fire. Refill your empty Bottles. Reset the block once more. Push the block south, collect the rupee, west, collect the rupee, north, collect the rupee, and then east to collect the final silver rupee. Finally, push the block south to access the next area. Use Blue Fire to melt the ice blocking the door, and enter the next room.
Defeat the Whit Wolfos (one good stab to the back kills it). After that, a chest appears containing the Iron Boots, and Shiek teaches you the Serenade of Water, which can teleport you to Lake Hylia.
Heart Piece: There's a Heart Piece submerged deep underwater outside of the Ice Cavern. Use the Iron Boots to sink to the bottom and snag it.
Be sure to grab two Bottles worth of Blue Fire on your way out of the Ice Cavern.
Un-Freezing the Frozen
Go back to Zora's Domain and use Blue Fire to unfreeze King Zora. He will reward you with the Zora Tunic, which allows you to remain underwater indefinately while wearing the Iron Boots. If you still have some Blue Fire, you can use it to unfreeze the entrance to the Zora Shop.
Biggoron's Sword: Now that King Zora is unfrozen, you can complete the Biggoron's Sword side quest. Doing so is highly recommended.
Heart Piece: In the northwest corner of Hyrule Field there is a lone tree. Drop a bomb next to it to reveal a hidden grotto. Enter the grotto and use the Iron Boots to sink to the bottom of the water and get a Heart Piece.
Lake Hylia
Warp to Lake Hylia by playing the Serenade of Water.
Lake Hylia Heart Pieces
Travel to the laboratory. You can access the roof of the laboratory by way of a floating bean platform (if you planted one as a child), or by using the Scarecrow Song to make a scarecrow target appear. Watch out for Guays, and climb the nearby ladder for a Heart Piece.
You can also use the Scarecrow Song to summon a scarecrow outside of the old fishing hut. Get a fish over 15 pounds to receive the Gold Scale, which allows you to dive even deeper. The largest fish hangs out around the curved log in the center of the pond. To make immediate use of the Gold Scale, go inside the laboratory and dive to the bottom (without using the Iron Boots), then talk to the scientist. For your diving prowess, he will award you with another Heart Piece. do not forget to dive back down with the Iron Boots and roll into the cratee, then use your hookshot to kill the Gold Skulltula hiding in there.
To the Water Temple
Now you are ready to enter the Water Temple. Dive to the bottom of the lake with the Iron Boots and use your Hookshot to hit the target above the entrance to the temple (it is right under the warp point).
Water Temple
The infamous Water Temple is the cause of frustration for many gamers, especially in the original game. To access all the levels of this multi-layered temple, you must change the water level frequently and constantly equip and un-equip the Iron Boots. The 3DS edition includes some modifications to make the dungeon a little less difficult, but it can still be confusing and frustrating without guidance.
Note: Keep the Zora Tunic equipped at all times, as it prevents you from drowning while wearing the Iron Boots.
Get used to this central room, because you will will return here several times before completing the dungeon. If you have Faeore's Wind, keep re-setting the warp point to here, to save some time. The first thing you must do is swim over to the right platform, go through the short hallway, and dive into the water here, using your Iron Boots to move around underwater. In this particular tunnel is a block that you must pull out until it can no longer move. This is important for later and will save you some unnecessary backtracking.
Meet the Princess
Return to the center room, throw on the Iron Boots and sink down to the very bottom. Run through the passage flanked by two unlit torches to meet up with Princess Ruto. She swims upwards to show you the first place you can change the water level.
Dropping the Water Level
Remove your Iron Boots to float all the way to the top after Ruto. Ruto is no where to be found, but there's a Triforce symbol on the wall. That's your cue to play Zelda's Lullaby to force the water level lower. Go through the door to encounter some brand new enemies that can be killed easily with the Hookshot when they are in rock form. Grab the Dungeon Map from the chest that appears.
Exit the room and jump back down to the spot where you met Princess Ruto. Shoot arrows through the lit torch to light the two unlit torches on either side of the door (Din's Fire will also work). Go through the unbarred door to a room inhabited by Shell Blade creatures. L-target one, wait until it opens its shell up, then fire at it with your Hookshot to kill it instantly. After you kill all three, grab the Small Key.
Gold Skulltula: Head back to the main room with the water completely drained. There's a tunnel that leads to a dead-end with a weakened floor. Drop a bomb on the floor and swim to a new room. Hit the switch and Hookshot to the platform. The diamond switch controls the gate, and you will find the Gold Skulltula on the wall.
Raise the Water to Mid-Level
 Return to the central room and go to the blocked entryway on the opposite side. Push the block until it drops and wade through the tunnel to the new room. The diamond switch creates a water spout that you can use to cross the gap to the other side. There's a whirlpool in the next room; jump into it. Put on your Iron Boots again and stand on the pipe to the right of the stone dragon's head. Use your Hookshot to hit the diamond switch resting in the dragon's mouth, then quickly look right and hit the Hookshot target in the underwater tunnel to quickly pull yourself over. Watch out for the Shell Blades and float up to the mini-room. Take the Small Key from the chest before hitting the switch again to re-open the gate.
Return to the main room of the temple and go through the only locked door on the bottom floor (towards the center of the room). Walk straight forward, turn around, and Hookshot up to the Triforce symbol. Play Zelda's Lullaby to raise the water level of the dungeon halfway.
Equip your Iron Boots and sink down, being careful to avoid the spikes. you will see an opening in the floor that was previously covered with a block. Sink to the bottom of the hole to enter an underground room. Strike the diamond switch to unleash a bunch of Shell Blades and Spikes into the room. Eliminate them all using your Hookshot to unlock a gate in the right-hand corner, leading you to a Small Key.
Getting the Compass
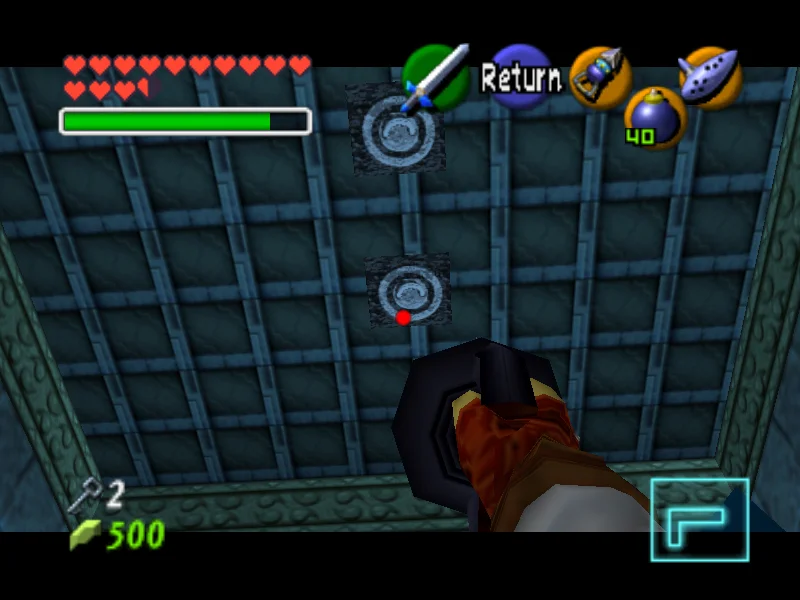 With the temple half-full, go to the central room and look for a platform holding two pots. Hookshot over to it and continue to follow the Hookshot targets to a small room with a treasure chest. Stand in front of the chest and fire the Hookshot into the diamond switch across the room. Quickly pop open the chest to gain the Compass. Return to the central room.
Raising the Water to the Highest Level
At this current water level, head to where you first met Ruto and float up. Use a bomb to open the cracked wall to get another Small Key. Return to the main room and go through the locked door on the same floor as the current water level. Here, you will need to stand on a water spout and shoot the diamond switch from the water spout using either arrows or the Hookshot. Go through the door leading back to the central room. Immediately to your right you will find another Triforce symbol, this one causing the water level rise completely. Play Zelda's Lullaby and head through the locked door on the west side of the room.
Getting the Longshot
Take out the Keese, hop down to the stationery platform below, then onto the moving platform below that one. Wait until you are pretty low on the moving block, then use your Hookshot to aim for the targets on the other moving platforms. Continue to Hookshot your way from platform to platform until you can reach the locked door.
Gold Skulltula: There's a Gold Skulltula on the north wall. Stand on the corner of the stationery platform on the east side of the room to reach it with your Hookshot.
Enter the next room. The switch in the middle controls the water level of this room only. Take out the Blue Tektites with arrows, the shoot the diamond switch. When the water level rises, the dragon statues also rise to reveal Hookshot targets. Hookshot over to the target to the west, then shoot the switch to lower the dragon heads. Hookshot to the target to the north, climb over the dragon head, then hit the switch again. Hookshot over to the last dragon head and hit the switch yet again. Stand on top of the dragon head and hit the switch one final time to reach the alcove above. Kill both Tektites, and take out the Like-Like with your bow, making sure to fire your arrows over the spikes (they won't go through them). Hookshot to the target above where the Like-Like stood and head through the door.
As you cross the expansive area in the hope of going through the door on the opposite side, you are stopped dead in your tracks by a barred door. Turn around and walk toward the center island to trigger a battle with your doppelganger, Dark Link. (If he does not appear, walk over the small island, then back to the barred doors, then back to the small island again).
Mini-Boss: Dark Link
Dark Link mirrors your every move. The best way to defeat him is to never use Z-target and slash away. Biggoron's Sword will work especially well, if you have it. After several hits, Dark Link will finally fall. Go through the north door. Take the Longshot from the chest, an upgraded Hookshot that reaches twice as far. The Song of Time song will make the blue block behind the chest disappear, allowing you to drop down into the room below. At the river, you can use your Iron Boots to navigate the treacherous river, but it is much easier to swim through it. Avoid the whirlpools or they'll take you back to the beginning.
Gold Skulltula: Immediately after the second whirlpool, equip the Iron Boots. There's one on the wall, right above the third vortex. Defeat the Skulltula with your Longshot.
Quickly heave yourself up onto the small platform on the left (the one without the pots). Hit the golden eye with an arrow to temporarily open the gate and tag the treasure chest with a Longshot to quickly cross over. Inside the chest is a Small Key. Continue through the hallway to reach a familiar room. Return to the central chamber.
Getting the Boss Key
The next step is to bring the water to mid-level once more. First you will need to drain it completely from the room above where you met Princess Ruto, then raise it at the second Triforce symbol in the central structure.
Gold Skulltula: There is a Gold Skulltula located high on the wall in the central structure. You can easily reach it now with the Longshot.
Back in the main room, the south doorway is blocked off by a black metal gate. Fire an arrow into the eye below the doorway and shoot the Hookshot target to cross over before the gate closes. Hopefully you took the advice at the beginning of this Walkthrough and moved the block from its initial resting place, because now you can just push it off to the side to access the room behind it. If you did not move it, you will need to head to the third floor (full water level), pull the block out, and return to this point. The chest inside gives up a Small Key. Since the way you came in is blocked by the gate, you will need to return to the central room via the route you took when you first moved the block, or via Faeroe's Wind.
Sink down to the bottom and enter the passage to the north. Remove the Iron Boots and climb onto the ledge opposite the spikes. Use the Longshot to sail over the spikes and reach the locked door. The door brings you into a room separated by a large pool in the middle filled with Tektites, whirlpools, and boulders rolling into it. They are certainly treacherous waters to cross, but you can make the crossing slightly easier by killing as many of the Tektites as you can with arrows. Make your way to the other side and go through the door.
In this room take out the Stingers with your Longshot. The walls on the southeast and southwest corners can be bombed, revealing a small connected corridor with a huge block in it. Enter the passage from the southwest corner and push the block as far as you can. Now enter the corridor from the southeast corner, and pull the block. Enter from the southwest corner again and push the block into the water so that it depresses the switch. This raises the water level of the current room, allowing you to reach the door on the west side. In the next room, pick off the Tektites on the opposite side before stepping on the switch to activate the water spouts. Use these to traverse the wide gap, then enter the door.
Gold Skulltula: Before getting into the water, look immediately to your right, where the boulders originate, and snag the Gold Skulltula on the wall there.
Wait for a boulder to pass, then jump into the water to the right and equip the Iron Boots. Take out the lone Shell Blade with your Longshot, and float up to the final locked door. The Boss Key awaits you in the next room. If you need them, there are fairies in the pots in this room. Return to the main room.
To the Water Temple Boss!
The boss door is located on the 3rd floor, so you will have to make the short trek back to the third Triforce symbol (2nd floor, west door) to completely flood the temple.
Once the water level is at its highest, use the Longshot to cross over to the dragon statue on the north side of the room, and enter the door. The last obstacle before the boss door is a relatively sharp incline with moving spikes. Running up this incline must be timed appropriately since any damage or movement other than running up will only cause you to slide back down. When you reach the top, enter the door to the Boss Chamber.
Dungeon Boss: Morpha
The red nucleus of this amoeba is the boss' weakpoint. Simply stay on the surrounding platform rather than the platforms in the middle of the water (be wary of the spikes on the side). Morpha follows a very rigid pattern, in which it basically swirls around in the water and summons tentacles. Morpha will try and grab you with these tentacles, so try and stay far enough out of its reach.
Fire your Longshot at Morpha's nucleus. Because the nucleus moves around a lot, the best times to snare it is when it travels back and forth through the outstretched tentacles. After you pull the nucleus close to you, deliver a few blows with your sword. After a few sucessful hits, Morpha will summon two or three tentacles at a time, but only one will contain Morpha's nucleus. Repeat this until Morpha is vaporized.
Collect the Heart Container from the center of the room and be transported to the Chamber of Sages to receive the Water Medallion from Ruto.
When you return again to Lake Hylia, you will encounter Sheik and watch the lake be refilled.
Gold Skulltula: At night, Longshot to the top of the tree that Sheik was at. A Gold Skulltula will be milling around up there. Use the Longshot to take it out.
Fire Arrows
Read the plaque near the Lake Hylia warp point for a hint about shooting into "the morning light". Look toward the island with the two epitaphs, play the Sun's Song to manipulate the rise and fall of day. At the first break of dawn, fire an arrow into the rising sun to forge Fire Arrows from the sun's power. Swim across to gather them.
While you are still here in Lake Hylia, you might as well tie up any loose ends here. Make sure you have gotten all the Gold Skulltulas from the Water Temple. There's also a Gold Scale to be won from the Fishing mini-game, if you have not done so yet.
Bottom of the Well
Getting to the Bottom
After completing the Water Temple, return to Kakariko Village to watch a cutscene and learn a new song from Sheik: the Nocturne of Shadow. Also be sure you have learned the Song of Storms from the guy inside the windmill.
Note: You have to enter the village through the main entrance to trigger the cutscene. Descending from Death Mountain will not do the trick.
Revert to young Link and play the Song of Storms to the windmill guy in Kakariko Village. This will cause the well to drain, allowing you to enter the mini-dungeon beneath.
Bottom of the Well
This is not a long dungeon, but it is filled with illusions (holes and doors that you cannot see, as well as fake walls). you are ultimate goal here is to get the Lens of Truth. Since there are some Fire Keese in this dungeon, you may want to equip the Hylian Shield.
Note: If at any point you fall through an invisible hole, you will end up on the lower level. To get back upstairs, you will need to collect the 5 silver rupees to unlock the door leading to the main room. 3 of them are located around the pit of poison, 1 is at the top of the first ladder, and 1 is right next to the barred door at the top of the second ladder.
 Crawl through the small opening, defeat the Skulltula, and continue straight through the fake wall behind the skeletal remains to enter the main section of the dungeon. Avoid the Green Bubble and walk only in the water-filled area (there are no invisible holes where there's water). Follow the water way around to the opposite side of the chamber, where you will find a Triforce symbol on the ground. Play Zelda's Lullaby to drain the water, and return to where you entered this room to find a small pit. There's a chest here containing bombs and a crawl space. Crawl through the small hole, defeat the Skulltula, and enter the next room, where you will fight a scary abomination called a Dead Hand.
To kill it, get close to one of the giant hands. When it grabs you, the Dead Hand will rises from the ground. Press any buttons rapidly to free yourself. Attack Dead Hand when it gets close and lowers its head. After 10 or so hits the Dead Hand will be defeated and you will earn your reward: The Lens of Truth.
The Lens of Truth is the only thing you need from this dungeon, so you can leave. But if you want to collect a few Gold Skulltulas, you will need to stick around and find three Small Keys.
Gold Skulltula Hunting
Return to where you entered the main room. Activate the Lens of Truth and follow the path counter-clockwise. On the inside wall around the first corner you will find a small room holding a chest with another Small Key. Now head clockwise until you find a little room containing a Small Key in a chest. Continue walking clockwise until you encounter a doorway leading to a big chest. Carefully avoid the hole and retrieve the Compass for the chest. Head back to the main room.
Optional: The Dungeon Map is located in the southeast corner of the lower level (where the silver rupees are). it is not necessary for completing this dungeon, or using this guide.
The third key is in the western-most room. This room contains a total of six coffins with torches on the ends. Kill the Gibdo (you can stun him by playing the Sun's Song) and light the most southwestern torch in the room with a Deku Stick. Kill the Keese; a Small Key will be sitting inside the now opened coffin.
Two of the Gold Skulltulas are in the inner chamber of the central room, which you can access through a fake wall in any compass direction. Enter the locked door in the northeast corner of this room. Kill the Keese with your Slingshot, then use the Lens of Truth to find the invisible path along the wall leading to the Gold Skulltula. Now head through the locked door in the northwest corner of the inner room, and collect the Gold Skulltula on the wall. The third Skulltula is behind a door in the northeast (watch out for invisible pits). Go inside and kill all of the enemies (three Fire Keese and a Beamos) while avoiding more invisible pits. Proceed cautiously to the next room, where you will need to kill a Like Like. In the same room is the last Gold Skulltula.
You are now done with the Bottom of the Well. you are next goal is the Shadow Temple, but there are few things you may want to do first.
Heart Pieces and Gold Skulltulas
Treasure Chest Shop
Go to Hyrule Marketplace at night and enter the Treasure Chest Shop (the door to the right of the exit leading to the drawbridge). Pay ten rupees to play the game. Use the Lens of Truth to see which chest holds the Small Key. The chest in the last room holds a Heart Piece.
Hyrule Castle Gold Skulltula
Sneak past the guards to the moat surrounding the castle. Stand next to the tree in the corner and play the Song of Storms to reveal a hidden grotto. Enter and destroy the wall to your left to uncover a Gold Skulltula.
Frog Heart Pieces
Go to Zora's River and work your way up until you see a log leaning on the path. Walk out to the square section on the end of the log and pull out your Ocarina. Play the Song of Storms to the frogs to receive a Heart Piece. Play the five remaining non-warp songs to receive a purple rupee and make a frog grow larger each time (if your wallet gets full, it would be a good idea to buy some Magic Beans). After all 5 frogs have grown, pull out your Ocarina and they will ask you to play a mini-game. When the bug appears over a frog, press the corresponding Ocarina button to make that frog jump. Completing the mini-game will result in another Heart Piece.
Mountain Crater Magic Bean
Collect a bug in a Bottle and make sure you have a Magic Bean. Play the Bolero of Fire to warp to Death Mountain Crater. Drop the bugs into the nearby soft soil to uncover a Gold Skulltula, then plant a Magic Bean.
Warp to the Temple of Time and draw the Master Sword to become Adult Link again. Warp back to Death Mountain Crater and ride the floating bean platform up to a Heart Piece.
Death Mountain Gold Skulltulas
As long as you are around Death Mountain, you may as well grab a couple of Gold Skulltulas.
You can find the first one during the night, in the little canyon leading up to Biggoron (where the rocks fall on you), there is a Gold Skulltula hiding behind a boulder. Smash the boulder with the Megaton Hammer to reach the prize.
The next Skulltula is in the Dodongo's Cavern. Enter the dungeon, and go through the door in the northwest corner. Use a bomb to detonate both sets of Bomb Flowers simultaneously, lowering the staircase. The Gold Skulltula is located in the alcove above the top of the staircase, and can be reached with the Longshot.
Rooftop Heart Piece & Skulltula
In Kakariko Village, stand between the Bazaar and the Potion Shop. Fire the Longshot at the top of the roof, to the left of the tall tower. Talk to the man sitting up here and he will give you a Heart Piece.
There is also a Skulltula on the top of the house on the south side of the village. Make sure it is nighttime, then Longshot from rooftop to rooftop to reach the Gold Skulltula.
Rematch with Dampé
Enter Kakariko Graveyard. On the north side of the graveyard, move the tombstone with flowers in front of it, and the enter the hole. Dampé will challenge you to a race. You need to reach the end of the course in less than a minute. Quickly follow Dampé, avoiding the flames he drops. When you reach the final room (the one with the round staircase), rather than running up the staircase, fire your Longshot at the torch at the top of the room. After you complete the race, talk to Dampé, and he will disappear, leaving behind a Heart Piece.
Shadow Temple
Now that you have acquired the Lens of Truth, you are ready to take on the Shadow Temple. As an Adult, play the Nocturne of Shadows to be transported to the entrance to the Shadow Temple. Walk down the stairs and stand on the pedestal. Use Din's Fire to light all the surrounding torches at once, which will open the door to the Shadow Temple.
Shadow Temple
You will be using the Lens of Truth frequently, so have it set to a button for quick access (make sure you have a full enough Magic Meter to use it. If not, you can forage for magic pots to replenish your magic reserve). Walk down the hallway, crossing the gap with your Longshot. You activate the Lens of Truth, you will see that the wall with the face on it is not real. Pass through this wall.
Getting the Dungeon Map
In the room with skulls and a giant bird statue in the center, there is one other wall that can be walked through. Head through this door in the corner. As soon as you enter this new room, head right and enter the first room that you can find with your Lens. Kill the ReDead and both Keese to get the Dungeon Map.
Getting the Hover Boots
Leave here and find another hidden pathway to the right, leading into a similar-looking room. There's another hidden pathway in this room that takes you to a sealed room with hands sticking out of the ground, a sight you have seen before at the Bottom of the Well.
That's right, another Dead Hand, although this time you are more powerful, especially if you have Biggoron's Sword. Use the same strategy as before (let a hand grab you, escape, and attack its head). Alternatively, if you just attack the hands, the Dead Hand will eventually pop up from the ground as well. Each strategy works just as well as the other. After being defeated, the Dead Hand will leave behind a chest with this dungeon's treasure: the Hover Boots. With these you can float off the ground for a while, but at the same time they offer little traction, causing you to slide around on the ground.
Set the Hover Boots to a button and return to the room with the giant circle of skull torches and the bird statue. Use your Lens to find the one, real skull on a pike (the one that does not disappear), and push the bird statue until it is facing the real one (do not stop pushing the bird statue until it is facing the correct skull, otherwise the floor will open up and send you back to the entrance of the room.) This will unlock the door to the east. Float over there with the Hover Boots (be sure to get a running start) and continue further into the temple.
Getting the Compass
There is a Beamos in the center of the next room with diverging pathways. The Lens reveals that two of them are only illusions, so proceed to the right and enter the door to encounter two Gibdo enemies. Use the Longshot, or Sun's Song to stun them, then eliminate them with your sword. This prompts another treasure chest with the Compass to appear. Return to the previous room.
If you want a Big Fairy to replenish all of your energy, destroy the Beamos, go to where it stood, and play the Song of Storms. You can do this as many times as you want by re-entering the area.
Enter the door on the opposite side. Be careful about the large rotating scythes and maneuver your way around the room, collecting all the silver rupees. they are pretty easy to find; the trickiest one requires you to use your Longshot to reach a platform above. Go through the now opened passageway and grab a Small Key from the chest.
Return once more to the room with the Beamos and use a bomb to destroy the easthern wall. Enter the locked door. you will now be in a long passage that is littered with Skulltulas and dropping guillotines. The shadows cast by the Skulltulas give away their positions. Work your way through, watching out for Wallmasters near the end.
Falling Spikes
Finally, you will reach a large room with platforms and more guillotines. You won't need the Hover Boots for this; in fact, they only make this part harder. Run and jump through the guillotines, watch out for the Fire Skull that bursts from nowhere at the last blade and tumble under the blade to the safety of the last platform. That safety is fleeting, however, when a single Stalfos enemy appears. While you fight him, be careful not to fall off the platform. (When he's defeated, you can play the Song of Storms to summon another big Fairy).
Gold Skulltula: Use your Lens to see platforms going to a door on the left. This leads to a large, seemingly empty space, but you will be mysteriously hurt. A quick look through the Lens reveals invisible, rotating scythes. Kill all the Keese and the Like Like in the room to unlock the gate to access the Gold Skulltula.
Equip your Hover Boots and walk onto the large, fluctuating platform to the right (make sure its in it lowest position when you start to run). From there, wait until the platform is in its highest position and hover over to the next platform, toward the guillotine to reach solid ground safely. A Beamos and Blade Traps dominate the big platform ahead. The idea is to collect the silver rupees around them, including the one underneath the Beamos, to open the locked door.
The next room features sets of falling spikes. The sign nearby hints at some kind of object that would protect you from them. Using the Lens, and you will see a big block in the wall nearby. Pull it out onto the face tile on the floor and push it along the outlined path. when you reach the point where the block stops both sets of falling spikes, stop pushing it and begin pulling. In the cells on either side, you will find a Gold Skulltula and a bundle of arrows. Continue pulling the block until it cannot budge and use it to climb on top of the cells. Now use the spikes to get to the other side of the room. Hit the switch and grab the Small Key from the treasure chest that just appeared on the other side of the room (you can reach it with your Longshot.
The Phantom Boat
Return to the large room and head toward the falling guillotine blade. The Lens of Truth reveals hidden platforms that lead to the locked door on the other side. Using your Lens in this room, you will see hidden spikes on the floor. Defeat the ReDeads and collect the silver rupees by using a combination of the Lens of Truth and the Longshot.
Go through the now unbarred door and it'll close behind you. Kill all four of the Keese in this room to re-open the door. Climb the big steps, pluck a bomb flower, and toss it into the giant skull to obtain a Small Key.
Gold Skulltula: There is a Gold Skulltula on the wall behind the giant skull pot.
Go back to the room you came from, use your Lens and check out the hidden target above the platform with the locked door. Longshot to it and go through door to enter the next room.
Be careful about the fans in this room. To avoid falling down, you are going to have to equip your Iron Boots to walk firmly on the ground. Rely on the Iron Boots to get you through this whole fan section. Watch out for the eye that shoots fire at you. Enter the door to the next rooom and destroy the ReDeads. you will find an invisible chest with arrows in it.
Now leave the room, and use your Lens to see an opening in the wall to your right. Equip your Hover Boots, and run towards that opening when the fan behind you starts to blow. Go through the door. Look to your right for a mound of dirt that looks out of place. Blow it up with a bomb and, using the Lens of Truth, open the chest for a Small Key. Take out the Gibdos and head through the locked door.
Gold Skulltula: There's a Gold Skulltula that you can reach if you have the Scarecrow's Song. Play the song after you climb the ladder and Longshot over to the Scarecrow to reach the Gold Skulltula and two recovery hearts.
In the next room, pull the block onto the marked tile under the ladder or use the Longshot to pull yourself up the ladder. Jump onto the ship and play Zelda's Lullaby on the Triforce marker to make the ship move. Careful, there are two Stalfos you will face as you sail. When the boat stops, it'll start sinking, so quickly jump off the left side onto a platform and go through the only door you can.
Getting the Boss Key
 Using the Lens, navigate this invisible maze, carefully avoiding the Wallmasters. There are three other doors in this room. The south room contains a Small Key that appears when you kill all the invisible enemies. The west room contains a lot of rupees after you blow the three pots up, as well as a Gold Skulltula. The room to the north contains the Boss Key after you use Din's Fire to burn the wooden spiked walls.
After you are done, go back to the area from which you came (where the boat sank). you will see another platform on the other side with a locked door, but it is across a very wide abyss. Take out your bow and fire one arrow into the bomb flowers to topple the giant gargoyle statue, creating a bridge for you to cross. Go through the locked door, and use the Hover Boots and Lens of Truth to reach the Boss door. Enter and fall into the pit.
Dungeon Boss: Bongo Bongo
Once the hands are out of commission, use the lens to see Bongo Bongo's eye charge at you. Time a sword swipe or shoot another arrow quickly into the eye to stun it. Hack away at the eye and repeat. This boss fight is made much easier by the Biggoron's Sword.
If you fail to defeat Bongo Bongo on the first try and find yourself at the entrance to the Shadow Temple again, there's a shortcut back to the boss chamber. Go past the first room with the skull torches and the bird statue, across the chasm, and into the room with the Beamos. Take the passage to your left into the room with the two grim reaper status and spinning scythes. A wall in one corner of this room is fake - run through it and drop down the opening and you will land on the boat. This enables you to skip a bunch of rooms on your way back to fight Bongo Bongo.
Grab the Heart Container and enter the portal to be on your way to receive the Shadow Medallion from Impa.
Gerudo Valley
Gold Skulltula: In Hyrule Field, right outside the entrance to the Gerudo Valley, there is a large number of boulders. Find the boulder surrounded by smaller rocks and blow it up. Use another bomb to reveal a hidden grotto. Enter and you will find three alcoves, each blocked with a spider web. Burn the webs with Din's Fire, or Fire Arrows. On the wall behind the cow you will find a Gold Skulltula.
The bridge connecting Hyrule Field to the rest of Gerudo Valley is currently under repair, so you need either Epona or the Longshot to cross it.
Gold Skulltulas: Once you cross the broken bridge, you can find a Gold Skulltula on the wall behind the tent at night. There is another Gold Skulltula on the stone pillar nearby.
Gerudo Valley Heart Pieces
The first Heart Piece is located on a small cliff above the water. On the side opposite the carpenter's tent, drop off the ledge (as far to the left of the "no diving" sign as you can get). Walk to the grey boulder, than Longshot to the box on the opposite side. Break the box to uncover a Heart Piece. The only way out of here is to dive down into the waterway below, which leads to Lake Hylia.
Return to the Gerudo Valley. On the same side as the carpenter's tent, drop off the north most portion of the ledge, onto the ledge below. Jump into the water and immediately equip the Iron Boots. Walk north towards the waterfall, and Longshot up to the ladder. Climb the ladder to reach a Heart Piece.
Gerudo's Fortress
Head west out of Gerudo Valley to enter Gerudo's Fortress, home of all female band of thieves known as the Gerudo. Walk up to any guard and they will throw you in jail. it is time to attempt your escape. The wooden awning in the window above provides a perfect surface for your Longshot to latch onto.
Heart Piece: After reaching the window your way out of the prison, do not fall from your high perch. To the left, you will see a treasure chest sitting on the highest part of the building. If you hug the wall and carefully move as close as you can to the edge without falling, you can reach the chest with your Longshot and receive a Heart Piece.
Freeing the Carpenters
From here, you will need to avoid detection, or you will be thrown back into the cell. Your purpose here (other than to escape capture) is to free the master craftsman's four workers so that they could get back to repairing the bridge. they are imprisoned throughout the fortress. Each time you attempt to free one you will have to defeat a Gerudo Thief, who is a vicious fighter. The Gerudo Thieves are particularly adept at defending against your attacks, but most jump attacks will connect, if you catch them off-guard. Upon defeat, they drop small keys used to unlock the prisoners' cages.
The first one can be found by dropping to ground level(from the escape window) and immediately going into the building on the left. His name is Ichiro. After freeing the carpenter here, leave through the other door to arrive back outside.
Shoot down the three guards with normal arrows (fire arrows do not work). If you are out of arrows, use the longshot to stun a guard and then take them down with your sword while they are stunned. Head up the ramp on the south side of the fortress, carefully walking around the Gerudo in white. Knock out the guard on the ledge above the white clad thief and go through the door that gaurd was pacing infront of. You will be in a room with two cells, one of which holds an imprisoned carpenter. Talk to him and trigger the battle with the guard. Grab the key and free the prisoner. His name is Jiro.
Continue into the next passage and through the door leading outside. Go through the nearby doorway. Knock out the two Gerudos and walk up the stairs on the opposite side. When you are back outside, drop down onto the ledge to the north and enter the doorway. Wait for the guard to pass and shoot her with an arrow. Continue down the passage to reach another prison cell. Defeat the Gerudo Guard and free the prisoner. His name is Sabooro. Exit the same way you came in.
Drop down onto the ledge to the west and go through the door to your right. Walk down the passage to reach the last prisoner. His name is Shiro. After you free him a Gerudo will appear and invite you to join the clan. She will give you the Gerudo Token, which allows you to roam free around the Gerudo Fortress.
Gold Skulltula: At night, on the east wall towards the top of the fortress, you can find a Gold Skulltula.
Since they've been freed, the carpenters will finish the bridgework, making it easy to to cross the gorge in Gerudo Valley. A word of warning: the Gerudo Training Grounds shouldn't be attempted until after you get the Silver Gauntlets from the Spirit Temple.
Spirit Temple
The Haunted Wasteland
Two things you will need before you attempt to traverse the perilous Haunted Wasteland: the Lens of Truth and a doubled magic meter. You should already have the Lens of Truth, if you have finished the Shadow Temple. The latter is not completely necessary, but nice to have in case you mess up a couple of times. The doubled magic meter can be found in a Great Fairy Fountain (take a look at the Fairy Fountain Locations section for details).
Climb the ladder in the northwest corner of the Gerudo's Fortress and speak with the guard at the top. She will open the large gate, and warn you of the two trials you need to pass in order to successfully cross the Haunted Wasteland. Pass through the open gate, and enter the desert.
If you stand in one place for too long, you will begin to sink into the sand. First, Longshot over the river of sand to the crates on the opposite side. You will then need to follow the flags posted throughout the wasteland. If you ever veer from it, the unrelenting wasteland will swallow you right up, sending you back to the beginning. Very carefully work your way across the desert by following the flags, until you reach a small stone building, atop which is a plaque that hints at using the Lens of Truth.
Gold Skulltula: If you enter this stone building, you will find the Skulltula inside. Plus, you can get a purple rupee for lighting both torches with Din's Fire.
Activate the Lens of Truth to see a Poe that will start floating away. Do not kill it. Follow it through the wasteland, avoiding the Leevers that emerge from the sand, until you reach the Desert Colossus.
Desert Colossus
While there is no sandstorm in sight, this place is crawling with Leevers.
Naryu's Love
Head towards the two trees on your right, destroy the cracked wall with a bomb, and enter. Inside, play Zelda's Lullaby standing on the Triforce symbol and the Great Fairy will grant you a spell: Naryu's Love.
Head into the Spirit Temple and you will discover that you cannot go further without the Silver Gauntlets. Return to the Desert Colossus, where Sheik will drop in and teach you the final Ocarina song: the Requiem of Spirit.
Spirit Temple (Child)
Play the Prelude of Light to warp to the Temple of Time, return the Master Sword to become a child again, then play the Requiem of Spirit to warp back to the Desert Colossus.
The Promise
Enter the Spirit Temple. Head up the stairs and to the left to find a Gerudo thief named Nabooru, hunched over the crawl space. When she inquires about your being here, respond with "Nothing really," and follow it up with "I hate Ganondorf!" to accept the small errand of retrieving the Silver Gauntlets.
The Power of the Sun
There are a few fiery enemies to be found here, so equip your Hylian Shield. Crawl through the hole to wind up in a room with two barred doors, a small crawl hole, a bunch of Keese, and an Armos in the center. Destroy all the enemies here to open the doors. Head through the door on the left.
you will face a Stalfos and a Green Bubble. These monsters look a lot bigger now that you are smaller, and consequently take longer to defeat. Hit the switch with your Boomerang (or your Slingshot, from the side). The fence will fall to make a bridge. Cross the bridge and head through the door. Use Din's Fire to incinerate the Anubis in the room, or lure it over to the fire that the diamond switch creates (the former method is much faster). Head through this last door to end up in a room with a fence dividing it. Avoid the Wallmaster and collect the silver rupees on the top of the climbable fence, to create a bridge to the other side. Take out the Keese and light the unlit torches with Din's Fire or Deku Sticks, to reveal a chest.
Gold Skulltula: There is a Gold Skulltula on the fence dividing the room. Retrieve it with your Boomerang.
Grab the Small Key from the chest and head through the door to return to the first room. Enter the crawl space, and open the locked door. The high wall can be scaled, but it is also occupied by some Skulltulas. Dispatch them with a few Slingshot shots and be on your way.
Gold Skulltula: Once you reach the top, turn around and look back at the wall to find a Gold Skulltula.
Inscribed on the floor in this room is a sun switch, although you will first have to deal with the two Lizalfos. Once they are defeated, you can locate an obstructed hole in the rock wall. L-target it and send a Bombchu to blow it up (if you do not have any Bombchus, hit the crystal switch high up in the corner of the room to summon a chest full of them). The sunlight will activate the sun switch, opening the door to the next room.
Getting the Silver Gauntlets
Enter the next room and push the statue on your left off the edge and onto a switch. Go up the steps, light a Deku Stick with the torch, and light the two torches in front of the big statue on the lower level to get the Dungeon Map (alternately, you can use Din's Fire). Go back up the stairs and head through the next door. Run through the short hallway and enter the next room. Throw bombs to destroy all the Beamos in this room, then collect the silver rupees. Use the newly-lit torch to light the three others located around the room. This prompts a small chest to appear, with a Small Key inside.
The next task is to unlock the door by moving the blocks in the middle of the room around, so that the one with the sun switch on it sits under the light coming from the window. Go through the now unblocked door and follow the path to a room with a metal-clad Iron Knuckle sitting on a throne.
Gold Skulltula: Above the door in the hallway leading to the room with the Iron Knuckle is a Gold Skulltula. Retrieve it with your Boomerang.
The door behind Iron Knuckle is locked, but once you slash at the hunk of metal armor it comes to life and strikes out with a vengeance. The Iron Knuckle, this foe wields a giant axe and focuses primarily on offense. Given that it is the most powerful, non-boss enemy you will face in the game, be careful to avoid its attacks. Retaliate when it is off-guard, and you will be able to whittle away its armor and health. Its wide swings can break down pillars and unleash plethora of hearts if you need them (which you will, if you get hit). Once some of its armor falls off, the Iron Knuckle will move considerably faster.
Once he is defeated, the door opens up, taking you to a ledge outside. Kaepora Gaebora will talk to you for the final time, before you can open the big chest to gain the Silver Gauntlets. After watching Nabooru be captured by the evil witch sisters Koume and Kotake, you will need to return here as an adult to utilize the strength-boosting Silver Gauntlets and complete the rest of the Spirit Temple.
Desert Colossus Heart Piece & Gold Skulltulas
Before leaving the Desert Colossus as a child, locate a patch of soft soil to the left of the entrance to the Spirit Temple. Drop some bugs into it to uncover a Gold Skulltula, then plant a Magic Bean. Return here as an adult and ride the floating bean platform to reach a Heart Piece, as well as a Gold Skulltula at night.
Spirit Temple (Adult)
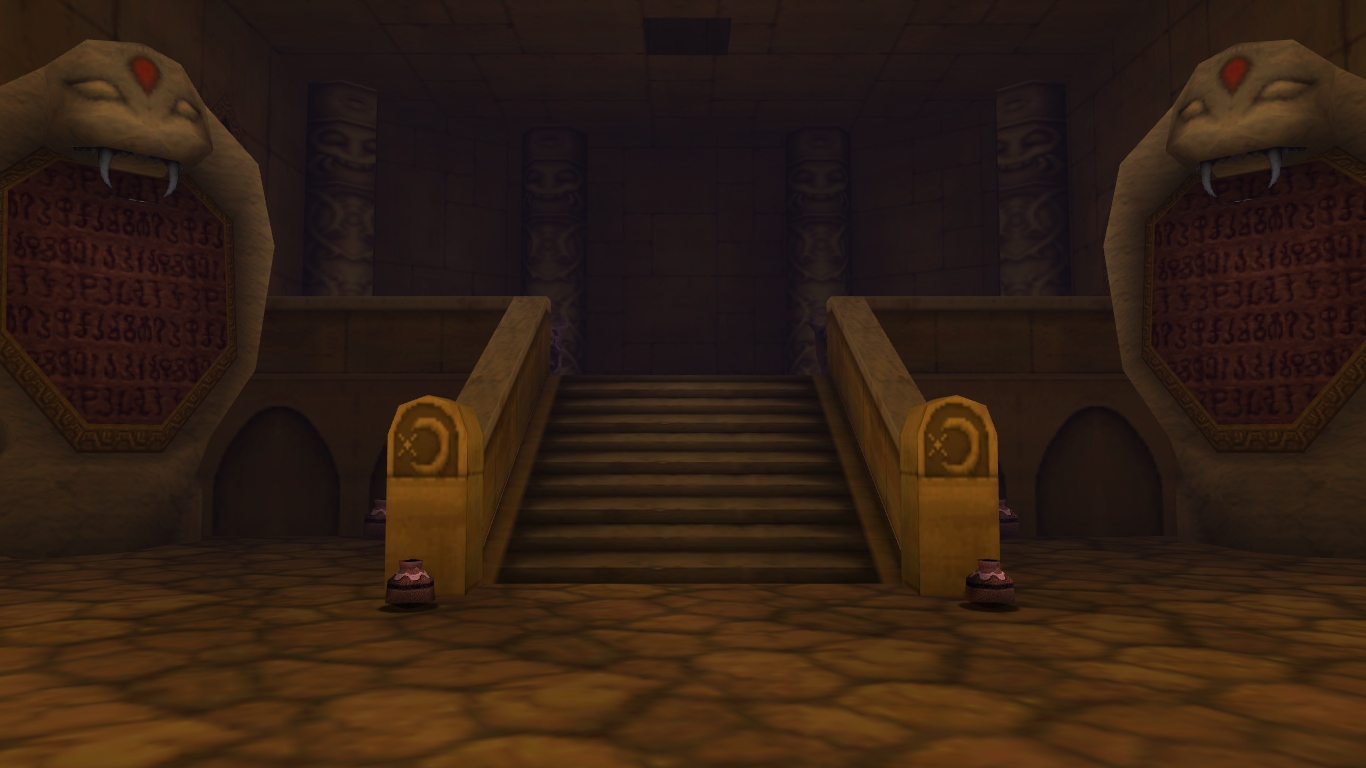 Return to the Spirit Temple as an adult, and head to the giant block on the right that you couldn't move before. The Silver Gauntlets are automatically equipped, so push push the block through the passage with ease. Destroy the Beamos and hit the crystal switch on the ceiling to unlock both doors.
Getting the Compass
Enter the door to your left, kill the Wolfos, and play Zelda's Lullaby on the Triforce symbol to make a chest appear. Longshot over to the chest, which holds the Compass. Now exit and enter the other door on the right, which leads to an interesting room. Here you must avoid the boulders rolling back and forth, and collect all the silver rupees. The first one floating in mid-air must be gotten using the Hover Boots.
Gold Skulltula: There's a blue block in the middle crevice here that can be banished by playing the Song of Time. Removing the block unveils the hiding spot of a Gold Skulltula. do not worry about the boulder, when you whip out the Ocarina, everything stands still.
Getting the Dungeon Map
Now go through the newly opened door and, while being cautious of the Like Like that falls from the ceiling, grab the Small Key from the chest. Return to the room with the Beamos and use the key to access the room beyond the locked door. Defeat the Like-Like, climb the high wall, and use the Lens of Truth to make the Floormaster in here visible. After you defeat it, grab the handle of the cobra mirror and rotate it around until the light hits the third sun symbol from the left, opening the door. Ignore the chests in here, they won't help you.
The next room is one you visited when you were a child. Unlike before, though, the Armos by the entrance is actually alive rather than just a statue. If you did not get it as a child, you can make a slight detour to grab the Dungeon Map by dropping to the ground and lighting both torches in front of the large statue with Din's Fire.
Gold Skulltula: Head up the stairs you ascended as child Link use your Longshot reach the Gold Skulltula in the northwest corner. If you want to, you can play the Scarecrow's Song to summon Pierre, but it is not necessary.
Getting the Mirror Shield
 Ascend the stairs near the door you came in through (if you dropped down to the lower level, there is a Longshot target above the door). Take a look at the giant statue's open palm and you will see a Triforce symbol on it. Using the Hover Boots, float onto that palm and play Zelda's Lullaby to spawn two treasure chests, one the opposite palm and one on the ledge above. Longshot over to the chest on the other palm and you will receive a Small Key. Walk back up the stairs and Longshot to the chest in the northeast corner. Smash the rusty switch with the Megaton Hammer to unlock the center door below.
Temple Shortcut: If you want to create a shortcut to the room with the giant statue, head through the south door that you just unlocked. Shove the huge blocks out of the way, and smack down the rusty switch with the Megaton Hammer. The tile acts as an elevator that takes you from this room to the very first room of the temple.
With the Small Key in hand, head through the locked door next to the flaming torch in the southeast corner. Pass through the short hallway and you will enter a room with a few Anubis enemies, a Beamos, and a switch. Remember that the Anubis are weak to fire. Use either Din's Fire or Fire Arrows to quickly dispatch them, or lure them over to the ring of fire that is created by stepping on the switch. Once all the enemies are defeated the door will be unlocked. Enter a room with a sun inscription and four Armos statues.
You have nothing to help reflect sunlight onto the sun switch as of yet, and the blue switch does not stay down unless there's weight on it. Your only option is to stand by the barred door on the south side of the room and hit the Armos statue in the far corner, causing it to hop towards you and (hopefully) onto the switch, unlocking the door for a brief moment. When the door is unbarred, quickly enter it.
The pathway leads to familiar-looking room with a familiar-looking enemy: an Iron Knuckle. The tactic is the same as before, though now you can slay it much faster (especially with Biggoron's Sword). Head through the door for your prize: the Mirror Shield. Now you can deflect certain spells and also reflect light onto other targets.
Getting the Boss Key
Equip the Mirror Shield and return to the room with the Armos. Use your shield to reflect the light pouring in from the window onto the sun switch to unlock the door. Enter and collect the Small Key from the chest inside. Return to the room where you fought the Anubis enemies and unlock the door.
The next room can be confusing at first. The walls keep shuffling back and forth into spiked, making climbing very difficult. You can forgo this arduous ascent and simply Longshot up to the uppermost section of the wall. Destroy the Beamos with Bombs or just run past them, walk around the Blade Trap, and enter the next room.
As you wander through this corridor, you will pass by a barred door with a Triforce symbol on the floor in front of it. Playing Zelda's Lullaby causes the door to open. Enter and slay the Torch Slugs. All the doors in here are fake, so blow up the one in the northwest corner to reveal a gold eye switch. Shoot it with an arrow to create a platform high up in the center of the room. Longshot the target on the ceiling to get up on top of the block, and use it to jump onto the switch, which removes the flames from the chest containing the Boss Key.
The Statue's Secret
Return to the previous room, walk up the stairs and enter the door. Activate the crystal switch below to unlock the door. Enter, defeat the Lizalfos, and head left towards the cobra mirror. There's a piece of wall bulging out on the left; blow it up and rotate the statue to the left to shine the light onto the other cobra mirror. Head towards the other cobra mirror, eliminating the Lizalfos on the way, and aim it towards the room with the giant mirror in the ceiling. Return to the room with the crystal switch and reflect light onto the sun switch to lower the platform. you will end up hanging just in front of the giant statue's face.
Use the Mirror Shield to direct the light onto the face of the statue. Keep light on the face to make it crumble, revealing a hidden passage behind it. Longshot over to the grating and unlock the Boss door. Before you deal with the twin witches, you must first vanquish yet another Iron Knuckles. After you take out the first layer of armor, the battle will end prematurely. Proceed to the next room and climb to the top of the platform to face Twinrova.
Dungeon Boss: Twinrova
The boss fight is separated into two phases and takes place on a central high platform surrounded by side platforms. As you probably expected, the Mirror Shield you found in this Temple is an integral part of the fight. During the first phase, Koume and Kotake, each with their distinct command of magic, fly around on their brooms. Watch both witches to see which one makes the first move, with the Mirror Shield at the ready. When one charges up magic, prepare to bounce the beam off your shield and onto the opposite sister. This means you must harm the fire witch with ice magic and the ice witch with fire magic. Repeat this a couple of times until the sisters fuse to become Twinrova.
Now the fight will change slightly. This time stand on the center platform and keep an eye on Twinrova as she flies around the room. She shoots either ice or fire magic. you are still trying to use her own magic against her, but this time the Mirror Shield will actually absorb her attacks and store them. Absorb the same type of magic three times to unleash it upon Twinrova, who falls to a side platform on contact. Rush over and deliver a few slashes before she returns to the air and repeats the process (If you are using Biggoron's Sword be sure to put it away before trying to use your shield). Keep this up until the evil sisters meet their maker and leave behind a Heart Container. You will then receive the Spirit Medallion from Nabooru, after which you will be asked to return to the Temple of Time to meet someone. Head to the Temple of Time to watch a cutscene and receive the Light Arrows, after which the only thing really left to do is face Ganon in his castle.
Tying Loose Ends
Before taking on Ganon, you may want to take a look at the Side Quests section and see if their is anything you still have not completed. You can also return to Gerudo's Fortress to try your hand at the Gerudo Training Grounds, now that you have the Silver Gauntlets.
If you have not gotten Biggoron's Sword yet, now would be the time to do so. It will make things easier for you in Ganon's Tower.
Ganon's Castle
 Ganon's Castle is where Hyrule Castle used to be. There is a Gold Skulltula you can get on the white bricked structure just to the right of the entrance of the castle. The bridge to the entrance has been broken, but the six Sages will lend their powers to create a new bridge for you to cross. Ganon's Castle has an interesting premise. When you reach the main room, you discover beams of energy being channeled into a central structure, creating an impenetrable barrier that you cannot access. you will have to sever these energy beams one-by-one. The color of the energy beams are linked to their corresponding Medallions (i.e. the blue beam denotes the Water Medallion). You must utilize the power of all the Medallions and items you have attained throughout your adventure to tackle each individual room. Most of the challenges resemble their temple counterparts, taking certain characteristics from the temple and inserting them as obstacles within the rooms.
Forest Barrier
The lone Wolfos is nothing but a minor speed bump to your ultimate goal, which is to actually light all the torches in the room, including the one above the locked door. you will need both Din's Fire and Fire Arrows to pull this off. Fire Arrows can be obtained from Lake Hylia, but you can shoot a regular arrow through the fire to the one above the locked door if you do not have any fire arrows on hand. The next room features a bunch of fans and silver rupees that are just begging to be collected. There's one stays afloat in mid-air on the left side of the room. You first need to step on the floor switch to summon a hookshot target.
Once all the rupees are collected, you can finally enter the door to find the pulsating core of the problem. Pierce it with a Light Arrow to destroy it and dispel the barrier. One down, five more to go!
Shadow Barrier
While you can easily visit the other barriers, there's a key item to be obtained first from this particular one.
If you can, take out the Green Bubble in the middle and the slimy thing on the other side. The unlit brazier on the right can be lit by shooting a Fire Arrow at it. The lit brazier creates temporary platforms to bridge the gap between platforms. If you didn’t kill the skull, he might become a slight problem for you. you will reach a platform with a Like Like on it. Shoot the brazier once more with a Fire Arrow to take the platforms to the switch on the right. Hookshot to the chest and open it to obtain the Golden Gauntlets.
Using the Lens of Truth, walk across the ledge to the rusted switch and hit it with the hammer. Work your way back across to the now unlocked door, still using your Lens of Truth, to cross the abyss. As with the Forest barrier, destroy this core with a Light Arrow.
Now that we have the Golden Gauntlets, we can get the Half Damage ability from the Great Fairy Fountain outside the castle. Head outside the castle, cross the bridge then head left to the white bricked structure. Past the structure, you will see a pillar. You can lift it up. Enter and play Zelda Lullaby on the triforce symbol to receive the Half Damage ability. Enter back the castle.
Spirit Barrier
The first room teems with Blade Traps, Armos, and a Beamos. Collect the silver rupees as always to proceed to the next room. The diamond switch here only gives up more bombchus. Look through the metal bars to see an unreachable diamond switch. The bombchus are the only items in your inventory that have the ability to travel by itself for a short time. Aim at the diamond switch by aligning the camera and facing it, then unleash a bombchu. Its explosion is enough to activate the switch. Using your Fire Arrows, burn the spider web above to allow light to enter. There are four suns on the ceiling; aim your shield at the first one to the right of the open doorway to unbar the door. Destroy the core with a Light Arrow to dispel this barrier as well.
Fire Barrier
Another room Involving the collection of silver rupees. Be sure not to spend too much time on any particular platform as they will begin to sink as soon as you set foot on them. Note that if you equip the Hover Boots, the center platform will not sink. Watch out for the flaming head jumping out of the lava and the Torch Slug at the opposite end of the entrance.
The only really tricky ones to get are the one behind the spinning flame and the other that is far in the distance and can’t be reached from any of the platforms. For the one behind the spinning flame, simply jump over to that particular platform in and jump up in between the gaps of the flame. Follow one of the flames, being careful not to get hit by the other, and grab the jewel. In order to get the one far in the distance, get the Golden Gauntlets from the Shadow barrier if you haven’t already and lift the huge pillar to throw it in the lava to get both the rupee underneath and the rupee across the room. In order to reach the unlocked door, stand on the main sinking platform and shoot your hookshot over before you sink into the lava.
Water Barrier
Break the icicles around the blue fire and capture it in a bottle. Defeat the two frozen statues to unlock the door. There’s a heart in the treasure chest on the right but the one on the left is a trap. Make sure you have a bottle of blue fire before advancing to the next room.
you are under a strict time limit to figure out what to do here, but it is actually very simple. Go to the farther of the two blocks (as you enter the room). Go to the left side of that farther block and push it against the small rock, and then into the square hole. Push the remaining block toward the red ice, using the ice rocks as a form of guidance (first push it against one small rock, then another, then towards the red ice). Hit the rusted switch with your hammer and climb up to the opened door to dispel the Water barrier.
Light Barrier
Using the Golden Gauntlets, lift the gigantic pillar that's blocking the entrance first. In the next room, use the Lens of Truth to find the Skulltula in the middle of the room and the bats scattered throughout. There’s a ring of treasure chests, some with prizes, others without; from left to right: blue rupee, freezing ice trap, heart, freezing ice trap, bundle of arrows, and freezing ice trap.
Stand on the Triforce symbol in the next room and play Zelda's Lullaby to reveal a treasure chest with a small key in it. In the next room are two boulders spinning around in a circle. Go around the circle with the boulders and collect silver rupees around the central part of the room. There are rupees located both inside and outside of the circle -- some in small pockets. The final rupee is on top and can be accessed by standing inside one of the outer pockets and shooting your hookshot at it.
When you enter the next room, expecting to find a core to destroy, you won't find anything. However, use your Lens of Truth and enter the fake wall to the real Light barrier.
The Central Room
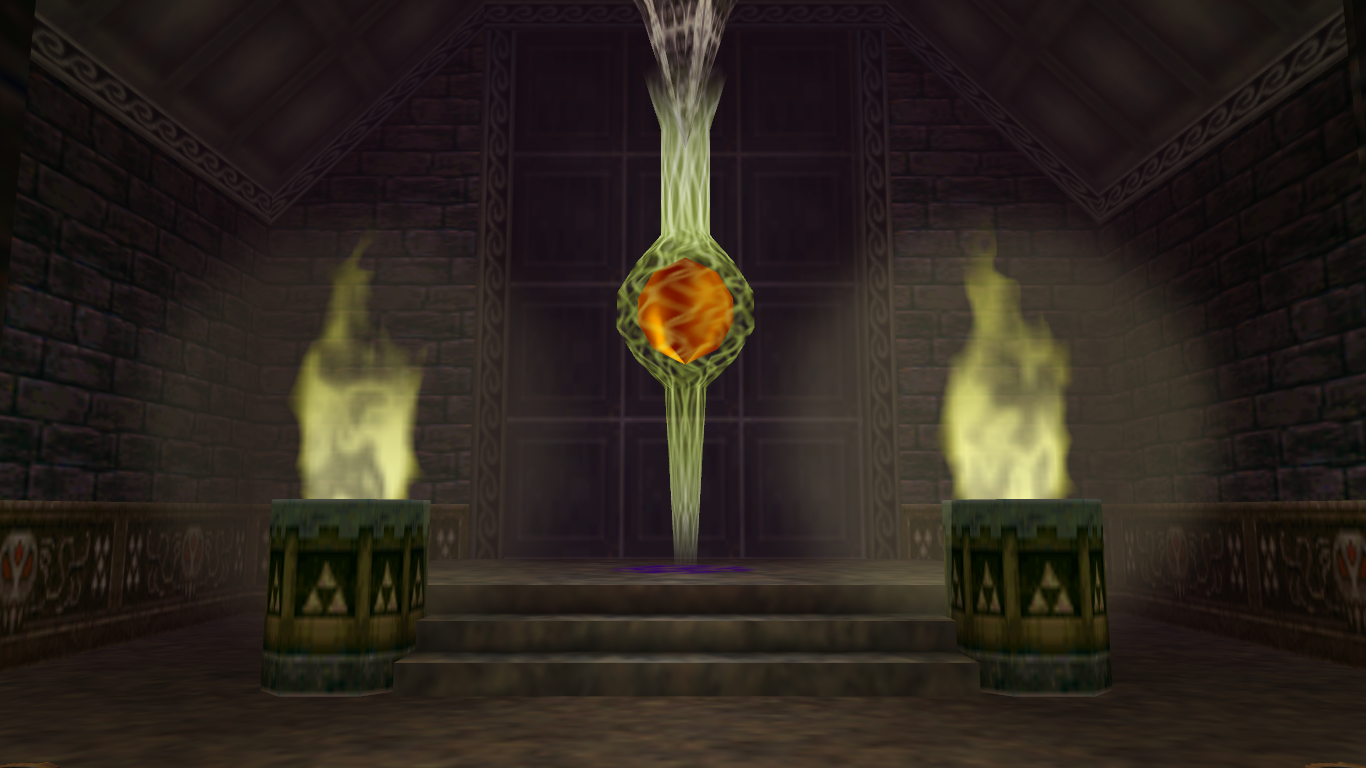 With all the barriers brought down, the central structure can be accessed now. Kill the Fire Keese or simply ignore them altogether. Climb up the stairs and defeat what looks like Lizalfos’ cousins, Dinolfos. Kill them in the same manner that you would kill the Lizalfos and go into the door that unlocks. Climb up the stairs and go into the next room. In here, defeat the two Stalfos while avoiding the fire in the middle. Get the boss key from the treasure chest and go into the unlocked door.
Climb up another set of stairs to a room with two Iron Knuckle knights to defeat. Defeat them the same way you defeated the others in the Spirit Temple and go through the unlocked door. Walk up to the stairs to your final challenge: Ganon.
Or so you thought. Don’t get too pot crazy and destroy all of the pots because you might need them later on. Enter the door to the right of where you just came in up to the final set of stairs.
Dungeon Boss: Ganondorf
Navi can’t help you with this battle so you’re on your own as far as targeting is concerned. Stand on one of the outer blocks and Ganon will start to shoot electricity at you like his phantom counterpart did in the Forest Temple. Deflect his electric projectile back just like in the Forest Temple and shoot him with a Light Arrow once he is stunned. After you hit him with the arrow, jump over to him and swipe him with your sword. If you need health, jump down to the bottom where the pots are and get the hearts from them.
Follow Zelda down the castle tower to safety. Your main obstacle is falling rocks and time. You only have a few minutes to hightail it out of the castle so hurry as fast as you can. You’ll reach a point where Zelda will be surrounded by fire and you’ll have to fight off two Stalfos to free her. If you don’t beat the second one fast enough, the first one will reappear and you’ll have to defeat it again. Once Zelda is free, hurry out of the castle.
Give Ganon a blow in between the eyes with your light arrows. When he is stunned walk around him and slice his tail up (you can also use the hammer if you do not have Biggoron's Sword).
If you don’t have magic, get it by walking behind any of the remaining walls of the castle and let Ganon slice right through them until you get some magic. Once you beat Ganon once, get your master sword back and swing at him a few times. He will get up again, upon which time you’ll be able to repeat the same process as the first time using the master sword instead of your Biggoron Sword. If at this point you don’t have magic and there’s no place to get it, slip through Ganon’s leg to his tail swipe him a few times with the master sword. Once the king is down, deliver the final blow to him while Zelda holds him still.