home ➜ Nintendo® ➜ SNES - Super Nintendo® Entertainment System® ➜ Shooter ➜ Zombies Ate My Neighbors
Zombies Ate My Neighbors #16 Zombies have invaded your neighborhood
Gameplay & Walkthroughs
Zombies Ate My Neighbors #16

- Developer: LucasArts
- Publisher: LucasArts
- Release Date:July 19, 1993
- Toys-R-Us · Reno: $20 · January 28, 1995
- Players: 1 - 2
Introduction
Zombies have invaded your neighborhood and are trying to eat your neighbors. Try to save the neighbors, cheerleaders, and babies in 55 levels of action and adventure. Battle zombies, mummies, evil dolls, lizard men, vampires, and giant ants with a wide range of weapons including Uzi squirt guns, exploding soda, bazookas, weed whackers, and ancient artifacts. If you have a hard time getting through one of the levels, have a friend come over and help you out in the Two-Player mode. Save your neighborhood from a terrible fate in Zombies Ate My Neighbors.
In the game you are a male or female protagonist (Zeke or Julia), fighting the vampires, mummies, zombies, etc. on over 50 levels (not including secrets) and saving all of the people you find. There are defined number of neighbors you save on every level. When they are free then "Exit" door opens and you jump on next level. The levels differ from mall and grocery store to beaches and football fields. Using different weapons such as bazooka or water gun you have to defeat the bosses such as huge babies, dragons or ants at the end of levels. You can play the game with two players cooperatively.
At the end of the game there is a special credits level called “Monsters Among Us” in which you walk around in the LucasArts headquarters. The game developers are sitting at their desks or just hang around and when you approach them they will tell you who they are and what their role in the development of the game was.
Some bits of trivia regarding this credits level:
- George Lucas welcomes you at the door tells you to get back to work.
- A woman at a desk says: “watch out for our boss Kelly Flock”
- Steve Purcell, of Sam & Max fame, is dressed up like Indiana Jones.
- The purple tentacle from Day of the Tentacle is one of the monsters in this level.
- A guy at a desk says: “I cannot wait for the robot game” (anybody got an idea which game he means? I guess it is something related to Star Wars)
Play the special credits level
To jump directly to the special credits level, type the following code at the password screen: XWJR
Day of the Tentacle bonus level
Use the Password BCDF then start the game like normal to play the bonus round "Day of the Tentacle" before going to Level 1.
Red Potions save ammo.
Save Red Potions! In certain levels, like Chainsaw Hedgemaze Mayhem, you can save a lot of Bazooka rounds by smashing through the hedges as the Purple Beast (unlocking the “Massive Damage” bonus award if you smash enough hedges). You can also take on stronger monsters like Vlad Belmont, Snakeoids and the Frankenstein Monster as the Purple Beast easier — you can inflict massive damage to them and take none yourself as the Purple Beast is invulnerable. Mystery Potions can sometimes turn you into the Purple Beast, but do not depend on that; you should be very conservative with Red Potions due to that fact.
Zombies Ate My Neighbors Passwords
Put the zombies on the barbequeue with this set of passwords.
Level 5 = VHRV
Level 9 = PBGG
Level 13 = BFCB
Level 17 = BKYZ
Level 21 = VXBB
Level 25 = XYLZ
Level 29 = YLZD
Level 33 = WJQK
Level 37 = BZVG
Level 41 = BRPK
Level 45 = VLHX
Level 45 = BLHR (alternate)
Zombies Ate My Neighbors Bonus Level
To access the bonus levels, enter the passwords BCDF or GYLM.
Zombies Ate My Neighbors Sound Effects
When the LucasArts logo appears on-screen, press L or R. If you press L, you will hear a person scream. If you press R, you will hear a dog bark.
XDSJ
Play 3 Bonus Levels: “Curse of the Pharoahs,” “Mushroom Men,” and the hard-to-reach “Cheerleaders vs. the Monsters.”
Controls
+ shaped pad - Move around the world and Swim, while in the water.
Y button - Fires your currently selected weapon.M
X button - Uses your currently selected special item.
B button - Changes your selected weapon to the next in the list.
A button - Changes your selected special item to the next in the list. - Allows you to check how many Keys and Skeleton Keys you have as well, as they are listed in there too.
L and R buttons - Toggle your Victim Radar on and off.
Start button - Pauses the game. Both players can toggle "paused" status.
- To dive into water, walk up to the edge of it.
- To get out of water again, swim back to the edge.
- There is only one Monster which can attack players and Victims in the water.
- To jump onto a trampoline, walk up to its edge.
- To jump off a trampoline, hold down the direction you want to jump. When you fall back to the trampoline, your character will jump in the direction you are indicating. (You will sometimes be unable to jump in certain directions.)
- No Monsters are able to attack players and Victims who are on trampolines.
Gameplay
The world of Zombies is seen from an angled overhead view, allowing you to see your character and his surroundings. In this walkthrough, movement instructions are given in terms of compass directions, "north" being directly up-screen. You will find locked doors as you explore the levels; these can be opened with the aid of Keys, which are used automatically when you walk into the doors. You will need to find one Key for every door you want to open (although you can use force to open doors instead, if you have the right weapons for the job).
Health
Each player begins the game with a Water Pistol, a First Aid Kit, a full health bar and three lives. Whenever you are hurt by a Monster, you will lose one-tenth of your health bar; when you have lost all of your health bar, you will faint and lose a life. If you lose all of your lives, it is game over for you. (You cannot see how many lives you have while on a level - only at the end-of-level bonus screen.) However, if your health bar is not full, you may use a First Aid Kit to make it full again. it is best to leave it until you have rather less than half of your health bar left (say, two-tenths left) before healing using a First Aid Kit, in order to strike the right balance between being too daring, and using First Aid Kits unnecessarily.
Victims
Although your characters are fighting through the Monster hordes primarily in order to get to Dr. Tongue's laboratory and show him the error of his ways, they are also defending the Victims in each area they visit. The Victims are your neighbours, referred to as "Victims" because they are who the Monsters are after (for the most part). it is one of your goals in the game to save as many of the Victims as you can, as you play through. Victims are saved by walking into them, which results in them disappearing in a cloud of gratefulness and bonus points. However, if a Monster makes contact with them in the same way, they are history.
You start on level 1 with ten Victims, and on each level they must all be either saved by you, or defeated by the monsters, after which the Exit Door will materialize and allow you to leave. Whenever you progress to the next level, the same number of Victims will be placed on it for you to save, as were collected on the last level. Beware - if all the Victims on a level die, without you saving any of them, it is an instant game over. Thus, from even the most cynical point of view, it is definitely in your interests to keep as many Victims alive as possible, for as long as possible.
The Victims come in ten varieties (in addition to a secret Victim who appears only once in the game, and gives you a bundle of points). Your neighbours comprise the following types of people:
- Cheerleaders (1000 points each)
- Babies (700 points each)
- Dogs (500 points each)
- Explorers (500 points each)
- Trampoline Girls (300 points each)
- Tourist Couples (200 points each) - These are pairs of people standing together; each couple counts as just one Victim, though.
- Barbecue Guys (105 points each)
- Soldiers (100 points each)
- Swimming Pool Guys (100 points each)
- Teachers (10 points each)
Victim Death and Rebirth, and Victim Provision Order
The number of Victims appearing on a level is mostly determined by the number you saved in the previous one. If you allow two Victims to die in a level, you will have two less in the next one. But as you will appreciate, this arrangement on its own would result in every player eventually losing all their Victims but for one, which they would then have to worry about on every level. This is not the case - because the game also offers you a way of reinstating the Victims who've previously died, by earning new ones.
Every time your score breaks a multiple of 40,000 points, you earn an "Extra Bonus Victim." To clarify: if, when the game finishes adding up your bonus points after you have exited a level, you have broken at least one new multiple of 40,000 points since you began the level, you are awarded exactly one Extra Bonus Victim, which is added to your number of Victims in time for the upcoming level. (A "multiple" just means a number that divides by 40,000 to give an integral answer: 40,000, 80,000, 120,000, 160,000, and so on.)
If you saved five Victims in a level but also earned yourself an Extra Bonus Victim, then you will have six Victims to save as you start the next level. If you are playing in two-player mode, you can both earn Extra Bonus Victims at the same time, if you both break a score barrier in the same level; this means that you can generate up to two new Victims per level. Note that the last two levels in the game do not allow you to earn any bonus points at all after exiting, nor do they allow you to earn Extra Bonus Victims.
Each level has nine "potential" Victims and one "Always There" Victim. The "Always There" Victim (hereafter referred to as "Victim [A]") is, as the term suggests, always there - even if you have only one Victim. The other Victims are numbered two to ten and are added according to how many Victims you have; thus, "Victim number seven" is present if you have seven (or more) Victims, but he is not present if you have six (or less).
This "Victim Provision Order" means that a player can predict exactly which Victims are going to appear on a level, and choose different routes through the map in order to visit each place he needs to. In my walkthrough, Keep your number of Victims squarely at ten the whole way through - which actually is not hard to do if you keep on racking up points to earn Extra Bonus Victims.
Each level walkthrough will direct you to every place you need to visit to find all ten Victims. If you have not got ten then most of the time you should tag along anyway, as it does not add much distance to your route and you will often pick up items that you need along the way. The main situation that arises in which you should not do this, is when the route suggested appears to be a detour that would result only in your needlessly using items or putting yourself in danger.
Tourist-Werewolves
On several levels, Tourists present must be saved quickly, or after a certain time limit is reached, they will turn into pairs of Werewolves when they are brought on-screen. Werewolves are powerful monsters which take several hits from most weapons to defeat, and can jump between points on the map in order to keep up with you. If Tourists change into Werewolves, they effectively die, so it is important to try and get to the Tourists as quickly as possible on the levels on which this occurs. (In some situations, it is possible to save Tourists even after the time limit has been exceeded, by exploiting the game's programming - see Tips, Tricks, and Strategies.
Victim Radar
The Victim Radar is toggled on and off by pressing the L or R shoulder buttons on the Super NES controller. The radar is a simple visual display in the corner of the screen; it shows all of the Victims within the radius of one and a half screen's lengths of you, with each Victim being represented by one dot. Despite being such a simple device, the Radar is often very helpful in searching an unfamiliar area for Victims, and when you need to know exactly how far you are from a Victim in danger. Although I only specifically direct you to use the Radar a few times in the whole game, it does no harm to have it on at other times as well.
Map Features
Cupboards And Other Storage Spaces
As you explore the levels of Zombies, you will come across a variety of storage units, which can be opened. The contents of a unit vary randomly and are different in each game you play: it may contain an item or weapon; it may contain nothing at all; or it may contain a Bogeyman, which is essentially a booby trap that reduces your health. Some storage units can be opened from their north as well as from their south - this eliminates the Bogeymen, but it seems to also reduce the probability of finding a useful item inside.
Responsible Use Of Bazookas
The Bazooka is a fine, powerful weapon, but it has another important use: it can be used to blast down obstacles that are obstructing your progress. This includes regular doors, weak plaster walls, hedgerows, and fences, among other things. you will rely on this use of the Bazooka quite a lot, which is why it is such a valuable weapon to have. The Monster Potion also allows you to knock down weak obstacles by punching them, but that's a useful side effect more than anything else.
Some items are hidden in areas where you can only access them with the Bazookas; for example, a First Aid Kit, a Monster Potion and a Fire Extinguisher are hidden in this way on level 4. Such items are usually hidden inside things I call "hedge blocks" - they are large blocks of greenery which have weak hedge sections at the front, which can be blasted down to expose a hollow area inside, that may contain goodies.
Here is a list of things that may be blasted down with Bazooka shells, and what to target to achieve this:
- Plaster wall: Cracks in the top. If there are no cracks, you cannot blast it down.
- Hedges
- (east-to-west hedges): The sections with the lower, slightly darker tops.
- (north-to-south hedges): The sections which appear more gnarled, with dark patterns on them.
- Fences: The sections with the pointy tops.
- Supermarket aisle walls
- (east-to-west walls): Toward the western sides of the rows of red tin cans on the top shelves.
- (north-to-south walls): The large groups of red tin-cans.
- Rows of boxes: The cracked ones.
- Regular door: straight at it.
- Shop window: straight at it.
- Giant cobwebs: straight at it.
- Cracked box: straight at it.
- Collapsing Roof Gate: straight at it. Archways that collapse after you have walked through them
Skeleton Keys
In the world of Zombies, a Skeleton Key is a differently shaped Key used to open a special kind of door. These are the Skull Doors, easily identifiable from their skull design. You cannot use a normal Key to open a Skull Door; likewise, you cannot use a Skeleton Key to open a regular door. Also, unlike regular doors, you cannot blast open Skull Doors with the Bazooka. You can check how many Skeleton Keys you are carrying by using the A button, as they are listed as one of the special items, just like regular Keys.
Skeleton Keys mostly appear towards the end of the game, hidden in levels or held by a boss monster. This is a way of forcing you to explore the level (or fight the boss) before you can get in to save the final Victim (generally the "Always There" Victim), who will be in a cell behind a Skull Door. So, for the most part, Skeleton Keys are an element of level design, and the way they are rationed out tends to prevent you from keeping one to use on another level.
However, you can find Skeleton Keys in Cupboards (though very rarely), and there are a total of two other Skeleton Keys in the game, which are available to anyone who cares to earn them and which do not need to be used to save Victims (however many of them you have). The first of these is on level 15, on which a Key is located on a small island and is easy to obtain. This should be used on level 22 to access a very worthwhile secret. The second free Skeleton Key is on level 25, held by a boss, and can be used on that level to obtain an Extra Life or kept for use later in the game.
There is a certain degree of investment in the use of a Skeleton Key; will you use it now, or will you put it aside to bypass part of a level that you dislike or aren't any good at, later in the game? If you can avoid using a Skeleton Key on one level, you might find it pays off when you can escape a level quickly later on. The following table tells you how many Skeleton Keys are available on each level in the game, how many must be used on each level (never more than the number present), and how many you have the option of using on each level, to access various bonuses. You can use this to plan an entire game from start to finish if you want.
Special Items and Their Uses
First Aid Kit
Fills your health bar. I recommend using it when your health falls to two-tenths of the bar, in most cases; but when you are in an area containing Jelly Blobs, you should use one as soon as your health falls to three-tenths of the bar, as that's how much damage the Jelly Blobs deal in total with one of their Jelly Bomb attacks.
Speed Shoes
Allows you to run across land at twice your normal speed for 15 seconds after you use them. they are therefore very useful for approaching Victims who are likely to be in danger, very quickly; in particular, there are a few occasions throughout the game in which Speed Shoes are very useful in getting to Tourist-Werewolves before the time limit is up. (If you need to use Speed Shoes directly at the start of the level, a notice at the end of the previous level's walkthrough will tell you that you need to prepare.) The only problem with the Speed Shoes is that it can be difficult to collect the Victims when you have actually got to them, because your control over your high-speed character is so much less accurate.
Pandora's Boxes
Little golden chests; when opened they let out energy blasts which whiz around the screen for a fraction of a second, dealing damage to Monsters. Although weak Monsters will usually be killed, and tough Monsters will usually take a dent to their health, you cannot predict exactly whom the blasts will target. In particular, some enemies, like Frankenstein's Monster, are barely ever targeted.
Apart from their use as an offensive weapon against bosses, Pandora's Boxes can also be used to defend Victims that are in danger as you approach. For example, let's say you have to approach a Baby who's in the northeast corner of the level, in the middle of a Zombie spawning area, from around the wall. As you approach, a Zombie rises up and heads for the Baby; you cannot kill the Zombie with your Water Pistol, but you can with a Pandora's Box. The only thing wrong with this is that sometimes, the bolts of energy do not get to the Monster you particularly want killed (in time), so the Victim dies anyway.
Monster Potion
Red liquid in the laboratory flask transforms you into a Purple Monster for about 35 seconds. While in Purple Monster form, you are invulnerable, but you can deal considerable and repeated damage to Monsters with your punch attack - press the A, B, X or Y buttons. The punch will also bring down regular doors and weak sections of wall, etc. as the Bazooka does. The Monster Potion is very useful for fighting tough Monsters, particularly bosses; and also for fighting *through* Monsters if you want to get somewhere fast, and not worry about taking damage. Note that as the Purple Monster, you cannot open Skull Doors, you cannot swim, and you cannot use trampolines.
Ghost Potion
Blue liquid in the laboratory flask turns you into a ghost for about 25 seconds. While in ghost form, you are invulnerable, and you can also walk across the surface of water. This makes it useful for approaching Victims without having to worry about being held up by Monsters, or by having to dive into the water. This is most useful in areas containing Squidmen, as they can get to Victims very quickly, whether in the water or not, and so you need to be able to as well. Note that as a ghost, you cannot use weapons, open any doors, or use trampolines.
Mystery Potion
A laboratory flask overlaid with a question mark. It can have any of six effects. The random nature of Mystery Potions makes them unsuitable for critical uses such as helping you to save Victims, but they can be useful when fighting bosses, as a time-wasting tactic; as a source of random health boosts; and for the occasional Purple Monster transformation. The six effects of the Mystery Potion are as follows:
- You are turned into the Purple Monster, as with the Monster Potion.
- You are turned into a ghost, as with the Ghost Potion.
- Your speed increases, as with the Speed Shoes.
- Your health bar is filled, as with the First Aid Kit.
- You lose some of your health (you will never fall below two-tenths of your health bar as a result of using the Mystery Potion, though).
- You turn into Mr. Hyde.
Mr. Hyde is an evil alternate form for yourself; you know that you have turned into him when your skin and clothes change to sickly colours and skull-and-crossbones icons appear in your weapon status bar. You have no direct control over Mr. Hyde; he walks around randomly, and if he gets near to a Victim (or the second player), he will dash over at high speed and kill him (or deal him damage). It seems that if you press the directional controls, you may be able to influence Mr Hyde's movement in a very limited way, but he will just as often purposely disobey you as he will obey, so do not count on being able to steer him away from trouble. You remain as Mr. Hyde for about 25 seconds.
Decoy Clowns
Inflatable clown toys that act as substitute Victims, drawing Monsters' attention away from you and the real Victims. They will occupy the Monsters' attention until they burst. Unmolested, the Clowns last about 17 seconds, but when under attack they will burst rather more quickly (the exact time depending simply upon how they are attacked). You can only have three Decoy Clowns inflated on the level at any one time.
Levels
- Level 1: Zombie Panic
- Bonus Level: Day of the Tentacle
- Level 2: Evening of the Undead
- Level 3: Terror in Aisle Five
- Level 4: Chainsaw Hedgemaze Mayhem
- Level 5: Weird Kids on the Block
- More Shocking than Level 5: Level 6: Pyramid of Fear
- Level 7: Dr. Tongue's Castle of Terror
- Forty Feet of Terror in: Level 8: Titanic Toddler
- Level 9: Toxic Terrors
- Bonus Level: Mushroom Men
- Level 10: No Assembly Required
- Plants Go Berserk in: Level 11: Weeds Gone Bad
- They Came to Earth for One Thing: Level 12: Mars Needs Cheerleaders
- Bonus Level: Cheerleaders Versus the Monsters
- Terrifying to the Bone! Level 13: Chopping Mall
- Level 14: Seven Meals for Seven Zombies
- Level 15: Dinner on Monster Island
- From the Depths of the Earth: Level 16: Ants
- Level 17: Office of the Doomed
- Bonus Level: Someplace Very Warm
- The Terror is Back in: Level 18: Squidmen of the Deep
- Level 19: Nightmare on Terror Street
- Level 20: Invasion of the Snakeoids
- Level 21: The Day the Earth Ran Away
- The Scary Sequel to Level Seven: Level 22: Revenge of Dr. Tongue
- Bonus Level: The Son of Dr. Tongue
- Level 23: The Caves of Mystery
- Level 24: Warehouse of the Evil Dolls
- Huge Discounts On: Level 25: Look Who's Shopping
- Level 26: Where the Red Fern Growls
- Level 27: Dances With Werewolves
- Scream in Horror on: Level 28: Mark of the Vampire
- More Shocking than Level 28: Level 29: Zombie House Party
- Level 30: The Horror of Floor Thirteen
- Level 31: Look Who's Coming to Dinner
- Get Ready for Big Terror: Level 32: Giant Ant Farm
- Level 33: Fish and Crypts
- Bonus Level: Curse of the Pharaohs
- Level 34: I Was a Chainsaw Maniac
- Level 35: Boardwalk of Terrors
- Prepare for the Terror: Level 36: Monster Phobia
- Bonus Level: Dr. Bug
- Level 37: Labyrinth of Horrors
- Level 38: Monsters of the Blue Lagoon
- Level 39: Destroy All Vampires
- More Terror than Before: Level 40: Pyramid of Fear Two
- They Are Back! In: Level 41: Martians Go Home!
- Terror has a New Name! Level 42: Spikes
- Level 43: Super Fund Cleanup Site
- Level 44: The Curse of Dr. Tongue
- Level 45: Danger in Picnic Park
- A Shocking Sequel to Level 34: Level 46: Day of the Chainsaw
- More Shocking than Level 46: Level 47: Gridiron Terror
- Level 48: Curse of the Tongue
- Credit Level: Monsters Among Us
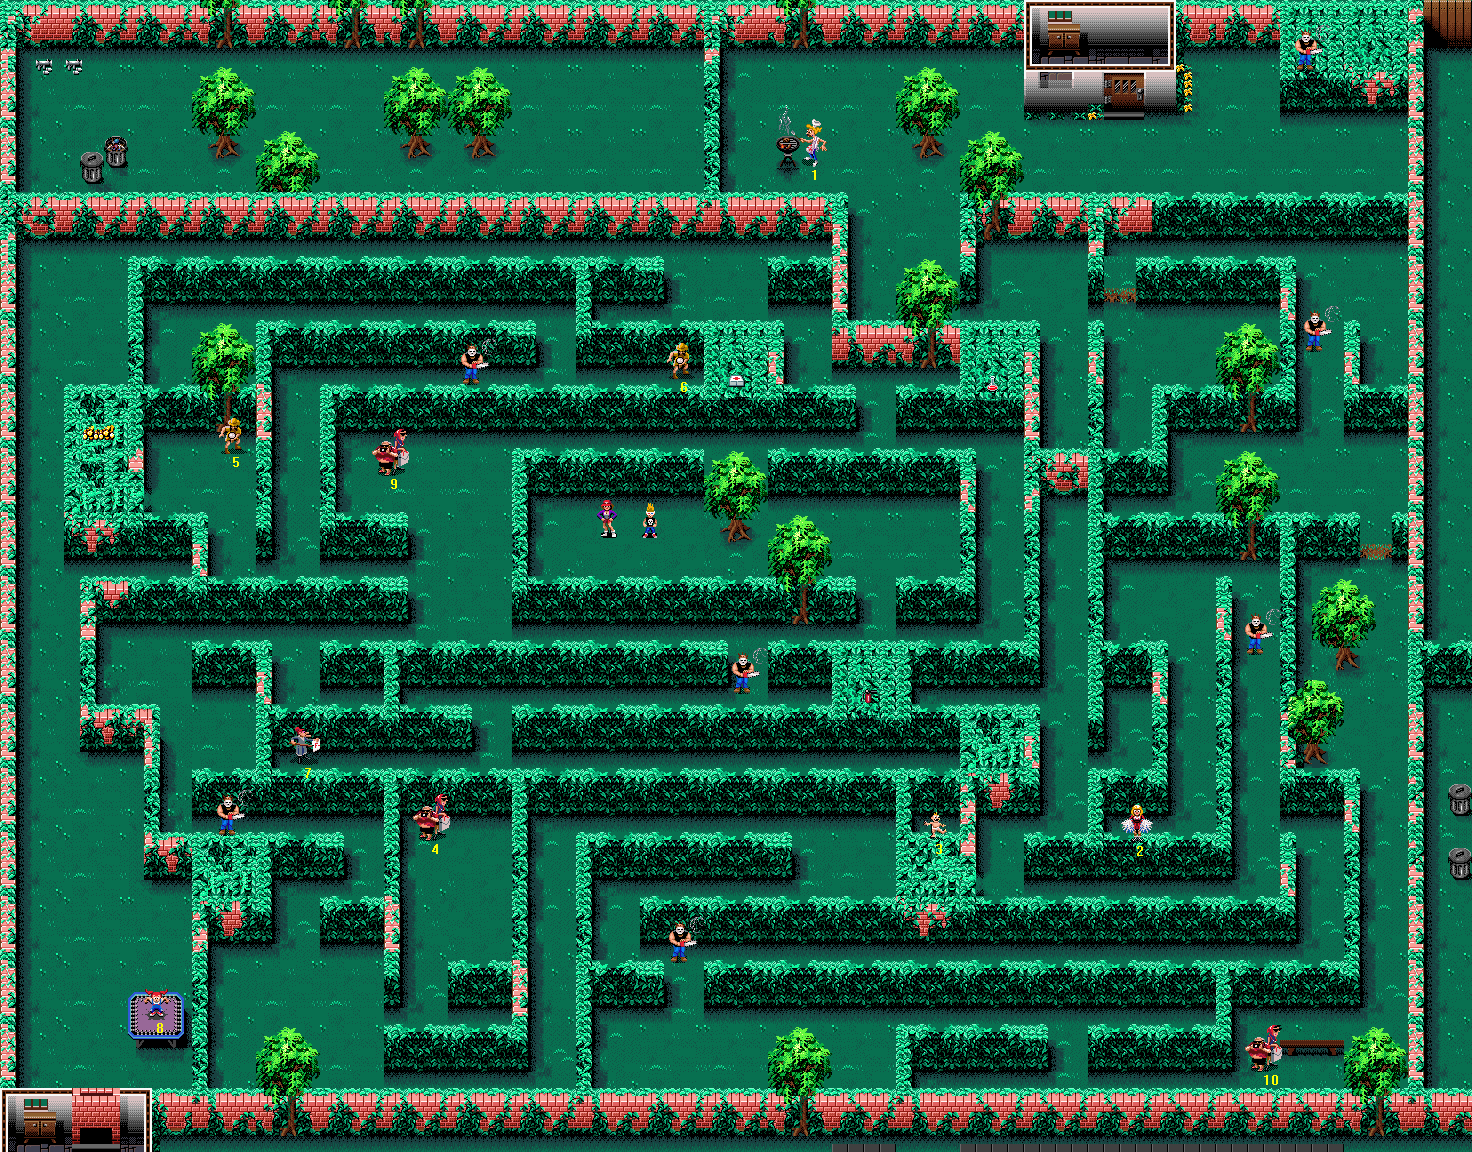
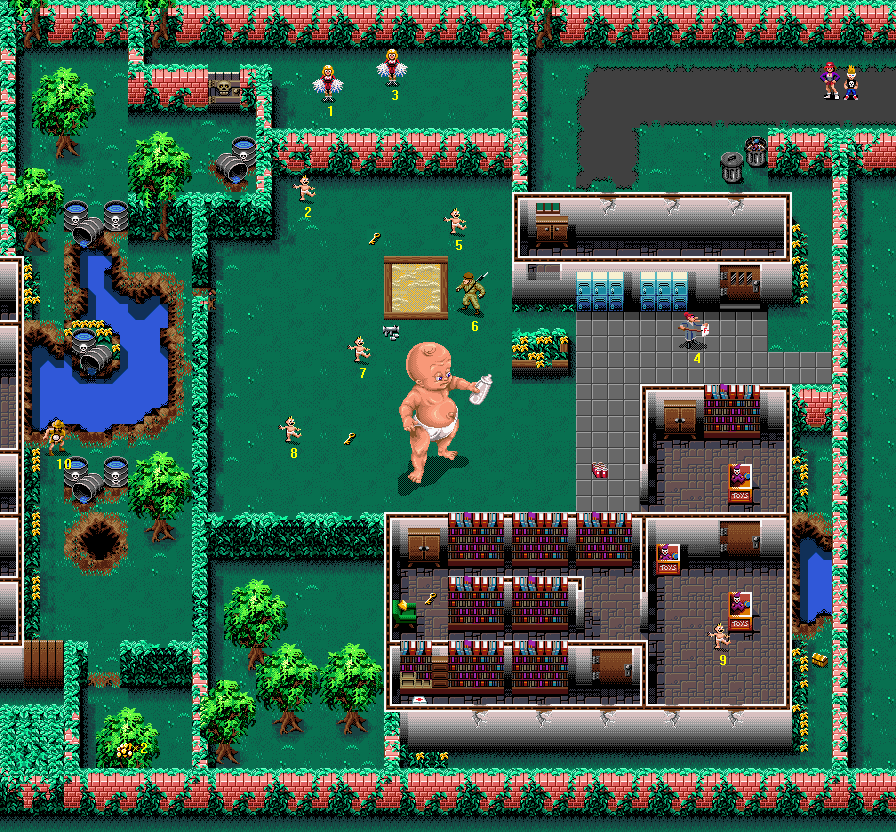
Level 1: Zombie Panic
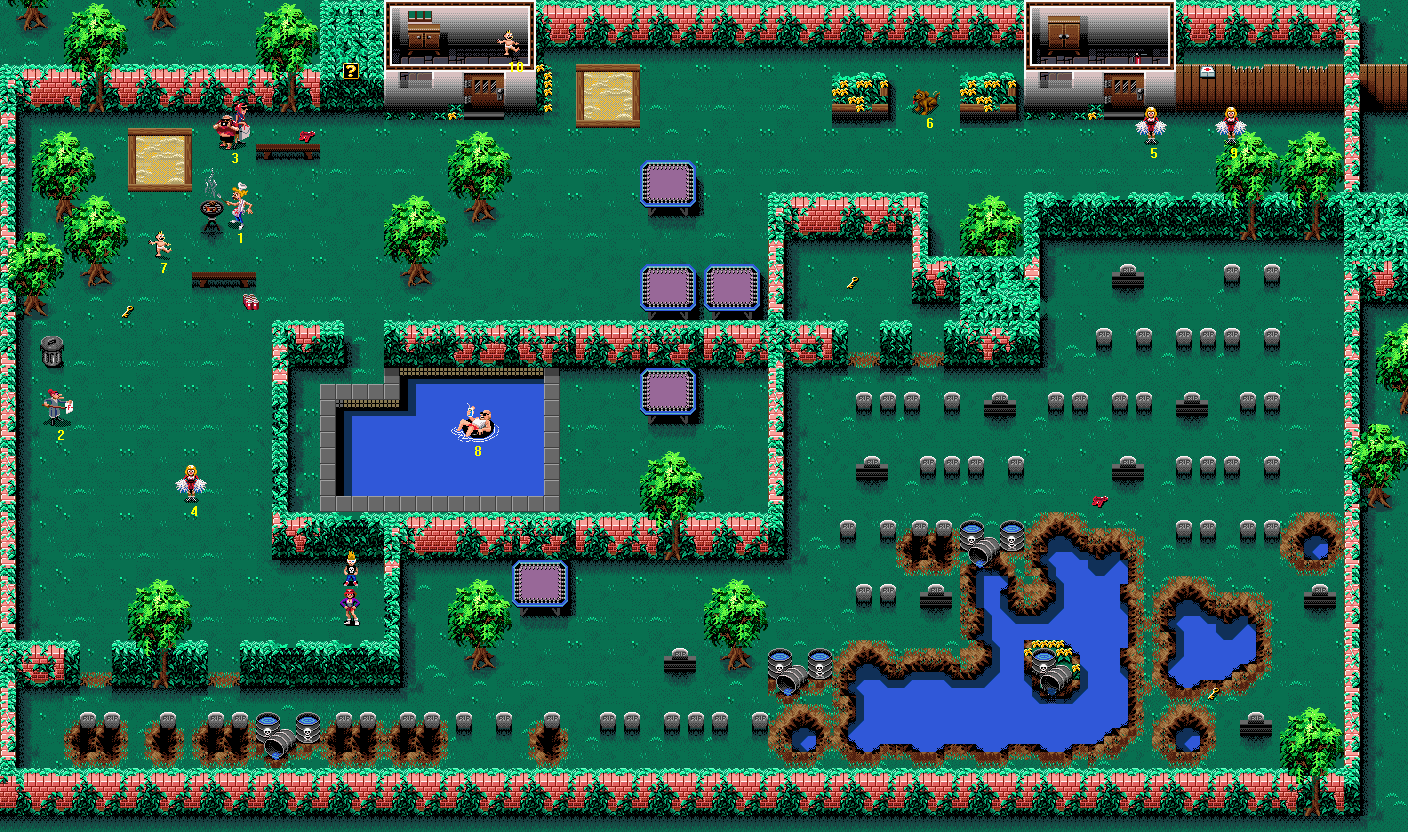
Difficulty: 1/10
Well, it is the first level it is not even possible to lose all the Victims if you enter the level in the regular fashion, because there is a Pool Guy but no Squidmen.
Monster List
Zombies [Normal] (intensity: ranges from very low to high. Location: everywhere).
Victim List
Note: As it is not possible to access this level with less than three Victims - unless you use a cheat device or something like that - three of the Victims are considered to be "always there."
- [A] Teacher - Northwest of your start point, standing by the western wall.
- [A] Barbecue Guy - North from where you start, in the picnic area in the northwest corner of the level.
- [A] Tourists - North from where you start, standing near the Barbecue Guy [A] in the picnic area.
- Cheerleader - On the lawn just northwest of your start location.
- Cheerleader - In the northeast corner of the level, south of a small hut containing a Fire Extinguisher.
- Dog - Near the northeast corner of the level, between two flowerbeds to the west of the Cheerleaders (5 and 9).
- Baby - Northwest of where you start, near the picnic area.
- Swimming Pool Guy - In the pool, roughly in the centre of the level.
- Cheerleader - In the northeast corner of the map, alongside Cheerleader #5.
- Baby - In a hut at the northern edge of the map, to the northeast of the picnic area. you will need a Key to get in.
Important Pickups
- Bonus Level Pickup (if you have Bazookas, or get some during the level)
- First Aid Kit (ditto)
Bonuses Available
- Victim collection bonuses
- Secret Bonus - 2000 points
Best Place To Score Bonus Points
The graveyard. But you'd have to use practically all your ammo to meet the first Extra Bonus Victim target, so do not bother going that far.
Walkthrough
Walk northwest and you will find first a Cheerleader (4) and then a Teacher [A]. North of the Teacher is a Bin; open it then head northeast. you will come to a Key, followed by a Baby (7) and then a Barbecue Guy [A]. North of the Barbecue Guy is a Tourist Couple [A]; to their east is a Water Pistol. Past the end of the bench, head south and a little west to find another bench with Soda Cans on the floor nearby. From the Soda Cans, head southeast, through a gap in the wall, and dive into the swimming pool. In the middle is a Swimming Pool Guy (8). Jump out again to the northwest and head due north.
You come to a hedge; head east from here and you will see a door to your north. Go inside to find a Baby (10) and a Cupboard. Exit and head southeast and you will come to a pair of trampolines side-by-side. Jump onto one and then jump off east into a walled-off yard with a Key inside. Exit the yard via the western gap in the hedge to your south. Continue south, keeping west of the gravestones, until you come to a batch of toxic waste barrels next to a pond. Walk east and dive in where the pond extends to the north, and swim east past a little island with more barrels on it to come out of the water on a muddy strip of land.
Head southeast around the edge of the other, smaller pond to find a Key. Return north along that strip of land to arrive back on the edge of the graveyard area, where there's a Water Pistol lying on the ground. Having collected that, head north, through a gap in the gravestones, and northwest over to what looks like a large square of greenery. There's actually a passage through there under the ivy - just walk into the eastern side and out the north. You come out into another grassy area; head northwest for a Dog (6), and from him, go east to find two Cheerleaders (5 and 9) practising their technique together. Before leaving, head northwest into the hut for a Fire Extinguisher and a Cupboard to open. You need that Fire Extinguisher on level 4.
If You Have Bazookas
If you are carrying Bazookas or a suitable Potion, from whatever source, then head west from the hut all the way across the gardens, past the trampolines and the first hut, to find a hedge block on the north wall. This can be demolished by firing Bazookas at the front; go inside to find a Bonus Level Pickup, which will let you into the bonus level when the current level ends. (If you just came from there then you can still go one last time - and all the Victims you are due, and all the items, will be replaced.)
Exit south and return all the way east to where the exit door is, but if you have Bazookas still remaining, do not go through yet; instead, examine the wooden fence to the north. The sections with the splintered tops are weak, so blast one of them down and step through. There's a First Aid Kit, hidden by the fence, near the eastern wall of the hut. Walk southwest, pushing into the fence, to pick it up (you will hear a "bleep" when you do). That's the last pickup left on the map, so leave the fenced off area and make use of the Exit Door.
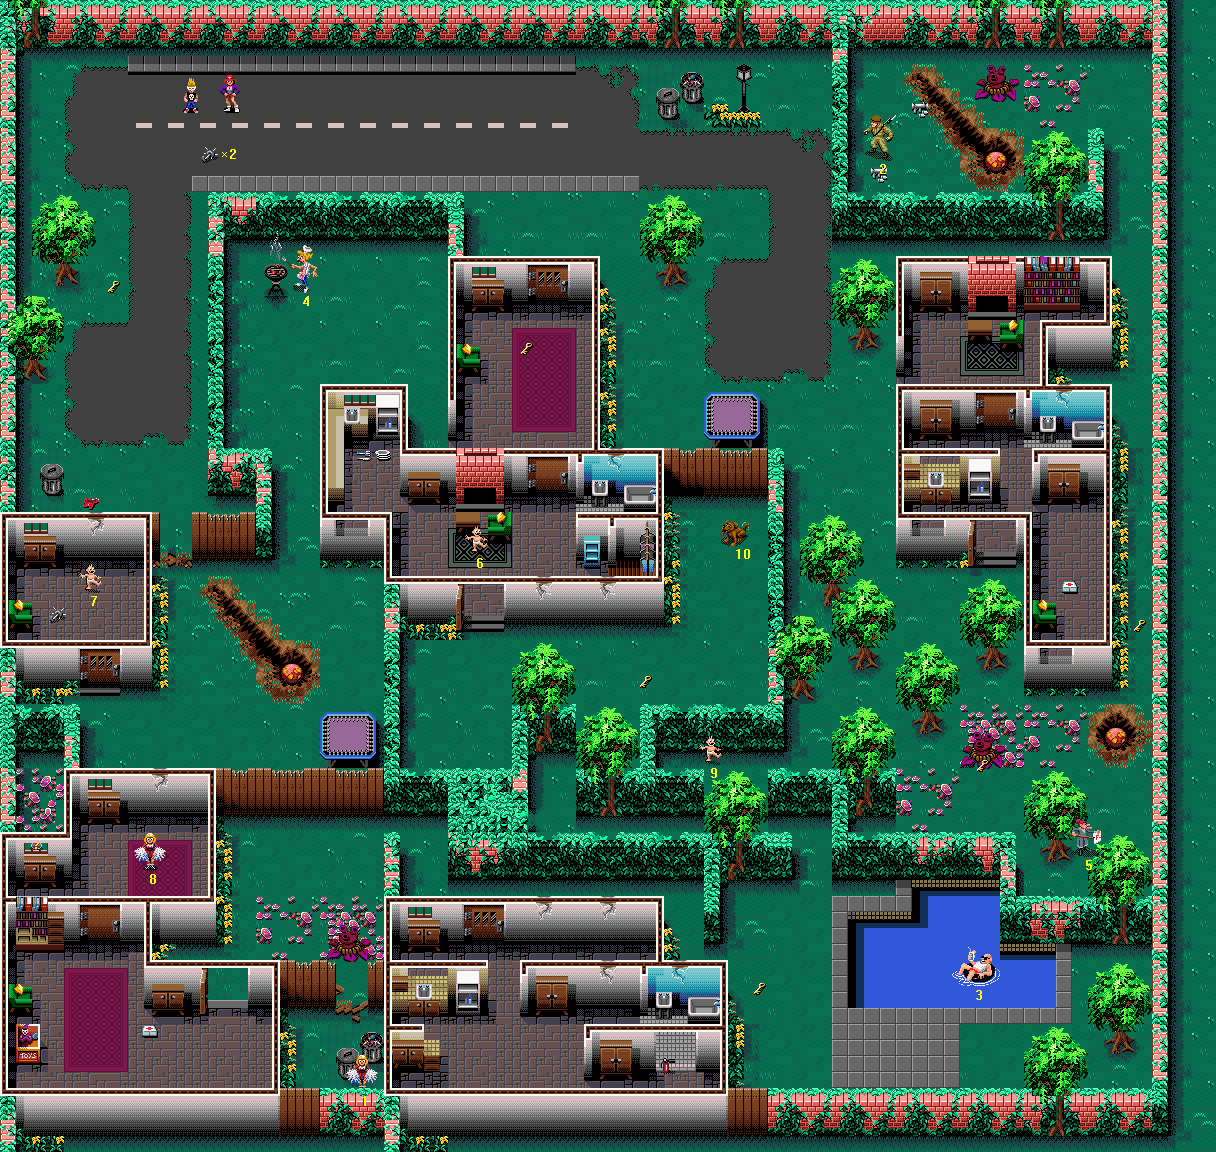
Bonus Level: Day of the Tentacle
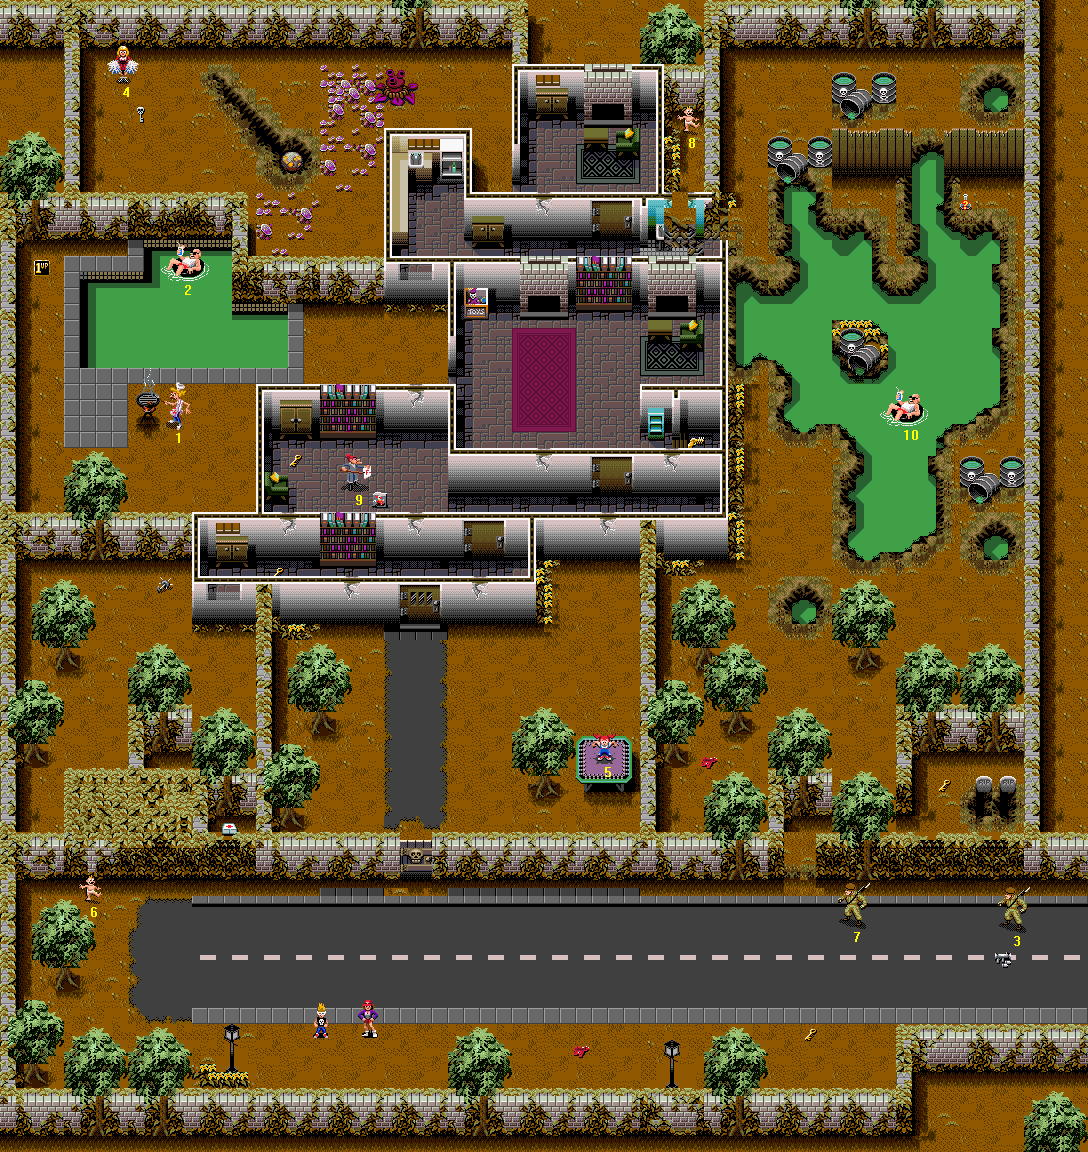
Difficulty: 4/10
Tentacles can be evil when it comes to getting to Victims quickly. Be quick, and be sure to provide defensive shots as you approach. Precisely four Victims on this level are in bad places, so there's potential to do very badly out of a visit. But you have got to play the level at least once, right?
NOTE: This level is what is termed an "Easter egg" - a noticeable feature in a game that also serves as a heavy reference to another, unrelated game made by the same developer or publisher. In this case, the game being alluded to is Maniac Mansion Two: Day of the Tentacle, a comedy adventure game for the PC that runs on the ancient MS-DOS operating system. Day of the Tentacle was the work of LucasArts, who were Zombies' developers.
Monster List
- Pod Plant (one)
- Tentacles (location: nearly everywhere)
Victim List
- [A] Barbecue Guy - In the garden accessed by opening the Skull Door and then passing through the second, isolated area of the house.
- Swimming Pool Guy - Safe in the swimming pool, in the same garden where the Barbecue Guy [A] is.
- Soldier - Standing at the side of the road, in the southeast corner of the map.
- Cheerleader - At the northern edge of the level, past a patch of weeds, standing by the Skeleton Key. Access this area by heading north along the eastern side of the level.
- Trampoline Girl - In the southeast corner of the yard just behind the Skull Door.
- Baby - At the western end of the road which runs along the southern side of the map.
- Soldier - toward the eastern end of the road at the southern side of the level, but west a little way from the other Soldier (3).
- Baby - In an alleyway leading out of the northeast corner of the house, at the northern edge of the level.
- Teacher - In the second room, inside the isolated section of the house which is behind the Skull Door.
- Swimming Pool Guy - At the southern end of the green pond on the eastern side of the level.
Important Pickups
- Bazooka (Lets you re-enter once, if you used the password)
- First Aid Kit (ditto)
- Weeddefeater (before its normal first appearance)
- Martian Bubble Gun (before its normal first appearance)
- Extra Life
Bonuses Available
- Victim collection bonuses
Best Place To Score Bonus Points
The road; tentacles appear fast there, and they are equivalent to Zombies, as far as points per Water Pistol shot goes.
Walkthrough
Head north to the wall first, then west and collect a Baby (6); you ought to fire a few Water Pistol shots in case of the sudden appearance of a Tentacle. Now walk to the south side of the road and head eastwards until you find Water Pistol ammo. Go back to the north side and then continue east to find two Soldiers (7 and then 3), one after the other. Again, firing in advance could be a tactic that pays off, particularly for #7. After you have saved both, collect a Bazooka pickup to the south of #3's position, and then move west for a Key. Your Bazooka ammo is important; do not use it as an offensive weapon yet.
Walk all the way west along the road back to where the Baby (6) was; you can see a First Aid Kit to your north, past a hedge. Blast through with Bazooka fire and get it, then blast the hedge block to its west. You can now go through an alleyway to a large garden containing nowt but a Weeddefeater pickup, which will be useful in a moment. Exit the garden the way you came in and once more, go east along the road, past the Skull Door, until you see a gap in the hedge to your north. Head in there, go east for a Key, and then north into another large garden. In the southwest corner is a Water Pistol.
Move north and jump into the green water to save a Swimming Pool Guy (10), somewhat improbably enjoying himself in the slime. After him you can swim to the northeast bank for a Mystery Potion. Jump out of the water past the opening in the fence and go west. Once at the wall, head south and then west into a ruined bathroom, and find a Baby (8) in the alleyway to the north. Back in the house, walk west along the passage and open a Cupboard. Go through the door to the north, open another Cupboard, and head out of this room into a weed-infested back yard.
Cut through the weeds and defeat the Pod Plant with your Weed-defeater, then continue to use the Weeddefeater while walking west until out of the weed patch. you will find a Cheerleader (4) and a Skeleton Key. it is time to head all the way back to the Skull Door. East through the weeds, southeast into the house, south into the passage, east all the way to the pond, swim south, head south through the garden to the road at the end, and head west until you see the Skull Door in the north wall. Go through, and then over to the east; collect a Trampoline Girl (5).
Jump off the trampoline to the west. If you have some, then switch your weapon to Soda Cans. Walk north, through the door, and lob one over the wall ahead quickly if there are any Tentacles in there - otherwise, they'll defeat the Teacher (9). Collect another Key to your west, and open a Cupboard and then the door over to the east. Walk through to the north, walk west (while throwing another Soda Can west just in case), and collect the Teacher (9) quickly.
Collect Decoy Clowns and a Key, and open a Cupboard, then head east quickly, as there is another Victim in danger while you stand in this room. Open a door, collect a Martian Bubble Gun, and head west and out of the building. Move southwest as soon as you can, and collect a Barbecue Guy [A]. As with the first three Victims, fire a couple of shots as you approach to protect him. Northwards is another Swimming Pool Guy (2) in unappealing water. Emerge at the west side of the pool and collect an Extra Life, then leave through the Exit Door.
Level 2: Evening of the Undead
Difficulty: 2/10
Some of the Victims are in mild danger of kicking the bucket if you are new to the game. There are still two which the Zombies cannot get at. Zombies are everywhere, but they do not spawn very fast.
Monster List
- Zombies [Normal] (intensity: medium, location: everywhere)
Victim List
- [A] Soldier - Standing by a couple of Bazooka pickups, just east of where you start.
- Swimming Pool Guy - In the pool northeast of where you start, past the long hedge. Blast through or go around to the east.
- Barbecue Guy - In the garden north from where you start, past the long hedge. Again, blast through or take the long route to pick up more Victims.
- Cheerleader - In the northeast corner of the tree-filled area which is in the southeast corner of the map.
- Baby - In the house on the western side of the level. There's an open door at the northern side of the building.
- Explorer - Standing by some waste drums in the northeast corner of the map.
- Trampoline Girl - At the southern edge of the garden to the north, through the hedge, from where you start.
- Cheerleader - At the northern edge of the level, at the corner of a strip of tarmac with some Bonus Points Pickups on it.
- Teacher - Just to the north of the house where the Baby (5) is.
- Explorer - At the northern end of the alleyway on the western edge of the level, just west of the house where the Baby (5) is.
Important Pickups
- Your first Bazookas (if you did not visit Bonus Level: Day of the Tentacle)
- Monster Potion
- Decoy Clowns
Bonuses Available
- Victim collection bonuses
Best Place To Score Bonus Points
The area where you start.
Walkthrough
Head east to find a Soldier [A], standing just north of two Bazooka pickups. Go east again until you come to the end of the hedge to your north, and then walk northeast over to a corner where you will find a Cheerleader (4) near a tree. Head west past a tree and a trampoline and dive into the water for a Swimming Pool Guy (2). Exit the swimming pool by jumping out the western side, and head first northwest for a Barbecue Guy (3) and then south for a Trampoline Girl (7). Jump north off the trampoline, and then head northeast from the barbecue grill for a Bin.
Walk east and past the protruding hedge to the north, and then head northeast and into an alcove for Soda Cans. Switch to your Bazookas, head round the front of the hedge block to the east, and blow it up. Inside is a Mystery Potion; collect it then head southeast, through a hole in the hedge and north. You come to a choice of routes; take the eastern one and when the alleyway opens out, go northeast for a Bin. Continue northeast from there to find an Explorer (6) behind some waste drums.
Having saved him, head around the waste drums and south over to what looks like a massive hedge to your south. It actually is not - there are three hidden passages through under the greenery. To enter the first one, just continue south. Once in, head east to exit. Walk a little south from there, so as to line yourself up with the mass of ivy that's visible sticking out to the west, and then walk west again into another passage. At its end, head north into a dead end containing a Water Pistol. Head south and east again, then head south to the end of the alley, where you will find a Key. Head through the final passage to your west, and you will find a Bonus Points Pickup where you come out.
Continue west, through a couple of holes in the hedge, past the grill where the Barbecue Guy (3) was standing earlier, and you will come to a Bin. Open it and then give the same treatment to a door to the south. Inside this little hut are a Water Pistol and a Cupboard. Exit the hut and head northwest; you come to a wall that has the entrance to another of those hidden passageways in it. Walk into the part that looks entirely green, and then walk to the north end of the alleyway to find an Explorer (10). There might just be a Zombie about to attack him, so be ready with your Water Pistol.
A short distance to the east of the alley's exit is a Teacher (9), also in possible peril. Enter the house to your south to find a Cupboard. Head into the doorway to the south of this and go over to the west to find a second Cupboard. Return east and north, and then west for a Baby (5) and a Monster Potion (in the southwest corner of the building). There's a Cupboard to the north of the Potion; around the kitchen unit to the north is a final one. Head east and exit the house through the northern door, and use your Bazookas to blast down the front of the hedge block to the north. This gets you some Decoy Clowns (useful for level 4.) Head due east to save a Cheerleader (8), and pick up the Bonus Points Pickups scattered around to her southwest before exiting.
Level 3: Terror in Aisle Five
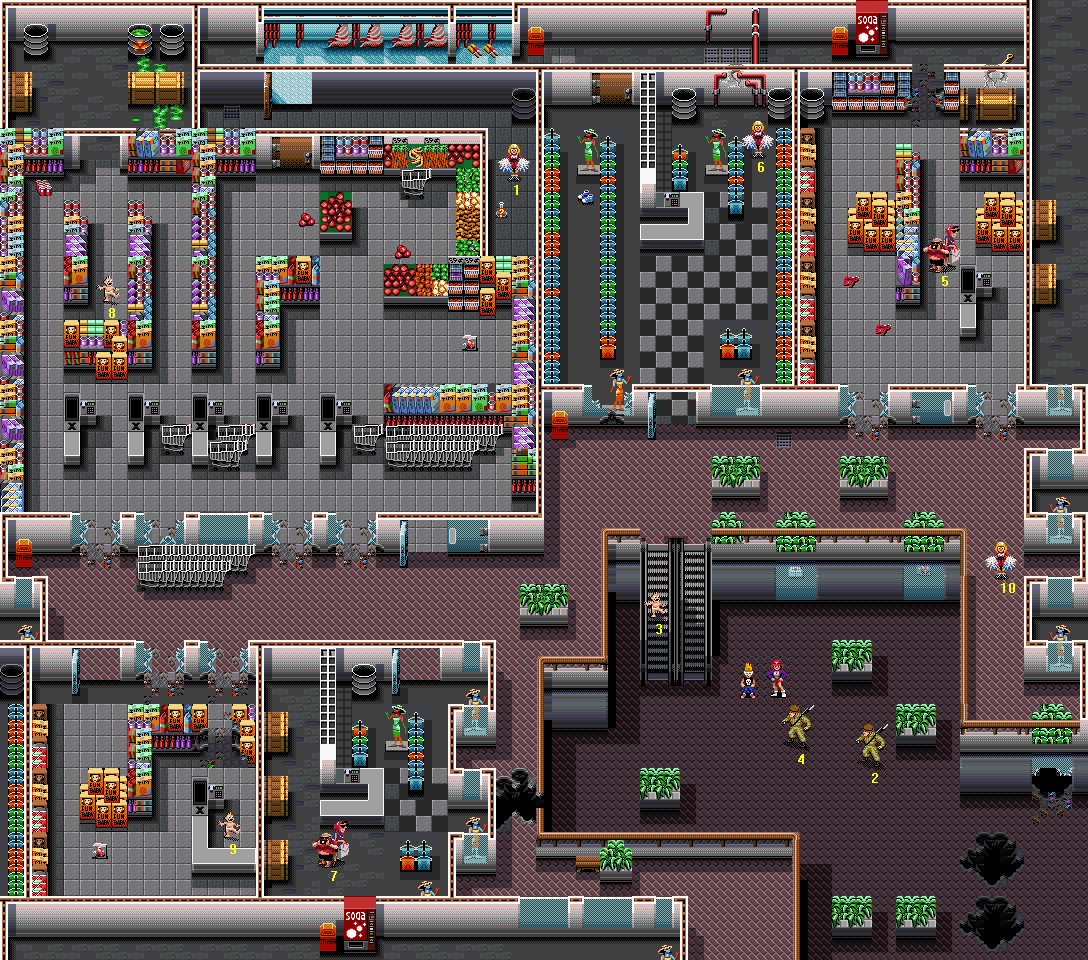
Difficulty: 2/10
The difficulty is not noticeably higher than that of level 2 Evening of the Undead, despite the appearance of a new type of monster - Evil Dolls. Also, a more tenacious variety of Zombie can be found in the southeast corner of the map, but you do not need to go there unless you want to rack up bonus points (Zombies spawn very quickly there).
Monster List
- Zombies [Normal and Vicious] (intensity: ranges from very low to very high, location: nearly everywhere)
- Evil Dolls (intensity: low, location: patchy)
- Fire Babies (from Evil Dolls only)
Victim List
- [A] Cheerleader - In the back room of the grocery shop in the northwest corner of the level. Head through the door to the north and go east.
- Soldier - Standing just southeast of where you start.
- Baby - Standing still on the "up" escalator, just northwest of your start location.
- Soldier - Standing with #2, just southeast of where you start.
- Tourists - At the front of the store on the eastern side of the level, in danger from the Evil Dolls.
- Cheerleader - In the northeast corner of the clothes shop to the north of the escalators.
- Tourists - In the far corner of a dingy shop, near the southwest corner of the map, second along from the slightly larger store containing a Baby (9).
- Baby - Standing in an aisle, at the western side of the store in the northwest corner of the level.
- Baby - Behind the counter, in the store in the southwest corner of the map.
- Cheerleader - On the balcony, accessed by heading east from the top of the escalator and then south.
Important Pickups
- First Aid Kit
- Three Decoy Clowns pickups
Bonuses Available
- Victim collection bonuses
Best Place To Score Bonus Points
Get right into the southeast corner, near where you start. Zombies pop up from the ground at a made rate here.
Walkthrough
Directly you start, move southeast and save the two Soldiers (4 and 2) quickly. After that, head northwest and collect the Baby (3) who is somehow remaining motionless while standing on the "up" escalator. You should now head back down onto the lower floor and Bazooka-blast two shop windows to the northeast of the escalators, for a First Aid Kit and Decoy Clowns. When you are finished looting, head southwest from the smashed windows and up the escalator once more. Walk east along the raised area over to a protruding balcony, for a Cheerleader (10).
Walk north and you will reach a shop. do not waste a Key on opening the door; walk through the broken shop window and quickly rescue the Tourists (5) to the north, who are about to get scalped by Evil Dolls. There are two Water Pistols to the west, around the display. Head north and out the back of the shop to find a Key, in the dead end to the east. Return south through the shop and out through one of the broken windows again.
Move west, and enter the next door to the north. it is an unimpressive-looking clothes shop. Head into the northeast corner for a Cheerleader (6), and then over into the northwest to find Speed Shoes next to a display mannequin. Head southeast and out the front door, and then southwest past the escalators. Ignore the shop to the north, and the first open door to the south, and use the second entrance on the south side. To the south, past a ruined display of goods and the cash register, is a Baby (9). Behind the till, he's probably safe from the Evil Dolls and Zombies, but collect him quickly anyway.
On the other side of the counter, in the middle of the shop floor, are Decoy Clowns. Pick them up, and then head north to exit this store, and then east. You may now head south into the other shop on the south side, which you ignored earlier for the Baby's (9) sake, and in it you will find a Tourist Couple (7) in the southwest corner, in complete safety. Head northeast and leave the shop, and then walk over to the western edge of the level. To the north of there is the entrance to a supermarket. North past the tills and an (inactive) display of "Fun Baby" boxes is an aisle containing an abandoned Baby (8).
you will find Soda Cans to the northwest, in a corner. Head back south again, east alongside the tills, and you will come to a bay containing Decoy Clowns. Go north of here, around a fruit and veg display, to find two pickups of Tomatoes. Get through the back door, to the north, by whatever means you see fit. Take the second right and carry on until you come to two pickups of Ice Lollies; now double back and take the southern corridor east for a Cheerleader [A] and a Mystery Potion. There are no more items, but do not exit just yet - read the Preparation to level 4, below, so that you are ready.
Level 4: Chainsaw Hedgemaze Mayhem
Difficulty: 5/10
While the previous three levels increased in difficulty in small gradations, this is more of a challenge, especially if you do not know how to deal with it.
Monster List
- Lumberjacks (seven)
Victim List
- [A] Barbecue Guy - In the clear area at the northern side of the level. You need to get all the way through the maze to reach him.
- Cheerleader - Near the eastern side of the level, in a dead end passage guarded by a Lumberjack.
- Baby - In a small cell, accessed through an ivy-covered passageway, to the west of the Cheerleader (2).
- Tourists - At the northern end of a clear area near the southern edge of the level.
- Explorer - To the west of where you start, past a few hedges, standing to the east of an ivy-covered passageway.
- Explorer - North of your start location, through a hedge, and to the west of the hedge block holding a First Aid Kit.
- Teacher - Standing in a dead end, near the western side of the level.
- Trampoline Girl - In the southwest corner of the level.
- Tourists - West of where you start, past a hedge, in a small clearing.
- Tourists - Standing by a bench in the southeast corner of the map.
Important Pickups
- First Aid Kit
- Monster Potion
Bonuses Available
- Victim collection bonuses
- No Bazooka Fired Bonus - 1000 points
- Massive Destruction - 2000 points
- Axeman Begone Bonus - 5000 points
Best Place To Score Bonus Points
You cannot obtain limitless points on this level - once all the Lumberjacks are dead, they are all dead. Go for the bonuses, though, because some of them pay out a lot of points.
Preparation to level 4
This level is quite different to the three previous ones. As soon as you move beyond your starting point, you will be challenged by at least one Crazy Lumberjack. These are high-powered enemies that are able to move around the level on their own once they have become alerted to your presence. They cannot defeat Victims unless you are nearby; however, they have a tendency to gang up against you if you let them, and they can destroy hedge sections (as with your Bazooka) to get to you.
A FAST method of getting through the maze involves defeating every Lumberjack as you find him. You may not manage to get it done very fast the first time around, and so you might lose your monster form too early; however, you can use an alternative method to defeat the last few Lumberjacks, described below. A certain amount of intuition, sense of direction and reasonable short-term memory regarding the route you have taken is assumed for this walkthrough. This maze is, after all, a complicated layout for a level.
An alternative method for defeating Lumberjacks (use on the last one, and any which you encounter after both your Monster Potions have worn off): Blast with the Fire Extinguisher (ten blasts should do it), and then fire at him with the Water Pistol until he explodes (about fifty to seventy-five shots will be enough). Your shots will appear to go right through him, but that does not mean they aren't hurting him. If he comes back to life at any time and attacks you, it is because you did not use enough Fire Extinguisher; freeze him again and carry on shooting.
You may freeze and run, or to make use of the Decoy Clowns; it is all good, but remember that you get a fat package of bonus points if you defeat all seven Lumberjacks. If both Monster Potions wear off and you want to get through a hedge, you can look for a way round, get a Lumberjack to bust it for you, or use your Bazooka (which will bar you from the No Bazooka Fired Bonus).
Walkthrough
Head northeast from your start point, without relaxing the controls, and go east once in the passageway north of the tree, to find a hedge block to the north. At this point, use the Monster Potion you picked up on level 2. Punch through the front, pick up another Monster Potion, and head out and west. (Be aware that at some point a little later on, your Monster Potion will wear out; you should switch to and use the second one when this happens.) When you come to another hedge block to your north, punch it open and then nip in for a First Aid Kit.
You can see an Explorer (6) to the north of your path; bash through and save him. Go west, and when you find your first Crazy Lumberjack, walk up to him and start punching. He may fall over occasionally, but just keep on punching until he explodes. Now punch through the hedge to your south, head west for Tourists (9) and punch through two more hedges to the west for another Explorer (5). Walk south from the Explorer, punching through hedges, until you meet another Crazy Lumberjack. Punch him out as you did the first one; then punch through hedges for an easily visible Teacher (7), and southeast of her, a Tourist Couple (4).
Return to the passage that held the Teacher and head east. you will find a Lumberjack to your north; beat him about and then carry on heading east. Punch open a third hedge block, to your north, to get a Fire Extinguisher, then knock down a hedge to your south to find a Baby (3). Walk south through an ivy-hung passage and carry on to the east. Assault greenery to your north to obtain a Cheerleader (2) and then carry on northeast and engage a Lumberjack in combat.
When he is dead, move south and punch through a few hedges to reach a Tourist Couple (10) and then north all the way along the eastern edge of the level. you will come to another Lumberjack along the way; cane him and move on. At the end of a long walk is a hedge for you to plough through, with a hedge block directly north. There is a Lumberjack concealed inside, so knock down the entrance and give him what for. When he is dead, head out and west, and knock down the door to a small room (you cannot get the cupboard inside yet - punching it open will not yield any items!) Further west is a Barbecue Guy [A] and hedges. Knock at least one hedge section down, because at the end of the enclosed yard is a Bin and two Bazooka Pickups.
Now, wait until you have returned to human form. Open the bin, and return east to open the cupboard inside the little hut, then head southeast from the barbecue grill, and east when you reach the wall. The last victim is at the opposite corner of the level, but cannot be defeated by the one remaining Lumberjack, which is why I've ignored her until now. Depending on whether you want to go for the fairly self-explanatory No Bazooka Fired Bonus, I have prepared two different routes you may take, one much longer than the other. Following are directions through the maze to the last Victim: a Trampoline Girl (8). (These routes do not take any collapsed hedges for granted.)
Using Bazookas
Ignore turning, head south at clearing, blast three southward hedges, move southwest, go into ivy tunnel, blast hedge down to north (if it is still standing after you came through here earlier), go west until you come to a dead end; then blast through south (again, if hedge is not already blasted down), walk around a couple of inconvenient hedges, head southwest and blast the northernmost of the hedge intersections to get through to the trampoline.
Not Using Bazookas
Ignore turning, take northern route at clearing, go south at first opportunity and take pre-demolished fence slightly to the east, head south until you reach the southeast corner of the level, head west, north and west again at fork, freeze Lumberjack with fire extinguisher (about ten blasts only needed). (At this point you can finish him off if you want by squirting him with your Water Pistol until he explodes, or leave him if you want to get more useful items and perhaps the Massive Destruction points bonus later.) Head past him, west, and around all the bends. Next time you have a choice other than demolished hedges, go north, around some hedges, north again (without using any chance gaps in hedges, remember) and find a long passage east. First chance you get, head north and then west. Ignore the T-junction, go through an ivy-covered tunnel and then head south to the trampoline.
Pickups
Far north of the trampoline, still on the western edge of the level, are two ivy tunnels - the southern one is used in the non-Bazooka route, above, while the northern one is a dead end and contains Bonus Points Pickups. After you have these, go to the place where the last Lumberjack is to be found (return south to the trampoline and jump east, head east along the passage skirting the southern wall of the level, and turn north at the corner). Even if you disturbed him before, he should not be far from where you left him.
Have this last Lumberjack follow you through the level, massacring innocent greenery as he goes (for the Massive Destruction bonus). It is possible to control him safely if you know what you are doing. Go to stand on the other side of a hedge from him, and he'll walk into it and (usually) knock it down. As you get more experienced, you will have more of an insight into what he's going to do, and when, and you can use this knowledge to your advantage. Once you have finished, defeat the Lumberjack with the Fire Extinguisher/Water Pistol combo, and exit.
Level 5: Weird Kids on the Block
Difficulty: 3/10
Three new monsters, but only one is of any concern - and you will soon master those overgrown weeds. There are one or two Victims who might get in a spot of trouble, admittedly, but do not let that music get you down. Smile! :)
Monster List
- Doppelganger [Normal] (intensity: low, location: nearly everywhere)
- Mushroom Men (intensity: low, location: in two places)
- Pod Plant (three)
Victim List
- [A] Cheerleader - At the far end of an alleyway to the south of a patch of weeds, in the southwest corner of the level.
- Soldier - In a small yard in the northeast corner of the level.
- Swimming Pool Guy - In a yard in the southeast corner of the level.
- Barbecue Guy - At the northwest corner of a large empty yard, just southeast from where you start. Head around to the south to get in.
- Teacher - Near a patch of weeds and south of a house, at the eastern edge of the level.
- Baby - In the southern room, in the house in the centre of the level.
- Baby - In a one-room house at the western edge of the level, accessed from a yard where Doppelgangers spawn.
- Cheerleader - In the northern room of the house in the southwest corner of the level.
- Baby - In an alleyway near the centre of the level, west of a patch of weeds. He may be in danger from Doppelgangers as you approach.
- Dog - Sitting next to the fence, in the northeast corner of the yard accessed through the southern door out of the house in the centre of the map. An alternative way to reach the Dog is to use the trampoline to the north of the fence.
Important Pickups
- Your first Weeddefeater (if you did not visit Bonus Level: Day of the Tentacle)
- Bazookas
- Two First Aid Kits
- Your first Silverware
- Your first Plates
Bonuses Available
- Victim collection bonuses
Best Place To Score Bonus Points
This level is not a good place to score points at all. Doppelgangers only give twenty points per defeat, after all. Wait for level 6 or level 7.
Walkthrough
Collect the Weeddefeater; that pickup is double value, giving you 600 ammunition. You'd normally get only 300 for such a Weeddefeater pickup. Go east to the end of the road, where you can find a Bin. Head southeast to find a path between a house and a hedgerow; go east and north round the hedge and into a small yard. you will find a Soldier (2) at the far end, hoarding Bazookas, and a Pod Plant. The Soldier may be murdered by the Mushroom Men that very occasionally appear here, so get him first and then dispose of the Pod Plant either by ploughing into it with your Weeddefeater or with a well-aimed Bazooka shot. (you will take damage if you walk on the weeds that the Pod Plant produces - clear them away with the Weeddefeater as well.)
Exit the yard the way you came in and walk down the eastern alleyway. you will find a Key near the end, and come out near a Teacher (5). defeat the second Pod Plant, to the northwest, and you will find a Key hidden underneath. (Note that if a Pod Plant is sitting on top of something and you wade right in to defeat it, then you could pick the item up without noticing - from now on, if I say that a Pod Plant hides an item and you cannot find it, that's why.) Directly north of here is a house; inside are three Cupboards and a First Aid Kit. do not bother opening the locked door in here; exit the house again, and skirt around the western side and north to find another open door to a room with one Cupboard in it.
Now exit again, go back down south to where the weeds were, and then go west into a hedge-lined alleyway. There's a Baby (9) at the end, and you will do no harm by firing a couple of Water Pistol shots ahead of you to try and neutralise any Doppelgangers who might otherwise strike it lucky. Now head south, west and round the bendy bit for a Key; to the northeast is a Dog (10). Return around the side of the house, and go inside to find a Baby (6). Also indoors are a Cupboard, plus Silverware and Plates. Save these two - they are useful, at specific times.
Go through the door for a Key and one more Cupboard, then exit the room through the southwest opening and head northwest to rescue a Barbecue Guy (4) from the yard. Walk due south to reach a meteorite-struck yard which seems to be the nerve centre of the operation for the Doppelgangers. Before anything else, take a quick detour through the gap in the fence to the northwest for a Water Pistol, a Bin and a Key up north. Way back south it is again, and enter the house to the west for a Baby (7), a Weeddefeater replenishment and a Cupboard. Blast through the hedge to the southwest of the house's entrance, and clear a path through the weeds with your Weeddefeater; a Mystery Potion is your reward.
Exit north, head east, and jump south with the trampoline. Southwards is the level's final Pod Plant for you to sweep away, and further southwards still are a Cheerleader [A] and a Bin. Be warned - if you get the Bin first, from the south, and a Bogeyman is released, then the Cheerleader will die (unless she is in the middle of a jump)! Exit the alleyway north, then head around to the west and in through the open door, collect a First Aid Kit and open a Cupboard, then open the next door for another Cheerleader (8) and two more Cupboards.
Head south to exit the house, skirt the weeds and use the northeast exit from the yard. You will soon come to a door, inside which are a final five Cupboards (this level really is chock-full of those things...) and a Fire Extinguisher. Go out of the house again, carry on and at the egress of the alleyway you will find a Key, and to the east, a Pool Guy (3) relaxing in his swimming pool (where else?). Jump out of the water and the Exit Door will appear.
More Shocking than Level 5: Level 6: Pyramid of Fear
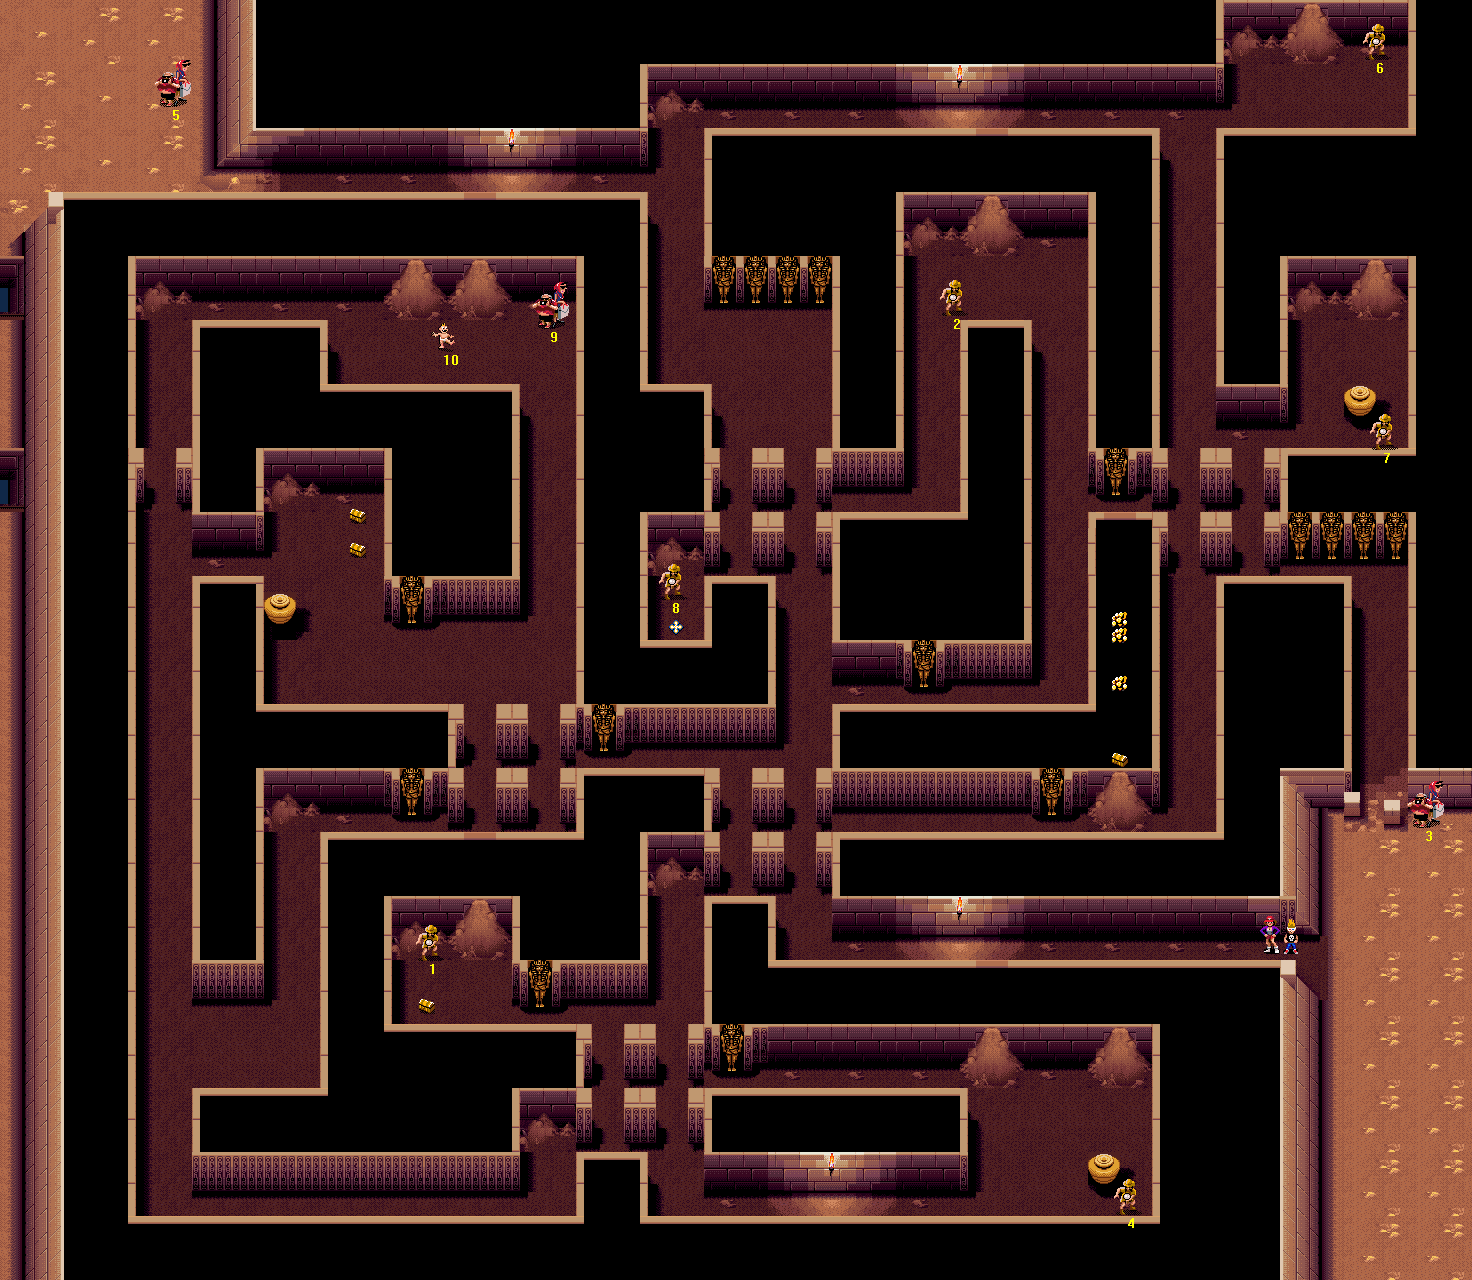
Difficulty: 3/10
The Mummies are a nasty bunch; you will need to master the art of running and shooting from a safe distance. Two victims are in dodgy places, but all in all it is not a hard level.
New Hazard
Collapsing roof gates. These allow you to walk through, but once you have moved a certain distance from them either north or south, they'll collapse (unless two players are on opposite sides of the gate). They are therefore unable to hurt you, but they can defeat low-powered monsters if they are following you. The "hazard" bit? You could get trapped in an area and want to get out the way you came in, but not be able to. Luckily, the collapsed gate counts as a fragile wall, and once blown up with a Bazooka (or whatever) it won't collapse again but will stay open for you to go through however many times you want.
Monster List
- Zombies [Normal] (intensity: ranges from very low to medium, location: nearly everywhere)
- Mummies (location: patchy)
Victim List
- [A] Explorer - In a small chamber in the middle of the pyramid, standing by a Pandora's Box, with a sarcophagus nearby on the wall that could spawn a Mummy.
- Explorer - At a u-turn in a passage near the northern side of the pyramid. The area can also be accessed through a hidden passage from the long northern corridor.
- Tourists - At the entrance to the pyramid, northeast from your start point.
- Explorer - In the southeast corner of a large room, in the southeast corner of the pyramid.
- Tourists - Just outside the pyramid, in the northwest corner of the level.
- Explorer - In a chamber in the northeast corner of the pyramid.
- Explorer - In a chamber on the eastern side of the pyramid.
- Explorer - In a tiny chamber in the middle of the pyramid maze, with some Ancient Artefacts.
- Tourists - In a room in the northwest corner of the pyramid, south through a hidden passage from the corridor leading to the exit.
- Baby - Standing in the same room as the Tourists (9).
Important Pickups
- Four Pandora's Boxes
Bonuses Available
- Victim collection bonuses
Best Place To Score Bonus Points
There aren't any spectacularly good point-scoring locations here. Try any place with a decent Zombie intensity and no Mummies (such as the southeast room which held the first Explorer). Mummies are bad value in points for the ammo needed to defeat them.
Walkthrough
Walk northeast to collect a Tourist Couple (3), then back southwest to the entrance of the passage you were standing in. Walk west along the passage until you come to a dark patch in the wall to your south; this is the entrance to a hidden passage. Walk south into it and you will come out from behind a Sandbank in a new room. In the southeast corner of this room is an Explorer (4); rescue him quickly, as the Zombies in here will often get there pretty fast. There is also a Pot to open, and another Sandbank along the north wall. Note that the Sandbank from which you entered the room may have given you an item to pick up as well - walk around a little way into the passage and see whether a "bleep" sounds. Remember to do this at the end of every secret passage that runs from north to south from now on.
Head back out of the room the way you came in. Go east again, to your start location, then northeast and north into the other passage. you will probably meet a Mummy or two at the corner, so be prepared with a well-aimed Soda Can or backtrack a little while spraying them with Water Pistol fire. At the branch, head north through the two collapsing roof gates and then east to save another Explorer (7). Also in this room is a Pot and a Sandbank. Go west again, then further north and east to come to a room containing a third Explorer (6) and a Sandbank.
From here go west until you come to another secret passage to the south (dark patches on the wall, remember). Collect the Explorer (2), and check the passage for a bonus item from the Sandbank. Now head south along the eastern fork, and at the first branch you will find a secret passage that heads a long way south, beginning opposite a sarcophagus. In here are Bonus Points Pickups and a Pandora's Box. You want this for level 8. Walk west, north through one collapsing roof, and then further north and west into a small chamber containing an Explorer (8) and Ancient Artefacts.
Out of the chamber, go north through another two collapsing roof gates, and northwest (watch out for the Mummies!) to a fork in the passage. You want to head west. Ignore the secret passage for now; head west to the sunny northwest exit from the pyramid, and find a Tourist Couple (5). Return east into the passage, take the hidden corridor south, and use it to find a couple of Sandbanks, Tourists (9) and a Baby (10).
From here, take the western exit, follow the passage, and at the first fork, head east to find two Pandora's Boxes and a Pot. Head southeast, south through two collapsing roof gates, and straight on south into the last secret passage, leading to the last Explorer [A]. He might well be under threat of attack from a Mummy, so be prepared for quick action. Collect the Pandora's Box and then pause the game. Read the preamble to level 7, below, to decide whether to kick off the level (ho ho ho) by using the Speed Shoes, and exit.
Level 7: Dr. Tongue's Castle of Terror
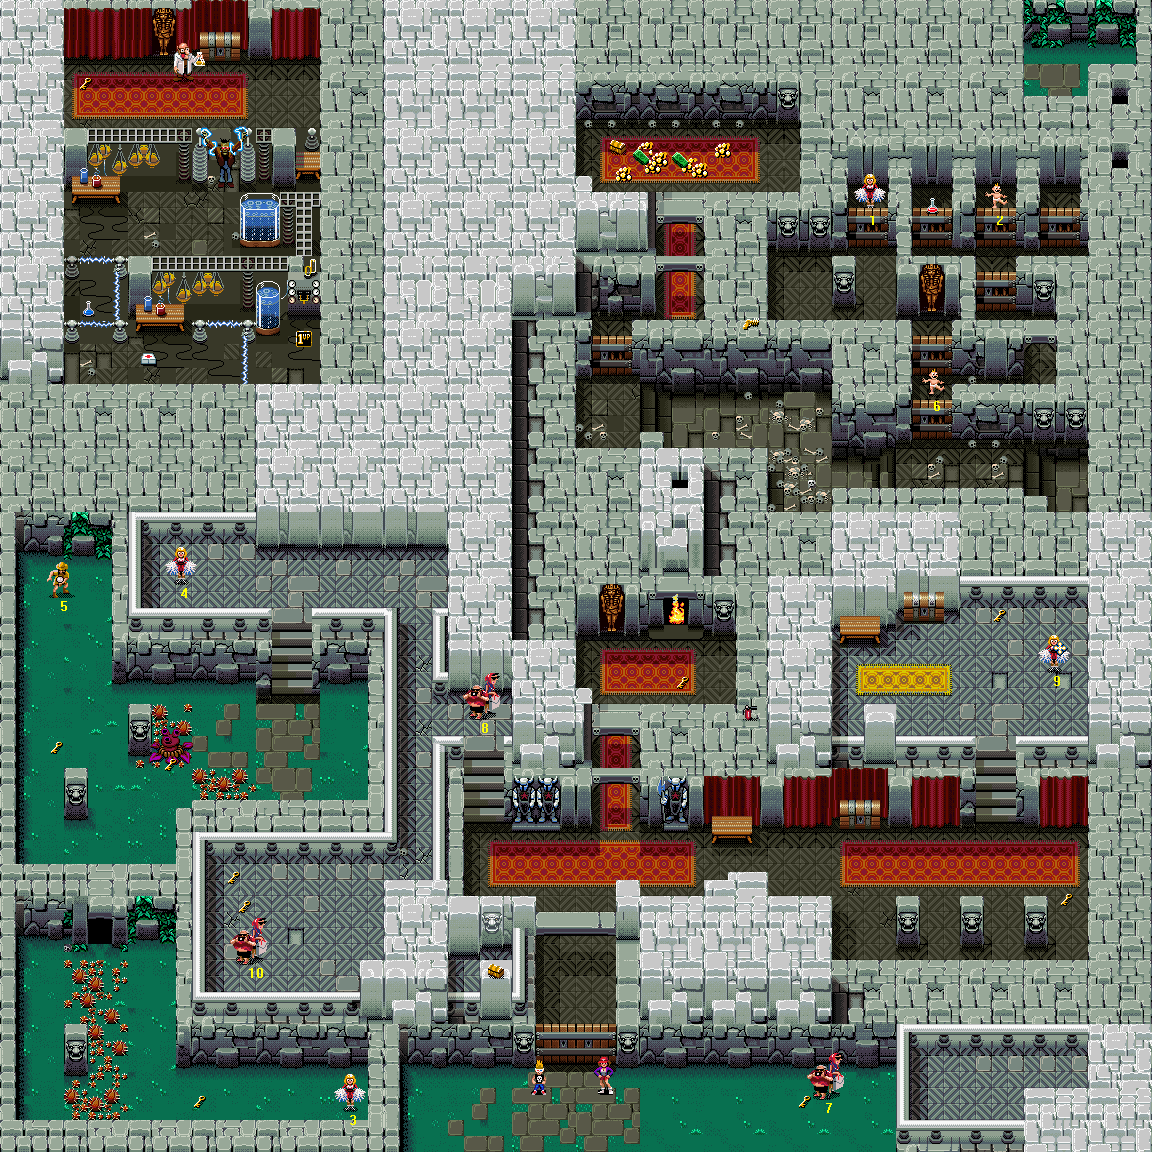
Difficulty: 2/10
The Werewolves (of which you should only meet two, and then only if you are doing very well) aside, there is nothing very distinguishing about this level.
Hazards
Fire. Fires are put out with the Fire Extinguisher. Mad Scientist. He drinks the potion he's holding and then he explodes, so he is not too much to worry about. do not fall into the trap of thinking he's a Victim though, as he'll hurt you if you touch him. Electric barriers. Time your walk so that you go through when they are switched off.
Monster List
- Zombies [Normal] (intensity: ranges from very low to medium, location: nearly everywhere)
- Frankenstein's Monster (one)
- Mummies (location: in two places)
- Pod Plant (one)
- Werewolves (source: from Tourists only after 9 seconds: #'s 7, 8 and 10)
Victim List
- [A] Cheerleader - Locked in a cell, at the far end of the dungeons in the northeast corner of the castle. Access the dungeons via the passage behind the fireplace to the north of the entrance hall.
- Baby - Locked in the second of three cells, to the east of the Cheerleader's [A] area, in the dungeons in the northeast corner of the castle.
- Cheerleader - In the southeast corner of a small courtyard accessed through a covered passage, in the southwest corner of the castle.
- Cheerleader - On a raised dais on the western side of the level. Go up the steps to the northwest of the front gates, and continue northwest.
- Explorer - In a yard, at the western edge of the level.
- Baby - Through a door, in the middle of the dungeon area in the northeast corner of the castle.
- Tourists - East from your start location.
- Tourists - Up the stairs to the northwest of the front entrance.
- Cheerleader - Up a flight of stairs on the eastern side of the level, near Ancient Artefacts.
- Tourists - On a raised dais, to the southwest of the stairs up to #8.
Important Pickups
- Two Pandora's Boxes
- Your first Ancient Artefacts
- Your first Martian Bubble Gun (if you did not visit Bonus Level: Day of the Tentacle)
- First Aid Kit
- Extra Life
- Ghost Potion
Bonuses Available
- Victim collection bonuses
Best Place To Score Bonus Points
The east end of the central hall, where the Zombies spawn quite quickly but there are no Mummies.
Walkthrough
This is the first level in which Tourist Couples will turn into pairs of Werewolves after a pre-set time period (here, it is 9 seconds). This has the same effect as their dying: you have lost a Victim. Victims 7, 8 and 10 on this level are Tourist Couples; you won't be able to save #10 without using the Speed Shoes at the start of the level. However, saving #10 is unnecessary, as you will have an eleventh Victim to save in level 8, which will repair the damage. New players may want to use the Speed Shoes to be sure of getting to victim eight in time; everyone else should save them for level 14. Bear in mind when deciding on this, that you will get an Extra Bonus Victim at the end of level 6 if you break the next multiple of 40,000 points... switch your special item to the Speed Shoes in case, if you are unsure.
As you wait to begin, hold down the right-arrow on the control pad, so that you start to move east as soon as possible. Collect a Tourist Couple (7), then go straight back to where you started, up the passage to a hall, northwest and up the stairs to collect more Tourists (8). If you really want to rescue the last pair of Tourists (10) and are using the Speed Shoes, head southwest and directly over to them as fast as you can.
If you have ten Victims but aren't aiming to save the tenth, equip your Silverware and head south and west at the turning. Slay the werewolves and then head north again sharpish; a Cheerleader (3) to the south is vulnerable while you stay here. North still, past the steps, and after turning left you will find a Cheerleader (4). Go downstairs, sweep up a Pod Plant with your Weeddefeater, collect two Keys (one under the Pod Plant, which you may collect without noticing if you use the Weeddefeater) and then head north for an Explorer (5). Now go south and into the roofed passage; use your Weeddefeater again to clear away the weeds from your path when you exit. Now head southeast and quickly collect that Cheerleader (3). Bear in mind that the Weeddefeater will slay Zombies too, if you walk up to them while using it! There's no need to waste time changing weapons.
Having picked up the Key, go back through the passage, up the steps, and south to the first flight of stairs. You can now explore the southern dais more fully; in addition to the two Keys is a secret passage in the southeast. A Pandora's Box is located behind a stone on the balcony. Exit and go down into the main hall once more. Head south and out the main gate again, and then over to the east, where the first Tourists (7) were, if you did not pick up the Key lying there the first time. When you have it, go east to the other end of the hall.
In this area, there are three Curtains and a Chest to be searched, and a Key to be picked up. Up the steps are a Cheerleader (9), Ancient Artefacts, a Key and a Chest. Head back once again to the main hall, and up the northern passageway. You may encounter a Mummy; anyway, yet another Key is here, plus a fire. Use your Fire Extinguisher - ammo for the Fire Extinguisher can be found in the eastern wall (walk into it while pushing south into the south wall, then north once you have found the bolt-hole). It does not take a long blast to put the fire out, so do not go crazy.
At the end of the narrow tunnel behind the fire are the dungeons; go through the door to the north to find lots of Bonus Points Pickups and a second Pandora's Box. Back out again, and head east this time; through another door to the north is a Baby (6), and you can go further north from there through another two locked doors, to find a Cheerleader [A] waiting in a cell.
Head southwest and walk into the western wall, as you did to get the Fire Extinguisher. This time you can find a Martian Bubble Gun, which will be very useful on level 16. Go east back out of there and take the first turning east opposite the Sarcophagus. Follow the narrow corridor to the end, and then go through one door, and you will be confronted with another three; on the left is a Monster Potion and straight ahead is a Baby (2).
Pickups
There's a multitude of useful items still remaining, so do not leave yet! Leave the baby's cell without exiting (you might have to hug the eastern wall), and open the last door. Head northeast to find a sheltered passage; when you emerge at the other end, go west into another one, much longer and leading to a scientist's lab. Have your Ancient Artefacts ready.
When you emerge from the passage, walk southwest over to Frankenstein's Monster. Start using the Ancient Artefacts before you make contact with him, then walk into him as you use them; he should explode quite quickly. (do not worry about the Mad Scientist - he just drinks his potion and then blows himself up.) Now head south. You will reach a set of timed electric barriers; wait until they have just turned off to walk south through them. You will take damage walking through the barriers if you do not time it properly - be careful. You are now free to pick up a First Aid Kit.
An Extra Life to the east is guarded by another electric barrier, and a Ghost potion, on the western side of the room, is surrounded by them. After collecting the Potion, walk north through the final electric gate, around the table and over to the north side of the room. you will find a Key in the northwest corner, and along the northern wall are two Curtains and a Chest. Having exhausted the possibilities of this chamber, leave the way you came in, heading east and then southwest through the secret passages; you can now exit the level, as there's nothing left.
Forty Feet of Terror in: Level 8: Titanic Toddler
Difficulty: 1/10
If you just blunder out onto the field, then up to five Victims could cop it, but you are more intelligent than that... "camping" might not be welcome in other games, but here it is a virtue. it is easy if you know how.
NOTE: In addition to the usual ten Victims, the Big Baby turns into a regular Baby if/when you defeat him, which is why this Baby is labelled "Extra" (E) and why there are eleven Victims overall listed in the walkthrough. This Baby does not have to be rescued if you defeat the Big Baby after the Exit Door has appeared (which is only possible if you picked up an extra Skeleton Key somewhere).
Monster List
- Big Baby
Victim List
- [A] Cheerleader - In the enclosed yard behind the Skull Door, at the northern edge of the map.
- Baby - In the large yard where the Big Baby is.
- Cheerleader - With Cheerleader #A, in the enclosed yard behind the Skull Door, at the northern edge of the map.
- Teacher - Standing on the patio at the eastern side of the yard where the Big Baby is.
- Baby - In the large yard where the Big Baby is.
- Soldier - In the large yard where the Big Baby is.
- Baby - In the large yard where the Big Baby is.
- Baby - In the large yard where the Big Baby is.
- Baby - In the house in the southeast corner of the level.
- Explorer - At the western edge of the level, near some toxic waste drums.
- E) Defeat the Big Baby, and he will shrink down to regular size.
Important Pickups
- Pandora's Box
- First Aid Kit
- Skeleton Key (which you will use)
Bonuses Available
- Victim collection bonuses
Best Place To Score Bonus Points
Once the Big Baby is shrunk, that's your lot; you cannot score indefinite amounts of points on this level.
Walkthrough
Open the Bin to your southwest, and then head southeast around the long, thin building. Head west and collect a Teacher (4), move southwest, collect some Soda Cans quickly, and then enter the other, larger building using the opening to the southeast. Open the Cupboard and then the door to the south; inside is a Baby (9). Bazooka-blast the wall to the south, and go through the new hole you made; walk east and then north for a Pandora's Box.
Switch to the Pandora's Boxes (you should now have seven of them), and head south, west and north back into the first room inside the house. Station yourself in the northwest corner of this room, where the now-open cupboard is, and wait. Whenever the Big Baby runs in, and pauses to squirt you with its milk bottle, use a Pandora's Box on it - after three to five of them, it will shrink back to the size of a regular Baby (E).
There are no more enemies in this level, so let's be efficient: Head south through to the second room again, and this time go west into a library. At the opposite end is a Cupboard and a Key; if you head back to the library's entrance then you can open a door to the south, leading to a storeroom containing a First Aid Kit. Head northeast out of there, and west out of the house again to collect the Baby (E) you defeated along with the Skeleton Key it was holding. Head northeast and go into the building with the lockers along its side; it contains a Cupboard. Having exited, you can explore the yard that the Big Baby was running around, to the west; it contains a Bazooka pickup, two Keys, a Soldier (6) and four Babies (2, 5, 7 and 8).
Exit the yard through a damaged hedge to the west. Head south along the water's edge, and west when you can, and you will find an Explorer (10) near some toxic waste drums. Further south, through another hole in the hedge, is a tree whose branches conceal Bonus Points Pickups from your view. After collecting them, head north, swim across the pond and then walk around the drums and northeast to a Skull Door. Go through and rescue two trapped Cheerleaders [A] and (3).
Level 9: Toxic Terrors

Difficulty: 5/10
Several Victims are in less-than-desirable positions, and the introduction of Jelly Blobs by having them spread all over the map is a little cruel. You might well suffer the first time you play this level.
Monster List
- Jelly Blobs (intensity: ranges from low to very high, location: everywhere)
- Pod Plant (two)
Victim List
- [A] Explorer - Roughly in the centre of the level, to the west of a large patch of weeds, between two groups of toxic waste drums.
- Tourists - Up by the northern wall of the level, west of a small building containing a First Aid Kit.
- Baby - In the centre room of the large building near the west side of the level. Enter via the door to the north, or through the damaged wall to the southeast, from the area filled with Jelly Blobs.
- Dog - Sitting in the road, just west of your start location.
- Cheerleader - In the clearing to the southeast of a large patch of weeds, toward the east side of the map, in the area filled with Jelly Blobs.
- Baby - In the small room on the east side of the map.
- Explorer - In the northwest corner of the area filled with Jelly Blobs, to the south of a fence blocking access from the tarmac path.
- Tourists - Near the northwest corner of the map, on a tarmac path to the north of a patch of weeds.
- Tourists - Standing to the north of the road that runs along the southern edge of the level, toward the western end, just past the end of the wall to the north.
- Explorer - Up by the northern wall of the level, to the north of some toxic waste drums, east of the hedge block containing a Bonus Level Pickup.
Important Pickups
- Bonus Level Pickup
- First Aid Kit
Bonuses Available
- Victim collection bonuses
- Weed Cutting Bonus - 1000 points
- Secret Bonus - 2000 points
Best Place To Score Bonus Points
This level really is not the best place to score points, as you will lose health quickly due to the Jelly Bombs.
Walkthrough
The Jelly Blobs launch Jelly Bombs into the air at frequent intervals (heralded by a squelching noise). A couple of seconds later, these land wherever you were when they were launched (or where a Victim was, and likely still is). For this reason you should keep moving and avoid retracing your steps; you should also make sure to use your First Aid Kits when you have four or less hit points if Jelly Blobs are around, because Jelly Bombs reduce your hit points by three in total while they are on your head.
Head west along the road to pick up first a Water Pistol, then a Dog (4). Walk west, keeping just south of the wall on the northern side of the road - there's a Tourist Couple (9) standing just past the end. (If you have no Weeddefeater at this point, then you should head northeast to get some - I do not recommend getting this Weeddefeater pickup at this point in any other circumstances, though, as it puts a couple of Victims at a slight risk.) Continue west and where a path turns north off the road, follow it. Switch to your Weeddefeater, and sweep through the weeds over to the Pod Plant. it is sitting on a Mystery Potion, so collect that after defeating it.
Continue over to the north side of the weeds, and collect another Tourist Couple (8). The square of greenery to the west hides a route through into the alleyway you see to the northwest, so walk west and north to find a Weeddefeater pickup. Switch to your Bazookas. Head south and out of the alley to the east, then head northeast and follow the path east where it continues. you will come to a line of fencing to the south, with an Explorer behind it; blast down one of the sections of fence with an irregular top, and head through to get the Explorer (7). (If you have no Bazookas, go around the fence via the green pond to the southeast.)
Head back through the hole and northeast over to the other side of the toxic waste drums to reach another Explorer (10). Head southwest from there and stand in front of the hedge block; fire a Bazooka into the front to gain access to a Bonus Level Pickup. Return northeast to where the Explorer (10) was and then head east past a few more barrels of gunge to find Tourists (2). Head southwest around another large batch of waste drums and then carry on south to find an Explorer [A].
Switch to your Weeddefeater. Sweep south through the small patch of weeds and then turn east at the other side and walk over to a second Pod Plant. Mow him down and then head east to find a Cheerleader (5). do not wait around here - there's a Baby to the northwest, who could be effectively defeated (as you won't be able to get to him) by a Jelly Bomb. Head northwest through the weeds and once at the edge of the infested area, go north.
Past a startlingly green pond is a little hut. Enter it for a Bonus Points Pickup, and then head into the back room for a First Aid Kit. Return south out of there and head east to find a Key near some toxic waste drums. Go southeast from there to enter another little room on its own, inside of which is a Baby (6). There's a Cupboard by the door. After opening that, head out the door and into the dead end to the east. Switch to your Bazookas and blast down the fence to the south, then head through for a Bonus Points Pickup. Head north out of the alleyway, and then northwest to find another one, and from that, head northeast to find a Key.
Walk west past a protruding wall, southwest past a group of waste drums, west past another, and south and west around the pond. you will reach a larger, more irregular pond - dive in and swim west across to the other side. Go southwest from your point of exit to find a Key. Continue southwest into a passageway inside another building, and head through the door to the north and save the Baby (3), who's on the east side of the room.
Pickups
Head through the door to your north, to find a Fire Extinguisher sitting there in front of a Cupboard. Switch to your Bazookas and head south through both doors inside the building; blow down one of the weak sections in the southern wall. Head through and go east; you will see a Weeddefeater pickup on the other side of a fence. Run around and get it, then backtrack west and north into the house, to return to the Exit Door.
Bonus Level: Mushroom Men
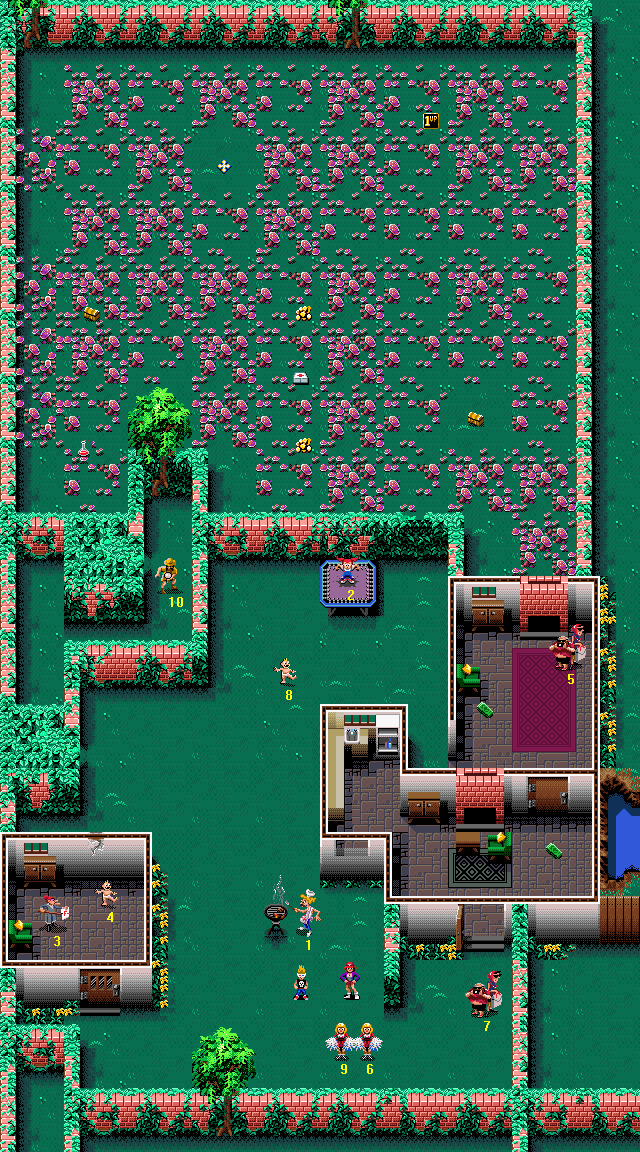
Difficulty: 1/10
it is a stroll through a monster-free house and grounds for Victims, followed by an expedition into a field for bonus items. If you use a Ghost Potion or Monster Potion, then you can ignore the aliens alluded to in the title, because you cannot even be hurt while grabbing the treasure.
Monster List
- Mushroom Men (intensity: high, location: in one large area)
- Weeds (present over one large area, but no Pod Plants)
Victim List
- [A] Barbecue Guy - Just north of where you start.
- Trampoline Girl - North of where you start, at the northern edge of the safe area of the level.
- Teacher - In the one-room building in the southwest corner of the map.
- Baby - In the one-room building in the southwest corner of the map.
- Tourists - In the northern room of the larger building, on the eastern side of the safe area of the level.
- Cheerleaders - Just southeast of where you start.
- Tourists - East of where you start, past a protruding hedge.
- Baby - North a little way from where you start, past the Barbecue Guy [A].
- Cheerleaders - Just southeast of where you start.
- Explorer - In the alleyway leading to the weed-covered field, northwest from your start location.
Important Pickups
- Monster Potion
- Two Pandora's Boxes
- Extra Life
- First Aid Kit
Bonuses Available
- Victim collection bonuses
- Weed Cutting Bonus - 1000 points
Best Place To Score Bonus Points
You could snipe off Mushroom Men from your alleyway hideout, but that would be very slow and wouldn't yield the score boost you want for your ammo. Save it for later.
Walkthrough
Walk south for two Cheerleaders standing together (6 and 9), and then east for a Tourist Couple (7). Head north into the house and find a Cupboard and a Bonus Points Pickup. Exit the house again via the south exit and walk due west; enter the next door you come to and find a Teacher (3), a Baby (4) and a Cupboard inside. Exit and head northeast over to a Barbecue Guy (A). Continue north to find a Baby (8) and, further on, a Trampoline Girl (2).
do not jump into the field of weeds yet; instead jump off south and head southeast into the other room in the large building. It contains a Tourist Couple (5), a Bonus Points Pickup and a Cupboard. Leave the way you came in, and head west to an ivy-covered alleyway. Through here, to the northeast, can be found an intrepid Explorer (10). That's all the Victims, but to leave now would be to entirely miss the point of the level.
Pickups
Switch to the Weedkiller and walk into the second ivy-covered alleyway. Now begin using the Weedkiller, and go forth into the field... Directly north is a Monster Potion, then a Pandora's Box. Northeast of that is an Ancient Artefacts pickup; then head directly east for an Extra Life. South a little is a second Pandora's Box, and west of that is a First Aid Kit flanked to the south and to the north by two Bonus Points Pickups. After the second of these, head roughly southwest and exit the field using the same route you came in. There's the Exit Door too, right where you left it! No problem.
Level 10: No Assembly Required
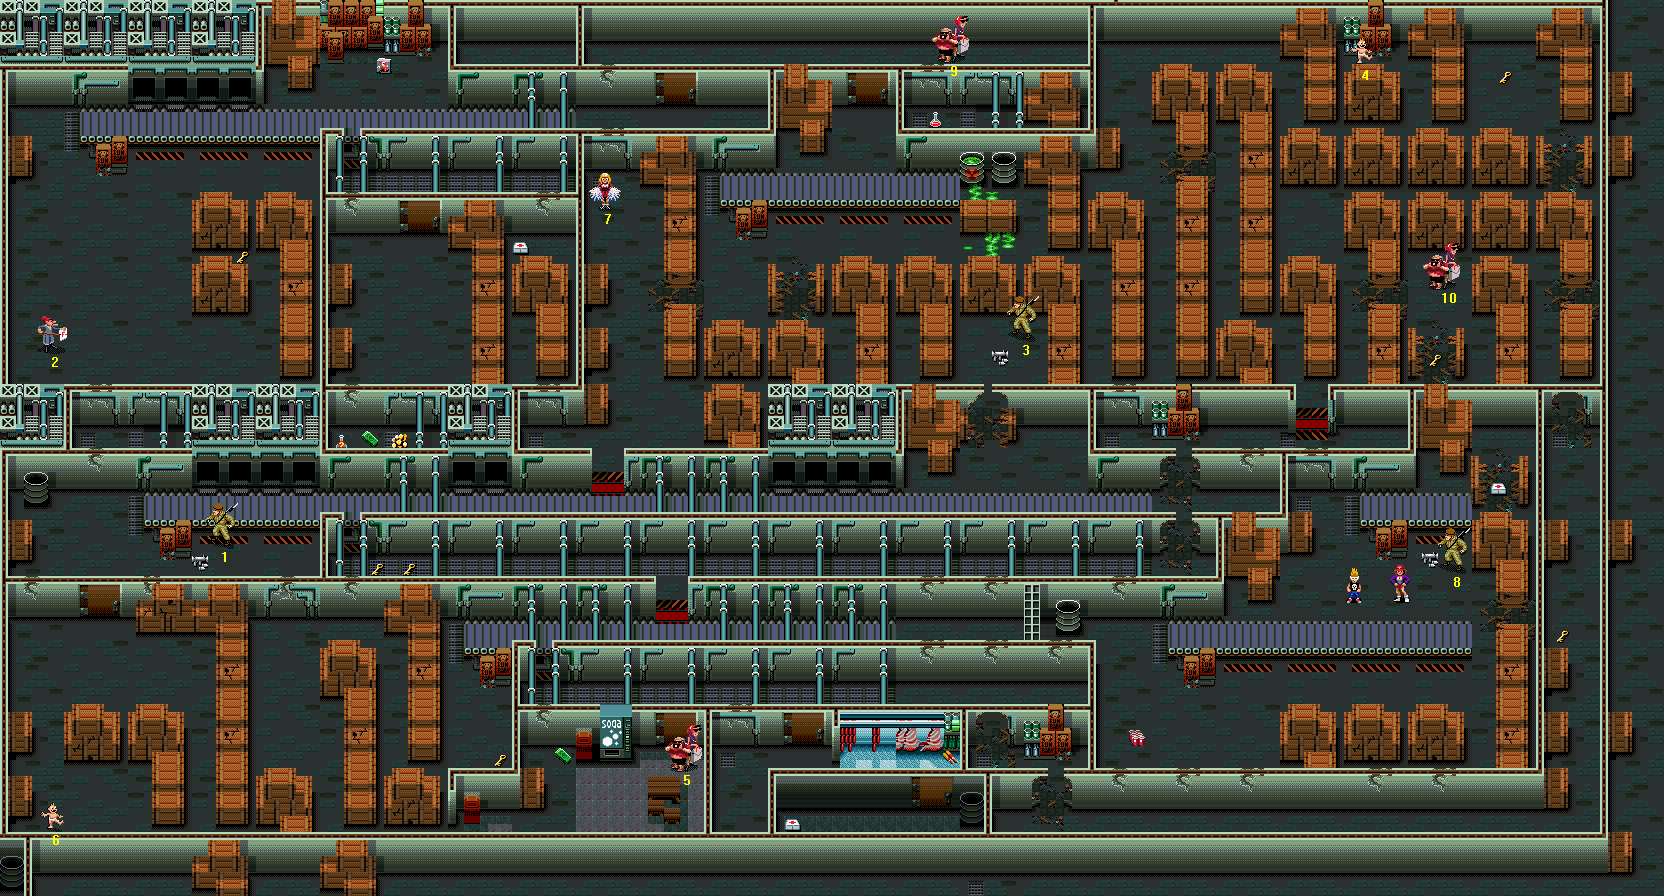
Difficulty: 3/10
This level is really pretty easy if you know what you are doing. The Evil Dolls are only threatening if you are slow, so do not be.
Monster List
- Evil Dolls (intensity: high, location: nearly everywhere)
- Fire Babies (from Evil Dolls only)
Victim List
- [A] Soldier - On the western side of the level, with some Bazooka ammo, to the south of a machine spitting Evil Dolls out onto a conveyor belt.
- Teacher - In the southwest corner of the large, mostly empty room in the northwest corner of the level.
- Soldier - Behind a barrier of boxes, on the south side of the large factory bay on the north side of the level.
- Baby - In a dead end formed by boxes, near the northeast corner of the map.
- Tourists - By the door in a small room with a soda vending machine, at the southern edge of the level.
- Baby - In the southwest corner of the level.
- Cheerleader - Near the northern edge of the map. In the northwest corner of the large factory bay on the north side of the map.
- Soldier - Standing with Bazookas, just east of your start location.
- Tourists - In a corridor at the northern edge of the level.
- Tourists - In the large area full of boxes, in the northeast corner of the map.
Important Pickups
- Bazooka pickups
- Three First-Aid Kits
Bonuses Available
- Victim collection bonuses
Best Place To Score Bonus Points
You could try standing in the aisle just to the south of a particular Evil Doll-producing machine, which is itself southwest of that last soldier. Wait for five to appear, then get them all at once with a Soda Can. That's one thousand points per throw, you know, and more when there are Fire Babies present.
Walkthrough
East of your start position is a Soldier (8) by a Bazooka pickup. Northeast of them is a First Aid Kit. After collecting these three, head southwest across a conveyor belt for Soda Cans. Next thing is to go back to the other side of the conveyor belt and then skirt the wall on the northwest of the room until you come to a collapsible wall. Blast it down and walk north through a collapsing roof, then northeast and through a gap. In here are Tourists (10), and a Key to the south.
Fire two Bazooka shots northwards, then head due north through the two destroyed crates and around into a dead end for a Baby (4). An Evil Doll will probably appear to your east now; throw a Soda Can while he's toddling north. Head out south again, taking a detour east for a Key. Go south back to the open space that contained the Tourists and exit through the northeast corner. Head south now, and carry on following the long passageway around a few corners (you will find a Key along the first straight) until you find a door to your south.
Go through the door, walk east, pick up Ice Lollies, open another door south and go inside and along to the west for a First Aid Kit. Go back out north through two doors to the passage, and open the next door along. Collect Tourists (5), and a Bonus Points Pickup on the other side of the soda machine, then walk out the southwest exit. Blow up the first box you see to the north, and go through for a Key. Head east along the conveyor belt to the north, go into the next passage as soon as you see it, and walk west to find a couple more Keys.
Return to where you blew up the box (east, south at the first opportunity, west against the conveyor belt, south, through the box fragments) and go northwest. Use a Bazooka shell on one of the weak box sections to the west, head south in the next aisle and skirt the south wall while walking west to find a Baby (6). Walk north and through a door, then east, for another Soldier [A], again with Bazooka ammo on the floor nearby. Head northwest and blow holes in two successive wall sections, then go through and save the Teacher (2).
Northeast, behind a box, is a Key; go north around the box, then east along the conveyor belt, taking a small detour for Decoy Clowns. Go through the door at the end of the passage, travel east and collect a Tourist Couple (9). Blast down the wall to the south for a Monster Potion. Return west, back through the now-open door, and blast through south to a Cheerleader (7). Walk further south and just before you come to a conveyor belt, enter an alcove to the west.
If you have four or more Bazooka shells left at this point, then you can obtain some helpful items by investigating the area behind the weak wall to the north. Blast down the wall, then a weak box section to the west, to access a large empty room. Blast down a wall to the south for a Mystery Potion and two Bonus Points Pickups; then move north, open a door and head east, to find a First-Aid Kit behind yet another hapless block of masonry to your south.
Once you have everything, exit the bonus area and go back north, near to where the Cheerleader was. Go east through the gap in the boxes, and continue southeast. Blow up a box and continue east, taking the south route around a line of boxes; you will find one last Soldier (3) and his trademark Bazooka. If there's an Evil Doll menacing him, it is probably not actually going to manage to kill him - for some reason they find it extremely difficult to kill Soldiers (maybe they have armour on). There's nothing more to see here, so exit now.
Plants Go Berserk in: Level 11: Weeds Gone Bad

Difficulty: 1/10
The Victims cannot even die unless Pod Plant Snot chances to land on them, and what are the chances of that happening, eh? If you run out of Weedkiller, use Monster Potion; if you run out of that use Ghost Potion; if you run out of that too, er, well, hop... The only thing that's difficult on this level is finding your way about, as there are virtually no landmarks and the Victims and Pod Plants are scattered all over the place.
Monster List
- Pod Plants (eight)
- Weeds (covering the map)
Victim List
- [A] Cheerleader - In the northwest corner of the map.
- Cheerleader - In the southwest corner of the map.
- Baby - In the southeast corner of the map.
- Tourists - In a small clearing in the weeds, around the centre of the southern edge of the level.
- Tourists - Where you start.
- Tourists - In a small clearing near the northwest corner of the map.
- Tourists - South of the large paved area, standing amongst the weeds.
- Explorer - Southwest along a clear pathway from your start location.
- Explorer - Standing in the middle of the weeds, close to two Pod Plants, at the eastern edge of the level.
- Explorer - In the large paved area some distance to the southwest of your start point.
Important Pickup
- Monster Potion
Bonuses Available
- Victim collection bonuses
- Weed Cutting Bonus - 1000 points (does not require Pod Plants to die)
Best Place To Score Bonus Points
The only source of points in this level are the Victims and the Pod Plants. When all are gone, you cannot earn any more points.
Walkthrough
Near you as you start are Tourists (5), and a Pod Plant, to the south. After you have finished with those two, head south along the (western) clear path, west at the turning and kill a second Pod Plant. Further west is an Explorer (8). Head south, then west, along the path; collect another Explorer (10) and kill another Pod Plant to the south. Go south from the Pod Plant for a Tourist Couple (7) in the middle of the weeds, then southeast for another Tourist Couple (4) in a clear patch.
Now go east for a Baby (3), situated in the southeast corner of the level, and north from there to find two Pod Plants on either side of an Explorer (9). The southeast Pod Plant is sitting on a Monster Potion. To the northwest, you can find a Weedkiller pickup in a clear patch. Head southwest and keep up against the south wall until you find a Cheerleader (2) in a small clearing, in the southwest corner of the level.
After collecting the Cheerleader (2), head east and a little north to find another Weedkiller pickup. There are two Pod Plants to the north of this, one after the other, with the edge of the paved area between them. After the second, go northwest and collect first a Tourist Couple (6) in a clear patch, then a Cheerleader [A], in the northwest corner of the level. At this point, the Exit Door will appear, but you can head east to find one last Pod Plant, which hides a Weedkiller pickup. Stroll west after finishing him off, and exit.
They Came to Earth for One Thing: Level 12: Mars Needs Cheerleaders
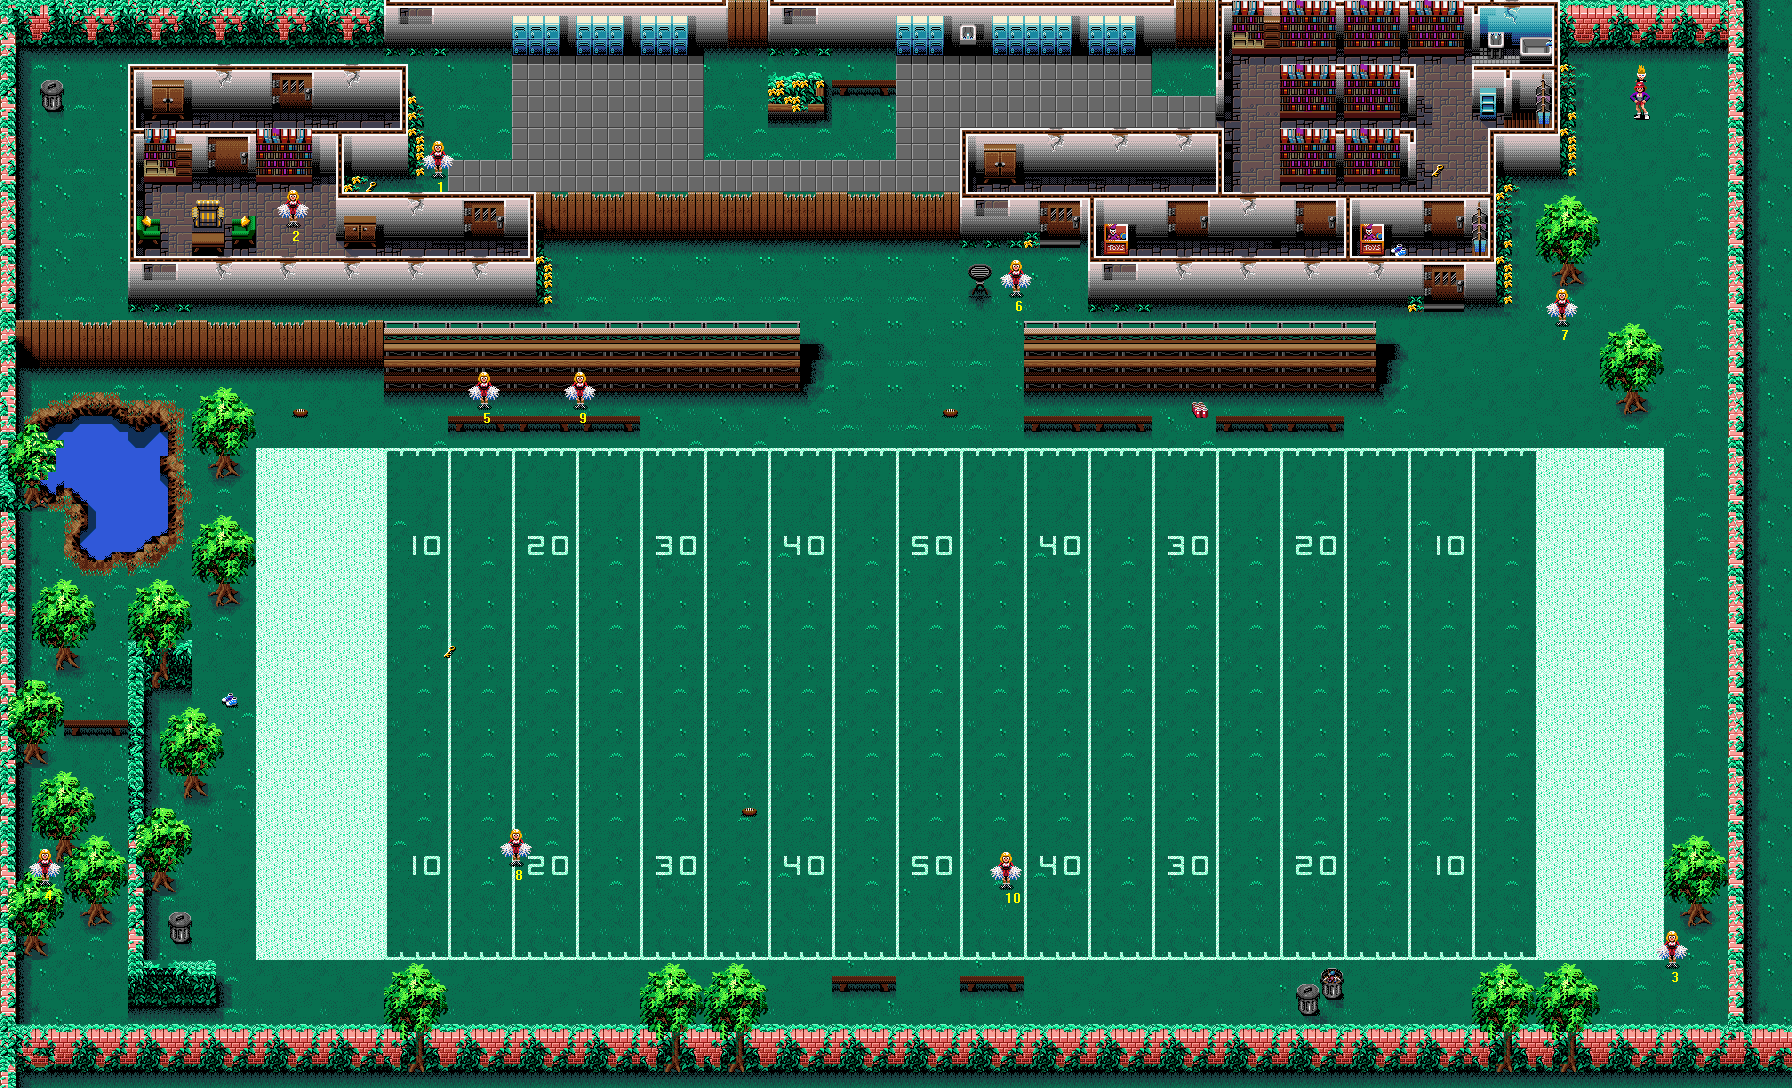
Difficulty: 4/10
You must collect all the Victims on this level in order to get into the next Bonus Level. Most are easy, but there are some you might be unlucky with! The enemies in this level are extremely good at hampering your movements, which can get very irritating; the Bonuses are fun to get, but challenging.
NOTE: At the end of this level, you will be given a password for level 13 even if you are going to the Bonus Level first. The password you get is for level 13, not for the Bonus Level.
Monster List
- American Footballers (intensity: low, location: all over the football field)
- Martians (intensity: ranges from low to high, location: everywhere)
- Martian Spaceship
Important Pickups
- Two pairs of Speed Shoes
- Three pickups of American Footballs
- Soda Cans, to use against the Martian Spaceship
- Ten Cheerleaders (access a Bonus Level if you save all ten)
Bonuses Available
- Victim collection bonuses (Ten Cheerleaders Bonus replaces
- All Victims Saved Bonus)
- Alien Invasion Repelled - 9900 points
- Bonus for Pass Completion - 5000 points
- Secret Bonus - 2000 points (awarded with Ten Cheerleaders)
Best Place To Score Bonus Points
Be sure to get the large one-off bonuses available (listed above). The northeast corner of the level, where you start, is the best place to score continually after that (though Martians are not easyopponents to wrangle points from while remaining unharmed). Martians appear fastest there, and there are no American Football Players to irritate you.
Walkthrough
The Martians begin teleporting in immediately, but you can make them retreat with a single Water Pistol squirt, so they cannot be that fearsome... Ignore the Martian Spaceship for now, because you can fight it better when you can wander around the football field without having to worry about the Cheerleaders dying. Go south straight away and collect your first Cheerleader (7) just past the tree, then enter the door to the west, collect Speed Shoes inside and go through to the next room to the north, where there's a Key. Head west along the aisle and out into the yard, and continue west to the far end to find a second Cheerleader [A].
Quickly pick up a Key and then go inside using the door to your southeast. Head west along the passage, open a Cupboard and rescue the third Cheerleader (2). Through the door to the north is a Cupboard. From there, head through the next door to the north (or go the long way round if you want to save a Key) and go west to find a Bin to open. Use Bazookas to blast a hole in the fence to the south, and go through and then east to pick up American Footballs. Continue east between the spectator stands and a bench to find two Cheerleaders (5 and 9); carry on going due east for a while to find more American Footballs, and then Soda Cans. Go west again to the end of the second lot of spectator stands, and north for a Cheerleader (6) next to a barbecue grill.
Through the door to the north is a Cupboard. If you head precisely southwest on leaving the passage then you will eventually come to a Cheerleader (8) at the southern side of the field, at the twenty-yard line near the western end. Go north from here for a Key (on another painted line), then west for a second pair of Speed Shoes. Walk north and west past the hedge, southwest around a bench, and then south to find a Cheerleader (4). Head southeast from her and out onto the southern edge of the field again; check the Bin to the northwest in case there are any useful items inside.
Turn on your Victim Radar; skirt the wall on the southern edge of the level and walk along east until it shows a dot to the northeast. That's the penultimate Cheerleader (10), so go and save her. Take a detour west and a little north for a third American Football pickup. Join the south wall and head east again. Open the Bin that you find as you go, and then just head east and you will find the final Cheerleader (3) near a tree in the southeast corner of the level.
Bonuses
You have all the pickups, but how about some bonus points? You can earn 19,400 points with just some Soda Cans and American Footballs! What do you need to do? Earn the Bonus for Pass Completion by throwing the Footballs at the American Football Players. At least ten Football Players must receive successful passes for you to earn the bonus. Earn the Alien Invasion Repelled bonus by blowing up the Martian Spaceship - throw Soda Cans into the hatch when it opens. As far as I know, no other weapon will work. You need to hit it ten times in this fashion to destroy the ship; you will know when you have hit it because it will flash orange. When it starts heavily distorting upon taking damage, you know that it is nearly destroyed.
Bonus Level: Cheerleaders Versus the Monsters
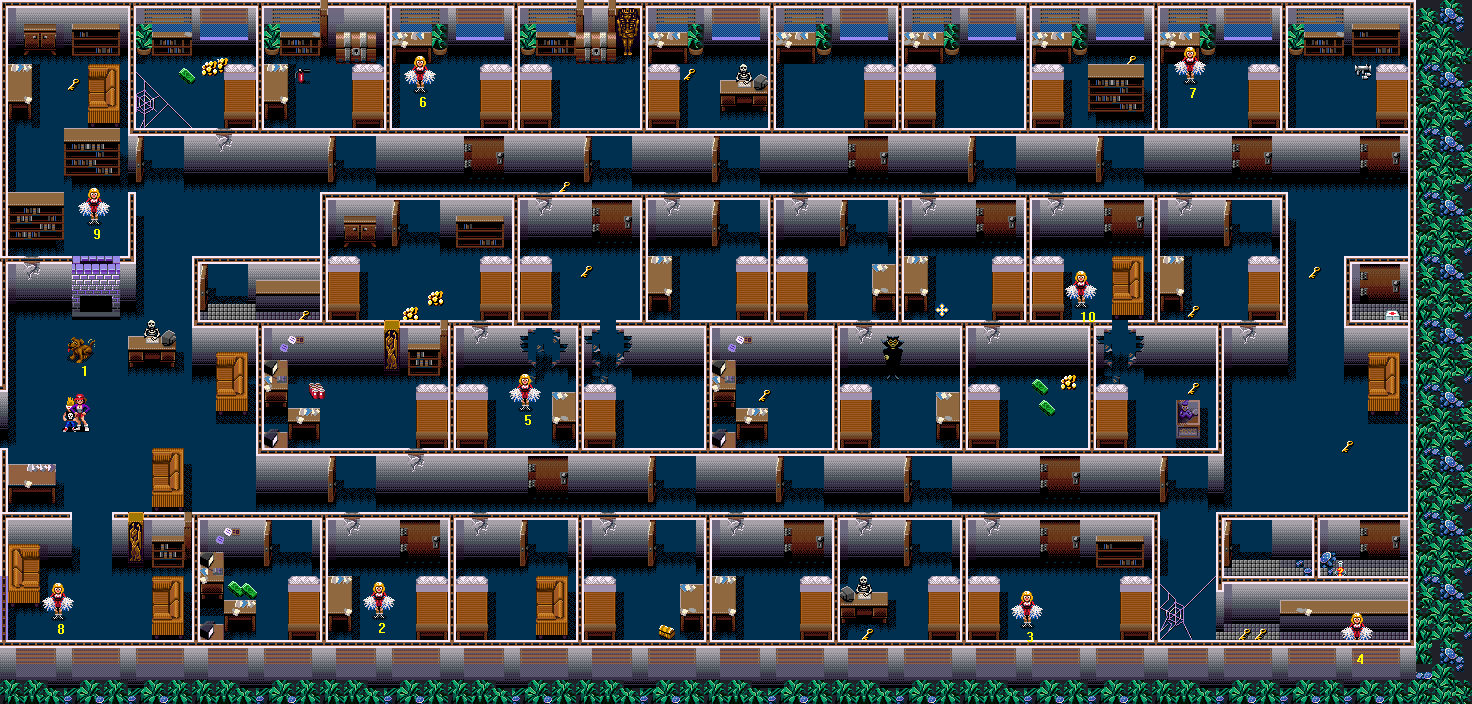
Difficulty: 3/10
The Werewolves make it hard; the Vampire is a doddle if you know what to do. it is a matter of looking out for what monsters are going to swiftly nab the Victims while you are not looking, or are doing something else. As I say, the Werewolves are the worst for this.
NOTE: It is only possible to access this level with ten Victims, which is why there are no Victim Numbers provided in the walkthrough. All ten of the Victims are "Always There."
Monster List
- Evil Dolls (intensity: low, location: one place)
- Spiders (intensity: low, location: one place)
- Vampire (one)
- Werewolves (source: appear after 45 seconds minimum, intensity: low, location: everywhere)
- Zombies [Normal] (intensity: low, location: one place)
Important Pickups
- Ancient Artefacts
- First Aid Kit
- Pandora's Box
Bonuses Available
- Victim collection bonuses
Best Place To Score Bonus Points
Slay Werewolves in the northern corridor if you want, but I'd hardly describe business as fast. it is really not worthwhile.
Walkthrough
Werewolves start to spawn on this level after approximately 45 seconds. The method described below takes a route that allows you to collect each item and Victim as you go; however, if you want to go through first and collect only the Cheerleaders, then come back for the items later, that's fine too. Bear in mind that the Vampire could slow you down anyway if you take a wrong turn.
Switch your weapon to Soda Cans. Head north for a Dog and then further north to a clear space in front of an open door. At this point, throw a Soda Can north into the doorway; Spiders frequently spawn there, in and around the web, and if you allow them, they will run southwest to kill the Cheerleader. Incidentally, collect her yourself. North of where she was, past the bookcases, is a Cupboard and a Key. Go into the next room, where the web is, and collect some Bonus Points Pickups. Head south from the doorway into a small supply room containing a Key.
Before long, Werewolves will start spawning, so have Silverware ready. Head out, and east along the corridor to the next room for a Fire Extinguisher and a Chest. Enter the next room to the south for a Cupboard and more Bonus Points Pickups, then the next one north after that for a Cheerleader. Pick up a Key in the passage and go north for a Chest. Open the door to the south for another Key, followed by a Cheerleader through the hole in the wall to the southwest. Head out to the northeast passage again, and into the next northern room for a Key.
Switch to your Ancient Artefacts, and head south into an empty room. The Vampire will fly in from the east, and you can engage him in battle. it is quite simple; whenever he is in human form, walk into him while using the Artefacts. As he takes damage, he will start to fly faster; after a short while (this being a weak Vampire compared to those in later levels), he will fly away and you will be free of him as far as this level is concerned. If any Werewolves or Zombies come in, just use the Ancient Artefacts on them too. Try and keep the fight confined to that room, as you run the risk of allowing the Werewolves to kill Victims if you go further afield. Be sure to massacre the accumulated Werewolves after the Vampire is gone, so that they do not cause trouble while you are doing the next bit.
Ignore the next two pairs of rooms for now - if you dawdle around here, Cheerleaders are liable to fall prey to the Werewolves. In the third room to the south is a Cheerleader. Use the big hole to nip into the room southeast of that quickly for a Key, but do not stay explore or Evil Dolls may appear and start stalking you. Return to the northern corridor and find a Cheerleader in the next room to the north, and a Key in the corresponding one to the south.
At this point you should backtrack; northwest of the room you are in now, in which you found a Key, is another room containing a Key. Southwest of that is a room in which you can find a much more valuable pickup, to replenish your stock of Ancient Artefacts. In the easternmost of the northern rooms is a Bazooka pickup. South of its entrance is a small cupboard holding a First Aid Kit; west of that is a Key.
Move south for yet another Key and then head southwest and into a side corridor leading south. Follow this to the end for two Keys and a Cheerleader. Head back out, go east and into the last supply room, which hides a Mystery Potion by some weeds. Go west along the southern corridor, and into the first room on the south for a Cheerleader. North of that is a room holding three Bonus Points Pickups. In the next room to the south is a Key; the room to the north is empty. In the next room to the north is a Key (the last one, thankfully); the room to the south is empty. In the next room to the south is a Pandora's Box; the room to the north is empty. No, I have not cut-and-pasted too many times; this level is just that exciting, that's all.
Ignore the next pair of rooms. Check the one to the south after them for the inevitable Cheerleader. Now it is to a northern room for Soda Cans, to a southern one for a couple of Bonus Points Pickups, and to the last southern one, near where you started, for the final Cheerleader. There's something about this dingy level that depresses me. I think it is intentional on the part of the game's designers. Whatever; leave as soon as possible.
Terrifying to the Bone! Level 13: Chopping Mall
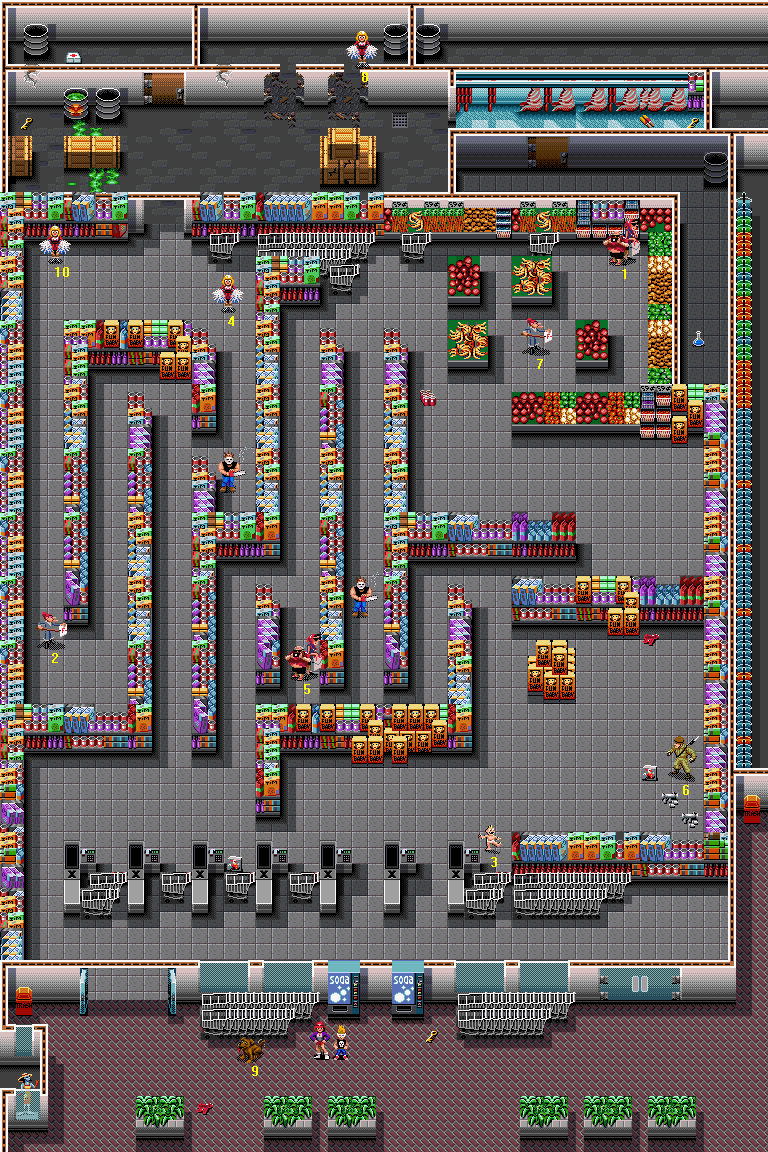
Difficulty: 5/10
The poor Victims are going to drop like flies on this one if you do not watch out. Be careful, particularly of Victims which are just off-screen; the Zombies might easily get to them. That could happen particularly when you are fighting the two Crazy Lumberjacks.
Monster List
- Evil Dolls (intensity: high, location: in two places)
- Fire Babies (from Evil Dolls only)
- Jelly Blobs (intensity: low, location: in one place)
- Lumberjacks (two)
- Zombies [Normal] (intensity: ranges from very low to high, location: patchy)
Important Pickups
- Bazooka pickups
- First Aid Kit
- Ghost Potion
Bonuses Available
- Victim collection bonuses
Best Place To Score Bonus Points
The west end of the checkouts. Definitely Zombie territory.
Walkthrough
West of your start location is a Dog (9), and east is a Key. Collect the Water Pistol south of where the dog was, and enter the supermarket through the double-doors. Go round the last checkout on the west, and head east along the row and into a display area. On your way you will find Decoy Clowns, a Baby (3), and finally a Soldier (6) with another packet of Decoy Clowns and two Bazookas. (Make sure to reserve at least two Bazooka missiles for use on level 15.) Head north into the other corner for Water Pistol ammo.
Now switch to your Ancient Artefacts and head west and around to the north. A Lumberjack in the next aisle will chop his way through the wall and come after you; lead him a little east to protect some Tourists (5) to the southwest, and then walk into him while using the Artefacts. If he falls over, then stop using them until he gets up. When the Lumberjack expires, arm yourself with your Water Pistol in case of any inconvenient Zombies and head north around two irritating protruding displays to find the grocery section, wherein are a Teacher (7), immediately obvious, and a Tourist Couple [A], to the northeast.
In the southwest corner of the grocery are Soda Cans; after them, return south around a long display to where you fought the first Lumberjack, and then go southwest (but not back into the Evil Doll area) to rescue that Tourist Couple (5) which I mentioned earlier. Head north from this point and another Lumberjack makes his presence known. Wait for him to hack through to your aisle, lead him a little south (to approximately where the Tourists were standing), then use the same procedure on him as you used to kill the other one. Remember that you can Bazooka the shop shelves yourself if it is absolutely necessary in order to get him into your aisle. After your second homicide, you can go southwest back to where the checkouts are. Blast through the shelves to the north (try the middle of the display of tins), in the northwest corner of this area, and you will come to a Teacher (2) on her own.
Walk north up the western aisle, armed again with your Water Pistol, and you will come to a clear area where two Cheerleaders (10 nearest, 4 furthest) are jumping up and down. You could feasibly benefit from getting the Pandora's Boxes ready for use, as the Zombies will sometimes appear in the wrong place in the wrong time, and could then potentially get an easy kill if you do not take desperate measures. Take the north door into the warehouse. In the northwest corner of the large room is a Key; through the door to its east is a First Aid Kit. Head on east through the warehouse and find a Cheerleader (8) to the northeast, through a hole in the wall.
Pickups
After the final Victim, further to the east, is a chilly-looking storage room terminating in a dead end, with Ice Lollies and a Key on the floor. There is also a door to the south near the entrance, leading around to a Ghost Potion. After you have this, return northwest and over to the Exit Door, then pause the game and read the preamble to level 14's walkthrough below. When you have finished, you can unpause, switch to the Speed Shoes if you want to, and exit.
Level 14: Seven Meals for Seven Zombies
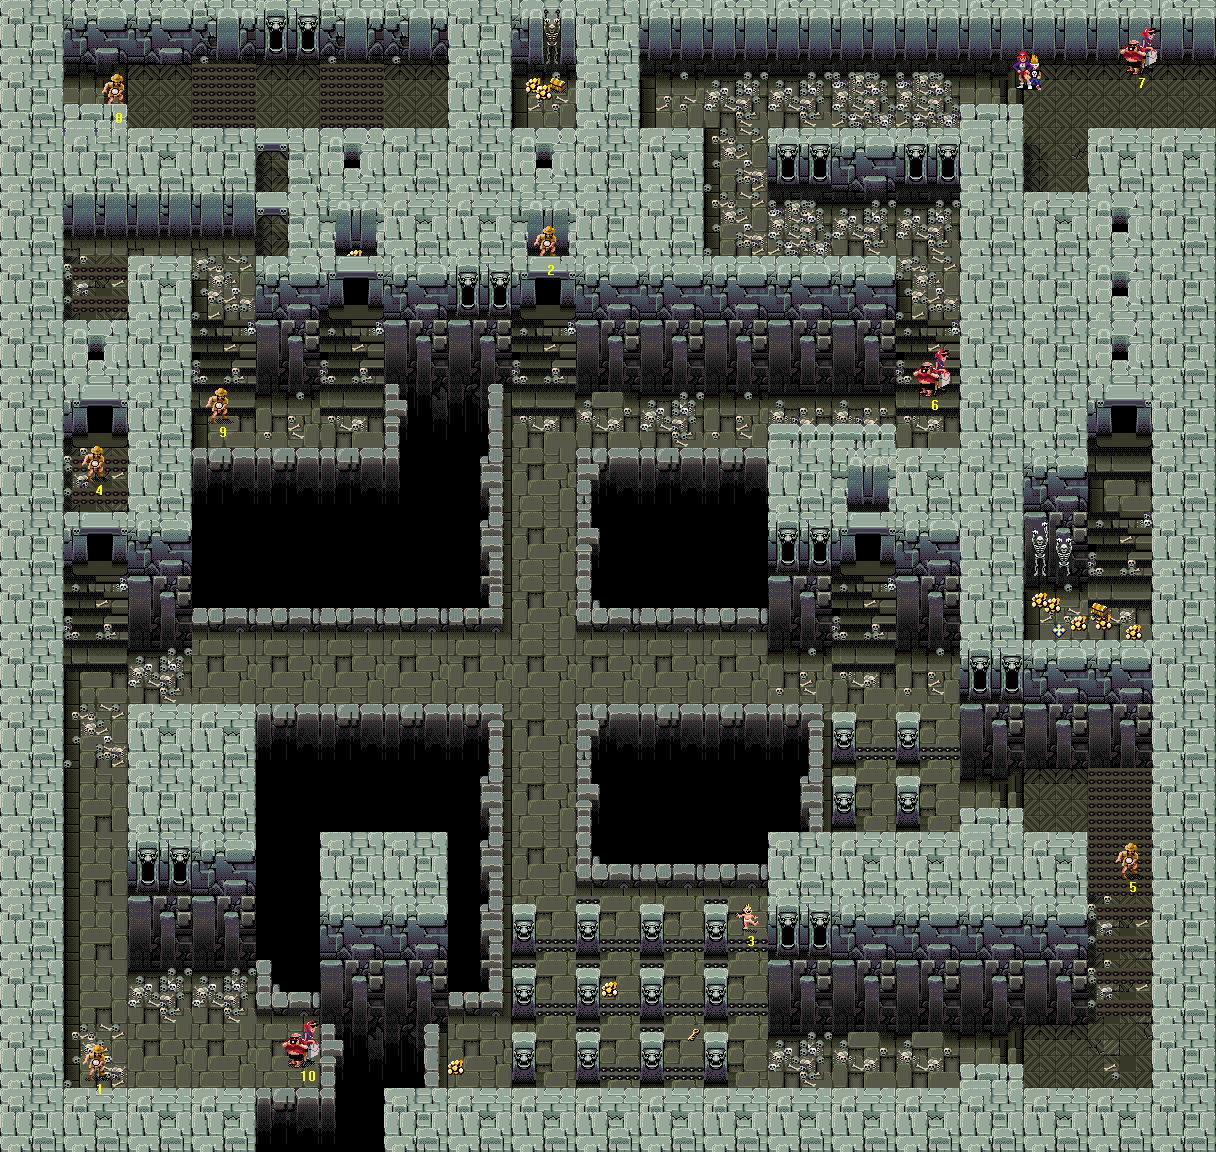
Difficulty: 7/10
Pretty difficult. There are several hard-to save Victims, including one particular Explorer standing in precisely the worst place possible. This level is also the first time that a meaner variety of Zombie starts making itself noticed (although it actually first appeared in small numbers in the southeast corner of level 3). While its appearance is the same, this one won't wander off if you run away, but will keep on going after you at top speed.
Monster List
- Jelly Blobs (intensity: ranges from very low to medium, location: in two places)
- Werewolves (source: from Tourists after 37 seconds: #'s 7, 6 and 10; one on its own which may appear after about 90 seconds, at a particular point in the northwest of the map)
- Zombies [Normal and Vicious] (intensity: ranges from low to very high, location: everywhere)
Important Pickups
- Two Pandora's Boxes
- Ancient Artefacts
Bonuses Available
- Victim collection bonuses
Best Place To Score Bonus Points
The chamber southwest of where you start, with the copious piles of bones all over the place. Zombies spawn there very quickly indeed. This level is a goldmine if you want Extra Bonus Victims or Players.
Walkthrough
it is another of those levels where the Tourists are walking (well, standing) time-bombs. This time they will wait 37 seconds before morphing into Werewolves. you have no worries unless you have ten victims, and if you do, then just start walking right away and you can get them all with ten whole seconds to spare. You could use the Speed Shoes from the off, though, if you have not played the level before and want to be sure of getting it right. I have written one all-purpose walkthrough to cover all eventualities, with the pickups coming last so as to protect the Victims. I do not think that really inconveniences anyone very much, as I've kept backtracking routes to a minimum.
East of where you start are Tourists (7). After you have them, prime your Water Pistol, head west, south, east through a hall with gargoyle decorations to the north, and south again for more Tourists (6). Now head west, south at the T-junction, west at the crossroads, south again at the second T-junction and once you have the Explorer [A] in the southwest corner of the level, east for the final pair of Tourists (10). You can go back up north to that second T-junction now.
If you have nine or ten Victims, then you should at this point make sure you are not low on health. (If you have three bars or less, use a First Aid Kit.) Use a pair of Speed Shoes and then immediately switch your special item to Pandora's Boxes - that's one, two, three, four, FIVE presses of the A Button if everything's well with your item reserves. Rush north through the gate, try to collect an Explorer (4) as you pass - it does not matter if you miss him - and then just belt northwards over the spikes - it does not matter if you lose health, either. If at any time a Zombie appears on the other side of the wall, anywhere near the Explorer (9), you should use a Pandora's Box. Once around the wall, rush south spraying Water Pistol fire and quickly save the Explorer (9).
Of course, if you have eight or less Victims, you can take the whole thing at a much more leisurely pace. Stroll north, wait patiently at each set of spikes and progress past them without losing your health, if you can. After you have got to the other side of the spikes, however fast you did it, go to the south past the wall, to where the Explorer is (or would be), and then east and north for a Bonus Points Pickup. When you have that, go south, west, north, northeast through a small passage, and then west over a bed of spikes. You will find an Explorer (8) in the northwest corner of the level.
Return to the crossroads in the middle of the level by these directions: east over spikes, south, west, straight on, south over four strips of spikes - collect the Explorer (4) if you did not get him earlier - and east at the T-junction. Once at the crossroads, take the northern path. Ignore the turning east (a Werewolf might appear to the west at this point) and collect an Explorer (2) in a small alcove.
Head south again, past the T-junction and crossroads, and once the path opens up, go to the northeast corner of the pillared chamber (sticking close to the north side of the north row of pillars in order to avoid being held up by the spikes) and rescue a Baby (3). Southwest of the Baby is a Bonus Points Pickup, southeast of that is a Key and in the southwest corner of the room is another Bonus Points Pickup. Exit the room through the passage leading out of the southeast corner.
North from the southeast corner of the level is another set of spikes. An Explorer (5) is standing on them, but he's immune, so do not worry; head over to him carefully. Take heed of the Jelly Blob which has probably appeared by the time you see him, though. When you have this last Explorer (5), the Exit Door will appear; stay away from it (and head northwest off the spikes) if you want the goodies listed below, otherwise pause the game before going forth. That is right, there are two Tourist-Werewolf levels in a row.
Go north past a strip of spikes, then west to find yourself back at the crossroads. Take the west route, and head north at the T-junction. Past the spikes (a Werewolf might appear to the southeast at this point, if it did not appear earlier), head northeast to come out between two beds of spikes, where you were before. If you walk onto the eastern bed of spikes and then walk south into the wall, you will enter a hidden passage. Go east when you come to the south wall, then press northeast to come out in a little room containing two Bonus Points Pickups and a Pandora's Box.
To exit this room, go south, west, and press northwest to reappear at the spikes (timing!). Return to the crossroads by heading west, south through a passage, west, straight on, south over strips of spikes, and east at the T-junction. Take the north path (a Werewolf might appear to the west at this point, if it still hasn't arrived) and go east at the T-junction. Prepare your Water Pistol, because it is fierce in the next area. Take these directions when you come to walls: north, west, north and east. Where the piles of bones finish, go into the alcove to the south and then walk southeast into the wall, then south along another secret passage. At the end are a lot of Bonus Points Pickups, one pickup of Ancient Artefacts and another Pandora's Box.
Assuming that the Explorer (5) was in fact the last Victim you collected, you can find the Exit Door again by following these directions: north, northwest, west, south, east, south, west, south, east, southeast over a strip of spikes, east. The Exit Door is probably on the big bed of spikes. As mentioned above, you should read level 15's preamble before proceeding.
Level 15: Dinner on Monster Island
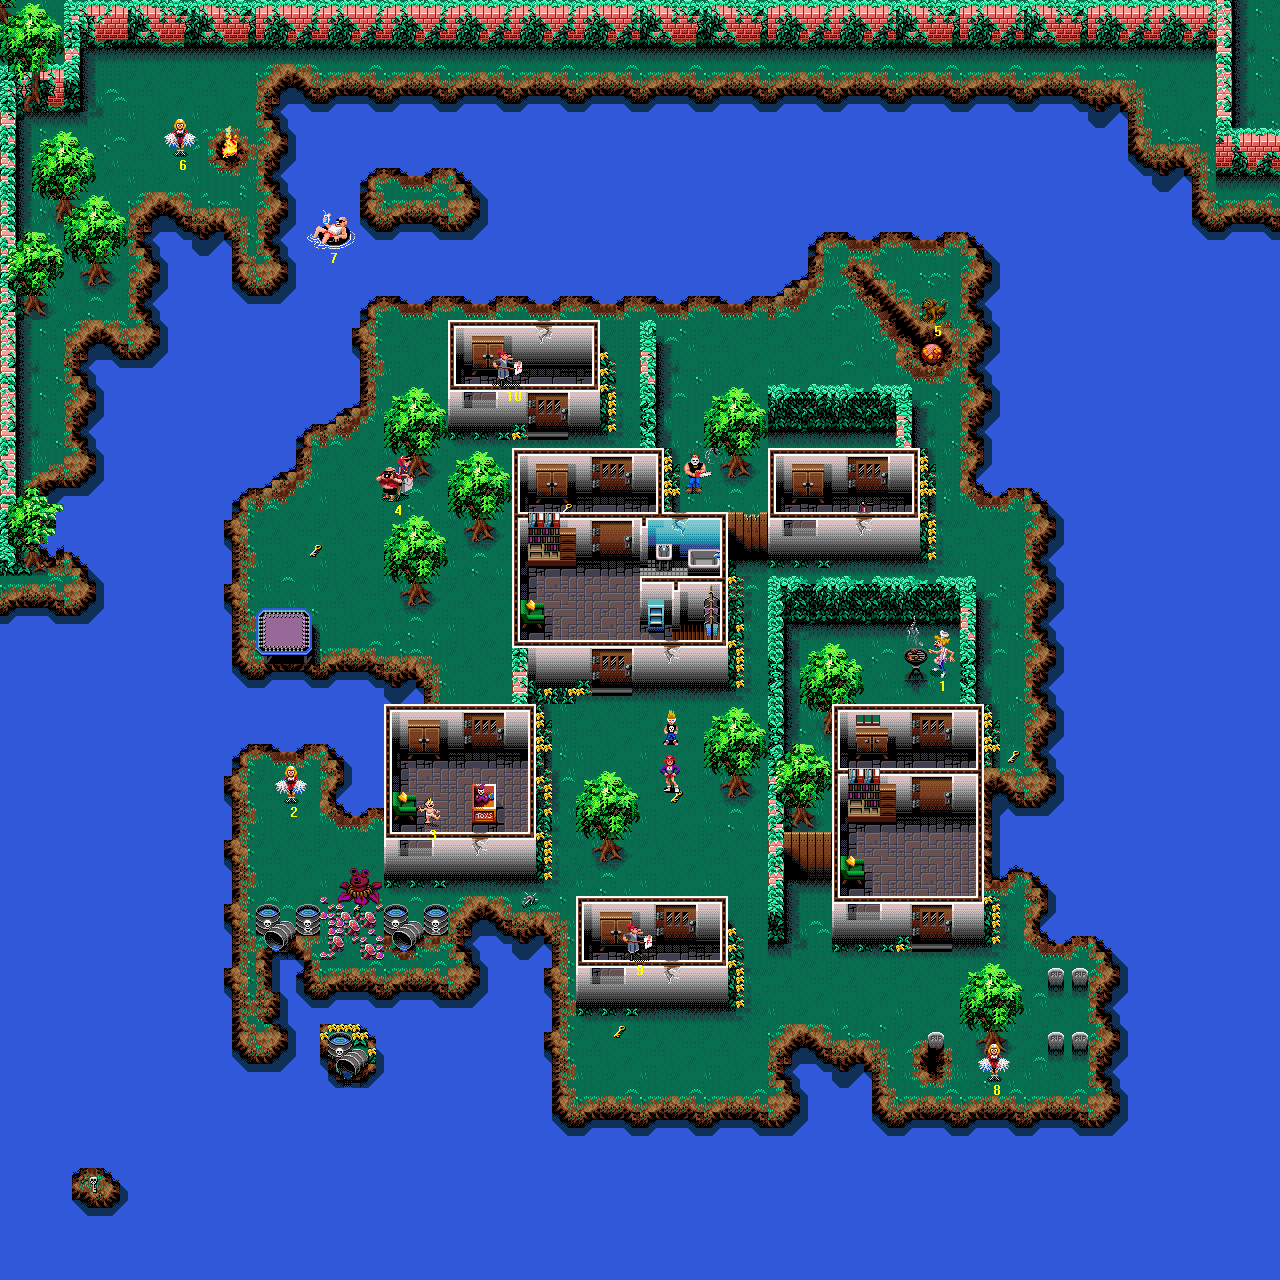
Difficulty: 3/10
Mostly easy. One Victim in minor peril.
Monster List
- Jelly Blobs (intensity: low, location: in one place)
- Lumberjack (one)
- Pod Plant (one)
- Squidmen (intensity: ranges from low to medium, location: patchy - wherever there is water)
- Werewolves (source: from Tourists only after 38 seconds: #4)
- Zombies [Vicious] (intensity: high, location: in one place)
Important Pickups
- Skeleton Key
Bonuses Available
- Victim collection bonuses
Best Place To Score Bonus Points
The Zombie zone on the southeast of the island.
Walkthrough
This level has one pair of Tourists who will change into Werewolves, after the extremely forgiving time limit of 38 seconds. it is not just for the high-achievers any more, though, because this time the Tourists are Victim number four. Just read through paragraph 2 below, headed "TOURIST-WEREWOLVES", and you will be fine.
Go south for a Key, then southwest for Weedkiller. Switch to your Bazooka and blast through a wall to the north (the recoil forces you backwards into the water! No worries, just climb out again). Collect a Baby (3), open a Cupboard and head north until you come to our Tourist Couple (4) to the northwest. You should not have any problem collecting them before they transform.
Go southwest for a Key, but ignore the trampoline and go back northeast. Ignore the Teacher (10) for a moment, go east and then wait for a Lumberjack to knock his way through the hedge or the house towards you (or go around yourself). Attack him by walking into him while using the Ancient Artefacts; when he explodes, go over to the Teacher's (10) little hut, collect her and open a Cupboard. Head into the larger building to the south, collect a Key and open another Cupboard. Exit the house and head over to the northeast of the island, where you will find a Dog (5).
Now go southwest around the hedge and into another little hut to find a Fire Extinguisher and a Cupboard. Go back around to where the Dog (5) was, walk south to collect a Key, then Bazooka-blast through the hedge (from the north if you want to avoid falling in the water) for a Barbecue Guy [A]. Go south through one door for a cupboard, then hurry through two more doors and further south to a Cheerleader (8). It won't hurt to be ready with your Water Pistol for some suppressing fire at this point - Zombies could be ready for the kill.
Go west until you find a Key, then round to the north side of this next hut and in for a Teacher (9) and a Cupboard. Out of the hut and west is a Pod Plant for you to mow down. (It hides a Key, but if you wade right in, you might pick this up without noticing it.) Head northwest for a Cheerleader (2), then south to the end of the long peninsula, and jump into the water. Swim southwest to find a little blob of land with a Skeleton Key on it.
After you have the Skeleton Key (it is needed for level 22), swim north along the side of the main island until you come to another land mass to hop out onto. North is a Cheerleader (6); you can put out the fire with the Fire Extinguisher for a Key. Collect the Swimming Pool Guy (7) in the water to the east, and then jump out of the water anywhere to have the Exit Door appear. Switch your weapon to the Martian Bubble Gun before you leave, as the next level is intense from the start.
From the Depths of the Earth: Level 16: Ants
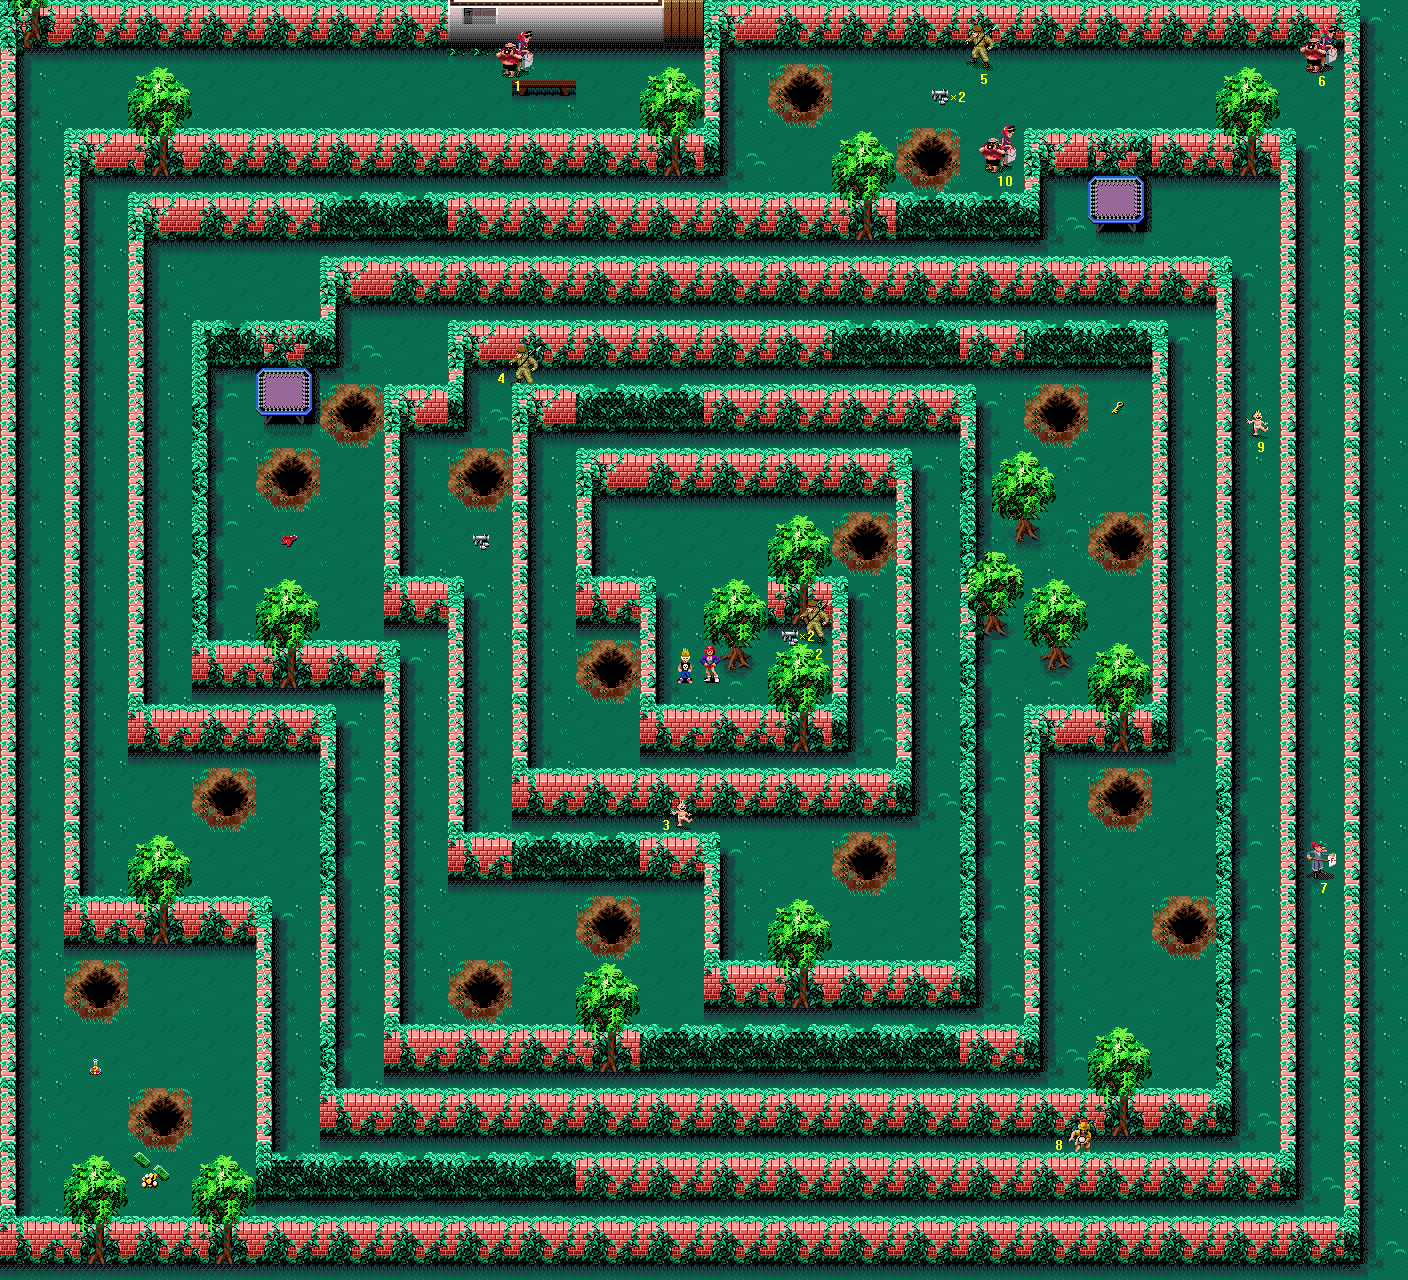
Difficulty: 3/10
you will be fine if you stay alert for those Ants. they are pretty fast, but the Victims are not in any real danger. Pay attention in case desirable pickups are dragged away and hidden by the Ants!
Monster List
- Ants (intensity: ranges from low to high, location: everywhere)
Important Pickups
- Bazookas
Bonuses Available
- Victim collection bonuses
- No Bazooka Fired Bonus - 1000 points
- Extermination Bonus - 1000 points
Best Place To Score Bonus Points
The southwest. EXTERMINATE! EX-TER-MINATE!
Walkthrough
East are a Soldier (2) and a Bazooka. Collect both and then walk around the wall to the north. You will be abruptly challenged by Ants; remember that the Martian Bubble Gun is the absolute best weapon to use on them. If you have none, it is the Ancient Artefacts, or Bazooka fire. Continue walking clockwise around the passage. After one and a half complete circuits, you come to a Baby (3), and further on from that is a Bazooka pickup; a Soldier (4); a Key; a Water Pistol; and a trampoline. You cannot collect this, but you can use it to bypass an empty loop in the passage, so jump north.
After getting over, switch to the Pandora's Boxes, then head east to another trampoline. If you see an Ant appear in the next loop to the north, use a Pandora's Box to kill it, or it may get one of the Victims. Use the second trampoline to jump west (you should collect specific Victims in this outside loop first, as they are in more danger than the other two left in interior loops). Collect a Tourist Couple (10), two Bazooka pickups occupying the same position, and another Soldier (5) before an Ant appears to attack them (or take one of the Bazookas away).
Keep the Pandora's Boxes ready for use - you will soon be walking past a Baby (9) in another loop of the passage, who may be attacked by Ants. Walk east, collect more Tourists (6) and follow the passage south until you find a Teacher (7); then turn around and head back north again. You will pass the Baby (9) on each journey, and the Teacher (7) is in some small danger, so have your Martian Bubble Gun and Pandora's Boxes ready for action.
Now, walk around the passage anticlockwise, and keep to the inside of the loop while near the southwest corner of the level - this prevents the Ants from carrying away the items there, to some extent. Along the south you will find an Explorer (8), and further on is that Baby (9) you passed earlier. (Note that if you do not care about the No Bazooka Fired Bonus, you could just blast through some hedges that are to be found at the north side of the outside loop, and take a detour in the clockwise direction for these two Victims.
You will come to that second trampoline again - use it to jump north, back into the outside loop. Head around clockwise; after a little walking you will find an open area containing some items - three Bonus Points Pickups and a Mystery Potion. After you have obtained these, head north, then east, and you will find a Tourist Couple [A] at the opposite end of the passage from where you started. Return south if you want to hunt Ants for the Extermination Bonus, but remember not to use the Bazooka if you want to earn the No Bazooka Fired Bonus.
Level 17: Office of the Doomed
Difficulty: 7/10
Spiders, Evil Dolls and Zombies are having a get-together in a haunted house (or office, I suppose). The majority of this level's Victims are in danger of getting killed. Be very careful, and resign yourself to the fact that they'll probably be decimated the first time you play through. Also, be warned that this level is all the more difficult if you start on it using a password, and I do not recommend it (though I've most generously provided a walkthrough to follow if you really want to, anyway).
Monster List
- Evil Dolls (intensity: medium, location: in the north and northwest)
- Fire Babies (from Evil Dolls only)
- Mushroom Men (intensity: low, location: one place)
- Spiders (intensity: medium, location: north and west)
- Werewolves (source: from Tourists only - after 9 seconds: #'s 9 and 10)
- Zombies [Normal and Vicious] (intensity: ranges from low to medium, location: in the south and southeast)
Important Pickups
- Monster Potion (you will need Bazookas or similar)
- Bonus Level Pickup (ditto)
- First Aid Kit
- Ancient Artefacts
Bonuses Available
- Victim collection bonuses
- Secret Bonus - 2000 points
Best Place To Score Bonus Points
In the southeast, where all the Zombies are. It has to be said that this is not the best of levels for this purpose.
Walkthrough
But yes! it is another of those Tourist-Werewolf levels! This time it is the last two Victims again, so if you are underachieving, your load will not be added to. If you start on this level using a password, then do start with ten Victims nevertheless, as you can collect one of the Tourist Couples (10) and avoid letting the other pair, #9, transform until nearly every other Victim is saved. If you want to collect Victim number nine, you should be well-advised to use the Speed Shoes, and if you want both, you will certainly need them. (Switch to the Speed Shoes before exiting level 16 if you plan to use them. Otherwise, you ought definitely to start with your Pandora's Boxes prepared.) The other Victims in #10's area are a pain, as well.
Playing since level 13 or earlier)
Go northeast straightaway, through the door, and to the corner. If you are an expert you should try and get your special item to the Pandora's Boxes while doing so - that's one, two, three, four, FIVE presses of the A Button if everything's swell with your item reserves - as another Victim could cop it while you go after the Tourists if you do not let out a blast. Hug the wall going east - you run all the more risk of certain neighbours to the north dying if you get them on-screen too early - and go northeast once past the spider's web to the north. Get the Tourists (10) and head quickly to the southeast. (If you have nine Victims or less, just carry on going east and enter this corridor ASAP.) Go down to the end of a passageway and to the east, and get those Tourists (9) as fast as you can.
do not hang around here - the Zombies are liable to attack a Teacher (3) to the south, past the wall. Use a Pandora's Box if things get desperate. Head west though for a more easily accessible Teacher (8). Switch your weapons to the Water Pistol and the Pandora's Boxes. Now go back up that passage to the east and directly you are out, head northwest to collect a Baby (7). Spray wildly with your Water Pistol while approaching; if a Spider appears the other side of the wall, where the Teacher (2) is, there's no time to lose! Get it with your Pandora's Boxes! Immediately you have the Baby (7), go next door (south, west, and northeast) and save that Teacher (2)! (If you got all five Victims so far and none have died, then that really is good work...)
Now things can get a little more relaxed (thankfully)... head south, through the gaps in each line of spider webs, and west to find a Baby (4) on the west side of the level. North from this point is an Explorer (6); pick up the Water Pistol ammo to his northwest while you are in the area. Walk south again, then further south from where the Baby (4) was, around some bookcases, to get to a second Explorer (5). Go round more bookcases to get Water Pistol ammo (again); now skirt the southern wall and head east. As soon as you can, go north and then collect the First Aid Kit that's through the door to the west.
The door to the north leads back to the area where you started; you could go all the way back around using the long route you just took, but I wouldn't think it worth bothering. So go through, then head east through a tiled area. At the end, go north for one Teacher (3) then south for another [A]. Unless, of course, the south one is under more threat, but then you should know when to be flexible by now.
Pickups
East of the southern Teacher (A) is a Key, and northeast of the other is a Chest. Also, if you omitted it before, there's more Water Pistol ammo at the entrance to this area. Head back west through the tiled area and at the end, northwest to find a Fire Extinguisher pickup. Walk east from there, past the door and then northeast to obtain a Key; head south around the desk, then east and you will find an area with two locked storage rooms that will provide you with Tomatoes, Ancient Artefacts and one replacement Key for your troubles.
Return to the big room where the Fire Extinguisher and Key were, and make use of the southern exit. In the northeast corner of this next room, you will find a Chest. Leave this room the way you came in, and use the northern exit from the starting room this time. Once out, head northeast around one web, and then northwest into an office that yields a Cupboard and a Mystery Potion. Return southeast and head north into the next room for a Cupboard; then go southeast, and south down a corridor.
At the end of this corridor you should take the east turning, and get your Bazooka out. North of here are two areas blocked off by spiders' webs, one containing a Monster Potion, the other a Bonus Level Pickup. Needless to say, if you can get to either, you should. (And bear in mind that if you can get to just one, it should be the Monster Potion - because then you could get to the other if you wanted, as well, and have some monster power left over.)
you have got everything now, so return to the Exit Door and leave. Remember where it is? No? Oh dear. Well, if you are reluctant to (or cannot) Bazooka-blast through the wall to the south, it is southeast, west, north, southwest, west along the wall, south through the door, south and southeast, east through the tiled area, and then south or north, depending on which Teacher you saved the last.
Starting this level using a password
TOURIST-WEREWOLVES (plus two other Victims nearby, who are in danger)
You will be able to get to Tourist Couple #10 in time, so use the appropriate password to begin with ten Victims. Pause the game whenever reading the instructions in these first two paragraphs, in order to waste the absolute minimum of time (as you have not got much). From your start point, head east and then northeast around a desk to find a Key in an alcove. Head south and west over to a door in the wall to the north. Go through and head further north under a wooden beam; then go directly east, hugging the southern wall, and you will come to a partition wall.
Head north at this point to find Tourists (10) between a couple of desks. Collect them and then go west around the desks to reach a Baby (7). it is not over yet - head south, west around a giant cobweb, and northeast over to a Teacher (2). As you are going around the obstacles between you and her, you should feel free to fire on any Spiders which are near her - not that you are likely to hit them, as Spiders have about the most erratic way of moving of any enemy in the game.
Head south from the Teacher's (2) position and then southeast between a couple of giant cobwebs. Head southwest over to the door you opened earlier, but do not go through - skirt the wall and continue west. you will find a Baby (4) in an open space north of some bookcases. Collect him and head north under an arch, and then further north on the eastern side of a row of desks. You will find an Explorer (6) past a desk on your east. Head northwest from him to find a Water Pistol behind another desk.
Head south and out of this room again through the row of arches. In the open area where the Baby (4) was, head southeast between a couple of bookcases into the library area. Once in the first bay of the library area, head southwest, southeast and southwest again to find another Explorer (5). Return north around all those rows of bookcases to where the Baby (4) was, and head east back to the first door you opened (the only door you have yet opened, as it happens). Head south in through there, and then southwest to find a Fire Extinguisher.
Walk southeast into a tiled passageway, heading east from a locked door to the south. you will find a Water Pistol where the passage opens out into a large office; head quickly south from there to save a Teacher [A]. Go east from her location to find a Key between two desks. Return west to the end of the row of desks and then north over to another Teacher (3) who's standing a little south of a fireplace. Walk between the two desks to the east, and over to the northern wall to find a Chest to open. The Tourist Couple (9) to the north will have transformed into Werewolves by now; head southeast to move the screen away from the Teacher (8) to the northwest, and wait for the Werewolves to jump over to you. When they do, kill them with your Water Pistol (well, you cannot get rid of them, and you have not got anything else to use on them).
Head west, and out of the large office area via the tiled passageway through which you entered. Out the other end, head northwest around a giant cobweb, and east. Pass the first door you see to your south and enter the second one along. Inside here are a replacement Key, and Ancient Artefacts. Exit this little storage closet and head west to re-enter the large open space where you began the level. Head through the door to the north and then walk northeast, around a corner in the partition wall, and then east until you come to another wall blocking your way. Walk north and east around this wall, and south down the passageway. At the far end, enter the little closed-in area to the west to find a Teacher (8).
Pickups
Head north back up the passageway, and once out of it head to the northwest corner of the room to find a Cupboard against the wall. Walk south from the Cupboard, west past a giant cobweb to the north, and northwest into the far corner of this next office area. There is a Cupboard here as well, and east of it is a Mystery Potion. Pick up the Potion and then head south, past a couple of rows of giant cobwebs, over to a corner in the southern wall. Go west from here to arrive north of the library area again. Head south through the library, around all the rows of bookcases, and you will find a third Water Pistol. Hug the southern wall of the level and head east until the corridor you are in opens up into a large room.
Head north over to a door in the northern wall, but do not open it - instead, open the one to its southwest, to obtain a First Aid Kit. Head out of that little cell and east along the north wall, and you will find a Chest in the northeast corner of the room. Open it, then follow these directions to return to the Exit Door: west, southwest, west, north past the rows of bookcases, east, northeast at the open door, east once you are past the first row of giant cobwebs, and south down the corridor. You now have the choice of gambling for an opportunity to collect the Bonus Level Pickup, and a Monster Potion as well.
The gamble in question is to use your Mystery Potion now in the hope that you will turn into the Purple Monster, and be able to get through the giant cobwebs that block off the two items. If you drink it and you are successful, then head east from the Exit Door, past the corridor heading north, and then head north in the open area to find the section of the level where the two pickups are located. If successful, you should also go and get Tomatoes from the storage cupboard you ignored earlier, in favour of collecting Ancient Artefacts and a First Aid Kit. That's east of the area where you started the level.
Bonus Level: Someplace Very Warm
Difficulty: 3/10
you will easily save all the Victims, but the pickups are another matter. they are strewn around pools of lava, guarded by Fire Babies that constantly spawn inside. A Monster Potion will help - as will dexterity and speed of thought if it wears off.
Monster List
- Fire Babies (intensity: medium, location: in the northwest area with lots of lava pools)
Important Pickups
- Three Pandora's Boxes
- First Aid Kit
- Extra Life
Bonuses Available
- Victim collection bonuses
Best Place To Score Bonus Points
You could use Soda Cans against the Fire Babies, but this will be difficult due to the random way in which they move about and also because the Soda Cans are not much defence when they get near you and come after you. Using the Monster Potion to transform into the Purple Monster and then wandering around punching them out of existence will allow you to rack up points surprisingly quickly, but you should not use more than two Potions for this because you will certainly want them later on.
Walkthrough
Walk north for Tourists (7), then west for two Cheerleaders (2 and 9) and an Explorer (8). Walk south and then turn to head west for another Explorer (6), a Baby (5) and a Teacher (4). North of here is a Baby (3), and two Soldiers (A and 10) who stand right at the start of a somewhat more dangerous area containing pickups.
Pickups
Move to the northwest corner of the clear area in which you are standing - there should be a rock wall to the west and a lava pool to the north - and then use a Monster Potion. you will be able to walk across the lava pools, and defeat each Fire Baby with a single punch. Now follow the following directions:
- North to a Bonus Points Pickup.
- Southeast to a Mystery Potion.
- East to a Pandora's Box and Bonus Points Pickup occupying the same space.
- North to a Pandora's Box.
- West to Water Pistol ammo.
- North to a Pandora's Box (again).
- Northeast to a First Aid Kit.
- East to a Bonus Points Pickup.
- Southeast from there to a passageway, which leads to a Weedkiller pickup and an Extra Life.
- Exit the passageway and then head west, skirting the wall to the south. Head south at the earliest opportunity to find a Key.
- Carry on to the south.
- Find a Bonus Points Pickup to the east when you come to the end of a short passage.
- Finally, head southwest to find the Exit Door again, near where you collected the Soldiers.
If the Monster Potion wears off before you finish, then unless you have not got anywhere near the end of the above route, it is probably not necessary to use another. Experienced players should be able to collect all the items before the time runs out.
The Terror is Back in: Level 18: Squidmen of the Deep
Difficulty: 4/10
it is a secluded beach, peaceful and beautiful except for the local wildlife that is not indigenous Squidmen have this level for themselves, and it pretty much provides a showcase for everything they can do to make your life difficult. This includes, but may not be limited to: appearing suddenly next to a Swimming Pool Guy and killing him; jumping out of the water to land right next to a Victim, and killing him; and killing Victims while you jump into and out of the water. If you are prepared, though, with a little luck you should come out of this level with not many fewer Victims than when you entered.
Monster List
- Squidmen (intensity: from low to medium, location: everywhere)
Important Pickups
- none
Bonuses Available
- Victim collection bonuses
- Fish Fry Bonus - 1000 points
Best Place To Score Bonus Points
You can beat up Squidmen and receive the Fish Fry Bonus, or you can... not. they are hard to fight without losing health, they do not give good value in points per water pistol shot (and will frequently jump out of the way), and it takes a while, so I really do not think it is worth it, personally.
Walkthrough
East of your start point is a Cheerleader (3). Northwest of her are a pair of Tourists (2). After picking them up, head south again until you see palm trees to the southeast. Turn on your Victim Radar and move so that the dot to your west is due west, rather than at all north or south of you. At this point, use a Ghost Potion, and then walk due west (ghosts can walk over water) and collect the Swimming Pool Guy (9).
Head north from him; you will come to a jetty where there is a Baby (8) - be careful not to walk into the posts, as the ghost is unable to walk through them. North of the Baby, back in the water, is a Swimming Pool Guy (7). After you have him you should go due east, then northeast and through a passage when you reach the coast. Walk onto the water at the end and immediately collect the Swimming Pool Guy (10) to the north; followed by the Tourists (6) to his north.
Head west until you reach another jetty; then jump into or walk onto the water that's to the south. You need to approach a Victim quickly, so jumping in near him will not do. If you are still a ghost, then you cannot lose your ghost status while on the water, so do not worry about that. Once in or on the water, head west until you see the end of the jetty to the north, then go north past it and rescue the Swimming Pool Guy (5). Hop out onto, or just walk onto, the dune island. If you are still a ghost at this point then wait until you return to human form before proceeding - you will be approaching a Victim on land, and so if it wears off before you reach him, you will be delayed by a couple of seconds, which could prove fatal for the Victim.
When you are ready, head north along the island, and rescue a Baby [A] standing at the far end. Squirting your Water Pistol as you approach will do you no harm, but could save the Baby's skin, so I'd recommend it. Dive in to the east, and swim directly to shore. Once out, head north to the final Victim, a pair of Tourists (4).
Level 19: Nightmare on Terror Street
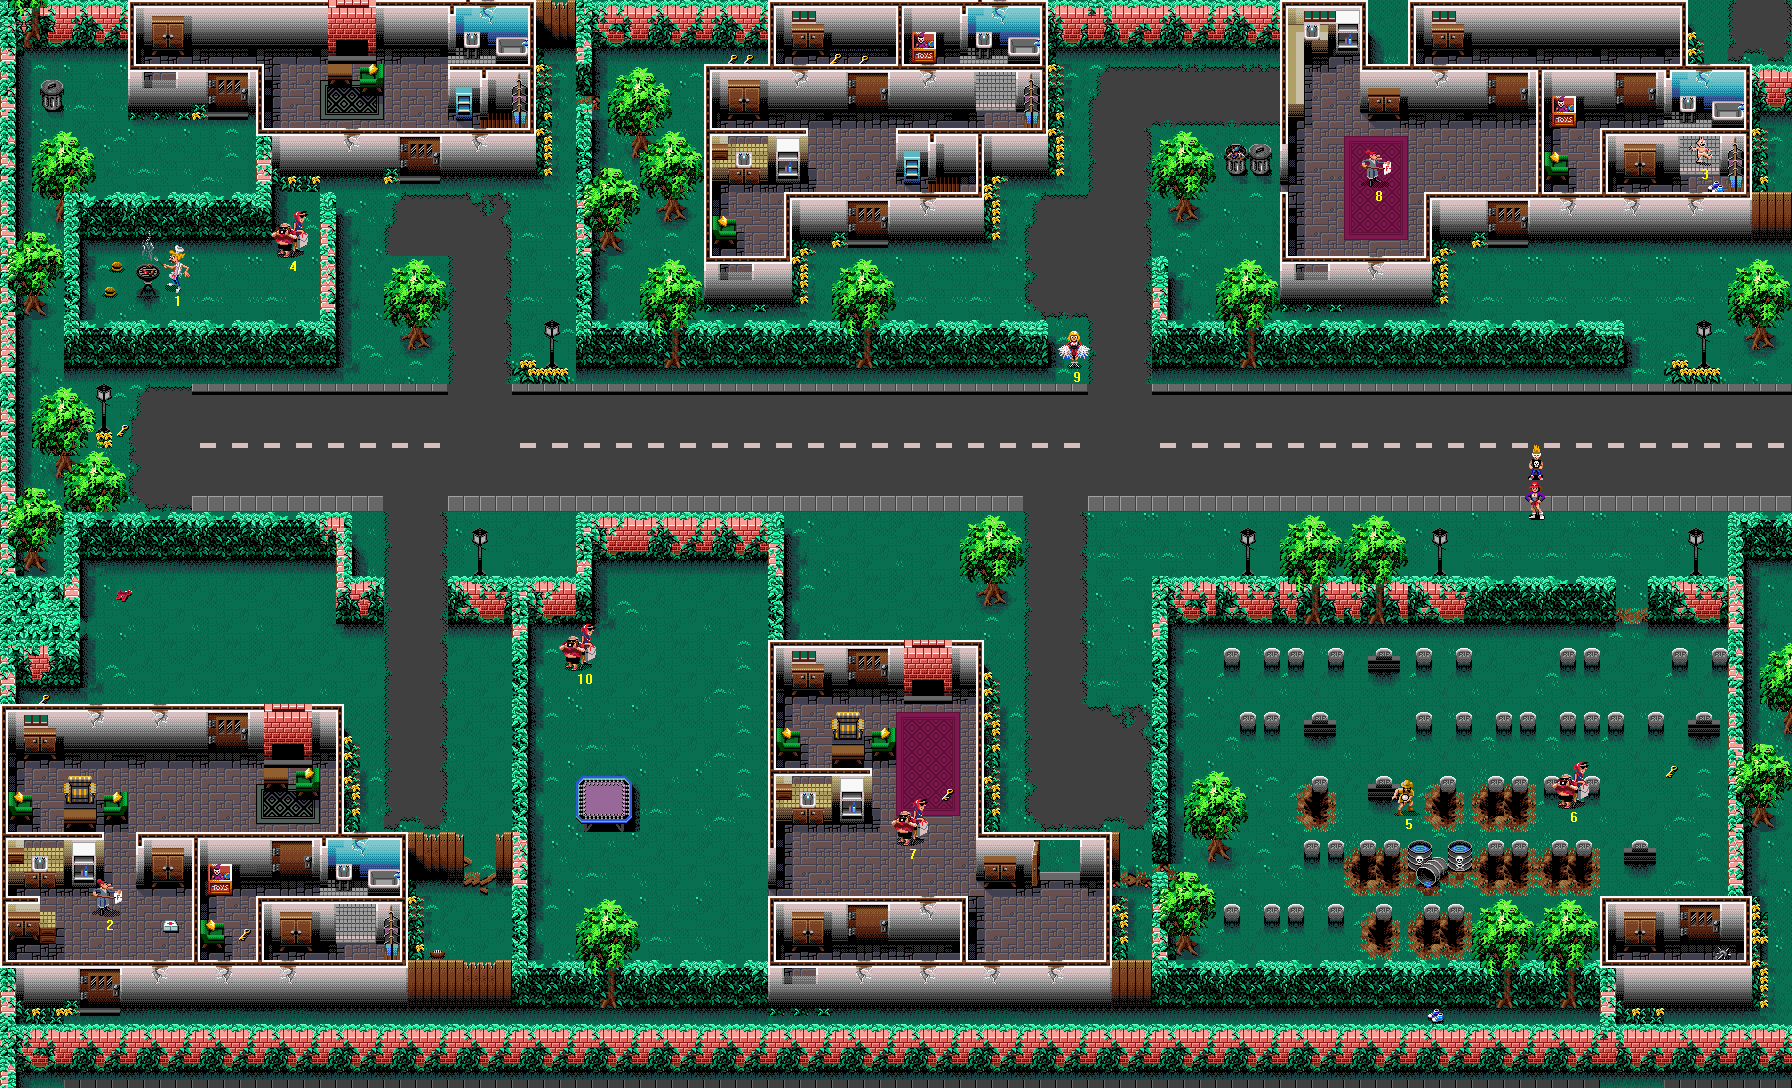
Difficulty: 5/10
You should not have a huge amount of trouble with this level, provided that you get it right with the Tourists. One other Victim needs care to make sure she gets out alive, but apart from her and the Werewolves you have no worries. There are a lot of (fairly mundane) items though, hence the size of the walkthrough.
Monster List
- Werewolves (source: from Tourists after 38 seconds: #'s 6, 7, 10 and 4; spawning randomly after about 60 seconds, intensity: from low to high, location: everywhere)
- Zombies [Vicious] (intensity: high, location: along the centre road)
Important Pickups
- Two pairs of Speed Shoes
- First Aid Kit
Bonuses Available
- Victim collection bonuses
Best Place To Score Bonus Points
Go to the road in the centre of the level and rake it in, massacring the Zombies. The constantly spawning Werewolves will cause you some problems, mind. Try using the Weedkiller on them if you use up all your Silverware.
Walkthrough
it is those Tourist-Werewolves again! You will need to move around the neighbourhood very efficiently to save all four of the Tourist Couples from a fate worse than... well... actually it is roughly equal to death with you around, I suppose. Use of the Speed Shoes is not necessary, but if you are inexperienced or unconfident then have them ready for use as soon as the level loads up. Of course, if you have four or five Victims then you could make absolutely sure of getting your single Tourist Couple by ignoring the first section of the walkthrough below, and instead heading west along the road, then northwest and round the wall at sight of the first lamppost to the north.
Go southeast, through a hole in the hedge, and south into the graveyard. After passing three rows of gravestones there is a Tourist Couple (6) to the west, and further on, an Explorer (5). Continue west, through a hole in the western hedge, and around to the north and into the open door. Inside this house is another Tourist Couple (7), to the northwest. After you have them, head out the western exit. Go northwest, ignoring the trampoline, to find Tourists (10), and then jump over the wall using the trampoline (to the south). Join the tarmac path and head north until you come across a tree, directly in front of you, on the other side of the road; then head northwest, around the end of the wall, and rescue the fourth and final Tourist Couple (4). There is a Barbecue Guy (A) to the southwest, whom you should also collect.
If you need a health refill, pick up the Burgers lying on the floor near the barbecue stand; each provides a maximum of three bars of energy. Head northeast out of the small yard, then head south and follow the road west. At the end is a lamppost with a Key at its base. Having picked that up, head northwest into the passageway and go to its end; there is a Bin to open. Enter the door and open a Cupboard, then exit again. Head southwest into the passageway and then south to its end, and continue south past the road into another. Walk southeast through the ivy tunnel, and you will find a Water Pistol as you exit. Also, southwest of the Water Pistol is a Key.
Enter the house to the south using the door to your east. As soon as you enter, head southwest to pick up a Teacher (2). After you have her, collect a nearby First Aid Kit and then open all three Cupboards. Head northwest out of the kitchen to find another Cupboard; then over to the eastern side of the front room, and through the door to the south. In here you can find a replacement Key, and another Cupboard. Leave the house using the entrance by which you came in. Head east, and southeast when you come to the path leading north again. South through the break in the fence is a small area containing an American Football pickup. Go north, along the path, and once on the other side of the road, northeast. Go through the break in the hedge, and northeast to find two Keys in a corner.
Leave the cul-de-sac and head south past trees, then east when you reach the hedge. Enter the house through the door to the northeast. Inside and to the west are two Cupboards; to the north is another locked door, through which are two Keys and a Cupboard. Head south out of the house, then switch your weapons to the Water Pistol and Pandora's Boxes. Walk southeast and across to the end of the hedge, where you will see a Cheerleader (9). Collect her quickly; should a Zombie or Werewolf get near her, you will have to decide whether it is best to shoot with the Water Pistol or open up a Pandora's Box.
From the Cheerleader, go northeast, past a wall, and open up a Bin. Enter the large room in the house to the east, rescue a Teacher (8) and open up the Cupboard to her north. Open the door into the passageway to the north, and check out another Cupboard; then walk east along the passageway and south through another door. In the next area, collect a Baby (3) and a pair of Speed Shoes, and open one more Cupboard. You can get another pair of Speed Shoes if you hang around, which you will find useful.
Pickups
Blast your way out southwards using your Bazooka. Be careful not to launch yourself backwards into the Exit Door! Head directly south, across the road and in through the hole in the fence, back to the graveyard. Walk south and you will find a Key slightly to the east; south of this Key is a little shed containing a Cupboard and some Weedkiller. Exit the hut and head southwest; Bazooka blast through the hedge to reach a second pair of Speed Shoes, in the alleyway.
Exit the alleyway and head west, through that gap in the fence that you used before and out into the little passage. Head north and around the wall, into the house. Open a Cupboard that's to the west of the entrance, head north past that for a Key, then go south again and open a door into a small room containing a Cupboard. Exit and go north for another Cupboard; and walk around the partition wall to head north, and find one final Cupboard at the northern end of the house.
Head southeast and exit the house the way you came in; if you now head persistently northeast you will come to the break in the wall you made earlier, inside which is the Exit Door. You can leave now - but bear in mind that those Burgers around the barbecue stand are good for what ails you, if you left any. And as I said, unless you are playing through for the first time and you do not want anything spoiled, you should read the preamble to level 20, so that you know the best way to start the level.
Level 20: Invasion of the Snakeoids
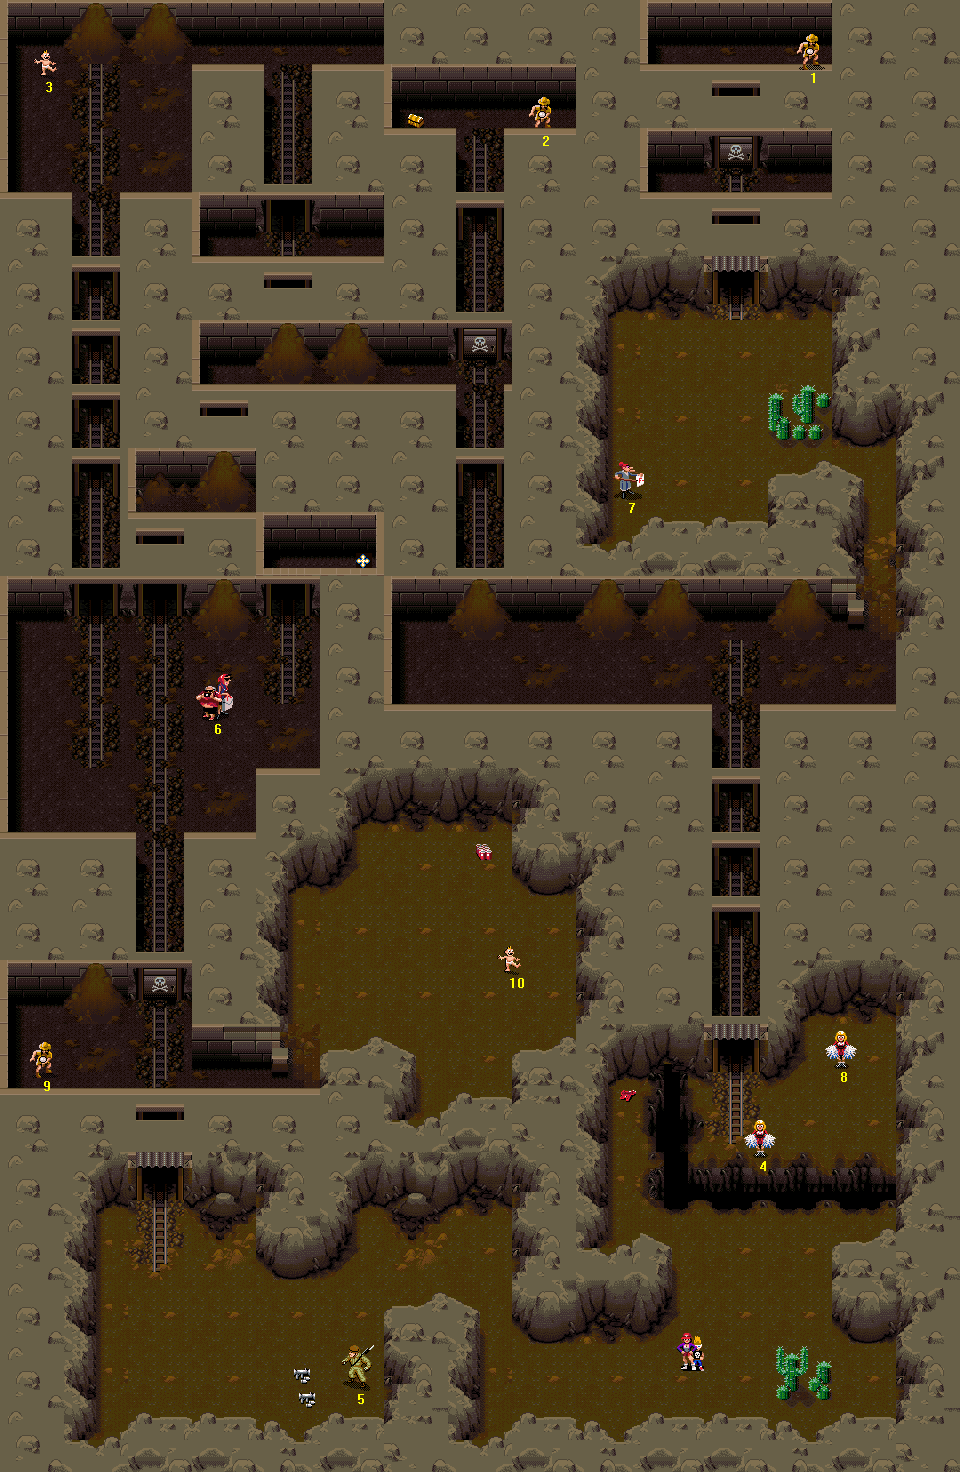
Difficulty: 5/10
This level is quite hard to fight the Snakeoids. It is easier with a Monster Potion than without.
Monster List
- Snakeoids (three)
- Zombies [Normal and Vicious] (intensity: high, location: two places)
Hazard
- Cacti. If you walk into a cactus, then you get hurt. Surprising, I know.
Important Pickups
- Bazookas
- Ancient Artefacts
- Pandora's Box
- Three Skeleton Keys (you will use all three, unless you have only one Victim, in which case you get to keep one.)
Bonuses Available
- Victim collection bonuses
Best Place To Score Bonus Points
Shooting Zombies in the northwest.
Walkthrough
The Snakeoids are huge green worm-like creatures that burrow around underground, and then pop out when near you, or a Victim - to bite. A Snakeoid's weapon, though, is also its weakness - they take damage when you attack their faces. You start near two of them, and there's another elsewhere in the level. The weapons you should ideally use against them are a Monster Potion (for the first two) and Plates (for the last one). You probably have twenty Plates at this point. If you have less, then try either Bazookas or another Monster Potion. it is perfectly possible to get rid of the last one with regular weapons, but you might find it draining on your health, if you do not quickly become good at judging how to keep away from its bite attack.
You start off near two Snakeoids. Notice the mounds of earth moving around switch to your Monster Potions and take a swig of one. If they do not seem to have stayed in the start area, take a look west first rather than north, as the Cheerleader (4) up north is vulnerable to their attack.
The way to attack is best described thus: Your monster should get into a position for the Snakeoids to attack him, and then keep on punching, repeatedly. The Snakeoids pop out of the ground to attack you when they are a certain distance from you, diagonally across the map. If one gets into a position to attack you, then as a Purple Monster, you won't actually get hurt - while your punches will hurt him. This is denoted by him flashing blue momentarily with each punch - if you do not see this effect, try changing the direction you are facing. With these first two, once one is in position, the other may follow so that they share attacking duties. But even if it does not, it'll likely stay around and continue to attack after the other has died.
When both of them are dead - and you will know about it when they are - collect the two Skeleton Keys they dropped, then head north from the start position. You will see a Cheerleader (4) across a long pit, and you will be able to collect a Water Pistol to her northwest. Once you have the ammo, head south again. When you reach the wall to the south of the area, head west and follow the path to a larger area. You will find a Soldier (5) and two Bazooka pickups to the south.
Now, head northwest and follow the mine cart tracks north. You will come to a small cavern containing an Explorer (9), to the west. To his north is a Sandbank for you to search for goodies - if you are still in Purple Monster form, you will have to wait to change back, as no goodies will appear if you just punch the Sandbank down. Before opening the Skull Door, take the southeast exit from the cavern and head over to the east side of the next large area to find a Baby (10) and Soda Cans.
Return southwest to the Skull Door and go through. Walk directly north to find a larger cavern, with multiple mine cart tracks leading into it. There is a Tourist Couple (6) near the entrance, and to their north is a Sandbank. Take the northeast entrance to find a cul-de-sac containing Ancient Artefacts. Exit this, go west from there, and take the last passage leading north. At this point you should get your Water Pistol ready; Zombies start appearing here, and at the end of the passage, there is a Baby (3). Walk north up the passageway to the end; when you see the Baby, get ready to move and shoot quickly if a Zombie gets near. Collect the Baby (3), and then search the two Sandbanks along the north wall.
Exit this chamber using the northeast passage, and take the south turning when you reach it. After passing through one small Zombie-infested room, you will come out from behind a Sandbank. Check the area behind the Sandbank, to the eastern side of the passageway, to make sure you pick up any item which appeared. Exit this room to the southwest and you come out from behind another Sandbank, which you should also check. After this second one, return northeast to the first and go east from there. Open one Sandbank up and then continue to find a second Skull Door to open; if you have only one Victim, you can skip this one, unless you want another Pandora's Box particularly badly.
If you have two or more Victims, however, go in and stroll north to the end, where you will find the promised Pandora's Box as well as an Explorer (2), in minimal danger from Zombies. Go all the way south from here until you come to another Sandbank; with this one, though, it is easy to see whether it has given up an item when you walk through, as you will see it to the north. So go through, then head east to find a total of three Sandbanks to search. Southwest of the last one is a passageway leading south; at the end are two Cheerleaders (4 and 8), one of which (#4) you could see earlier, from the other side of that pit. Collect them and then head north again.
At the northern end of the passage, turn east, and follow the path until you come to an opening into a large area, marked by a cactus. This is where the third Snakeoid is located; there is also a Teacher (7) on the west side of the area, so collect her quickly before she gets licked. You should be able to finish this last Snakeoid off using only Plates. When he pops out of the ground, walk about a metre away and then throw a Plate in his face. He'll flash blue if it damaged him. If you run out of Plates, then provided you hit him with, say, ten of them, you should probably just finish him off with other conventional weapons (starting with the Bazookas). Otherwise, if you are not an experienced Snakeoid fighter then you may want to go for a second Monster Potion, just to be safe.
If the Snakeoid seems to have disappeared at any point, you could try heading out the way you came, using the pathway that terminated at the east side of your current area, and searching the large rectangular mining room at the other end. Once you have killed him, nick his Skeleton Key and take it up north to a Skull Door, through which is a final Explorer [A]. There are no more items, so head south to make the Exit Door open, shoot the Zombies that appear while you are waiting, and leave straight away.
Level 21: The Day the Earth Ran Away

Difficulty: 3/10
You will have to stay alert, but there are no Victims particularly likely to die. The Martians are as irritating as ever in their movements and methods of attack, though - and the Spaceship is back, with its big laser fully functional.
Monster List
- Jelly Blobs (intensity: low, location: one place)
- Martians (intensity: high, location: everywhere)
Important Pickups
- Bazooka pickups
- Two First Aid Kits
- Martian Bubble Gun
- Decoy Clowns
Bonuses Available
- Victim collection bonuses
- Alien Invasion Repelled - 9900 points
Best Place To Score Bonus Points
Martians are hard to hit, but find it all too easy to hit you. As such, once you have destroyed the Spaceship in order to hit the bonus points jackpot leave. But if you want to try anyway, pretty much anywhere in the level will do, bar the pond area.
Walkthrough
North of your start position is a Barbecue Guy (4), and north of him is a Baby (10). Get these two quickly, then head southeast from the Baby's location and follow the eastern wall south to the corner for a Key. Head northwest from that, west at the trampoline, and find two Soda Can pickups south of a bench. Head east around the bench then north, find a gap in the fence and go through it. If you head directly north you will find a Soldier (2), in addition to a Bazooka pickup to his south. Head quickly north around the wall to your west, and south through the knocked-down section, to find a Cheerleader (6).
Northwest of the Cheerleader (6) is a Cupboard; on the southern wall of the room is a door leading to Bonus Point Pickups and a First Aid Kit. Head out north and skirt the western wall heading north; you will find a Bin. Go south until just past the first tree, then east, past a meteorite and enter a building. First head northeast and collect a Dog (9), then loot the Cupboard on the north wall, take the Fire Extinguisher in the little alcove at the southern end of the room and exit west again. Head north, and once past the far end of the building, stick to the wall, to head east then north along the edge of the pond.
You will come to a Martian Bubble Gun, after which point you should take the thin path west between pools until you come to a Soldier (8). Go north, dive into the water on your east and swim through the gap in the fence to come out on the north side. Head northwest and through the gap in the wall, save another Soldier (7) and head through the door to the north. To the east are a Decoy Clowns pickup and a Cupboard.
Head through the next door to the north; ignore the two Cupboards for now, and just head northeast and out through the hole in the bathroom wall. You need to quickly collect a Baby (5), who is to the northwest; go north around a wall, and west into the enclosed grassy yard. There may be a Jelly Blob around here to complicate matters. Go east back through the hole, and use the hole in the corner wall to the south to get back into the building with the Cupboards. Open them both, then head out through the damaged bathroom again. East of this exit is a Key lying in the middle of the road. Once you have this you should head southeast, then south through a gap in a fence to quickly save a Soldier [A], who hoards more Bazooka ammo.
Head directly north from him, and you will find the final Soldier (3) - naturally, with yet more Bazooka firepower - in the northeast corner of the map. West a little way is a First Aid Kit; follow the wall south to find a Bin. it is northeast from that Bin back to the Exit Door, but before you go through, consider the fat bonus you will get for blowing up the Martian Spaceship. Soda Cans in the circular hatch when it opens up
The Scary Sequel to Level Seven: Level 22: Revenge of Dr. Tongue
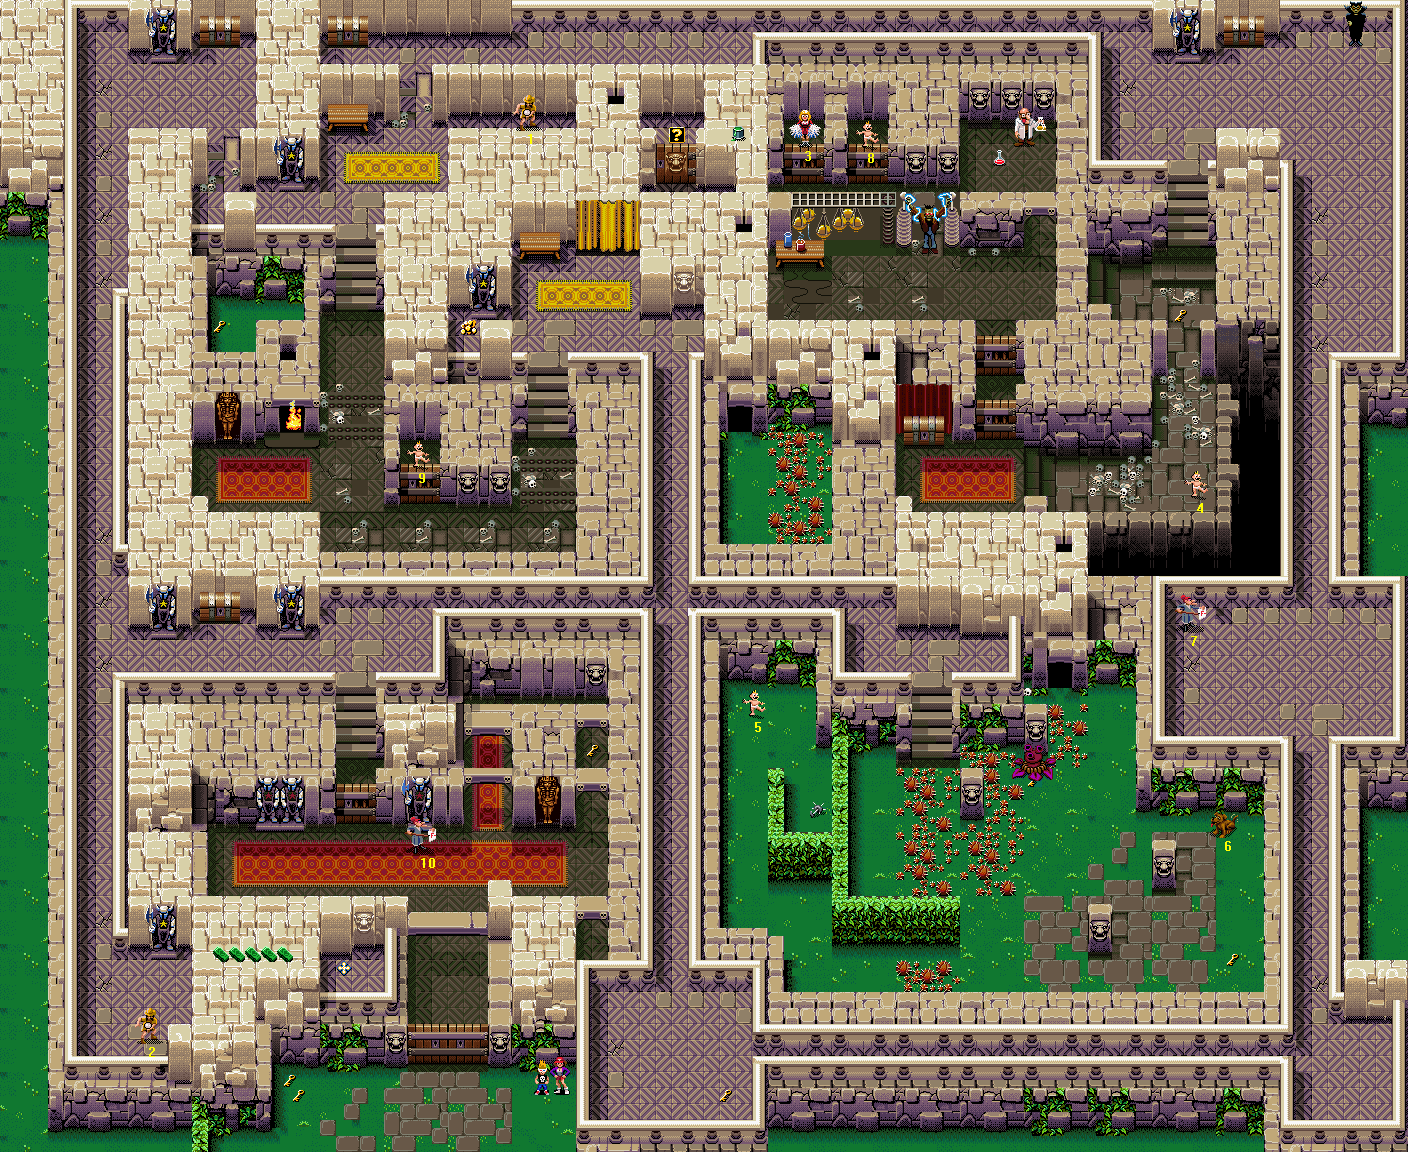
Difficulty: 3/10
This level is really pretty easy, despite the Vampire and Frankenstein's Monster. it is just because there are quite a lot of things to find that it has such a very long walkthrough.
Monster List
- Doppelgangers [Normal and Vicious] (intensity: high, location: one place)
- Frankenstein's Monster (one)
- Jelly Blobs (intensity: low, location: one place)
- Mummies (intensity: very low, location: one place)
- Pod Plant (one)
- Vampire (one)
- Werewolves (source: spawning randomly after 10 seconds, intensity: low, location: in the south)
- Zombies [Normal and Vicious] (intensity: from low to high, location: patchy)
Important Pickups
- Ancient Artefacts
- Bonus Level Pickup (requires use of a Skeleton Key)
- Flamethrower (the only one in the game! Also requires you to use your Skeleton Key, as it is in the same place as the Bonus Level Pickup)
- Monster Potion (be sure to collect this if you want to visit the Bonus Level)
Bonuses Available
- Victim collection bonuses
- Secret Bonus - 2000 points
Best Place To Score Bonus Points
The long balcony on the west side, where a lot of Zombies are found.
Walkthrough
Start by walking west and picking up two Keys. Quickly go back east over to the gates, as there is an Explorer (2) nearby who can be killed if you hang around the Key area. Open one side of the gate and head north through the hallway; there is a Teacher (10) dead ahead. Beware - there's a slight chance that a Mummy might appear and get her. Go east and north for another key, then go west back to where the Teacher was, and north through a door and upstairs. At the top, go west for a Chest. Prepare your Water Pistol and Pandora's Boxes and head further west, then south. At the southern end of this balcony is the Explorer (2) whom I mentioned earlier; if you have heard any Werewolves' howls, then it is okay to have an itchy trigger finger on those Pandora's Boxes.
After you have the Explorer (2), walk into the eastern wall of this area. Keep pushing east while also walking north and you will enter a secret passageway. Inside are several Bonus Point Pickups, and at the end, in the open, are Ancient Artefacts. Return west and follow the balcony route north, wasting Zombies on the way, until it opens out into a larger area (ignore the first turn east, as you have already been there). Walk northeast for a Chest and go south from there, through a collapsing roof gate, and a little way east to find an Explorer (A) in a side passage.
Head northwest through a collapsing roof gate for a Chest. Head east until you come to a large open area; open a Chest on the north wall. A Vampire attacks you at this point; you should walk into him while using Ancient Artefacts whenever he assumes human shape. When he gives up and flies away, if there are Jelly Blobs near the steps in the southwest, you should kill them using the Fire Extinguisher (this is to protect a Victim whom you are not yet able to collect).
Afterwards, head to the eastern wall, prepare your Pandora's Boxes once again, and then head south. You will shortly come to a large dais that has a Teacher (7) standing in the northwest corner. Strike any hard-to-shoot Zombies near her down with your Pandora's Box, save her and then head back north sharpish - for the sake of that Baby (4) in the northwest - to the place where you fought the Vampire. In the southwest of this place is a flight of stairs. Use it, walk south through a collapsing roof gate (picking up a Key along the way), save a Baby (4) and head west at the corner. At the west end of this area is a Chest, but do not bother opening it; due probably to a mistake in level design, it is impossible to collect any item that it reveals (though you can still get hurt if there's a Bogeyman inside).
In the large chamber to the north, through the two doors, is a Frankenstein's Monster; there are also two Victims in dungeon cells to the north. Frankie's electric bolts can sometimes zap them through the doors; your best bet is to walk through the two doors into the room and approach him, then when he takes notice, have him chase you into the southwest corner of the chamber. Stay there and kill him, far away from the cells. As with the Vampire, slay him by walking into him while using your Ancient Artefacts.
If you now look at the southern wall of the laboratory, you will notice a hole in the top of a wall. This is a secret passage; walk south into it and at the end, turn west and sweep through a patch of weeds using your Weedkiller. Enter the next passage to the north, and you come out in front of a Skull Door. You did get that out-of-the-way Skeleton Key on level 15, did not you? Excellent. Open the door to reach a Bonus Level Pickup.
Now for one of the game's best hidden secrets! Walk east into the wall, and you will enter a secret hidey-hole. (If you do not find anything, you are too far to the north.) Inside is the Flamethrower (walk about a bit if you do not hear the bleeping noise immediately). This is used in the same way as the Fire Extinguisher, but is much more precious as it does a great deal of damage to the target. You start with four hundred ammo, which in common with the Fire Extinguisher's ammo is lost pretty fast during use. I tend to save it for special occasions.
Now, head south out through the passage, east and north through the first passage again, back into the lab. Due north of your exit point from the tunnel are the cells where a Cheerleader (3) and a Baby (8) are being held. Get them, and then head east for a Monster Potion (ignore the Mad Scientist - he just blows himself up) and south to leave the lab the way you came in. Slightly east of your exit from the passage to the carpeted area is another hidden passage in the south wall; walk through. At the far end, switch to your Weedkiller, and walk south to where a Pod Plant is. Kill it (it hides a Key underneath, which you should pick up after finishing it off, if you did not already while standing and sweeping), and then clear a path through the weeds to the stairs. You will want to use it later.
Head east and slightly south and you will find a Dog (6) in a corner of the paved area. South of him is a Key. Head west of him, clear a path through a small patch of weeds (you cannot evade damage by sticking close to the hedge) and go northwest, then north for a Baby (5). To his southeast you will find replacement Weedkiller. Head around and out of the hedge passages, then around the weeds to the stairs at the northern side of the garden. Go northwest, and west to the crossroads. Take a detour south, find a Key in the southeast corner of the dais, and then head all the way north past the crossroads.
At the far end, open up the fancy golden curtains, head southwest for a Bonus Points Pickup, then descend the stairs. Wait patiently for both sets of spikes to retract before passing through. Ignore the Baby (9) to the north for now; to the northwest of his cell is a Fire. Extinguish it and head through to find a Key in a small neglected yard. Exit from here the way you came in, and go southeast back to where the Baby (9) was. Collect him and then exit. What a long and complicated level!
Bonus Level: The Son of Dr. Tongue
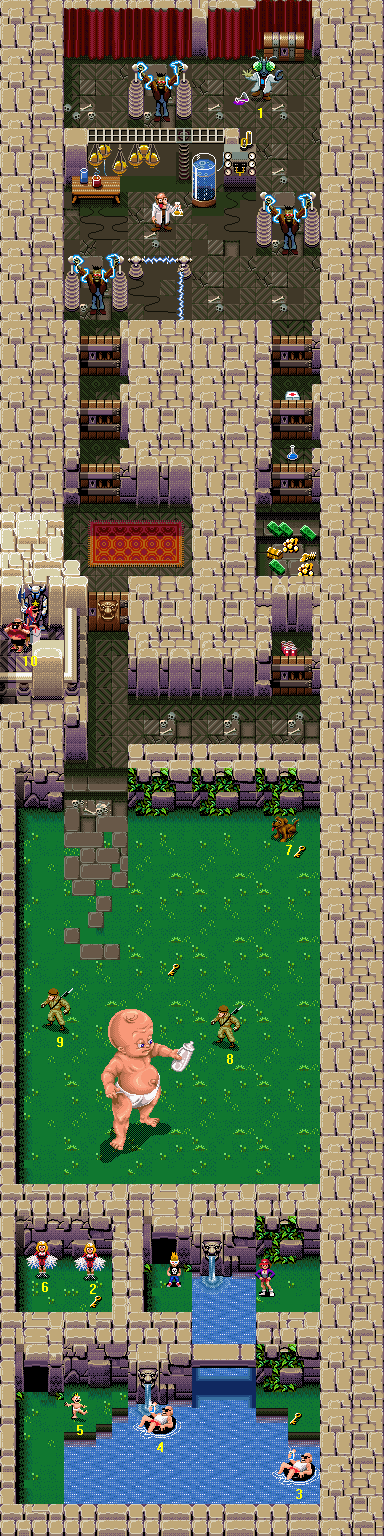
Difficulty: 6/10
The difficulty depends more on what equipment you have with you than anything else. Those who've played through from the beginning will find it pretty simple, but those who have not the same amount of ordnance will be stretched a little more.
NOTE: In addition to the usual ten Victims, the Big Baby turns into a regular Baby if/when you defeat him, which is why this Baby is labelled "Extra" (E) and why there are eleven Victims overall listed in the walkthrough. This Baby does not have to be rescued if you defeat the Big Baby after the Exit Door has appeared (admittedly, this is only possible if you picked up an extra Skeleton Key somewhere, or did not use one on level 20).
Monster List
- Frankenstein's Monster (three)
- Werewolves (source: from a Tourist Couple on an inaccessible balcony, who may not be saved: #10)
- Big Baby
Important Pickups
- The Son of Dr. Tongue (as well as being the "always there" Victim, he's worth 9,999 points, so be sure to collect him)
- First Aid Kit
- Ghost Potion
- Pandora's Box
Bonuses Available
- Victim collection bonuses
- No Bazooka Fired Bonus - 1000 points
Best Place To Score Bonus Points
There are only four (well, maximum six) enemies to be defeated on this level, and no way to earn further points once they are gone.
Walkthrough
Dive into the channel to the east. Swim south to find a pool containing two Swimming Pool Guys (3 and 4), and jump out onto the small platform in the northeast corner to get a Key. Dive back in and swim west over to the other side of the pool. There's a Baby (5) here to collect, and north through the tunnel are two Cheerleaders (2 and 6) and a Key. Now, head back south through the tunnel, swim east and then north and jump out to the west, and you are back where you started but five Victims the richer.
To the north is the area containing the Big Baby; there are three Victims there as well, but unlike in level 8, you will not be staying at the edge of the arena and attacking with Pandora's Boxes. You need to keep your Pandora's Boxes for use in defending Victims in later levels, and all three Victims are ones which the Big Baby has difficulty killing (unlike the four Babies who were in danger in level 8). My recommended strategy, then, is to use a Monster Potion (as the Purple Monster cannot be trampled) and quickly collect the Victims before turning your mind to the Big Baby itself. There was a Monster Potion on the last level, in the laboratory, so there's really no excuse not to have one.
Use the Monster Potion and then walk directly north from the tunnel entrance. (If the Big Baby comes near you, punch as you pass in case you manage to hit and damage him.) You will find two Soldiers (8 and 9) to either side of you; as soon as you see them, rescue first the eastern one (8), then the western one (9) - the western Soldier is nearer the wall and slightly less likely to be trampled. After you have the western one, make a beeline northeast and save the Dog (7). You may now turn your attention to the Big Baby.
The best method of dealing with this Big Baby is just to follow him around, punching continually. Your Monster Potion might run out before his health does, so if this happens, evaluate what is best to do. If you did not hit him very much, then you could use another Monster Potion, but it is likely a waste. If you have not any more Monster Potions, or do not think it is worth it, move on to Pandora's Boxes (do not worry about running out - you will pick up two more shortly after the battle, one on this level, one on the next).
Next, try Mystery Potions in case one acts as a Monster Potion. Otherwise you are down to conventional weaponry; the best thing to use is the Bazooka, followed by long-range things like Tomatoes, Ice Lollies, Plates and the Water Pistol. Soda Cans are a good choice as well, but you will generally find it hard to hit him with them unless he's standing still - in which case he's also squirting milk at you... Your new Flamethrower, by the way, is not a good choice at all, as it requires you to be absurdly close to him to have any effect, and you will waste a great deal of precious ammo.
Once he has finally transformed into the more manageable smaller Baby (E), collect him and the Skeleton Key he drops. If you have not already, get the two normal Keys in the arena (one in the centre, one in the northeast) and then head to the northwest. Go north into the paved area; if you have ten Victims, a Tourist Couple on an inaccessible balcony to the west now transforms into a couple of Werewolves. These are much more easily dealt with than the Big Baby, of course; once they've jumped down from there - head south again if they seem reluctant - use Silverware, or a very short blast of Flamethrower each. (You might find that one disappears without your having to kill it.) Once they are gone, go east once inside the paved area and open the door to find Soda Cans, locked away in a dungeon.
Head west again and north to find a Skull Door, which is followed by three more normal doors. Before you go through the doors, switch to your Ancient Artefacts. Now, go through, and immediately you are through the last one, start using the Artefacts; head east, wait for the electric barriers to time out and walk past, then head northeast and north around a bank of dials on some machinery. You will find the Son of Dr. Tongue (A), a humanoid ant and one-off Victim worth 9,999 points (though it says you get 10,000 points, you do not really). Now that you have all the Victims, it is time to deal with the three Frankenstein's Monsters that you have activated.
Provided you have at least thirty Ancient Artefacts left, this is very easy. Just walk into each using the Artefacts until they blow up. If you do not. it is still easy. You have that Flamethrower, remember? Once they are fried, search the wall to the north for items - there are three Curtains and a Chest to inspect. Next you should head to the southeast corner of the laboratory; go through the three doors to find a First Aid Kit, a Ghost Potion and finally, a little room containing Bonus Points Pickups, a Martian Bubble Gun and a Pandora's Box. Once you have those, do exit straightaway, as there's no more to do even in the way of bonus points.
Level 23: The Caves of Mystery
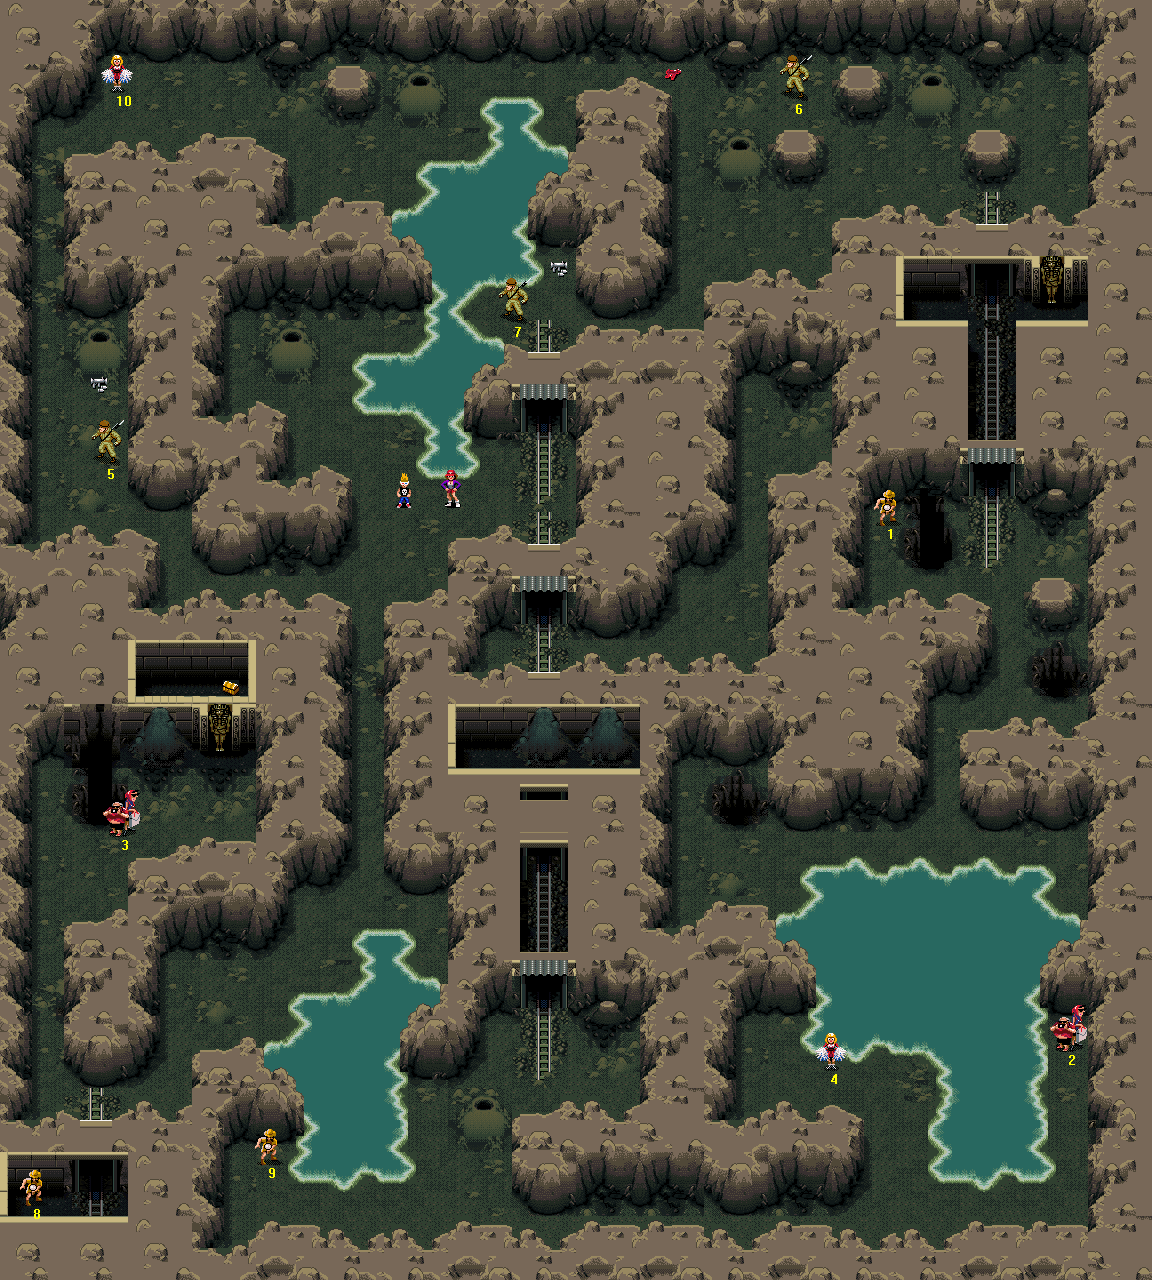
Difficulty: 3/10
The occasional tricky Victim aside, this level is quite easy. There are a variety of enemies to face off, but you should hopefully get through without any casualties.
Monster List
- Ants (intensity: low, location: patchy - wherever you see the Ant nest exits, which are conical with a hole in the top)
- Jelly Blobs (intensity: high, location: one place)
- Mummies (intensity: very low, location: two places)
- Squidmen (intensity: ranges from low to medium, location: patchy - wherever there is water)
- Zombies [Normal and Vicious] (intensity: low to medium, location: patchy)
Important Pickups
- Bazookas
Bonuses Available
- Victim collection bonuses
Best Place To Score Bonus Points
In the southwest, where there is a Vicious Zombie spawning ground, but you will be interrupted by Squidmen; or in the southeast, where there are only Squidmen in a large lake (but as I've noted previously, Squidmen do not give a good return on your efforts). This level is not a very good place to score points.
Walkthrough
Head south and into a thin passageway. At the end, kill any Squidmen who have appeared, then dive into the water and continue south; jump out and quickly save the Explorer (9) on the other side. Now jump back in and swim up north again; on the north side, head southwest, and into the tunnel to the south where the mine cart tracks are; in this cul-de-sac is an Explorer (8). Head out and turn left to go north into a long passage. When you come out at the other end, go northeast and collect the Tourists (3) straight away; they could be under threat from a Mummy. North of them is a Sandbank, behind which is a little room containing a Pandora's Box.
Head southwest out of there, south along the passage, east and then around the rocks over to the water. Dive in, and swim to the east bank in the southern area. Head northeast, and north into the tunnel. At the end are two Sandbanks; open both up, and walk further north into the tunnel opened up by the one on the left. Continue north and you will come to a Soldier (7) standing with Bazooka ammo nearby; do not drag your feet, as a Squidman could jump out and swipe him. Once you have him, head south back through all of the tunnels to the southern edge of the level. Walk around the rock at the end and there will be a path east.
Prepare your Pandora's Boxes for immediate use; the two Victims in the next area are vulnerable to sudden attacks by Squidmen. If you see any jump out of the water and land in the vicinity of the Victims, blast them with a Pandora's Box straight away. Head east and at the first opportunity, north; there is a Cheerleader (4) standing by the pond. When you have her, go southeast, around the edge of the water, and north to save a Tourist Couple (2). Emergency over!
Switch to the Fire Extinguisher. Jump in to the west and head north; at the far side, walk into the passage heading north. Round a little bend and north takes you to an opening, with an Explorer (A) in the northwest corner; walk west, then north in order to skirt the pit. Be quick, or a Jelly Blob might get him - if there's one right by him, then using the Fire Extinguisher while approaching him cannot hurt matters.
Head around the pit again and carry on north. You will shortly come to a mound of rock where a mine cart track ends abruptly; turn left to go west and go for the Soldier (6) to the north when you see him. To his west is Water Pistol ammo. Continue west, past a pond and an Ant nest exit, to find a Cheerleader (10). Switch weapons to the Martian Bubble Gun and walk south along the passageway. At the end is a Bazooka pickup, then a Soldier (5); an Ant could be going for either. If so, blast it with the Bubble Gun, then collect both and exit.
Level 24: Warehouse of the Evil Dolls
Difficulty: 4/10
On this level you will need to use the Soda Cans well to avoid taking excessive damage from the Evil Dolls (which appear absolutely everywhere). Hiding behind the boxes and throwing Soda Cans over the top, as the Evil Dolls try in vain to run through the boxes, is a good tactic. It can be taxing if you have not played before, and you are bound to lose a little health.
Monster List
- Evil Dolls (intensity: high, location: everywhere)
- Fire Babies (from Evil Dolls only)
- Jelly Blobs (intensity: high, location: one place)
- Lumberjacks (One)
Important Pickups
- First Aid Kit
- Monster Potion (if you choose to use a Skeleton Key)
Bonuses Available
- Victim collection bonuses
Best Place To Score Bonus Points
The area containing lots of boxes, in the southwest of the map. Evil Dolls appear very fast here, but due to the boxes it is easy to hide from them, and kill them safely using Soda Cans.
Walkthrough
Go southeast for Soda Cans and a Water Pistol. Prepare your Soda Cans for use and go east around the boxes, following these directions: north, east, south, east, north, east, south, east at the first opportunity, north, and west. You will find a Key. Head southeast through the wreckage of two boxes, and south through a hole in the wall. Southeast of this entrance is another Key. Go northwest out of this room, and back through the remains of the two boxes; then go around another box to the southwest, and south through the door. Walk through the door to the south of the toy boxes, and southeast to find a third Key.
Walk out of this room using the western exit. Take the first south and turn east. Go through the next door you come to, to the south, and go west to find a Teacher (6). Exit this storeroom by going east, north, and then west until the corridor opens out. To the south are a Baby (8) and a Fire Extinguisher. Northwest of them are Decoy Clowns, and southwest of those are an Explorer (10) and a Mystery Potion. Use your Bazooka again to blast through a weak spot to the north, and you will find a Teacher (5), and two Keys in the small room to her north.
Head south back into the open area you were just in, then south again through an open door. Once you are in the next corridor, a Lumberjack will make his presence known; he'll chainsaw his way through boxes, then the wall, northwest to you. Switch to your Ancient Artefacts and kill him with them. If you have no Artefacts, try a short blast from your Fire Extinguisher, followed by attacking with your Weedkiller - or try taking him through the collapsing roof gates to the northeast, so that one collapses on him.
Once the Lumberjack is dead, check a little east along this corridor to find Soda Cans and a Key. Go back west and then south through the hole the Lumberjack made. Walk past the first two rows of boxes, and head east along the aisle. Go south once in the open area, and exit southwest to find a Cheerleader (4). Exit this smaller clearing southeast and head east to find a Tourist Couple (2). Now head southeast again and south along to the end. Turn west, and use the next north turn to go north past one row of boxes. Walk west into a dead end where you can find a Baby (3).
Leave the dead end and take the first north. Once at the end, turn west at the corner and take the next south to find a First Aid Kit. Blast through the wall to the south, in the corner, and walk south to find a Key. Now, follow these directions to your next location: north, east at the first opportunity, north, north around the boxes, east, south, and east to find an Explorer (9). Go northeast past a box into a long, wide corridor.
If you have picked up an extra Skeleton Key in Cupboards and the like, did not need to use one on level 20, or for whatever reason did not use the one from level 15 to access level 22's Bonus Level, then you could open the Skull Door to the south. Inside, you will find a Monster Potion, a Bonus Password Pickup (for ten Victims on level 25 - pretty useless since you are using this walkthrough with all the passwords anyway) and Soda Cans.
From the Skull Door, head east, and north through a damaged wall into an area containing toxic waste barrels. Switch to your Pandora's Boxes and exit using another hole in the wall to the northwest. you will see a Baby (7) in a room to the north; if an Evil Doll gets near him, use a Pandora's Box to teach it a lesson. After you have the Baby (7), keep your Pandora's Boxes ready for use, for the benefit of the last Victim, and head southeast out of the room and east to the end of the corridor. Go through another hole to the south and along to the end to find two Keys. To get to the final Cheerleader [A], walk north, through a door, and to the end of the next room.
Huge Discounts On: Level 25: Look Who's Shopping
Difficulty: 4/10
You are relatively unlikely to lose Victims on this level. Also, it is entirely your choice whether or not to transform the Big Baby back to normal - so this level is certainly not as bad as it looks at first glance.
NOTE: In addition to the usual ten Victims, the Big Baby turns into a regular Baby if/when you defeat him, which is why this Baby is labelled "Extra" (E) and why there are eleven Victims overall listed in the walkthrough. This Baby does not have to be rescued if you defeat the Big Baby after the Exit Door has appeared.
Monster List
- Ants (intensity: medium, location: almost everywhere)
- Evil Dolls (intensity: high, location: one place)
- Fire Babies (from Evil Dolls only)
- Jelly Blobs (intensity: medium, location: one place)
- Big Baby (voluntary)
Important Pickups
- Monster Potion
- Bazookas
- Two Silverware pickups
- First Aid Kit
- Ghost Potion
- Skeleton Key (defeat the Big Baby)
- Extra Life (if you choose to use the Skeleton Key dropped by the Big Baby on this level, instead of saving it)
Bonuses Available
- Victim collection bonuses
Best Place To Score Bonus Points
Mess around with your Martian Bubble Gun in the northern part of the lower mall - where the two pits are, and where the Soldier (4) was.
Walkthrough
You begin on an escalator, which carries you north to a balcony. Switch to the Fire Extinguisher, then take the escalator's cue and enter the door to the northeast. North of the entrance is an area with a box that is leaking green slime, and a Cheerleader (8) is stationed by this. She may be attacked by a Jelly Blob, so have your Fire Extinguisher ready for use in case one of them gets near to her. Southeast of her is a Bonus Points Pickup, between two rows of clothes hangers holding up unidentifiable garments. Once you have both, leave quickly by heading south again to avoid the Jelly Bombs. Once out the door, descend the escalator and then switch to the Bazooka. West of the escalators is a display window to the north, which yields Soda Cans when you blast it in using your Bazooka.
You should stick to the northern wall of your current area and walk west now. At the corner you will find a Key; take it and then walk northwest to another. You want to minimise the time you spend out in the open, so continue west to the wall, and then carry on heading north. When you reach the corner, go east for a Soldier (4), then return west and blast another display window in for Weedkiller. Switch back to the Martian Bubble Gun and head back around to the south side of those pits; collect Bazooka ammo, then hug the eastern wall and head south, east at the corner, up the escalator, west and then north at the top, and west at the next corner.
When you come to a red soda vending machine to the north, switch to the Soda Cans. The next area has Evil Dolls. Take the first south you come to and head around the counter to save Tourists (5). Exit the shop using the door in the southwest corner. Go west into the next shop along; walk past the tills, then over to the northwest corner of the shop to find a Teacher (9) and a Bonus Points Pickup.
East of the Teacher, across the shop floor, is a barrier formed by a fruit-and-veg display that bars access to a Monster Potion in a little utility closet. Blast through using the Bazookas to reach it. If you have difficulty finding the correct latitude to aim from, position your character so that his/her feet are aligned with the second east-west horizontal line visible from the display to the south. Exit by heading all the way west and then all the way south. Once out of the door, carry on south, round a stone plant pot and into a small warehouse. In the southeast corner of this warehouse is a pair of Speed Shoes.
Exit the warehouse the way you came in, then head northeast and continue east once you have passed the blue soda vending machine. Once past a pair of escalators, you will find a Teacher (3) on her own on a balcony. Return west back to the escalators and go down to the lower floor. Immediately south is a Bazooka pickup; southwest of that is a Soldier (7) - be quick, and have your Martian Bubble Gun ready, in case of Ants - and right by him is another Bazooka pickup. When you have that, head east for a Key sitting in the middle of the floor, then south to find a Baby (6) whose choice of location is a little more prudent.
Use the up escalator to reach the raised area to the south. do not bother using the door; instead enter the storeroom to the south using one of the already-damaged windows. Inside are two Silverware pickups - very important for upcoming levels. Skirt the south wall and head east; to the north at the end of the passageway is a destructible wall leading to a Bonus Point Pickup and a First Aid Kit. Fire your bazooka at the purple cans, rather than at the (inactive) "Fun Baby" boxes. If an Ant starts carrying the First Aid Kit, you must kill it, and grab the thing before leaving the area. Go back into the passage, west to the open area and then north and through the windows again.
Continue north, turn east when you come to a balcony (watch out for spawning Ants), and once the screen stops scrolling for you, you will come across a Baby (10) near a model in a small window. Return west, south, west and north down the "down" escalator. At the bottom, turn west; when the stone plant pots appear on the western side of the screen, turn north and walk until you come to a pair of display windows offering you Ghost Potion and Mystery Potion. What to do? Blast them in and take what you want, of course.
In some circumstances, I'd now recommend defeating the Big Baby. If you have ten Victims, then I would not recommend it (unless you are going for as many Victims as possible), as it is principally to obtain an extra Victim. Also, if you have few Victims but less than two Monster Potions, then I would not recommend it, as you would expend too much of your precious firepower in doing it - and be left with a Big Baby to fight with conventional weaponry, while also fending off Ant attacks.
If you fit the job description - less than ten Victims, but a reasonably large arsenal - then drink your first Monster Potion and start chasing the Big Baby around, punching. It will probably last your first Monster Potion out, so drink another once the first wears off. If it survives both, then unless you failed dismally to do it any damage, it is probably safe to resort to conventional weaponry like Bazookas, Water Pistol or a little of your Silverware. When it is defeated, collect the Baby (E) and his Skeleton Key fast - after all, both are under threat from the Ants on this level. If you are still a Purple Monster, kill a little time punching Ants.
Once you have finished (or if you decided not to start), return to the western set of escalators and head southwest from there. Past the pair of stone plant pots, head north and jump on the trampoline to collect a Trampoline Girl (2). Jump off the trampoline to the southwest to reach the final area. From your landing point next to another trampoline, head south, past the corner of a fast food restaurant and then in via a damaged window. Go around the counter and west to find a Barbecue Guy [A].
East of the Barbecue Guy [A], along the south wall, is a packet of Ice Lollies. In the main eating area of the restaurant, to the east of the tills, are two Burgers lying on the ground, which you can eat for three health points each. Now, if you got a Skeleton Key off the Big Baby, you have a choice: use it on this level, to get an Extra Life, or save it for upcoming levels, on which you can obtain an Extra Life plus a Monster Potion (level 38) or avoid unwanted fights or map-searching. I suggest saving it, but it is your choice.
If you want the Extra Life, head out of the restaurant via the window to the northwest of the Burgers, and go north, east, and south in through the normal door. The Skull Door is in the southwest of this little shop. Return to the Exit Door when you are done, by heading northeast and out the door, west along the balcony, south into the fast food outlet and south around the tills.
Level 26: Where the Red Fern Growls
Difficulty: 2/10
Unless you find it particularly difficult to sweep up Pod Plants without getting hurt, I cannot see this being hard. it is quite straightforward, and blowing up the Zombies that constantly spawn in the weed-less areas is fun that everyone should take the time to experience.
Monster List
- Pod Plants (fourteen)
- Weeds (covering certain areas of the map)
- Zombies [Normal and Vicious] (intensity: ranges from medium to very high, location: patchy - all raised areas)
Important Pickups
- First Aid Kit
- Four Weedkiller pickups (very important for this level)
Bonuses Available
- Victim collection bonuses
- Weed Cutting Bonus - 1000 points
Best Place To Score Bonus Points
On the northeast dais, where Zombies appear very quickly indeed.
Walkthrough
Northeast of your start position are Tourists (7). In the southwest of this paved area is Weedkiller, but save this to pick up later if you are full or nearly full - you will want a refill. Anyhow, you now need be using the Water Pistol. Go back to where the Tourists (7) were, and up the stairs. In the middle of the large paved area is Water Pistol ammo. (Feel free to come back for this later, as well - there are plentiful opportunities to go Zombie hunting on this level.) Take the western exit out of this area, passing by a Weedkiller pickup (unless you still need more) onto a stone walkway. You come to another open space; take the western exit once more.
In the next large area, carry on over to the west side and pick up the Tourists (4). Switch to your Pandora's Boxes, and then head south. When the path widens out, you will see an Explorer (9) over on the right-hand side of the screen; quickly rescue him, sacrificing a Pandora's Box for his safety if necessary. Over on the western side of the platform is a First Aid Kit. Get it and go north again. Pass through the area that held the Tourists and go all the way north until you come to another large, empty dais; here, take the stairs in the southeast.
Switch to your Weedkiller and go first for the Tourists (5) to the southeast - they are standing near weeds, if not on them by now, so use the Weedkiller as you are collecting them. Next, kill the two visible Pod Plants in whatever order suits you. Go east to find another, then take the north route out of here. You will come to another Pod Plant just before a fork in the path and an Explorer (10). Collect him first for safety, then kill the Pod Plant. Take the turning to the right and carry on. There is one Pod Plant to kill along the way, followed by a corner turning you south. At the end of this path you find a Tourist Couple (6), standing in front of a Weedkiller pickup - so that you cannot see it at first, but you might unwittingly collect it as you walk towards the Tourists - and also a Pod Plant.
Return north and west, and take the western route this time when you come to the fork. Again, the path turns south. After this you will come to a tunnel leading south, with a stone roof; there are no weeds inside, so do not waste any Weedkiller ammo. Immediately outside the tunnel is a Pod Plant; continue south once you have dealt with him, turn east then north, and deal with another Pod Plant stationed just before the entrance into a little yard (overgrown, of course). To your northwest is an Explorer (8). Collect him, then sweep up the Pod Plant nearby. There is a Mystery Potion underneath it to be collected, if you did not get it already while Weedkilling.
Take the eastern exit from this place and head northeast in the new area for a Cheerleader [A]. Walk further east into a narrow passageway, and you will find two Pod Plants side by side. Exterminate both and continue past them. You are now in the large, unevenly paved area where you started the level. If you did not get the Weedkiller earlier, I'm sure you need some now, so head south and pick it up. Switch back to the Water Pistol and head northeast and up the stairs. Head to the west side of the dais and pick up more Weedkiller ammo; then finish any more Zombie-killing you want to do and collect the Water Pistol ammo to the east, before heading north.
In the northeast corner of this last raised area is a Water Pistol; if you do not need it, take the opportunity to make yourself need it by having a Zombie massacre. Afterwards, head southwest and down the stairs, and switch to your Weedkiller again. There is a Pod Plant to the south for you to kill, another to its west, and one last one over to the west of that. Before getting the last one, save the Baby (3) to its north, in case Pot Plant Snot hits it in the meantime. Once both of those chores are complete, collect the Weedkiller ammo to the south, in among the weeds, before going north for one final Cheerleader (2) and exiting.
Level 27: Dances With Werewolves
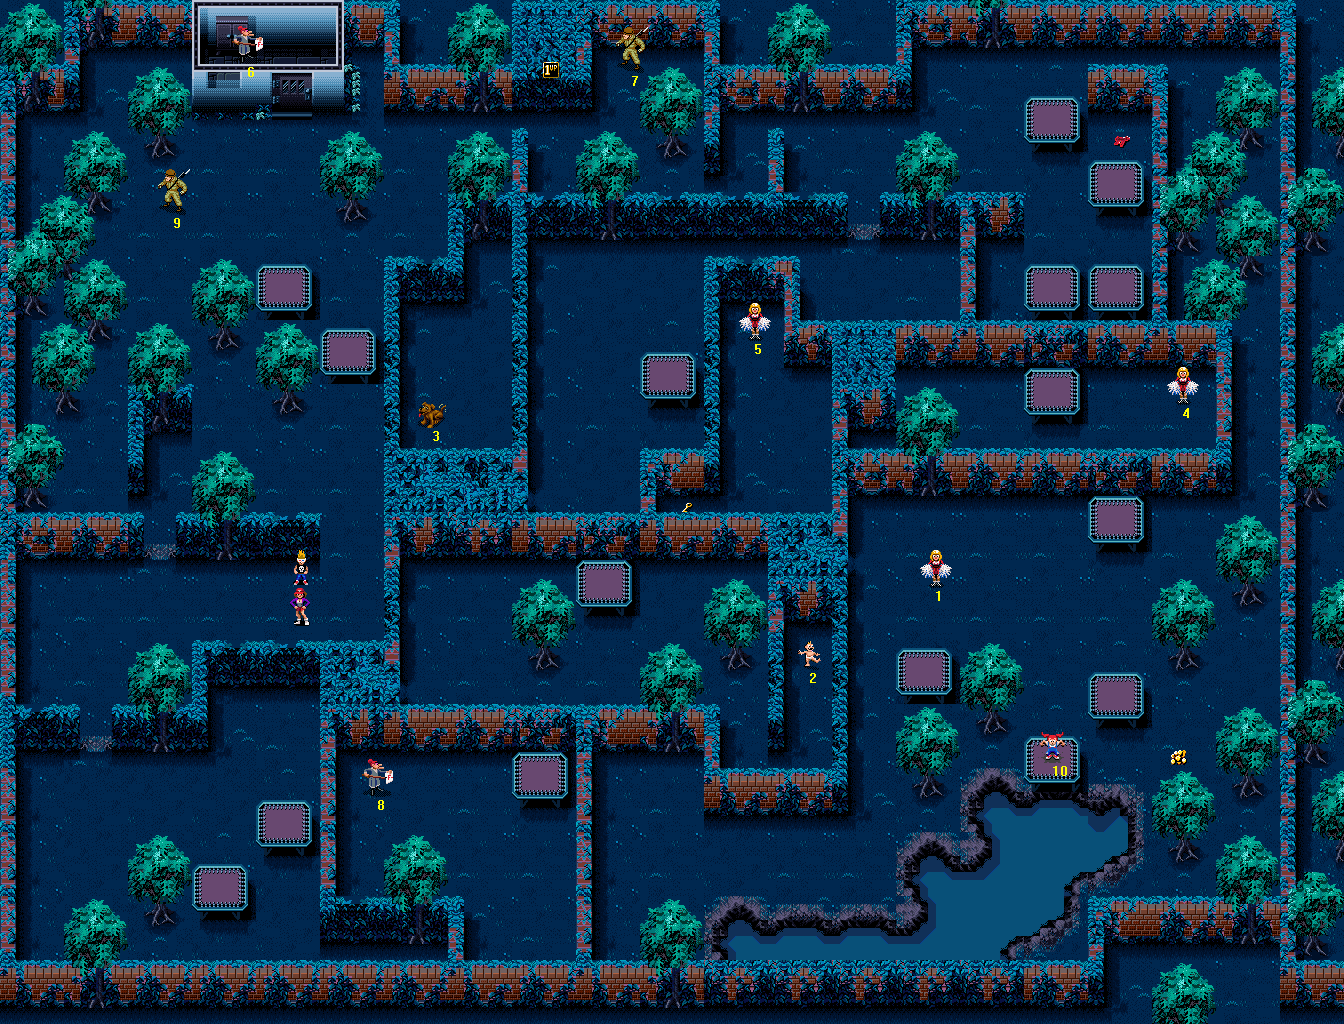
Difficulty: 4/10
You need to be careful to approach each Victim in the right way and from the right direction on this level, or you will find that the Werewolves get there first. The Werewolves will also constantly harass you, so go in, quickly get what you came for, and get out.
Monster List
- Werewolves (source: spawning randomly after 8 seconds, intensity: high, location: everywhere)
Important Pickups
- Extra Life
Bonuses Available
- Victim collection bonuses
Best Place To Score Bonus Points
In the southeast. do not use up all your Silverware, because you will need some on the next level.
Walkthrough
Be quick in getting to this first Victim, as this method of saving her relies on there no being any Werewolves around yet... Head southwest, through a hole in the hedge and then east over to a pair of trampolines. Jump onto the northeast one, and east to rescue a Teacher (8). Head east over to a trampoline, and jump northwest. Head west into an ivy-covered passage and turn north. Continue to walk north until you come to more trampolines, then turn to go northwest.
Collect a Soldier (9), then walk northeast to find a little hut containing a Teacher (6) and a Cupboard. Exit and head east. You will come to another Soldier (7) - collect him, and then use your Bazooka to blow in the front of the hedge block to his west for an Extra Life. Continue east, around a wavy path formed by two protruding walls, and further east until you come to trampolines. Walk northeast between the two diagonally opposite ones for a Water Pistol, then get on one and jump west away from them.
You must now approach a Cheerleader (4) who is vulnerable to Werewolf attack - and the only way to do it is using the relatively slow mode of transport that is the trampoline. Start by switching to your Pandora's Boxes if you have any; bear in mind that you may need to use one immediately after landing on the ground. Kill any werewolves of whose presence you are aware. Now get onto the southeast of the two diagonally opposite trampolines, and jump south, twice. When you land, hasten east and save the Cheerleader (4).
Jump onto the trampoline in this walled-off yard, and jump north twice. Head north around a trampoline, east, and south past all the trees until you come out into a big garden. Once south of the trampoline that you see in the northeast corner of this garden, go west until you come to a Cheerleader [A] and then quickly move southeast to prevent Werewolves from targeting the Baby (2) in the adjoining alleyway to the west. You will find a Trampoline Girl (10), whom you should save.
Jump off the trampoline to the east and you will land near a Bonus Points Pickup, which you should collect. Walk northwest through the gap between the two trampolines, then west over to another one. Use it to jump west into the alleyway containing that Baby (2). Head out of the alleyway to the south, then go northwest. Jump onto another trampoline, and jump off it to the north. Go west into the green section of wall and you will enter a hidden passage, covered in ivy; once you reach the western end (it occupies the whole green rectangle that you can see), walk north and collect a Dog (3).
Enter the passage again and walk east to exit it, and on exiting kill all Werewolves of which you are aware - you may re-enter the passage, but do not stray beyond this corner of the yard that you are now in. Once all the Werewolves are slain, use the trampoline to the northeast to jump east over the hedge. Collect the Cheerleader (5), then head southwest to find a Key in a little alcove.
Scream in Horror on: Level 28: Mark of the Vampire
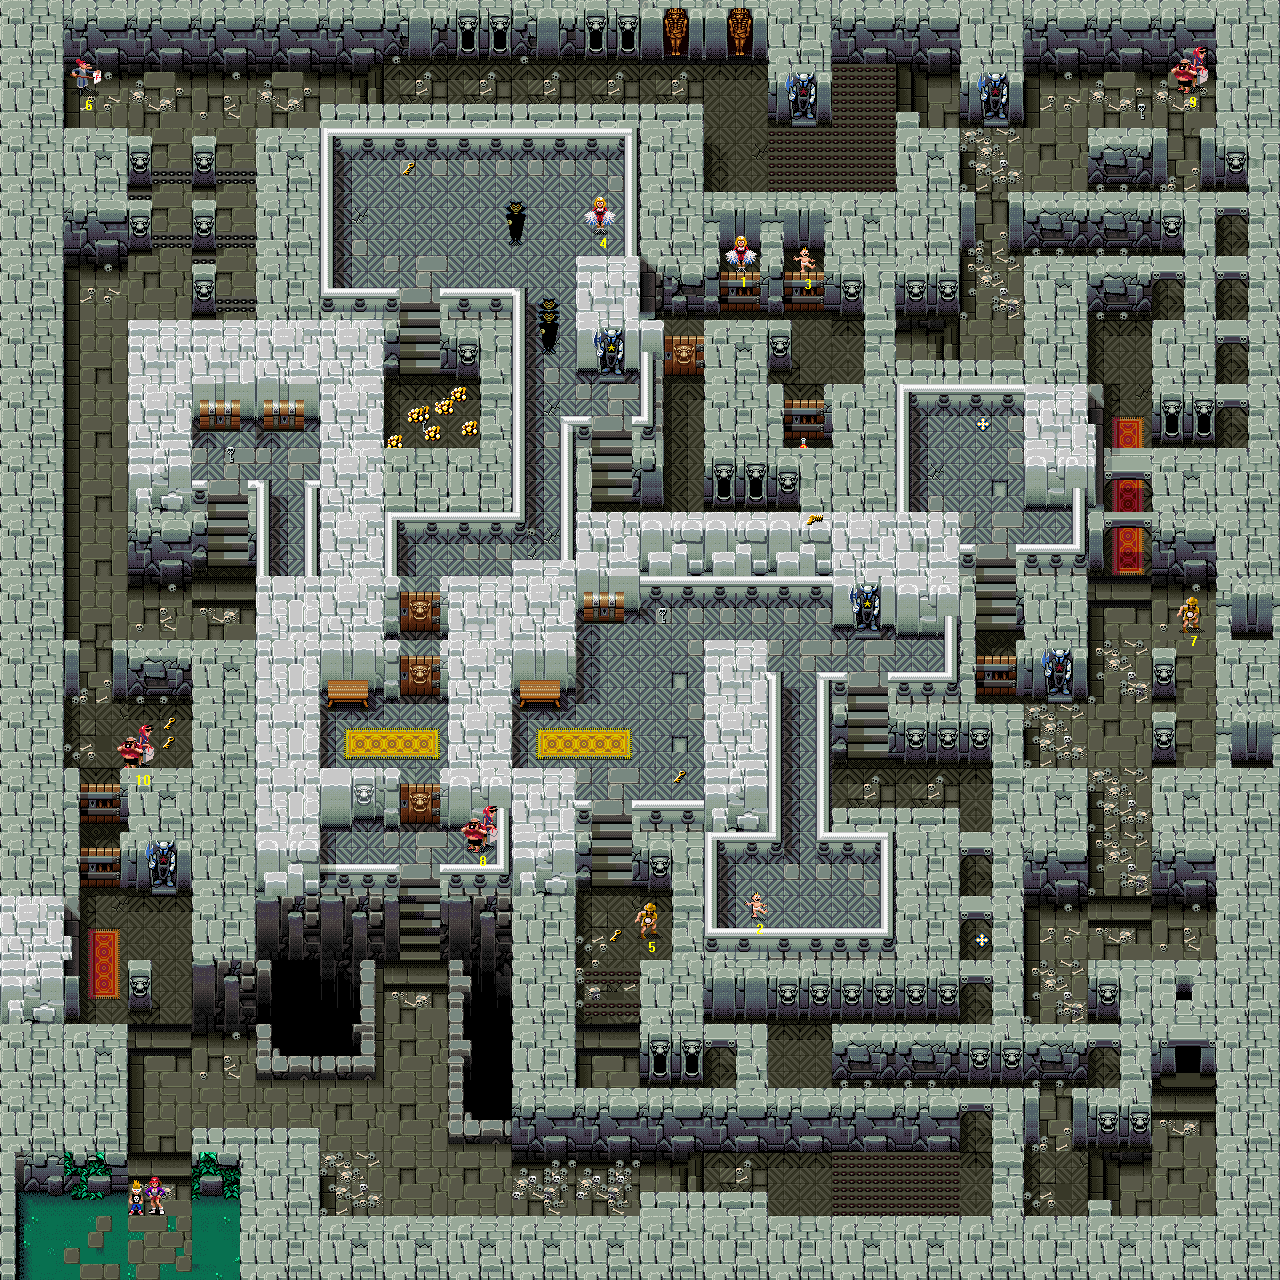
Difficulty: 7/10
Scream indeed! This level is a dramatic departure from the much simpler ones you have been seeing recently. First you have to save the Tourists, pronto; then you have to search for Skeleton Keys with which to open the Skull Doors, while saving the odd nastily placed Victim; and then you have three Vampires to fight before you can leave. Sound hard? It is, so pay close attention.
NOTE: Victim number 9 on this level will definitely die unless you make use of an exploit within the game's programming (which some may consider cheating).
Monster List
- Mummies (intensity: low, location: one place)
- Vampires (three)
- Werewolves (source: from Tourists after 8 seconds: #s 8, 9 and 10; spawning randomly, effectively immediately, intensity: medium, location: one place)
- Zombies [Normal and Vicious] (intensity: ranges from very low to very high, location: patchy)
Important Pickups
- Four Skeleton Keys (needed to open the Skull Doors)
- Two lots of Ancient Artefacts
- Martian Bubble Gun
Bonuses Available
- Victim collection bonuses (It is supposed to be impossible to collect all ten Victims, but you can actually do so if you make use of the aforementioned exploit)
Best Place To Score Bonus Points
In the south, near where you start, in the little courtyard where the Zombies spring up like weeds. And you should be scoring bonus points, too: after all, you probably won't have ten Victims at the end, so an Extra Bonus Victim will be just what you need.
Walkthrough
Here's the situation: Victims 8, 9 and 10 are all Tourist Couples, who will transform into Werewolves after 8 seconds. #9 is in the opposite corner of the map to you and is impossible to collect in time; #s 8 and 10 are near where you start and can both be collected, even in the same attempt (if you know exactly what you are doing, are using the Speed Shoes, do not try to collect items along the way and do not screw up).
If you have ten Victims then you should definitely prepare for the start of this level by switching to the Speed Shoes before you exit level 27. If you have eight or nine, it is not necessary, but you will have to be fast to save #8; and since you should have plenty of pairs of Speed Shoes by now, I'd certainly recommend newcomers to the level to wear them anyway. You should take different routes depending on how many Victims you have, in order to make sure that you are as likely to retain them as possible. If you have seven or less Victims, you do not need to read the "Tourist-Werewolves" section; just start at "Victims."
If you have TEN VICTIMS: Use the Speed Shoes. Run north, around a pillar with a face carved into it, and through two doors in a passage to the northwest. Collect the Tourists (10) at the other end, then continue north through a collapsing roof gate and head northeast up some stairs. Walk around onto what looks like a dead end passage; go south but before reaching the end wall, make sure for a moment to be as far towards the eastern side of the passage as possible. You will go straight into a secret passage that leads south. Do not continue to press into the eastern wall, as this will slow you down.
Once you can see that you are near the other end of the passage leading south, push east as well as south and once you start heading east, abandon pushing south. You will emerge from the passage on a landing and find Tourists (8) at the other end of it. Collect them. You may now stop hurrying. We'll return to the start point, in order to synchronise the walkthrough with that of those with less Victims. Head south down the stairs, and at the bottom head west. At the fork in the path, head south to the grassy area where you started.
If you have EIGHT OR NINE VICTIMS: Use the Speed Shoes if you want. Head north, and then east once up the stairs. When you get the opportunity to head north, take it; you will go up some more stairs and find Tourists (8) at the top. Collect them. You may now stop hurrying. We'll return to the start point, in order to synchronise the walkthrough with that of those with different numbers of Victims. Head south down the stairs, and at the bottom head west. At the fork in the path, head south to the grassy area where you started.
Head north, then east once up the stairs. Once in the large area, head to the southeast corner and continue east. Wait for the spikes to retract before crossing, and on the other side of them, head north, then west. You will come to a protruding stone wall; walk around it to the north and carry on to the west. When the path widens out, switch to your Pandora's Boxes; wait patiently again for the Spikes, and cross them to find an Explorer (5). There is a Baby (4) to the northeast - if you see Zombies anywhere near him, let rip with a Pandora's Box. Collect the Key, then head north up the stairs. There's another Key just at the top, to the east. In the north of this area is a Chest, and near it, the first of the Skeleton Keys that you need to find.
Be ready with your Water Pistol. Go east, then south down a narrow passageway to an open area containing a Baby (4). Return north, around the wall to the east and down the stairs. Once down, go east and then south, and pick up Ancient Artefacts on the way. At the other end of the passage, follow these directions: west, south, east, straight on, straight on, north, west and north. You should now be in a large chamber with bones scattered across the floor.
Switch to your Flamethrower, or failing that, your Fire Extinguisher; you may need to spray one of these ahead of you to protect a Victim from Zombies and Werewolves as you approach. (Odd that, protecting someone by pointing a Flamethrower at them and firing.) Exit the chamber using the wide passageway to the north. When the path widens out into a courtyard, with two pillars to the east, head northeast and collect an Explorer (7). In the southwest of the courtyard you are in is a door. Go through and up the stairs. North of the stairs are more Ancient Artefacts. Go downstairs again, northeast and then out of the courtyard using the carpeted passage to the north.
Before you go to Victim #9 - a Tourist Couple - you should note that while it is supposed to be impossible to save them, there is a way to trick the game into letting you collect them. You should check section two, "Tips, Tricks and Strategies", for more details. Assuming you are not bothered or do not have that many Victims though, switch to the Silverware now. At the first opportunity, head east, then north. At the northern end of the passage, if you have ten Victims, you will find the aforementioned pair of Tourists (9), and they'll promptly transform into Werewolves. Naturally, you should slay them both.
Walk north through the collapsing roof gate and collect a second Skeleton Key. Next, head west until you come to a large set of spikes. In order to deal best with these (since they are activated in precisely the wrong order for you to best manage them), you should hug the southern wall as you pass. Stand as far to the south as you can in the area just east of them; then, once the northern block has risen, walk onto the southeast block and south to stay next to the wall, where there is a thin strip of an invisible pathway that has no spikes. Walk west to pass.
Once past the spikes, switch to your Water Pistol. A lot will happen in the next few seconds, so read through this paragraph before you begin... Head north and west. You will see a Cheerleader (3) to the south. A Vampire will appear, with an evil laugh, and begin to circle her. Just continue west, regardless; he'll forget about her and come after you. You will come to a Teacher (6) at the end of the hallway, and she may be under threat from Zombies, so trigger-happiness with your Water Pistol is encouraged. After you have her, wait for the Vampire to arrive, and cane him with your Ancient Artefacts.
Once you are done with all that, head south and pass the spikes with careful timing. Continue south - after a bit of a walk, you will reach a collapsing roof gate accompanied by a turn to the east. If you had ten Victims when you started the level, then the gate will be blocked; for everyone else, it will be blocked shortly. Blast it down with a Bazooka shell when you need to, anyway. Go through, collect two Keys and then return north again, through the gate.
Northeast of the gate is a flight of stairs - go up and you will find a third Skeleton Key and two chests at the top. Head south down the passage to the east, which seems to be a dead end - walk into the end wall on the east side, and you will find that it is a secret passage that may be used as a shortcut. When you get to the end of the passage south, walk east and you will come out onto a landing near the first Skull Door.
Switch to your Ancient Artefacts. Walk north through three Skull Doors and go east slightly, then north a little more; two Vampires should appear and start attacking. Lead them south to the anteroom that followed the first Skull Door, and slay them both, ideally with Ancient Artefacts. When both are dead, continue north from the point you reached last time, passing a turning towards some stairs to the east, and you will find the Cheerleader (3) you ignored earlier on a raised dais. In the northwest of the dais is a Key, and south of that is a sunken chamber containing a fourth Skeleton Key and Bonus Points Pickups.
Go north out of there, east and south. Take the east turning and go down the steps. At the bottom, go all the way east and you will enter a secret compartment in the wall that contains Martian Bubble Gun. (If you do not hear a bleep to indicate that you have picked something up, then press north into the wall of the compartment before moving west to exit.) Go west a bit, and move north up another passage. Open the final Skull Door at the end, and head east, then south. Locked away behind a door is Mystery Potion. Once you have that, walk north again. There are two cells right next to each other; the one on the right holds a Baby (2), while the one on the left holds a Cheerleader [A].
Unless you still have ten Victims because you used the exploit to save the "impossible" Tourist Couple (9) - see the "Tips" section *still to be added* - you will want to earn yourself an Extra Bonus Victim. If you have not already gotten your score past the next multiple of 40,000 points since the beginning of the level, then now's the time to do it. Follow these directions: Out of the dungeons through the Skull Door, south, west, north, west, south, west, south a long way. You will come to a courtyard that generates Zombies at a very high rate. Get your score to the required level, then take these directions back to the Exit Door: north, east (eventually), north, east, south, east, north and into the dungeons.
More Shocking than Level 28: Level 29: Zombie House Party
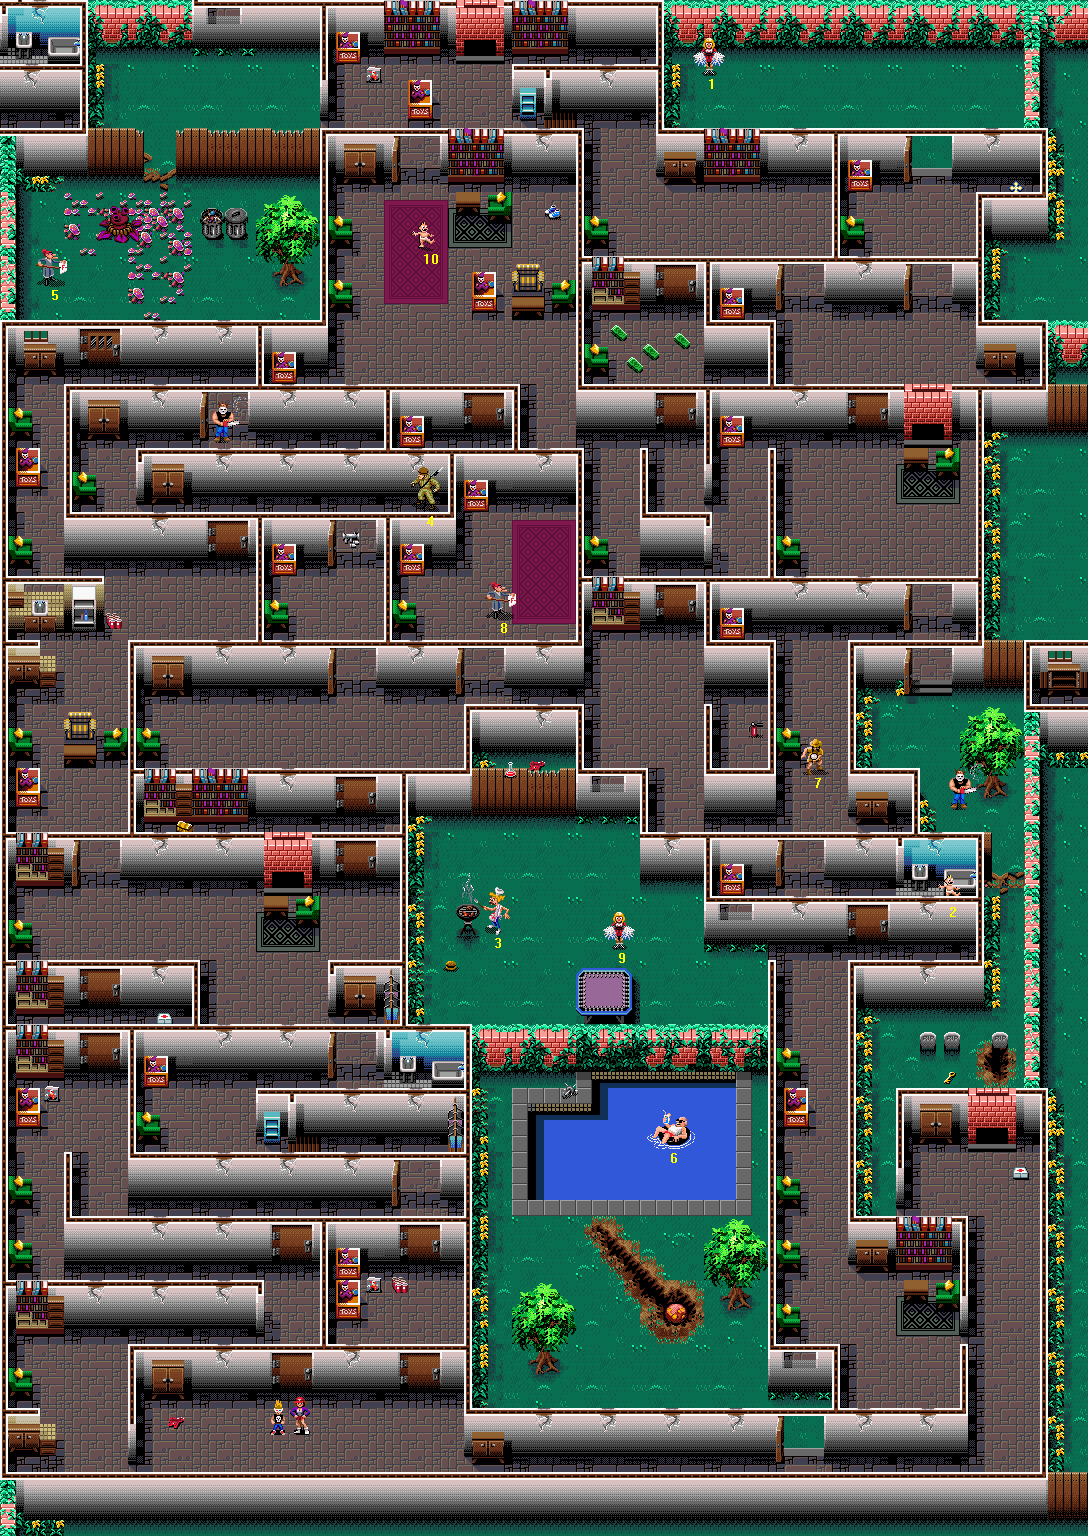
Difficulty: 5/10
There are a lot of things which you will want to collect, and it is a bit of a maze, but you are not going to have too much trouble provided you have enough Keys and Bazooka shells.
NOTE: Starting on this level using a password is quite hard, due to the monsters present, the occasionally difficult Victims, and the number of locked doors blocking your progress (while there is also a dearth of Keys to find). Level 30 exhibits the same problem. As such, I do not recommend beginning on this level. Starting on level 25 and playing through the intervening stages is a better choice.
With this in mind, this walkthrough is written with the assumption that you have a fair amount of Keys and/or Bazooka shells to use in navigating around the house. However, the best method, if you insist on starting on this level, is to use one of the Crazy Lumberjacks to your advantage in clearing a path. you will need to be good at managing Lumberjacks while also being harassed by Zombies and Evil Dolls, though - and the problem still remains for level 30.
Monster List
- Doppelgangers [Normal] (intensity: low, location: one place)
- Evil Dolls (intensity: high, location: patchy)
- Fire Babies (from Evil Dolls only)
- Jelly Blobs (intensity: low, location: one place)
- Lumberjacks (two)
- Martians (intensity: low, location: around the northeast corner of the map)
- Mushroom Men (intensity: medium, location: one place)
- Pod Plant (one)
- Squidmen (intensity: low, location: one place)
- Werewolves (source: spawning randomly after about 55 seconds, intensity: low, location: the eastern and southern sides of the map)
- Zombies [Normal and Vicious] (intensity: ranges from very low to medium, location: patchy)
Important Pickups
- Three lots of Decoy Clowns
- Two First Aid Kits
- Pandora's Box
- Bazookas
- Speed Shoes
Bonuses Available
- Victim collection bonuses
Best Place To Score Bonus Points
Either standing behind a wall somewhere, throwing Soda Cans at the witless Evil Dolls, or shooting Zombies in the southwest corner of the map. This is not a good level to score huge amounts of points on.
Walkthrough
On the west side of the room in which you start is Water Pistol ammo and a Cupboard. Head south and west around a partition wall to find a Cupboard in the southwest corner of the level. Head northeast, east, north, west and north to find Decoy Clowns next to a toy box which spawns Evil Dolls. Enter the door to the north to find a First Aid Kit, then go south out the door and into the passage on the east side of the wall. Head east along the passage until you get right to the end, and open the door to the south to find Soda Cans and Decoy Clowns. Be quick collecting them and heading away, as there's a Swimming Pool Guy (6) to the east who could be killed by Squidmen if you give them the chance.
Go north through two doors, and head west, north and east to get around the wall. North through an open door is a Cupboard. Go round the wall to the north and continue north through one closed door, then head west to find a Pandora's Box. Go east again and north through another door, and then head northeast and through an open door to find a Teacher (8). Exit this room the way you came in and head west, past another open door to the north, to find a Cupboard.
You can now enter that other door to the north. At the end of the room is Bazooka ammo - collect it, then save the Soldier (4) nearby. As you are probably aware, a Crazy Lumberjack has noticed your presence, and is trying to get through to attack you. Switch to the Ancient Artefacts and wait for him to either break through, or walk around to the west - if you go any further north at this stage, then you will put a Teacher (5) to the north at risk. Once he is dead, switch weapons to the Weedkiller and the Pandora's Boxes.
Head around the wall or through any opening the Lumberjack made, and north through an open door and then northwest through a closed door, and you will come to a yard containing a Teacher (5). Mushroom Men spawn here, so collect her quickly. Use the Weedkiller on the Pod Plant to the northeast, and then open the Bin. Head southwest and into the now open door. To the west of the entrance is a Cupboard. After you have opened it, head east, south and west to find another; there's a third one southeast of that. Return to the first one (that's west, north, east, north, west) and then head south past an Evil Doll spawn point.
To the southeast are Soda Cans. To the west of those is a Cupboard under a sink, and south of that, round the wall, is another Cupboard. When you have all those, head south past some furniture and through a door, east past more furniture and north through two doors. Head northeast from here to find an open door - do not enter it, but instead focus your attention to the cracked wall to its southeast. Stand north of it and fire two Bazooka shells at it; you will destroy the wall, and also the fence on the other side, giving you access to the garden.
Go through the hole in the wall, collect a Water Pistol and a Monster Potion, and continue through the hole in the fence. You will find a Barbecue Guy (3) and a Cheerleader (9); be careful of Squidmen jumping in from the south to kill the two Victims. You can also eat a Burger for an instant health refill of three bars. You will now have to approach a Swimming Pool Guy (6) quickly in order to minimise the chances of his being killed; walk north of the trampoline in the south of the garden, then walk up to it, jump south immediately and you will land in the water. Collect the Swimming Pool Guy (6) before a Squidman appears to kill him.
Jump out of the water in the northwest corner of the pool; there is a Weedkiller pickup there for you to collect. Head south around the edge of the pool, and then southeast to a door that leads into an indoor passageway. Go west a little way for a Cupboard, then return east, past the door, and head north, ignoring a turning to the west. You will find a First Aid Kit and a Cupboard. Exit this room by heading out the opening in the southwest corner, and head north and east; you will find a Key by some graves.
Head south and east into the house again. Go south and take the first turning west. To the northwest is a Cupboard. Go north up a corridor and at the end, quickly go through a door and east to save a Baby (2) from a Lumberjack. do not go for the Lumberjack yet - there's another Victim to save. Head west and north into a room, through an open door; there's an Explorer (7) ahead to be collected. Now go back to the Lumberjack and kill him with your Ancient Artefacts. Northwest of where the Baby (2) stood, or southeast of where the Explorer (7) stood, is a Cupboard. Open it. Head west from there, north and then east into a little alcove to find a Fire Extinguisher.
Now, take these directions to find your next Victim: west, south, east, north, east, north through a door, northwest, south, west and north around a protruding wall, west and then northwest past a toy box producing Evil Dolls to find a Baby (10). To his east are Speed Shoes. In the northwest corner of the room is a Cupboard. Go through the door to the north to find more Decoy Clowns. Head east and into the southern passage; you will find a Cupboard where it widens out into a room. South of the Cupboard is a door leading to Bonus Point Pickups.
Head north out of there, east, and south through an open door. In the southeast of the room in which you now find yourself is a Cupboard. Head north from there, through an open door, and find Ancient Artefacts to your east. Head north through another open door, then walk west to find a Cheerleader [A]. Read the preamble to level 30 (do not worry, it is short - the preamble, that is) before going through the Exit Door.
Level 30: The Horror of Floor Thirteen
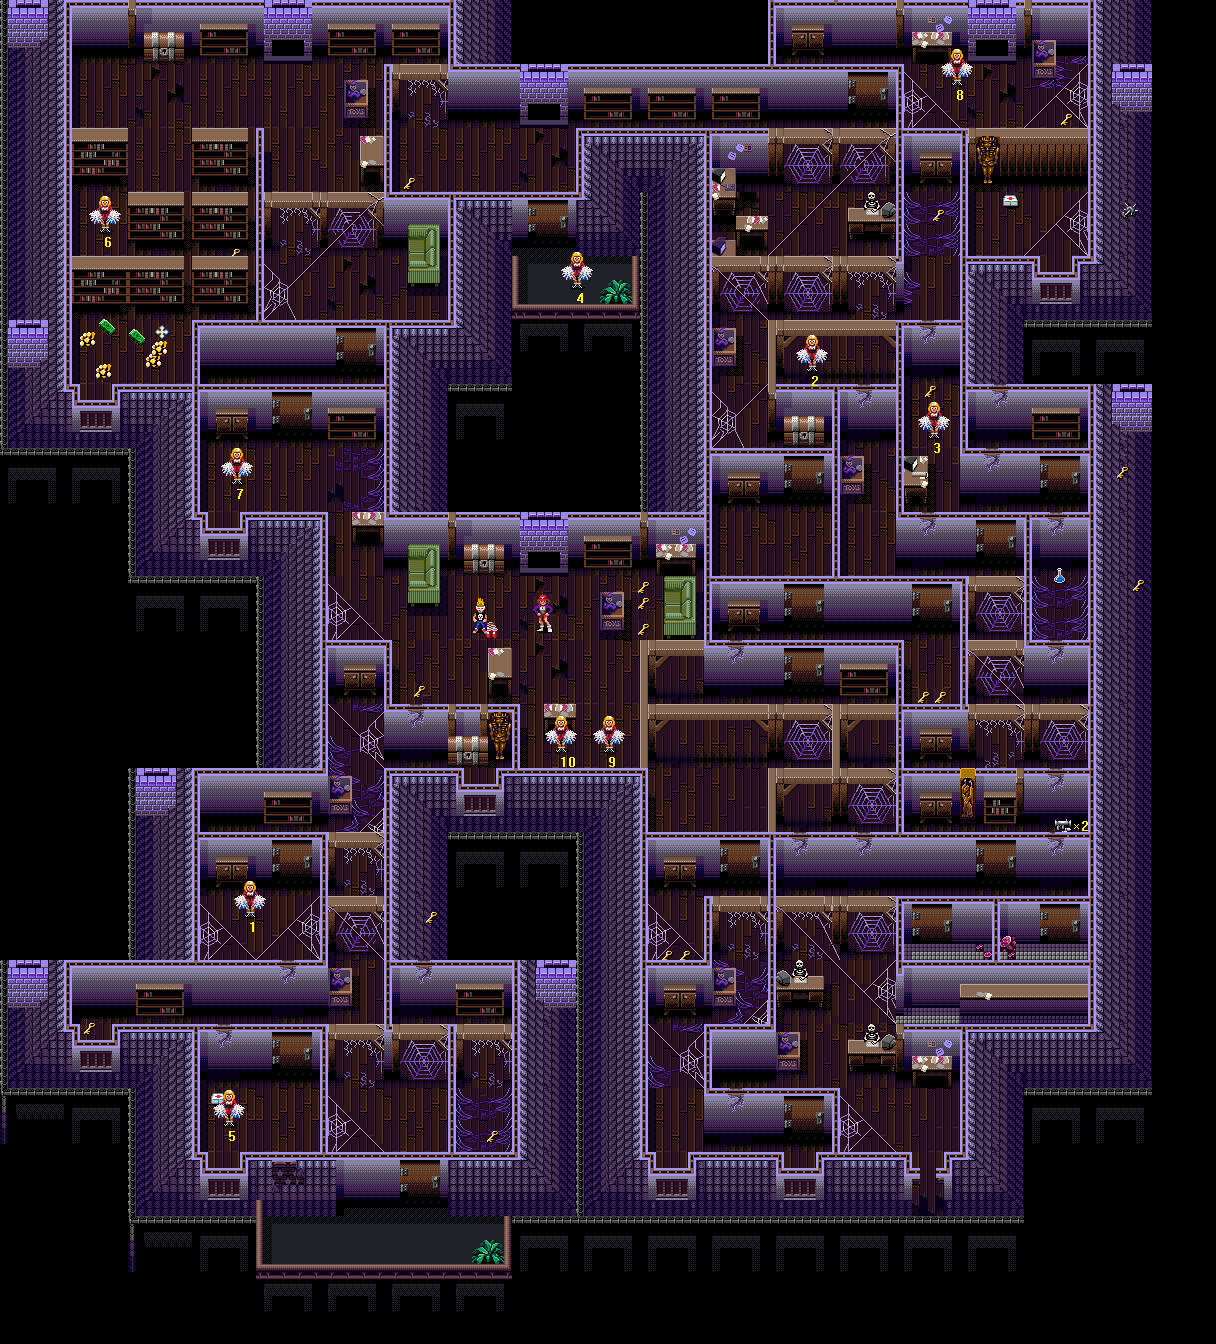
Difficulty: 7/10
it is the second (and last) level featuring only Cheerleaders, so you can get another Ten Cheerleaders Bonus, this time on top of the regular All Victims Saved Bonus, for a total of 2000 points!... you wish. I count five Cheerleaders who are in severe danger of dying, and two of them are #s A and 2, so start sweating, especially if you have less than three Victims right now.
Monster List
- Evil Dolls (intensity: high, location: three places)
- Fire Babies (from Evil Dolls only)
- Jelly Blobs (intensity: low, location: one place)
- Mummies (intensity: low, location: one place)
- Spiders (intensity: ranges from medium to high, location: patchy)
- Werewolves (source: spawning randomly after about 50 seconds, intensity: very low, location: one place)
- Zombies [Vicious] (intensity: very low, location: two places)
Important Pickups
- Ghost Potion
- Ancient Artefacts
- Bazookas
- First Aid Kit
Bonuses Available
- An unusual set of Victim collection bonuses.
- 50 points per Victim saved
- Ten Cheerleaders Bonus - 1000 points (for each player)
- All Victims Saved Bonus - 1000 points (for each player)
- You Saved More Victims Bonus - 1000 points (two-player mode)
Best Place To Score Bonus Points
South of Cheerleader #2, there is a little room with a Cupboard in it. Adjoining this room to the east is a corridor containing a toy box, from which Evil Dolls spawn quite frequently. Stand in the safe room and throw Soda Cans over the wall at the Evil Dolls. This is slow, so unless you have a real need for an Extra Bonus Victim, wait for the next level.
Walkthrough
You start northwest of a pair of Cheerleaders (9, to the east, and 10, to the west). North of them, and east of you, is a toy box from which Evil Dolls spawn. At any moment, an Evil Doll could jump out, dash over and get one, if not both of them before you have even had the presence of mind to start moving. With this in mind, as soon as you unpause the game, you must head southeast and grab both Cheerleaders (10 and more urgently, 9) pronto, before an Evil Doll can get there. Got that? Good. Go.
You probably collected the Soda Cans in passing, but if you did not, return to your start point and get them. North of there is a Chest, and southwest of that is a Key. Now head over to the northeast corner of the room, where you will find three more Keys in a row. Head southeast and you will come to an area containing two huge spiders' webs. On the north wall is a door; enter. Once inside the next room, switch weapons to the Water Pistol and Speed Shoes. You are going to approach two Cheerleaders (2 and subsequently 8) who are in great danger of being killed, so you will need to be quick. Read paragraph 3 in full, so that you will know what to expect.
Use the Speed Shoes, then switch your special item to the Pandora's Boxes (that's likely to be five presses of the A button if you have been playing for a while and have picked up a lot of items). Run north through the next two doors and then north around the wall with the chest in front of it. Save the first Cheerleader (2). As you approach, squirt liberally with the Water Pistol, in case a Spider appears and goes for her. Do not worry about the other Cheerleader (3) who may be seen to the southeast; she is safe. Switch to the Bazookas and pause the game; read paragraphs 4 and 5 in advance.
Now, look at the line of giant spiders' webs to the north. Two unbroken webs are side by side, but next to them on the east is one that has been broken. Stand south of the broken web and fire your Bazooka northwards. This is in order to break another web to the north ahead of time; so that you are guaranteed a quick approach to the next Cheerleader (8) you need to collect. Be ready to use the Pandora's Boxes, as the approach to this Cheerleader (8) is a long one.
Switch to the Fire Extinguisher this time, as there may be Evil Dolls threatening the Cheerleader (8) as well as Spiders. Go north, west around the desk, through the broken web to the north of the desk, through the door to the north of the web, and east, to save the Cheerleader (8). This one, I'm afraid, can often get killed before she even comes into your view, even if you are using the Speed Shoes; nothing much you can do about that, unfortunately.
In the southeast corner of the room you are now in is a Key, and in the northwest corner is a Cupboard. Once you have both, leave the room via the door you came in by and continue south. Take the first opportunity to turn east; to the north in this next side-corridor are a Key and a Cupboard. Return to the southern end and then go southwest until you reach the corner of the office. Open the Chest, and then go south through a door into the next room. West of the door is a Cupboard to be opened.
Head south again into another room, with another Cupboard in the same position as in the last room. Head east to the other end of the room, and pick up two Keys before going through the door. Take the next door, to the northeast, straight away, to avoid the Evil Dolls. In the next room after that, head northwest to find a Cheerleader (3) and then a Key. Go southeast from there and in through the door in the north wall at the southeast end of the room.
Blast through the cracked wall to the north with your Bazooka, and step out onto the sloped roof (do not worry, you cannot fall off). Walk north and you will see a window fitting with a room behind it, containing a First Aid Kit. Stand south of the window fitting and blow it open with the Bazooka (curiously, the recoil does not force you off the roof either!). Get your Water Pistol out, as a Mummy could appear and attack once you are inside, and then enter to get the First Aid Kit, and exit quickly.
Once on the windowsill again, head east and then north to find Weedkiller, and then head south, all the way west and south again to re-enter the room from which you originally accessed the roof. Go east and south, and blow down the wall to your south to find a Ghost Potion. Do the same to the wall at the end of this little room; go through the hole, and head southwest to find a Cupboard to be opened. Then, take the following directions: northeast, north through the room that contained the Ghost Potion, southwest through two doors, west, north though two doors, northwest around a protruding wall, northeast across the floor and through a broken spider's web, and north around a desk and through another broken web.
To the west is a Cheerleader (4); you should approach reasonably fast so as not to give Werewolves a possible chance to kill her. Head west along the corridor until it widens out, then head south and through a door and you will find the Cheerleader (4) standing (jumping) on a balcony. Now, head back north through the door and west to the corner of the room, to find a Key. Head north through a broken Spider's web, and then head west until you come to a Chest. Do not take the time to open it yet, but instead head south to find a Cheerleader (6) next to some bookcases. South a little and east to the end of the southern aisle, you will find a Key.
Head west, northeast a little, and north over to that Chest you saw earlier; open it now. Head southeast and once past the partition wall, south; go through two doors to find a Cheerleader (7) standing in a small room. To her north is a Cupboard, and to her south is a window fitting, which may be blown down with the Bazooka. Do so, go through and head west and north to find another window fitting, to which you should give the same treatment to access Bonus Points Pickups and Ancient Artefacts.
Go back through the window, south, east and north to return to the room where that last Cheerleader (7) was. Exit it through the southeast corner and head southeast all the way through the next room as well; you will find a door in the south wall at the end, so go through it. Open the Cupboard to its west, and collect the two Keys south of the Cupboard. Walk around the wall to your east and continue south to find a Cupboard at a corner.
Head south from the Cupboard, then east and north through the door. Continue north, around the desk and through the broken web, and head east in the corridor that follows. At the far end, take the door to the north for a Cupboard, and a Bazooka pickup that grants you ten shells instead of five. Head south out of this little utility room, west and south through the web again. When you pass the desks, instead of using the door, head to the southeast corner of the office, where an already broken window fitting allows you to walk out onto the sloping roof.
Walk out, then, and head east, north, east again and finally north again. At the other end of this path, you will find two Keys. Return south, west, south and then west until you come out onto a balcony with a little plant in the corner. Switch to your Bazookas and head west over to the other side of the balcony. you will see a damaged wall to the north. Inside the room beyond this is a Cheerleader (5), but before you get her you will want to save another one to the north who is in much more danger than her, from Spiders. With this in mind, aim squarely at the damaged wall and fire not one, not two, but three Bazooka shells north at it. Now, read the whole of paragraph 15 through before doing what is says, so that you are prepared.
Switch to the Water Pistol and use a pair of Speed Shoes (yes, two pairs in the same level, I know, but that's how hard it is). Switch your special item to the Pandora's Boxes (five presses of the A button, remember), and then run north. Once you see the Cheerleader [A] to your north, past a broken-down interior wall, start sloshing Water Pistol fire about the place, and if you see any Spiders appear that look as if they will get her before you get them, let rip with a Pandora's Box. Once you have saved her, return south through the hole in the wall, then through the door, and save the other Cheerleader (5) too.
North of where that safer Cheerleader (5) stood is a First Aid Kit. Collect it, then exit via the door to the north and head west along the corridor. At the end is a Key. Go east again, and north into the room where the Cheerleader (A) stood who was in more danger. In the northwest corner is a Cupboard; open it. Now go out the door to the north and northeast past a toy box; you will come to a fork in the path. To the east is a Chest, to the north is a Cupboard; open both in whatever order you want, and then head southwest back into the room where the endangered Cheerleader [A] stood.
Head south out of the room and into the corridor; now go southeast, through a broken web, and into a small, featureless room. In the northeast corner is a web that is not broken; blast it down with the Bazooka and go through the hole you made, then east and south to find a Key in among the webs. Follow these directions to obtain one more Key: north, west, south, west, north, west, south through first a door then a ruined wall, east along the balcony and then around its barrier onto the sloping roof, north where the drainpipe goes north, east around the chimney outlet and further north, west and south. Now follow these, to return to the Exit Door: north, east, south, west onto a balcony and over to the other side, and north through a ruined wall.
Level 31: Look Who's Coming to Dinner
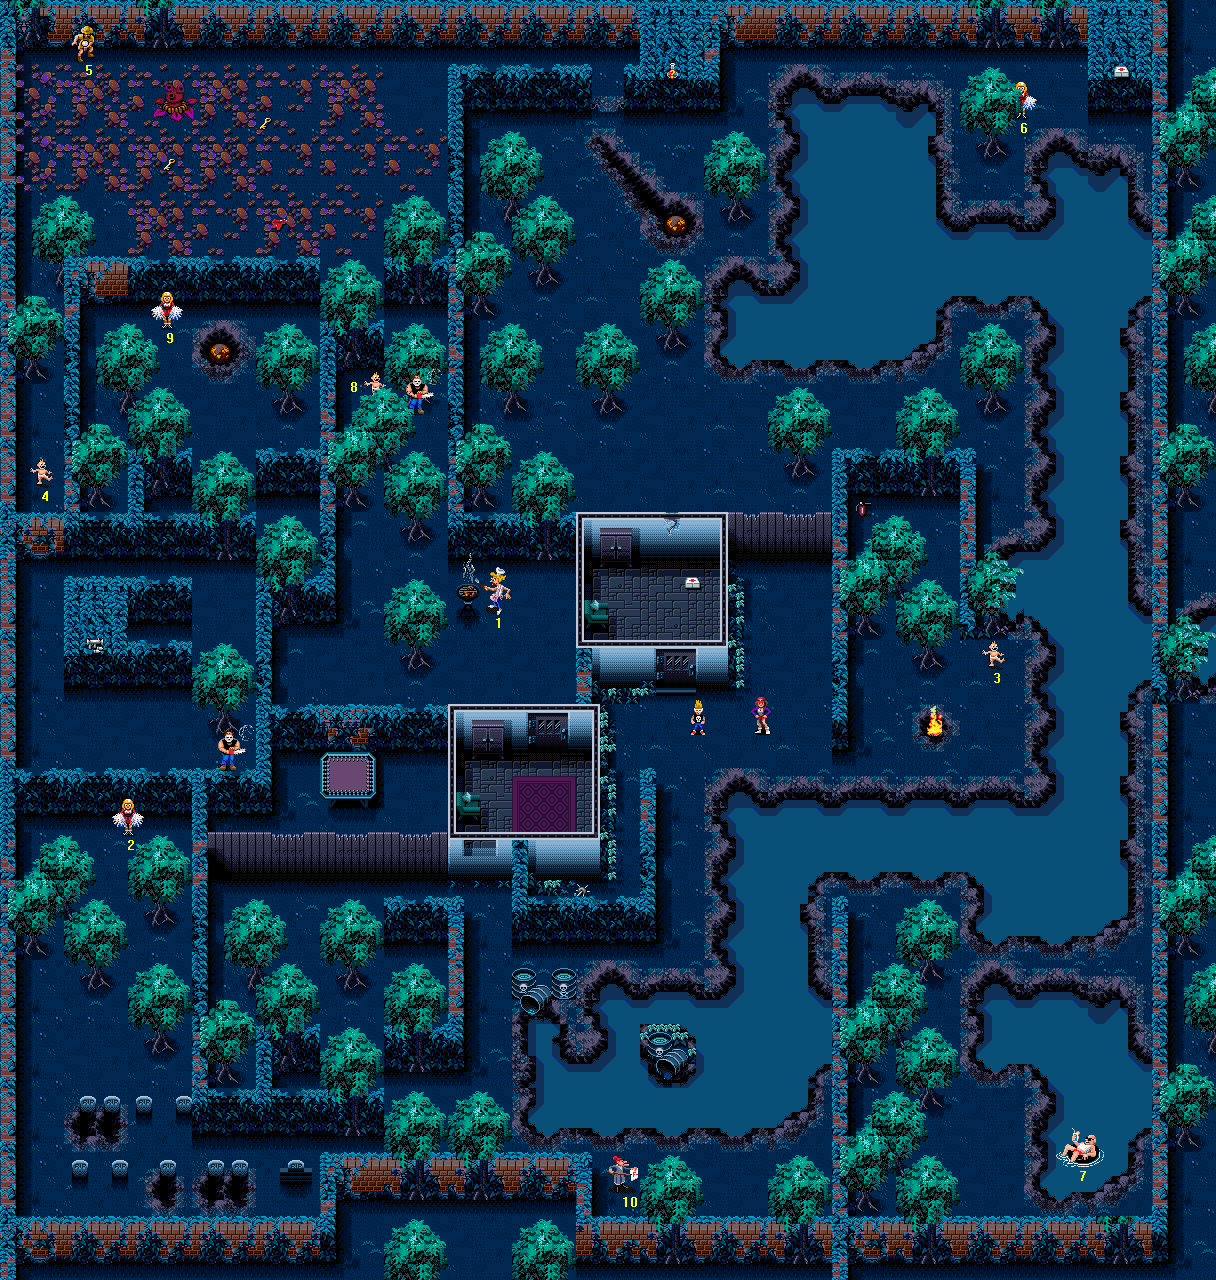
Difficulty: 4/10
You should not have much trouble with this level. There is only one Victim in particularly serious danger - a Baby (8) who is stationed right next to a Crazy Lumberjack - and he can still be rescued if you try the sneaky method I've prepared. And succeed, naturally.
Monster List
- Doppelgangers [Normal and Vicious] (intensity: very high, location: one place)
- Jelly Blobs (intensity: low, location: two places)
- Lumberjacks (two)
- Mushroom Men (intensity: high, location: one place)
- Pod Plant (one)
- Squidmen (intensity: from very low to high, location: patchy - wherever there is water)
- Zombies [Normal and Vicious] (intensity: from high to very high, location: two places)
Important Pickups
- Two First Aid Kits
- Bazookas
Bonuses Available
- Victim collection bonuses
Best Place To Score Bonus Points
The graveyard area in the southwest corner of the level. Zombie massacre! Yes!
Walkthrough
Walk north and into a little hut, in which can be found a First Aid Kit and also a Cupboard in the northwest corner. Exit the room again, and head east, south around the end of a wall, and then northeast to find a Baby (3) standing between a fire and the edge of the water. (Not the safest place to put a baby, really, even when there aren't any Squidmen around.) You should be quick, as a Squidman will probably jump out and land by the Baby (3) in order to kill it fast. From the Baby, walk northwest into a copse of trees, at the end of which is a Fire Extinguisher.
Head south again all the way over to the water, and jump in (there's no point in extinguishing the fire - there's nothing in it, and you do not get any bonus points). Jump out again on the other side of the channel, and continue to head south, winding through the trees. When you reach the southern wall of the level, move into the corner to the west formed by the two walls, and stay there until you are satisfied that there are no Squidmen still coming after you (this is a measure to protect the next Victim). Head east and jump into the water quickly, the better to save the Swimming Pool Guy (7) who's in there.
Swim north, jump out of the pond at its northern end, and then straight back into the channel further north. Continue north; when you next come to a turn to the west, take it and hug the south bank, in order not to get close enough to the Cheerleader (6) to the north for a Squidman to jump out and kill her. If you see any Squidmen appear in the water to the north or northwest, it might be an idea to quickly head south away from there so that they do not get to kill the Cheerleader (6). Swim west until you come to the edge of the lake; jump out, then head north and once at the northern end of the map, east. You will quickly come to the Cheerleader (6), near a tree. To her east is a hedge block; blow the front in with your Bazookas to reveal a First Aid Kit.
Still keeping the Bazookas as your primary weapon, head west along the northern edge of the level and when your path widens out, you will find another hedge block to Bazooka. This one contains Mystery Potion. Being careful to avoid the Jelly Blobs' Jelly Bombs, head out of the hedge block and in through the damaged hedge to its west. Switch to the Weedkiller and then continue west. As soon as you reach the yard full of weeds, start sweeping but continue walking west, and you will come to an Explorer (5), relatively safe, near the northwest corner of the level. Southeast of his location is a Pod Plant, which you should kill.
There are two Keys to pick up among the weeds, near where the Pod Plant was. The first one you should get is the one to the east. Once you have it, walk back through the path you have cleared, and then make a new one south to get the other Key. Once you have this second Key, do not move east or west, but just move south by degrees until you can see the top of a hedgerow. Get out your Bazooka and fire it at the hedgerow so as to make a hole out of the westernmost weak spot.
Once the hole has been made, retreat north and then east, to the end of the alleyway where the entrance from the lakeside area is. This is to clear the machine's memory of monsters in the vicinity of the next Victim, a Cheerleader (9). Once at the eastern end of the alleyway, switch back to the Weedkiller; go west again and south over to where the hedge was, continue south, cutting through the weeds, and go through the hole in the hedge for the Cheerleader (9). Do not go east at all! This is a precaution to avoid the death of a Baby (8) who is very near a Lumberjack who starts over there.
After you have saved the Cheerleader (9), switch back to the Bazookas and look west; blow a hole in the hedge to the west, go through and then head south to the end of the alleyway to get a (different) Baby (4). Go north out of the alleyway and you will find yourself back in the area overgrown with weeds. Read through paragraphs 8 and 9 in full before beginning, so that you know what you need to do.
Position yourself at the southeast corner of this clearing, right next to the southern wall (where there are no weeds, so you won't need to walk along using the Weedkiller) and switch to the Fire Extinguisher. Walk east until you come to a second gap in the hedge (the first having been made by you, yourself). Do not wait around here - Jelly Blobs are liable to attack the Baby (8) whom you are trying to save, with Jelly Bombs, at this point.
Head south through the gap, and east around another hedge - to your southeast now is the Lumberjack, and to your southwest is the Baby (8). The Lumberjack will wave his axe (or rev his chainsaw) for a moment, then (try to) stride towards the Baby and chop its head off. The best way of preventing this from happening is to stand near to the hedge (but not right up next to it) and spray your Fire Extinguisher southwards so that the Lumberjack is caught in the blast, and frozen - then you can nip over and collect the Baby (8) for yourself.
Kill the Lumberjack using your Ancient Artefacts, and then head north again, back through the hole in the hedge and into the field of weeds. Switch to your Weedkiller (last time, I promise) and go over and collect the Water Pistol ammo that's just to your northwest. Head southeast again, through the gap in the hedge and back into the copse of trees where the Baby (8) and Lumberjack were. Head south through the trees and at when you come out at the end, go southeast to find a Barbecue Guy [A]. South of him is a little hut, with a locked door, with a Cupboard inside.
Exit the hut after opening the Cupboard, head northwest over to stand just south of the barbecue stand, then directly west over to a hedge (position yourself in the corner formed by the bend in the hedge). Another Lumberjack to the southwest will walk towards you after a second or two; wait patiently for him to break through the hedge - to protect a Cheerleader (2) to the southwest - and then kill him with your Ancient Artefacts, like you did the first one.
do not go through the hole in the hedge made by the Lumberjack. Instead head north through the copse of trees again and then around the hedge to the north, west, and south again. You will come to two more lines of hedges - go through them, but no further south. Instead go west all the way into a corner formed by two walls, and then switch to your Bazookas and fire southwards. Switch your weapons to the Water Pistol and Pandora's Boxes. When ready, march south, through the hole you made in the hedge and east to the Cheerleader (2); you should hopefully not see any Zombies get anywhere near the Cheerleader if you are quick, but if any do, then you ought to know how to deal with it by now.
Head northwest back through the hole in the hedge, and then northeast over to a hedge block. Blast down the front with a Bazooka shell, and inside you will find... Bazookas. Well, you are ahead in shells overall, and that's the main thing. Return to where the Cheerleader (2) was by heading southwest and through the hedge, and then go south through some trees, past one row of graves and then east out of the graveyard area. Carry on heading east and you will eventually come to one end of the channel you were swimming in earlier. South of the channel is the last Victim, a Teacher (10). Collect her and then exit.
From the Teacher (10), dive into the channel to the north, and swim across to the other side (ignoring the little peninsula to the northwest). Once at the other bank, head northeast around the hedge to the north, then head north alongside it and go around the north end into a narrow alleyway by the side of a small hut. At the southwest extremity of the alleyway is a Weedkiller pickup - perfect after all that weed clearance you were doing earlier. Now, return to the Exit Door. Head northeast, around the north end of the hedge that forms the alleyway, and south and into the water. Swim around the little island with the toxic waste barrels on it and jump out at the other side. The Exit Door is here, if you had ten Victims.
Get Ready for Big Terror: Level 32: Giant Ant Farm
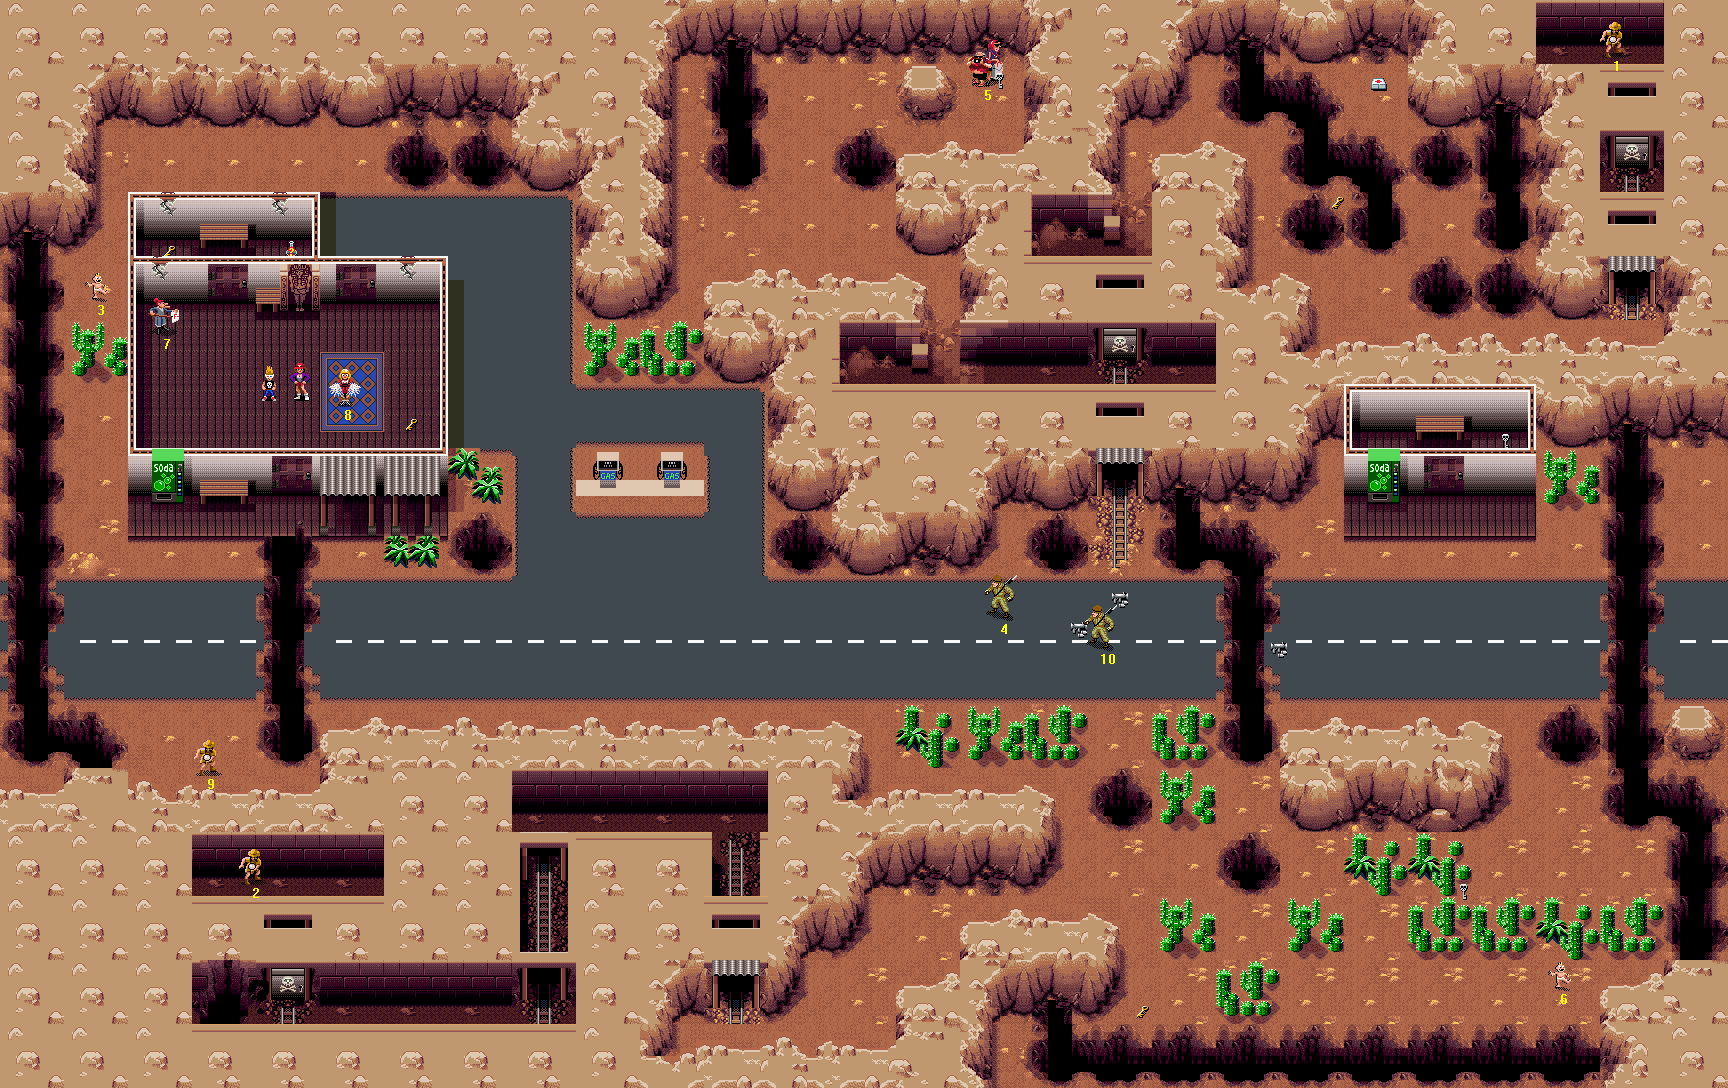
Difficulty: 3/10
"Big Terror?" Not really. You will not have many difficulties here, although the introduction of Red Ants, which are your equal in terms of speed, could come as a shock. But, isn't it refreshing to see a level with a walkthrough of only six paragraphs, after all the huge ones I've had to write recently?
NOTE: Though you must pick up Skeleton Keys, do not worry about the Ants dragging them away and making the game forget them, thus trapping you in the level. The game will always remember where the Skeleton Keys (and regular Keys) are, though they won't return to their original locations.
Monster List
- Ants (intensity: high, location: patchy)
- Red Ants (intensity: ranges from medium to high, location: behind the Skull Doors, plus one other place)
Important Pickups
- First Aid Kit
Bonuses Available
- Victim collection bonuses
- Extermination Bonus - 1000 points
Best Place To Score Bonus Points
Bubble Gunning the regular Ants in the main area, around the road.
Walkthrough
Switch to the Martian Bubble Gun, if you hadn't already. Head northwest and collect a Teacher (7), then enter the door to her northeast. Pick up a Mystery Potion and a Key, and then leave quickly. Head southeast to get a Cheerleader (8) and another Key. Exit the house using the door to your southwest. Once out, take a couple of steps west to avoid the big trench through the middle of the road.
Now, head south. Once you pass the dashed white lines in the middle of the road, hold your finger on the Y button so as to fire constantly; the probability is that an Ant will climb out of the trench at the end and go for the Explorer (9). Your Bubble Gun will kill it, keeping the Explorer safe. Speaking of Explorers, collect him, then go back north up to the house. Re-enter it through the southern exit, then head north and a little east over to the exit in the north side.
Once out, head north a little, around the protruding room, and west. When you reach the rock wall, head south, and you will find a Baby (3) standing near some cacti. Head north, east for a while and then south when you come to the eastern rock wall. Once you come to the main road (the road with the dashed white lines in the middle), follow it east. You will come to a pair of Soldiers (4 and further on, 10) with a pair of Bazooka pickups. Get all four of them, and then head south through a gap in the cacti and further south until you come to a Key at the southern end of the level. Hug the pit to the south and head east - you will come to a Baby (6).
Continue east over to the pit that is north of a large rock. Stay on the east while walking north past the cacti. Staying north of the row of cacti, walk west to find a Skeleton Key. Now head north and a little east, being careful of the Red Ants that occasionally spawn from out of the pit here. Walk into the road, and then head west along the very middle to find Bazookas next to another big trench. Go northeast from there and into a little hut to find a second Skeleton Key. Exit the hut and go south. When you come to the rock wall, head southeast over to the trench on the eastern side of the level. Hug the trench and walk south past the cacti, then go over to the southern trench and head west until you come to another large rock wall.
Take these directions to reach the eighth Victim: north, west, southwest, north into the tunnel, west, south, west, north through the Skull Door, and over to the Explorer (2). Now take these directions to your ninth Victim: south, east, north, east, south, northeast, east, north past a pit, through a gap in the cacti, over the road and into a tunnel, west at the Skull Door, north through the break in the rock wall, northwest past a pit, east and north. Once you have collected the Tourists (5), you will see that they were standing in front of the level's third and final Skeleton Key; you probably did not walk over that yet, so be sure to collect it as well.
Now head south, west, and once past the pit, southeast and into a tunnel in the rock. Go over to the east end of this tunnel, and open the Skull Door. Continue north as far as you can, then head east. When you see a Key to the southeast, go and get it. Go south and east around the pit, then all the way north to find a First Aid Kit. When you have that, walk south all the way to the rock wall, then head east and north into the tunnel. Open the Skull Door and go through to find an Explorer [A]. Head south out of the restricted tunnel to make the Exit Door appear, and use it to good effect.
Level 33: Fish and Crypts
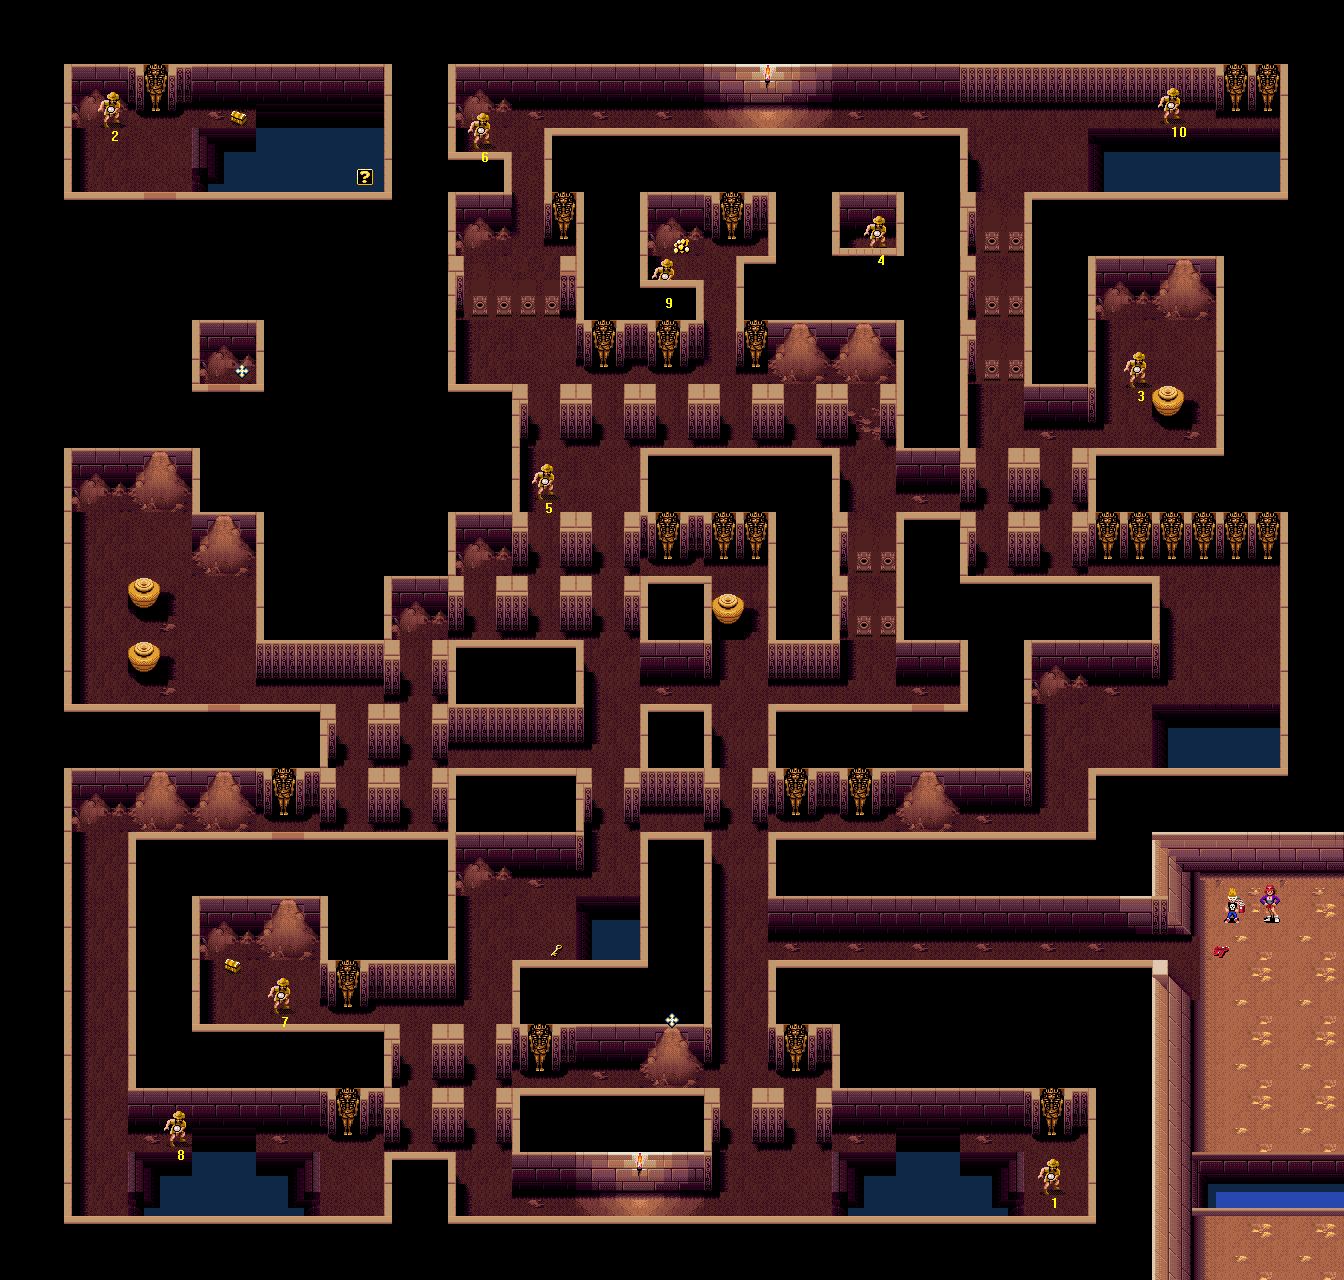
33 Difficulty: 3/10
Some of the Victims in this level will fall foul of the Mummies and Squidmen if you are lax in protecting them. You will need to be careful in getting to them quickly - but of course, you are used to that state of affairs by this stage. By the way, starting from this level using a password and managing to finish level 36 takes a lot of skill - you will need to do very well on the next five levels (not in terms of Victims so much as items and preserved health) to stand a chance against the boss. Unconfident players should begin at the more forgiving level 29 - or even earlier, as level 29 presents difficulties of its own - in order to have a chance to stock up on more weapons and items on the approach.
NOTE: You can access a Bonus Level from here, but you might decide that it is best not to visit in some circumstances. Consider the facts... The lower-numbered Victims in the Bonus Level are mostly easy to collect, but the higher-numbered ones are considerably more taxing. You can pick up five Pandora's Boxes, a Monster Potion, a First Aid Kit and an Extra Life (though you need Bazookas to access these last two). You might lose one or two of those Pandora's Boxes trying to save the higher-numbered Victims (and of course, you might lose one or two of those Victims). On the whole, I'd say that it is worth it - especially if you have less than, say, seven Victims.
Hazard
Flame traps. These are flamethrowers mounted on the floor so that they fire straight up (yowza!). Time your walk so that you pass over when they are not firing.
Monster List
- Mummies (intensity: ranges from very low to high, location: patchy)
- Squidmen (intensity: ranges from low to high, location: patchy - wherever there is water)
- Zombies [Normal and Vicious] (intensity: ranges from very low to low, location: three places)
Important Pickups
- Two lots of Ancient Artefacts
- Two Pandora's Boxes
- Bonus Level Pickup
Bonuses Available
- Victim collection bonuses
- Fish Fry Bonus - 1000 points
- Secret Bonus - 2000 points
Best Place To Score Bonus Points
Go to the northwest corner of the level, where the Bonus Level Pickup was, and fry up some fishes.
Walkthrough
Collect the Soda Cans and Water Pistol by which you start, and then head west into the pyramid. At the fork, go south. You come to a couple of collapsing roof gates; to their northwest is a Sandbank. Open the Sandbank to reveal a dark entrance; all that's inside, though, is an Ancient Artefacts pickup. Get it and exit, heading southeast through one of the gates. Go east over to the water, jump in and swim over to the other side, where you can find an Explorer [A].
Jump back in and swim over to the west side again, then continue west into a passage. At the end of it are two pairs of collapsing roof gates to the north. Walk north through one pair and then head west to get the Explorer (7) in a little chamber which also features a Pandora's Box and a Sandbank on the north wall. Pulling down the Sandbank reveals a tunnel heading north. Go through and you will come out near two more Sandbanks, to the west. Ignore them for now; go south along the corridor to their southwest and you will arrive at the edge of another little pool. There is an Explorer (8) standing here, so get him nice and quick in case a Squidman appears and jumps out (it does sometimes happen).
Head north again and check the two Sandbanks you ignored earlier. Behind the eastern one is another tunnel heading north. Go through and at the end, head northwest for two Pots. Go northeast from there and open another Sandbank, head north into a third tunnel and at the end, you will find another lot of Ancient Artefacts. Go back south through the tunnel and once out the other end, head northwest. You come to another Sandbank on the north wall. When you pull it down you find yet another passage north, so take it. March straight out of the tunnel at the other end and go northwest to get an Explorer (2) before the Squidmen do. East of his location is a Pandora's Box.
If you fancy subjecting yourself to a rather difficult Bonus Level - see the note in the level summary section above - then jump in the water and swim over to the east to get a Bonus Level Pickup. Once you are finished in here, head south back through the secret passage (look for the orange part of the southern wall to find it) to the room with the pots. Once in this room, head out the southeast corner, east a little, and then northeast through three collapsing roof gates for an Explorer (5).
Now, walk over to the east - do not go any further north if you have more than eight Victims! - and stand by the wall. Kill any Mummies that approach and then switch weapons to the Pandora's Boxes. Look north - there is a long row of collapsing roof gates there. Read to the end of paragraph 6 in advance, so that you know exactly what to do.
Walk north towards the collapsing roof gates, east a little, through the third gate along, and then north up the tunnel that is northeast of that gate. At the end of the tunnel is an Explorer (9), and near to him on the wall is a sarcophagus that may spawn a Mummy, which would promptly go after him, and kill him quite quickly. If you see a Mummy near the Explorer (9) as you approach (and there's a high probability that you will), use your Pandora's Box to kill it straight away. No other method of saving this Explorer will work as effectively.
North of that Explorer (9) is a Bonus Points Pickup. Get it and then walk south out of the little room. To its east are a couple of Sandbanks, and the one to the east hides (groan) a secret passage. Walk up there, save another hidden Explorer (4) and exit south again. Continue south through an already-ruined collapsing roof gate and head east at the first opportunity. Head north through either of the next pair of gates you find, and east into a little chamber that features a Pot - a chamber Pot, if you will, - an Explorer (3), and a Sandbank on the north wall. Head back to the southwest corner to exit. Head south through two collapsing roof gates, then east, and south away from the sarcophagi at double-quick speed.
You come to a pool of water. Head southwest from there until you come to a Sandbank to the north; search it, but do not enter the tunnel. Just continue west past a couple of sarcophagi, and a collapsing roof gate. When you reach the second gate to your north, head southwest to find a Key beside another pool of water. Now head northeast back to the gate, go through, and at the following turnings, go east, then north to find a Pot. From that, go north to the sarcophagi at the end of the corridor, west, and north through two collapsing roof gates (spaced a little apart).
Head northwest once through the second one, but pause before passing over the little holes in the floor. Make sure to time it so as to walk past when they are not firing. Past them, carry on north and pick up an Explorer (6) in a corner. Head east from him, along a corridor, and do not stop until you have saved the last Explorer (10), standing by the poolside at the other end. To make the Exit Door appear, by the way, you do need to give it space - go west and off that sliver of land, and the Door will appear. Before exiting, read the short preamble to the Bonus Level, if you decided to go there.
Bonus Level: Curse of the Pharaohs

Difficulty: 5/10
Mummies spawn rather easily near to the high-numbered Explorers, and as a consequence if you are doing well in terms of Victims, you might, well, lose a couple. For those with less than about six Victims, this level is a cinch.
Monster List
- Mummies (intensity: ranges from low to high, location: patchy)
Important Pickups
- Five Pandora's Boxes
- First Aid Kit
- Monster Potion
- Extra Life
Bonuses Available
- Victim collection bonuses
Best Place To Score Bonus Points
Beating up the Mummies... anywhere, really. They give terribly few points, given the amount of effort you have to put in, anyway. Why even bother?
Walkthrough
As soon as you start, a Mummy will spawn to the north. Begin by walking directly east and saving an Explorer (4), and then shoot the Mummy dead.
From that first Explorer (4), head west and save another one (A) who's safe in a corner. Now head east, and north into a narrow passage in the rock. At the other end of it, go east sharpish, then south. You emerge by an Explorer (2) and three Bonus Point Pickups. Head south, skirting the wall, until you come to a giant cobweb to the south. Ignore it for now. Instead head east, picking up a Pandora's Box as you go, but not stopping, and you will find an Explorer (3) standing by a First Aid Kit. Head northwest from him to find a fifth Explorer (8) standing in front of a big rock.
Move west around the rock and head south over to the giant cobweb. If you have Bazookas, then you can get through to a Monster Potion; if you do not then you cannot have it. From there go north and you will come to a golden wall display showing some kind of mystical creature. To both the east and west are exit tunnels heading north - you want to take the western one. Head north, west and south. At the end of the part going south, you arrive in the area where you started. Head northwest through here. you will come to another passage heading north - take it.
you will find an Explorer (5) in the middle of the passage, where it swerves to the east slightly. Switch to the Fire Extinguisher (if you have it) and then walk north, staying against the eastern edge of the passageway. Once you pass the Pandora's Box to the east, in another passage, start spraying the Fire Extinguisher ahead of you as you go. You will come to the end of the passage and find an Explorer (6) just to the east. You may also find that a Mummy has been frozen as it attempts to reach that Explorer - neat, yes? If there was no Mummy after all, you have lost nothing but a little Fire Extinguisher ammo.
Head south down the little passageway that's to the east of the one you came in by. you will find an Explorer (9) there, with the Pandora's Box you observed earlier. Head north out of there, and then west over to where you will find a Bonus Points Pickup. To the south of this is a giant cobweb, through which is an Extra Life. Switch to your Ancient Artefacts and Pandora's Boxes. You should read paragraphs 5 and 6 in full, in order to be prepared.
Go east and enter a hallway, lined to the north with pictures of winged dogs or some such (stay up close to the northern side, as it will allow you to see what is going on better). When you near the eastern end of the passage, you may find that there is a Mummy approaching you; if there is, switch on the Ancient Artefacts for a moment in order to pass it without harm. Once you have reached the chamber at the far end of the hallway, you will see that there is an Explorer (10) in the northwest corner (pay attention to the northern edge of the screen). He may be under threat from a Mummy; if so, use a Pandora's Box to neutralise the threat.
Now continue across to the southeast corner of the chamber, and collect a different Explorer (7). Head northwest from him directly over to where Explorer #10 is, and save him. He's standing on a Pandora's Box - I'm fairly sure that it is impossible to collect him without collecting it as well, but do make sure you get it. The Exit Door will now appear, but before making use of it, head over to the northeast corner of the room to collect two Pandora's Boxes and two Bonus Points Pickups, and then over to the southwest corner for another Bonus Point Pickup. On the next level, you should pause the game as soon as you start while you determine which of the two walkthroughs you should follow.
Level 34: I Was a Chainsaw Maniac
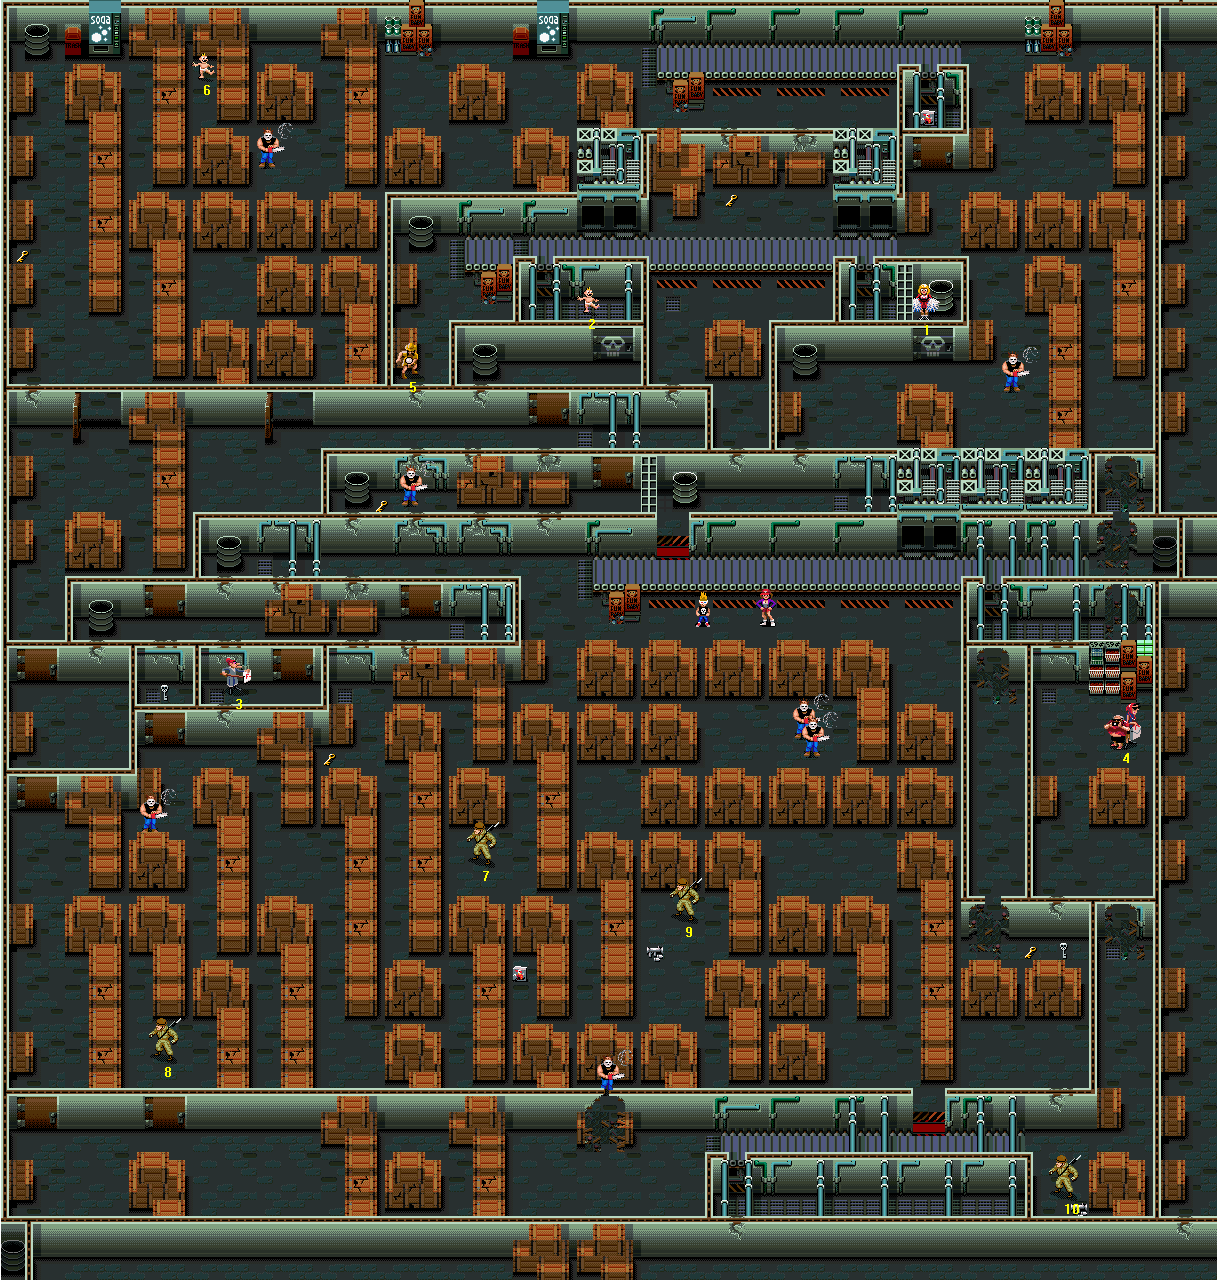
Difficulty: 5/10
Depending on how well equipped you are, this could be a simple clean-up operation or a mad rush to escape as quickly as possible. Those who started on level 33 will have it hardest, unsurprisingly. I've written two walkthroughs: use the first one if you are well enough equipped to hammer all of the Lumberjacks as you go through; or use the second one if you are not so well equipped, and the Lumberjacks are more likely to be hammering you.
Monster List
- Lumberjacks (seven)
Victim List
- [A] Tourists - On the eastern end of a length of pier, which stretches out from the northern part of the dry land on the western side of the level.
- Baby - On the very end of a pier in the southeast corner of the level.
- Swimming Pool Guy - at the end of a long row of boats, in the northeast corner of the level.
- Tourists - On a sandy island in the north of the map.
- Swimming Pool Guy - Roughly in the middle of the level, in water enclosed by sections of pier, and a lot of boats. There's also a hut on a nearby pier section.
- Tourists - In the exact same place as Tourists #A (in such a way that it looks like there's only one lot of them there), so that if they are both there you pick them up at the same time.
- Teacher - Standing on a rowboat on the south side of the level, and slightly to the east.
- Baby - In the southwest corner of the level, at the end of a jetty sticking out from a little sandy island.
- Trampoline Girl - Roughly in the middle of the level, near a hut on the pier. The trampoline is stretched over a boat and supported by the pier's mooring posts.
- Swimming Pool Guy - Near the little hut at the end of the pier, at the eastern edge of the map.
Important Pickups
- Two Bazooka pickups
- Two Decoy Clowns pickups
- Two Skeleton Keys (of which you will use both, or just one if you have only one Victim)
Bonuses Available
- Victim collection bonuses
- No Bazooka Fired Bonus - 1000 points
- Massive Destruction - 2000 points
- Axeman Begone Bonus - 5000 points
Best Place To Score Bonus Points
You cannot obtain limitless points on this level - once all the Lumberjacks are dead, they are all dead. Go for the bonuses, though, because some of them pay out a lot of points.
Walkthrough
you have been playing for a while and can take on the Lumberjacks
You start with two Lumberjacks on the other side of a row of boxes, so let them come to you and then kill them. (Ancient Artefacts are always good, or you could consider freezing them with the Fire Extinguisher and then using Weedkiller.) Walk north onto a conveyor belt and then east along it to the eastern side of the level. Head through the hole in the wall to your south, then continue along the passage west and south. You emerge in a small area that holds a Key and a Skeleton Key. On the wall to the north is a crack, so blow it open and head through. Further north in this room are Tourists (4). Get them and then exit the room using its southeast exit, and head down to the southeast corner of the map. There's a Soldier (10) here with Bazookas.
Hop onto the conveyor belt and walk against it all the way over to its western end. A Lumberjack will come after you from the northwest, so take care of him and then blast down the box he was standing in front of (if he did not already carve it up himself). Head through; you now have a choice of three paths. Pop into a dead end to your west to get Decoy Clowns, and then take the eastern path and head north for a Soldier (9). Get the Bazookas and then take the middle path north to find a Soldier (7) to your northwest. Fire two Bazooka shells west into the broken boxes here; they'll both break, one after the other.
Go through the hole made by your first Bazooka shell, then take a quick detour north up the aisle for the Key at the end. Return to the gaps you made in the box wall and walk through the second one. Once you are in the middle of the next wide area, a Lumberjack will come crashing through more boxes to the west. Give him what for and then head through the hole he made, and south. Go around the bends and you will come to a weak box in the western barrier, which when blown up allows you through to another Soldier (8). Having saved him, go back up north, past the box broken by the Lumberjack; you will find a small room behind a door, with a second Skeleton Key in it. Blast the wall behind it and step through. Head east in the next corridor and go south through the next door to find a Teacher (3).
Fire a single Bazooka shell at the wall north of the doorway into the Teacher's (3) room. Step through the hole into the corridor beyond and proceed east. A Lumberjack will break through from the north and attack (if he does not, just wait and he will eventually). Kill him and head north through the damaged wall. At the western end of the passage he was in is a Key. If you have no entrance to the next corridor to the north yet, stand south of the cracked wall just east of the Key's position and fire a Bazooka shell north. Head north, and then east along the corridor, and open the door to your north. Once through, head through the Skull Door further north to free a Baby (2).
Return southwest through those two now-open doors. Continue west along the corridor until you come to another open door to the north; fire a total of three Bazooka shells north through it at the cracked box directly in front of it. do not switch weapons away from the Bazooka - stride north through the wreckage of three boxes and you will encounter a Lumberjack, with a precious Baby (6) standing vulnerable to his northwest. Give him a rocket so that he falls to the floor, and then nip over and get the Baby (6). You may now finish the Lumberjack off at your leisure.
Go out of the Baby's (6) cul-de-sac into the open area, then take the southwest route out. You come to a wall to your west; walk around it to the north and continue south. you will find a Key by the wall on the western edge of the level. Return north, around the boxes, south and then go east until you see a conveyor belt to your south and machinery to your east. Continue northeast and follow another conveyor belt east. Where it ends, head south and then west over to a little storeroom which holds more Decoy Clowns.
Go south out of that room and east around the edge of the Cheerleader's (A) cell. The final Lumberjack will come after you, so cut him down and then go in through the Skull Door to rescue the lady. Head out, and north around the east side of the cell. You will see a conveyor belt to the west; step on and walk against it until you can step off to the north. Collect the Key and then get back on and go all the way to the western end of the belt. Here, you can head south to find an Explorer (5), after which the Exit Door will appear.
You started on level 33
This walkthrough will tell you how to get through without fighting the Lumberjacks - because realistically, you cannot be expected to do very well if you started on level 33. If you are better equipped, then you can use the alternative walkthrough above, which involves killing all of the Lumberjacks. There are a couple of pickups of five Bazookas on this level, but you definitely ought to save your heavy weaponry for level 36, so it is not a priority - you will get to them when it is convenient.
The only other adequate weapons you will have are a couple of pickups' worth of Ancient Artefacts, and some Soda Cans. That's not much good against seven Lumberjacks considering that you need to save your ammo for the tough levels you are approaching, so I'll provide you with a walkthrough that involves you running like the wind (and hopefully not losing too much health). Pause regularly and do not dither.
As you begin, there are a couple of Lumberjacks to your southeast standing past a line of boxes. If you remain still, then they'll head towards you straight away and come through the boxes. do not do that - instead head north-east and east along the conveyor belt. Where it ends you can head south, west and south again into a long passage. At the end of this you come out into a small bay that holds a Key and a Skeleton Key. Head north again, east and north past the end of the conveyor belt.
You arrive in another large factory-floor area where there's a Lumberjack waiting for you, west past more boxes (those other two should not be following you unless you have been either slow or unlucky). Wait and see what he does (you will ideally have at least some idea of how Lumberjacks behave when they are behind walls). You might choose to get him to demolish both sections of box, or you might head round to the north; anyway, once on the other side of the boxes, walk northwest and in through the Skull Door. There's a Cheerleader there [A].
Hopefully the Lumberjack won't be coming in through the door, but will have gotten stuck outside. Wait for him to start wandering, then split; go south out the door, east and north around the cell, and then west onto a conveyor belt. The belt is moving east, but just keep walking until you can step off it to the north. There's a key over to your west. Step back on to the conveyor belt and continue west to the end. Move south quickly to find an Explorer (5) in a dead end, wait around just long enough for a Lumberjack to your south to take note of your presence and start chopping through the wall, and then go north again and east all the way over to the other end of the conveyor belt.
From there go north and, if you want, into a little storeroom for Decoy Clowns. Either way head around to the east and north to the end of another conveyor belt going in the wrong direction. You only have to push against a couple of metres of it, though; step off to the south when you can and continue west. you will next be approaching a Baby (6) who is near a Lumberjack. The Lumberjack's position is not predictable at this point, though, so you will have to be wary. You should have at least two Pandora's Boxes, and just one will usually cause the Lumberjack to fall over - so, use one to delay him if you must.
Turn on your Victim Radar. Once you reach the blue soda vending machine that's on the northern wall, the Baby (6) will appear on it to the west. Head southwest from there, west and then northwest and the Baby (6) should come into view. Grab him and then evade the Lumberjack as appropriate; you are aiming to reach the northwest corner of the level, and head south from there. Along the wall as you go south from that corner is a Key. Further south of there is an open door; go through and head to the southeast corner of the next room. There's a closed door here, leading into a passageway; head east, and then south into a little storeroom for a Teacher (3).
A Lumberjack to your southwest will have taken note of your presence, and will start walking towards you, with the intention of breaking in and chopping you up. This is a good thing for you - no, seriously, you want him to break down some walls and doors at this point. Firstly, though, nip past him and into the even littler storeroom to the Teacher's (3) west for a Skeleton Key.
From the Skeleton Key, head south (and east when you are obstructed by boxes) until you see the Explorer to your southwest. The Lumberjack should be following you. Continue southeast into a dead end, and press west into the side of the corridor. The Lumberjack will follow you in, and once in, if you have done it right, he should pretty quickly get rid of all three weak boxes on the sides of this corridor, including the one to the west. This allows you to get to the Explorer (6) - rush in quickly and grab him! Exit the little clearing the way you came in - try not to get too badly cut in the process.
The Lumberjack should have destroyed the box to the east of the corridor - if he did not, you will have to find your way around to the north. Assuming everything's going well, go east, past protruding boxes, north, west and north. you will now see a Soldier (7) past some boxes to the east. If any Lumberjacks are chasing you then it might be wise to try and get them to break through, so you can be sure of getting to him first. If you do not think he's at risk, carry on north. There's a Key to your west, in a little alcove. Go northeast, around some boxes, and southeast until you come out into the clearing where the Soldier (7) stands (or stood).
Carry on southeast; you will see Decoy Clowns to the west and a Soldier (9) standing with Bazookas to the east. Go quickly - the Soldier may be at risk, even if you cannot see any Lumberjacks around him. Go around the row of boxes to the south and north to collect him. You can now get the Bazookas, and the Decoy Clowns - head southwest until you come to a corner, and then north.
From the Decoy Clowns, head southeast until you pass through a collapsing roof gate. (Ignore any smashed-up boxes - consider them as obstacles still.) Once through the gate, head east along to the end of the conveyor belt, and then save an Explorer (10) and pick up Bazookas. Go north into the long passage, and when it opens into a long room, go west around the boxes and collect Tourists (4). Now that you have Bazookas, you can blast down the weak wall to the northwest.
Go through that wall you just demolished, and northeast through another hole in the wall. Walk west, against the conveyor belt, and step off to the south at the earliest opportunity. Carry on west until you see a collapsing roof gate to the north; walk through across the conveyor belt, and then head west to find a Key at the end of the passageway. One of the wall sections to the north ought to have been demolished, so go through, and then head through a regular door to the northeast. you will arrive outside a Skull Door; walk through to find a Baby (2). Exit before the roaming Lumberjacks find you (or indeed, before the chasing ones kill you).
Level 35: Boardwalk of Terrors
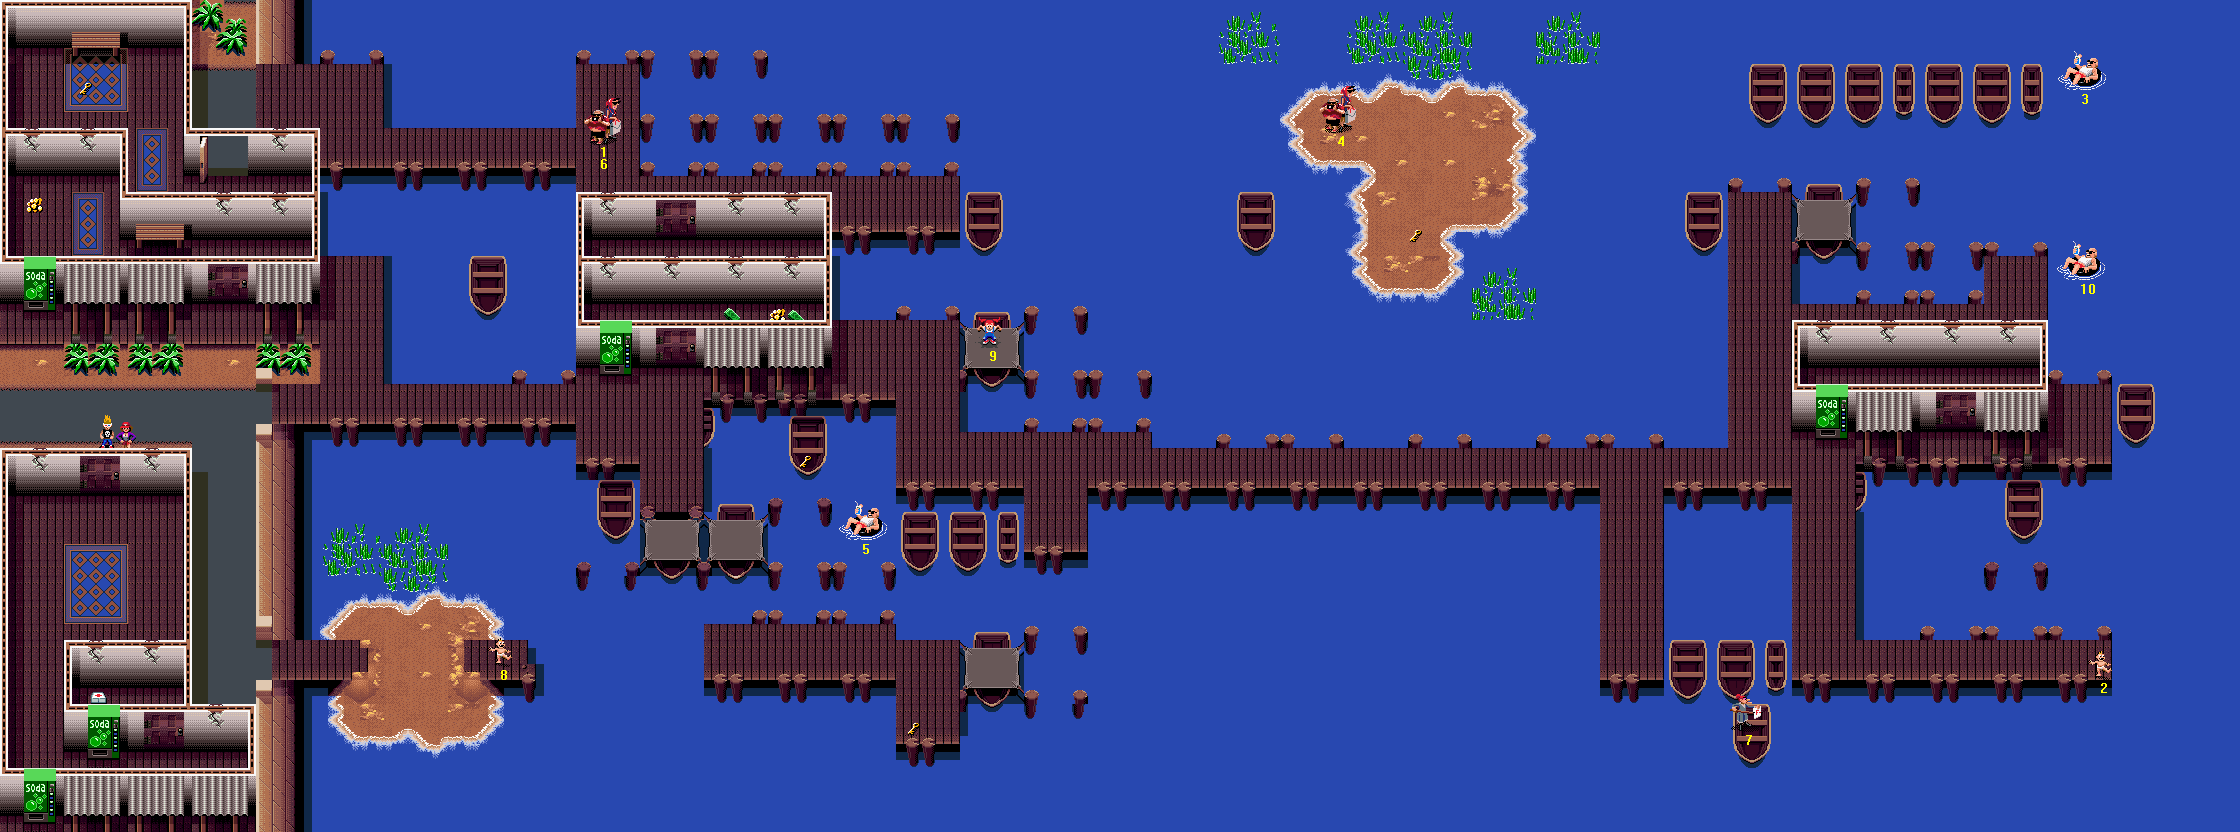
Difficulty: 5/10
it is a small-town dock that's been invaded by the Squidmen (prone as ever to jumping in and out of the water almost at random, and appearing right by Swimming Pool Guys and killing them instantly). For the last few Victims, you will benefit from the use of a Ghost Potion. Fear not if you have not got any - I have, once again, provided an alternative walkthrough for those lacking in the items department.
Monster List
- Squidmen (location: everywhere except the dry land to the west, intensity: ranges from low to high)
Victim List
- [A] Tourists - On the eastern end of a length of pier, which stretches out from the northern part of the dry land on the western side of the level.
- Baby - On the very end of a pier in the southeast corner of the level.
- Swimming Pool Guy - at the end of a long row of boats, in the northeast corner of the level.
- Tourists - On a sandy island in the north of the map.
- Swimming Pool Guy - Roughly in the middle of the level, in water enclosed by sections of pier, and a lot of boats. There's also a hut on a nearby pier section.
- Tourists - In the exact same place as Tourists #A (in such a way that it looks like there's only one lot of them there), so that if they are both there you pick them up at the same time.
- Teacher - Standing on a rowboat on the south side of the level, and slightly to the east.
- Baby - In the southwest corner of the level, at the end of a jetty sticking out from a little sandy island.
- Trampoline Girl - Roughly in the middle of the level, near a hut on the pier. The trampoline is stretched over a boat and supported by the pier's mooring posts.
- Swimming Pool Guy - Near the little hut at the end of the pier, at the eastern edge of the map.
Important Pickups
- First Aid Kit
Bonuses Available
- Victim collection bonuses
- Fish Fry Bonus - 1000 points
Best Place To Score Bonus Points
Anywhere away from the west side of the level, as the Squidmen spawn rapidly in places. As I've remarked before, though, fighting Squidmen does not really pay, so only do it if you are desperate for an Extra Bonus Victim.
Walkthrough
Walk south into the house and over to the far end. Enter the little store cupboard for a First Aid Kit. If you have not got enough Keys, just Bazooka it down. Get out of there and back up to the road where you started. Follow the road east and then south, and at the end you will see a wooden platform connecting the road to a little sandy island to the east. Go east without stopping, across the island, and over to the Baby (8) on the jetty on the other side. Return west to get back to the road, and then walk north again, until you come off the road and reach a door. Enter and head over to the west side for a Bonus Points Pickup.
Go southeast and out of there, and head under the canopy over to the water to the northeast of the exit. Jump in and swim over to the pier to the north. Once on the pier, go west, into the house by another entrance, and go northwest over to the larger carpet, where you can get a Key. Return southeast and then exit the building. Go east along the long wooden platform quickly and you will find Tourists (A and 6) standing near a hut. That's right, both sets of Tourists are standing on the exact same spot, so you get two Victims for the price of one.
Ignore the door to the southeast - there's nothing inside. Carry on east along the pier instead, and step onto a boat. Jump off to the south, and swim to the next boat to the south (with the trampoline stretched across it). Jump onto the trampoline to save the Trampoline Girl (9). Jump southeast off the trampoline and you will land on a large platform. Turn on your Victim Radar and continue walking east along the pier. The Radar will show a dot travelling along the northern edge; once it is slightly past the centre, jump off to the north and swim north. you will come to another sandy island. Collect a Key quickly and then stride northwest to collect Tourists (4).
Keep your Victim Radar on for now. Head back over to the southern side of the island and dive into the water. Swim south and you will get back to the last pier you were walking along. Go west, but do not continue south when you can; just carry on until you see another dot appear on the Radar. This the point in the level at which you will benefit from having a Ghost Potion to use (assuming you have more than four Victims). I'd advise different approaches for the "haves" and the "have-nots", so choose the appropriate second half of the walkthrough, below.
You have a Ghost Potion
As with the other walkthrough, I'd suggest waiting a few seconds for Squidmen to arrive where you are, to the east of the Swimming Pool Guy (5). This could give you a little extra edge. Once there are three or four jumping around, head slowly west and then south onto a protruding section of platform - allowing the Squidmen to follow you - and then use the Potion. To your west is a line of boats. Walk along there and off the end (no time-wasting diving, you see!) and the Swimming Pool Guy (5) should be yours much more easily. From him, head south, around any obstructing mooring posts, and you will find a Key on an unconnected section of pier.
Once you have the Key, keep south of the trampoline-boat and head due east, across the water. you will eventually come to a boat that has a Teacher (7) standing on it, teaching a school of fishes (aha!). Get her ASAP and continue east. Step onto the pier to the north and carry on over to the end. you will find a Baby (2) there. At this point, walk out onto the water to the east.
Do not step onto any land, pier sections, or boats until you have saved the remaining two Swimming Pool Guys (10 and 3) - you will remain as a ghost while you are on water, even if the Ghost Potion has timed out, and this helps you in collecting these final Victims. Walk north across the water and you will come to a boat obstructing you to the north. Walk around it to the east - not across it - and then walk northwest over to the Swimming Pool Guy (10) who is floating just off the pier. From him, continue walking north to get to another Swimming Pool Guy (3).
You have all the Victims, but there are a few things left for you to pick up. (do not worry about the Exit Door - it will appear as soon as you step onto land.) Head south around the line of boats to your west, and then go west until you see the sandy island, where the Tourists (4) were earlier, to the west. Head south and once past the reeds, west again. You will eventually come to a trampoline-boat to the west; walk south onto the platform. You should immediately revert to non-ghost form, and the Exit Door should appear.
Head west over to the edge of the water, and dive in. Swim over to the boat with the Key on it, and pick it up. Dive in again to the west and swim over to the next section of platform. To the north of your point of egress is a door leading into a room. The room contains Bonus Points Pickups, so get them and then leave the way you came in. Head south from the door and then jump into the water to the east again, and swim over to the other side (skirting around the boat this time, obviously). Jump out onto the platform to the east; the exit door will be nearby, probably a little east of here, if you left the water where I advised you to. Note that you should be prepared for the next level, but only if you have ten Victims (or will do because you earned an Extra Bonus Victim). Read the preamble below.
You have no Ghost Potion
The next Victim you have to collect is a Swimming Pool Guy (5), who is smack in the middle of a spawning ground for Squidmen. I'll direct you through the safest approach route, but your chances of successfully collecting him are dicey. However, you can make sure the probability of your succeeding is as high as possible by gaining an entourage of Squidmen - this makes it less likely for one to spawn near the Swimming Pool Guy (5), which gives you better odds. If you have it, switch to your Flamethrower; if you do not, the Soda Cans will have to do. While you were switching weapons, you should have had a number of Squidmen (four or five, ideally) spawn around you. Now continue west reasonably slowly until you have an extension of a large wooden platform to your south. Walk onto that with your party of Squidmen following you along. Read paragraph 6 before continuing.
There is a line of boats to your west. Abandon the Squidmen you were bringing with you and move quickly across the boats. Just past the last one, in the water, is the Swimming Pool Guy. As you are just about to enter the water, let out a short blast with your Flamethrower, or throw a Soda Can, in order to kill any Squidman who chooses that moment to appear. You should have entered just by the Swimming Pool Guy (5), so nab him before a jammy Squidman appears and nullifies your efforts.
To your northwest is a rowboat with a Key lying on the deck; grab it and then jump off to the west and swim over to the large platform. To the north on here is a locked door leading into a hut that has Bonus Points Pickups inside. Get them and then exit the way you entered. Head south and you will come to a pair of trampoline-boats, side by side. Jump onto the western one, and jump off it southeast. Head over to the southeast end of the platform you land on for a Key.
Now jump onto the trampoline to your northeast, and jump off northeast as well. you will land in the water just next to a wooden platform. Swim due east for a while and you will jump out onto a pier leading south. Walk south to the end, and then straight out onto the boats to the east; to the southeast is a Teacher (7) on the southernmost boat. Get her quickly - and do not try to walk across water. Get onto her boat by walking onto it from the middle boat, which touches it, to prevent "invisible walls" from giving you grief.
Return to the line of boats to the north and then walk east non-stop until you come to the far end of the pier. There's a Baby (2) here. Jump off east into the water, then swim north. you will come to a boat, which obstructs your progress. Head east and swim past it, then swim northwest to find a Swimming Pool Guy (10). From him, carry on north, and you will come to another Swimming Pool Guy (3) - who's also the final victim. You could jump off onto the line of boats to the west, but you could find it a tad difficult to get the Exit Door to appear. As an alternative, go to the southwest and you will find a (reasonably wide) section of pier. you have already collected all of the pickups.
Prepare for the Terror: Level 36: Monster Phobia
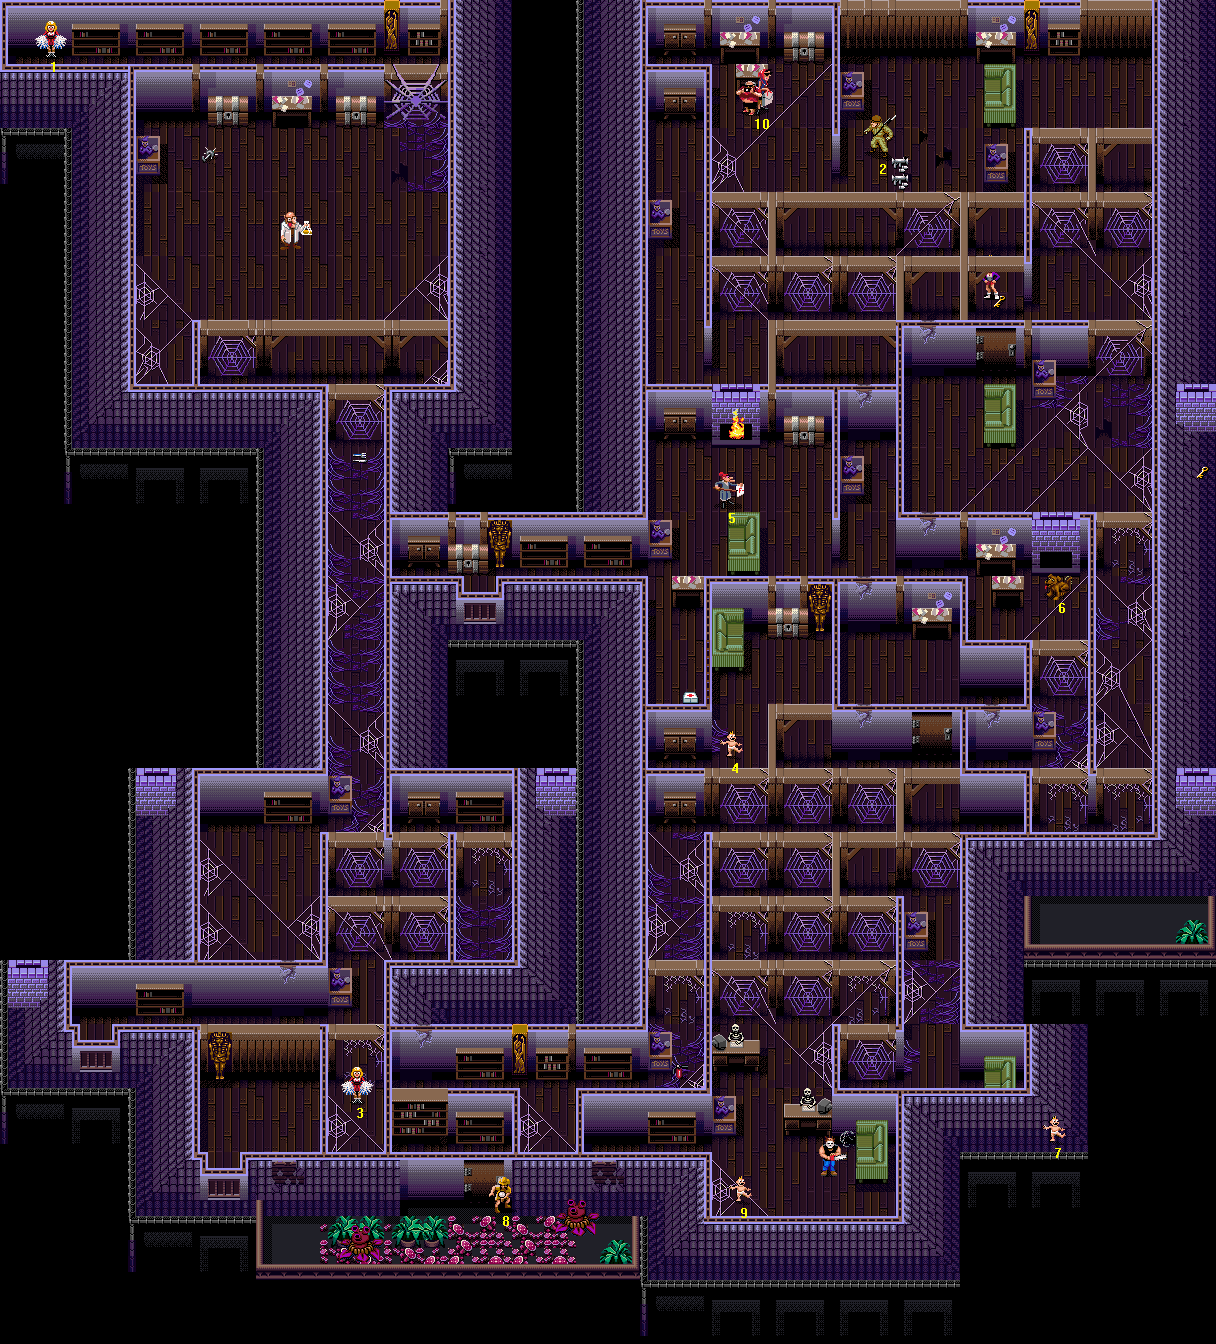
36 Difficulty: 9/10
Most of the Victims are challenging to collect, and you will have to go through carefully in order to reduce the probability of their copping it. And then, at the end, there is of course the boss, Dr. Bug. In the end, how hard he is will depend on how well equipped you are. If you started on level 33 then this will be a big challenge; if you played from the beginning of the game then it won't be nearly so hard.
NOTE: On rare occasions, the Cheerleader [A] whom you are fighting to save is not found in her proper position after the battle. You can tell whether she is present at any moment by checking whether a dot appears on your Victim Radar, showing her to the northwest of the boss arena - but her being there at the start of the fight may not guarantee her still being there at the end. If this glitch does occur, you cannot exit the level, meaning you have no choice but to start a new game.
I know it is not the sort of thing you want to find has happened, especially if you have played from the start of the game; but looking on the bright side, it is only happened to me twice, and I've played through the game enough times for that not to be particularly significant. it is still a small worry, though, and you should check before you get stuck into the boss (for what good it'll do).
Monster List
- Evil Dolls (intensity: medium, location: patchy)
- Fire Babies (from Evil Dolls, and spawning from the fireplace on the eastern side of the map, while it is lit - very low intensity)
- Jelly Blobs (intensity: low, location: the east side of the map)
- Lumberjack (one)
- Mummies (intensity: low, location: a few places)
- Pod Plants (two)
- Spiders (intensity: low, location: patchy. Additionally, the Giant Spider produces regular-sized Spiders at a medium intensity rate, which is quite considerable when you have got the larger version to worry about as well.)
- Werewolves (source: from Tourists after 9 seconds: #10; spawning randomly, effectively immediately, intensity: very low, location: around the eastern area of the map)
- Giant Spider (Dr. Bug)
Victim List
- [A] Cheerleader - She's held captive behind the Giant Spider's web. You have to kill the Giant Spider, to make the web disappear, so that you can have access to her. Note that on rare occasions, due to a glitch, she may not be found in this position - this necessitates starting a new game. See above.
- Soldier - Northwest of where you start, standing by two double-value Bazooka pickups, and between two cots, which spawn Evil Dolls.
- Cheerleader - South of the passageway that leads north to the boss arena; also south of a cot which spits out Evil Dolls.
- Baby - Just north of the cobweb-filled area in the southeast corner of the map. In a room with a sarcophagus that occasionally spawns Mummies.
- Teacher - In the room with the lit fireplace (where Fire Babies spawn), southwest of your start position.
- Dog - In front of the unlit fireplace on the eastern side of the level.
- Baby - On the roof in the southeast corner of the level. Access this roof by walking around the barrier at the eastern end of the weed-covered balcony on the southern edge of the level.
- Explorer - On the weed-covered balcony on the southern edge of the level.
- Baby - Southwest of the Lumberjack's starting point in the southeast corner of the level. Approach carefully.
- Tourists - Northwest of where you start, with a partition wall to their east shielding them from the Evil Dolls.
Important Pickups
- Two double-value Bazooka pickups (for a total of 20 shells)
- First Aid Kit
- Silverware
Bonuses Available
- Victim collection bonuses
- Weed Cutting Bonus - 1000 points
Best Place To Score Bonus Points
Probably around the fireplace, especially if you leave it lit so you can occasionally nab a 400-point Fire Baby.
Walkthrough
If you have ten Victims upon starting this level, there'll be Tourists (10) a little way to the northwest, who turn into Werewolves after just 9 seconds. You should go there directly, yes? No. There's a Soldier (2) nearby who'll probably get chopped up by Evil Dolls if you do not go to him first. Because of this, you will have to get the Tourists (10) second, which does mean moving reasonably fast. Prepare yourself by reading through the "Tourist-Werewolves" section below in full.
You start by a Key. Take it and then head northwest past a giant web and you will come to a Soldier (2) who needs saving from Evil Dolls. He's standing near a couple of double-value Bazooka pickups, which between them grant you twenty shells. (do not use these indiscriminately while playing - you need to fire your Bazookas quite a few times in this level to get through walls and over to the boss.) Once you have them carry on west past a partition wall and then northwest over to the Tourists (10).
Northwest is a Cupboard in a narrow alcove, and east of it, past tables, is a Chest against the wall. From the Chest, head south to the end of the partition wall and then southeast until you come to a door. Walk west from here to come to another partition wall. Head south around it and go north along a passageway and you will come to a Cupboard. Go south, east when you can, north around the wall and east again and you will arrive at the door you saw earlier. Head south past the sofa and then southeast, and you will come to a broken web. Go south through it, pick up a Key and then return north, through the broken web and west.
Near the southwest corner of the room, you will find a ruined wall to your south. Blast it down with a Bazooka shell, head through and then go southeast to find a little den with a Dog (6) in front of an unlit fireplace. Go back west over to the wall you demolished and continue west into a room with a Teacher (5) standing north of a green sofa. Get her quickly. You can put out the fire to the north with the Fire Extinguisher if you want to avoid fighting Fire Babies (and you probably do). To the sides of the blaze are a Cupboard and a Chest. There are more goodies around here, but you can come back for them later - collecting them now would put a Baby (4) at risk.
Switch to your Bazookas again and return to the southeast corner of the room. On the south wall of the corridor just outside is a weak patch. Blow that up as well. Head through and southeast to a door; go through that and then head west into a room and over to the Baby (4). That Baby (4) has a Cupboard to his west, and a Chest to his northeast. When you have opened them, return to the southeast corner of the room and east over to the door you came through earlier. Head through and northwest; once through the hole in the wall, go west into the room with the sofa. Head north around it and over to the southwest corner of the room.
You come to a couple of separate paths at right angles to each other. To your south is a First Aid Kit; to your west is a passage with a Chest and a Cupboard at the end. When you have both, return to the southeast corner of the sofa room, head southeast through the damaged wall and the door, and then continue south. you will pass one row of giant cobwebs and come up against another row. Head southwest to pass through two gaps, then stop and pause the game.
you will next be approaching a Baby (9) who is very near a Lumberjack's starting point (across the room, in fact), so you should make sure you are prepared to save the Baby and cane the Lumberjack. Switch to your Ancient Artefacts, and read to the end of this paragraph, before starting. Head east to the end of the aisle (between cobwebs) you are in. Now head south through the gap that is there, and then move directly southwest through the open area, avoiding being obstructed by the two desks and the cot, and collect the Baby (9) who's in the southwest corner of the area. The Lumberjack will be after your blood now, so switch on the Artefacts and waste him.
Return northeast into the cobweb-filled area. Past the first row, head west, north, east, and then north at the first opportunity. You can now head west over to a Cupboard; at the southern end of the passageway you are in is a Fire Extinguisher. Collect it, then return north, east, south, west, south, east, south and southwest. Switch to your Bazookas. Walk into the corridor leading out from the room's west side. At the end, to the south, is a damaged wall - destroy it. Now if you have Weedkiller, switch to it, head through and sweep up the first Pod Plant there. If you do not have any then you ought to stick with your Bazookas - stand east of the Pod Plant and blast it to death.
You can ignore the Explorer (8) for now - he's safe. Instead of heading west, walk over to the eastern edge of the balcony, and north and east around the barrier. You can now walk along the edge of the sloped roof - head southeast and then northeast to reach a Baby (7), who's been left in a rather questionable place, to put it mildly. There's nothing else on the roof, so head southwest and then northwest and back onto that balcony. If you had Weedkiller, then you should still have it equipped. Head west, cutting through the weeds, to save the Explorer (8), and then continue southwest and you will reach a second Pod Plant which you should trim down.
If you do not have Weedkiller, on the other hand, then carefully walk onto the slanted roof to the north of the balcony, and (still pushing north into the roof), over to the door, in front of which is an Explorer (8). Now stride southwest to the very southern edge of the balcony, where the weeds won't hurt you. Move west, past the second Pod Plant, and once at the southwest corner of the balcony, fire a Bazooka shell east at the Pod Plant to kill it.
Past the weeds, to the north, is a weak wall. If there's a Mummy through there, throw a Soda Can over to kill it. Switch to your Bazookas and blow the wall down, walk into the room, and then blast down the window in the southwest with your Bazooka, and go through onto another section of roof. Do all this quickly, as there may be an endangered Cheerleader to the northeast. Once on the roof, head northwest and you will see another window just asking to be blown up. Fire a shell at it, then head through and east over to the area containing the Evil Dolls' cot and the Cheerleader (3), south. Collect her and then head northeast into a little alcove formed by the walls and a giant cobweb.
Fire two Bazooka shells north, and then head through both cobwebs and open a Cupboard. Return south through the northern cobweb and head west to stand between a couple more; now fire your Bazooka north, twice. Head through the first broken cobweb and north up the passageway, and you will come to a Silverware pickup in front of the second broken web.
North of here is Dr. Bug's boss arena. You need to fight the boss, Dr. Bug, in order to access the final Victim, a Cheerleader [A]. She's at the western end of a corridor behind a web, in the northeast corner of the arena, which will only break apart in response to the boss' death. You can consider this level finished, but for the boss, as there are no more pickups to collect outside the boss arena. Read the next section of the walkthrough to learn how the boss fights, and the strategies I recommend for beating him.
Bonus Level: Dr. Bug
Head north to the far side of the arena, and open up two Chests (in case there's anything of worth inside). Switch on your Victim Radar and check that's there's a dot on it to the northwest; if there isn't, then the Cheerleader isn't where she should be, and you will have to start a new game (this is very unlikely, and only happens due to a glitch). Unless you have less than about 500 Weedkiller ammo, do not pick up the Weedkiller next to the western Chest; it is a double pickup worth 600, and so you'd only be wasting it. By now the Giant Spider is probably fully formed and ready to fight you, so get to work.
The Giant Spider will flash whenever you do him damage. (He will also flash when you hit him with the Fire Extinguisher or Martian Bubble Gun, even though these do not have any effect on him.) Where he flashes depends upon how damaged he is. Initially the two large eyes on the front, the mandibles, and the four additional eyes on his forehead (around the green patch) will flash. However as you deal him more damage, these four eyes fail, one by one; first the Spider's upper left eye will fail (remember, that's the top-right one as you look at him), then his upper right eye, then his lower left eye. With the failure of each eye, the Spider's whole body will momentarily flash electric blue.
Once the last eye, the lower right one, has failed, the spider will flash all over for an extended period of time (whenever you hit him, his whole body will flash electric blue). After a while, this stops and only his two front eyes and mandibles will be flashing - this means he's close to death, and you only need to keep attacking until he starts blowing up. You should realise that after he has completely perished, the Giant Spider still manages to send out a final feeble burst of two or three normal-sized Spiders for you to deal with, which isn't good if you are on your last legs! do not worry about Dr. Bug, the Mad Scientist who's left over afterwards, because he's just a normal one from now on (i.e. he drinks his potion and them explodes).
The Giant Spider is restricted to the room in which you fight him, but he can move about rapidly within that room. This sets the pace for the whole battle - it is frantic if you are low on supplies or health, and you will be very low on supplies indeed if you started on level 33. you will need to keep track of how many lives and how much ammo you have, and you will need to think and act fast. This is where the difficulty of completing this level from level 33 really comes to a head.
it is quite hard to hit him, whatever weapons you are using - bar the Pandora's Boxes, but those should only be a last resort in any case. He has only two attacks, both of which are rather unpleasant (note that walking into him, or having him run over you, will result in your taking damage as well). His first attack is the cobweb attack: he sprays out spider silk as white missiles. If it strikes you then it will hurt you; whether it strikes you or not, it'll produce sticky cobwebs on the floor where it lands. You cannot walk normally across these, as they stick you to the floor and do not let you move. This applies to all alternative forms you can take except for Mr. Hyde.
However, you can move across them by constantly moving with a fidgety motion - changing the direction in which you attempt to move, by alternating quickly between the two component directions of diagonal movement, to make your character move with a juddering motion across the arena. The Weedkiller can sweep up the sticky cobwebs - and they will contribute to, and indeed are necessary for, the Weed Cutting Bonus. This leaves behind an area of the floor without texture, on which the Giant Spider cannot place any more webs. This gives rise to the third of the strategies detailed below.
The Giant Spider's second attack is to spawn normal-sized Spiders. He does this at a rate roughly equivalent to a medium intensity spawning area for Spiders, but do not expect it to seem laid-back; those little Spiders will account for most of the damage you take. they are nearly as difficult to hit as the Giant Spider, and they just keep coming (and they do not, of course, slow down when travelling across sticky cobwebs). The Decoy Clowns, though, can distract them, which is useful.
Weapons And Items You Should Consider
Bazooka
If you have good aim, this will deal decisive damage quickly. It works best if you are firing directly north and the Giant Spider is stationary.
Decoy Clowns
These work very well at distracting the normal-sized Spiders, but they do not last for very long. Bear in mind that you can only have three active at the same time - keep an eye on how those you have placed are doing (that is, whether they've burst yet). If you have any, you should make sure to use them if you are not transformed into some alternative shape.
Flamethrower
Of course, if you have been playing since level 13 or earlier, it is likely that you have gotten yourself a Flamethrower. Although this boss will drain much of your ammo for it - even a skilled player (i.e. me) loses from 100 to 150 - you can use it to get rid of the Giant Spider very quickly, even without bothering to remove the cobwebs.
Monster Potion
Although you will deal damage quite slowly as the Purple Monster, you will be invincible while you do it. Unfortunately, in addition to the slow rate of attack, you just cannot get to the Giant Spider very often - while you are in the centre of the room punching on the spot, unable to move due to the cobwebs, the Giant Spider will run rings around you and rarely come close. But, if you use the Weedkiller to clear away the sticky cobwebs, and then use the Monster Potion, this problem will be all but eliminated, so that the Monster Potion becomes a much more effective weapon.
Mystery Potion
you will sometimes turn into a Purple Monster, allowing you to deal with the Giant Spider most effectively, but at other times you will wind up as a ghost or as Mr Hyde, unable to do anything for about 30 seconds. The Mystery Potion can be a good timewaster, though, as you wait for the floor to get covered in webs, ready for you to sweep them up.
Pandora's Boxes
ge, but you want them for later levels, to protect Victims. Unless you only intend to reach level 37 for the sake of it, then stop, you should keep your Pandora's Boxes if at all possible.
Plates And Silverware
Both of these are very effective against the Giant Spider... if you can hit with them. Unfortunately, it is difficult to do so, and so if you use them, they are likely to mostly be wasted. As with the Pandora's Boxes, Plates and Silverware should be a last resort, as they are more helpful against easier-to-hit boss creatures.
Weedkiller:
Hardly the best thing to chase after the Giant Spider with (you will take massive damage), but it is very useful to sweep up the sticky cobwebs that he drops. It can also protect you from the normal-sized Spiders - though they move so fast that it is a hit-and-miss thing.
And Those You Should Not
Water Pistol, Ancient Artefacts, Soda Cans, Tomatoes, Ice Lollies, and American Footballs. Avoid using these like the plague. They really are no good against the Giant Spider, and you will get a kicking.
Strategy One: Exclusive Use of One Weapon
Just use one of the better weapons listed above to knock out the boss, without using anything else at all. This is rather boring, and for most of the weapons listed - for example, the Monster Potion - it isn't very efficient. (The exceptions to this are the Bazooka and the Flamethrower.)
Strategy Two: Weapon Sequences.
In conjunction with the two other strategies below, use your weapons in the following order, unless there's a compelling reason not to (for example, low health). This order has been formulated based on how effective each weapon is, and how much of your current (or imagined) stock you are likely to need in the upcoming levels. Some of the bullet points might not apply to you, but the idea is to conform to this rough plan when possible.
If you have been playing for a while (that is, you started before level 33) then I suggest the following weapon sequence:
- Flamethrower until you have 300 ammo left.
- Monster Potions until you have four of them left.
- Bazookas until you have 40 shells left.
- Flamethrower until you have 250 ammo left.
- Monster Potions until you have two of them left.
- Bazooka until you have 20 shells left.
- Mystery Potions until you have four of them left.
- Flamethrower until you have 200 ammo left.
- Bazookas until you have ten shells left.
- Mystery Potions.
- Monster Potions.
- Flamethrower until you have 100 ammo left.
- Plates.
- Silverware until you have twenty ammo left.
- Flamethrower ammo.
- Bazookas.
- Pandora's Boxes.
- Silverware.
- Water Pistol until you have 100 ammo left.
- Ancient Artefacts.
- Water Pistol ammo.
- Tomatoes, Ice Lollies and American Footballs.
- Soda Cans.
- Weedkiller ammo to attack the Giant Spider, and probably die.
If you started on level 33, then use of the following weapon sequence while making good use of Decoy Clowns is probably your best bet:
- Use all Pandora's boxes first.
- Bazooka shells.
- Clear a few strips of floor in the centre of the arena with Weedkiller.
- Ancient Artefacts.
- Silverware you picked up just before entering the arena.
- Water Pistol.
Strategy Three: Wait, Sweep, and Kill.
Waste time until he's covered the floor in sticky cobwebs, and then clean them all up and kill him without having to move at horribly slow speed. Decoy Clowns are likely to be an integral part of this strategy, especially while you are using your Weedkiller. After you have finished clearing away the cobwebs, pretty much any of the weapons listed above are good ones to use. But how should you waste time in the first place? Just standing in a corner and shooting at the Spiders which approach will not work, as the cobwebs will only be scattered around the area where you are standing.
However, if you have got a few Mystery Potions, you could wander around and occasionally drink them and see what happens (delay a suitable amount of time between each drink, in order to make the most of the occasional health refill you will receive). If you are rolling in ghost potions, you could take those and just sit around - but I do not think you are. What is more likely is for you to have a lot of Monster Potions, and if you do then you can take one and just idly punch the air while waiting in the middle of the arena.
Strategy Four: Snipe from an Advantageous Position.
This strategy only really applies to the Bazooka, the Silverware, the Plates and Pandora's Boxes. You stand in a reasonably sheltered area for a time (for example, you could move on whenever it becomes necessary to place down a new Decoy Clown). I recommend staying around the southern edge of the arena, as it is easiest to do damage with the Bazooka when firing from there. Feel free to combine this strategy with strategy number three (Wait, Sweep, and Kill).
After He Is Dead
it is obvious enough when you have finished him off, as he'll light up orange and start exploding. Once he's disappeared, a Mad Scientist will appear in his place, and he'll drink another potion and then explode like all good Mad Scientists do. More importantly for you, the Giant Spider sends out a few normal-sized Spiders when he dies, which you must kill before the battle is actually over.
Once there are no more enemies to worry about, things can slow down a bit. If you want to get the Weed Cutting Bonus and you do not think you have removed enough weeds to qualify, spend a few seconds wandering up and down the room with your Weedkiller on, in order to strip the sticky cobwebs off the floor. Once you have finished with the weeding, collect the Weedkiller pickup in the northwest corner of the room (if you did not already), and then head over to the northeast corner. The great big cobweb that was there earlier is gone, so you can get through to a corridor heading west.
At the western extremity of this corridor is the Cheerleader (A), still bouncing up and down happily as if nothing out of the ordinary had happened. (If she's not there, it is because a glitch in the game has taken her away. You will have to start a new game all over again. Curse all you like, but not at me - it is not my fault.) Assuming she's there, collect her and then walk over to the eastern side of the corridor and out into the boss arena again (as the Exit Door won't appear until it is got a reasonable amount of space near you in which to open).
Level 37: Labyrinth of Horrors
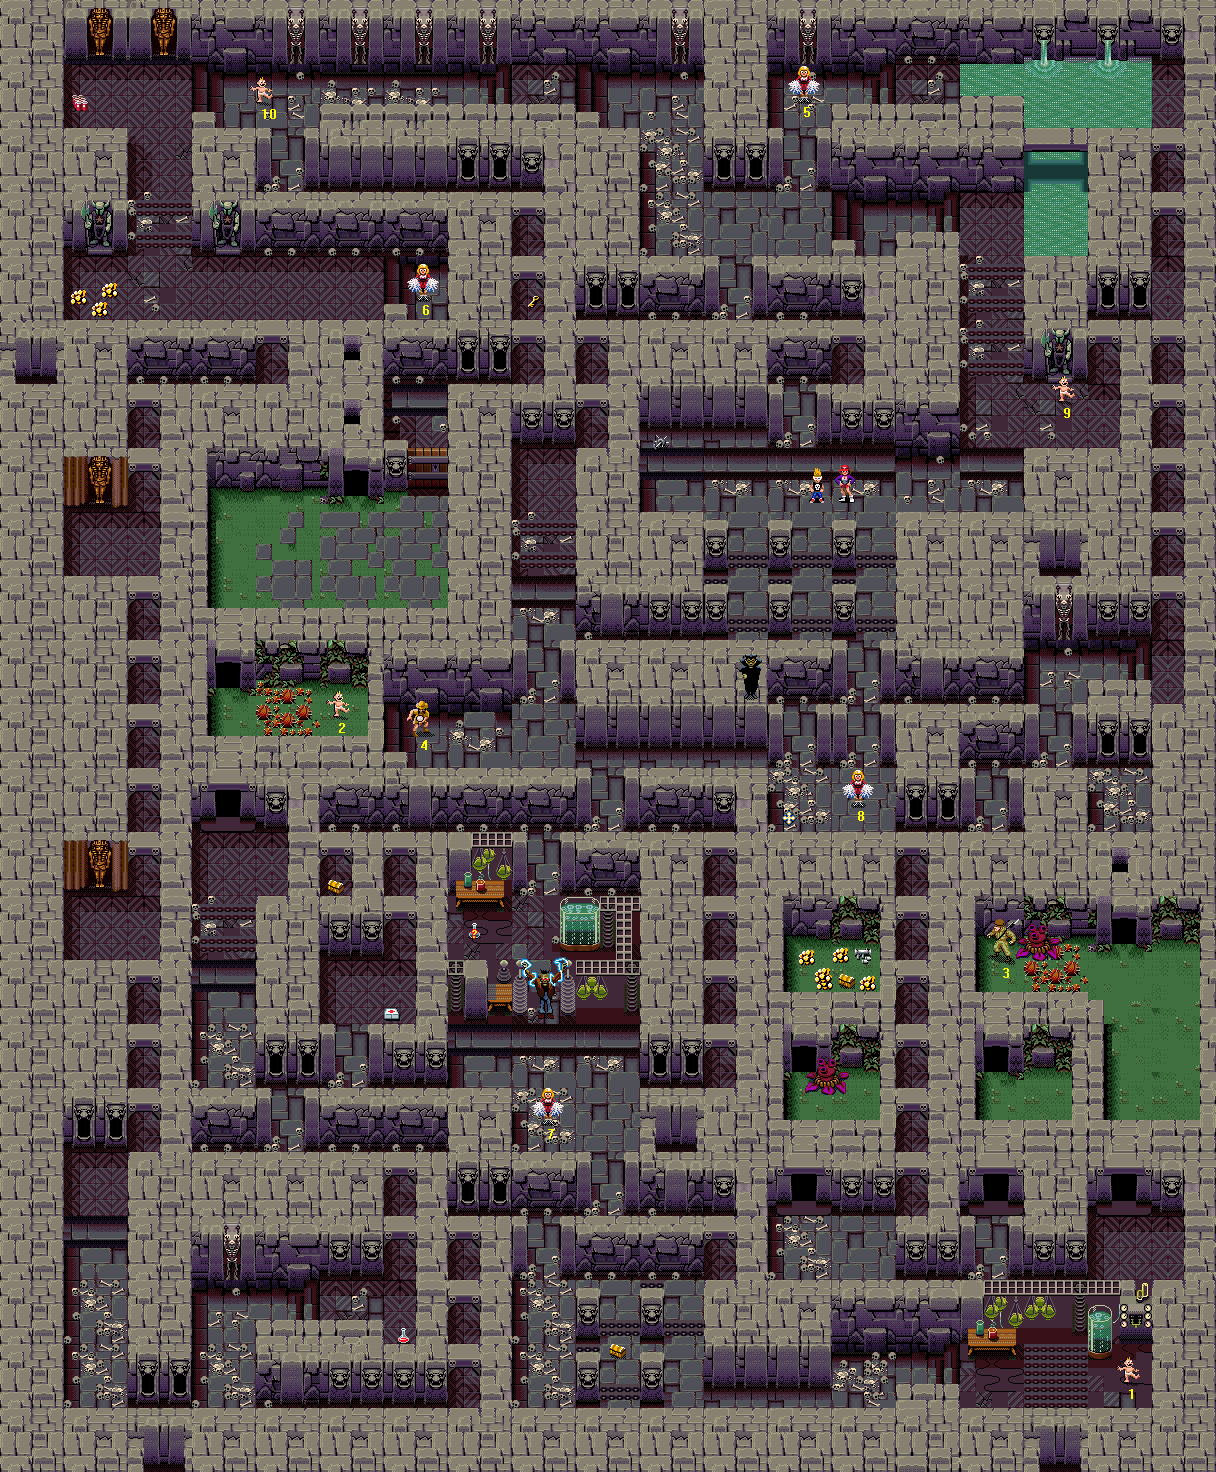
Difficulty: 4/10
Providing a comparatively relaxing playing experience after the hectic boss level, this stage is easy going (even if it is a little maze-like, as the title suggests). Although Frankenstein's Monster and a Vampire both put in an appearance, the Vampire can be avoided for as long as matters and Frankie's not hard to blow away. The Victims are mostly easy as well if you approach them in the right way.
Monster List
- Frankenstein's Monster (one)
- Jelly Blobs (intensity: low, location: one place)
- Mummies (intensity: very low, location: one place)
- Pod Plants (two)
- Squidmen (intensity: very low, location: one place)
- Vampire (one)
- Werewolves (source: spawning randomly, effectively immediately, intensity: low, location: patchy)
- Zombies [Normal and Vicious] (intensity: ranges from medium to high, location: patchy)
Victim List
- [A] Baby - In the southeast corner of the map, past a bed of spikes in a small laboratory.
- Baby - Past a patch of weeds in a little yard in the middle of the level.
- Soldier - Standing by a Pod Plant on the eastern side of the level.
- Explorer - In a chamber north of the laboratory containing Frankenstein's Monster, southwest of where you start.
- Cheerleader - In a safe area on the north side of the level.
- Cheerleader - Near the northwest corner of the level, at the eastern end of a long chamber, where Zombies spawn at a high rate.
- Cheerleader - In the laboratory around the centre of the level, standing south of Frankenstein's Monster.
- Cheerleader - South from where you start, past a couple of strips of spikes and through a couple of collapsing roof gates.
- Baby - A little northeast of where you start, south of some strips of spikes.
- Baby - In the northwest corner of the map.
Important Pickups
- Three Pandora's Boxes
- First Aid Kit
- Bazookas
- Monster Potion
Bonuses Available
- Victim collection bonuses
Best Place To Score Bonus Points
On the southern edge of the level, or in the northwest, slaughtering Zombies. You could find that you get Werewolves interrupting you occasionally.
Walkthrough
Head into the northwest corner of the chamber where you start to find Weedkiller. do not head south very far in this chamber, or a Vampire will appear; you do not want to see him yet. Head east from there, past a collapsing roof gate and some gargoyles' heads to the north, and northeast once you come to the steps. You will find a Baby (9) standing by a suit of armour. Head northeast under an arch, then south down a passage that features a series of arches. When you get the opportunity, head west, south through a collapsing roof gate, and then southeast into a tunnel (just walk into the south wall of that little dungeon where the air hole appears). You emerge by a Pod Plant, on the other side of which is a Soldier (3). Kill the Plant and save the Soldier.
Go east and south across the lawn, and enter another passage at the south end. Once you are out the other side, head southwest, under an overhead rack, and east to save a Baby [A]. If the spikes are up, you will just have to walk over them this once, in order to get to him. Head northwest across the spikes again (waiting patiently this time), take the west passage and when it opens up carry on northwest into a tunnel heading north. You arrive in a tiny yard that contains a Pod Plant; sweep it up, and clear a path through the weeds as well. Carry on through the next tunnel into another tiny little place with more desirable contents: a Pandora's Box, Bazookas and Bonus Points Pickups.
Return south through the two tunnels and head southeast until you return to the lab with the spikes in. Walk south onto the spikes after they lower, and then head west along the passage until you come to a room containing four pillars, with a Pandora's Box between them. Collect the Box, then head out the northwest corner of the room through a collapsing roof gate. There is another one to your northeast; go through that one next and then collect the Cheerleader (7) inside.
Frankenstein's Monster is standing to the north; if you have Ancient Artefacts from a previous level then you can just head straight over and kill him. If you have not got any Artefacts, then switch to the Bazookas that you picked up earlier, and walk north to stand near him so that he disconnects from the electrodes and attacks you. Fire Bazookas north, straight into his chest - do make sure that he's standing still for each missile, rather than just keeping the Y button held down, in order that he takes the most possible damage from it. Most of the time (if you do it right) it will take three shots or less to kill him, but if he's still standing after you are down to one shell then you can finish by using the Weedkiller on him. (You need that one shell later.)
Head north between the electrodes where Frankie was charging, and on the other side, to the west, you will find a Mystery Potion. Continue north through one collapsing roof gate and do not go the slightest bit east unless you want the Vampire to appear now (and you do not). Go west as far as you can instead, and you will come to a little dead end containing a Pandora's Box. Head out of there and south down the next passage to your east; at the end of it, where it opens up, you will find a First Aid Kit.
Head southwest through a collapsing roof gate. Once past it, walk west and then north up the hallway. Time your walk across the spikes. Once past them, you will go through a passage into another of those little yards; there are weeds between you and a Baby (2) to the east. You can avoid having to clear the weeds if you just skirt the southern wall of the yard, so use this method to get over to the Baby (2) and back again. Go back the way you came - south through the tunnel, then carefully across the spikes down to the end of the hallway. On the south wall, slightly to the east, is a collapsing roof gate; walk southeast through it, and east along the passage. Head south down the next passage to find a Monster Potion.
you will now need to go through a series of corridors to reach your next destination. Head west, south, east, north, east and south. Continue south through the next room you enter, minding the spikes. Go east into the lab where the Baby [A] was, north at the big pad of spikes, northeast and then north into a dark passage. You come into a little garden, where the first Pod Plant was earlier. Continue north through the next tunnel and you will come to a couple of gargoyles' faces carved on the wall. To their west is a collapsing roof gate that's already fallen in - blast it down with the Bazookas and go through.
Head northeast into a passageway heading north, decorated with arches. Carry on walking north up this until you reach the northeast corner of the level, then dive into the water to your west. Swim across to the other side and jump out, then continue walking west to come to a Cheerleader (5). Go south through a collapsing roof gate and then head northwest into a wide hallway, heading west. You will come to a Baby (10) near a couple of sarcophagi standing against the walls; collect him quickly.
Continue to the far west end of the hallway for Soda Cans. Now head south, carefully timing your walk over the spikes, and you will arrive in another hall. do not go east or you risk getting a Cheerleader (6) killed by Zombies; collect the Bonus Points Pickups to your west and then switch to your Water Pistol and Pandora's Boxes.
Step north or south in order to align your character's feet with the first visible line between the paving stones on the southern side of the hall - this is roughly on the same line of longitude as the Cheerleader (6), which aids you in shooting Zombies who are targeting her, because they always walk diagonally to align themselves in this way before heading due east to get to her. Walk due east without stopping, and fire your Water Pistol as you go; you will come to the Cheerleader (6) right up next to a wall on the eastern side of the chamber. If you see a Zombie rising up from the ground on her east, try letting off a Pandora's Box, as it might work.
With the Cheerleader (6) safe (or dead), head northwest, north past the spikes, and east a little. you will see a collapsing roof gate to the south; if you have bazookas to spare and fancy a Key, enter. Walk east and then south to find the Key, then return northwest, blast down the now collapsed gate and head north out of there again. Standing in the hallway, head east, and southeast once you come to a corner to arrive by another collapsing roof gate to the south. Head south through the gate, turn west and at the corner continue down the passageway to the south. Past a couple of rows of spikes, you will find a collapsing roof gate; carry on south through that and to the west is an Explorer (4).
Now just head east along a passageway to find a Cheerleader (8) standing by Ancient Artefacts. The Artefacts are lying on top of a pile of bones, and so they appear slightly camouflaged. As you approach the Cheerleader (8), a Vampire will fly in and begin circling you - make sure to be quick in saving her. do not let the Vampire fly into her as he circles you - in order to make sure this does not happen, you could pause for a moment in the narrow passageway (where he cannot assume human form) and time your walk over to her.
you have now got all the Victims and pickups that this level has to offer. As you have picked up Ancient Artefacts, you could fight the Vampire, but I would advise against it if they were the first you got (that is, you only have 30), as they'll be useful later on. Should you decide not to slay him, it is not exactly hard to escape.
Level 38: Monsters of the Blue Lagoon
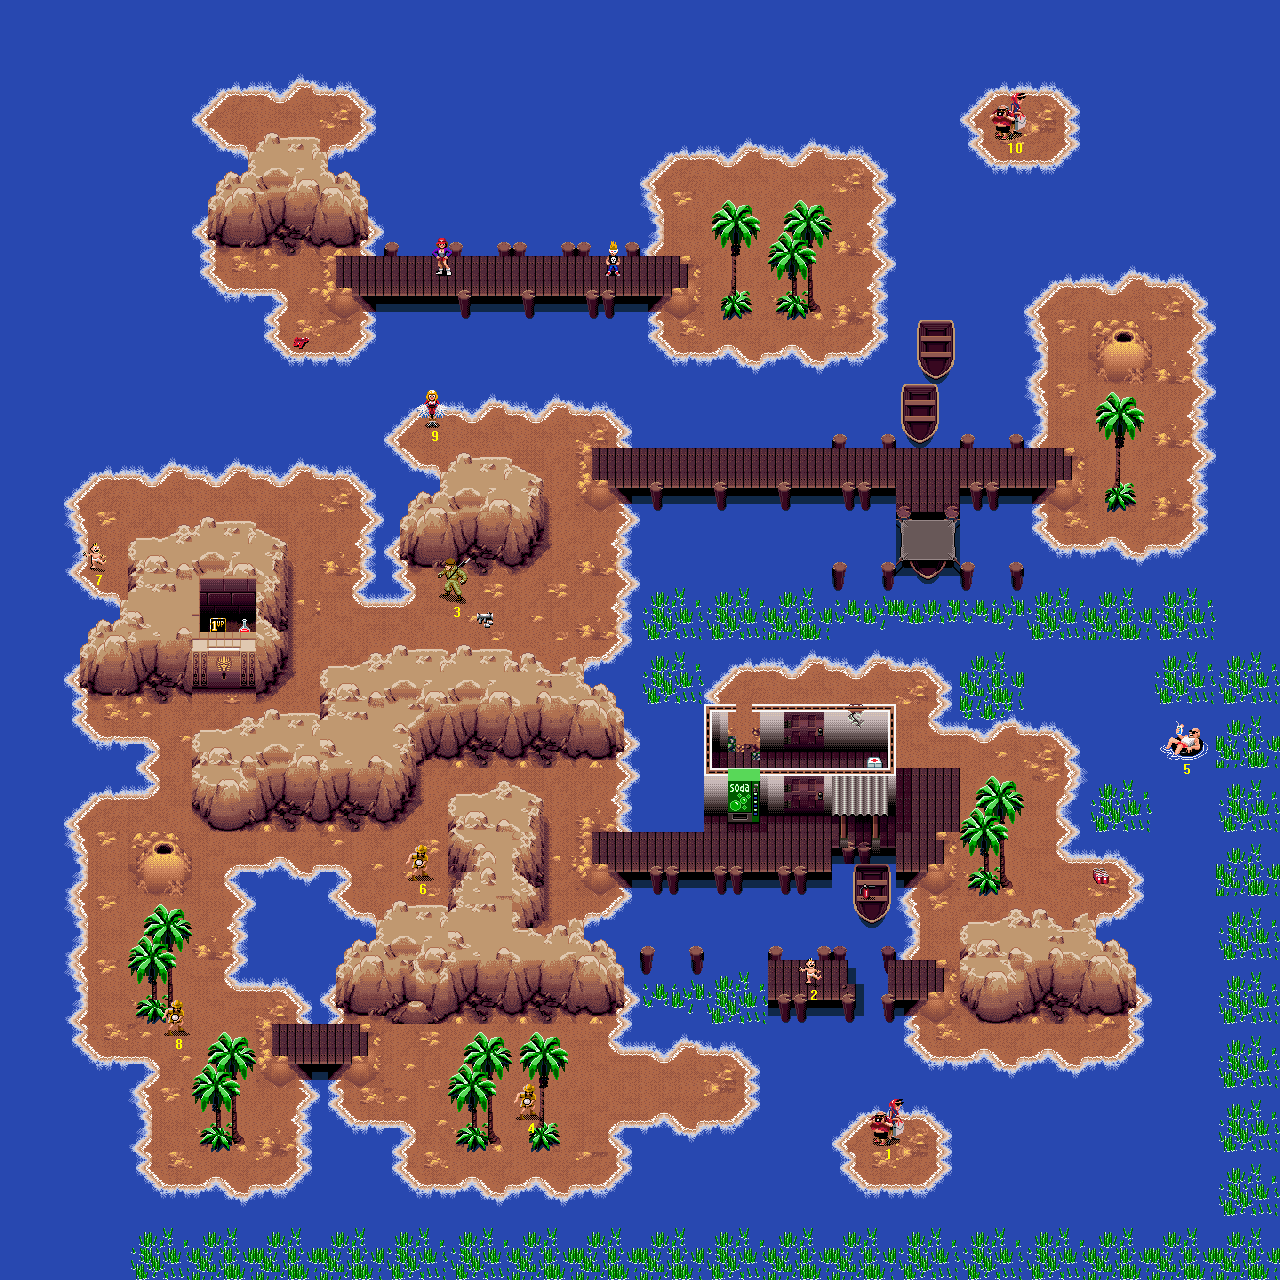
Difficulty: 4/10
You need to stay on your toes to save some of the Victims, but it is at about the same level of difficulty as level 37 (not very high). If you put aside a Skeleton Key on level 25, now is the time that your investment matures (if you want it to yet) - you can get a couple of useful items if you open a Skull Door on the western side of the level.
Monster List
- Ants (intensity: ranges from medium to high, location: two places)
- Doppelgangers [Normal and Vicious] (intensity: high, location: one place)
- Squidmen (intensity: ranges from low to high, location: nearly everywhere)
- Zombies [Vicious] (intensity: very low, location: one place)
Victim List
- [A] Tourists - On a tiny little island, on the southern side of the level, south from a hut equipped with a small jetty.
- Baby - On a small, isolated wooden platform, just south of the hut with the jetty.
- Soldier - Standing by a Bazooka pickup, east of the Skull Door, near the northern end of the largest island (on the western side of the level).
- Explorer - Standing by the palm trees in the Doppelganger spawning ground on the southern side of the level.
- Swimming Pool Guy - Among the reeds, past the beach to the east of the hut with the jetty.
- Explorer - At the start of a rock passage, which leads east from the central area of the largest island to the hut with the jetty.
- Baby - Standing northwest of the big rock, which contains the cell locked behind a Skull Door, in the northwest corner of the largest island.
- Explorer - Standing by a couple of palm trees, south of an Ants' nest, on the largest island, on the western edge of the level.
- Cheerleader - At the northern extremity of the largest island, to the north of a large rock, southwest of the long wooden platform on which you start.
- Tourists - On a tiny little island in the northeast corner of the level.
Important Pickups
- First Aid Kit
- Bazookas
- Extra Life (if you choose to use a Skeleton Key)
- Monster Potion (behind the same Skull Door)
Bonuses Available
- Victim collection bonuses
- Fish Fry Bonus - 1000 points
Best Place To Score Bonus Points
On the island in the northeast where both Ants and Squidmen can be found. You will need some exotic weaponry (such as a Monster Potion or the Flamethrower) to fight them effectively, though, and you will lose health on top of that. Squidmen just aren't good for point scoring, as you will be aware by now.
Walkthrough
Head east onto an island with a few palm trees on it, and carry on over to the eastern edge. After diving into the water, swim north and once abreast of the tiny little island to the east, swim over there and jump out onto it for a Tourist Couple (10). Jump off to the south, and swim south until you arrive at a long wooden platform, just past a pair of rowboats to your west. Once on the platform, to your southwest will be a trampoline. Jump onto it, and then jump south over the reeds and into the water.
Jump out of the water onto the beach - you will have to move slightly west, as for some reason, your character has difficulty exiting the water directly south of the position at which he enters. Walk west, ignoring the locked door to the south but entering the hut via the hole in the wall. On the eastern end of the long room inside is a First Aid Kit. Return west and north out through the damaged wall, again ignoring the doors. Head east to the end of the building, and then south to the edge of the wooden boards.
You now have to save three nearby Victims (2, A and 5), two of which (A and 5) are in some minor danger from the Squidmen who occasionally spawn. If you use a Ghost Potion then you will reduce still further the probability of their dying, as you will not need to waste time jumping into and out of the water, but will be able to just walk over it. You will also move slightly faster over the water.
However, I do not recommend using a Ghost Potion unless you have two or more - that is, you will still have at least one left afterwards. This is because you will have a more pressing need for one at the end of level 40. Whether you use a Ghost Potion or not it does not make a difference to the route you ought to take while collecting the three Victims.
Walk south across the boards until you come to a boat to your west, with a Fire Extinguisher resting on the deck. Walk onto the boat and collect the Fire Extinguisher; now head south off the boat and over to the wooden platform to the southwest. Collect the Baby (2) who is standing on it, and then continue south and a little east to find a Tourist Couple (2) standing on a tiny little island. Head east from this island and you will come to the southeast corner of the level, bounded by water reeds. Go due north from there, passing Soda Cans on a beach to the west, and you will come to the Swimming Pool Guy (5). Return south from him to where you saw Soda Cans, and head west onto the beach to collect them.
At this point, if you are still a ghost then you should wait to change back before continuing. Head west and a little north to arrive on the boards by the hut you entered earlier. Continue west under the canopy, past the locked door to the north, and then along the wooden platform to arrive on a secluded beach area. Head northwest into a passage in the rock, then south out of there to find an Explorer (6). Continue west from him along the beach to arrive at an Ants' nest; from there, head south towards a pair of palm trees, which have another Explorer (8) at their base.
Switch to your Water Pistol if you have not already got it ready to use. Walk east across a small bridge and then continue going east and slightly south, over to an Explorer (4) who is standing just north of a set of palm trees. If any Doppelgangers look like they are going to approach the Explorer (4) - quite unlikely, as it happens - then kill them first. Return west and across the bridge, then north for a while, past the Ants' nest, to arrive by a Skull Door with an Extra Life and a Monster Potion behind it. You should ignore this for now, even if you have a Skeleton Key to use on it, because going in could bring certain Victims nearly into view (which, you should realise by this stage in the game, means bringing them into danger).
If you switched away from your Water Pistols, you will need to switch back to them now. Head east and north into a wide beach area. Continue east to arrive by a Soldier (3) who has Bazookas with him; you might find that a Squidman jumps out of the water to attack him before you can get there. If so, squirt him with your Water Pistol so that he (hopefully) gives up and jumps back into the water. Save the Soldier (3) and then head east and north around the large rock, and west to find a Cheerleader (9). If any Squidmen attack her, squirt them with your Water Pistol like you did (or would have done) to those attacking the Soldier (3).
Jump into the water to the north and swim over to the long wooden platform. Once on it, head west over to a little island to find Water Pistol ammo. Dive into the water to the south and swim south over to the large beach. Walk west once on the beach to find a Baby (7). As he's the last Victim, the Exit Door will now open. Before exiting, you should decide whether you will get the goodies inside the cell behind the Skull Door, but more importantly, you should read the preamble to level 39.
If You Have A Skeleton Key
From where the Baby (7) was, head clockwise around the great big rock to your southeast. you will arrive back in front of the Skull Door I told you to ignore earlier. If you have a Skeleton Key then you can go in and get an Extra Life and a Monster Potion. However, you might decide to keep your Skeleton Key for use on a later level; in particular, you could avoid a battle on level 40 by just fleeing through a Skull Door, the Skeleton Key to which you'd normally have to earn. Have a look at the walkthrough for level 40 if you are not sure. After you have finished there, head anticlockwise around the big rock to return to the Exit Door. Read the preamble to level 39's walkthrough before you use the Door, though, as you need to prepare yourself.
Level 39: Destroy All Vampires
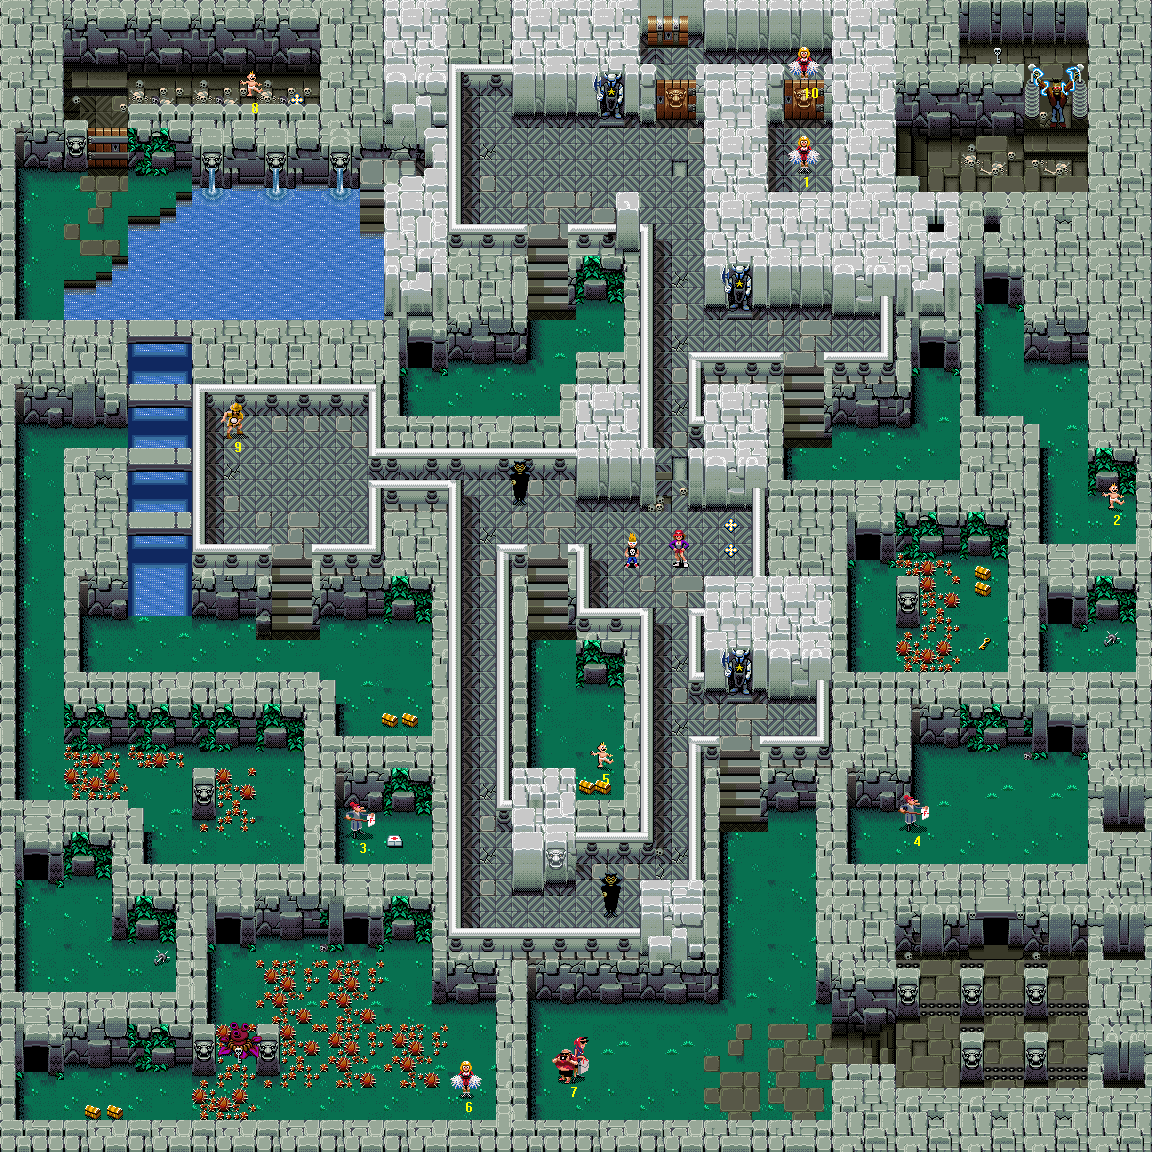
Difficulty: 4/10
There are two Vampires and Frankenstein's Monster shows up, but you are granted a great deal of weaponry with which to take them out (you even start right next to a couple of Ancient Artefacts pickups). Only one Victim is in great danger of dying, and the Tourists (7) are easy to reach in time. Once you get past its forbidding exterior, this level is a very easy proposition and you get a fat package of bonus points at the end for killing those Vampires.
Monster List
- Frankenstein's Monster (one)
- Pod Plant (one)
- Squidmen (intensity: low, location: one place)
- Vampires (two)
- Werewolves (source: from Tourists after 37 seconds: #7; spawning randomly after 60 seconds, intensity: high, location: the eastern and southeast areas of the map)
- Zombies [Normal and Vicious] (intensity: ranges from medium to high, location: two places)
Victim List
- [A] Cheerleader - At the northern side of the level, behind two successive Skull Doors. you will need to find two Skeleton Keys to get to her.
- Baby - On the eastern edge of the level, at the southern end of a little yard, which is south of the chamber containing Frankenstein's Monster and a Skeleton Key.
- Teacher - In a little yard, northeast of the Pod Plant hiding a Skeleton Key, with a First Aid Kit.
- Teacher - In a garden on the eastern edge of the level, north of the chamber containing spikes. She's in danger from Vicious Zombies.
- Baby - At the southern end of the little yard that's down the steps to the west of your start point.
- Cheerleader - On the southern edge of the map, to the east of the Pod Plant that hides a Skeleton Key.
- Tourists - On the southern edge of the level, on the eastern side of the dividing wall. Just head south from where you start. You have plenty of time before they become Werewolves.
- Baby - At the eastern end of the dungeon in the northwest corner of the level, along with Ancient Artefacts.
- Explorer - Near the western side of the level, standing in the corner of a dais to the east of the water channel.
- Cheerleader - Between the two Skull Doors leading to Cheerleader [A].
Important Pickups
- Three Ancient Artefact pickups
- Eight Pandora's Boxes
- First Aid Kit
- Two Skeleton Keys (both of which you will use)
Bonuses Available
- Victim collection bonuses
- Vampire Destroyed - 9900 points
Best Place To Score Bonus Points
The yard in the southwest corner of the map, where Zombies spawn reasonably fast. Although they spawn faster in the garden on the eastern side, Werewolves spawn there as well and constantly interrupt you, which makes it a poor choice for safe points-scoring.
Walkthrough
here is one pair of Tourists (7) on this stage, and they will become Werewolves after 37 seconds. That's a lot of time, considering the distance you have to cover to reach them, so you should easily be able to get down there to save them. However, the Vampire who starts near you will follow you down there, as will the other one, whom you encounter along the way. You should therefore pick up the Ancient Artefacts that the level designers have generously provided at the start point, and slay the Vampires once the Tourists (7) are safe.
East of where you start are two Ancient Artefacts pickups. Collect them both, then head south down the tiled walkway, ignoring the Vampire. You come to a flight of steps to your east, opposite a suit of armour standing up against the wall. Go down the steps and continue south, keeping to the west in order to avoid endangering a Teacher (4) in a garden to the east. When you can, turn west; you will find the Tourist Couple (7) standing at the far end of the yard.
Once you have saved them, head east a little from the dividing barrier, so that it is off-screen - there's a Cheerleader (6) on the other side, and you do not want the Vampires to get too close to her. Wait for them to arrive, and them kill them with the Ancient Artefacts. If you run out of Artefacts, then switch to using Weedkiller to finish them off. To keep nearby Victims safe, do not stray too far north or west while fighting the Vampires.
Go to the tiled area at the centre of the yard, and then head north, skirting the western edge of the yard. Do not get near to the eastern edge of the northern section of the yard, as a Teacher (4) to your east will likely be killed by Zombies if you allow her into view. Go north up the stairs, and then head northwest, along a walkway, and northwest again across a tiled yard, to find another stairway to your south. Head down the stairs and across to the other end of the sunken yard at the bottom, and you will come to a Baby (5) and two Pandora's Boxes.
Return north and up the steps, and then walk onto the walkway to the northwest and head west until you arrive at a dais. There is an Explorer (9) in the northwest corner, so collect him and then move south and down the steps to a grassy area. Walk southeast from the foot of the steps and you will find another couple of Pandora's Boxes. Return northwest to the steps and then continue west, and you will find a channel of water to the north. Dive in, and then swim north until you see an opening to the west. Jump out here.
Head south along the alleyway, and into a covered tunnel at the southern end of the grassy area, where the weeds are. You come out into a little yard where Zombies spawn. There is a Weedkiller pickup in the southeast corner for you to collect; when you have it, head south out of there via the next tunnel, in the southwest corner. You will emerge by a third pair of Pandora's Boxes; collect them, then switch to your Weedkiller and head east a little to find a Pod Plant to the north, around a corner. Sweep it up, and pick up the Skeleton Key on which it was resting.
Keep alongside the southern wall and head east. you will find a Cheerleader (6) in a corner. From her, head north and slightly west through the weeds to find a tunnel opening to the north. Go through and you will find a Teacher (3) and a First Aid Kit. Return south and into the main yard, then head west, cutting through the weeds, to reach another tunnel heading north. Walk through and at the other side, head northwest past another patch of weeds - in order to avoid using more Weedkiller, you can skirt the south wall at the point where they appear to stretch across the yard. You will arrive back in the featureless alleyway you walked down earlier. Walk north along it this time and dive into the water channel to the east at the end.
Swim north up the channel and into a wide pond, then go west over to the edge of the water and jump out. Move north from there to find a dungeon door blocking your way. Head through and then walk east to the other end to find a Baby (8) and Ancient Artefacts. Having collected those, head west and south out of the dungeon, then jump into the water to the east and swim over to the platform in the northeast corner of the pond. Jump out and then walk northeast into the corner. From there, push southeast and you will enter a long covered passage heading south. Walk further south to come out the other end into a grassy yard.
Head northeast over to a flight of steps. Walk north up them and at the top, head east and then south. Take the next turning east that you come to, and descend the steps to the south. You arrive in a yard. Head southeast and push southeast into the wall, and you will enter another passage south. Head south over to the far side of the next small garden you enter, and then walk east, skirting the wall, to pass the weeds without having to bother cutting them down with the Weedkiller. On the eastern side of the weeds are a Key and yet another pair of Pandora's Boxes for you to pick up. Return west along the south side of the garden, and then north through the tunnel back into the other yard.
You will now fight Frankenstein's Monster. You could use Bazookas (best), Ancient Artefacts (a good choice provided you have more than about seventy of them) or Weedkiller (the slowest feasible way to kill him, and the one that will lead to your losing the most health). Switch to the most suitable weapon you have, and then head northeast over to a long tunnel heading north, and enter. Once out the northern end, continue northeast to come to Frankenstein's Monster, who will start attacking you. Kill him and then head north through his charging electrodes to find a Skeleton Key.
Head south again through the electrodes and over to the southern wall of the laboratory. You can see two large air holes in the wall to the south - the western one, in the passage built of lighter stone, is the one you entered Frankie's chamber from; while the one on the right, in the middle of the darker stone, is the exit you want to use now. With this in mind, press southwest into the wall, and once you move into the passageway, just carry on walking south. You emerge in a long yard; walk to the southeast corner to find a Baby (2).
Read the whole of this paragraph before carrying out its instructions, in order to increase the survival prospects of your next Victim, a hazardously placed Teacher (4). Switch to your Water Pistol and Pandora's Boxes. Walk southwest and into a passage heading south. Once in, start firing your Water Pistol continuously as you walk south. You will pass through a tiny yard that holds a Weedkiller pickup; you should ignore this for now. Continue south and you will pass through another passage and into a much larger yard. You should be able to see the Teacher (4) now, in the southwest corner of the screen. If there is a Zombie anywhere near her, use a Pandora's Box now to try and get rid of him. Otherwise, march southwest, still firing your Water Pistol at any Zombie which gets in your way, and collect her.
Head northeast again and north into the tunnel you just came out of. On the other side of it is the Weedkiller pickup that I told you to ignore earlier. You may now stop ignoring it. Once you have collected it, head southwest again through the tunnel and then south to the other side of the yard. Push southwest into the wall and you will enter a tunnel heading south - this is the last tunnel, I promise. Out the other side, you will be in a stone-paved chamber containing several strips of spikes. Exit the chamber by heading out the west side, timing your walk over the spikes so that you do not get hurt. Continue west past a couple of steps, and you will find yourself walking onto the partially tiled section of the yard where you fought the Vampires earlier.
Head north from the tiled area, up some stairs and along the walkway to the northwest. Continue north across a tiled courtyard, through a collapsing roof gate, and yet further north to the end of the corridor, where you will find a Skull Door. Head through this and open a Chest. Head east from the Chest to collect a Cheerleader (10) in front of another Skull Door, to the south; go through that one to come to the final Cheerleader [A].
More Terror than Before: Level 40: Pyramid of Fear Two
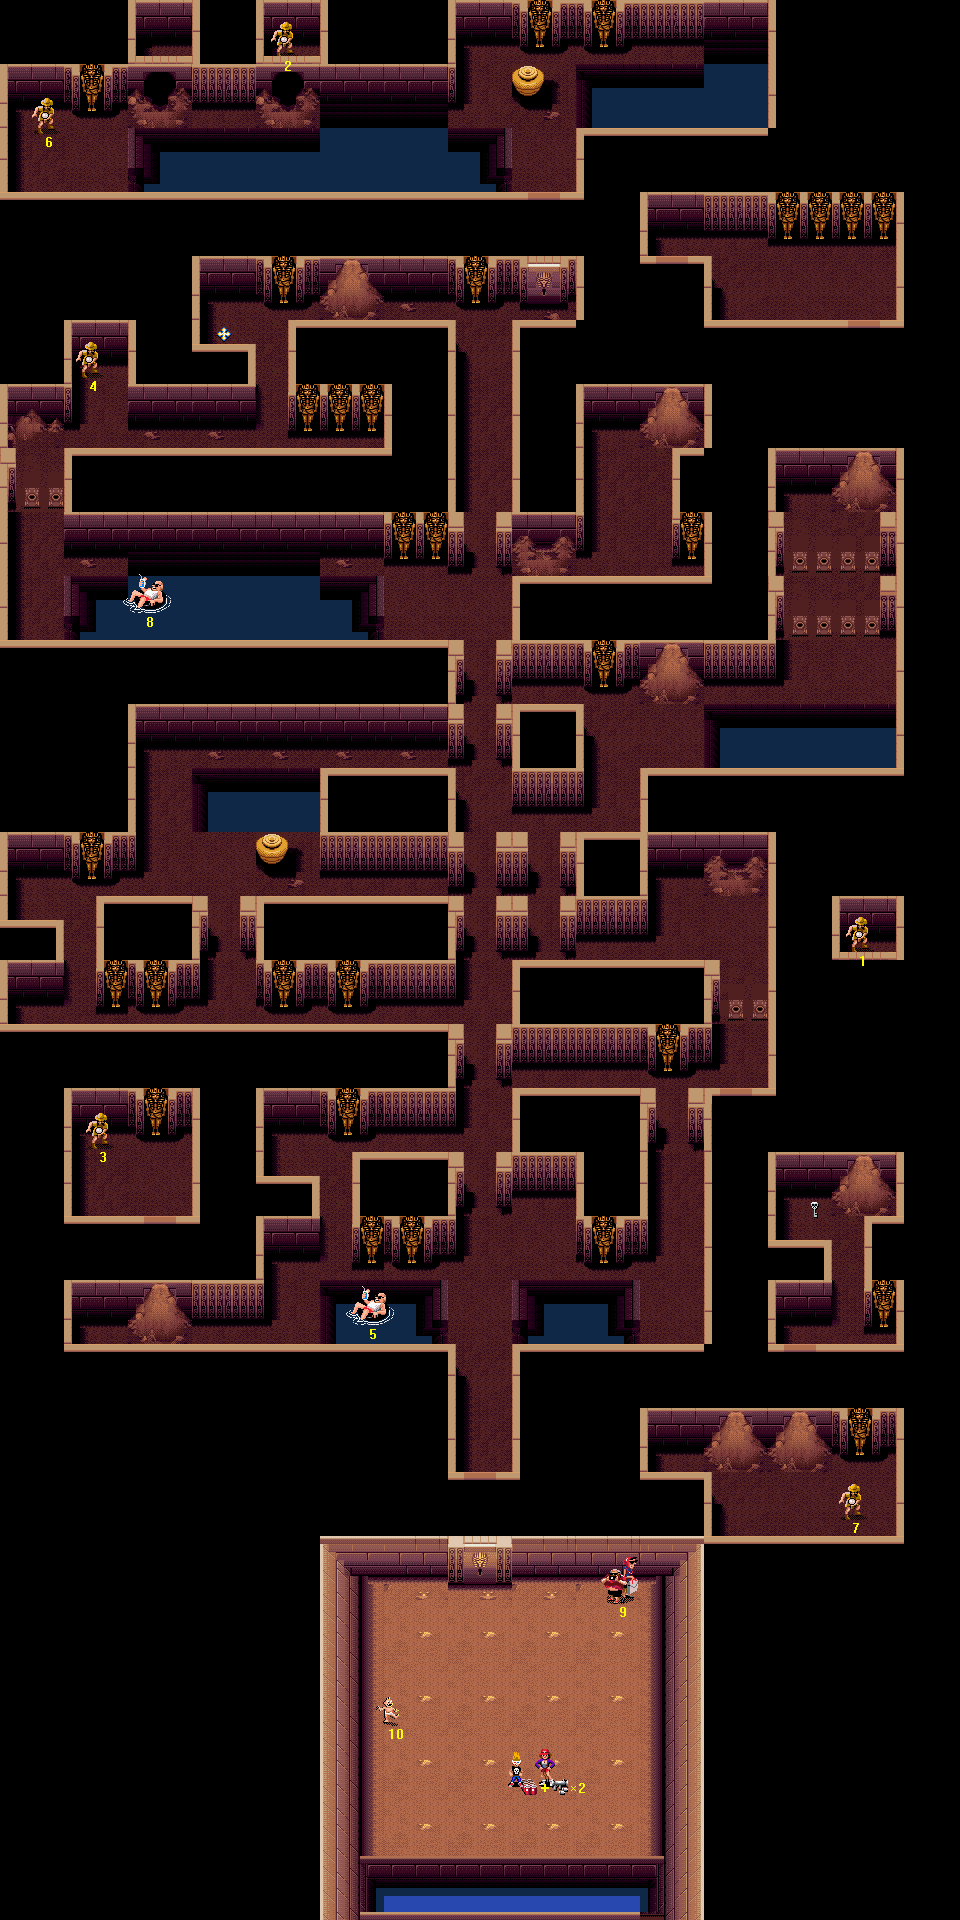
Difficulty: 6/10
This is a complicated stage that has a mini-boss fight with a Snakeoid, a labyrinthine pyramid interior populated with Mummies, Squidmen, and Zombies. The Snakeoid should not cause you too much harm if you use your heavy weaponry effectively and keep out of the way of his wicked tongue. You need to locate a Skeleton Key to get through to Victims 2 and 6, who are far to the north, and three of the Victims are in decidedly unsafe positions, which ramps up the difficulty further.
Monster List
- Mummies (intensity: ranges from low to medium, location: patchy)
- Squidmen (intensity: ranges from low to medium, location: in a few places - wherever there is water, except for the trench on the southern edge of the level)
- Zombies [Normal and Vicious] (intensity: ranges from very low to high, location: patchy)
- Snakeoid (one)
Victim List
- [A] Explorer - In a tiny little cell, north of the location of the second Skeleton Key, accessed through a long tunnel north behind a sandbank.
- Explorer - Past the second Skull Door, north of the large pool, in another small cell adjoining the walkway at the edge of the water.
- Explorer - West of the main entrance area of the pyramid, north through a tunnel behind a sandbank, in a large chamber with a sarcophagus.
- Explorer - In a little alcove, in the northwest corner of the large maze to the south of the second Skull Door.
- Swimming Pool Guy - In the little pool to the west as you enter the main entrance area of the pyramid.
- Explorer - Past the second Skull Door, to the west of the large pool and near a sarcophagus. Inexplicably, he sometimes does not appear on your Victim Radar.
- Explorer - South of the area where the second Skeleton Key is found, between the two passages you use to get there. He sometimes isn't on the Victim Radar, as well.
- Swimming Pool Guy - In a pool to the southwest of the second Skull Door, reached by heading south through a collapsing roof gate. He sometimes isn't on the Victim Radar, as well.
- Tourists - In the northeast corner of the sunny courtyard where you start.
- Baby - Northwest of where you start, next to the western wall of the courtyard. He's quite vulnerable to attack from the Snakeoid.
Important Pickups
- A double Bazooka pickup, and Soda Cans (both on the exact same spot, next to where you start)
- Ancient Artefacts
- Two Skeleton Keys (both of which you will use - unless you have only one Victim, in which case you will only use one)
Bonuses Available
- Victim collection bonuses
- Fish Fry Bonus - 1000 points
Best Place To Score Bonus Points
The area south of the second Skull Door, past a collapsing roof gate. Zombies spawn pretty quickly here, although Mummies occasionally wander along as well.
Walkthrough
Walk north for Tourists (7), then west for two Cheerleaders (2 and 9) and an Explorer (8). Walk south and then turn to head west for another Explorer (6), a Baby (5) and a Teacher (4). North of here is a Baby (3), and two Soldiers (A and 10) who stand right at the start of a somewhat more dangerous area containing pickups.
Pickups
Head northwest quickly to collect a Baby (10). Return southeast to where you started to find a double-value Bazooka pickup and Soda Cans placed on the exact same spot. As you will have noticed by now, there's a Snakeoid in the courtyard with you. You need to kill him in order to get past the Skull Door to the north. Try standing diagonally near the mound of earth, then running out of the way when its head rears up, and firing on it. One of the very best weapons to do this with, is with the Bazookas you just picked up. A caution, though - leave yourself at least one shell, as I'll be directing you to use it later on in the level. Should you use so many shells that you are left with just that one left, you can use a few of the Pandora's Boxes you picked up in level 39; but do not let your ammo drop below four.
Although you picked up Soda Cans with the Bazookas, they aren't nearly as good as the Bazookas for fighting the Snakeoid - mainly because you have to first run out of the way, and then wait for them to fly through the air, which is rather too much of a time delay to have a good chance of hitting the Snakeoid before it moves its head back underground. With this in mind, do not use the Soda Cans at all, but revert to more basic weapons like the Water Pistol after you have depleted your stock of Bazooka shells and Pandora's Boxes. You really should not find yourself getting that low on ammo, though. One last note - if you find that the Snakeoid disappears and you cannot get it to reappear, walking around the perimeter of the courtyard seems to work as well as anything.
Once he's blown up, collect the Skeleton Key he leaves behind and then head northeast over to the far corner of the courtyard, where you will find Tourists (9). In the centre of the northern wall of the courtyard is a Skull Door; open it and then walk north along a passage. you will arrive between two small pools to your left and right; dive into the one to your left and collect a Swimming Pool Guy (5). Return to the waterside using the steps to the east, then head north and west around the pool, past a couple of sarcophagi and a passage north. you will come to a corner; do not head south yet, but first read paragraphs 4 and 5 in full in order to be ready to save an Explorer (3).
Switch to your Fire Extinguisher and Pandora's Boxes. The Fire Extinguisher is necessary because you are going to be defending the Explorer (3) against Mummies, which are neither killed nor slowed by the Water Pistol - at least, they are not killed within the time it takes them to do some killing of their own. Push into the corner in the northwest of the passage. Can you see a Mummy shuffling around inside the chamber to the northwest? If you can, then walk east back over to the area between the two small pools, and then west to return to the corner; check again and repeat if necessary.
Once there appears to be no Mummy, head south and then west over to a Sandbank on the north wall of the passage. Open it, but do not bother picking up the item if one appears; just head into the tunnel sharpish. You will emerge in a spacious chamber containing an Explorer (3), with a sarcophagus set against the northern wall. There's a good chance that a Mummy has already walked out of the sarcophagus and started approaching the Explorer (3). If so, you have two options: freeze it with the Fire Extinguisher (a good idea if you have it in a direct line of sight and can get there in time); or try and blast it with a Pandora's Box.
Once you have collected the Explorer (3), or once he's been killed, head southeast into the dark patch on the southern wall of the chamber. You will come out of the tunnel on the south side, where the Sandbank was. If it revealed an item when you pulled it down, then you may pick it up now. Hug the southern wall of the passage and head due east, and you will pass the two small pools and the pyramid's entrance hallway and arrive at a corner in the passage. Head north here, through a collapsing roof gate, and then southeast into another hidden passage heading south (again, marked by an orange patch on the wall). You will burst through a Sandbank in a wide chamber. Head southeast to save another Explorer (7).
North of that Explorer (7) is a Sandbank. Open it to find a tunnel behind. Walk north into the tunnel, and you arrive in a constricted chamber. Continue to the northern end of the chamber and collect a Skeleton Key, then open the Sandbank to its east. Yet another tunnel is revealed; walk north into it and you will come out into a little cell containing an Explorer [A]. Having picked him up, head south down the passage again, and through the small room and the second passage, to arrive in the large room where the other Explorer (7) was. Head north to the far end of the western of the tunnels on the north wall, and you will return to the main, maze-like section of the pyramid.
Head west and you will come to a collapsing roof gate to the north. Walk through it and continue north through a further two gates up ahead. Through the second of the pair of gates, head east and then northeast to find a Sandbank near a pool of water. Continue east along the side of the pool, and then north, carefully passing over a couple of rows of flame traps. At the end of the corridor is a Sandbank; open it up, but do not head through into the passage it reveals. Head south across the flame traps again instead, and west at the pool. Continue west until you arrive at a T-junction, with collapsing roof gates to the north and south.
Head through the gate to the north, and in the next area, walk into the passage leading out of the northeast corner. you will arrive in a room where Zombies spawn rapidly. Continue northeast to find a Sandbank against the northern wall. Ignore the tunnel hidden behind it, as you did the last one, and return southwest through the passage. You arrive to the south of a collapsing roof gate; walk north through it. When the gate collapses behind you, turn around and fire a Bazooka shell south into it to clear away the blockage - you will need to use this path later, and you won't be able to fire Bazookas at the time, because you will be in ghost form. Now, carry on north until you come to a sarcophagus standing against the wall, just west of the second Skull Door.
Open the Skull Door and head through. You come out onto a platform between two large pools of water, with a Pot to your north. Open the Pot and then switch to your Ghost Potions. If you have no Ghost Potion to use at this point, then you will be following the same route as if you had used one, but your chances of successfully collecting two particular Victims, #s 6 and 8, will be a little slimmer. While carrying out the instructions in paragraphs 11 and 12, be sure to pause the game when you are not moving, as you only have a limited amount of time to spend as a ghost.
Stand on the steps of the western pool of water. Drink a Ghost Potion, then head west all the way over the water and onto the steps at the other end. A short distance west from these steps is an Explorer (6), and provided that a Mummy hasn't already beaten you to him, you need to save him very quickly. From him, head east along the platform next to the water. If you find yourself walking into the sarcophagus that protrudes from the wall, then move a little south to get around it. you will see two small chambers to your north as you walk; in the second one is another Explorer (2). Return south to the walkway and head west, and onto the water via the steps. Head east over to the far side of the pool, and go south into the darker wall section to travel down the tunnel and back out through the opened Skull Door.
Walk south down the passageway to the west of the Skull Door, pass through the collapsing roof gate which you already re-opened, and onto the water to the west via the steps that lead down into it. Carry on walking west and you should hopefully get to the Swimming Pool Guy (8) before a Squidman does. Leave the water via the stairs to the west, and wait on the waterside to return to human form (note that you must have left the water before you will change back). Head north across the flame traps and you will come to an Explorer (4) in a little alcove. Should it look as though the Explorer is in danger from Zombies, it would of course be sensible to walk across the flame traps whether they are firing or not.
Pickups
There are still Ancient Artefacts to collect nearby. These will be very helpful in the coming levels, and you would be well advised to take a quick detour in order to get them. Oh, and there's a Sandbank you have not checked yet, as well. To get to these, head south out of that alcove and east along a corridor. Take the next north turn and you will find Ancient Artefacts to your west; continue east from there to find a Sandbank on the wall to the north. Open it and then return west, south, and west over to the alcove, where the Exit Door awaits you.
They Are Back! In: Level 41: Martians Go Home!
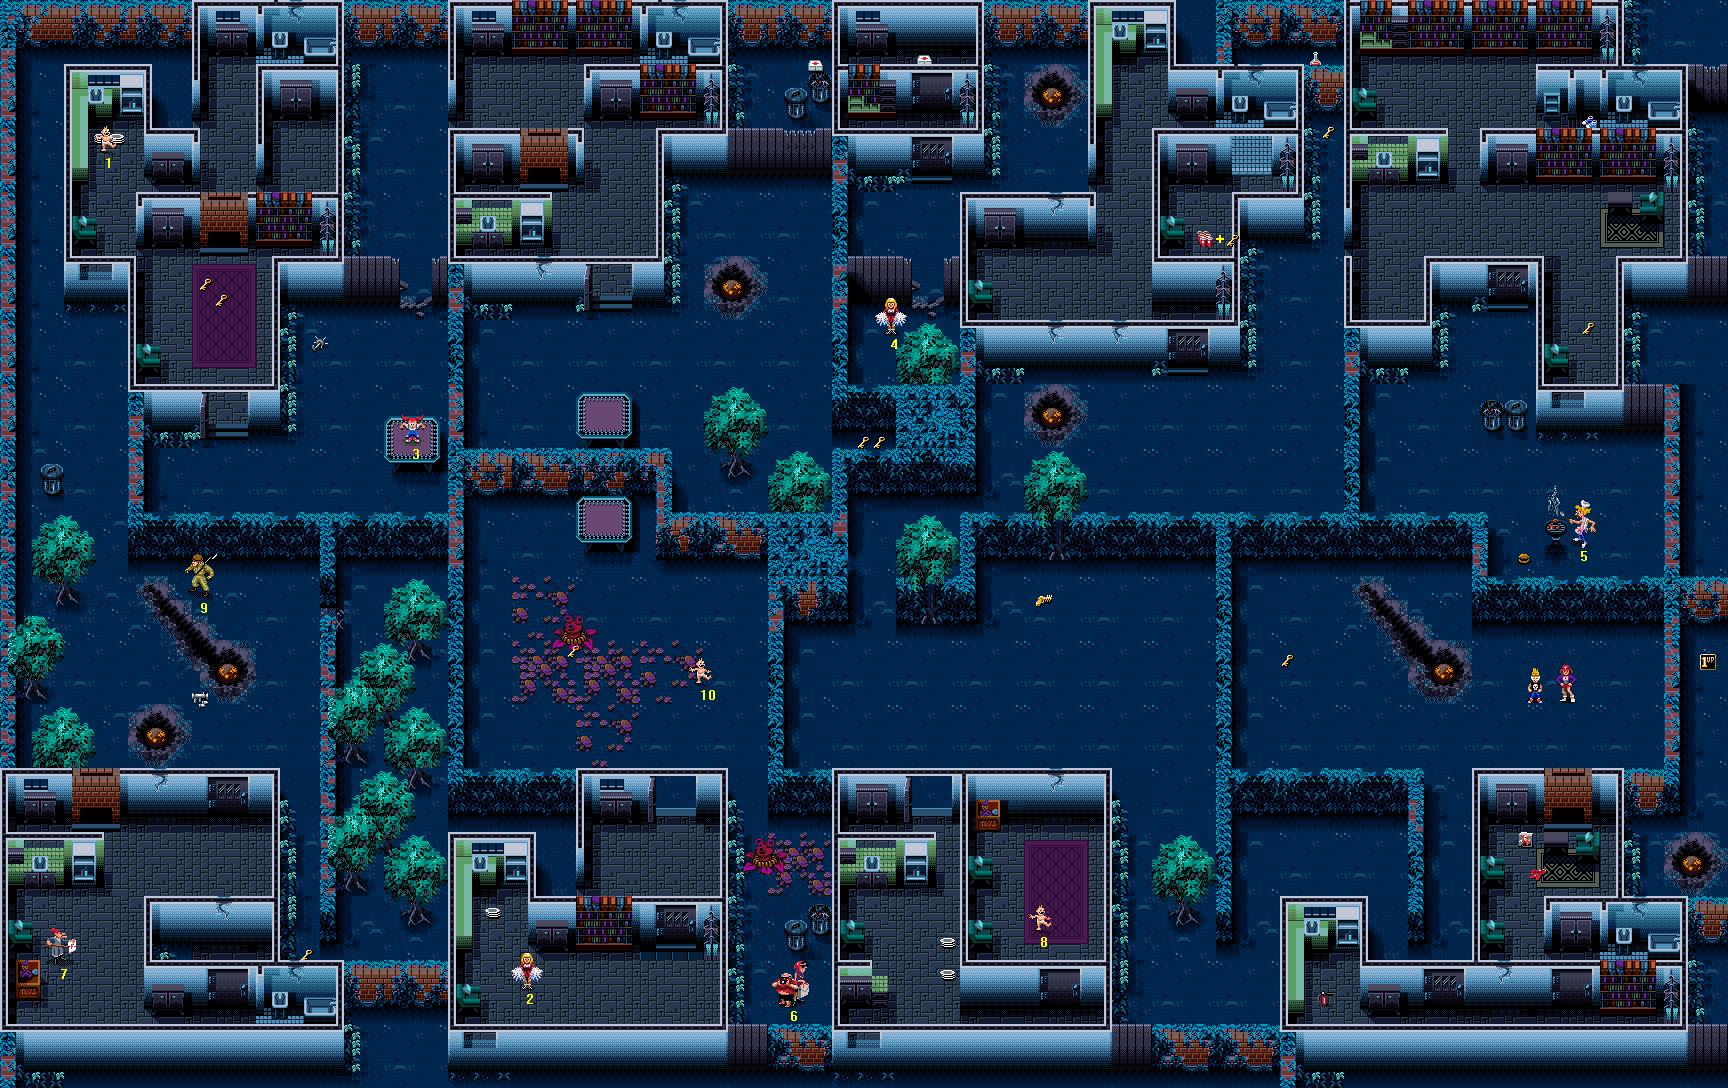
Difficulty: 3/10
This is indeed the last level in which you will encounter the Martians, so why not add insult to the injuries you have (hopefully) already caused them, by managing to save every last Victim? That's actually not particularly hard to do - assuming you start with all of them, of course... On top of that, there's an abundance of very useful items (including pickups granting you a total of one hundred Plates!). There's no Martian Spaceship to worry about, which is a relief as the level is big and complicated enough as it is (as you may have noticed if you have glanced at the length of the two walkthroughs). In terms of difficulty, though, even if you start using a password, this level is a piece of cake.
Monster List
- Doppelgangers [Normal] (intensity: high, location: one place)
- Jelly Blobs (intensity: low, location: patchy)
- Martians (intensity: ranges from medium to high, location: nearly everywhere)
- Pod Plants (two)
Victim List
- [A] Baby - In the northwest of the level, inside a house, by a couple of Plates pickups.
- Cheerleader - In a house to the south of the weed-covered lawn, in the southern room (past a locked door), also near Plates. She's in danger from the Martians, as one of them will often beam in when you approach.
- Trampoline Girl - In the yard southeast of the house containing the Baby [A], and north of the field where Doppelgangers spawn.
- Cheerleader - In a yard accessible through a broken-down fence, south of the area where the two First Aid Kits are.
- Barbecue Guy - North of where you start, on the other side of a hedge.
- Tourists - At the southern end of the yard that is southeast of the large weed-covered garden.
- Teacher - In a house in the southwest corner of the level.
- Baby - Standing on the carpet, in a large room inside a house to the east of the weed-covered area, on the southern edge of the level.
- Soldier - Standing near Bazookas on the west side of the level, where Doppelgangers spawn.
- Baby - On the eastern edge of the large weed patch in the middle of the garden, near the centre of the level.
Important Pickups
- Speed Shoes
- Two First Aid Kits
- Monster Potion
- Five Plates pickups
- Bazookas
- Martian Bubble Gun
- Decoy Clowns
- Extra Life
Bonuses Available
- 50 points per Victim saved
- You Saved More Victims Bonus - 1000 points (two-player mode)
- Note: You cannot obtain the "All Victims Saved Bonus" on this level. I do not know why.
Best Place To Score Bonus Points
The Martians appear just about everywhere, but you are less prone to attack from Jelly Blobs if you stick near the northwest corner of the map. Bear in mind that Martians are hard to hit, but find it easy to hit you, so you could regret trying to earn an Extra Bonus Victim on this level.
Walkthrough
Been playing for awhile
Go west to find a Key, stepping slightly south around the glowing meteorite, as a Jelly Blob is likely to appear. Head northeast from there, into the corner between the hedges, and use the Bazooka to blast through the weak hedge section to the north. Having walked through to the other side, go east to find a Barbecue Guy (5). There's a Burger lying on the floor near him, so collect it if you need a health boost. Go north from there for a Bin, and then continue north around that and into the house. Once inside, head southeast to find a Key near an armchair.
Walk north, and west a little bit to find a Cupboard next to a pair of bookcases. Go north through the entrance to the next room, and east to find Speed Shoes in a little alcove. Return west and south to the previous room, and check the northwest corner to find a little Cupboard under the sink. Head out the building's western exit into a garden, and walk north into a dead-end alleyway to find a Key. Head south out of the alley again, and then southwest across the garden. At the southwest corner, there is an entrance into a little square yard lined with hedges; use your Bazooka to blast down the hedge block to the north. This reveals a hidden passageway; walk in, and when you emerge at the other side you will find a Cheerleader (4).
Head through the gap in the fence to the north and continue over to a door. Enter, and then go through a second door to find a First Aid Kit and a Cupboard in a small room together. Head south through the two doors again and then head east across the southern end of the little yard with the meteorite in. Inside the house, head northeast to find a Cupboard. You should still have your weapon switched to the Bazookas, so stand south of the cracked wall in the bathroom and fire at it; walk through the hole you made to find a Monster Potion in the little walled-off passageway.
Return south into the bathroom and then continue south into another room, where you will find Soda Cans and a Cupboard. Head north, back into the bathroom, and then go west and then south along a passageway. Once past the western entrance, by which you accessed the building, head west into the large front room to find a Cupboard along the northern wall. From that cupboard, head southeast and out the front door. Outside, head southwest to arrive back in the small yard you passed through earlier, with the damaged hedge block to the north. Head over to the western side of the yard, and walk into the block, past the western wall, that appears green. you will enter another passageway covered with ivy, like the one earlier; once in, head north to exit into a new area.
Walk northeast into a dead end to find two Keys. Head out of there and walk north alongside the wall to find a fence at the northern end of the garden. Use your Bazooka to blast down the section with the serrated top, and head through. Open a Bin, and then walk around it and into the northeast corner of the yard to get a First Aid Kit. Head south out through the hole in the hedge again, and then southwest. Past the southeast corner of the building, you will find an entrance in the wall to the north; go in.
Head west to find a Cupboard, and then north around the little kitchen area to find another one. From there, head east past the unlit fireplace and north to find a third Cupboard. Continue northwest into the corner of the room to find a fourth one, then go southwest and out of the building into a long, thin garden. Head south through a hole in a fence, and then head west to find Weedkiller. Go southeast from this and jump onto the trampoline to save a Trampoline Girl (3). Jump off to the west; go slightly south around the corner of the house, west and north in through the open door.
Walk north onto the carpet to pick up two Keys, then quickly continue northwest (ignoring the Cupboard for now) and collect a Baby (A) in a small kitchen area. Take the two Plates pickups in front of the sink as well. You can now head south again and open the Cupboard in the northwest corner of the front room. Having done so, head north again into the kitchen and then open the Cupboard against the wall to the east. Walk east across the passage into an empty room containing only a Cupboard; open it, then walk southwest again into the passageway. Walk north and you will find a Cupboard at the end of the passage.
Head south and exit the house via the opening to the west. You emerge in an alley. Head north, west and then south for a while; you will find a Bin after a bit of a walk. When the alleyway opens out into a wide yard containing trees, head east to get a Soldier (9. Go south for a Bazooka pickup sitting between two meteorites, and continue south through a door into a house. Once inside, walk southwest to find a Teacher (7). Walk southeast from her to find a Cupboard just inside a little passageway; return northwest to find another Cupboard in a corner. Head around the kitchen unit and north, and you will find a Cupboard in the northwest corner of the house. Walk east along the northern wall and out of the door that you entered by.
Head south down the alleyway to your east and you will find a Key where it turns east; do not continue with it. Instead, return north and you will come to a long hedge in your way. Blast down a weak section with the Bazookas and head through; to your east is a trampoline. Jump onto it and then jump off to the southeast. You land in a large garden just north of a weed infestation. Head east, keeping south of another trampoline, and then southeast to find a Baby (10) at the edge of the weeds.
Switch to the Weedkiller and head west into the weeds. You will come to a Pod Plant; kill it and then pick up the Key it was sitting on. Head southeast over to an open door, and head south through the first room inside (ignoring the Cupboard for now). Pass through another door and head swiftly west to find a Cheerleader (2) at the other end of the room. Pick up Plates to her north, then open the Cupboard to their southeast. Return east to the door, head north and go to the northwest corner of the next room to deal with the Cupboard you left unopened earlier.
Head northeast out the door, then southeast through a small opening into a little yard whose northern end is also full of weeds. Kill the Pod Plant and clear a path through the weeds heading south; open the Bin and then save the Tourists (6) at the southern end of the yard. Go north again, along the path you cleared, and out onto the big lawn. Switch to your Bazookas and blow down one of the weak patches in the hedge to the east. Head through, and go southeast into an open door.
West of the entrance to the building is a Cupboard. Open it, then walk east and south around the partition wall, and open the Cupboard on the other side. Walk southeast from there to find two Plates pickups on the floor together. Move southwest from them to find a Cupboard in the corner of the house. From that, walk east along a passage and you will come to a door to the north; enter, and collect the Baby (8) who's standing on the carpet. I do not recommend exiting straightaway, but if you do, at least read the preamble to level 42 first.
Pickups
Head south out of that room, west and then north and out of the building. Once out, walk northeast to find a Martian Bubble Gun near a hedge. Walk southeast from there, and when you come to the hedge, continue south. Past a tree, you will find the end of the hedge; walk east around it and then head north. Go east once past the end of the building, and then southeast and in through a door. Inside, go west to find a Cupboard and then a Fire Extinguisher.
Walk to the eastern end of the corridor and you will find a door to the north. Go through and open a Cupboard straight ahead, then head north around the wall into a little sitting room. you will find a Water Pistol and Decoy Clowns in front of a Cupboard. Switch to your Bazookas and head south to the other end of the room, then walk east, past the door, into the bathroom. Blast down the damaged wall at the northern end of the bathroom, and walk through the hole. Carry on walking north up the alleyway to find an Extra Life at the far end.
To return to the Exit Door, follow these directions: head south; southwest through the hole in the wall, and then through a door; northwest through a door, over to the west side of a hedge, and past the corner of the building you were just in; southwest past the other corner, and past the end of another hedge; north past a tree, and west when the area widens out into a big lawn; south into the first door you come to, and over to the southern end of the room inside; east along a passageway, and north through a doorway into the room where the Exit Door is. Before making use of the Door, make sure you read the preamble to level 42.
You have started on this level using a password)
Walk west to find a Key, stepping slightly south around the glowing meteorite, as a Jelly Blob is likely to appear. Now, head southeast to find a pathway heading south out of the large grassy area. At the southern end, you will find a door; ignore that for now and instead head west, northwest past the corner of the building and then southwest past another corner and the end of a hedge. Head north past a tree and when the area you are in opens out into a much wider lawn, head northwest to find Martian Bubble Gun near a hedge.
From the location of the gun, head southwest to find an open door into the building to the south. Walk in and open the Cupboard to the west of the entrance, then walk east and south around the partition wall to get to another one. From that one go southeast to find two Plates pickups by the wall, and then turn to head southwest into the corner of the room, to find a third Cupboard to open. Walk east from that and you will find a door to the north; enter and walk onto the carpet where a Baby (8) is waiting for you.
Head back out through the door to the south, and go west along the passageway and north and out through the front door. Now head north and a little west, and into a little square yard through a gap in the hedge. To your west is a block of greenery; walk into it and you will find that you have entered a passage hidden under the ivy. Head north out of there, and once visible past the tree, go east into a little alcove for two Keys, and then head out again and continue west. When you come to a trampoline, turn to head north and you will come to an open door letting you into a house.
Head west of the entrance to find a Cupboard under the sink, then walk around to the north to find a second one. Head east past the fireplace, then north to find a third Cupboard next to a bookcase, and walk northwest from there into the corner of the room for one last one. Head west out of the building through the side entrance, and then walk south and through the gap in the fence. There's a Weedkiller pickup immediately to your west once through; be sure to collect it. Go southeast from there and jump onto the trampoline to rescue the Trampoline Girl (3) from her perpetual bouncing.
Jump west off the trampoline. Step south to walk around the plants by the side of the house, then walk west and north into the building. You will find two more Keys straight ahead on the carpet; after you have them, walk northwest, disregarding the Cupboard for now, and over to a Baby (A). Collect the two Plates pickups and then walk south again and open up the Cupboard you were ignoring. Walk around to the north and open another Cupboard to the east of where the Baby (A) was standing. Continue east across the passageway and you will find a Cupboard in the otherwise empty room opposite the kitchen. Head back into the passageway, then walk north along it to find a Cupboard at the other end.
Head out the house using the exit to the west, to find yourself in an alleyway. Follow the path north, west and then south; after about twenty metres it widens out and shortly after that you come to a Bin. From that head southeast past a corner in the hedge and you will find a Soldier (9) just north of a glowing meteorite. Once he is safe, head south to find first a Bazooka pickup, then a locked door into another house. Open it, and once inside walk southwest to find a Teacher (7) in the middle of the room.
Walk southeast to find a Cupboard. From that, walk northwest to find another Cupboard, north of where the Teacher (7) was. Continue north around the kitchen area to find a third Cupboard in the northwest corner of the house. Head east from this, and walk out the door to the north to exit back to the Doppelganger-filled area. Walk east over to the hedge, and then south down the narrow alleyway to find a Key at the other end.
Do not continue east with the alleyway; instead return north, and walk northwest once past the end of the alley to return to the wide pathway heading north, which you used previously. Walk north to the end, then head southeast into the house, southwest and southeast into the front room and south out the front door. Head east to get to a trampoline, jump onto it, and jump off to the southeast. On the other side of the wall, continue east around the weeds, keeping south of another trampoline, and then head southeast to collect a Baby (10) on the edge of the weed patch.
Switch to your Weedkiller and cut a swathe through the errant plant life to the west. Kill the Pod Plant that is in the centre of the tangle and pick up the Key it was hiding. Walk southeast of there and in through the open door. Do not open the Cupboard to the west yet, but walk straight across the room to the southern door. Go through and walk west to find a Cheerleader (2) at the other end of the room. Once you have saved her, go north over to the little kitchen area to find Plates.
Head southeast to find a Cupboard against the north wall. Carry on east, and walk north through the door, then northwest over to the Cupboard you passed earlier. Open it and then head out of the building through the door to the northeast. Make sure that your weapon is still switched to the Weedkiller, then head southeast through a gap, into a small yard containing another Pod Plant. Exterminate it, and then clear a path to the southern end of the yard. Open the Bin, and then save the Tourists (6) who are standing around at the far end.
Head north, along the path that you cleared through the weeds, and out into the wide garden where the rest of the weeds are. Continue north, skirting the eastern wall, and at the northeast corner turn to head northwest to where a trampoline stands against the wall. Jump onto it, and then jump off to the east. From where you land, head north, and when you come to a meteorite stuck in the ground, turn to move northeast instead. You will come to a fence; use a Bazooka shell to knock down the weak spot (notable by its pointed top).
Head through the fence and open the Bin, and then head around it to the north to find a First Aid Kit in the northeast corner of the yard. Return south, through your hole in the fence, and continue south and into the passageway under the greenery at the far end of the garden. Head east out of there, and northeast to find a hedge block to the north. Your Bazooka ammo is far too limited for you to use it to open up every last shortcut, so you will have to go the long way round.
Head northeast and you will come to a door. Enter and head northwest to find a Cupboard up against a wall; go northeast from there, past an exit to the west, and you will come to another Cupboard just west of a bathroom. Head into the bathroom and launch a Bazooka shell at the cracked wall to the north; walk through the hole and collect a Monster Potion. Go back into the bathroom, and continue south into a little room containing Soda Cans and a Cupboard. Head northeast into the bathroom again, and then head west and southwest out of the side door into a little yard.
Carry on west a few metres and you will find a small building to the north. Go in, open the second door that you come to, and you will find a First Aid Kit and a Cupboard. Go south out of there, and continue south through a hole in the fence at the far side of the yard; you come to a Cheerleader (4). Get her and then head north through the fence again, east at the corner, and southeast and out of the large house through the front door.
Walk northeast from the door and you will come to the side entrance to another house. Do not go in yet - check the little dead-end passage to the north for a Key. One you have that, go inside and open the Cupboard to the north of the entrance. Head east from there and open the next Cupboard, just past an entrance to the north. Go through the entrance and head east once inside the next room, to find Speed Shoes in a little alcove.
Walk west again, and south through the opening in the partition wall. Head southeast to find a Key in a protruding section of the front room. Go northwest from there to return to the main room, and head out the door to the south. Walk south to find a Bin, and then continue around the Bin and southeast to find a Barbecue Guy (5). There's a Burger lying on the floor nearby, which will give you three points of health if you pick it up. You ought to go and get the Extra Life before exiting, but even if you do not want to (and why not?), read the preamble to level 42 in order to be prepared for it.
Pickups
Use your Bazooka to blast through the hedge to the south. Head through into the yard where you began the level; go to the centre of the southern side to find a pathway leading south. At the southern end of this path is a door, which you can now enter. Once inside, go west to find a Cupboard and a Fire Extinguisher, and then walk east over to the other end of the corridor. you will find a door to the north; go through and open the Cupboard that is right ahead of you. Head north around the Cupboard and in the room beyond you will find a Water Pistol, some Decoy Clowns, and a Cupboard to open.
Return south to the other end of the room, and then east into a bathroom. There's a cracked wall to the north; use your Bazooka on it to open up a hole. You should have one Bazooka shell left now; you will be able to access no less than two Ghost Potions with this on level 43. Head through the new opening in the wall and then walk northeast into an alleyway heading north; at the far end you will find an Extra Life. Go southwest again, through the hole in the wall and then through the door. Walk west along the passageway, north through the door you came in by, and carry on walking north. You will arrive in the yard where you started this level; go over to the northeast side, find the hole you made in the hedge and go through. Before using the Exit Door, you ought to read the preamble to level 42 below.
Terror has a New Name! Level 42: Spikes
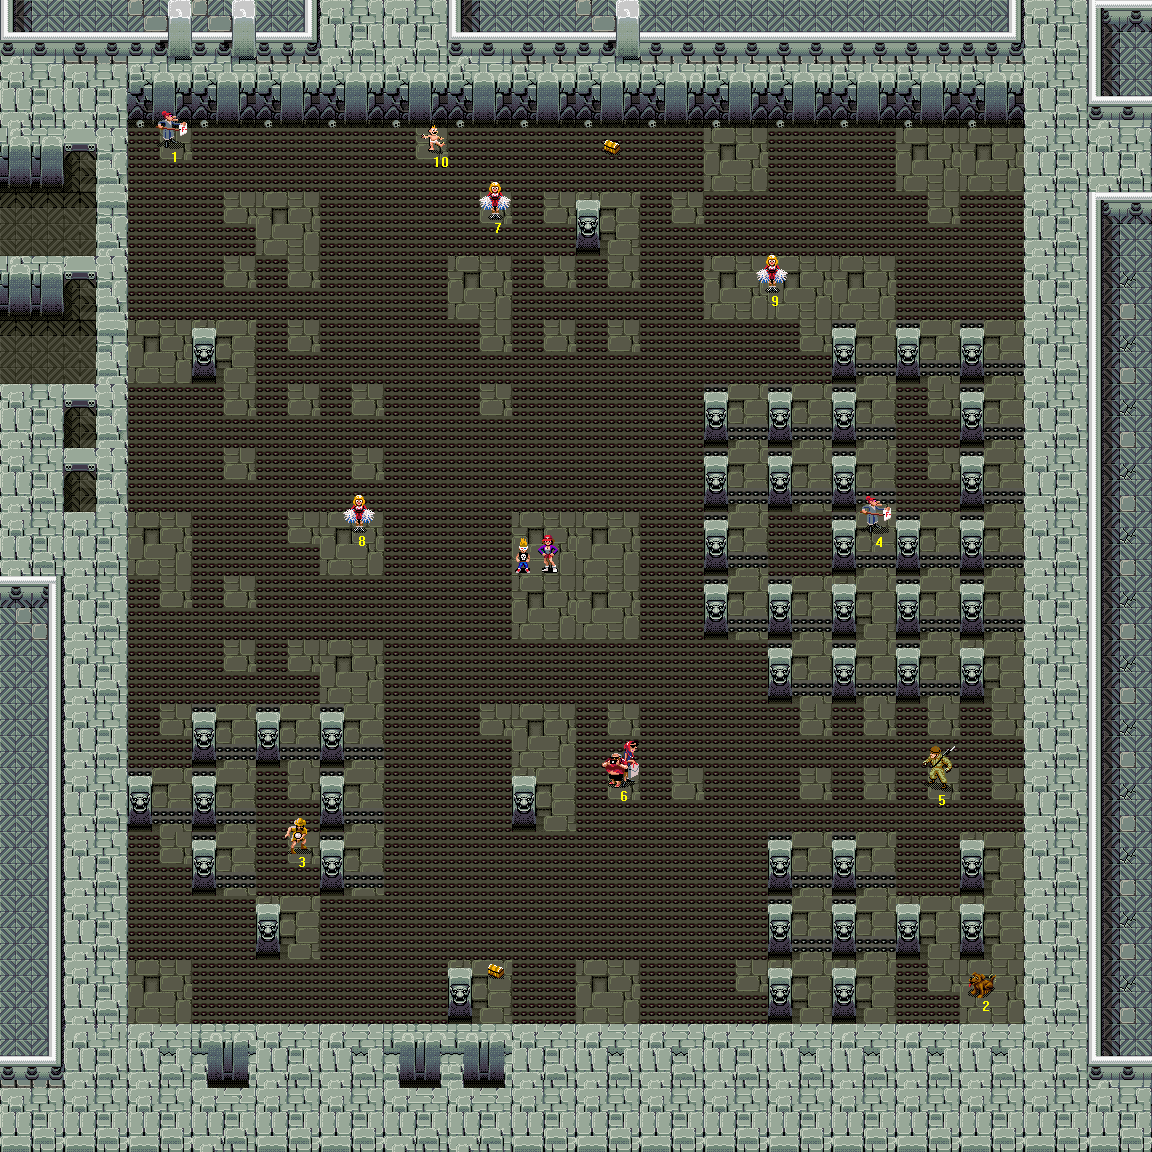
Difficulty: 6/10
This level is not like anything you have seen before. it is just a big paved courtyard covered with the timed spike traps you have become familiar with from the castle levels that you have visited. The spike beds rise and fall in a complex pattern that requires timing and efficient movement. However, just to add a little urgency to the mix, Werewolves will spawn near the edges of the map, meaning that to collect the majority of the Victims in the level you will have to be fast, and adept at fending off the creatures while also making your way across the spikes. Expect to lose health (and Victims), especially the first few times you play. Of course, if you had something to make you invulnerable to spikes and Werewolf claws, you might find it considerably easier.
Monster List
- Werewolves (source: from Tourists after 8 seconds: #6; spawning randomly after ten seconds, intensity: high, location: near the perimeter of the level)
- Also, in case you hadn't guessed, there are lots and lots of spikes.
Victim List
- [A] Teacher - In the northwest corner of the map.
- Dog - In the southeast corner of the map.
- Explorer - Southwest of where you start, in the centre of a set of pillars.
- Teacher - East of your start point, in the midst of a larger group of pillars.
- Soldier - East and a little south of where you start, near the eastern wall.
- Tourists - South and a little east of your start point, past just a few beds of spikes.
- Cheerleader - North of where you start.
- Cheerleader - Just west of where you start, across a single large bed of spikes.
- Cheerleader - Northeast of your start location, in a fairly large clear area just north of the largest set of pillars.
- Baby - Up against the northern wall of the level, just northwest of Cheerleader #7.
Important Pickups
- Two Pandora's Boxes
Bonuses Available
- Victim collection bonuses
Best Place To Score Bonus Points
You can hang around and fight Werewolves on the spikes if you like, but even if you have masses of Silverware it would be a very poor decision.
Walkthrough
This level is much easier if you drink either a Ghost Potion or a Monster Potion, as you can disregard the spikes and walk directly between Victims - you can pretty much bypass all of the level with one potion, provided that you are efficient enough and do not waste time (read: pause the game whenever you are not moving, and do not hang around fighting Werewolves). Assuming you have got any potions, through, the question you should ask yourself is whether you can afford to use one of them. If you have a Ghost Potion, then go for it, as you will get two more on the next level anyway. If you only have Monster Potions, then I would strongly advise against it if you have less than three - and I'd still recommend against it if you have less than five, unless you have masses of other heavy weapons to use on the later levels.
If you choose not to use a potion, your path through the level will be more complicated, as you will need to pick your route carefully not only to avoid crossing raised spikes, but also to keep away from the edges of the map, where Werewolves spawn, where possible. Consequently the second walkthrough, for those who aren't using potions, is longer and perhaps harder to follow, though I've tried to make it as self-explanatory as possible. Whichever walkthrough you use, you will start by collecting the Tourists (6) to your southeast, as they'll turn into Werewolves after just 8 seconds otherwise.
You will use a potion
As you wait to begin, press on the down-arrow on the control pad, so that you start to move south as soon as possible. You will walk off the featureless square of flagstones on which you start and across a sunken bed of spikes, over to a pillar at the southern end of another safe area. Walk east and wait for the bed of spikes to sink, then walk across it and rescue Tourists (6).
Drink your potion of choice, and when the transformation is over, walk northwest to find a Cheerleader (8). Head south from her; you will walk past a couple of pillars to the west before finding an Explorer (3) on the other side of them. Return to the eastern side of the pillars after saving him, and head southeast to find a Pandora's Box near the southern wall. Walk due east from there and you will pass between two rows of pillars and come to a Dog (2) in the southeast corner of the level. Head through the pair of pillars just to the northwest of the Dog's (2) location and then go north. You will come to a Soldier (5).
Walk west across one bed of spikes to the next small paved square, then head due north to find a Teacher (4). Walk west again between a pair of pillars and onto a large bed of spikes, and then walk north to find a Cheerleader (9) in a large clear area. Head west, and turn to go northwest as you pass a solitary pillar to the north; you will collect first a Cheerleader (7) then, if you continue northwest, a Baby (10). Head east from the Baby to find a Pandora's Box in the middle of a bed of spikes, then walk west for a while to find a Teacher [A] in the northwest corner of the map. Exit immediately.
You cannot or won't use a potion
This level is difficult enough to play through without losing Victims (and health!), but it is even more difficult to write a detailed walkthrough for. As with level 11, there aren't any distinct landmarks anywhere on the map and so I've had to concentrate on the minutiae in assembling the instructions. The route described within is one which I think gives you as good a chance as you will get of saving all of the Victims, and minimises the amount of time you have to spend getting beaten up by Werewolves and walking over spikes. Some aspects of the description of the route are in shorthand, as describing the same things repeatedly would greatly increase the number of paragraphs, and make the walkthrough rather hard to use. Please note the following:
Directions And Use Of The Walkthrough
- As referred to in the walkthrough, a "rest" is one of the paved areas which has no spikes on it. When on a "rest", you can stop indefinitely, although you may still be attacked by Werewolves.
- "Separated" beds of spikes are those with a rest in between.
- "Adjacent" beds of spikes are distinct beds (i.e. they rise and sink at different times), but they are not "separated" (i.e. they are right next to each other, with no "rest" in between).
- When I instruct you to walk across a bed of spikes, what I mean is for you to do so after waiting for them to first rise, then sink. This ensures that you have the maximum amount of time to traverse them before they rise up again and hurt you.
- However, if I direct you to walk over multiple groupings of spikes in the same instruction, I mean you to keep walking continuously after you have begun.
- On occasions when you have to walk across spikes no matter what their status (i.e. in order to reach a Victim quickly), this will be clearly stated in the walkthrough.
Technique And Playing Style
- The Tourist Couple (6), which is to your southeast as you begin, should be saved first. Check the "Tourist-Werewolves" section of the walkthrough, below, to benefit from exact directions.
- s the Werewolves often jump over to a Victim you are approaching and attack them, you should be prepared to slay them from a distance. If you have any Pandora's Boxes with you - and you will have a couple by the time the level finishes, at least - then you ought to keep them ready for instant use.
- The Werewolves will frequently attack you as well, and you cannot just run away across the spikes - so, you need to defend yourself. If you have no Silverware, switch to the Weedkiller and when they approach up close, mow them down (literally). I advise you not to allow a following of Werewolves to build up, chasing you around the level; this is bad for the Victims, and also for you. Kill them quickly when they approach, and move on.
- You should keep an eye on your health, because it could get hammered down very rapidly - particularly if you get overwhelmed by the Werewolves.
- Much of what this level throws at you is random (which is what makes it exceptionally difficult to write for!), and as a consequence I cannot anticipate everything that will happen, and write about it. If it seems sensible for you to take a detour, or to stay in one place for a moment to kill a crowd of Werewolves you have gathered around you, then do so.
- Whenever you read from the walkthrough, or check what it says, or even just think what to do next, pause the game - the less time your character spends waiting around, the less time there is for Werewolves to come and attack you, and for other things to go wrong. During the time that you are actually playing the game, you need to be moving as fast as you (safely) can.
As you wait to begin, press on the down-arrow on the control pad, so that you start to move south as soon as possible. You will walk off the rest on which you start and across a sunken bed of spikes, over to a pillar at the southern end of another rest. Walk east across a bed of spikes, and rescue the Tourists (6). Once you have them, switch your weapon to either the Silverware or, if you have none, the Weedkiller; also, switch your special item to the Pandora's Boxes.
Walk north across two separated beds of spikes. Walk to the northeast corner of the rest on which you arrive. Walk east across one bed of spikes and keep south at the far end, in order to pass just to the north of a pillar and avoid a strip of three spikes. Head east across another bed of spikes and slip past the next pillar in the same way. You find a Teacher (4). Walk north across three separated strips of spikes. Past the last one, go northwest to save a Cheerleader (9).
Stand roughly in the northwest corner of this rest, and pause the game. What needs to be done next requires a thorough explanation, as it is the best way of saving the next two Victims (7 and 10) but is quite complicated. If you look due west of where you are standing, you will see two beds of spikes. You are going to walk west once the nearest bed sinks; but you can only do that if the next bed after it has just sunk, a quarter of a second earlier. This is the case once every two times the nearest bed sinks, due to the cycling system of rising and falling that the spikes follow.
Unpause the game and wait there, killing any Werewolves that appear. Once the spikes to your west sink in the way you want them to - almost together - head west promptly, over first a large bed of spikes, then a rest; then a small bed of spikes, then another rest; then onto another small bed of spikes. At roughly this point, the spikes to the north of your current location will sink. Walk north and then west to save a Cheerleader (7). Now, walk northwest across the spikes - even if they are raised - in order to save a Baby (10).
Walk due east across a large bed of spikes to find a Pandora's Box. Head south off the spikes, onto a rest, and over to the southern end of it. Walk across two separated beds of spikes to the west, to reach another rest. Head to the northwest corner. Wait for any Werewolves that are chasing you to arrive, and kill them when they do. Once the spikes to your west sink, immediately walk west and you will come to a rest. do not stop, but turn to head northwest. At the end of the rest, continue northwest across a small bed of spikes (which should be sunk when you come to them), and you will reach a Teacher [A] on another rest next to the wall.
Head southeast onto a rest, and continue over to its southeast corner. Walk south across a couple of separated beds of spikes, followed by a series of adjacent beds. You will arrive at a large rest with a Cheerleader (8) on it. (You should hopefully be hurt by the spikes only once while crossing them.) Continue south across a bed of spikes and you will arrive on a rest northeast of a group of pillars. Kill any Werewolves that are chasing you at this point.
Head into the southeast corner of the rest. Walk south across two separated strips of spikes. You may find the second strip raised when you get to it; walk across it anyway. Once past the two strips, quickly go west, skirting around the north side of the pillar as you did the two pillars earlier, for an Explorer (3). Walk east past the pillar again, and then wait for the strip of spikes to your south, and the spike bed south of that, to rise and fall. When they have done so, walk south until you are right up against the wall. Head east here (you are standing on a thin, obscured path next to the wall that has no spikes on), and once you reach the rest with the Pandora's Box on it, step away from the wall and collect it.
Walk east across a bed of spikes and onto a rest. Wait in the northeast corner of that rest for the long line of spikes to your east to rise, then sink. When it does, walk east across it and continue once you are past it. You will cross another sunken bed of spikes and reach a Dog (2). From him, head north between the two nearest pillars, and across a long bed of spikes to the north, to find a Soldier (5) on a small rest. Exit straight away.
Level 43: Super Fund Cleanup Site

Difficulty: 5/10
There are a few Victims in danger from the Squidmen, but beyond that, this level will not challenge you too much. it is a poisoned marshland with a large lake on the east side, and vivid green water channels and ponds all over the place. You can pick up two Ghost Potions here, and I recommend using one of them straight away to collect Victims 2, A and 10, as described in the walkthrough.
Monster List
- Jelly Blobs (intensity: low, location: two places)
- Pod Plant (one)
- Squidmen (intensity: ranges from high to very high, location: nearly everywhere)
- Zombies [Vicious] (intensity: high, location: two places)
Victim List
- [A] Swimming Pool Guy - In the southeast corner of the map, just by a strip of land protruding into the poisoned lake.
- Tourists - On a little island in the middle of the poisoned lake, northeast of the centre of the level.
- Explorer - On the northern side of the level, by some waste drums, just south of the walled-in area that contains two Ghost Potions.
- Swimming Pool Guy - North and a little east of where you start, most easily saved by jumping north twice on the nearby trampolines.
- Teacher - On the western side of the pond holding the Swimming Pool Guy (4), north of your start point.
- Baby - Also on the western side of the pond holding the Swimming Pool Guy (4), slightly north of the Teacher (5).
- Explorer - At the end of a peninsula pointing into the lake, roughly in the centre of the level, south of the Tourists (2) on the island.
- Dog - East of where you start, on a small peninsula protruding into a large pond, southwest of a patch of weeds.
- Teacher - In the house to the south of your start point.
- Explorer - Near the Swimming Pool Guy [A] in the southeast corner of the map, standing at the end of the narrow strip of land to his east.
Important Pickups
- Decoy Clowns
- Two Ghost Potions
Bonuses Available
- Victim collection bonuses
Best Place To Score Bonus Points
The area where Vicious Zombies spawn, around the gravestones over on the eastern side of the level. No Squidmen appear around here, and you can score points pretty quickly and with a minimum of fuss.
Walkthrough
Walk south into a building and head west to find a Cupboard. Head south through the next door into a room containing a Teacher (9) and in the northeast corner, a Water Pistol and Decoy Clowns. Return north through the two doors and head northeast over to a trampoline. Jump onto it and continue by jumping north straight away onto another trampoline, and north from that one into the water. you will land directly on top of a Swimming Pool Guy (4), which (unless you are very unlucky) allows you to save him from any Squidmen that have appeared before they get near him. (Whether he's still in good shape after you landed on him at high velocity is another matter - but at least he's alive.)
Jump out of the water onto the north bank and walk west around the edge of the pond. you will find a Baby (6) just past the western side, and a Teacher (5) to his south. Walk east around the southern bank of the pond, and jump onto the trampoline; jump south twice and you will arrive back where you started (but four Victims the richer). Dive into the unhealthy-looking stream to your southeast and then jump out on the western side, south of the fence. Head south here to get some Weedkiller.
Head north again, and return to the northern side of the fence by jumping into the water and swimming to the northern bank again. Jump onto the trampoline to the northwest (again), and this time jump off it to the northeast. Head north around the little puddle and walk east, over a tarmac surface, to the western edge of a large green lake. Dive in and swim east over to another muddy bank. Jump out and then walk south along the edge of the water, past a patch of weeds, to find a Dog (8) on a small peninsula.
Switch to your Weedkiller. Head north past some barrels of waste, then turn to walk northeast through the weeds. When you come to the Pod Plant, sweep him up to find a Key underneath. Walk east from the weed patch, and south a little when you arrive at the edge of the water. Continue east past a couple of clusters of toxic waste barrels, and you will come to an Explorer (7) in the southeast corner of a large peninsula with a puddle in the middle. The route outlined in paragraph 5 is quite a roundabout one, but it is designed to maximise your chances of saving the remaining four Victims, so follow it to the letter and you should not go far wrong.
Switch to your Water Pistol. Jump into the water just east of where the Explorer (7) stood, and swim northeast over to another piece of land. Walk northeast once on the land, past a line of gravestones, and over to the wall on the eastern side of the map. Walk north here to arrive by a longer line of gravestones at the northeast corner; head west from there to rejoin the perimeter wall, and follow it until you come to a protruding section of wall. Head southwest here and quickly collect the Explorer (3) by the waste drums.
Switch to your Bazookas and blast down the slightly damaged section of fencing to the northeast; walk through and head west to pick up two Ghost Potions. Drink one of them and then pause the game. You are going to save the last three Victims while in ghost form, so make sure to not waste time, and to pause whenever you are reading instructions, as you do not want your time to run out before you are done. Head southeast, out of the walled-off area, past the waste drums and over the water, to find Tourists (2) standing on an island.
Walk east, past the end of the island, and continue due east across the water. When you arrive on the bank of another piece of land, head south away from the toxic waste drums, southeast around a couple of gravestones and then walk south to reach a Swimming Pool Guy [A] floating just off a narrow strip of land. Once you have him, waste no time in walking onto the strip of land to the east, and saving the Explorer (10) who's standing there. You can choose to leave now, or stay to earn an Extra Bonus Victim (or two) by going after the Zombies to the north. This is the last level in the game, by the way, in which you can earn an Extra Bonus Victim through easy Zombie-shooting, so maybe you should take advantage of the opportunity.
Level 44: The Curse of Dr. Tongue
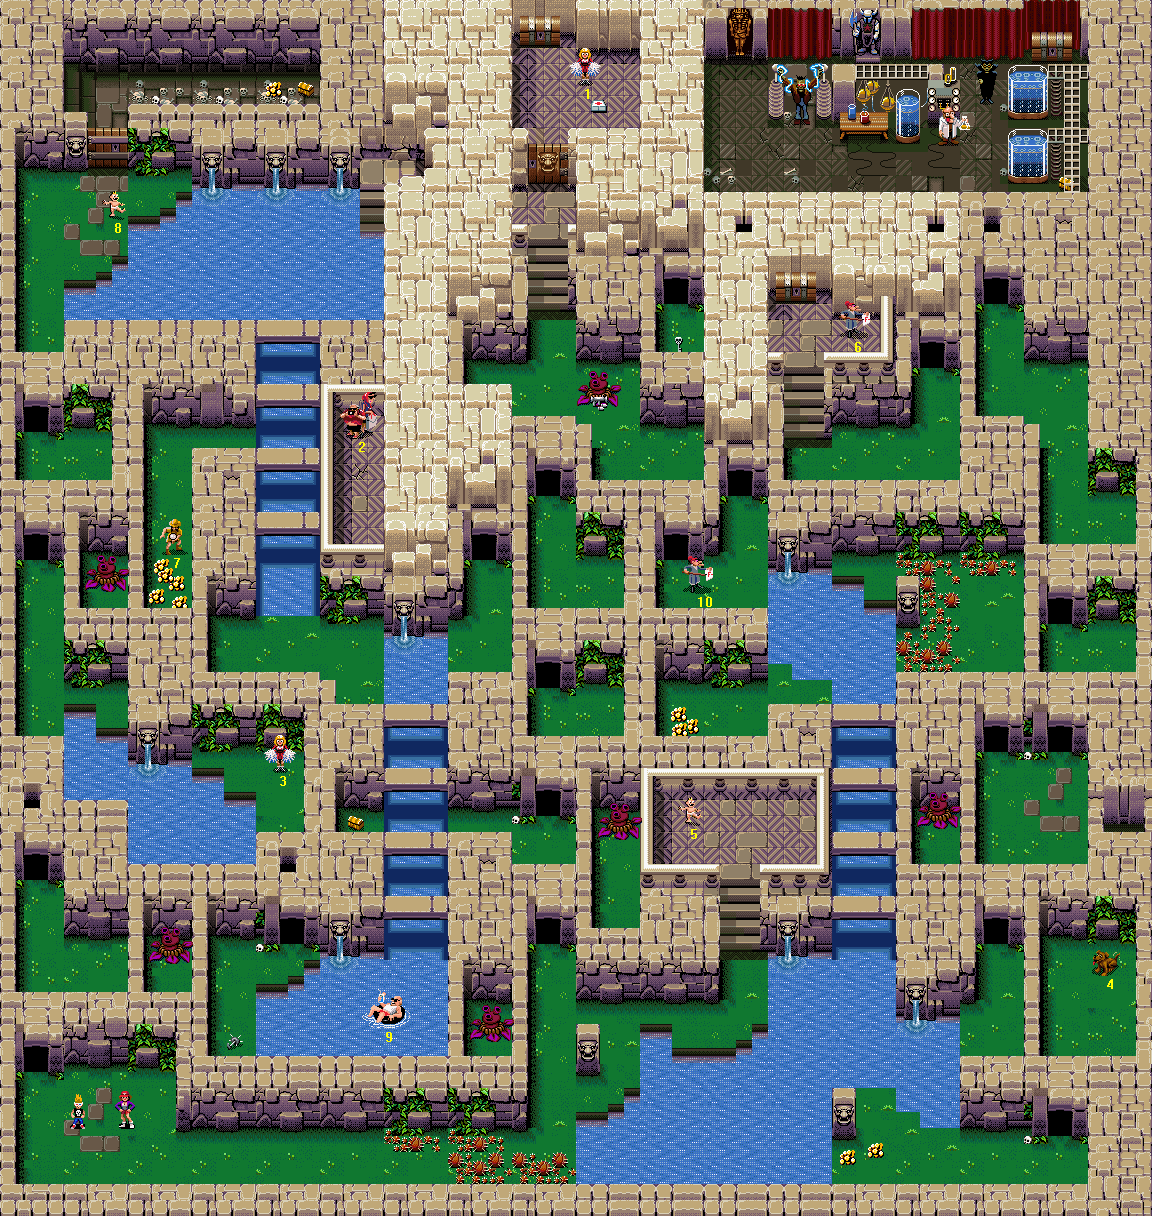
Difficulty: 3/10
This level is fairly large and complicated in its layout, but it is not actually all that hard. You will have to fight a Frankenstein's Monster, and if you have six or more Victims you will be forced to fight a Vampire as well, but they are not too difficult to do away with if you use the right tactics (even if you started on level 41). None of the Victims are in very great danger.
Monster List
- Doppelgangers [Normal and Vicious] (intensity: ranges from very low to medium, location: patchy) Frankenstein's Monster (one) Mummies (intensity: low, location: one place) Pod Plants (six) Squidmen (intensity: ranges from low to medium, location: a few places) Vampire (one)
Victim List
- [A] Cheerleader - Locked safely in a cell behind a Skull Door, on the northern edge of the level. you will need to find the Skeleton Key to get in.
- Tourists - On a balcony overlooking the water channel on the west side of the level. You need to get out at the northeast corner of the pond at the northern end of the channel, and then walk south down a hidden passageway.
- Cheerleader - On the bank beside an ornamental pond. She can be found by heading north through two tunnels from your start location, then swimming east across the water.
- Dog - In a walled-off yard, north of the grassy bank at the southeast corner of the level.
- Baby - On a raised dais west of a water channel, near the southeast corner of the map.
- Teacher - Standing on a balcony overlooking a grassy yard, near the northeast corner of the level. You will need to use a hidden passage south out of the laboratory to reach the yard.
- Explorer - At the end of a cul-de-sac, accessed via an opening on the western side of the water channel on the west side of the level.
- Baby - On the bank to the northwest of the large ornamental pond in the northwest corner of the level.
- Swimming Pool Guy - In a pool at the southern end of the longest water channel, roughly in the centre of the level. This also puts him south of the Cheerleader (3), through a tunnel.
- Teacher - On the west bank, at the northern end of the water channel on the eastern side of the level. Also accessible by heading south along the hidden tunnel, from the western end of the laboratory in the northeast corner of the level.
Important Pickups
- Three Pandora's Boxes
- Bazookas
- First Aid Kit
- Skeleton Key (which you will use)
Bonuses Available
- Victim collection bonuses
- Weed Cutting Bonus - 1000 points (does not require Pod Plants to die)
Best Place To Score Bonus Points
Although there are quite a few diverse "one-off" ways of earning points on this level, there's not much to keep you here after you have exhausted them all. If you absolutely must have an Extra Bonus Victim, then go and beat up Squidmen, in the southeast corner of the level. The time will not pass very quickly, and of course they aren't the easiest of creatures to fight.
Walkthrough
Head into the tunnel to the northwest. Once inside, head north through the tunnel, across a small yard, into another tunnel, and out the other end. To your east now is a pool of water. Jump into it, and swim along to the east bank, then jump out quickly and collect the Cheerleader (3) who's standing there. Walk south, and into another tunnel - marked by air holes in the ceiling - and you will emerge by another pool, which contains a Swimming Pool Guy (9). If there is a Squidman following you at this point, then it would be a good idea to turn around and shoot him to death. That done, jump in and swim over to the Swimming Pool Guy (9). Having collected him, swim over to the west bank and jump out, and collect the Weedkiller.
If you have a lot of Soda Cans (more than fifty), you could use them to kill the Pod Plant in the enclosure to the west. Stand in the northwest corner of your current area and throw the cans over the wall - it takes five cans to kill a Pod Plant this way, assuming they all hit. Tomatoes and Ice Lollies will also work, though not as quickly; they must also be aimed more precisely. Once you are done here, head north into the tunnel through which you entered. At the other end of the tunnel, dive into the water to the west, and swim northwest over to the opposite side of the pool.
Switch to your Water Pistol. Continue north along the western side of the level; you will walk through two more covered tunnels, and after the second you will emerge on a grassy bank with a large ornamental pond to the east. Head northeast along the bank to collect a Baby (8). Fire your Water Pistol vaguely in the Baby's direction as you go, because if a Squidman has jumped out of the water in order to attack the Baby (8), the shots may strike it and discourage it from staying out of the water. Once the Baby is safe (or dead), go through the door to the north. Walk along to the eastern end of the cell inside to find a Bonus Points Pickup and a Pandora's Box.
Return to the western end of the cell and head south out the door, then jump into the water to the east and swim across to the northeast corner of the pond. Jump out onto the steps and then walk northeast, pushing into the northeast corner of the little platform. Walk southeast from there and you will enter a hidden passage; continue south along it. You will pass a Tourist Couple (2) to the west. Once you stop moving south, head west to emerge on the balcony, and walk north to collect the Tourists (2). Walk southeast, pushing into the wall, and you will enter the passage again; walk north up to the other end and you will find yourself back on the platform to the northeast of the ornamental pond.
Dive into the water to the southwest, and swim southwest to find a broad water channel leading south out of the pond. (Swim into the channel from its north, as there are barriers preventing access from the side.) A little way along it is an entrance to the west; jump out here and head south along the passage to find an Explorer (7) along with a few Bonus Points Pickups. If you want to, you can kill the Pod Plant to the west, as with the one you encountered earlier. Return north and jump into the channel to the east, then swim south down it to the end. Jump out onto the grassy platform and then head east and dive into another water channel heading south.
Swim south and you will find a niche to the west, holding a Pandora's Box. Collect that, then dive into the channel again and jump out on the eastern side. Walk southeast (you will probably need to start using the Weedkiller here) and into a hidden tunnel heading south. Once out the other side, continue south to where the path widens out. There is a third Pod Plant on the other side of the wall to the west, so kill it with your Soda Cans if you want and then head east alongside the wall to the north. Past the end of the wall, head north up the steps and collect the Baby (5) which is tottering around on the raised platform. A fourth Pod Plant is situated on the other side of the balcony on the west side of the dais, so kill it if you must.
Head south down the stairs and jump into the water to the east. Swim south to the southern wall of the level, then jump out of the water to the east. Collect two Bonus Points Pickups and then sweep east through the weeds that have doubtless established themselves here. Once you come to the tunnel to the north, go through and collect the Dog (4) at the northern end of the yard inside. Walk back over to the southern end of the yard, and south out through the tunnel.
Walk west and dive into the pool to the north. Swim north and jump out onto the bank to the east. Head north into a tunnel, and out the other side, you will find a small yard where Doppelgangers spawn. (There is another Pod Plant over the wall to the west, so kill it if you want. This is the last one you need to use Soda Cans to kill.) Continue north through a second tunnel and out the other side, then walk west and jump into another pool of water. Swim over to the western side from where you entered, and head to the western end of the little yard in which you arrive to find Bonus Points Pickups.
Return east over to the edge of the water, jump in and swim northwest, and hop out at the northwest bank. Collect a Teacher (10) and then head northeast and into the tunnel that is further to the north. At the far end of the tunnel you will emerge near Frankenstein's Monster, who will promptly come alive; walk over to him - but no further east, in case the Vampire comes after you - and kill him using either the Ancient Artefacts or Weedkiller. (do not let your Ancient Artefacts fall below sixty if you can avoid it.) If you do not have enough of either weapon, then try freezing him using a long blast of your Fire Extinguisher, then firing your Water Pistol at him - your shots will appear to go right through him, as with the Crazy Lumberjacks, but they are hurting him.
Once Frankenstein's Monster is dead, you can walk east to cause the Vampire to attack. However, if you have less than six Victims, you have the option of avoiding an encounter with him altogether; this would allow you to preserve some firepower for use on later levels, although it also means you cannot collect a Pandora's Box here (as it is very near to the Vampire's location). If you aren't going to fight the Vampire, then check the nearest Curtain, to the north of Frankie's charging electrodes, and then skip past paragraphs 11 and 12; if you will fight him, then walk east now.
You should move back to the western end of the laboratory once you have gained the Vampire's attention, because otherwise, you will be continually annoyed by Vicious Doppelgangers coming out of a passage to the south. While fighting the Vampire, the order of preference for weapons should again be Ancient Artefacts, followed by Weedkiller; if you have less than about eighty Artefacts left at this time, you should choose the Weedkiller instead. (Do not use your Fire Extinguisher on the Vampire, as he does not take damage from the Weedkiller while frozen.)
If you do not have enough of either, you should use some of the Plates which you collected on level 41 instead, as it only takes about twenty-five of those to finish him off if you are careful with them. Remember to only fire at him when he's in humanoid form, and not moving. Once he is dead, walk over to the equipment in the centre of the lab.
South of the bubbling immersion tank, and a little east, is a tunnel in the wall (revealed by the air holes in the ceiling). Walk south into it, and once out the other side, head southwest over to some steps heading north. Walk up them, open a Chest at the top, and collect a Teacher (6). Return south down the stairs, northeast over to the tunnel, and north through the tunnel to the laboratory. Head into the southeast corner of the lab to find a Pandora's Box, and then walk up to the northern wall. In the northeast corner is a Chest, and along the rest of the wall as you go west are three Curtains.
Walk into the southwest corner of the laboratory and then walk northwest, pressing into the wall; you will enter a hidden passage. Walk south along this passage and you will come out into a tiny little enclosure containing a Skeleton Key. (You will probably find that you have to use the Weedkiller in order to collect the Key without taking damage.) Walk north back into the tunnel, and when you stop moving north, head east to arrive back in the lab. Walk to the southwest corner of the room again, and this time push southeast into the wall to enter the passageway through which you originally accessed the lab.
Go south all the way to the end of the tunnel, and continue south once out of it, past the corner in the wall to the west. Walk north into the other tunnel to the west, and head northwest once out the other side. Kill the Pod Plant in the middle of the yard using Weedkiller, or if you have none left, Soda Cans. Once it is dead, you can collect the Bazooka pickup it was sitting on, and continue northwest over to a flight of stairs. Go up the stairs and through the Skull Door. Collect the First Aid Kit and the Cheerleader (A) inside, open the Chest against the northern wall, and then exit the level.
Level 45: Danger in Picnic Park
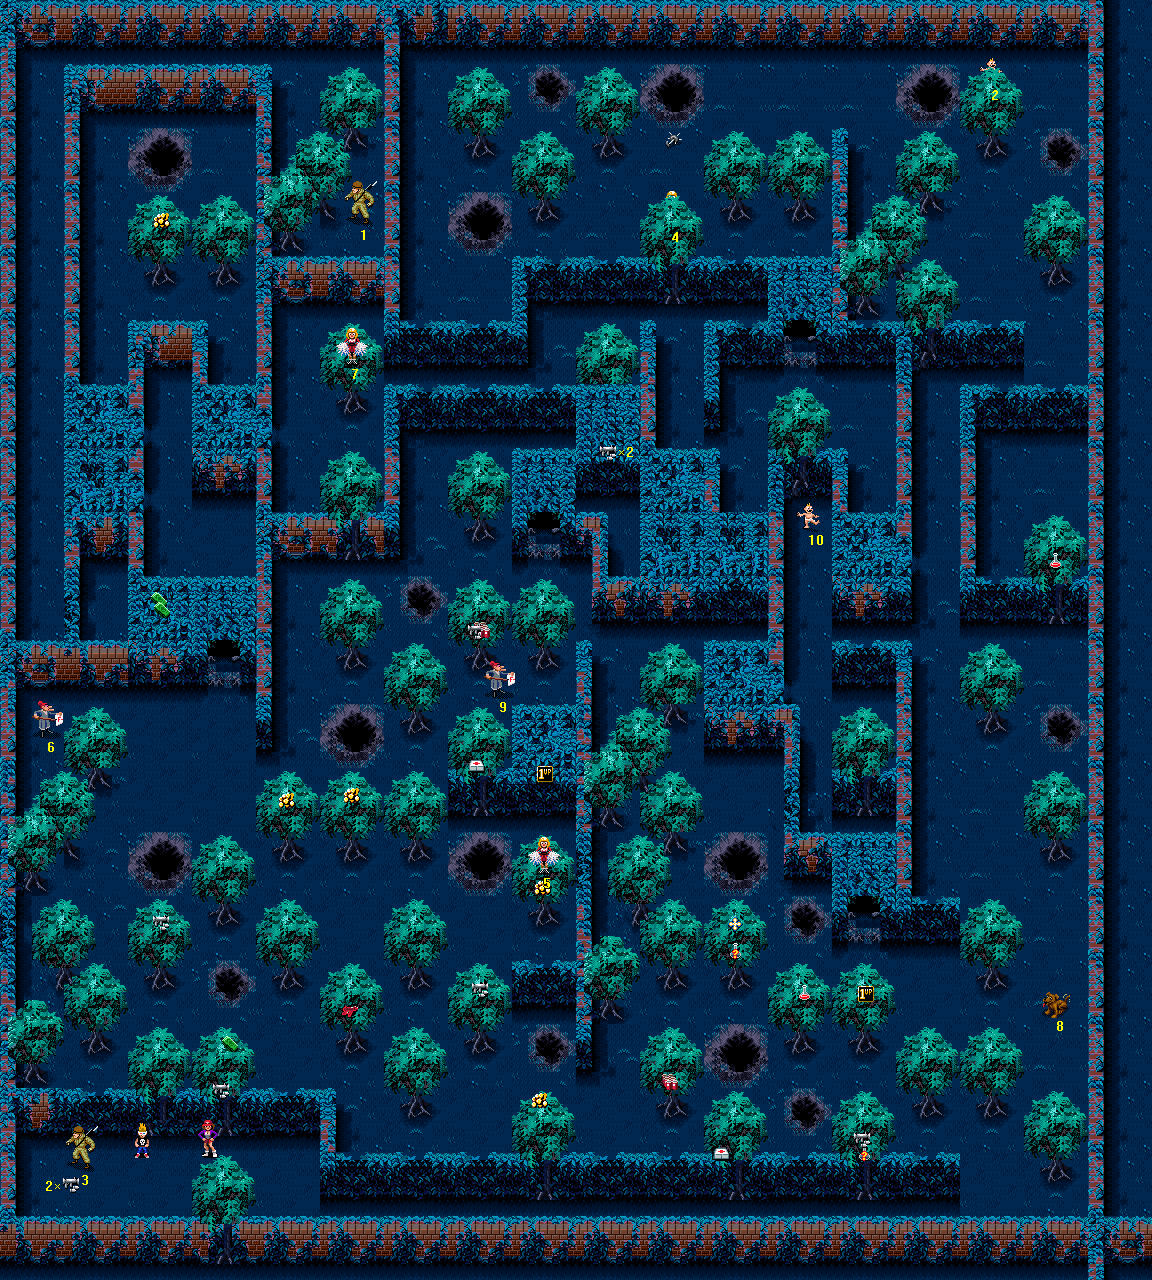
Difficulty: 7/10
Overrun by the Red Ants, this park is no longer anything like a suitable venue for picnics. You encountered the Red Ants on level 32, but not in very great numbers; here, they are everywhere. They move as fast as you do, so it is impossible to outrun them if they come after you, and if you have not got the Martian Bubble Gun, they take a Bazooka shot each to kill. Having to deal with the delaying effect of the Bazooka recoil will add to the already considerable problems experienced by those who start on this level using a password.
There are a lot of Bazooka pickups on this level, though, along with a large stash of other useful pickups. The snag is that these items are all hidden behind the trees, and that if the Ants find them, they'll drag them away and destroy them - you will have to either chase after the Ant responsible, kill it, and swiftly pick up the item, or else accept that you have lost it. So, it is like a kind of high-stakes, time-limited treasure hunt. You should have at least sixteen Bazooka shells remaining for the next level, in order to make use of the walkthrough to level 46 that's the least demanding in terms of ammo, and so that you have at least three left on level 47 - try not to use all of your shells up.
This walkthrough tells you the best route through the level allowing you to collect a majority of the items each time. Victims are a difficult bunch, as many of them are very near Ants' nests and will get killed if you do the slightest thing wrong (or do everything right but are unlucky). While playing through the level using this walkthrough, you should carry out instructions exactly, and keep the game paused at all other times. This is a very tough level, and must be approached with military precision.
Monster List
- Red Ants (intensity: ranges from low to high, location: nearly everywhere)
Victim List
- [A] Soldier - In a walled-off garden near the northwest corner of the level. You will need to take a roundabout route, using several different passages to reach him.
- Baby - Next to an Ants' nest, in the northeast corner of the map.
- Soldier - Standing next to you where you start, with some Bazookas.
- Cheerleader - South of an Ants' nest, in the open area on the northern side of the level. Mostly hidden behind a tree, except for when she jumps.
- Cheerleader - South of the hedge block containing one of the Extra Lives, northeast a little way from where you start. She's also hidden behind a tree while she's not jumping.
- Teacher - North of where you start, in the northwest corner of the main area of the park.
- Cheerleader - South of the walled-off garden containing the Soldier (A), in the maze-like area near the northwest corner of the level. Like the other two Cheerleaders (4 and 5), she is hidden behind a tree and can only be seen when she jumps.
- Dog - In the southeast corner of the level, near the end of the hedge separating the main area of the park from the long alleyway along the southern edge.
- Teacher - Just north of the hedge block containing an Extra Life, in the centre-north of the main area of the park.
- Baby - Safely hidden inside a dead end, to the northeast of the centre of the level, near hedge blocks hiding a double-value Bazooka pickup.
Important Pickups
Easy: hidden in out-of-the-way areas where the Ants are unlikely to come across them
- Two double-value Bazooka pickups (one where you start, one hidden inside a hedge block north of the main area of the park)
- Monster Potion (hidden behind a tree in a walled-off area on the eastern side of the level)
- Weedkiller (in the open area on the northern side of the level)
HARD: hidden behind trees in the main area of the park, giving cause for concern, as the Ants may find them and carry them away
- Five more (single-value) Bazooka pickups
- Two Extra Lives
- Two First Aid Kits
- Another Monster Potion
- Ancient Artefacts
- Two Mystery Potions
- Water Pistol (no, really, this is useful for level 48)
Bonuses Available
- Victim collection bonuses
Best Place To Score Bonus Points
Wander around the main area of the park and take on the Ants. This is the last outing for your Martian Bubble Gun, so use it all up. If you have absolutely stacks of Bazooka shells then you could use some of them as well, but save a nice lot of shells for the upcoming levels (if possible, do not let your Bazooka ammo fall below 75 shells). You cannot earn the Extermination Bonus as you could on levels 16 and 32 - disappointing, as it is the last level featuring the Ants.
Walkthrough
Collect the Soldier (3) and the double-value Bazooka pickup to your west. Blast through the weak spot in the hedge to the north, which is furthest west - the one without a tree behind it. At this point, switch to the Martian Bubble Gun if you have any. Walk north through the hole you made, and continue north through the trees - you will probably have to kill a Red Ant as you go - and over to the northwest corner in the wall to find a Teacher (6). If you see an Ant carrying Bazookas away from behind a tree to your east, try to kill it and pick up the Bazookas without straying too far from the Teacher (6).
Head south again, skirting the wall to your west. When you come to a tree that is right up against the wall, head east over to an Ants' nest and then turn to walk south and behind a tree. You should hear a "bleep" noise, which indicates that you have picked up some more Bazookas. If you do not, walk around behind the tree until you do - the Bazookas are near the northern end of the area hidden by the tree, so move to such a position that all of your character except his feet are visible, and then move around. If you still cannot find it, that probably means that an Ant has run away with it.
Having gotten the Bazookas (or not), head northeast a few paces (so as to be on the northern side of the tree that's to the southeast of the Ants' nest), and then head due east. You will probably come across an Ant, which suddenly comes towards you; be ready to kill it, and then continue due east to find a Cheerleader (5) hidden behind a tree. There's also a Bonus Points Pickup behind there. do not go too far north at this point, or a Teacher (9) just off the screen could die. Walk west over to the Ants' nest and then turn to go south, and you will find a Bazooka pickup behind the tree that you come to just past a protruding hedge. Having got that, return northeast over to the tree where the Cheerleader was.
Blast down the hedge block to the north. Walk in for an Extra Life, continue walking out the open back end and then head west to get to a Teacher (9) before an Ant does. you will probably meet an Ant approaching the Teacher from the other direction, in fact, so kill it quickly before going to get the next pickup. Walk directly south to get a First Aid Kit behind a tree. This item is near the base of the tree, almost directly next to the hedge. Walk west past the end of the hedge, and over to the second of the two trees in the row; walk around behind it to find a Bonus Points Pickup. There's another one behind the third tree, to your west.
Head northeast from there, past an Ants' nest and a tree, and you will come to a second tree, behind which (near the base) are a Bazooka pickup and Soda Cans on the same spot. Head east, past the end of a wall to your south, and over to the northeast corner of the next area. There is a hidden passageway through the greenery to your south; walk into it and then east out of it, and then walk north up the alleyway to find a Baby (10) at the other end. Return south to the exit of the passageway, and head west into it and then north out of it. Switch to the Bazookas and blast down the hedge block to the north.
Walk into the hole you have made and once inside, head west through a passageway under the ivy and out into a small, walled-in area. Blast down the next hedge block to the north to reveal a double-value Bazooka pickup. Collect it and then head southeast again into the passageway and out to the entrance of it, at the first hedge block. Switch back to your Martian Bubble Gun. you will now be approaching an area that contains four pickups very near to each other, three of which you particularly need (a second Extra Life, a Monster Potion, and Ancient Artefacts). You must be careful to allow the Ants to take as few of them as possible, so be vigilant as you carry out the instructions in paragraphs 7 and 8, and pause constantly.
Head southwest out of the entrance to the hedge block, to arrive north of some more trees. Head south through them until you see an Ants' nest to your southeast; walk over to that, killing any Ants which appear, and then walk directly southeast from it, over to a tree which is south of a broken-down hedge block. The Extra Life is hidden behind this tree, so if you see any Ants running away with it, chase after them to get it back.
The Monster Potion is behind the next tree to your west. Note that if you see an Ant carrying it away, it will look like a Ghost Potion (that is, the liquid inside will be blue rather than pink) but it is still actually a Monster Potion. Northwest of that tree is another one containing Ancient Artefacts and a Mystery Potion; they are not on the same spot, so as you search, listen for two separate bleeps to indicate that you have picked them both up.
Walk between the two trees to your southwest (the eastern of which hid the last two pickups), and continue south from there, past an Ants' nest. You might meet an Ant coming up to meet you as you pass between the trees, so be ready to blast it and move on. When you arrive at the hedge, search behind the tree that's just to the south of the Ants' nest; there's a second First Aid Kit in there, near the base of the tree but not quite up against the hedge. Walk northwest over to another nearby tree after you have the First Aid Kit, and walk around behind it to find Soda Cans.
Walk west past the end of a wall to your north, and southwest from there to find a Bonus Points Pickup behind the tree next to the hedge, just hidden behind the very top of the tree. Walk west from there, and when the hedge to your south moves slightly north, continue west alongside it. At the first tree you come to, near the base but not directly beside the hedge, you will find a Bazooka pickup. To your north, just behind the tip of the tree, is a Bonus Points Pickup. Walk east from there, over to the base of another tree, and search behind that tree to find a Water Pistol.
Walk southeast from there and join the hedge heading east again. After walking about twenty metres due east, you will pass an Ants' nest to the north, followed by another, smaller nest to its southeast. Walk behind the next tree you come to, and search behind it to collect a Bazooka pickup and a Mystery Potion (they are not on the same spot, so listen for two separate bleeps). However, if you see an Ant moving east off the screen to the northeast, retreat west quickly, as it is probably going to go and kill the Dog (8) which is over there. Assuming this does not happen, once you have collected both items, walk northeast and you will find the Dog (8) out in the open, next to the eastern wall.
Head north past a few trees and an Ants' nest and you will come to a hedge to the north, with one tree on the other side of it. Blast through the weak spot to the west of the tree and head through, and search behind the tree to find a Monster Potion. Head out through the hole you made, and go north up the passageway just to the west. When you come to the corner, head east over to the end of the hedge. From there, walk north to the other side of the hedge, and then walk west, skirting the hedge, to reach the southeast corner of your current area.
Wait here to see if any Ants approach you; if they do, kill them without straying too far from your corner. There is a Baby (2) to your northeast whom you want to save, and this is aided if there are as few Ants around as possible. Once everything looks quiet, head north past two trees, and when alongside a third, turn to walk northeast over to the tree that partially hides the Baby (2). If you see any Ants on the approach, go after them and kill them as well.
Walk south, to stand next to the base of the tree behind which the Baby (2) was toddling about. Kill any Ants that appear, and then walk due west, past an Ants' nest to the north, and a wall and two trees to the south. If you have the Martian Bubble Gun equipped, then fire it continuously once you have passed the base of the second tree, until you reach the Weedkiller pickup - this is to kill an Ant which may spawn at this point and push the Weedkiller over to a Cheerleader (4), killing her.
You will find the Weedkiller pickup south of another Ants' nest, and north of the tree behind which the Cheerleader (4) is jumping up and down. Kill any Ants that have appeared at this point - you will be collecting the Cheerleader in a moment, and you do not want the Ants to follow you over, and get to her instead. Once there are no Ants in sight, walk south over to the tree and save the Cheerleader (4).
Switch to your Bazookas and blast down the weak section of hedge that's just to the southeast of the Cheerleader. Head through, then walk west. Walk southwest around the bend in the hedge to the north, and west along the passageway. Where you emerge, you will find a tree with another Cheerleader (7) behind it; collect her. Quickly head southwest from there over to a green patch in the western wall; this indicates a hidden passageway. Walk west into the passageway and then head northwest out of it and into an open area containing two trees. Behind the western tree, you will find a Bonus Points Pickup.
Head southwest away from the tree and into an ivy-covered passageway in the southwest corner of the small garden. Head east out of the passageway, and then walk due south to enter another area covered by greenery, in which 2000 points' worth of Bonus Points Pickups can be collected. Walk due north out of there and west through the first green area you arrive by. Now head north up the alleyway to a corner. If an Ant appears in the walled garden to the southeast, wait until it either climbs over the wall to get to you, or disappears. When all is well, continue east, and when you arrive in the little walled-in area, head southeast over to the opposite corner. you will find a Soldier [A] there; collect him and then leave.
A Shocking Sequel to Level 34: Level 46: Day of the Chainsaw
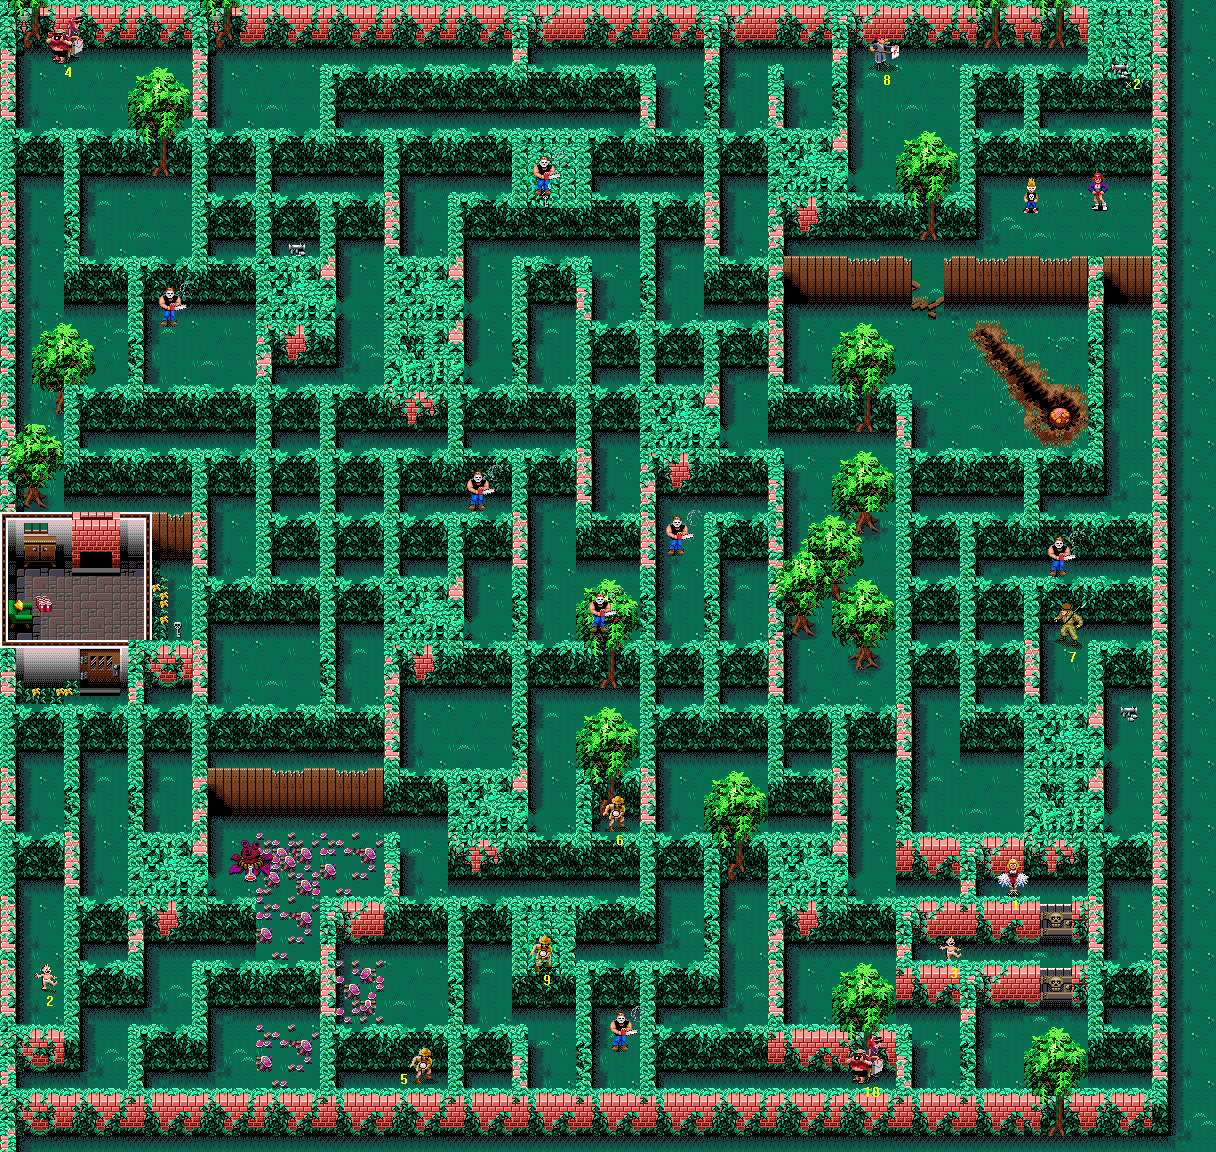
Difficulty: 7/10
This level is set in the same type of environment as level 4, and its structure is essentially the same - there are several Lumberjacks dotted around a map covered with a mass of hedges, and you have to evade them for long enough to find the Victims and leave. However, where it differs from level 4 is in the way the hedges are arranged; in level 4 you were running around a maze - confusing at times, but navigable. Here, you are faced with a hedge-maze which is overgrown so that there are no easy routes around the place; just long lines of hedges, crossing each other, which you must force your way through.
The level very difficult for those who do not have the necessary Bazooka ammo to make their own way through, as they'll have to get the Lumberjacks to cut down hedges in order to get through - never an easy task, and especially difficult to do while avoiding taking too much of a hammering, and also collecting all the Victims. As on level 4 (and level 34), it is also considerably more difficult to get through if you do not have the weapons necessary to kill the Lumberjacks, and must just run away; where is there to run? Not many places.
The best way to approach the level if you have been playing for ages, from nearly the start of the game, is to keep swigging Monster Potion and just bashing the Lumberjacks to death as you find them. This method should only be used if you have nine or more Monster Potions at the start of the level, because you are going to need a lot of them on level 48. The first walkthrough describes the best route to take if you do this; make sure to follow it efficiently and pause whenever reading it, so that you do not waste your time as a Purple Monster.
If you aren't so well-stocked-up on Monster Potions, but can still get rid of the Lumberjacks using weapons such as the Ancient Artefacts, or even the old Fire Extinguisher / Water Pistol trick (see the preamble to level 4), then follow the second walkthrough. If you just do not have the supplies necessary to kill all the Lumberjacks, and yet still have a good amount of items left to use on the next level and level 48, then you are going to have to use the third walkthrough. This provides a method of clearing the level, dodging around and running away from every Lumberjack you meet.
This walkthrough is the largest with 3 sections: 1 with 10 paragraphs, one with 16 paragraphs, and one with 22 paragraphs. It is very complicated to describe the best way of getting through. It is also difficult to complete by doing as it says. It is so tough to get past the Lumberjacks every time you encounter them. Use speed and skill to get through without losing too much health.
Monster List
- Jelly Blobs (intensity: medium, location: one place)
- Lumberjacks (seven)
- Pod Plant (one)
Victim List
- [A] Cheerleader - Safe inside a cell, locked behind a pair of Skull Doors, in the southeast corner of the level. You will need to find the two Skeleton Keys hidden around the level to get in.
- Baby - Inside a walled-in alleyway in the southwest corner of the level. You will need to clear away a couple of hedges to get in.
- Baby - Safely held at the western end of the passageway, between the two Skull Doors that bar access to the Cheerleader [A].
- Tourists - In a grassy yard in the northwest corner of the map.
- Explorer - At the southern edge of the level, blocked into a small enclosure by hedges.
- Explorer - In a tiny cell formed by hedges, near the east side of the level.
- Soldier - South a little from where you start, past a few hedgerows and a Lumberjack.
- Teacher - Just northwest of your start location, past a hedge; up against the northern wall, near the northeast corner of the map.
- Explorer - Inside a hedge block on the southern side of the level, roughly in between the other two Explorers (5 and 6).
- Tourists - At the end of a short cul-de-sac, formed by indestructible walls, to the southwest of the Skull Door cells. you will need to blast through the hedges to their west to get in.
Important Pickups
- A double-value Bazooka pickup
- Two single-value Bazooka pickups
- Monster Potion
Bonuses Available
- Victim collection bonuses
- Massive Destruction - 2000 points
- No Bazooka Fired Bonus - 1000 points
- Axeman Begone Bonus - 5000 points
Best Place To Score Bonus Points
Once you have earned all the bonuses and cut the Lumberjacks down to size, there are no other sources of points - well, except for the Jelly Blobs that spawn to the south of your start location. As trying to earn points there is clearly not even worth considering, just exit and put the points you earned on this level, towards an Extra Bonus Victim on the next level (as it is similarly limited from a points-scoring point of view).
Walkthrough
You want to use up your Monster Potions)
Walk into the northeast corner of the area where you start and then drink a Monster Potion. do not be too slow switching to your Monster Potions, because a Jelly Blob will probably spawn to the south and start launching Jelly Bombs at you. Note that for the purposes of this walkthrough, whenever you return to human form, you should stay that way until you need to knock down another hedge or fight a Lumberjack; at which point you should drink another Monster Potion. I will advise you when not to do so any more.
Punch through the weak section to your north, then punch in the entrance to the hedge block, and you will find a double-value Bazooka pickup inside. Come out of there and then punch through the hedge to the northwest. Go through and walk west, past the end of the hedge, to find a Teacher (8). Punch through the hedge to her west, head west past a protruding wall, and then punch down another hedge to the west.
Punch down a hedge to the south, and then another one southwest of that. Punch down the entrance to the hedge block to the west and go in to get a Skeleton Key. You can kill the Lumberjack who's hiding in there, if you want, too. Head out, and south down the western fork in the path. At the far end, you will find that you have attracted the attention of another Lumberjack, past a couple of hedges to the south. If you want to fight him, then wait for him to get through the hedges - move around a little if he seems reluctant - and kill him without going any further south (as there is another Lumberjack to the southeast whose attention you do not want yet).
When you are finished with the second Lumberjack, walk west into the ivy-covered passage, and once out the other side of that, walk northwest through another one to find a Bazooka pickup in a little cell made out of hedges. Knock down the two hedges to the north, and then head west and go through three more hedges as you go south. you will meet a Lumberjack as you go south; kill him if you want. Past the third hedge heading south, you arrive in a small square pen. Punch down the hedge in the northwest corner to arrive in another, identical square. Knock down the northwest corner of this one to arrive in a little yard in the northwest corner of the level, with Tourists (4) standing against the northern wall.
Return southeast through the two gaps and then head over to the southern edge of the first square pen. Punch down two hedges and then a fence as you head south, and you will find a Skeleton Key at the end of an alleyway. Return north through the fence and one hedge, and then head east to the end of the cell and punch through a hedge to the south. Continue south, knocking down two more hedges, and then head southeast a little to punch through the weak section in a fence. Walk over to the Pod Plant and punch it to death; you can then pick up the Monster Potion it was sitting on. (If you do not see any Monster Potion there, it is because you inadvertently picked it up when you were fighting the Pod Plant.)
Walk west into the covered passageway, and north out of it. Punch through a weak hedge section to the west, and having gone through, punch through another one to the north, then a door. Collect the Soda Cans inside the room, and then head south out of it again (ignore the Cupboard, as you cannot open it normally in Purple Monster form, and it will not contain anything if you punch it open). Back in the long, narrow passageway south, punch through the weak hedge section to the west, and then through another to the south. At the southern end of the area you have opened up is a Baby (2).
Return north through one hole in the hedge, and then east through two more. Head southeast through the covered passageway and then once out the other side, walk to the northeast corner of the weed-strewn area. Head south, punching through two hedges as you go, to get to an Explorer (5) who's in a walled-in area at the southern edge of the map. Head north through the hole you just made in the hedge, punch east through another weak section, and then punch down the entrance to the hedge block just to the east to access the Explorer (9) who's inside. Head southeast through the hedge to get to a fourth Lumberjack. You can kill him, or just carry on as if he wasn't there - it is up to you.
Go north through a hedge, walk east and then knock down the next two weak hedge sections to the south. Go along to the eastern end of the walled-in passageway on the other side to find Tourists (10). Go back to the western end of the passage, and head north again through the last two hedges you damaged. Break through the hedge to the northwest, and then continue north through another hedge to find an Explorer (6) in a tiny little cell.
Punch through the next two hedges to your north and you will find that you attract the attention of two Lumberjacks at once (if you ignored the second Lumberjack you encountered, then he'll be present to the northwest as well). If you want to kill both of the Lumberjacks (or even all three), then go ahead and fight them. When you are done, head through the hole in the hedge to the east (made by one of the Lumberjacks), then walk to the northeast corner of the cell you are in and break down the weak point in the hedge to the north. Continue northeast and destroy another hedge, and you can step through to the Jelly Blob area, near where you started.
At this point, I do not recommend drinking any more Monster Potions; you are nearly at the end of the level, and you can rely on Bazookas and Lumberjacks to break through the remaining few hedges. You might decide to drink another if you really want the No Bazooka Fired Bonus, or you do not want to use conventional weapons (i.e. Ancient Artefacts) to defeat the Lumberjacks. Head to the southeast corner of the Jelly Blob area, past the meteorite, and punch down two hedges to the south. You come across the final Lumberjack at this point; whether you fight him or ignore him is up to you. Punch south through another hedge to get to a Soldier (7).
Go south from the Soldier (7) into a covered passageway, and head east out of it. Collect the Bazookas to the north and then head south, punching through the three hedges you encounter on the way. You arrive at the southeast corner of the level; head northwest over to the first Skull Door. If you are still in Purple Monster form, wait until you return to human shape. Go through the first Skull Door and walk over to the western side of the cell to collect a Baby (3), and then head north again through the second Skull Door to find a Cheerleader [A]. Exit straight away, as there are no more opportunities to score points if you have killed all the Lumberjacks. (You should find that you have earned the Massive Destruction bonus already.)
You have suitable weapons for killing the Lumberjacks
Head over to the northeast corner of the area in which you start, and fire two Bazooka shells north at the last weak section in the hedge. This will open up the hedge block to the north; walk in and collect a double-value Bazooka pickup. Head out of there and blast down the hedge to the west. Head through the gap and walk west to find a Teacher (8). Walk south, then west into the hidden passageway in the southwest corner. Head north out of there, and west around the wall to come to a dead end.
Blast through the hedge to the west, head through the hole, blast through the next hedge to the south, and head southwest through there. Blast through the weak point at the southwest corner of the little cell of hedges you are in. Blast through the front of the hedge block to the west, then switch to your Ancient Artefacts and kill the Lumberjack bumbling around inside. Pick up the Skeleton Key sitting inside, and then head south out of the hedge block, and continue south down the western fork in the path, to the end.
As you reach the end of the passageway, a Lumberjack to the south will take note of your presence and carve his way through the intervening hedges to get to you. (If he does not start cutting down the hedges straight away, try moving around a little, as that might make him hurry up.) When he is through to you, use your Ancient Artefacts to kill him as you did the other one. Walk south through the two hedges he destroyed, and another Lumberjack to your southeast will notice you and start approaching. This Lumberjack may take either of two possible routes through to attack you, but he'll get through to you whichever he uses. When he does, kill him.
Use whichever route is open to get into the comparatively large yard to the southeast. Once you are inside, a fourth Lumberjack, to the east, will start attacking; wait for him to break through the hedge to the east and then kill him. Stay in the yard where the third Lumberjack started (the large one with the tree growing by the hedge in the southeast), and blast through the weak hedge to the south, in the southwest corner. Walk due south through it and over to the southern end of the next yard to the south; blast down the hedge you come to there as well and step through. Step east to the end of the passageway and blast down the hedge to the north, to gain access to an Explorer (6) inside a tiny little hedge-cell.
Blast down the next hedge to the south at this point as well, and then walk through it; a Lumberjack to your south will notice you, and break through the remaining hedge that separates you. When he is through, kill him with your Ancient Artefacts. Switch back to your Bazookas, and head to the eastern end of the area you are in (or were in, before that Lumberjack started attacking). Fire two shells south at the weak hedge section in the southeast corner of the cell, and then walk south through the two holes this makes in the hedges. Head east along the southern wall to find Tourists (10) standing in a dead end.
Return west, and north through two broken hedges, and then walk southwest into the cell where the Lumberjack was standing. Blast down the hedge to the west, go through and blast down the front of the hedge block to the north; you will find an Explorer (9) inside. Blast down the weak hedge section to the west, go through, and then blast down the one immediately to the south. Head through the hole you made to get to another Explorer (5), then head north again, east through the two holes you made previously, and north through two more. Now continue by walking west, then north at the corner, to reach a weed-covered area.
Switch to your Weedkiller, and sweep west into the weed patch. Go over to the Pod Plant on the western side, and kill it; pick up the Monster Potion it was hiding, and then continue west into the ivy-covered passageway. Head north out of there into a short dead-end passageway. Blast through two hedges to the west and head through, and then demolish another one to the south once in the furthest-west aisle, between the hedge and the wall. Head over to the far end of the passageway to collect a Baby (2). Return north and east to the middle aisle between the hedges, and blast down the hedge to the north. Go north, through the door, into a little hut. Pick up the Soda Cans lying by the chair, and open the Cupboard in the northwest corner.
Take the following directions to arrive at the next place you need to visit: head southeast out of the house, south and east through two hedges, southeast through a covered passage, northeast over to the corner of the weed-covered yard, southeast until you pass the end of the red brick wall to your north, north through two broken hedges spaced far apart, northwest over to the cell where you met the second Lumberjack, north through broken hedges until you come alongside a covered passageway, west through that passageway, and northwest through another into a little cell containing a Bazooka pickup.
As you enter the small cell containing the Bazookas, a Lumberjack to the west will notice you and begin stalking towards you. He will smash through the hedge to your southwest, thereby letting him through to another small hedge-cell directly west of yours. Face the hedge to your north, and fire two Bazooka shells at it; you will blast down the two hedges to the north, allowing you through.
Walk north and out into an open area, and head into the southwest corner of the area; you should now find that the Lumberjack breaks through the two hedge sections to your south. If he is not trying to get to you any more, return south down the line of broken hedges you just came through, to see if you can get him to start chasing you again. When he has finally finished making his way through the hedges (or once you have blasted them down yourself), you can kill him.
After heading south down the line of hedges that the Lumberjack took care of, you arrive in a small square pen formed out of hedges. Blast through the weak hedge section in the northwest corner, and then head through to another square pen. Blast down the hedge section in the northwest corner of this one as well, and you can go through to a small yard containing Tourists (4), standing against the northern wall of the level.
Having saved them, head into the southwest corner of the area, and blast down the hedge to the south. Walk south until you arrive at the northern wall of the house that you investigated earlier, and then walk east to find a fence to the south. Blast through the fence, and head south through it into a small, walled-in alleyway, to find a second Skeleton Key at the far end.
Take the following directions to reach your next destination: north through the fence, west to the edge of the level, and north up to the yard in the northwest corner, where the Tourists (4) were; southeast through two broken hedges to the first square pen you arrived in, north through three broken hedges in the northeast corner, east a little and then south through two broken hedges, southeast through a covered passageway and over to another one, east through that; northeast, past an opened-up hedge block to the north and through three broken hedges; east around the protruding wall, south into a covered passageway and then northeast out of it and across the yard, south through two broken-down hedges, and finally southwest and into a wide open yard through a hole in the fence.
Walk southeast over to the meteorite in the corner of the yard, and the final Lumberjack, to the south, will notice you and carve his way through the two hedges between you. Kill him once he's through, but if there are any Jelly Blobs in the yard with you (very likely), be careful of standing for too long in one place, as this positively invites Jelly Bombs to land on your head. (Even if you are using the Ancient Artefacts, Jelly Bombs will still hit you, and deal three points of damage as usual.)
You would do best to use your Ancient Artefacts until you hear the telltale squelching noise, and then move to a new location and let the Lumberjack follow you - repeat this until he dies as you use the Artefacts. Killing the Jelly Blobs and then taking care of the Lumberjack is not really a feasible strategy, because at least one Jelly Blob is likely to respawn before you have finished with him, and because you have the difficulty of evading the Lumberjack while you are killing the Jelly Blobs in the first place.
Head south through the two hedges the Lumberjack ruined, and blast down another one to the south to get to a Soldier (7). Walk south of him and into a hidden passageway. Move east out of this, pick up the Bazookas to the north and then head south to the end of the little passage you are in. Face the hedge at the southern end, and fire three Bazooka shells in its direction; then walk through and you can head south, unobstructed, to the southeast corner of the level. From there, head northwest and through one Skull Door, collect the Baby (3) to the west, and then head north through the second Skull Door for the Cheerleader [A]. There is nothing left on this level, so leave now.
You cannot or won't fight the Lumberjacks
Walk into the northeast corner of your start area. Face the weak point in the hedge to the north and then fire two Bazooka shells north at it. Walk through the ruined hedge and into the hedge block to the north, to collect a double-value Bazooka pickup. Head out of there, and blast down the hedge to the north, directly west of the hedge block. Head through the hole, and then west over to where a Teacher (8) stands. Go south, over to the entrance to the ivy-covered passageway to the west; head into it, north out the other side, and west past the wall that protrudes out north into the small square area.
Blast through the hedge to the west, and head through; blast down the hedge to your south, and head through and over to the southwest corner of the next cell; and blast through the hedge to the south there. Head around to the south of the hedge block; blast the front in with a Bazooka shell. This frees up a Lumberjack inside, who will currently be wandering aimlessly around, but isn't likely to carry on doing so for very long; quickly dash into the hedge block, pick up the Skeleton Key that's inside, and then dash out again and head south down the western fork in the path.
If a second Lumberjack to the south spots you, do not worry - he's not likely to give you much trouble, yet. The one you just left behind could do if he's on your tail, though - so head west into the covered passage, and once out the other side, head northwest fast to confound him. Continue northwest through a second passageway to get to a tiny little hedge-cell with a Bazooka pickup inside. Face the hedge to the north and fire two shells to demolish the two hedges ahead. Meanwhile, to the west, another Lumberjack will have started the chase, and he'll have chopped down a hedge to your southwest. You should walk north through the two hedges you got rid of, and then step west to stand in front of the two undamaged hedges remaining ahead of the Lumberjack.
The Lumberjack should stride north and cut his way through the two hedges that now separate you. If he does not, head back into the aisle of damaged hedges to the east; walk south down it to bring him back on-screen, so that you can regain his attention; and then return north and try again to have him cut through to you. (If this tactic keeps failing, blast through one or both of the hedges yourself using the Bazookas.)
As the Lumberjack demolishes the last hedge, dodge around into the eastern aisle and wait there while he attempts to reach you by walking into the wall. (If he manages to follow you in, head west right up to the hedge, and get him stuck on the other side of one of the hedge stumps protruding from the side of the corridor, as this will have much the same effect.) After a few seconds of waiting, the Lumberjack will begin walking along the wall instead of directly towards you, into the hedge; what you should do now depends on whether he walks towards you or away from you.
If the Lumberjack walks away from you, then wait until he returns, and repeats the sequence of movements, as you will otherwise not have enough time to get past him and through the hedges. Once he has started walking in your direction around the wall, though, you should leave your defensive position and move hastily past him (provided he's sufficiently near to you). The trouble with this method is that he may not comply with what you want by moving in the right direction; if you have a comfortable number of Bazooka shells, of course, you could just step out in front of him and blast him down, then walk past him while he lies down quaking on the floor.
Move south down the western aisle and you will arrive in a square pen bordered by hedges. do not slack now - keep moving, as the Lumberjack will be coming after you again imminently. Blast down the hedge in the northwest corner of the square using Bazookas, head through and give the same treatment to the hedge in the northwest corner of this second square. You can now get through this second hole, to a little yard containing Tourists (4).
Head to the southwest corner of the yard you are in, and blast down the hedge section to the south using a Bazooka shell. Walk through it and over to the southern end of the passageway beyond. When you reach the plaster wall, head east and you will come to a dead end, with a fence to the south. Blast the fence down, and head through into the alleyway to get a second Skeleton Key.
Return north out of the alleyway to arrive south of a hedgerow. You should note that the Lumberjack is still around somewhere - it is not possible for me to predict where, so you will need to be ready to evade him when you encounter him. Hiding behind hedges, and then running past him when he starts stumbling around the walls, is always a good approach. Head west to a tree at the corner of the passageway, then turn to go north. You arrive back in the brick-walled yard which contained the Tourists (4). Head southeast through two gaps in the hedge.
You arrive in the first square pen you entered; head north out of the exit in the northeast corner. At the end of the aisle of broken hedges, head east and south down another one. You will arrive at a covered passageway; head southeast through it and out the other side, and over to another passageway leading from west to east. You will probably encounter the first Lumberjack again around here (from inside the hedge block that contained the first Skeleton Key), so you will need to continue with the wary approach to movement. If he does attack you, then you could try dodging inside a third ivy-covered passageway, whose entrance is to the north of the one you are currently in, on the east side, and whose exit faces north.
Head out of the passageway, and walk northeast, passing the hedge block to the north. Continue northeast through three gaps in the hedge and you will arrive at a walled-in area; head east around the wall, south into an ivy-covered passageway, and northeast out of there and over to the corner of the next yard. Move south through two demolished hedges, and then southwest, through a gap in the long fence. Continue over to the southeast corner of the next area and a Lumberjack to the south will become aware of your presence.
Allow him to break down the two hedges between you, then as he takes his axe to the second one, walk north round to the other side of the meteorite. He will follow you over to the meteorite, and he'll attempt to walk over it, but will be unable to do so. Lead him to the eastern hedge so that he cuts a section of it down, then stand still. After a moment he will start walking around the meteorite - you now have a few seconds in which he will ignore you, as with the other Lumberjacks. Quickly head south through the two hedges he's cleared for you, then blast down another hedge to the south of that, and you can get through to a Soldier (7).
Carry on heading south, into a covered passageway. Head east out of it and pick up the Bazookas to the north. Now walk over to the southern end of the passageway you are in, and fire three Bazooka shots at the hedge. Walk south to the southeast corner of the level, and then head northwest and in through a Skull Door. To your west once inside is a Baby (3), and north through another Skull Door you can collect a Cheerleader [A].
Exit through the first Skull Door, and head southeast over to the corner of the square yard outside. Go north up the passageway until you come to a covered passageway to the west. Walk through this and over to the western hedge of the yard on the other side. Blast through the hedge and walk southwest over into another covered passageway. Head out of this one to the north and then head west over to the southwest corner of a square of hedges, making sure not to go too far north.
You can see an Explorer (6) in the hedge cell to the west; you are now going to rescue him, but in order to do so, you will need to move fast. As you make your approach to him, two Lumberjacks will be alerted to your presence - one to the north, one to the south - and will come after you. After you have him, though, there are two more Explorers (9 and 5) nearby whom you will need to hasten to collect, after which you need to escape from the Lumberjack who was to the south. Move quickly and pause often, in order to make sure you do everything right.
Face the hedge to the south, and then blast through it with a Bazooka shell. The recoil pushes you back just far enough to alert the Lumberjack to the north - those playing the American version will be able to hear him revving his chainsaw - so you need to start moving fast now. Walk southwest along the passage you just opened up, to the far end; to the south, another Lumberjack takes note of your presence. He'll move north and cut through the hedge that separates you; meanwhile, you need to face north and swiftly fire your Bazooka twice at the hedge. Once those hedges are gone, dash north into the cell to save the Explorer (6).
What happens next depends on how many Victims you have, and also on how quick you have been. In the hedge block to your southwest is another Explorer (9); if you have more than eight Victims and you have gotten over to that last Explorer (6) quickly enough, then the Lumberjack to your south will be attempting to penetrate the hedge on the eastern side of the hedge block, so as to get in and kill the Explorer (9). However, if you do not have that many Victims, or you do, but you allowed the Lumberjack to follow you too closely, then the Lumberjack will still be on your trail. If the Explorer (9) is not present, then skip past paragraph 18, as it deals only with saving him and returning to your current location.
Whether the Lumberjack is targeting you or not, head south (past him) all the way over to the cell where he was initially standing. There is a hedge to the west: either allow the Lumberjack to knock it down himself (if he's wandering along the wall, and it looks as though he's going to do so); or blast through yourself. Having gotten through, face the hedge block to your north and demolish it with another shell. Head in and save the Explorer (9). You are now hopefully in a position to just wait where you are, for the Lumberjack to occupy himself with the usual distraction of wandering off for a few seconds. When he does, head south out of the hedge block, east through a broken hedge and north through two more into a comparatively long aisle heading from east to west between the hedges.
Head west along the passage, to the corner where it turns north. Face the nearest weak hedge section to the south and fire two Bazooka shells through it. Walk south through the holes you made and over to the third Explorer (5), who's inside a little cell at the southern edge of the level. Return north through the two holes and walk east to come to another hole in the hedge to the south. If you do not know where that last Lumberjack you found is right now, be ready for him to appear again. As usual, dodging around indestructible hedge sections, and waiting for him to get bored and wander off around the walls, will work well.
Head southeast through the hedge and over to the east side of the passageway just past it. Face the weak section in the hedge to the south, and fire two Bazooka shells directly at it. Walk through, and head over to the eastern side of the corridor you enter to find Tourists (10). Return west, north through two broken hedges, northwest through another, and (still keeping an eye out for the Lumberjack if you do not know where he is) west along the aisle between the hedges. You will come to a corner where the path turns north; follow it and you come to the entrance to a weed-covered area. Switch to your Weedkiller and sweep west across the weeds; at the western end, kill the Pod Plant and collect the Monster Potion it was resting on.
Head west into the covered passage, and north out of it. Face the weak hedge section to your west, and fire two Bazooka shells at it. Walk through the ruined hedges and fire another shell south at the next hedge; walk through that to come to a Baby (2) standing in the southwest corner of the level. If you can spare one more Bazooka shell (two if you have not got any Keys), then you can stay to get Soda Cans and open a Cupboard. As a brief hint, I'll just say that at this particular stage in the game, I do not consider Soda Cans to be worth much... So, if you are not interested, leave the level now.
Pickups (Only applies if you used the no-killing-Lumberjacks walkthrough)
Head north through a broken hedge and east through another. Blast through the hedge to the north, and head through the door into the hut - if you have not got any Keys, you will need to use your Bazooka to get through that as well. Once in the hut, you can pick up Soda Cans, and open a Cupboard against the northern wall. Head south again out of the open door and through a hedge, then west and south through two more hedges. it is now (finally) time to exit the level.
More Shocking than Level 46: Level 47: Gridiron Terror
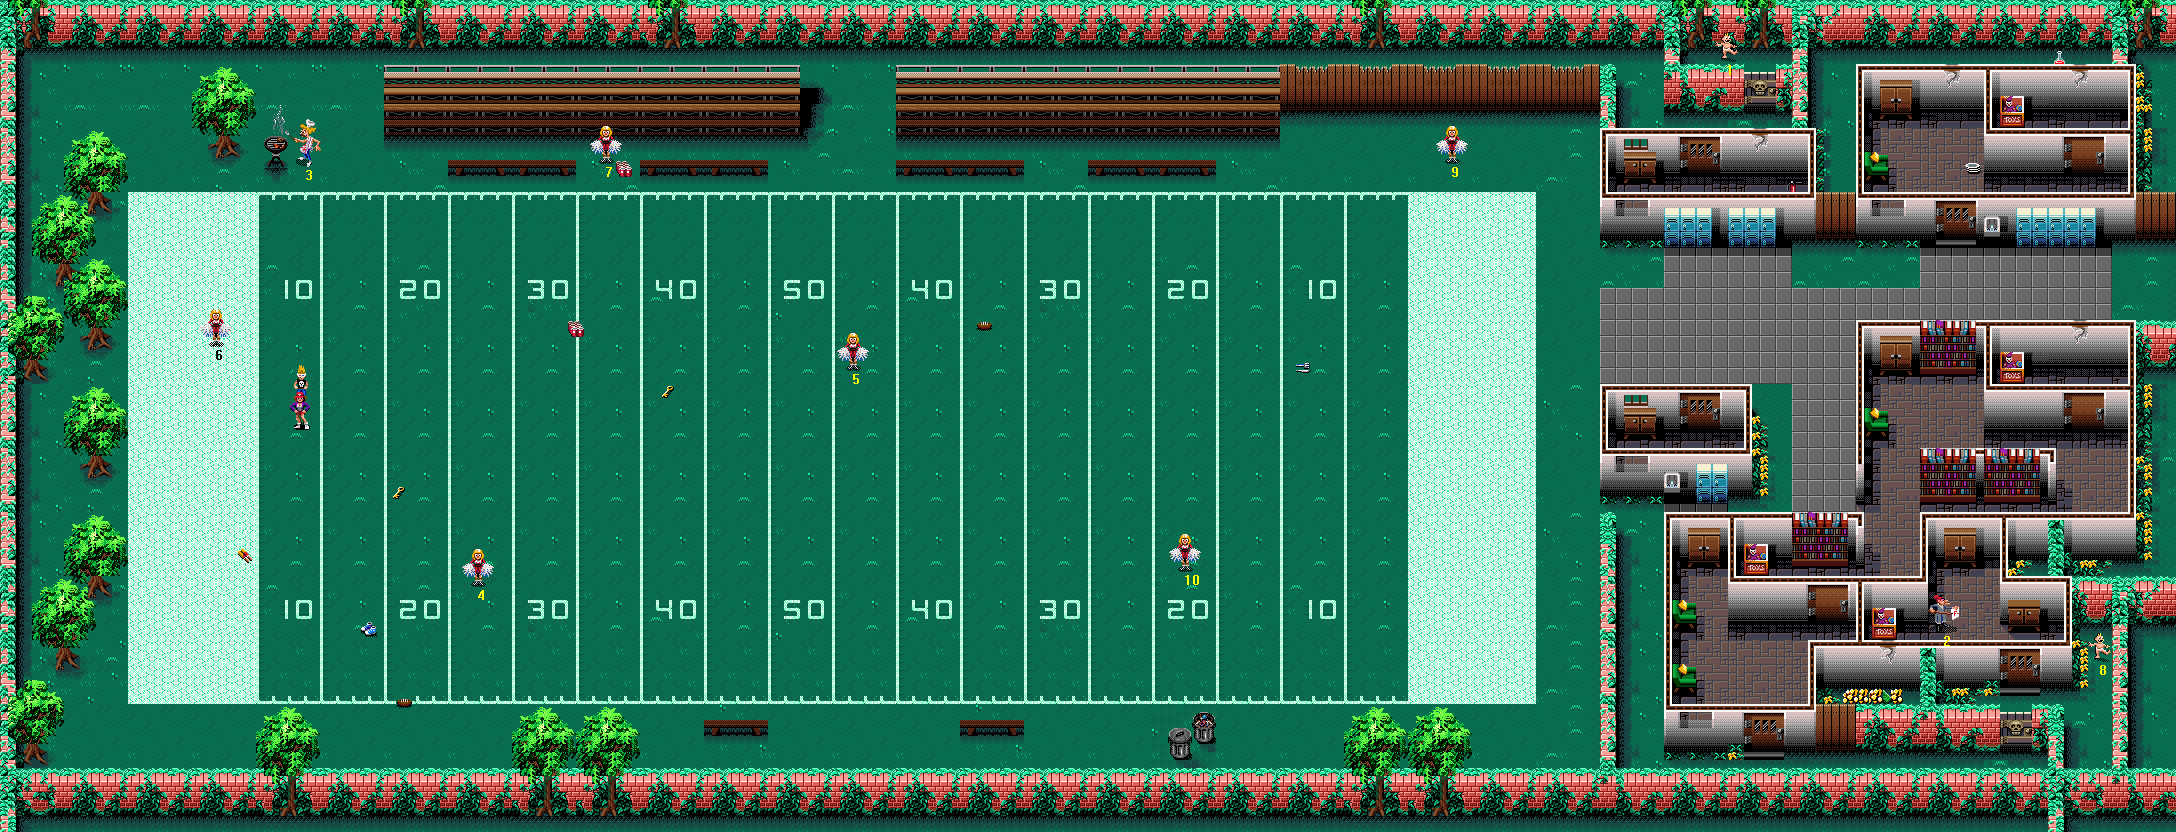
Difficulty: 6/10
This level features three of the rather unpleasant Snakeoid creatures, which between them have the run of an American football field. You have to kill two of them (although if you have only one Victim, you need only kill one Snakeoid - but I hope you are doing better than that for Victims). As more Snakeoids die, the trickle of American footballers becomes a torrent. If you are an optimist you will see this as an easy opportunity to earn the second and last Bonus for Pass Completion available in the game; if you are a pessimist you will see it as an opportunity to be batted around the field like a paper doll. Whichever way you see it, the fact remains that you won't take any damage from the American footballers - which is more than can be said for the Snakeoids.
Monster List
- American Footballers (intensity: increases as more of the Snakeoids are eliminated - very low intensity when they are all alive, very high intensity when they are all dead; location: nearly everywhere)
- Snakeoids (three)
Victim List
- Baby - Locked behind a Skull Door, in a cell at the northern edge of the level.
- Teacher - Locked in a separate part of the main building to the east of the American football field, accessible through a Skull Door in the southeast corner of the map.
- Barbecue Guy - North of where you start, just west of the spectator stands, near the northwest corner of the level.
- Cheerleader - Southeast of your start location, near to the southern edge of the playing field, between the twenty- and thirty-yard lines near the western end.
- Cheerleader - East of where you start, standing near the middle of the field.
- Cheerleader - Standing near to where you start, just a little to the northwest.
- Cheerleader - Standing between the benches in front of the spectator stands at the northern side of the field, northeast of your start location.
- Baby - Locked behind the same Skull Door as the Teacher (2), in the southeast corner of the map, in the small yard outside the building.
- Cheerleader - At the northeast corner of the field, just south of the fence.
- Cheerleader - Near to the southern edge of the field, next to the twenty-yard line near the eastern end.
Important Pickups
- Ice Lollies
- Plates
- Monster Potion
- Speed Shoes
- Two pickups of American Footballs
- Fire Extinguisher (needed if you are low on Ancient
- Artefacts, to help you fight Frankenstein's Monster on the next level)
- Silverware
Bonuses Available
- 50 points per Victim saved
- Ten Cheerleader Bonus - 1000 points [awarded in place of the "All Victims Saved Bonus" despite the fact that not all of the Victims are Cheerleaders.]
- Secret Bonus - 2000 points [This is also awarded to you if you save all ten Victims, although you do not visit a Bonus Level. So, in total, you get 3000 points for saving all ten Victims, instead of the normal 1000.]
- You Saved More Victims Bonus - 1000 points (two-player mode)
- Bonus for Pass Completion - 5000 points
Best Place To Score Bonus Points
After you have gotten rid of the Snakeoids, earned your Bonus for Pass Completion, and collected the small stash of Bonus Points Pickups, that's about it - there aren't any inexhaustible sources of bonus points on this level. it is a pity, as this is the last point in the game at which you are potentially able to earn an Extra Bonus Victim.
Walkthrough
Part 1
The first step in this level is to collect all the Victims who are on the American football field, without attracting the attention of the Snakeoids. I will direct you mostly around the edge of the field, so that you collect the Victims in the optimum order without straying over the Snakeoids' territory; be aware that the American Football Players, which occasionally spawn on and around the field, will attempt to charge into you in order to throw you a few metres across the grass. You do not want them to knock you somewhere where the Snakeoids will notice you (certainly not at first), so be careful to keep away from them.
Head northwest and collect a Cheerleader (6), then head south to find Ice Lollies lying on the edge of the end zone. From them, go north up to the edge of the field, and head east from there to save a Barbecue Guy (3). Continue east, between the bench and the spectator stand, and you will find a Cheerleader (7) standing in front of the stand, accompanied by Soda Cans. Head directly south from her location to find more Soda Cans on the field. Go southeast from them to find a Key, and then east to find another Cheerleader (5).
Move north up to the edge of the field, and then head east between the benches and the second spectator stand. Further along from the end of the stand, at the northeast corner of the field, you will find a Cheerleader (9). Walk east to the wall of the small hut, and then walk south around it and continue east across the paved area. You will come to a door to the north; enter, pick up Plates inside, and head northwest over to a Cupboard. Having opened that, use your Bazooka to blast through the cracked wall to the northeast; walk through and over to the eastern end of the alleyway to get a Monster Potion.
Return south through the hole in the wall and out the door, then head west alongside the northern wall until you reach the eastern end of the field. Walk south from there until you reach the southeast corner of the field. Head west at this point, and when you pass the painted number "10" on the grass to the north, head northwest to find a Cheerleader (10). Head south from her location to find a Bin to open at the southern edge of the field.
Now head northwest until you are on a line with the row of numbers painted from east to west across the field, and then walk due west over them. The Snakeoids will most likely appear around now, as you walk west. Past the 30-yard line on the western side of the field, you come to the final Cheerleader (4); collect her quickly, before the Snakeoids eat her up. Note that there are some American Footballs to the southwest, which you may find useful.
you will now be confronted by up to three Snakeoids. However, you only need to kill two of them (and only one if you have just one Victim!). Killing the extra last Snakeoid will get you an extra Skeleton Key, yes, but at this late stage in the game, that's redundant. Starting the next level with an additional Skeleton Key will give you a slight advantage, but it does not really come to anything. So, unless you are simply rolling in Monster-killing equipment, I recommend that you only kill as many of the Snakeoids as you actually need to.
That's all very well to say, but in reality you cannot ensure that all of your attacks go towards damaging just one or two of the Snakeoids, because they all look the same. Actually you could, in theory, if you watched one like a hawk and made sure never to hit any other one, but of course their mounds of earth sometimes cross over each other anyway so that you aren't sure which is which afterwards.
So, how easy you find it to fight the Snakeoids now will depend upon how many (one, two or even three) there are with you, and upon how many (one or two) you actually need to kill. If there are more present than you need to kill, it is inevitable that you will be expending at least a little firepower on a Snakeoid whom you won't eventually kill. I do not know of any way of separating Snakeoids so that one follows you and one stays behind, unfortunately.
Some things to consider while fighting the Snakeoids:
- Do not move around the field too much; try and stay still, preferably somewhere near one of the edges. The reason for this is that if you move around you are almost certain to end up fighting all three of the Snakeoids (which you do not need to do) as you will have gathered them on the way.
- If you are fighting more than one at once, try and get them both to your north. it is easiest to judge their movements and to hit them when they are to your north; and also, you really do not want them on either side of you with respect to latitude, as it is then a nightmare to keep track of their movements, particularly when they decide to take turns rising up and biting you in the back. To get them to your north, just try and move south around them; however, do not get right up close to the southern wall, or they will have you trapped.
- The Snakeoids rise out of the ground in response to movement from you, however slight. If you actually stand still on the spot (which means not firing or changing your weapons, as well as not moving), they will not bite. If in a difficult situation, try standing for a moment, and then running, to get away.
- A good strategy for fighting the Snakeoids is to run up to stand diagonally near their mound of earth, but before they rise up to bite, run back to stand further away, and then fire on them. If this strategy is used effectively, you can eventually kill a Snakeoid with something as weak as the Water Pistol.
- The most powerful weapons are not necessarily the best to use (certainly on this level, as you will need as much firepower as possible on the next one). As noted above, even your flimsy little Water Pistol can be used effectively against them if used correctly. If you can pull off the "bait-and-run" technique described above, you could benefit from using the opportunity to unload some of the weapons that you aren't going to get rid of anywhere else.
Weapons to Use
- Plates: Use all of your Plates here, as it is the best time to use them. Although you would benefit from having a few on the next level, they are far more useful here for putting paid to the Snakeoids. (It takes about fifteen Plates to kill a Snakeoid.)
- Tomatoes, Ice Lollies, American Footballs: If you use up your weak weapons on the Snakeoids, it ensures that you have as many of the more powerful weapons as possible for the final boss. Note that I do not include the Water Pistol in this group of weapons - it can be used here, but it is good on the next level in its own right.
- Water Pistol: This is actually very useful on the next level (and not just for fighting Zombies). Feel free to use them here, but if you can avoid it, do not let your ammo fall below 150.
- Bazookas: Although they are most effective, these are something that you might want to save for the next level. But, if the weapons above aren't working for you, you can choose to use the Bazookas here, instead. Make sure you save enough shells to blast down all the doors and walls you need to get through, to access the remaining Victims and important pickups, on this level. (That will be at least one, and possibly two if you are low on Keys.)
Dream Weapons (you may not have these with you.)
- Monster Potion: Only if you have buckets of it. You are likely to want as much of this stuff as you can get on the next level, but if you have, say, seven of them, it might suit you to be lazy and use one of them here. Certainly if you can spare one, it gets most of the job done at once.
- Mystery Potion: You could try these repeatedly until you get one that turns you into the Purple Monster. You might want to save them for the next level, like I advised you to do for the Monster Potions, but I do not think you are going to miss them as much.
- Pandora's Box - Another thing that you ought really to be keeping for level 48 if you have not got many. How many you can get away with using really depends on how many weapons of other types you have; I advise that if you have less than five Monster Potions, you do not use any; if you have more than five Monster Potions but less than eight, you should not let your Pandora's Boxes fall below ten; and if you have more than ten Monster Potions, well, you can use as many as you want.
- Flamethrower - Fry them! But do not let your ammo fall below 150 if you can help it.
Weapons Not to Use
- Soda Cans (too slow)
- Weedkiller (too close-range)
- Ancient Artefacts (too close-range)
- Silverware (you need it to use against Werewolves on the next level)
- Fire Extinguisher (no effect)
- Martian Bubble Gun (no effect)
- Decoy Clowns (do not last long enough)
Part Two
Unless you actually killed all of them, there will still be one or two more Snakeoids roaming around the field; you might well run into them as you pick up the items scattered around. If so, try to move on your way quickly and leave them behind. In addition to the remaining Snakeoid(s), the number of American Footballers running around will have increased - they will be all over the field and any other open areas, and they'll push you all over the place if you let them.
This does not cause you to lose any health, but it is very annoying and a complete waste of time. So, stay up against walls and in confined spaces where possible, in order to keep away from both your enemies. Remember that the footballers provide you with an opportunity as well as an irritation; if ten of them are passed American footballs, you will receive the 5000-point Bonus for Pass Completion when you reach the end of the level.
Make sure to collect the Skeleton Keys dropped by the Snakeoids you killed. Now head over to the southwest corner of the map. Walk east until you see the ten- and twenty-yard lines to your north, then walk north over to the field. You will find Speed Shoes and American Footballs (assuming you did not already collect those) on the ground near the edge. Continue further north to find a Key, and then carry on walking to the northern edge of the field.
Walk east, keeping north of the bench in front of the spectator stand. When you reach the end of the first spectator stand, head north up between the two stands and continue east along the northern wall of the level. After a bit of a walk, the path takes a turn south. Follow it around to the Skull Door to the north. Go through and collect a Baby [A].
Return south out of the Baby's [A] cell. There is a door to the southwest; if you have three or more Keys, then open it. If you do not have enough Keys, you should blast it open with a Bazooka shell (the Fire Extinguisher inside will be more useful than you might think). Inside the little hut, pick up the Fire Extinguisher and open a Cupboard. When you are finished around here, return northwest to the alleyway behind the fence, and walk west again, behind the eastern spectator stand, to the gap between the stands.
Walk south out to the side of the field and continue walking east. When you reach the gap between the two benches in front of the second stand, head south to find American footballs a few metres from the edge of the field. Return north once more, and head east to where the second spectator stand ends and the fence begins directly to its east. Head south from here to find Silverware on the ground near the end zone.
From the Silverware, head east across the field to the edge of the paved area. To the south here is a hut, with a door on the north side. If you have two or more Keys on you at this point, go through and open the Cupboard. You can use a Bazooka to get in if you have not got enough Keys, and want to take a gamble on it being worth a shell. Once you have finished with the hut, head southeast from it to find an entrance in the side of a large building. Go in, and head north to find a Cupboard.
Return south to the side entrance, and head out of it and walk west. Head south at the first opportunity, and continue south down the passageway to the wall at the southern edge of the level. Head east here; there's a door to the north a few metres on. If you still have two or more Keys at this point, go in and over to the northern wall to find another Cupboard. If you do not have that many Keys, then you can choose whether or not you want to gamble a Bazooka shell on the Cupboard.
From that door, head east and you will come to a Skull Door to the north. Through here are the last two Victims (2 and 8). If you do not need to enter because you have only one Victim, and you do not want the Bonus Points Pickups and the two Cupboards either, then return to the Baby's [A] cell on the northern edge of the level, where the Exit Door awaits you. (Read the preamble to level 48 before you use it.) If you have more than one Victim, though, you should go through now.
To the northeast of the Skull Door, in a little alleyway, is a Baby (8). Collect him and then return southwest. There is a regular door to the north. Open it (or blast it down with your Bazooka), and head through. Open the Cupboard that's dead ahead, and another Cupboard to the northwest. Collect the Teacher [A]. To her southwest is a cracked wall that may be blasted down to provide access to a small collection of Bonus Points Pickups. Go and grab them if you want. Before you exit the level, read the preamble to level 48, below, so that you are prepared when you start.
Level 48: Curse of the Tongue
Difficulty: 10/10
the most difficult level in the game - it is the one featuring Dr. Tongue, the final boss! As with the previous boss on level 36, how hard you find this one will depend on how well equipped you are. If you started on level 37 (or even at the beginning of the game) then you will find it to be relatively easy, but if you started on level 45 then you will be swatted aside unless you are very good - and fairly lucky. As with level 36's boss, it is been dealt with in a separate section - look below this level's walkthrough to see.
Of course, before you even get to the boss, you have to make your way through Dr. Tongue's most complex castle laboratory yet, and that's pretty hard in itself. You will need to fight a Vampire, and Frankenstein's Monster, in order to stop them from following you to the boss' arena, and ganging up on you there. The Victims are also a difficult lot, being placed in some fairly inconvenient locations. In particular, your first task in the level is to get halfway around the laboratory in time to save two Tourist Couples (4 and 5) from undergoing the usual transformation as night falls. Whether you eventually find the boss easy or hard, the level you have to fight through to get to him is certainly one of the most difficult ones in the game as well.
NOTE: Cheating: It is possible to exit this level, and make the game behave as if you completed it legitimately, without defeating the boss. (This does, of course, not count as finishing the game properly.) Go and see section two of this file, "Tips, Tricks and Strategies," to find out exactly how to achieve this.
Dr. Tongue has two forms: the Giant Spider (as seen on level 36) and the Giant Head (new). The Giant Spider is the first form he uses, and it is also his most difficult. it is tougher even than it was on level 36, as you have a larger arena to fight him in - meaning that there will be more sticky cobwebs to clean up, and he has more scope for dodging your attacks. However, for the most part your tactics in fighting this boss will be the same as they were on level 36. The only thing that is different is the order of weapons you should use on him, as you have only one more form of the boss afterwards, rather than a whole string of levels to play through.
The Giant Head, meanwhile, is comparatively easy. He's vulnerable to most of your weapons, has much less powerful attacks, and isn't as good at dodging out of the way. The transition from Spider to Head is via his human form; he'll blow up as a Giant Spider, return to human form, then wait for you to approach before drinking another Potion and taking on the Giant Head form. This gives you an opportunity to use your Weedkiller to sweep up the sticky cobwebs before allowing him to turn into the Head. Since the Spider is so much more taxing, you should use your choicest weapons on him first, and kill the Head with the leftovers (pretty much). Notably, the Head takes more damage from the Water Pistol than you might expect.
Monster List
- Frankenstein's Monster (one)
- Jelly Blobs (intensity: very low, location: one place)
- Mummies (intensity: very low, location: two places)
- Spiders (the Giant Spider produces regular-sized Spiders at a medium intensity rate, as you fight him)
- Vampire (one)
- Werewolves (source: from Tourists after 36 seconds: 4 and 5; spawning randomly after 40 seconds, intensity: ranges from low to medium, location: patchy)
- Zombies [Normal and Vicious] (intensity: ranges from very low to very high, location: patchy)
- Giant Spider followed by Giant Head (Dr. Tongue)
Victim List
- [A] Cheerleader - In the northwest corner of the level, behind the barrier at the northern side of the boss arena. You will need to defeat Dr. Tongue in both his forms before you can get through to save her.
- Cheerleader - In a cell on the northern side of the level, at the other end of Dr. Tongue's complicated laboratory. You will need to find your way through a tortuous route around the edges of the level to get over to her, and you will need to use one of your Skeleton Keys to get in to save her. (it is lucky they are so easy to come by on this level.)
- Cheerleader - On the eastern side of the map, inside a ring of timed electric barriers.
- Tourists - On a secluded balcony in the southeast corner of the map.
- Tourists - Standing on a Skeleton Key, on a balcony which is near your start location, but is accessed by heading north along a walkway from the southeast corner of the level, where the other Tourists (4) were.
- Teacher - On a raised dais, south of where you start, and accessed by a flight of stairs to its south.
- Baby - On the eastern side of the level, west across the laboratory from the Cheerleader (3), also penned in by timed electric barriers.
- Dog - South a little from where you start, in a corner of the pathway.
- Cheerleader - Standing near a Skeleton Key, on a balcony in the southwest corner of the map.
- Baby - At the western end of the raised dais, at the end of the long route through the laboratory, west of the Skull Door cell holding the Cheerleader (2).
Important Pickups
- Two Pandora's Boxes
- Two Weedkiller pickups
- Two First Aid Kits
- Extra Life
- Decoy Clowns
- Five Skeleton Keys (all five of which you will use, unless you have only one Victim, in which case you only need to use four)
Bonuses Available
- none
Best Place To Score Bonus Points
Near the southwest corner of the level, through the hidden passage, where Zombies spawn at a very high rate. If you go and score bonus points on this level, it can only be for the sake of getting a high points score - you cannot earn an Extra Bonus Victim.
Walkthrough
There are two Tourist Couples (4 and 5) on this level, and they both need saving within 36 seconds. Luckily, the Speed Shoes which you picked up on the previous level will get you there comfortably on time. Make sure you have switched your special item to the Speed Shoes, so that they are ready for use as soon as you start on this level. You should make sure to collect the Dog (8) along the way, because someone's left him smack in the middle of a Zombie spawning area. Other than that, there is a Vampire, and also a Frankenstein's Monster on the level, as mentioned above; this walkthrough allows you to tackle them both in isolation. What you must not do is walk north at all as you begin the level, as then the Vampire will come after you too early, which will give you extra difficulties.
Use your Speed Shoes, and then set off southwest. At the second corner, where the path goes south again, follow it along and you will come to some steps, with a Dog (8) to the side at the end. If there are Zombies around, spray them with Water Pistol fire as you approach, in order to protect the Dog (8); collect the Dog and then carry on southeast, and south down a corridor under a series of arches. Head west at the end, and northwest across a courtyard littered with bones. At the northwest corner of this yard, head west, moving south a little as the passage alters bends slightly.
At the western end of the passage, you will come to a carpet laid on the floor. You may start hearing evil laughter repeated occasionally at this point; this is coming from a Mad Scientist standing at the top of the stairs to the northwest. You could avoid listening to him by going up the steps towards him, prompting him to drink his potion and explode, but I recommend going to save the Tourists (4 and 5) first, as my walkthrough directs you back to this part of the level immediately after you have finished doing so.
Walk off the carpet and push south into the section of the wall that is made of lighter-coloured stone, as you move west and east, and you will find a secret passage leading south; go along to the other end and east, then north up the staircase. Walk east from the top of the stairs, then turn to go southeast at the T-junction. Note that the Speed Shoes might wear out, anywhere from around here onwards; when they do, if you have another pair with you, use that straight away - this is the last time in the game that you need any, so get rid of them all if you want.
At the southeast corner of the paved area, there is a walkway leading east. Walk along it to the other end, and then carry on east using the route to the south. You will come to a Tourist Couple (4); save them, take a second to open the Chest, and then return west, and north along another, slightly less narrow walkway. You will pass an open dais to the east; continue past it, and you will come to a large open paved area at the northern end of the walkway. In the northwest corner of it stand the second Tourist Couple (5). They are standing on a Skeleton Key, which you will collect at the same time as them.
Return all the way along the walkway to the southern edge of the level, and then all the way west to the other end of the first walkway. (Switch to your Silverware, so as to be prepared to fight Werewolves who jump onto the walkway ahead of you, blocking your path.) Open the chest to the north, then head northwest to a T-junction. Take a short detour east to pick up a First Aid Kit, then go west over to the top of a flight of stairs. Descend them and then go west, and north up the covered stone passageway to the area with the carpet. Head northwest and up the flight of stairs, and that blasted noisy Mad Scientist will top himself with a potion.
do not bother investigating further here - instead return south down the stairs, then head east along a corridor. When you come to a corner, with a raised dais to the east, head south. Where the corridor opens up, head southwest into a little cul-de-sac, and you will find Weedkiller at the end. Having collected it, get your Silverware ready for use, and head out of there and northeast over to some stairs. At the top of the stairs, you will find a Teacher (6), in the northeast corner of the platform. If a Werewolf has spawned around here, you will need to be ready to slay it quickly.
Go south down the stairs again, and southeast into the narrow passageway heading north under arches. Walk north up to the other end, then head northwest to come to another, wider, passage north. At the other end of that, go west for a Pandora's Box, then east until you find stairs to your north. At the top of the stairs is an entrance to a covered passage, which is a dead end; walk into it and up to the northern end, to get Bonus Points Pickups and a Skeleton Key. A Vampire will fly in from the northeast and begin circling you. Quickly move south out of the passage and over to the base of the stairs, as it is not unknown for a Werewolf to jump into the Cheerleader's (2) cell, visible on-screen to the west, and kill her.
You now need to move to a safe place to fight the Vampire: head west, south, southeast and south down passageways. From the southern end of the passageway with the arches overhead, walk west and then north across a yard covered with bones, to the northwest corner. Head west along a long, wide corridor, over to the carpeted area, and go up the stairs to the northwest. Head south down the walkway to their west. At the far end of it, in the southwest corner of the level, you will find a Cheerleader (9), two Bonus Points Pickups, and a Skeleton Key all in a spacious paved area where the walkway opens up.
As you wait for the Vampire to fly over, switch to your Ancient Artefacts, or if you have none, your Weedkiller. When the Vampire arrives, kill him with either your Artefacts, or your Weedkiller. Using the Weedkiller is actually not as expensive in terms of ammo and health as you might think, if done well. If you attack the Vampire every time he opens up into human form, his bat missiles will usually be caught by the Weedkiller before they reach you; and the whole operation should take no more than about one hundred of your Weedkiller ammo. Do not use the Fire Extinguisher on him before using the Weedkiller - he will not take damage from the Weedkiller while frozen.
When the Vampire has flown away, go north up the walkway to the end, and head down the stairs to the southeast. From the base of the stairs, head over to the hidden passageway through the lighter stone area in the eastern side of the southern wall. Go south to the other end of the passageway, head east and north up the stairs, and then go east to a T-junction. Go southeast here, to the far corner of the paved area.
Have your Silverware ready, because Werewolves will be all too ready to ambush you as you cross the first walkway ahead. When you are ready, escape the Zombies by stepping onto the walkway to the east, and crossing to the far end. Go north up the next walkway, and when it widens out into a large area to the east, walk east onto it and then south down the stairs to a carpeted area. Go east here and north across a second (very long and narrow) carpet.
When you reach the far end of that second carpet, switch to your Water Pistol, and (if you are prepared to spare one to protect a Victim) your Pandora's Boxes. Head over to the timed electric barrier to your north. Wait for it to switch on and then disappear, and then immediately walk north through it, through one more afterwards, and over to a third one north of that. You will see a Cheerleader (3) to the north, and a Baby (7) to her west; there may be a Zombie in the area, threatening either of them. If so, kill it with either your Water Pistol or a Pandora's Box.
do not relax; continue north as soon as the next barrier switches off, wait at the last one, and go through when it is inactive - unless there is a Mummy approaching from the north, in which case, disregard the pain and rush over to save her as fast as possible. Having saved the Cheerleader (3), wait for the beam to your west to disappear, then head through the gap, wait at the next one, and save the Baby (7) in the corner.
You should now exercise caution in passing all of the timed electric gates; you will not be specifically instructed where you need to wait and where you do not need to. Switch to either your Ancient Artefacts (if you have ten or more left), or your Fire Extinguisher. Go north through a barrier, then northeast and through another one. Frankenstein's Monster, to your northwest, will now notice your presence and disconnect from his electrodes. You should either get to burning him with fire from your Artefacts, or hit him with a long blast of your Fire Extinguisher (40+ ammo). When he is properly frozen, switch to your Weedkiller, and attack him. Provided you get your positioning right for the attack, it should take less than one hundred Weedkiller ammo to kill him.
Head north between Frankie's charging electrodes, and a little further north past one electric barrier to the east. Go east between the pylons of the two barriers nearest to the north and south - these two pylons are unconnected and so do not have a barrier running between them. Head north through an electric barrier to collect another Skeleton Key, then return south when it is safe. Go west again between the unconnected pylons, then head northwest to an empty pair of charging electrodes. There is another electric barrier to the west; go through and then continue west. Push southwest into the corner at the end to find a hidden Extra Life. Quickly go east past a stool to the north, and north through an electric barrier.
Walk over to the northeast corner of the laboratory and open a Curtain there. Head west along the northern wall to open another Curtain and a Chest. Go west through another electric barrier, and open the next Curtain to the north. Carry on west along the laboratory, past a couple more electric barriers, just to the south of a row of gargoyles' heads along the northern wall. Past the last one, investigate the northern wall to find another pair of Curtains.
Go south over two carpets and all the way down a passageway, and at the end head east, and then north up a flight of stairs. At the top, to your northwest, is a Baby (10); collect him quickly. If there are Werewolves following you at this point, kill them before continuing east. When all Werewolves are slain, head east past a suit of armour to your north, and over to a Chest. Open it and then head southeast to stand in front of a Skull Door to the north. Open it and save the Cheerleader (2) inside, before opening the Chest behind her. (do not open the Chest first, because if there's a Bogeyman inside, it will kill her as well as hurting you.)
To get to your next location, follow these directions: South out of the cell, northwest to the stairs, south down the stairs, west, north; east, through a total of three timed electric barriers, until you come across an empty pair of Frankenstein's Monsters' charging electrodes to the south; south through these, and further south and through another pair; southeast and through a timed electric barrier; south further through another three barriers, then east through one more.
South along a carpet, west at the end, and north up the stairs; south down a walkway to the west, and west along another walkway (with your weapons switched to Silverware in case Werewolves attack you); northwest to a T-junction, west to some stairs, south down them, west to a covered passageway, north to the other end of it, northwest to some stairs, and north up them to arrive in front of a Skull Door.
Walk north, through three Skull Doors, and then east and south down some more stairs. At the bottom, walk southeast across the carpeted hallway, to the lighter part of the wall to the south. Press into this section of the wall, as you walk east and west, and your character will enter a hidden passageway. Inside, you will collect a First Aid Kit, Decoy Clowns, and a Weedkiller pickup. Return north out of there, onto the carpet, and head over to the eastern end of the hallway.
Press into the eastern wall and walk north, and you will enter another hidden passageway, which takes you through to a large square platform above an abyss. On the platform are Bonus Points Pickups and one last Skeleton Key. Having collected these, return to the southwest corner of the platform and push west into the wall while walking north. You will walk back through the hidden passageway to the carpeted area. Head north up the tiled passageway to another Skull Door. Head through it and past some laboratory apparatus, to find a Mystery Potion lying on the floor in front of a row of timed electric barriers.
North of here, past the electric barriers, is Dr. Tongue's boss arena. As on level 36, you now need to fight the boss in order to access the final Victim, a Cheerleader [A]. She's in a stone dungeon to the north of the arena, behind a barrier that will only disappear in response to the boss' death. You may consider this level finished, but for the boss, as there are no more pickups to collect outside the boss arena.
The Giant Spider's Health, and How to Gauge It
The Giant Spider will flash whenever you do him damage. (He will also flash when you hit him with the Fire Extinguisher or Martian Bubble Gun, even though these do not have any effect on him.) Where he flashes depends upon how damaged he is. Initially the two large eyes on the front, the mandibles, and the four additional eyes on his forehead (around the green patch) will flash. However as you deal him more damage, these four eyes fail, one by one; first the Spider's upper left eye will fail (remember, that's the top-right one as you look at him), then his upper right eye, then his lower left eye. With the failure of each eye, the Spider's whole body will momentarily flash electric blue.
Once the last eye, the lower right one, has failed, the spider will flash all over for an extended period of time (whenever you hit him, his whole body will flash electric blue). After a while, this stops and only his two front eyes and mandibles will be flashing - this means he's close to death, and you only need to keep attacking until he starts blowing up.
When the Giant Spider starts blowing up, you need to get away from it and over to the other side of the arena, as quickly as you can. Dr. Tongue will drink another potion and transform into the Giant Head when you are near enough; and you need to sweep up as many as possible of the cobwebs that are all over the floor, before you let him do that. You should also realise that after he has completely blown up, the Giant Spider still manages to send out a final feeble burst of two or three normal-sized Spiders for you to deal with.
The Giant Spider's Movements and Attacks
The Giant Spider is restricted to the large arena in which you first come across Dr. Tongue, but he can move about very rapidly within that arena. This causes the first difficulty: it is difficult to hit him with projectile weapons. His attacks come thick and fast, and are difficult to defend against. The attack that will cause you the most damage is his continuous spawning of normal-sized Spiders; these are persistent in their attacks, and hard to kill.
His other attack is his web missiles; these are sticky strands of webbing which stick to the floor where they land (and hurt you if you are standing where they strike). The webbing stays on the floor, sticking you down and almost stopping your movement; the fastest way to move across the web is to fidget the controls, so that your character alternates between the two component directions of diagonal movement. This will allow him to move at the fastest rate he can across the sticky cobwebs (not very fast). However, the webs can be cleared off the floor using the Weedkiller; and patches of floor which have webs cleared from them in this way, will be stripped clear so that future webs cannot attach.
The boss' difficulty, then, lies in him laying down his webs so that you cannot escape easily, and then setting his little Spiders on you so that they leech your health away as you are trying. You can use the Decoy Clowns to distract the little Spiders, while you attack the boss, but this isn't the best way to go about it.
Even if you started as recently as level 45, you should have picked up at least three, preferably four Monster Potions while playing through the previous three levels. To take advantage of the invulnerability from Spider attacks they offer, Monster Potions are what you are advised to use - after first waiting for the Giant Spider to cover a reasonable amount of the floor with sticky cobwebs, so that you can then strip them off and be mostly rid of the problem of immobility.
Giant Spider - Weapons And Items You Should Consider
Bazooka
If you have good aim, this will deal decisive damage quickly. It works best if you are firing directly north and the Giant Spider is stationary. do not worry about saving these for the Giant Head - if you have got to use them, do.
Decoy Clowns
These work very well at distracting the normal-sized Spiders, but they do not last for very long. Bear in mind that you can only have three active at the same time - keep an eye on how those you have placed are doing (that is, whether they've burst yet). If you have any, you should make sure to use them if you are not transformed into some alternative shape.
Flamethrower
Of course, if you have been playing since the beginning of the game or thereabouts, it is likely that you have gotten yourself a Flamethrower. Go ahead and use it all up - it is not necessary to save it for the Giant Head, as there are other, more commonplace weapons that will work just as well against him.
Monster Potion
Although you will deal damage quite slowly as the Purple Monster, you will be invincible while you do it. Unfortunately, in addition to the slow rate of attack, you just cannot get to the Giant Spider very often - while you are in the centre of the room punching on the spot, unable to move due to the cobwebs, the Giant Spider will dance around you and rarely come close. But if you wait for the centre of the room to get covered in sticky cobwebs, you can then strip them away and attack the Giant Spider relatively actively. This is the strategy I recommend using here.
Mystery Potion
you will sometimes turn into a Purple Monster, allowing you to deal with the Giant Spider most effectively, but at other times you will wind up as a ghost or as Mr Hyde, unable to do anything for about 30 seconds. The Mystery Potion can be a good timewaster in this way, though, as you wait for the floor to get covered in webs, ready for you to sweep them up.
Pandora's Boxes
If you have any, use them all up straight away! they are great against the Giant Spider.
Plates And Silverware
Both of these are very effective against the Giant Spider... if you can hit with them. Unfortunately, it is difficult to do so, and so if you use them, they are likely to mostly be wasted. Plates and Silverware should be a last resort, as they are more helpful against the Giant Head.
Weedkiller
Hardly the best thing to chase after the Giant Spider with (you will take massive damage), but it is very useful to sweep up the sticky cobwebs that he drops. It can also protect you from the normal-sized Spiders (though not very well, as they move so fast).
And Those You Should Not
Water Pistol, Ancient Artefacts, Soda Cans, Tomatoes, Ice Lollies, and American Footballs. Avoid using these, because they are absolutely no good against the Giant Spider. However, some of them will prove more useful against the Giant Head.
Strategy One: Exclusive Use of One Weapon.
Just use one of the better weapons listed above (such as the Monster Potions) to knock out the boss, without using anything else at all. This is the easiest (and least interesting) way of doing the boss; it will be open to you if you have been playing for a particularly long time (since before level 25, say). For other players, it will be necessary to use a strategy that's not so wasteful in terms of your items.
Strategy Two: Giant Spider Weapon Sequences.
In conjunction with the "Wait, Sweep, and Kill" strategy below, use your weapons in the following order, unless there's a compelling reason not to (for example, low health). This order has been formulated based on how effective each weapon is, and how much of your current (or imagined) stock you are likely to need while fighting the Giant Head. Some of the bullet points might not apply to you, but the idea is to conform to this rough plan when possible.
If you have been playing for a while (that is, you started before level 33 or on level 37) then I suggest the following weapon sequence:
- Use remaining Pandora's Boxes.
- Use the Monster Potions until you have one of them left.
- Use remaining Flamethrower ammo.
- Use the Bazooka until you have 15 shells left.
- Use Plates and Silverware until you have 15 of each left.
- Use remaining Mystery Potions.
- Use remaining Monster Potion.
- Use remaining Bazookas.
- Use remaining Plates and Silverware.
- Use remaining Ancient Artefacts.
- Use remaining Tomatoes, Ice Lollies and American Footballs.
- Use remaining Water Pistol ammo.
- Use remaining Soda Cans.
- Use remaining Weedkiller ammo to attack the Giant Spider, and probably die.
If you started on level 41 or level 45, then use of the following weapon sequence while making good use of Decoy Clowns is probably the nearest you will get to a reliable strategy:
- Use Pandora's box(es) first.
- Use all Bazooka shells.
- Waste as much time as possible using your Mystery Potions.
- Clear a few strips of floor in the centre of the arena with your Weedkiller.
- Use Monster Potions.
- Use Plates.
- Use any remaining Silverware.
- Use Ancient Artefacts.
- Use Weedkiller on the Giant Spider itself.
- Use Ice Lollies and American Footballs.
- Finish by using Water Pistol.
Strategy Three: Wait, Sweep, And Kill.
Waste time until he's covered the floor in sticky cobwebs, and then clean them all up and kill him without having to move at horribly slow speed. Decoy Clowns may help in this strategy, especially while you are using your Weedkiller. After you have finished clearing away the cobwebs, pretty much any of the weapons listed above are good ones to use. But how should you waste time in the first place? Just standing in a corner and shooting at the Spiders which approach will not work, as the cobwebs will only be scattered around the area where you are standing.
You should certainly have at least a couple of Mystery Potions; try wandering around and occasionally drinking them, and see what happens. Delay a suitable amount of time between each drink, in order to make the most of the occasional health refill you will receive. If you have any ghost potions left, you could take those and just sit around. If you really have a lot of Monster Potions (more than seven), then you could take one and just idly punch the Giant Spider as it occasionally hurtles past, while you wait in the middle of the arena.
For those who started on level 45, as explained in the Weapon Sequence list above, you are best off using first your Pandora's Boxes; then using your remaining Bazookas; and finally stretching out your Mystery Potions over as long a time as you safely can. When you have finished with all that, clear the centre of the room with your Weedkiller, moving outwards as you go - this ensures that you clear a useful part of the arena. You do not want to clear the entire western side, run out of Weedkiller ammo, and then find that the Giant Spider spends all his time over on the eastern side as you sit around with your Monster Potion time draining away.
After The Giant Spider Is Defeated
it is obvious enough when you have finished the Giant Spider off, as he'll light up orange and start exploding. You need to try and get away from him at this point; Dr. Tongue will reappear, and when you are near enough he'll drink another potion, and assume the Giant Head form. However, if you stay far enough away, it gives you a chance to sweep up as many of the remaining weeds as you can. Obviously, if you have just drunk a Monster Potion, you may as well get Dr. Tongue to take on the Giant Head form as soon as you can, in order not to waste all your time as a Purple Monster. Assuming that's not the case, sweep up the weeds, then approach, and you can start the second part of the boss.
The Giant Head's Health, And How To Gauge It
When you damage it, the Giant Head flashes yellow-green. (It will also flash in this manner if you use the Fire Extinguisher or Martian Bubble Gun on it, even though they have no effect.) The Giant Head moves through four distinct stages of damage, looking progressively worse as you continue to damage it.
Stage one damage
Smooth-skinned head with warts. Unbroken glasses.
Stage two damage
Part of skull visible beneath scalp. Some warts bursting. Cracked glasses.
Stage three damage
Large amount of skull visible. Holes in head. Some skin melted and dribbling down side of head. Colourful, glowing eye sockets visible beneath fully broken glasses. Wires dangling from damaged right chin.
Stage four damage
Huge gaping hole in head, electronics visible inside. Metal jaw visible with no lower row of teeth. Lots of skin melted.
The amount of damage required to take the Giant Head on to each successive stage of damage seems roughly equal.
The Giant Head's Movements and Attacks
The Giant Head is able to move quite fast, like the Giant Spider, and so he is difficult to hit. His movements grow faster and more erratic as you damage him more and more. Unlike the Giant Spider, he does not have any attacks that slow your movement. However, he is able to barge into you at high speed and send you flying across the arena, much like the American Footballers do - this does not reduce your health.
He only has two other attacks: in damage stages one and two, he spits slime at you (which is not hard to dodge); while in damage stages three and four, he attacks you with eyeballs, which home in on you, much like the Vampires' bat missiles do, and will hit unless intercepted with your weapons. The Giant Head is not as hard to defeat as the Giant Spider, due to his physical weakness and rubbish attacks, although it can be tricky to pin him down and do damage to him, especially towards the end.
Giant Head - Weapons And Items You Should Consider
Plates And Silverware
These are very effective against the Giant Head, so under most circumstances you should use them first thing. However, once he gets to stage three damage, he starts to move rather too quickly for your Plates and Silverware to hit, so do not carry on trying to use them; go on to using the Water Pistol instead. If you are desperately low on health when you start, use any remaining Monster Potions first; then go on to either the Plates and Silverware, or the Water Pistol, depending on how well you do.
Monster Potion
If you have any left, use them. Note that while it is not possible to corner the Giant Head, it does sometimes seem to get confused if you walk up to it and start punching, so you may have some luck backing it into a corner.
Bazooka, Flamethrower, Pandora's Boxes
If you still have some of these, then let him have it.
Mystery Potion
If you have any left, use them once you are out of other options, as you might get lucky and turn into the Purple Monster.
Decoy Clowns
These act as a distraction; he'll use his slime attacks and eyeball attacks on them sometimes, instead of you. Go ahead and use them if you have any left.
Water Pistol
Surprisingly, your starting weapon is very good against the Giant Head, and is accurate enough to be useable when the Plates start to fail in that department (you have a large amount of ammo - hopefully - and it does not matter if a few shots miss here and there). You should still have some left, so once he's gotten to stage three damage, you can, er, squirt him to death.
Soda Cans
These can be useful, but only if you are hiding in the alcove in the northeast. (See strategy five below.)
Ice Lollies, Tomatoes, American Footballs
These will hurt him, but you should try and exhaust your other options first.
And Those You Should Not
Ancient Artefacts, Weedkiller (too close-range - he'll throw you out of his way anyway), Soda Cans (too inaccurate).
Strategy Four: Giant Head Weapon Sequence
- Sweep up the sticky cobwebs on the floor with Weedkiller (preferably before allowing Dr. Tongue to drink his second potion).
- Use remaining Plates and Silverware, until he reaches stage three damage.
- Use remaining Monster Potions.
- Use remaining Pandora's Boxes, Bazookas and Flamethrower ammo.
- Hide in the northeast alcove and use remaining Water Pistol ammo.
- Use remaining Mystery Potions.
- Hide in the northeast alcove and use remaining Soda Cans.
- Use remaining weak weapons (Ice Lollies, etc.)
Strategy Five: Stay In The Corner
The Giant Head's attacks - in particular, his eyeball attack - are most effective when you are in the middle of the arena, with no defensive walls around you. But, there is an alcove in the northeast corner of the arena in which you can shield yourself from the eyeball attack; go in there and stand next to the southern wall. The eyeballs will not often hit you here, as they fall apart when they hit walls, and they are likely to strike the walls first here rather than go straight for you. Hiding in this area also allows you to shoot at the Giant Head with projectile weapons - or even the Soda Cans - as he passes the opening into the arena to your west, without taking any great risks.
After He Is Defeated
it is obvious enough when you have finally killed Dr. Tongue, because the Giant Head turns to an interesting assortment of fluorescent colours and explodes. There are no more Monsters let out after he dies, so just go straight for the final Victim. Walk up to the northern wall of the arena and you will find that the barrier has disappeared; walk through the doorway into the stone dungeon, and then walk west to find a Cheerleader (A) at the other end of it. The Exit Door now appears; there's nothing more to do on this level, so go through. Note that if you intend to collect as many Victims as possible, you will need to get off to a quick start on the credits level (which commences after the victory screen), but Speed Shoes are not necessary.
Well done - you have destroyed Dr. Tongue, and successfully defended your neighbourhood and its inhabitants from the menace of his army of Monsters! Now, enjoy the victory screen, as you see how well you did against all the different varieties of Monsters.
Credit Level: Monsters Among Us
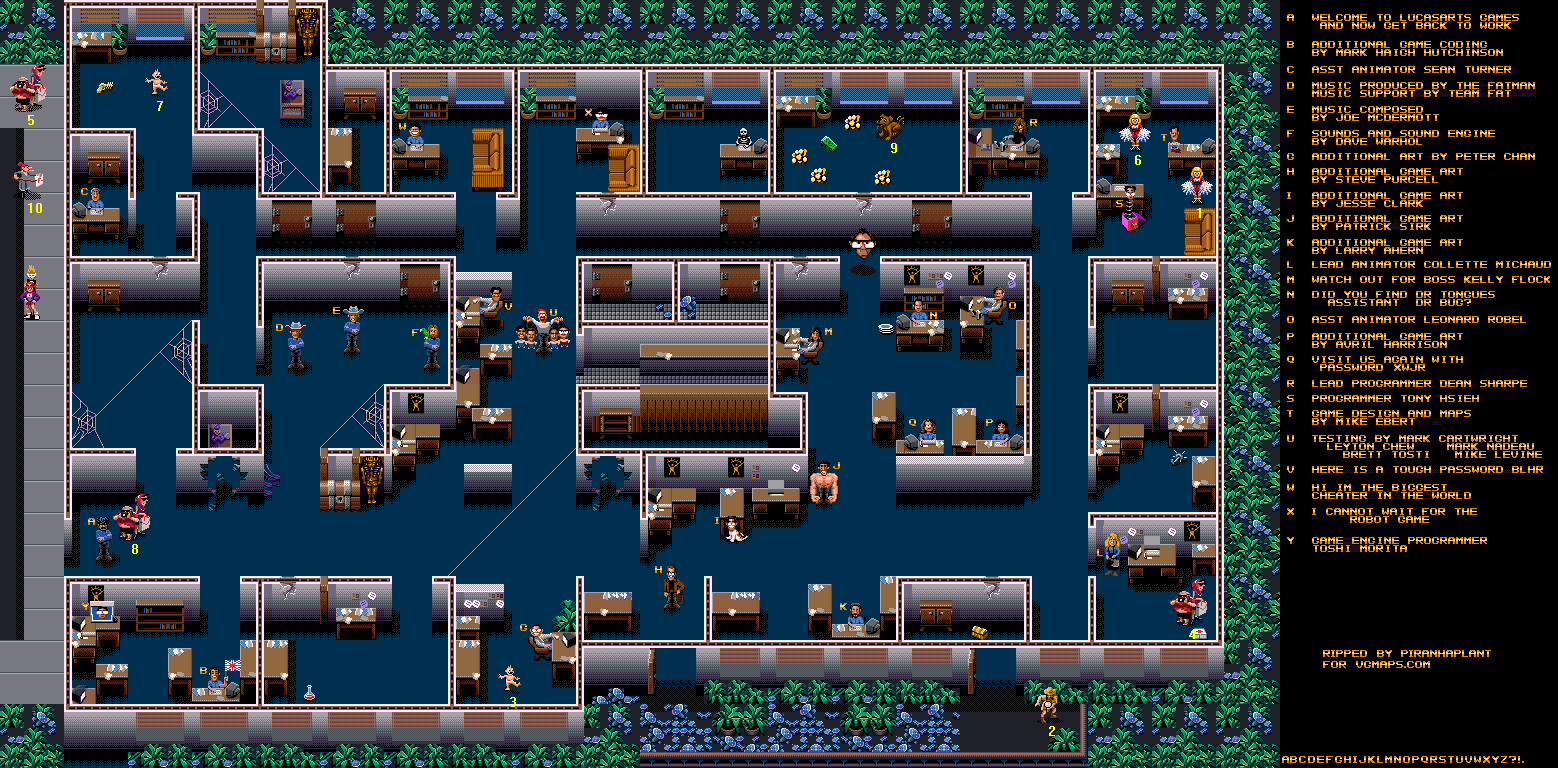
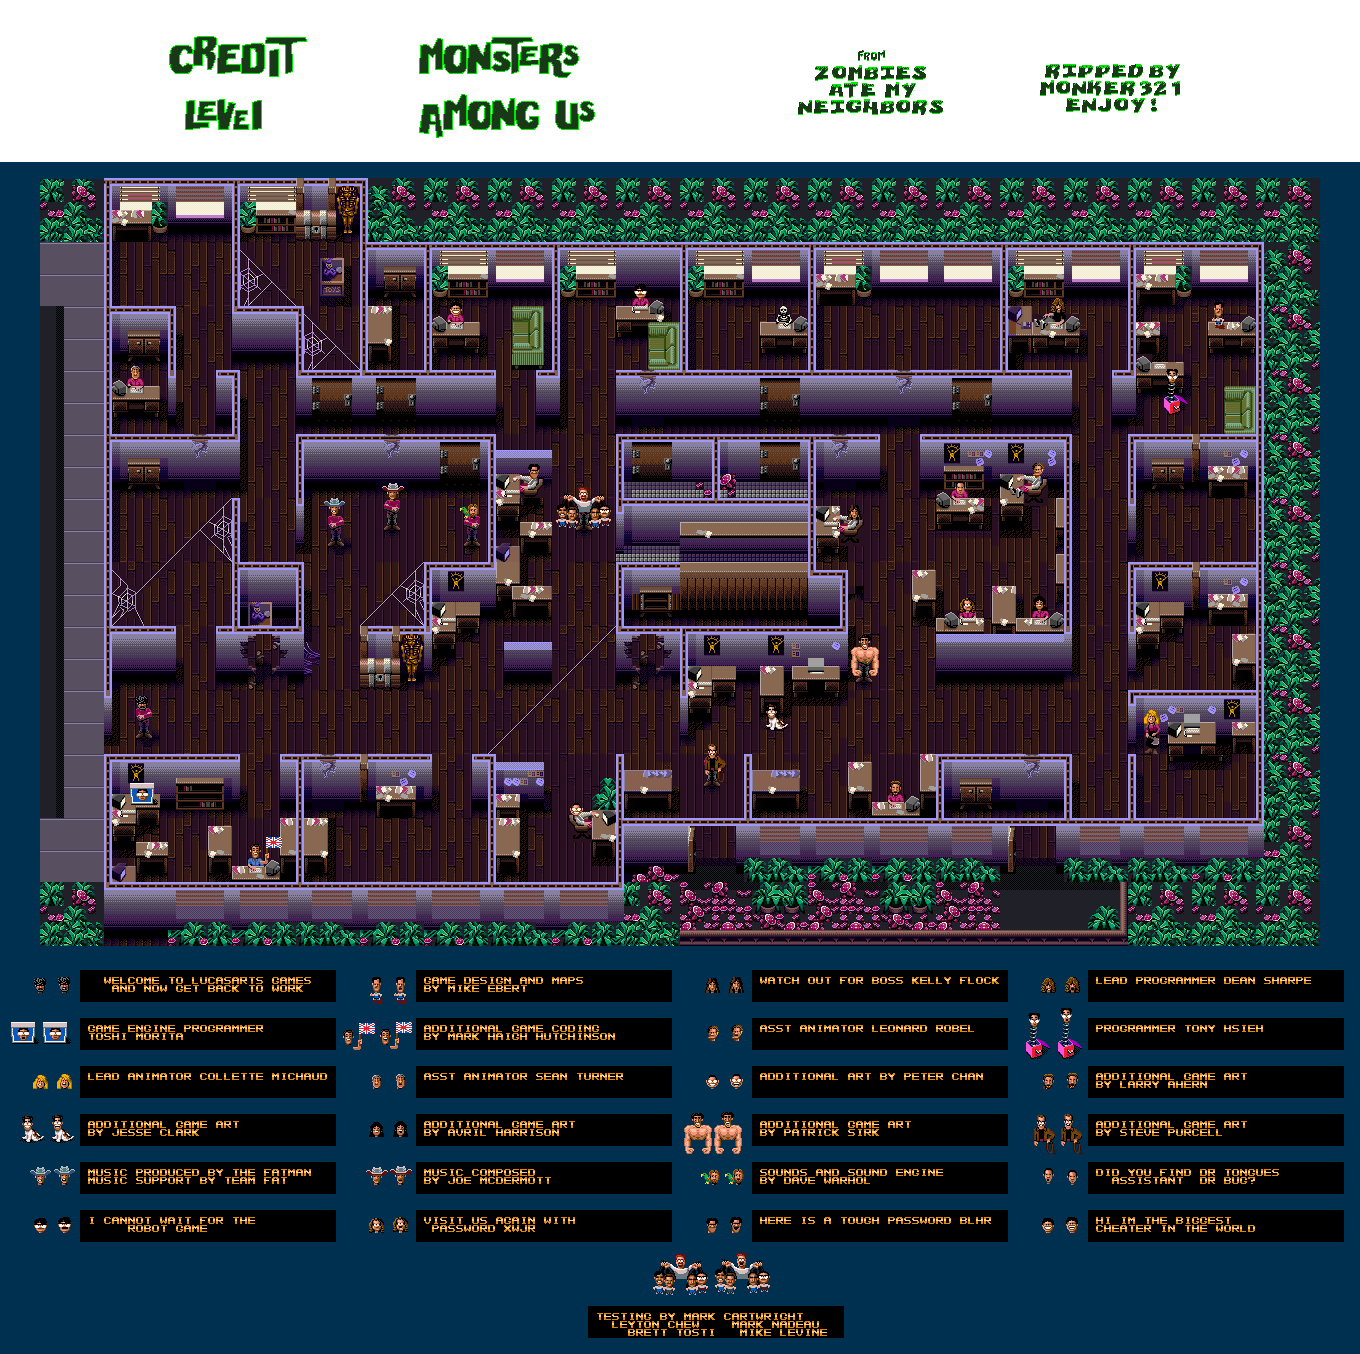
Difficulty: 2/10
Set in the LucasArts offices, this is a nice, relaxed, low-key way to end the game. None of the Victims are in any danger, although you do need to go after the Tourists as you begin. There's a Miniature Flying Head making a nuisance of itself, which you can kill if you want (it isn't very tough). I think it is one of the bosses at LucasArts.
Monster List
- Evil Dolls (intensity: medium, location: one place)
- Fire Babies (from Evil Dolls only)
- Jelly Blobs (intensity: low, location: one place)
- Miniature Flying Head
- Tentacles (intensity: very low, location: around the southern part of the building)
- Werewolves (source: from Tourists only after 38 seconds: 4, 5 and 8)
- Zombies [Vicious] (intensity: very low, location: one place)
Victim List
- [A] Cheerleader - In the office in the northeast corner of the building.
- Explorer - East of a patch of weeds, in the garden outside the building on the south side.
- Baby - In a cubicle on the southern side of the building.
- Tourists - In an office in the southeast corner of the building, standing by a First Aid Kit.
- Tourists - On the pavement, north of where you start.
- Cheerleader - In the same office as the other Cheerleader (A), to her northwest.
- Baby - In an empty office in the northwest corner of the building, standing by a Martian Bubble Gun.
- Tourists - Standing by a LucasArts employee at the entrance to the building, south of where you start.
- Dog - Behind a locked door, in an office containing Bonus Points Pickups, at the northern edge of the building.
- Teacher - Standing at the edge of the pavement, just north of where you start.
Important Pickups
- First Aid Kit
- Weedkiller Monster Potion - needed to rescue the Dog (9) if you have no Keys
Bonuses Available
- None (there is no bonus screen at the end of the level
Best Place To Score Bonus Points
There's nowhere you can earn good points, and no point in trying either - it is the final level, and so an Extra Bonus Victim would not mean anything even if you could earn one. Get as many of the Victims as you can and then leave.
Walkthrough
There are three Tourist Couples (4, 5 and 8) on this level, but you have a lenient time limit of 38 seconds in which to save them all. Speed Shoes are not necessary. You will find many LucasArts employees as you move through the level; do not mistake these for Victims, as they cannot be "saved", nor do the Monsters even take any notice of them. As you pass them, they will "speak" to you (via a message bar at the top of the screen), to tell you about the part they played in making the game, or just to give you a message; when this happens, the game pauses. The quickest way of skipping past this is to relax the movement controls momentarily when they start speaking, then press them down again. do not get distracted by this novelty until you have saved the Tourists.
Walk north to find first a Teacher (10), then Tourists (5) standing on the pavement. Having collected both Victims, walk south along the pavement to come to an entrance into the large building to the east. Walk in, past the LucasArts employee, and collect the Tourists (8) standing behind him. Continue east across the office floor; you will pass a chest and a sarcophagus to the north, followed by a spider's thread visible across the ceiling, and a large hole in a wall.
You will then pass another LucasArts employee to the south, holding a whip; continue past him, then past a strange lizard-like employee to the north. Carry on east across another part of the office, and you will come to an entrance to a small room in the southeast corner of the building. Inside is a final Tourist Couple (4), standing by a First Aid Kit.
Go out of the small room, past the LucasArts employee holding an axe, and step north and into the next doorway you see to the east. In the opposite corner of this room is a Weedkiller pickup. Collect it, then head out of that room and west across the office; go south around the lizard creature, and carry on west past the man holding the whip, and a partition wall to the south. Now go south into a cubicle and you will find a Baby (3) there. Collect him and head north out of there again; carry on west and into the next room to the south, and you will find a Monster Potion on the floor in the southwest corner.
Go out of the room via the doorway to the north, east past the cubicle to the south which contained the Baby (3), and then south past the employee holding a whip and out into a garden, filled with weeds. Sweep south around the pot plants and east across the weeds, to find an Explorer at the eastern end of the garden. Collect him and then head into the little room to the north to find a Pandora's Box and a Cupboard. Return south out of that room, west across the path you cleared through the weeds, and north back into the main part of the building.
Head north past the whip guy and east past the lizard, over to the entrance to the room where that last Tourist Couple (4) was, with the woman with the axe standing there. Head north here, past a couple of rooms to the east, and then head into the third one, which holds an employee who appears to be a jack-in-the-box. There are two Cheerleaders (A and 6) in here, one [A] opposite the entrance, the other (6) to the north of the jack-in-the-box.
Head west out of the office and along a corridor, until you come to a locked door to the north. At this point, the Miniature Flying Head attacks from the entrance of the office to the southwest. Drink your Monster Potion, bash down the entrance to the door, and rush in to save the Dog (9) inside. You can now turn your attention to the Miniature Flying Head; give him a good bashing and he'll blow up. Note that pushing him all the way into a corner of the room won't work; your fists need to land on him as he's a particular distance away from you, so you will have to allow him to fly back and forth just a little bit. You can tell when you are damaging him because he will flash blue.
If you change back into human form before the Head is dead, use your Pandora's Box on him and then finish him off with your Water Pistol. Collect the Bonus Points Pickups inside the room where the Dog (8) was, if you want to boost your score for its own sake, and then head out and go west along the corridor. At the far end, head northwest around a couple of bends into an empty room. There's a Baby (7) in here, standing by a Martian Bubble Gun.
End of The Game
Provided that you got into the high score table, you will be asked to enter your name (or both your names, in succession, if you were playing in two-player mode). You will also be shown where you ranked on the table. Congratulations! You have entirely completed Zombies.
If you are still hungry for more, you could perhaps try playing through again, saving more of the Victims; or you could start on a later level and try and defeat the final boss, having had fewer opportunities to collect helpful items. Or maybe you could do both at the same time. Whatever you do, have fun.
Tips, Tricks, and Strategies
Tourist-Werewolf Exploit
This is an exploit that allows you to save some Tourists on levels in which they would turn into Werewolves, even after the time limit has expired. In particular, this exploit is useful in saving Victim number 9 on level 28, because that particular Tourist Couple is much too far away from the start of the level for you to have any hope of getting to them in addition to the other two Tourist Couples present. However, for all its usefulness, this exploit may be looked upon as cheating by some, and they will not want to use it.
While running Zombies, your Super NES machine has only a limited amount of its resources dedicated to the Monsters that are present on-screen; in particular, it only has the capacity to animate a certain number of sprites on the screen at once. "Sprites" here means all objects that switch between frames of animation, which includes Victims too. When a certain number of Monsters are present, no more can be spawned until some have died, because otherwise the Super NES would be unable to cope with all the work and would slow to running the game at a snail's pace.
Tourist Couples are just one sprite, but each Werewolf is two sprites. More importantly, if there are more than a certain number of enemies on screen, the Werewolves are two enemies too many. So, if you have a certain number of enemies following on close behind when you approach the Tourists, the machine won't allow them to transform into more enemies, and you will be able to collect them. After collecting the Tourists, you are then free to kill the enemies following you, as they have served their purpose.
On level 28, for example, there is an area to the south of Victim #9 where Vicious Zombies spawn at a reasonable rate. If you go there and wait around, dodging the Zombies until there are five or six of them (but killing the randomly spawning Werewolves that jump in), you will have a force of Monsters that will prevent the Tourists (9) from transforming while they are in the Super NES' memory. Shuffle along ahead of them, not allowing them to fall behind and off the screen, and make your way north through the system of passages to where the Tourists (9) stand. (The system might start working slightly sluggishly when the Tourists come on-screen - this is normal.) You will be able to collect them safely - after which you can get rid of the Zombies chasing you, by shooting them all.
This tactic can also be used on, for example, level 48, to collect two consecutive Tourist Couples (4 and 5) who are east across a stone walkway from an area where Zombies spawn. An example of a level in which this approach is unfeasible is level 17: here, the Tourists (9 and 10) are just past an area of the level where a variety of enemies appear, and where other Victims can be found. It is not a good idea to attempt to bring a group of Zombies through, because they will try to kill the other Victims along the way, and because there is nowhere nearby that can suitably be used to recruit them.
Clearing The Machine's Memory
Another limitation of the Super NES that may be exploited is the game's inability to preserve the locations of most Monsters when they are too far away from the player. For all but the most powerful, semi-boss-like Monsters (Crazy Lumberjacks, Vampires, and Frankenstein's Monsters), the game will discard them as soon as they are a certain distance off-screen. Even those three varieties of Monster can do nothing of any consequence if the player is not nearby to witness them doing it; that means that they cannot kill Victims (and Lumberjacks cannot use their axes to demolish bits of the level, either).
This is convenient because sometimes when you arrive near a Victim, you will see that they are in danger, about to be killed by some Monster, and that you definitely cannot do anything in time. What should be your reaction? Well, perhaps you should consider just walking away - if you do that, then you could easily manage to escape from the scene before the Zombie (or whatever it is) makes the kill. If that happens, the Victim lives on, and you have another chance. Remember, it is not over until you hear them scream.
Where To Start Playing?
How long do you want your game of Zombies to be? Do you want to finish in an hour of play? Less time? Or do you want to spend the afternoon playing through all 55 levels from the start? The position in the game where you start playing affects not only how long your game will take (if you intend to finish it), but also how easy a time you will have of it. To take either extreme: those who start at level 1 (or even on level 1's bonus level) will have a much easier time than those who start on level 45.
The reason why playing for longer makes the game easier is mainly to do with collecting items. If you start on an early level and stockpile your items as you rise through the levels, you will arrive at the end boss with a stack of weaponry with which you can easily beat him. However, if you start nearer to the boss, you will not have nearly as much at hand to fight him with. You might want to sweep through the bosses in the game with ease - or you might be hoping for more of a challenge. Anyway, whatever difficulty you hope to experience, check this table for advice on where to start.
- 1 or 1-B: This is the easiest of the lot. You will have no problem beating the game starting here - but it will take you a while.
- 5: This is still a very easy place to start and it will still take you a long time to finish the game if you start from this point.
- 9: This is not quite as easy as starting at the previous two milestones, but you won't have any major problems.
- 13: This is where the difficulty level starts to get a little more noticeable. You will have difficulty on the first few levels you play, but by the time you reach the end of the game, they'll be things of the past and you will find it as easy as anyone else.
- 17: Start here and you will have a tougher time of things. The first few levels are hard to clear from starting with just Water Pistol and a First Aid Kit; but as with level 13 you will be coping fine by the end of the game.
- 21: This is actually an easier place to start than level 17, as the first few levels are not too bad. You won't find it hard.
- 25: Halfway through and it is still not all that challenging. You can still get through the last level easily, although it is not as effortless as starting from level 1.
- 29: Starting from here, you will find the first two levels difficult because of a lack of Keys. We are moving into harder territory here; you will find the boss on level 36 something of an obstacle.
- 33: The difficulty here takes a sharp turn upwards. There's a boss on level 36, and to beat him you will need to put in a top performance. Afterwards, your health and item stocks will be shattered, and you will need to recover well to be ready for the final boss on level 48.
- 37: Starting here is considerably easier than starting on level 33, because you will not just have fought a major boss from only four levels' preparation. You will find the end-of-game boss tough, but not too tough.
- 41: This is just the right level to start on if you want a good, challenging assault on the level 48 boss. it is hard, but not excruciatingly so.
- 45: You must be either a highly skilled player, or just crazy to begin playing here. you will be given a beating by the four super-tough levels at the end of the game, and you are very unlikely to get through them.
Keeping Your Victim Numbers High
You already know (if you read section one of this guide) about the Victim Provision Order and the way that Extra Bonus Victims work, but how do you take advantage of it to make sure you always have as many Victims as you can manage? Of course, you must make sure to protect your Victims well, but the other thing you must do is to replace them when they die - which is to say, you must earn enough points for an Extra Bonus Victim, so that they are returned to you.
For every level during which you break through a new multiple of 40,000 points, you earn an Extra Bonus Victim. So, score a lot of points. The best way to do this is:
- If there are areas where a particular type of Monster spawns fast, and you have good weapons to use on them, go there and have a ball. Zombies are great for this, as they only take one hit with the Water Pistol to kill, and you get 100 points a pop. Meanwhile, Werewolves are harder to kill and do not give as much value for the ammo you have to use (plus, the best weapon for the job - Silverware - is in short supply, and you do not want to run out of it).
- Do all the optional stuff on the map. There is generally a variety of things you can do, from killing Pod Plants, and tough enemies such as the Lumberjacks, to collecting out-of-the-way Bonus Points Pickups. These things all earn you points, so do them.
- Earn all of the bonuses. This ties in closely with the second point above, because it is as a result of going out of your way to do everything that you get most bonuses. All of the bonuses that the game awards are listed in the section just below; those of them that are awarded on a level, are listed in the level data section in the walkthrough. The bonuses that are added to your points total on the screen at the end of the level, definitely do count towards your Extra Bonus Victim.
You should realise that if you have ten Victims and you earn an Extra Bonus Victim, you will receive an Extra Bonus Player (an Extra Life) instead. If you have ten Victims and six lives (the maximum), you will be given the "Perfect Player Bonus" (5000 points) to help you towards your next target. So, it is never a waste of time to earn points (unless you do it in a really pointlessly slow and/or hazardous way, such as trying to kill huge numbers of Jelly Blobs). Remember that if you are playing in the two-player mode, it is possible for both players to earn Extra Bonus Victims on the same level, thus supplying two replacement Victims.
Bonuses
Victim Collection Bonuses
- 50 points per Victim saved, up to a maximum of 500 points per player.
- All Victims Saved Bonus - 1000 points - Save ten Victims.
- Ten Cheerleaders Bonus - 1000 points - Save all ten Victims in the level. This bonus is awarded on three levels - but oddly, one of them (level 47) as only six Cheerleaders to save, in addition to four Victims of other varieties. On levels 12 and 47 this replaces the All Victims Saved Bonus, but on level 30 it is awarded in addition to it. (Levels 12, 30 and 47)
- You Saved More Victims Bonus - 1000 points - If you are playing a two-player game, and one of the players collects more Victims in a level than the other, he will receive this bonus.
Other Bonuses
- Alien Invasion Repulsed - 9900 points - Destroy the Martian Spaceship by throwing ten Soda Cans into the hatch when it opens. (Levels 12 and 21)
- Axeman Begone Bonus - 5000 points - Kill all the Crazy Lumberjacks on the level. (Levels 4, 34 and 46)
- Bonus for Pass Completion - 5000 points - Successfully pass American Footballs to ten or more American Football Players. (Levels 12 and 47)
- Chainsaw Begone Bonus - See "Axeman Begone Bonus."
- Extermination Bonus - Kill a lot of Ants. (Levels 16 and 32)
- Fish Fry Bonus - 1000 points - Kill a lot of Squidmen. (Levels 18, 33, 35, 38 and 40)
- Massive Destruction - 2000 points - Make sure the level is a mess by the time you leave. That means tearing down as many hedges or walls as you can - with a little help... (Levels 4, 34 and 46)
- No Bazooka Fired Bonus - 1000 points - Simple! do not fire any Bazookas. (Levels 4, 16, 22-B, 34, 46)
- Secret Bonus - 2000 points - This is usually awarded when you have collected a Bonus Level Pickup, and usually indicates that you are about to enter a bonus level. On level 12 you earn your bonus points and bonus level by collecting all ten Victims. On level 47, as well, it is awarded if you collect all ten Victims - so that you get a total of 3000 points for doing so - despite the fact that you are not taken to a bonus level afterwards. (Levels 1, 9, 12, 17, 22, 33 and 47)
- Weed Cutting Bonus - 1000 points - Sweep up a large quantity of weeds over the course of the level. Killing Pod Plants does not affect your chances of getting this bonus. (Levels 9, 9-B, 11, 26, 36 and 44)
- Vampire Destroyed - Kill both Vampires. (Level 39)
- Extra Bonus Victim - A new Victim, to replace one who has previously died.
- Extra Bonus Player - This is an Extra Life, given to you if you break an Extra Bonus Victim score barrier, but you already have ten Victims.
- Perfect Player Bonus - 5000 points - This is given to you if you break an Extra Bonus Victim score barrier, but you already have ten Victims and six lives.
Cheat: Avoiding The Final Boss Fight
Level 48's final boss fight can be entirely avoided by exploiting the level design - there is a way to bypass it and exit the map prematurely, which will nevertheless result in the game behaving as though you killed the boss properly. Although the level contains an important boss whom the game's plot demands you must destroy, the only element of the game's mechanics that actually prevents you from leaving the level is the fact that you are not able to access the "Always There" Victim, a Cheerleader, until the boss has died; and so the Exit Door will not appear - as it only appears when all of the Victims are gone from the level.
However, it is possible to get that Cheerleader (A) killed, and when this is done you can (after the other Victims are also gone) cause the Exit Door to appear, allowing you to leave - whether the boss is dead or not. (You will obviously need more than one Victim, because if you only had the one, you would fail the game as soon as you allowed her to die.)
What you need to do is to provoke the Vampire into following you, and go through the level without killing him. When you are through to the boss arena, walk into the northwest corner and wait there. The Vampire will arrive and attack you with his bat missiles; wait until your health bar empties, and you lose a life and faint. (So, you obviously need at least two lives, as well as at least two Victims.)
At this point, the Vampire flies north, over the wall, into the dungeon that holds the Cheerleader (A). If you continue to wait in the corner of the boss arena, he will proceed to kill her. (This may take him a short while.) This will result in the Exit Door opening up immediately, provided that you have collected all the other Victims. Of course, if you do not then go on to conscientiously kill the boss, this does not mean that you have properly finished the game - it is just an exploit arising from some ill-thought-out level design.
Passwords
After every fourth level you clear, you are presented with a new password. This password will allow you to return to your current point in the game (that is, the start of the upcoming level) with your current amount of Victims (after any Extra Bonus Victims that you have earned, have been applied). You will not restart with all the weapons you had; you will just have the standard Water Pistol, First Aid Kit and three lives. This makes levels much harder, as you will not have so many special items.
Use these passwords to get to any of the listed levels, with any number of Victims. You can start with ten Victims to make you feel good (expect to see their numbers quickly reduced at the higher levels!), or less than ten to increase the challenge.
| Level | 10 Victims | 9 Victims | 8 Victims | 7 Victims | 6 Victims | 5 Victims | 4 Victims | 3 Victims | 2 Victims | 1 Victim |
|---|---|---|---|---|---|---|---|---|---|---|
| 5 | XHRS | THRL | GHRT | FHRX | VHRV | PHRP | RHRK | LHRR | SHRG | WHRB |
| 9 | WBGR | GBGF | XBGD | DBGK | NBGW | LBGS | PBGG | TBGY | FBGZ | CBGX |
| 13 | GFCY | LFCP | TFCL | SFCG | BFCB | RFCR | JFCZ | PFCJ | YFCT | XFCK |
| 17 | KKYM | DKYR | ZKYP | PKYT | WKYK | SKYJ | YKYD | FKYQ | RKYL | BKYZ |
| 21 | BXBS | ZXBL | KXBT | LXBX | CXBV | FXBP | SXBK | DXBR | PXBG | VXBB |
| 25 | GYLM | LYLR | TYLP | SYLT | BYLK | RYLJ | JYLD | PYLQ | YYLL | XYLZ |
| 29 | GLZJ | LLZS | TLZF | SLZZ | BLZX | RLZY | JLZT | PLZM | YLZD | XLZG |
| 33 | XJQY | TJQP | GJQL | FJQG | VJQB | PJQR | RJQZ | LJQJ | SJQT | WJQK |
| 37 | KZVJ | DZVS | ZZVF | PZVZ | WZVX | SZVY | YZVT | FZVM | RZVD | BZVG |
| 41 | KRPY | DRPP | ZRPL | PRPG | WRPB | SRPR | YRPZ | FRPJ | RRPT | BRPK |
| 45 | BLHR | ZLHF | KLHD | LLHK | CLHW | FLHS | SLHG | DLHY | PLHZ | VLHX |
| Credits | XWJR | TWJF | GWJD | FWJK | VWJW | PWJS | RWJG | LWJY | SWJZ | WWJX |
| Day of The Tentacle | BCDF - Day of The Tentacle may be reached by entering this password, then selecting to "START" as usual once you are returned to the title screen. It may only be accessed in this way with all ten Victims. You will go to level 1 after you finish it giving you the opportunity to return for a second visit (with all the Victims you are due, and all the pickups, replaced) by collecting the Bonus Level Pickup. | |||||||||
| 33-B | XDSJ | TDSS | GDSF | FDSZ | VDSX | PDSY | RDST | LDSM | SDSD | WDSG |
