Super Smash Bros #23 The original Super Smash Bros.
Gameplay & Walkthroughs
Super Smash Bros #23

- Developer: HAL Laboratory, Inc.
- Publisher: Nintendo
- Game Rating: E (Everyone)
- Published Date:December 26, 2000
- $15 / $10 • December 1, 2001 - from a local GV kid
- Players: 1 - 4
- Miscellaneous Attributes: Vibration & Memory Card
Introduction
Super Smash Bros. is a 3D side-to side fighting game featuring 12 of Nintendo's most popular characters: Mario, Luigi, Link, Ness, Yoshi, Captain Falcon, Donkey Kong, Samus, Kirby, Fox, Pikachu, and Jigglypuff.
Super Smash Bros. 64 may not have as many moves for each character as any of the other Super Smash Bros. games that followed, but do not let this scare you away. there is plenty of depth here! Can Link beat up Mario? Can Yoshi deck Donkey Kong? Can Kirby punch out Pikachu?
Before Super Smash Bros Melee for Nintendo Gamecube, these and other age-old questions were first answered with Super Smash Bros, the original all-star Nintendo tournament fighter for Nintendo 64. Crossing multiple universes and alternate dimensions, the most popular of Nintendo's characters grace this bare-knuckle Pak.
The 12 superstars are Mario, Luigi, Donkey Kong, Link, Samus, Yoshi, Kirby, Fox McCloud, Jigglypuff, Ness, Captain Falcon and Pikachu. Each has a specific 3-D fighting arena, with power-ups and obstacles scattered throughout the areas.
Two to four players can fight simultaneously on the same screen, or one player can battle through the tournament ladder to reach a secret boss at the summit. The goal is to knock your opponent out of the playing field as many times as possible within a specified time limit. If you dominate the competition, you can kick them so hard they fly into the sky and turn into a constellation. Link hacks away with his Master Sword, Yoshi slurps up enemies and turns them into eggs, and Fox McCloud is strapped with his trusty Blaster.
If you get into trouble, any character can take advantage of classic special attack items like Fire Flowers and Bob-ombs. Super Smash Bros. is extremely easy to learn, but to become a true master takes many hours of practice. Subtle technique can mean the difference between victory and defeat, and each character has unique strengths and weaknesses to learn and put to use.
Super Smash Bros. is also full of surprises - in Pikachu's arena random Pokémon are always popping up to help and hinder the combatants. it is strange seeing two good guys like Mario and Fox McCloud butting heads - but do not worry. When the battle is over, you will discover that all of the characters are actually good friends.
Gameplay
The original Super Smash Bros. plays much like a 2-D platformer with fighting-game mechanics. Characters all have special moves and life bars, but the concept of both is innovated upon. Special Moves are simplified to a direction and a press of the B Button for every character, yielding different moves with each character, and all but one character's up-special acts as a third jump. Health is handled as an increasing percentage, with a higher percentage meaning a higher chance of being knocked off of the stage.
Unlike other fighters, ring-outs are a necessity. The titular technique, smash attacks, are performed by litterally smashing the control stick in a direction and pressing A. A mix of the moves can be utilised to succeed in Single-Player, level based modes or the frenzied 4-Player mode, where players compete to either reduce other players lives to zero or rake up the most knock-outs in a limitied time.
Single-Player Mode
In single-player mode, a player must choose a character, and fight various opponents until reaching the final showdown with the Master Hand. The player can select a level of difficulty, choosing from five difficulty levels. The single-player mode also boasts a training mode, which allows the player to practice against any unlocked opponents, on any of the playable stages. Practice modes are also available, where the player has a chance to take part in bonus stages such as Board the Platforms, and Break the Targets.
Multiplayer Mode
In multi-player mode, you and up to three friends (or, up to 3 computer players) get to choose your favorite characters, and fight it out on the stage of your choice. There are many different ways to play in the multiplayer mode. You can choose one-on-one, or team battles; and you can determine the limits of your battles, by time, or by lives.
Time Battles
In a time-battle, the game will last for a predetermined amount of time. In this mode, characters can be killed, or knocked off of the stage, an infinite number of times (as long as it is done within the time limit). The end scores are tallied by subtracting a players falls from their KO’s. In the case of a tie, the tying players must return to the stage and take part in a ‘Sudden Death’ battle. In this type of battle, each player starts off with 300% damage, so the winner is usually determined within a few hits.
Stock-Battles
Instead of a time-battle, you can choose a stock-battle. There is no time-limit in a stock-battle. Instead, each player is given a fixed amount of lives, so there is no score calculation; the last player standing is simply made the winner.
Team Battles
If you would rather play cooperatively, there is also a team battle option, which, like the one-on-one option, can be played in time-battle or stock-battle mode. The rules are the same for the team battle mode, the only difference being the calculation of the final score. In a team battle, the score is calculated by taking the KO’s from each player in the team and adding them up to form a team score.
Attacks
Each character has their own standard attacks, aerial attacks, smash attacks, special attacks, grab moves, and a taunt.
Items
A variety of Nintendo-themed items can also be used to help players fight. These range from projectiles and other weapons, to health boosting items.
Playable Characters
There are 8 characters plus 4 hidden ones that battle in arena-like stages. You must send other players out of the arena. In this section, I will list the moves for each characters and explain some strategies about how to use them efficiently, I will also rate each character. All those characters are people from different games (pikachu from pokèmon, etc...). When you see a + instead of a, in a move, it means that you must press those buttons nearly at the same time (sometimes it is somewhat tricky to pull it off). For a, you must hold the directions that is said and after that you should press the button. Some moves will send your opponents flying a long way if you have dealt enough damage to them and others will only do damage. Also, the C buttons are only used for jumping, hit a C button while in the air to do a Double Jump. Damage for the hits varies if it is a clean hit or not, if you hit someone near the end of the move you will do less damage and he'll get thrown less far.
All twelve of the characters in the Super Smash Brothers game hail from Super Mario Brothers, The Legend of Zelda, Donkey Kong, and other popular and well-known games developed by Nintendo. To make it easier to identify characters on-screen during a fight, the game utilizes symbols, which are inspired by the characters’ respective original games. Out of the twelve total characters, players start with eight, and must unlock the rest through reaching certain goals in the game, then once they have challenged you, beat them in battle and they are all yours. The eight starting characters are:
Mario (Super Mario)
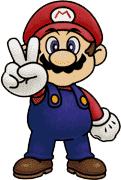
Mario has average speed and weight, but has very good jumping abilities and strong attacks. His Fireballs are bouncy, similar to most Mario games.
Special Moves
Fireball - Super Jump Punch - Mario Tornado
: Basic close quarters attack for each character. Pressing this one several times, Mario will do a punch + punch + kick combo, pause, restart. It does small damage, use this on the edge of the stage to prevent a player from coming back. DAMAGE: 1st hit = 2% - 2nd hit = 2% - 3rd hit = 4%
Up, (Uppercut): Mario will punch over his head, this move should be useful to keep your opponents in the air, it does not do much damage by itself, but you can follow up by an air attack. DAMAGE: 8%
Down, (Low Kick): Mario will crouch and kick at feet height, this move should be used only to it someone like Fox who is doing a laser barrage with his gun. DAMAGE: 12%
Forward, (Kick): Press the control stick forward and A and Mario will do a kick. This move could be like a normal attack so it is not that useful. DAMAGE: 10%
Jump and (Low Air Kick): Mario will do a Low Kick in the air. Usually nobody uses this move. DAMAGE: 11%
Up + (Head Bash): Mario will perform a hit with his head, you must be close for this hit to work, it does some decent damage, but the close range of the hit makes it less effective. It will send your enemies flying in a flash too. DAMAGE: 16%
Down + (Trip Kick): Mario will do a kick around him. This move has more range than the Head Bash and it hits all around you so it should be used instead of the Head Bash. DAMAGE: 14%
Forward + (Charged Punch): Mario will do a strong punch in front of him. It is a good move, has it deal some damage and send your opponents away. DAMAGE: 14%
Running stance, (Slide): Press A while running (tap the control stick to make your character run) and Mario will make a sliding move a short way. This can be useful to surprise opponents and it will send them flying too. DAMAGE: 9%
Jump and Down, (Spinning Kick): Mario will do Spinning kick like in Super Mario World, but this time in diagonal. Do not let the multiple hits and damage impress you this move is not so good, usually use the Spin instead of this. DAMAGE: 3% per hit
Jump and Up, (Round Kick): Mario will do a round kick toward the sky. Use this move after an Uppercut to send your opponent higher. DAMAGE: 9%
Jump and Back, (Air Kick): Mario will do a kick behind him while in the air. This or the Drill Kick should be used to send opponents who are coming back on the ground on the side of the stage. DAMAGE: 12%
Jump and Forward, (Drill Kick): Mario will drill his body in front of him while in the air. This or the Air Kick should be used to send opponents who are coming back on the ground on the side of the stage. DAMAGE: 12%
B button (Fireball): Mario will launch a basic bouncing fireball, it is a little slow to launch and does not do much damage. Use it has an harassing technique to bring your opponents to you if you are away. (You can launch it in the air) DAMAGE: 6%
Up, B (Jumping Uppercut): Mario will do a jumping uppercut done diagonally. Any enemy caught with this technique will receive a fair amount of damage and will be tossed away. This is one of the best moves to execute has it has a quick recovery. You can use it to come back on the arena if you are missing and if an enemy his waiting for you on the edge he will be caught by the move and you will come back safely. DAMAGE: 2% per hit (1 coin = 1 hit)
Down, B (Spin Assault): Mario will spin and if an enemy is near him he will take an hefty amount of damage and get tossed up. This his a GREAT move if you hit them at the beginning of the spin. Use this move on groups of enemies and follow it with a Jumping Uppercut you will do a near 30-40 damage in no time. If an enemy is falling on you use this move, he/she will be surprised!! (You can use it in the air, but it is not as strong) DAMAGE: 1% per hit, 3% for the last punch where he throws them in the air.
L button: The taunt button. Mario will become BIG and after a little time, will regain normal height. Do not do it unless you are out of danger because you are bigger than DK when you do this.
A, B or R button when landing on belly (Head Turn): Mario will get up by spinning his head around, cleaning a little space around him. DAMAGE: 6%
A, B or R button when landing on back (Feet Turn): Mario will spin his feet around him to clear the space to get up. DAMAGE: 6%
A or B button when hanging from a ledge (Climbing Kick): Mario will throw himself over the ledge and kick at head height. This move is done if you are under 100% damage. DAMAGE: 6%
A or B button when hanging from a ledge (Low Kick): Mario will climb up the ledge and execute a low kick. This move is down if you are over 100% damage. DAMAGE: 6%
Pressing Forward when holding an opponent (1 Turn Throw): Mario will spin around once and launch the opponent into the air. DAMAGE: 12%
Pressing Back when holding an opponent (3 Turns Throw): Mario will spin around 3 times, the velocity of the movement will lift the opponent a little and finally he will launch the opponent into the air. Great throw because you use the enemy to clear space around you. DK is the best because of his size. DAMAGE: 16%
Playing As: With Mario, use the Spin Assault and Jumping Uppercut combo to do big damage. When your opponents are high on damage and they are in the air, use the drill kick or air kick to send them on the side of the arena. You can also use his fireballs to harrass opponents while staying far away.
VS Mario: Do not stay above Mario, he can easily juggle you out of the stage or throw you off-course from the air, it is best to stay on the ground and close to him so you do not get pummeled with fireballs. Learn to predict his Jumping Uppercut move, so you can hit him out of the field once he falls after executing it, he's helpless until he touches the ground at that moment.
Overall: 8/10 Mario his a good fighter with quick recovery. His moves are well done and useful, but his throw must be executed at close range. When playing a 4 player Free-For-All, he can be hard to play with. When he is 1vs1, he can be a very dangerous foe. He is an easy-to-learn character with nearly no pause between attacks. If you are a beginner, pick Mario.
Donkey Kong (Donkey Kong Country)
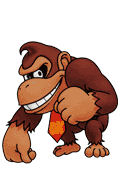
Donkey Kong is one of the strongest characters and is a heavy-weight character. When he picks up a character, he can carry them for a short distance. He can also charge up his Giant Punch to make it more powerful.
Special Moves
Giant Punch - Spinning Kong - Hand Slap
A button: DK will do 2 punches, pause, 2 punches.... Basic attack, useless. DAMAGE: 1st hit= 4% - 2nd hit= 4%
Up, A (Overhead Slap): DK will slap over his head, this move is slow and should only be used if there's no danger around. DAMAGE: 10%
Down, A: (Low Slap): DK will do a low slap, this move is slow and useless. DAMAGE: 6%
Forward, A (Strong Punch): DK will punch in front of him. Stronger than the basic move but not more than that. DAMAGE: 10%
Jump and A (Shoulder Spin): DK will spin in the air and hit people with his shoulders. DAMAGE: 12%
Up + A (Upper Clap): DK will clap his hands over his head, use this instead of the slap to keep an opponent in the air, it will send them a long way up also. DAMAGE: 16%
Down + A (Spinning Donkey): DK will sit down and spin with his legs stretched. Use this to clear the space around you has it has a large radius and it his executed fairly quick. DAMAGE: 16%
Forward + A (Strong Slap): DK will slap strongly in front of him. This move is very strong if you can connect with the opponent. DAMAGE: 16%
Running Stance, A (Running Kick): DK will kick in front of him while running. This move is quicker than his other moves and has a good radius. Watch out because his running is not too fast compared to other characters and the recovery from this move is slow. DAMAGE: 10%
Jump and Down, A (Falling Feet): DK will stretch his body, feet downward, to hit players under him. To move is quick and good. It does good damage too. It will propel your opponents straigth downwards, use it above holes to send them to their doom! DAMAGE: 10%
Jump and Up, A (Flying Overhead Slap): Same has Overhead Slap, but in the air. DAMAGE: 9%
Jump and Back, A (Side Kick): DK will kick behind him while in the air, this move is good to send other characters farther when they're jumping. DAMAGE: 12%
Jump and Forward, A (Flying Ball): DK will roll in the air in front of him. This move actually sends people downward at an incredible speed and you can easily smash down in the hole any player that are trying to come back, much like Ness' Squash move, but with greater range. DAMAGE: 12%
B button (Charge Punch): Press B one time to charge (it takes quite a while), after that press B to do a STRONG punch. This punch is deadly if DK can get it charged up. You will go flying far even at 0% damage. The only problem is the charging time. Find a safe place to charge it. (You can start it in the air, but it is not recommended). The charging will be reset if you are hit during the process, you can be interrupted while punching and it will negate the charging, the recovery from this one is slow also... DAMAGE: Not charged = 11% - Charged = 33%
Up, B (Flying Tornado): DK will float in the direction you are facing while turning on himself with his arms stretched. You can use this move to come back a LONG way if you have been sent far away. This move can clear up much space and it is quick. The only drawback is, one time you started it, you must finish it. (Exception: If you get hit, you will have to restart the move. You can use it in the air) DAMAGE: 6%
Down, B (Ground Hammering): DK will hit the ground with his two hands. This move sends all opponents (on the same floor and a short distance away from you) in the air. it is quite strong and you can do it indefinetly with no pause between each. (If you set the game to 200% Damage, this move will send everyone in space nearly everytime, you will rack up big scores this way.). In Mushroom Kingdom Stage, if you do this under the brick ceiling to the left of the stage, they cannot escape from it!! (Infinite combo!!) DAMAGE: 8%
L Button: DK will put his hand by his head and move it. Use this to tick your opponent.
A, B or R button when landing on belly (Back Slap) : DK will do a slap behind him while getting on his feet. DAMAGE: 6%
A, B or R button when landing on back (Retracted Feet) : DK will retract his feet then let go of them to get up. DAMAGE: 6%
A or B button when hanging from a ledge (Sitting Hit) : DK will throw himself over the ledge and let himself slide a little while sitting. Clears a bigger space than other characters. This move is done is you are under 100% damage. DAMAGE: 6%
A or B button when hanging from a ledge (Low Slap) : DK will climb the ledge and do a low slap. This move is done when over 100% damage. DAMAGE: 6%
Pressing Forward when holding an opponent (Carrying Throw): DK will carry the opponent on his back and move until you find a good place to throw them. Good throw because you can move. Opponents can escape this by quickly pressing different buttons. DAMAGE: 8%
Pressing Back when holding an opponent (Under The Arm Throw): DK will throw the opponent behind him from under his arm. DAMAGE: 14%
Playing As: Charge his punch everytime you are not the target of your enemies. (hard to do if you are 1vs1) This way you can do big damage. The only other combo to use the Ground Hammering and an air hit after. The only trick is that he can move after getting hold of someone (R button). This way, you can grab new opponents (0% damage) and walk your 200% and + damage DK in the hole with him so you take his life with yours!! (cheap but effective). A trick is to grab an opponent, jump over the ledge, throw them away and float back to the ground. Grab them once they come back and repeat until they do not come back.
VS Donkey Kong: Be careful around him, he might be slow but he'll hit you hard if you do not watch out. Never let him charge his punch fully, and if he succeeds, be on the lookout for it at all times... If he grabs you and moves around, quickly press all the buttons and twirl the Control Stick as fast as you can to break free quickly (You can break free almost as soon as he grabs you if you are quick). Beat on him from a distance as he do not possess ANY projectile attacks without items, so be sure to use those projectiles to soften
Overall: 5/10 DK is an extremely strong character, but he pays too much for that. First, he is THE slow guy, all his attacks are slower than the others and he moves slower than the others. Second, he is the biggest target in the game. Third, he does not have any projectiles. Your best bet is to rush to the projectile-thrower. Fourth, he does not have much chances against a good player in a 1vs1 match (He's just too slow and too big). Lastly, his jump is not so good, he does not jump high and his comeback move (Flying Tornado) is mostly done horizontaly. His only good advantage is the fact that he can move after getting hold of someone. He can be very good in a team as a finisher.
Fox McCloud (StarFox)
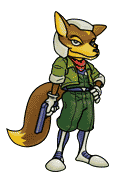
Fox is a fast and light character with average strength. His blaster can stun opponents, thus stopping them in their tracks. He can use his Reflector to reflect projectiles, including thrown items.
Special Moves
Blaster - Fire Fox - Reflector
A button: An attack much like Kirby's basic attack, but this time with kicks. You don,t have a very long range with this attack also. DAMAGE: 1st hit = 4% - 2nd hit = 4% - Quick kicks = 1% each
Up, A (Sky Kick): Fox will kick over his head. Much like Kirby's. DAMAGE: 7%
Down, A (Sweep): Fox will sweep his tail (not sure) across de ground. DAMAGE: 9%
Forward, A (Kick): Fox will kick in front of him. Decent, but not much about it. DAMAGE: 7%
Jump and A (Low Air Kick): Pretty much like Mario. DAMAGE: 11%
Up + A (Flip Kick): Fox will do a Flip Kick. Much like another character move. This move is an excellent move for kepping those nasty opponents of yours in the air. DAMAGE: 12%
Down + A (Split): Fox will do some sort of split. Clear a small area around you, Fox is fast so use it because it is extremely fast. DAMAGE: 11%
Forward + A (Jumping Drill): Fox will jump a little and drill with his feet. With a range it is useful, also it is a pretty good move because opponents usually do not have time to block it. Not really strong though. DAMAGE: 13%
Running Stance, A (Power Kick): Fox will kick while running thus, breaking his run. Good clearance move considering the speed at which he runs. DAMAGE: 8%
Jump and Down, A (Spinning Kick): Fox will do a move like Mario's Spinning Kick. Good, but not strong at all. DAMAGE: 2% per hit
Jump and Up, A (Vertical Flip): Fox will flip his body vertically. Good to juggle with players in the air. Very decent hit range if both hits connect, can kill an opponent easily. DAMAGE: 1st hit = 6% - 2nd hit = 6%
Jump and Back, A (Air Split): Much like the Split but in the air. Use it as a Knock-off move. DAMAGE: 9%
Jump and Forward, A (Drill Kick): Like Mario's Drill Kick DAMAGE: 9%
B button (Laser Shot): Fox will shoot a laser with his gun. it is the fastest projectile attack in the game and does 6% per shot, very harrassing. A good tech to use to soften up your opponents from a range. DAMAGE: 6%
Up + B (Flaming Fox): Fox will charge-up and blow in flames in one direction (the one you are pointing with the control stick at the end of the charge-up). Very useful for coming back safely on the ground, but the charge-up animation leaves an opening for a hit also... DAMAGE: 12%
Down + B (Repulsive Shield): Fox will set-up a shield around him. This shield will reflect any projectile thrown at you . it is clear now, ANY projectiles will deal 0% damage to Fox while shielded, this is a EXTREMELY good move against projectiles. Anything reflected does double damage to the target. It can be used when near an opponent to electrocute the opponent and throw him back a bit.
EXCEPTION: The Bob-Omb item will not be reflected, it will explode upon contact of the shield and pierce through it, the shield DOES protect you agaisnt it, but will break and damage you because of the blast of the explosion. SO keep watch for those pesky little items... DAMAGE: 4%
L button: Fox will cross his arms and look away, like if he's provocating the enemy.
A, B or R button when landing on belly (Backward Kick) : Fox will kick behind him while getting up. DAMAGE: 6%
A, B or R button when landing on back (Frontal Kick): Fox will kick in front of him while getting up. DAMAGE: 6%
A or B button when hanging from a ledge (Climbing Drill Kick) : Fox will throw himself over the ledge and do a drill kick. This move is done if you are under 100% damage. DAMAGE: 6%
A or B button when hanging from a ledge (Round Kick): Fox will climb the ledge and execute a round kick. This move is down if you are over 100% damage. DAMAGE: 6%
Pressing Forward when holding an opponent (Over Shoulder Throw): Fox will turn around and throw the opponent over his shoulder. DAMAGE: 12%
Pressing Back when holding an opponent (Feet Throw): Fox will lie on the ground and throw the opponent by using his feet to launch him behind him. DAMAGE: 16%
Playing As: With Fox, use your Laser Shot a lot, it travels a great way so use it, it is the fastest projectile in the game and deals a fair amount of damge too. Also, when you grab an opponent, you will want to throw him behind you. Why? because you throw it farther this way. Also, watch for projectiles, if you see one coming just use the Repulsive Shield. His close-range attacks aren't very strong, you,re better off using his speed to keep away from the enemy until they're at 50~70% so you can try to knock them off the stage. One of the few close-range techs to use is to send your opponent above you and annoy them with the Vertical Flip attack to send them off the stage. Fox is a great air fighter.
VS Fox: The only real advantage Fox has agaisnt anybody is his awesome speed that can be used to avodi you and pummel you with various projectiles. The point is to get near him and hammer at him with close-range moves, Fox' moves aren't that strong to deal with and any character can usually withstand them fine. Avoid using shots or projectiles against him because of his Repulsive Shield. Avoid fighting in the air against Fox for he can easily counter you with his Vertical Flip attack.
Overall: 9/10 Fox is the fastest character in the game (In terms of moves). He moves fast and his moves are fast. Also he got the best projectile attack. However, he does not have any really strong move. you will have to rely more on his speed than his power. In a 3vsFox match, He has the advantage of speed upon power (which is THE fact in 3vs1 games). The fact that his Repulsive Shield actually shields him from ALL projectiles is a pretty good asset. Try to master the shield to put it in time and people will want to rely more on close attacks than projectiles to kill you. Also use his Flip to juggle opponents it is pretty annoying for those who try to get back on the ground.
Kirby (Kirby)
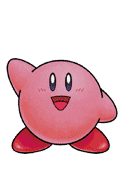
Kirby is a light, fast character. He can multi-jump in the air and his special Swallow move allows him to copy other characters' abilities.
Special Moves
Swallow - Final Cutter - Stone
A button: An attack much like Link basic sword attack but this time with punches. Press A repeatedly to do a 3 hits per second attack. DAMAGE: 1st hit= 3% - 2nd hit = 4% - Quick punches = 1% each
Up, A (High Kick): Kirby will kick above him. It does some damage and keeps opponents form touching the ground. DAMAGE: 11%
Down, A (Ground Kick): Kirby will kick at feet height. DAMAGE: 7%
Forward, A (Middle Kick): Kirby will do a middle kick in front of him. Strong, but not that useful. DAMAGE: 8%
Jump and A (Low Air Kick): Much like Mario. DAMAGE: 8%
Up + A (Circle Kick): Much like High Kick but stronger. it is nto very strong and powerful, but sends your opponent in the air a bit, perfect to start juggling. DAMAGE: 12%
Down + A (Split Kick): Kirby will do like DK's Spinning Donkey, but with lower range and it is not as strong. DAMAGE: 14%
Forward + A (Powered High Kick): Kirby will do much like Samus's Round Kick, but in a different fashion. It will send your opponents flying quite a bit, and it works over a short distance, good for surprise attack from a small range... DAMAGE: 13%
Running Stance, A (Head Slide): Kirby will slide with his head first. Strong and throws back. DAMAGE: 8%
Jump and Down, A (Spinning Kick): Kirby will spin diagonally and deliver some damage to opponents with a multihit. Strong and has a pretty good recovery. DAMAGE: 2% per hit
Jump and Up, A (Air Cartwheel): Kirby will spin like a wheel in the air. You should use this to throw away characters as it do much damage and throws back. it is an all-aroudn attack also, ideal to use. DAMAGE: 8%
Jump and Back, A (Reverse Kick): Kirby will kick behind him, much like the kicks from other characters. DAMAGE: 12%
Jump and Forward, A (Spinning Kirby): Kirby will spin horizontaly in the air. A multi-hit attack that does not damage or throws back very much, use the Reverse Kick instead. DAMAGE: 2% per hit
B button (Inhale): Inhale an opponent and copy his B button technique. This way you can get the projectile attack you want. You can also spit back the enemy by pressing A instead of B to copy his tech. DAMAGE: 5%
Up, B (Sword Attack): Kirby will smash his sword down and it will leave a wave to damage opponents. A trademark from previous Kirby games. Strong and can be used as a comeback move. DAMAGE: 1st hit = 6% - 2nd hit = 2% - 3rd hit = 3% - 4th hit = 5%
Down, B (Stone): Kirby will turn into a stone and crush anyone under him. Another trademark from Kirby's games. it is extremely strong and much like Yoshi's Head Stomp, but you get an extra protection from the brick form. Nothing can damage you when you are in the form of a brick, the only way for your opponents to damage you is to use a grab attack. DAMAGE: 15%
L button: Kirby will salute in one direction. This move also release the B button attack you got from inhalation. Can be useful if you want another projectile attack than the one you got.
A, B or R button when landing on belly (Half-Circle Kick) : Much like Samus. DAMAGE: 6%
A, B or R button when landing on back (Foot Turn) : Much like Mario, but with only 1 foot. DAMAGE: 6%
A or B button when hanging from a ledge (Splatter Step): Kirby will throw himself over the ledge and stand with his feet first, effectivly hitting anyone standing near. This move is doen if you are under 100% damage. DAMAGE: 6%
A or B button when hanging from a ledge (Kirby's Bash): Kirby will climb the ledge and hurl himself in front of him to hit opponents. This move is down if you are over 100% damage. DAMAGE: 6%
Pressing Forward when holding an opponent (Ballistic Throw): Kirby will lift HIGH into the air and smash the opponent on the ground. DAMAGE: 12%
Pressing Back when holding an opponent (3 Turns Throw): Kirby will hit the opponent on the ground behind him by passing the opponent over him. Using this throw sends your opponent farther horizontaly and is faster to execute. DAMAGE: 16%
Playing As: With Kirby, always try to get a projectile you are good with, even if you do not use projectiles often, the extra attack can be useful. This can help a lot. Also his Stone attack is a very strong move use it a lot, also, on a inclined terrain the rock will slide and crush anybody on it is way. Also use his Sword as it can get many opponents with the wave. Use the Powered High Kick attack to send your opponents away easily.
VS Kirby: There is not that many weakpoints to exploit agaisnt Kirby, he can come back easily and counter msot of what you woudl try agaisnt him. His comeback move is more vertical than horizontal though. A fight agaisnt him should be well-balanced, use his light weight agaisnt him by jugglign him in the air with strong upward moves.
Overall: 8/10 Kirby has a few strong moves and get the distinct advantage in projectiles as he can get anything other players have. His double jump will let you travel pretty far (you know the balloon trick in other kirby games?). Also he can clear up an area quickly with his Stone attack, he also benefits the extra protection of the rock form. He will take sometime to master properly however, one time you are good with him, you can easily kill careless players.
Link (Legend Of Zelda)

Link is a character with medium weight, strength and speed. Most of his attacks center around his sword, and Link also has a number of projectiles in Bombs and a Boomerang.
Special Moves
Boomerang - Spin Attack - Bomb
A button: If you press repeatedly the A button, he will hit with his sword at a very great speed (3 hits per second) until you stop pressing the button use this on opponents in corners to whittle them down (1% damage per sword hit, you will litterally pin them there, you can wait for them to reach 700% if you want to!! on a 1vs1 match of course) or use it on the edge of the arena to keep a player from coming back by grabbing the ledge. DAMAGE: 1st hit = 5% - 2nd hit = 3% - 3rd hit = 4% - Quick stabs = 1% each
Up, A (Overhead Slash): Link will swing his sword over him. Good to keep opponents flying. DAMAGE: 8%
Down, A (Low Thrust): Link will thrust his sword at feet height. Not a good move, just forget it. DAMAGE: 10%
Forward, A (Front Slash): Link will swing his sword from over his head to the ground in front of him. This move is strong for a normal move. In fact, you should use it whenever you want to hit in front of you it is the best move to do so. This move can block projectiles too. DAMAGE: 14%
Jump and A (Single Kick): Link will do a single kick in the air. DAMAGE: 8%
Up + A (Upper Stabs): Link with hit with his sword 3 times over him. Stronger than the Overhead Slash, just make sure to hit your opponent. DAMAGE: 1st hit = 6% - 2nd hit = 3% - 3rd hit = 9%
Down + A (Round Swipe): Link will swing his sword from the front to the back. Use it to clear the area around you. DAMAGE: 14%
Forward + A (Souped Frontal Slash): Same as Front Slash but stronger. This move is very strong, in fact it is so strong that you can use this and your opponents will go flying far if they're over 50%, probably killing them. It is executed fairly quick too and has a wide radius of attack. DAMAGE: 20%
Running Stance, A (Dashing Thrust): Link will thrust his sword in front of him and slide some distance with his sword out. This move is good, use it to clear a group of opponents easily. You can start it a little way from them because you will slide a little. DAMAGE: 11%
Jump and Down, A (Downward Thrust): Link will point his sword downward when falling. it is strong and easy. You can get more than one enemy with this because you will bounce a little when you hit someone so get another hit if there's someone near, or get a second hit on the same person. DAMAGE: 12%
Jump and Up, A (Upward Thrust): Link will point his sword upward and hit anybody who is over him. it is strong but not as powerful as the Downward Thrust. DAMAGE: 14%
Jump and Back, A (Double Kick): Link will do a double kick in the air (one kick right, one kick left). This move does not do much to your opponents, and does not make them fly far either. DAMAGE: 1st hit = 8% - 2nd hit = 8%
Jump and Forward, A (Flying Swipe): Link will swing his sword in the air. Use this to send your opponents away, a lot more powerful than the Double Kick. DAMAGE: 12%
B button (Boomerang): Link will throw his boomerang one of three directions (decide by the control stick when he is preparing to throw it) diagonally up or down or in front of him. You can hit enemies when the boomerang is coming back. DAMAGE: 8% when throwing the boomerang, 6% when boomerang is coming back.
Up, B (Spin Slash): Link will spin his sword around him. This move can be done in the air and on the ground, its radius is more wide on the ground. You can use it has a comeback move of good power. Use it to clear the area around you when you are on the ground. DAMAGE: 12%
Down, B (Bomb): Link will get a bomb from behind him and you can throw it with the A button. Throwing with the A button makes the bomb explode on impact while throwing with the B button makes the bomb bounce off enemies for a bit of damage and explode once the timer has ran out. The bomb lasts for about 4 seconds. DAMAGE: 7% for getting hitten by the bomb, 7% from the explosion.
L button: Link will pull back his sword with some fancy move. it is a taunt so do not use it unless you are feeling careless.
A, B or R button when landing on belly (Half-Circle Swipe) : Link will get up by doing an half circle swipe around him. DAMAGE: 6%
A, B or R button when landing on back (Inverted Half-Circle Swipe) : Same as the other but starts from the other side. DAMAGE: 6%
A or B button when hanging from a ledge (Frontal Slash) : Link will throw himself over the ledge and do a frontal slash. This move is done if you are under 100% damage. DAMAGE: 4%
A or B button when hanging from a ledge (Upward Stab) : Link will climb up the ledge and do an upward stab on the way up. This move is done if you are over 100% damage. DAMAGE: 4%
Pressing Forward when holding an opponent (Knee Throw) : Link will launch the opponent by hitting him with his knee. DAMAGE: 12%
Pressing Back when holding an opponent (Backward Kick Throw) : Link will put his opponent behind him an launch him with a backward kick. DAMAGE: 16%
Playing As: Link is a pretty powerful fighter. Use his slash attacks to make big damage and send opponents flying. If a character is making a barrage of projectiles, jump and throw him a bomb to take care of him. Also keep on the lowest level (Exception: Samus's Stage), because you are more able to hit opponents from under than from over. Another good point is the fact that is Slash will block shots and projectiles. Take advantage of his strength fully, because he does not have much to come back on the stage, easily killed if thrown off. Be sure to take advantage of his grab over a distance.
VS Link: Take advantage of his poor recovery, his Spin Slash attack will leave him helpless for a small while when he lands, and this is perfect for you to grab him and throw him off the ledge. Throwing him off is the best way to prevent him from using his strong attacks on you, he'll be too busy trying to get back on the ground. There is no real other advantage agaisnt him as his recovery for his other moves is fast enough to prevent you from doing anything in that short moment.
Overall: 7/10 Link is a powerful character with strong moves and a good speed. He jumps high enough and his Spin Slash can be very dangerous when used properly. He has a drawback however, his throw has a range but it is quite slow if you miss your shot so... The boomerang and the bombs are good projectiles attacks even if they do not have the range of Fox Laser's or Luigi's Fireball. He can handle close and projectiles fights very well and does not fear a 4 player Free-For-All. He has a real hard time when it comes to coming back on the board his Double Jump and Spin Slash do not raises him very much. However, Link controlled by a good player is an extremely dangerous foe and should be watched at all costs...
Pikachu (Pokémon)
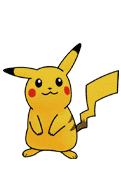
Pikachu is fast and light. It mostly uses its electric attacks to damage other enemies. Pikachu has weak attacks as well.
Star Stamp
Thunder Jolt - Quick Attack - Thunder
A button: Pikachu will simply hit in front of him with his head. Weak, but done quickly enough. DAMAGE: 2%
Up, A (Overhead Tail): Pikachu will hit his tail over him. Much like the Overhead Kick from other characters. Use this move quickly on fresh new opponents to build up a bit of % before they get out of range. This move is weak enough to only knock them away from you when they are a little high on %. DAMAGE: 6%
Down, A (Tail Trip): Pikachu will try to trip you with his tail. DAMAGE: 9%
Forward, A (Sideway Kick): Pikachu will do a Sideway Kick. DAMAGE: 8%
Jump and A (Low Air Kick): Same as Mario. DAMAGE: 11%
Up + A (Tail Whip): Pikachu will whip with his tail over his head. Much like the Overhead Tail, but a little stronger. DAMAGE: 14%
Down + A (Low Kick): Much like other characters Low Kick. it is weaker this time. DAMAGE: 12%
Forward + A (Shock Treatment): Pikachu will electrocute in front of him. Low in damage, high in power. It will sned your opponents flying quite a bit far away. DAMAGE: 8%
Running Stance, A (Head Ram): Pikachu will ram with his head. Knocks opponents back a bit, but remains a weak attack. DAMAGE: 9%
Jump and Up, A (Spinning Tail): Pikachu will spin his tail over him. it is weak, but you can juggle a little with this. DAMAGE: 8%
Jump and Down, A (Electric Stomp): Pikachu will hit players under him with his body charged with electricity. Good move to use on opponents under you, it will damage them a bit and send them over a distance. DAMAGE: 10%
Jump and Back, A (Reverse Kick): Much like another Reverse Kick, but it is weaker. DAMAGE: 12%
Jump and Forward, A (Drilling Electricity): Pikachu will drill forward with his body charged with electricity. It will hit your enemy multiple times for a decent amount of damage, use this move to soften up your enemy when they jump in the air. DAMAGE: 3% per hit
B button (Electric Slinky): Pikachu will send a ball of electricity that will act as a slinky when it touches a surface. It can reach a LONG way before wearing out, but it is slow and overall weak. DAMAGE: 5%
Up, B (Teleport): Pikachu will teleport in a direction decided by your press of the Control Stick in the desired direction. This is not an attack, there is a way to pull off a double teleport, just press the control stick quickly in another direction while doing the first teleport for Pikachu to do a Double Teleport. A great comeback move so you can get back to the arena safely.... DAMAGE: 0%
Down, B (Thunderbolt): Pikachu will send a Thunderbolt from the sky, it will hit the first obstacle in its path. If it hits Pikachu, he will be surrounded by electricity for a little time (useful for knocking away nosy opponents). The bolt of lightnign itself does not hit for much power, but if the opponents are hitten by the electricity around Pikachu, they will fly a long distance away. DAMAGE: 12% when opponents hit the electricity surrounding Pikachu, 9% when they hit the Thunderbolt itself.
L button: Pikachu will say: "PIKA, PIKA!!" it is kind of irritating if someone always does it because it seems his voice covers much of the sound when he speaks.
A, B or R button when landing on belly (Tail Turn): Pikachu will get up by making his tail spin around. DAMAGE: 6%
A, B or R button when landing on back (Feet Turn): Much like Mario. DAMAGE: 6%
A or B button when hanging from a ledge (Small Low Kick): Much like Yoshi. Done if you are under 100% damage. DAMAGE: 6%
A or B button when hanging from a ledge (Tail Swipe): Pikachu will hit with his tail after climbing the ledge. This move is down if you are over 100% damage. DAMAGE: 6%
Pressing Forward when holding an opponent (Round Throw): Pikachu will pass the opponent under him and behind him to throw him from over him. DAMAGE: 12%
Pressing Back when holding an opponent (Electric Throw): Pikachu will put the opponent on his back an launch them by sending an electric current in thier body. This throw sends the enemy farther than the front throw. DAMAGE: 16%
Playing As: The only way to deal much damage is to do a Drilling Electricity on your target and do a Thunderbolt immediatly when you touch the ground to catch him while he's down. However this combo does not do more than 30% damage so it is still not much. You can still use your thunderbolt to pummel the players on the upper platfroms by staying under these platforms. If enemies start to close in on you use the Thunderbolt or Double Teleport away. The best way is to use harrassing techs to soften your opponent until he/she is at about 70% damage, then try to knock him/her off with Shock Treatment.
VS Pikachu: Light-weight enemy with only little defense agaisnt you. Be wary of his Thunderbolt attack and roll out of the way when he performs it, roll back to Pikachu and grab him once he's recovering. Try to anticipate the telports also, you can easily knock pikachu off his teleportations with a bit of practice. Sicne this move does not grant him any defense except the speedy warp.
Overall: 5/10 Pikachu is the weakest character in the game. He has a medium speed, but he's just too weak. The Thunderbolt is his only powerful attack, it has some delay on it and an opponent only need to hit you to knock you out of it. At least DK was STRONG and slow, but he is not fast and his attacks are much weaker than the others. Practice is the only way to be efficient with Pikachu.
Samus (Metroid)
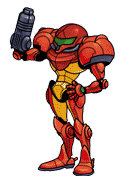
Samus is a slow and heavy character with powerful attacks. Her Grapple Beam allows her to grab characters from far away, and she can power up her Charge Shot for a stronger attack.
Special Moves
Charge Shot - Screw Attack - Bomb
A button: 2 punches combo, pause, 2 punches. DAMAGE: 1st hit = 3% - 2nd hit = 6%
Up, A (Overhead Kick): Samus will do a kick over her head. Decent, but not so useful. DAMAGE: 6%
Down, A (Trip Kick): Samus will do a trip kick. Useless. DAMAGE: 10%
Forward, A (Round Kick): Samus will kick from in front of her to behind her in a round pattern. This move has two good hits in it so... you decide. DAMAGE: 8%
Jump and A (Flying High Kick): Samus will kick at head height while in the air. DAMAGE: 12%
Up + A (Flamethrower): Samus will throw flames in a 1/4 circle fashion over her. Good for keeping away nosy opponents, VERY damaging also. DAMAGE: 8% per hit
Down + A (Power Trip): Samus does a powered Trip Kick. Pretty much the same as Trip Kick but stronger. DAMAGE: 12%
Forward + A (Blast Punch): Samus will punch with her gun. Great speed and a powerful move. Its range is good also. DAMAGE: 18%
Running Stance, A (Ramming): Samus will tackle her opponents while running toward them. Good for clearing space. DAMAGE: 9%
Jump and Down, A (Blaster Hit): Samus will roll in the air with her blaster in front. This move will send those you hit straigth down without them being able to react, use it to send your opponents to their doom. DAMAGE: 11%
Jump and Up, A (Flashy Kick): Samus will kick to the upper-right with her head in the lower-left. it is flashy but not useful it does not do enough damage to justify it. DAMAGE: 2% per hit
Jump and Back, A (Reverse Kick): Samus will kick behind her while in the air. Good move to send opponents into the side of the stage. DAMAGE: 11%
Jump and Forward, A (Air Flamethrower): Same as the Flamethrower, but in the air. Use it to clear your landing as it spews flames right under you. The damage inflicted is less impressive than the ground-based Flamethrower attack. DAMAGE: 4% per hit
B button (Charged Shot): Press B to charge and B to shoot after being charged (Samus will be flashing once she is charged). This move does the nearly the same damage as DK Charged Punch, but it is better because it as a range (I mean a VERY LONG range). If you are hit during the charging process, it will reset to zero and you will have to restart charging, you can be interrupted into firing the shot, so be sure of what you do when you shoot... The projectile is fairly fast too. DAMAGE: Not Charged = 3% - Charged = 25%
Up, B (Screw Attack): Samus will do her multihits attack from previous Metroid games. This attack is almost inevitable, if you are caught just wait for it to finish. It deals a fair amount of damage, but you are highly vulnerable after it. Samus benefits of a small span of invincibility while performing this, most opponents that try to hit her while she performs that move will be sucked into the attac kand hit instead. DAMAGE: 2% per hit
Down, B (Metroid Bomb): Samus will roll in a ball and drop a Bomb. You can use it in the air to drop it on groups of enemies. This bomb is not strong it does minor damage and should be used as an harrassing technique and not a main technique. Use it to build the % of enemies. DAMAGE: 7%
L button: Samus will lift her blaster and shake it a little. it is not even noticeable unless you see your character in close-up so forget it.
A, B or R button when landing on belly (Half-Cicrcle Kick): Samus will get up by by sending her feet in an half-circle motion over her to the ground. DAMAGE: 6%
A, B or R button when landing on back (Inversed Split): Samus will get up by doing a split over her head. DAMAGE: 6%
A or B button when hanging from a ledge (Head-To-Ground Kick): Samus will climb the ledge and go a kick at head height and bring her leg back to the ground. This move is done if you are under 100% damage. DAMAGE: 6%
A or B button when hanging from a ledge (Punch): Samus will climb up the ledge and do a basic punch. This move is down if you are over 100% damage. DAMAGE: 6%
Pressing Forward when holding an opponent (Forward Release): Samus will release the hook in front of her, sending the opponent flying. DAMAGE: 12%
Pressing Back when holding an opponent (Over The Shoulder Release): Samus will release the hook over her shoulder, sending the opponent flying behind her. DAMAGE: 16%
Playing As: With Samus, try to always use your screw attack against enemies. Too, if a Yoshi makes an egg out of you, just use this move upon exiting the egg so you catch him off guard. Try to charge your shot as much as possible, with it, you can catch an opponent that is the other side of the screen and deal him the same damage as if close so... Try to use her Air Flamethrower to clear the space under her. Her Flamethrower attack on the ground is perfect to deal large amounts of quick damage to an enemy, use it well. do not abuse her throw too much, as it is rather slow to execute, especially if it misses it leaves a large window of opportunity to catch you off-guard.
VS Samus: Samus' techs are mostly defensive, being reckless and bold against her will get you burned agaisnt a good player. The use of harrassing projectiles here will pay off to wear her down. You cannot juggle her easily in the air because of her flamethrower and bombs. Use her slow falling agaisnt her by pummeling her with stuff while she falls. Also, once she executed her Screw Attack, NOW is the time to knock her to the side of the screen, nearly guaranteeing a kill if she was damaged a bit already. Take advantage of her predictable throw also, jump in the air when she starts to throw her hook at you and grab/hit her while the hook comes back, yo ugot a large window of opportunity if you avoid her grab.
Overall: 7/10 Samus is mostly defensive, she has strong moves (Screw Attack and Charged Shot) and she has great clearing attacks (Flamethrower). 1vs1 matches are the best with her, with all those defensive moves she has. Her kicks and punches are weak so do not rely on them. She has a good comeback move and can be hard to throw off-board. Use her in a team to tick of your opponents with her Screw Attack.
Yoshi (Super Mario)
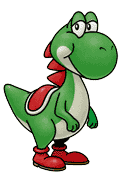
Yoshi is a fast and middleweight fighter with strong smash attacks. Unlike other fighters, Yoshi's shield is not an energy bubble but a green-spotted Yoshi Egg. He does not have a third jump, but his second jump gives him a knockback immunity to make up for that.
Star Stamp
Egg Lay - Egg Throw - Yoshi Bomb
A button: 2 kicks, pause, 2 kicks.... DAMAGE: 1st hit = 3% - 2nd hit = 5%
Up, A (Head Hit): Yoshi will hit his head above him. Not useful at all, it is too weak. DAMAGE: 9%
Down, A (Tail Swipe): Yoshi will trip people with his tail. Useless. DAMAGE: 8%
Forward, A (Front Kick): Yoshi will kick in front of him. A little stronger than the basic kicks, but still weak. DAMAGE: 10%
Jump and A (Low Air Kick): Same thing as Mario. DAMAGE: 11%
Up + A (Jumping Head Hit): Will knock your opponents upwards a lot, or even on the side, depends on the angle in which it connects. DAMAGE: 14%
Down + A (Round Tail): Same as Tail Swipe, but this time it will it in front and behind Yoshi. It will throw opponents away so use it to clear space. DAMAGE: 11%
Forward + A (Strong Head): Yoshi will do a powerful Head Hit in front of him. it is a strong move and fast move you should use to send opponents away quickly. DAMAGE: 14%
Running Stance, A (Head Ram): Yoshi will ram with his head while running. It will throw opponents away a bit so use it on groups. DAMAGE: 9%
Jump and Down, A (Multi Feet): Yoshi will do a multi-hit with his feet under him. The multihits will do much damage by themselves so it is worth it. For 4% damage per hit it is the strongest multi-hits attack in the game. Use it when falling on an enemy to do BIG damage. DAMAGE: 4% per hit
Jump and Up, A (Upward Tail Whip): Yoshi will hit his tail upward. This move is weak and only useful for juggling opponents in the air. It is better to use the Jumping Head Hit. DAMAGE: 12%
Jump and Back, A (Backward Kick): Yoshi will kick behind him. This move is average but should be used to throw opponents off-board. DAMAGE: 12%
Jump and Forward, A (Flip): Yoshi will flip his body, hitting anyone close. Sends players away a bit, but not all that powerful. DAMAGE: 14%
B button (Swallow): Yoshi will try to sallow a player with his tongue, if he succeed that player will be turned into an egg for a short time. You can do damage to him while he is in the egg and the opponent trapped in the egg will not move a single bit. DAMAGE: 4%
Up, B (Egg Toss): Yoshi will throw an egg upward, the egg will explode after some time. Bombard people on the upper levels with this. The eggs will make your opponents fly away fast and hard, you can somewhat contro lthe angle at which the egg is thrown with the control stick. DAMAGE: 11%
Down, B (Head Stomp): Yoshi will come down at an extremely fast speed with his head first. This is the only really strong move Yoshi has so use it a lot, you aren't invincible in that form, but you can pretty much counter any attacks that will come from the characters themselves, thrown items and projectiles will clobber you even when you,re performing this move though. DAMAGE: 14%
L button: Yoshi will salute in one direction. Useless unless you want to lose time.
A, B or R button when landing on belly (Tail Hit) : Yoshi will get up by slapping his tail behind him. DAMAGE: 5%
A, B or R button when landing on back (Head Hit) : Yoshi will get up by doing an head hit in front of him. DAMAGE: 5%
A or B button when hanging from a ledge (Small Low Kick) : Yoshi will do a small low kick after climbing the ledge. This move is done if you are under 100% damage. DAMAGE: 5%
A or B button when hanging from a ledge (Head Hit) : Yoshi will hit with his head after climbing the ledge. This move is down if you are over 100% damage. DAMAGE: 5%
Pressing Forward when holding an opponent (Forward Spit) : Yoshi will spit the opponent in front of him. DAMAGE: 12%
Pressing Back when holding an opponent (Backward Spit) : Yoshi will spit his opponent behind him. DAMAGE: 12%
Playing As: With Yoshi, you should do this: Make an egg of a player and Head Stomp his egg. you will do big damage this way and soften your opponents a bit so you can dispose of them after a bit of damage. You should also do the Head Stomp on groups of opponents has it will send them flying far. Another trick is to put yourself on the edge of the platform, head toward the arena, then make an egg out of someone at this place and maybe the egg will drop in the hole with your opponent forced to watch himself die. Try to use the multifeet as much as possible to do much damage to enemies. Use the Egg Throw on anybody standing or jumping above you, it is the perfect counter.
VS Yoshi: Use his single double-jump as his main weakness. Once he performed it and starts falling on the ground, knock him to the side of the screen. He'll be helpless but to fall down in the hole as the only way to perform the double jump again is to land on the ground after performing it once. Avoid his Head Stomp at all costs, best is to just use your shield if you are on the ground under him, then grab him once he's recovering from it.
Overall: 7/10 Yoshi has mostly weak moves with very few exceptions. The only way he has to do much damage is to perform a Head Stomp or Multifeet. He also lack in projectiles. His distinct advantage is his HUGE double-jump, he does not have any comeback moves but his double-jump covers so much distance that it is useless. Watch out however, if an opponent sends you flying after you have done your double-jump and you did not have the time to touch the ground you will be helpless and forced to die.
Unlockable Characters
Captain Falcon (F-Zero)
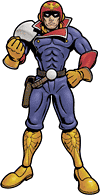
Captain Falcon is the fastest character in the game. His special attacks are all fiery, and the Falcon Punch is the strongest one-hit attack of any character.
To unlock C. Falcon you need to beat Adventure Mode on any difficulty in under 20 minutes. C. Falcon will then challenge you. Beat him, and he's all yours!
Special Moves
Falcon Punch - Falcon Dive - Falcon Kick
A button: A combo much like Mario's Punch + Punch + Kick combo, but if you continue to press the button, Falcon will throw multiple punches at a 3 per second rate. The range on this infinite attack is quite short, not very ueseful. DAMAGE: 1st hit: 3% - 2nd hit: 3% - 3rd hit: 4% - Quick Punches:1% each
Up, A (Overhead Kick): Pretty much like another Overhead Kick. DAMAGE: 11%
Down, A (Low Kick): Everyone knows what it is. DAMAGE: 9%
Forward, A (Straight kick): While walking Falcon does a kick at middle height in front of him. An ok move, but there's much better. DAMAGE: 10%
Jump, A (Low Air Kick): Like Mario, not much about it. DAMAGE: 12%
Up + A (Shoulder Hit): Falcon will hit over him with his shoulder. Good damage and throw back, pretty quick too. DAMAGE: 13%
Down + A (Round Sweep): Falcon will sweep his leg around him. It has some range and is a strong enough move to clear up the area aroudn you easily. DAMAGE: 12%
Forward + A (Flaming Kick): Much like the Straight Kick, but this time opponents catches fire. Great range, very fast and powerful attack. Use it well. DAMAGE: 15%
Running Stance, A (Shoulder Bash): Falcon will ram people with his shoulder, EXCELLENT rushing move with Falcon's running speed. Opponents will never be able to see it coming unless you start miles away. DAMAGE: 9%
Jump and Down, A (Down Kick): Falcon will kick below him. This move will propel your opponents straigth below him, execute it on airborn targets to send them crashing down to their doom. DAMAGE: 11%
Jump and Up, A (Flip Kick): Much like Mario's Round Kick. DAMAGE: 12%
Jump and Back, A (Reverse Punch): Acts the same way as a Reverse Kick from another character. DAMAGE: 12%
Jump and Forward, A (Double Kick): Much like Link's Double Kick, but this time in front of him instead of behind him. Not powerful enoguh to warrant use. DAMAGE: 1st hit: 8% 2nd hit: 8%
B button (Falcon Punch): Falcon will do a punch in form of an hawk in front of him. This move is extremely strong and you should be aware that it can kill you pretty easily if you are over 40%. It has a HUGE delay on it however, use it in advance, like when an opponent is coming at you. Learn to practice the timing on it so it connects before your opponent can prevent or block it. DAMAGE: 18%
Up, B (Flaming Throw): This comeback move will make falcon jump and grab any opponent he can grab while ASCENDING (not while falling after this move). it is perfect as it will interrupt anyone doing delay attacks and it will throw them a little farther than his normal throw. You can perform the move again if you catch somebody and throw them.
Down, B (Falcon Kick): Falcon will slide on the ground while in fire OR will plunge in a diagonal fashion while in fire (if done in the air). On the ground, it will travel a great distance, but it will NOT stop on the edge, it will zip right off so watch out. Overall it should be used on campers to knock them away. Use it to clear the ground or cover a distance quickly. DAMAGE: 12%
L button: Falcon will say "Show me your moves!" while staring to the foreground or background.
A, B or R button when landing on belly (Half-Circle Kick) : Much like Samus. DAMAGE: 6%
A, B or R button when landing on back (Inversed Kick) : Much like Samus. DAMAGE: 6%
A or B button when hanging from a ledge (Ground Kick) : Falcon throw himself over the ledge and kick at feet height. This move is done if you are under 100% damage. DAMAGE: 6%
A or B button when hanging from a ledge (Punch) : Much like Samus. This move is down if you are over 100% damage. DAMAGE: 6%
Pressing Forward when holding an opponent (Ground Smash) : Falcon will smash the opponent on the ground sending them up. DAMAGE: 12%
Pressing Back when holding an opponent (Backward Kick) : Much like Link. Better than his forward throw because you send opponents far horizontally instead of verticaly. DAMAGE: 16%
Playing As: Use the Falcon Punch on enemies trying to come back, if you time it right you will send them on the sideways for a +1 score. If you miss a punch because your opponent has put up his shield, do a Falcon Kick, he will propably put down his shield to grab you after the punch so you will catch him off guard. Use the Flaming Throw when you have an opponent over you, it will surely make them angry. The Flaming Kick is a great and quick move to use instead of the Falcon Punch, it is not as powerful, but it hits for a good deal of power nonetheless.
VS Captain Falcon: Be wary of the Falcon Punch at all costs, if he tries to pull it agaisnt you, try to hit him with a basic hit to stop it before he hits. Put up your shield to protect yourself and grab him while he's recovering (Best counter). do not stay near the ledge when he tries to come back, or he'll grab you with his Flaming Throw and put you in trouble... use projectiles to keep him at bay when he tries to come back.
Overall: 7/10 Falcon his pretty strong with his Falcon Kick and Punch, he is the fastest running character in the game. His moves are pretty kick (except for the Punch), he can be deadly. If you knows him well you can easily take care of him. He is EXTREMELY predictable (He always yell Falcon before one of his strong moves so...). Overall, use your punch in crazy battles, you will most certainly catch opponents unaware of the danger.
Jigglypuff (Pokémon)
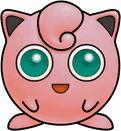
Jigglypuff is weak and light. It has the ability to multi-jump in the air. Its rest attack can be lethal if it uses it adjacent to an opponent. Unlike most characters, it does not have a recovery move, but it can use Pound to gain distance while floating in the air. If its shield breaks, it flies up and usually gets KO'd.
To unlock Jigglypuff you need to play Adventure Mode on any difficulty w/ continues if needed. She will then challenge you. You must beat her to un-lock.
Special Moves
Pound - Sing - Rest
A button: Jiggly will do a 2 punch combo. Useless, because she pauses between the 2 punches, it is better to use the Smash Punch. DAMAGE: 1st hit: 3% 2nd hit: 4%
Up, A (High Kick): I bet you already guessed what that is... DAMAGE: 8%
Down, A (Low Kick): Again an already known move... DAMAGE: 8%
Forward, A (Head Kick): Jiggly will kick in front of her to head height (HER head I mean). DAMAGE: 6%
Jump, A (Low Air Kick): Same as Kirby. DAMAGE: 11%
Up + A (Balloon Bash): Jiggly will hit someone with her body. Much like Mario's Head Bash, excellent move to use along with the Spinning Kick (See combo). DAMAGE: 14%
Down + A (Sitting Puff): Jiggly will sit down, blowing some air by her sides. Quick and good move. Use it if many opponents stand near you. Sends them on the sides. DAMAGE: 12%
Forward + A (Balloon Hit): Jiggly will ram her body into someone. Not much about it. DAMAGE: 12%
Running Stance, A (Head Slide): Jiggly will slide with her head first. Decent rushing move, but Jiggly does not run fast enough to make it worth it. DAMAGE: 8%
Jump and Up, A (Slap): Jiggly will do a Slap over her. EXCELLENT move to keep opponents flying, considering the fact that you can do a Slap then Double Jump, restart and continue until you cannot Double Jump anymore.
Jump and Down, A (Spinning Kick): Same as Mario's own Spinning Kick. Does good damage and as a fast recovery, use it to get opponents to higher damage %. DAMAGE: 3% per hit
Jump and Back, A (Reverse Kick): AGAIN?!?!?! DAMAGE: 10%
Jump and Forward, A (Side Kick): Jiggly will do a kick on each side. Pretty much useless, this move does not send opponents very far, compared to other characters move.
B button (Smash Punch): Jiggly will punch (can be done in the air) and will travel a small distance with her punch. Good for sending opponents flying as it sends them over Jiggly, so just do the punch again behind you. If you get it, you can make some pretty good damage to him/her before he/she can do anything.
Up, B (Lullaby): Jiggly will sing a lullaby that will send any opponents close to her asleep (The opponent MUST be on the ground for it to work). This is perfect for doing homeruns with a Homerun Bat, because your opponent can just stare at you while his/her character sleeps.. Watch out, however, because it take a LONG time to do and if you miss you are open against ANY attacks (Probably something thrown at you). DAMAGE: 0%
Down, B (Nap): Jiggly will take a short nap. If you execute it while near of an enemy, that enemy will go flying FAR with 20% on thier side and you will not even move of a pixel!! But it only works at the BEGINNING of the move after this you are even more vulnerable than when using the Lullaby. If you get the timing right, you can usually prevent those easy kills using Homerun Bats sicne it leaves a small invincible frame as Jiggly falls asleep... DAMAGE: 20%
L button: This is an EXTREMELY funny looking taunt. Jiggly will "puff" herself a little and dangles from one foot to the other and say "Jigglypuff!" I nearly wanted to roll myself on the floor when I saw this.
Combo: Opponent on the ground? no problem! Use her Spinning Kick (Jump and Down, A) on them and IMMEDIATLY use her Balloon Bash (Up + A) just as you touch the ground, if the timing was right, you should do at least 15% damage with the Kick and 18% with the Bash. This move must be executed when your opponent is on the ground because the Kick will let them stunned for a little while and they will be unable to block the Balloon Bash. This combo can easily kill an opponent over 70%. If you caught the 3 other chracters in that combo, you may even be able to annihilate the 3 of them with that move!
A, B or R button when landing on belly (Half-Circle Kick) : Much like Samus. DAMAGE: 6%
A, B or R button when landing on back (Foot Turn) : Much like Mario, but with only 1 foot. DAMAGE: 6%
A or B button when hanging from a ledge (Splatter Step) : Jiggly will throw himself over the ledge and stand with his feet first, effectivly hitting anyone standing near. This move is done if you are under 100% damage. DAMAGE: 6%
A or B button when hanging from a ledge (Jiggly's Bash) : Jiggly will climb the ledge and hurl himself in front of him to hit opponents. This move is down if you are over 100% damage. DAMAGE: 6%
Pressing Forward when holding an opponent (Vertical Throw) : Jiggly will throw the opponent in a straight line up. Weak, but useful to send them in the air easily. DAMAGE: 12%
Pressing Back when holding an opponent (3 Turns Throw) : Jiggly will hit the opponent on the ground behind him by passing the opponent over him. DAMAGE: 16%
General Strategies: With Jiggly, you will want to keep your opponents flying. If they stand thier ground, you do not stand a chance. Use the Smash Punch a lot or just throw them (Her throw sends them in a straight line up) and use the Slap combo (Slap, Inflate, Slap, Inflate....) until you must touch the ground to inflate again. Also, beware of any projectile, a bob-omb will usually kill Jiggly Puff even if she's at 0% damage (On a small stage, of course). So do not stay too far of your opponents. Use the combo as many time as you can because it is very deadly!
VS Jigglypuff: As deadly as the Puff can prove herself to be, she is quite weak and easily disposable. She can die easily at 50% and can have trouble handling any opponent. The best is to always knock her on the sides, and make sure she does not tocuh the ground, that way she will eventually run out of floats... and fall down the stage.
Overall: 6/10 Jiggly is weak, but if you pratice with her, you can easily surprise opponents and beat them. She is light (She's a balloon, what did you expect?!?) so she'll pretty much go flying easily. However, she can come back on the Stage pretty easily with this move: You inflate and you do a Smash Punch, inflate, Smash Punch... until you get back on ground. Her Lullaby and Nap moves are quite good, but requires timing and strategy to use them efficiencly (Unless you want to be always open to opponents because you switch into Sleep or Sing mode!!) Also it is pretty fun to hear her yell "JIGGLY PUFF!!!!" (not sure, but funny anyway) when you send her into the background. A bug in the balloon programming (I think), if your shield breaks Jiggly Puff eliminates herself because she gets sent up VERY VERY high and dies in the background (Even at 0% damage), it is a real pain to lose this way.
Ness (EarthBound)
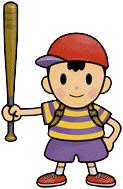
Ness is a fast and light character. He uses a homerun bat and a yo-yo for his Smash Attacks. He has to direct a PK thunder into himself in order to utilize his third jump. Ness can use his PSI magnet to absorb most projectiles to heal himself.
To unlock Ness, beat the one-player mode with any character, with the number of starting lives set to 3 and the difficulty set to NORMAL. You must beat the game without continuing then he will challenge you. Beat him, and he's all yours.
Special Moves
PK Fire - PK Thunder - PSI Magnet
A button: Ness will do a 1-2 Kick combo, like any other basic moves it is useless. DAMAGE: 1st hit: 2% - 2nd hit: 2% - 3rd hit: 4%
Up, A (Overhead Push): Ness will jump a little and push his enemies up. Better use the yo-yo to keep them flying because it sends them farther. DAMAGE: 6%
Down, A (Fast Trip Kick): Ness will kick low. If you are good you can rack up big damage on enemies with this because it can be done VERY quickly and people usually does not understand what is going on the first time they see it. DAMAGE: 3%
Forward, A (Frontal Kick): Ness will kick in front of him. it is better to use the Baseball Bat than this. DAMAGE: 8%
Jump, A (Air Sitting Kick): Ness will sit in the air and hit people with his feet, flashy, but not much about it. DAMAGE: 11%
Up + A (Around The World Yo-Yo): Ness will throw his yo-yo in front of him and make it do an half-circle over him. This move is a good juggling move as it makes them go up and you have move range than most downward mid-air moves (You must start it a little early for it to connect before enemy can touch you). The catch it is that you can hit people around you at a pretty good range too. DAMAGE: 14%
Down + A (Flashy Yo-Yo Trick): Ness will throw his yo-yo behind him and make it go in front of him after. This is a GREAT clearing move as it throws enemies very far!! and as a fairly long range. Careful, because the yo-yo goes behind you before going in front of you. DAMAGE: 15%
Forward + A (Baseball Bat): Ness will do a hit with his own baseball bat. it is not like the Homerun Bat, but it is beter in a way. Use it on people trapped in your fire, if it does not make them fly away, throw another fire and whack them again. they will end up getting 18% one after the other. it is as a very little delay before so watch it! You can also use this attack to reflect non-explosive projectiles back at the thrower for double damage, you just have to get the timing right. DAMAGE: 18%
Running Stance, A (Push): Ness will push his opponents. Use it to rush opponents up so you can get so ground, you can usually do it again after they land and they will fall for it. DAMAGE: 12%
Jump and Down, A (Squash): Ness will squash enemies with his feet in the air. If they're in the air they will go plummeting down at an incredible speed, do this if they're over the hole and you will get an easy kill. If they're on the ground, they will go up a long way before coming down. DAMAGE: 12%
Jump and Up, A (Air Head Bash): Pretty much like Mario's Head Bash, but in the air. it is a pretty good juggling move as it sends them pretty far. DAMAGE: 12%
Jump and Back, A (Reverse Kick): Yeah right, as if nobody knew what is this move. DAMAGE: 12%
Jump and Forward, A (Air Push): Much like the Push, but in the air. Not as strong as some other moves, use the Air Head Bash instead. DAMAGE: 9%
B button (PK Fire): Ness will throw a fire in front of him (if on the ground) or in a diagonal fashion (If in the air). Now this move is CHEAP, but it is extremely useful. It will stop projectiles and rushing players and will keep players getting damage because it forms a little Pillar of fire after it hits. It as short range, should be use to prepare enemies to your Baseball Bat or throw. DAMAGE: 3% per burn
Up, B (Homing Thunderball): Ness will launch a thunderball that you can control. It is, again, a CHEAP move as YOU control it, so you can pretty much hit coming back players or falling people to steal a kill. The most useful use to it is to smack yourself with it (You will not get any damage) and you will go flying a GREAT way in the direction you hit yourself. If you hit someone you will send them flying a LONG way even if they do not have any damage and you are invincible when you do it. However do not fly off the edge because you will die surely. The only way to stop Ness' electrified form is a Bumper item, they will knock you back. DAMAGE: 6% if it by the ball, 23% if hit by Charged Ness body.
Down, B (PK Magnet): Ness will put up an absorb shield around himself. This shield will absorb projectiles that touch you and recover lower your damage %. BEWARE! It will not absorb items throw at you, only projectiles or Pokèmon shots. Can be very useful if your opponents throws Pokèmons and a Starmie or Charizard come out, put yourself in his line of fire and shield up! Your 200%+ Ness will be back to 0% in no time. Now enemies will learn not to use Pokèmons against you. DAMAGE: 0%
L button: Ness will bow and say: "OK!". Pretty boring for a taunt.
Homing Thunderball on Ness (Thunder Strike): Throw a PK Thunder and make it hit you to go flying in the direction you hit yourself and throw away the competition with the hefty 23% you will hit any character foolish enough to stand in your way. Best comeback in the game, you can practicly burst yourself back from the dead with this. you are also invincible when you have hitten yourself so nobody can block you (Walls AND Bumpers can however!!!). It requires a little practice to get the timing right and you should practice with it in CPU battles until you fell comfortable with it. DAMAGE: 23%
A, B or R button when landing on belly (Head Turn) : Much like Mario. DAMAGE: 6%
A, B or R button when landing on back (Feet Turn) : Much like Mario. DAMAGE: 6%
A or B button when hanging from a ledge (Climbing Kick) : Same as Mario. This move is done if you are under 100% damage. DAMAGE: 6%
A or B button when hanging from a ledge (Low Kick) : Same as Mario. This move is down if you are over 100% damage. DAMAGE: 6%
Pressing Forward when holding an opponent (PK Throw) : Ness will use his psychokinetic abilities to turn an opponent in front of him and finally send them flying. Good because you clear the space in front of you using the opponent's body. DAMAGE: 12%
Pressing Back when holding an opponent (Inversed PK Throw) : Ness will use his psychokinetic abilities to turn an opponent behind him and finally send them flying. Good because you clear the space behind you using the opponent's body. DAMAGE: 16%
Playing As: Use the fire a lot, when you paralyze enemies in it, use the Bat. You will deal very much damage this way. Use the Thunderball Strike only to get back on the board, otherwise you risk to zip right off the edge and die uselessly. If enemies are near you, clear the space with the yo-yo. It will keep them at bay, if you throw them in the air, use the Air Head Bash a couple of time to get the kill, at 70%+ they will most likely die from this. Whenever you see someone putting up a projectile barrage, use your PK Magnet. He'll stop very quickly.
VS Ness: Ness is both good at long-range and short-range, there is no real "strategy" to use against him but his recovery after his smash attacks (Yo-Yo moves and Bat). Speed is your only ally.... and skill also.
Overall: 10/10 Ness is THE character in this game. The only problem is to master it, spend some time in training and against level 3 cpus to train yourself. Once you get the hang of it, most people will try to kill you first. The only way to kill him is throw him hard so he hits the sideways or goes into the background, otherwise he'll just come back using his Thunderball. Also, any enemy hit by this will be thrown a LONG way. Also he got his own Baseball Bat, which is strong enough to send anyone to oblivion. His yo-yo has a long range and good strength. You can use your Thunder to harrass opponents from very far considering the distance it can travel. He does not jump, he FLOATS, this is a good thing to confuse edge guarders that will do thiers delay moves (Falcon Punch) too soon. If not, just pull away from the edge (with his floating you can do it!) and use your Thunder on yourself to send him away while you regain safety. To my knowledge, the only drawback he has is a steep learnign curve for the Homing Thunderball comeback move.
Luigi (Super Mario)
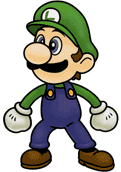
Luigi is a character with average weight and speed but with above average strength. His moves look similar to Mario's, but they function very differently. His Super Jump Punch can be very strong if he uses it while adjacent to an opponent, but otherwise it is a very weak attack. His Luigi Cyclone makes opponents fly away. His fireballs float in a straight line instead of bouncing. He also jumps higher than Mario, but he is also slower and lighter.
To unlock Luigi, you have to beat Bonus Round 1 with the eight starting characters, then Luigi will challenge you. Beat him to unlock.
Special Moves
Fireball - Super Jump Punch - Luigi Cyclone
A button : If you press this one several times, Luigi will do a punch + punch + kick combo, pause, restart... It does small damage, but you can use this on the edge of the stage to prevent a player from coming back. DAMAGE: 1st hit= 2% - 2nd hit = 2% - 3rd hit = 4%
Up, A (Uppercut): Luigi will punch over his head, this move should be useful to keep your opponents in the air, it does not to much damage by itself, but you can follow up by an air attack. DAMAGE: 8%
Down, A (Low Kick): Luigi will crouch and kick at feet height, this move should be used only to it someone like Fox who is doing a laser barrage with his gun. DAMAGE: 12%
Forward, A (Kick): Press the control stick forward and A and Luigi will do a kick. This move could be like a normal A button attack so it is not that useful. DAMAGE: 10%
Jump and A (Low Air Kick): Luigi will do a Low Kick in the air. Usually nobody uses this move. DAMAGE: 11%
Up + A (Head Bash): Luigi will perform a hit with his head, you must be close for this hit to work, it does some decent damage, but the close range of the hit makes it less effective. DAMAGE: 16%
Down + A (Trip Kick): Luigi will do a kick around him. This move has more range than the Head Bash and it hits all around you so it should be used instead of the Head Bash. DAMAGE: 14%
Forward + A (Charged Punch): Luigi will do a strong punch in front of him. it is a good move, has it deal some damage and send your opponents away. DAMAGE: 14%
Running stance, A (Berserk Punches): Press A while running (tap the control stick to make your character run) and Luigi will punch like crazy in front of him while running. Good to rush opponents, but I prefer Mario's Slide, because the Slide knocks your opponents away. This runnign move is weak and does not send your enemies away at all.... DAMAGE: 2% per hit
Jump and Down, A (Spinning Kick): Luigi will do Spinning kick like in Super Mario World, but this time in diagonal. do not let the multiple hits and damage impress you this move is not so good, usually use the Spin instead of this. DAMAGE: 3% per hit
Jump and Up, A (Round Kick): Luigi will do a round kick toward the sky. Use this move after an Uppercut to send your opponent higher. DAMAGE: 9%
Jump and Back, A (Air Kick): Luigi will do a kick behind him while in the air. This or the Drill Kick should be used to send opponents who are coming back on the ground on the side of the stage. DAMAGE: 12%
Jump and Forward, A (Drill Kick): Luigi will drill his body in front of him while in the air. This or the Air Kick should be used to send opponents who are coming back on the ground on the side of the stage. DAMAGE: 12%
B button (Fireball): Luigi will launch a green floating fireball, it a little slow to lauch and does not do much damage. Use it has an harrassing technique to bring your opponents to you if you are away. Luigi's fireball goes into a straight line instead of bouncing like Mario's fireballs. DAMAGE: 5%
Up, B (Flaming Uppercut): Luigi will do a jumping uppercut done diagonally. Same has Mario, but this time, enemies will get 1 hit and get thrown away. The catch is the fact that opponents sometimes catch fire instead of giving coins and if they catch fire, they will pretty much go into the background if they're over 50% damage. If you want them to always get fire, get yourself as close as you can (when you start pushing him/her) and execute this move, it will always work, I tried it. You can also jump at them in the air and perform it to make them catch fire too. DAMAGE: 1% per hit, 20% if opponent catches fire.
Down, B (Cyclone): Luigi will spin and if an enemy is near him he will get tossed up. This time enemy just get ONE hit of 12% instead of getting stuck in the spin like with Mario. This spin sends opponents upward a langthy distance instead of just doing damage. DAMAGE: 12% per hit
L button: Luigi will look bored by scuffing his heel and looking to the ground. Looks like he wants a big taunt like Mario's.
A, B or R button when landing on belly (Head Turn) : Luigi will get up by spinning his head around, cleanign a little space around him. DAMAGE: 6%
A, B or R button when landing on back (Feet Turn) : Luigi will spin his feet around him to clear the space to get up. DAMAGE: 6%
A or B button when hanging from a ledge (Climbing Kick) : Luigi will throw himself over the ledge and kick at head height. This move is done if you are under 100% damage. DAMAGE: 6%
A or B button when hanging from a ledge (Low Kick) : Luigi will climb up the ledge and execute a low kick. This move is down if you are over 100% damage. DAMAGE: 6%
Pressing Forward when holding an opponent (1 Turn Throw) : Luigi will spin around once and launch the opponent into the air. DAMAGE: 12%
Pressing Back when holding an opponent (3 Turns Throw) : Luigi will spin around 3 times, the velocity of the movement will lift the opponent a little and finally he will launch the opponent into the air. Great throw because you use the enemy to clear space around you. DK is the best to twirl around because of his size. DAMAGE: 16%
Playing As: Much like Mario, but the Spin and Jumping Uppercut combo will be done differently and also your opponent MUST catch fire for it to kill him. You must hope that your Spin will send them upward too. Use the same strategies as with Mario, but keep the Cyclone & Flaming Uppercut moves as finishers, as they are easy to perform with practice and can kill instantly. Luigi's fireballs aren't very useful and are slow projectiles, it is better to just avoid using them unless necessary.
VS Luigi: Watch out as you did with Mario, but this time ,do not along yourself to get close to him at all costs, his Cyclone and Flaming Uppercut attacks can kill you instantly as opposed to Mario's Spin and Jumping Uppercut attacks. The best way is to make sure you hit always first when he comes near you so you knock him back right away. do not let him come under you, it is a perfect setup for him to execute a deadly Flaming Uppercut on you.
Overall: 8/10 Luigi plays much like Mario, he's a little slower when moving, he jumps higher and he kind of... fall slower than Mario. You can use his longer fall to launch a screen of fireballs. Overall, he's like Mario and should be considered a dangerous foe in expert hands, especially for his special moves.
Stages
The game features nine stages derived from each character's universe, exceptions being EarthBound and F-Zero. While most universes receive a single stage, Mario uniquely has two instead: Peach's Castle and the only unlockable stage in the game, Mushroom Kingdom. Besides of that, the other stages consist of Congo Jungle, Hyrule Castle, Planet Zebes, Yoshi's Island, Dream Land, Sector Z, and Saffron City from Donkey Kong, The Legend of Zelda, Metroid, Yoshi, Kirby, Star Fox, and Pokémon respectively.
- Peach's Castle
- Congo Jungle
- Hyrule Castle
- Planet Zebes
- Yoshi's Island
- Dream Land
- Sector Z
- Saffron City
- Unlockable - Mushroom Kingdom
Peach's Castle
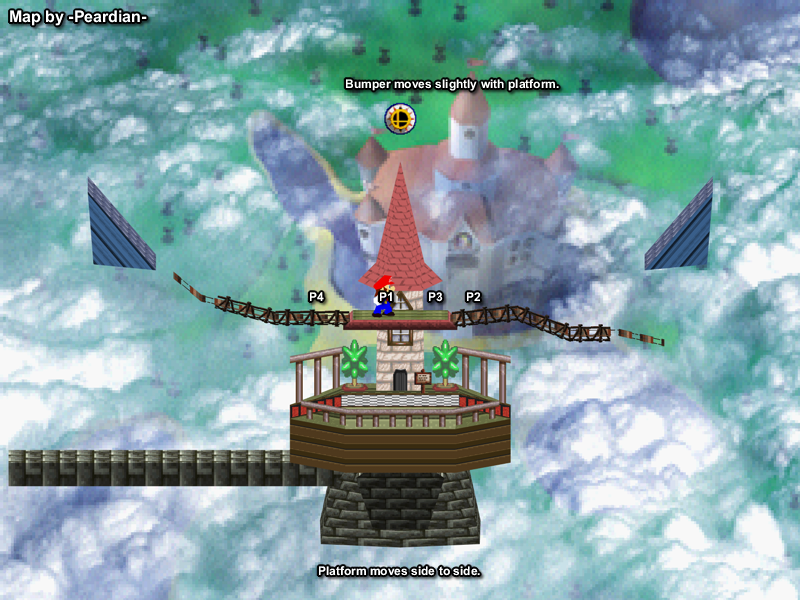 A stage with one large platform, two mid-air sloped platforms at the side, and a moving platform toward the bottom. There are two bumpers in the upper right and left-hand corners of the stage. The challenger match against Luigi takes place here.
Peach's Castle is a stage in Super Smash Bros., and is heavily based off of Princess Peach's actual castle. The castle is actually a very small arena suspended in the air. In actuality, the stage may just be a piece of land that is part of Princess Peach's Castle, as the actual castle can be viewed far below the arena. This arena has a moving board that wends into the castle and comes out on the other side, making temporary platforms on both sides. It also has two Bumper-like platforms at the top, which will stop players from being knocked out of the stage. There is also a Bumper in the middle, which moves back and forth. A Lakitu also makes a cameo appearance in the background after a few minutes. The "Challenger Approaching!" match to unlock Luigi in Super Smash Bros. takes place here.
Congo Jungle
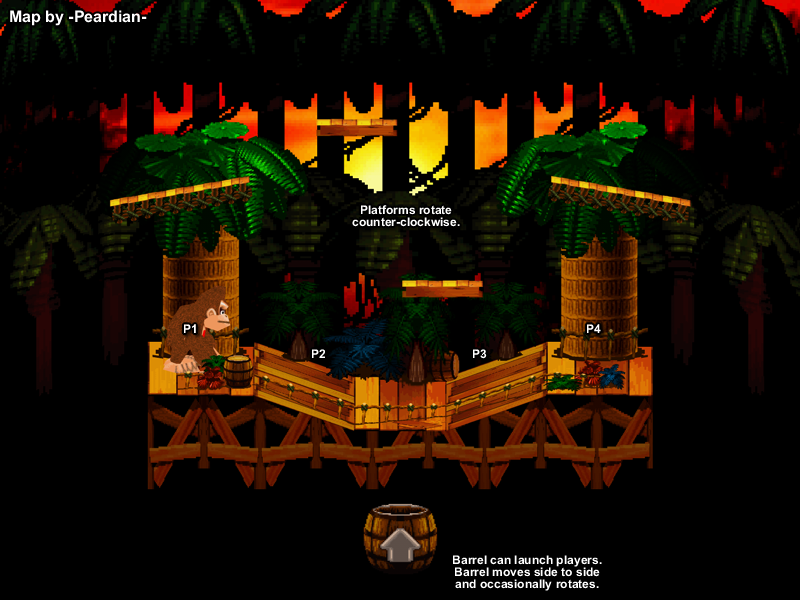 A stage sloped toward the middle, with platforms on either side. There is also a Barrel Cannon moving side to side at the bottom of the stage. If players are to fall into it, the barrel would start rotating and the players press the A Button button, they can launch in whichever direction the arrow is pointing. This stage is the home stage of Donkey Kong.
Kongo Jungle (misspelled Congo Jungle in its debut) appears as one of the arenas in the game Super Smash Bros. The Kongo Jungle stage is made out of a large wooden platform with several smaller ones, some of which float, around it. There is also a vast jungle in the background of the arena and a Barrel Cannon underneath the arena.
Hyrule Castle
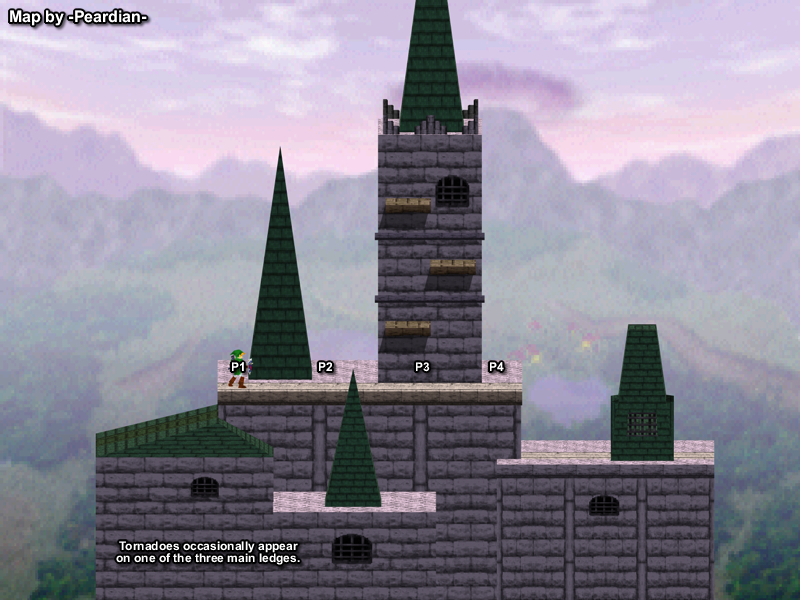 A very long stage, and the first stage of the single-player mode. It does not have many gimmicks, except for a whirlwind that appears every 30 seconds. The tornado sends players flying with a percent cost, and it can turn unlucky players into stars depending on the location and percent. The tornadoes appear in 4 places in this stage. This stage is the home stage of Link.
In Super Smash Bros., Hyrule Castle appears as a lengthy stage based off of its appearance in The Legend of Zelda: Ocarina of Time. In single-player mode, Hyrule Castle is the first stage the player battles on. During gameplay, a whirlwind appears about every 30 seconds; any character caught in it is blown upwards, and sometimes out of the stage if sufficiently damaged. The castle also has a little shack at the far right end of the stage, which may act as an additional platform. This stage serves as Link's home stage in the game.
Planet Zebes
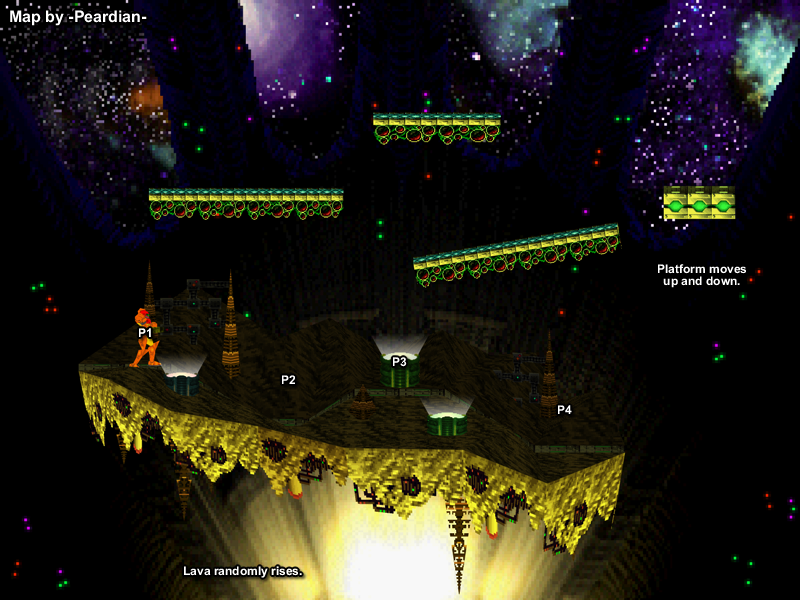 A small stage that is easy to get blasted off of. The only other feature is the acid, that rises up about every 30 seconds. The acid hurts players and knocks the player out of the stage if the percent is high enough. The acid also makes it nearly impossible to score a KO in the bottom part of the stage. This stage is the home stage of Samus. Also, the challenger match against Captain Falcon takes place here, as the game features no stages from the F-Zero series.
Planet Zebes is a planet seen in the Metroid series. It is the main setting of the first and the third game in the series, Metroid and Super Metroid, respectively. The surface is mostly barren and the underground is riddled with large caverns.
Planet Zebes also appears as a stage in Super Smash Bros. The only feature is the acid, that rises about every 30 seconds and damages any players. After a few cycles, it rises so high that only the center platform, which is also the highest, is safe. Samus is always fought here in 1P Mode. The unlocking match for Captain Falcon takes place here, due to the game featuring no F-Zero stages.
The stage itself is not in any of the sequels. A similar stage called Brinstar is in the games instead. The stage's music does return in Super Smash Bros. Ultimate, however, and can be played on any Metroid-themed stage.
Yoshi's Island
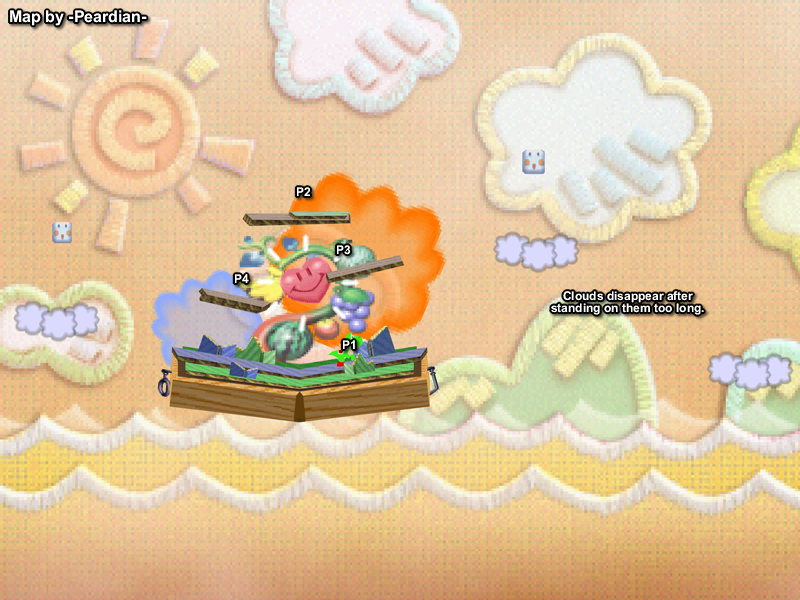 A stage slightly sloped on either side, meant to look like a book. There are also three mid-air platforms, two of which are also slanted. Clouds on the sides of the course can be stood on, but they disappear if the player stays on the platform for a period of time. This stage is the home stage of Yoshi.
Super Happy Tree, known as Yoshi's Island prior to Super Smash Bros. Ultimate, is a stage in Super Smash Bros. that is heavily modeled after Yoshi's Story. It consists of a big platform with the Super Happy Tree in the background, three other smaller floating platforms above, and three clouds at the edges of the stage, which vanish when a character stands on them too long. For unknown reasons, there is a very slight height difference on the top platform of the stage. Flying Shy Guys and Goonies can occasionally be seen flying in the background, with the latter being more common.
Dream Land
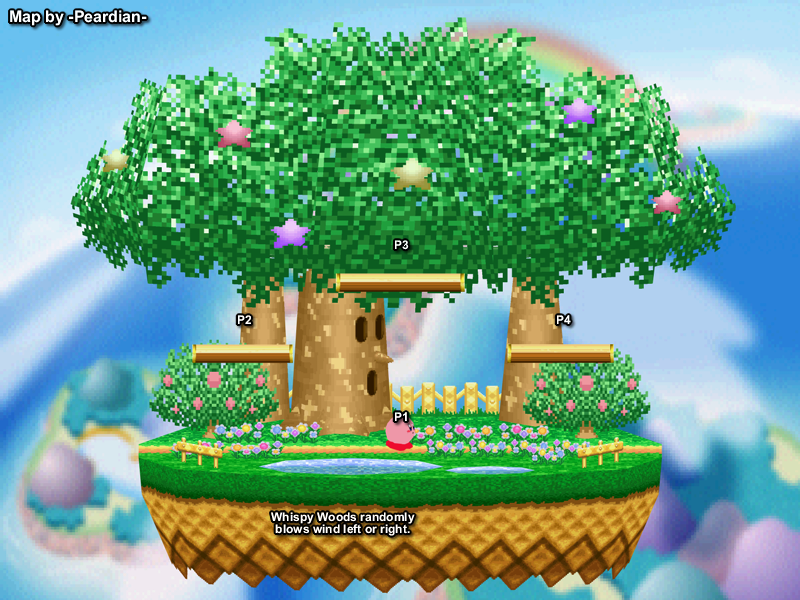 A flat stage, with Whispy Woods at the center. Whispy sometimes blows air that pushes players in the direction he is facing. This stage is the home stage of Kirby. Also, the challenger match against Ness takes place here, as the game features no stages from the EarthBound series.
Dream Land is a central location in the Kirby series, being Kirby, Meta Knight, and King Dedede's home land. It is also a stage in the game Super Smash Bros. However, it is set in the forest of Dream Land, rather than the village. The stage layout consists of three platforms arranged with two on both sides and one higher platform in the middle. The main feature of the stage is Whispy Woods, who occasionally blows a heavy wind at players which pushes them toward either side of the stage. At certain points, a Bronto Burt or King Dedede can be seen flying by in the background. The "Challenger Approaching!" match to unlock Ness takes place here, due to the game featuring no EarthBound stages.
Sector Z
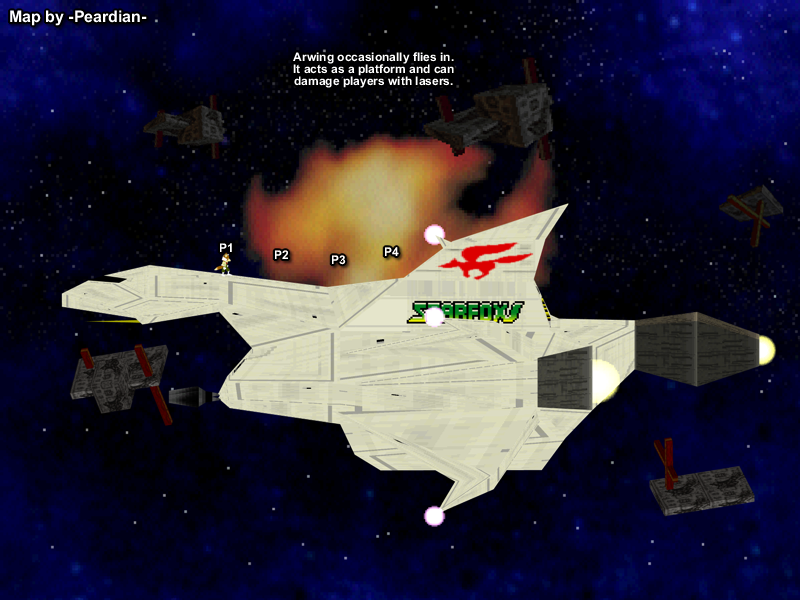 A very large stage, set on the Great Fox. Occasionally, an Arwing enters the screen and fires blasts of beams at the players. The stage is the largest of the game, considering the length of the blast lines. This stage is the home stage of Fox.
Sector Z is one of nine stages in Super Smash Bros. for the Nintendo 64. It is the second largest stage, with the Mushroom Kingdom stage being the largest. This arena takes place on the Great Fox, which is Fox McCloud's ship, in an area of the Lylat system called Sector Z. Occasionally, an Arwing will appear and shoot at the players. It will either shoot a very strong blast across the screen or directly at one of the fighters. The stage did not return in any of the sequels. Instead, they featured two other stages that involve a fight on the Great Fox: Corneria and Venom. However, the stage's music does return in Super Smash Bros. Ultimate, and can be played on any Star Fox-themed stage.
Saffron City
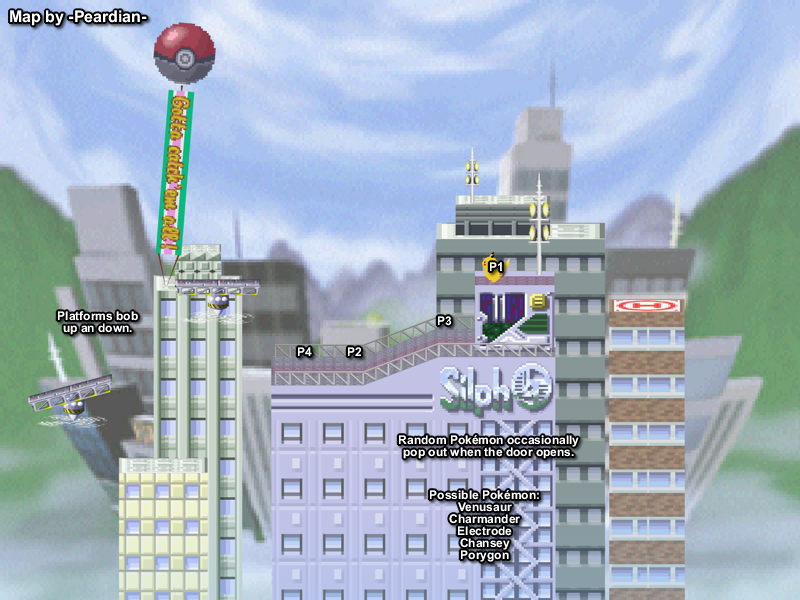 A large stage that features the most gimmicks. It is the home stage of Pikachu and Jigglypuff, and the challenger match against Jigglypuff takes place on this stage. Various Pokémon emerge from the building in the middle, having effects on gameplay.
Saffron City is a stage in Super Smash Bros. and returns in Super Smash Bros. Ultimate. The stage is set upon the Silph Co. building and is the home stage of Pikachu and Jigglypuff (with the unlock match for the latter taking place here). The stage has the most features of any stage in the game. On the right side of the arena, there are floating platforms. On the left side of the arena, there is a door leading down the stairs, but when one tries to go down, a random Pokémon will jump out and attack the player.
Unlockable Mushroom Kingdom
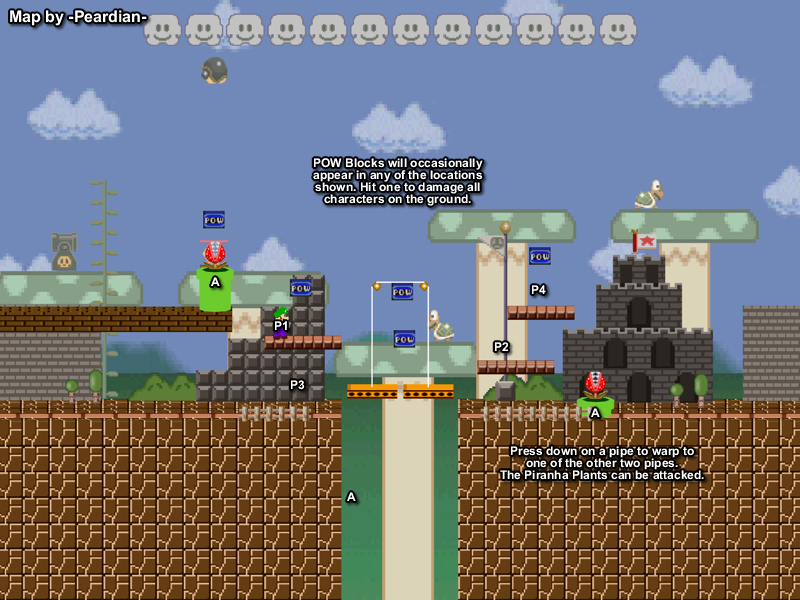 A large stage, featuring some gimmicks: moving platforms, Warp Pipes, and others.
Mushroom Kingdom is a stage in Super Smash Bros. It is the only unlockable stage in the game. It is set to resemble Super Mario Bros., with brick blocks, falling platforms, Warp Pipes with Piranha Plants, POW Blocks and a scene from the original game in the background. It is unlocked by beating 1-P Mode with all of the eight default players, and then playing all of the other stages in Vs Mode. By going through a Warp Pipe, the player is placed at random at either the other Warp Pipe of the stage or above the abyss. The stage has additional basis in Super Mario Bros.: The Lost Levels, as there are red Piranha Plants that were first seen in that game, not Super Mario Bros. The castle in the background of the stage has a flag on top of it, which cannot happen in the original game.
How To Unlock
Clear 1-Player Game with all default characters, and play each stage in VS Mode.
Items
There are many items throughout the game that help fire up the battle. All items disappear after a period of time it is unused or if it is used to a certain extent. The following is a full list of them.
Crate, Capsule, Egg, and Barrel
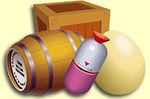
The Crate is a wooden box that contains a random item, which can be released by breaking it open or throwing it to the ground. Barrels are similar, but can roll along the ground if hit. Capsules and Eggs are lighter than Crates and Barrels. Sometimes these items explode.
Bob-omb
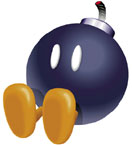
This item can be extremely dangerous for the thrower and the target. It does in fact 40% of damage if you it soemone when you throw it. You must NOT throw it too close to an opponent for the explosion will get you. Anyone over 40% will probably never get back on stage if they get hit. When you use this item, you must be EXTREMELY CAREFUL. Also, if you want to use it, pick it up before 5 seconds because it will start walking around and explodes if someone stand close OR self-destruct itself after some time.
Explosion : Simple, the explosion it produces when it hits something or someone. Excellent damage and throw back, even better than the Motion Sensor Bomb. DAMAGE: 30%
Throw it : You throw it to hit your opponents and connect for a 10% damage AND a 30% because get caught in the explosion resulting from the Bob-Omb. DAMAGE: 10% + 30% from explosion because it is inevitable if you get hit by it.
Fire Flower
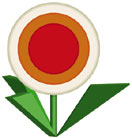
With a Fire Flower, you breath fire (duh!). It as a fairly short range, but if your opponents are in front of you, you can get them up in % at a very quick pace (3% per hit). After it runs out of fire, just throw it to them. Everyone knows this item comes from many Mario's games.
A button: Fire breath, hold the A button to maintain the flow until it runs out of fire. Use it on near opponents so they get the maximum damage before getting out. DAMAGE: 3% per hit
Throw it: If it hits someone, he/she will catch fire for a second. Only throw it when it as run out of fuel because the throw is not very useful. DAMAGE: 6%
Green Shell
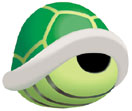
The basic turtle shell found in any Mario game. You throw it, it connects, you hear the "PLOK!" sound and you watch your opponent hit the stratosphere if he's high in %, if no kill, pick up shell again and restart from step 1, clear enough? (duh!).
Throw it: This item is dangerous because it deals a hefty amount off damage and can mean death if you are over 50%. What's dangerous it is because he/she can throw it from far away and get a kill while staying out of danger. You must watch for these and use them for yourself if you can. DAMAGE: 23%
Hammer
When you pick this up, your character will hammer like crazy and each opponents can handle a maximum of 3 hammer hits before going in space. This is a lifesaver (if you get it)or a doom weapon (If your opponent has it). Usually, I turn it off in the Item menu (When you have it) to make it a fair fight. It is actually possible to kill a player with the hammer. He/She is NOT invincible, but it is nearly impossible to do so. The drawbacks is that you cannot Double Jump when you have it and you cannot get rid of it. It comes from old school Donkey Kong and music too.
Tips on how to dispose of hammer-armed opponents: 1) Throws items or hit from below. (You can always try to hit from over him/her, but it is highly improbable you will get him/her that way.)
2) Kirby related= Use the Stone, or inhale the opponent. When inhaled, just press to release the opponent in form of a star (Preferably over the hole) where he'll fall to his death.
Hammer hit: Touch someone with the hammer to do a 30% damage and send them flying HIGH in the sky. DAMAGE: 30%
Red Shell

Nearly the same as the Green Shell, but it will roll on a platform when you throw it until it disappears and it will nearly always hit you if you throw it near your opponents. In my opinion, the Green Shell is much better. This item comes from Mario's games (What a surprise!)
Touch : Get hit while it rolls, it does not throws you back VERY far like the Green one. You actually harrass people with this one because, they try to come back and get thrown back down by the shell maybe 2 or 3 times (if you thrown it at the good place) before it disappears. DAMAGE: 10%
Throw it : A little more damage, but it will nearly always get you back after hitting your opponent (unless you throw it from far away.) DAMAGE: 15%
Star
The Star makes the player invincible for several seconds. Players with this item do not take damage from their enemies and cannot be hit or grabbed. However, they can still fall off the stage and self-destruct.
A little star that hops in one direction and renders the character who touch it invincible (Yeah right, has if nobody knew this...). It would have been good if people and CPUs would not run away from you when you get it and it does not last long enough to be of any real use. However take it anyway so that YOU get the invincibility and not THEM. Comes from various Mario's games. DAMAGE: The only damage dealt is the one you deal with your moves.
Beam Sword
This weapon is a great close-combat sword. It has the longest range of all close-combat weapons. It does BIG damage and throws your opponents pretty far. If you see 2 or 3 beamswords on the stage, grab one and throw the other swords off the stage so you keep the advantage for you. It also blocks projectile with the basic swing, it is very easy to do because the sword is long enough. It ressembles the one used by Darth Maul in Episode 1. I think it comes from a Kirby game, but I do not know which one.
A button: Basic sword swing. Does normal damage, but, considering the range of the weapon, could be prety useful to keep opponents away. DAMAGE: 9%
Forward, A: Like a normal swing, but stronger. This should be the move you should use much of the time. It sends them pretty far and delivers good damage without having any delay on it. DAMAGE: 14%
Forward + A: An EXTREMELY strong slash, you will get a kill if your opponents are over 40% nearly always (On a small stage, of course...) It as a small delay, but you should use it anyway because it deals a hefty 25% damage and sends them in space pretty easily. DAMAGE: 25%
Running Stance, A: Your character will slide with the sword in front. Good for closing up as the sword hits them before they get a chance to retaliate. DAMAGE: 12%
Throw it: NEVER EVER THROW THIS WEAPON AWAY!! Unless you are sure it will disappear or fall down in the hole. This weapon is too strong to let any opponents get it when you had it before. It does pretty good damage when thrown and sends opponents flying a good distance. DAMAGE: 15%
Bumber
Easy, think of it as a Proximity Mine like in GoldenEye (that is were it comes from, I think). Explodes when it senses someone near it or if you throw something on it. EXCELLENT power and throw back. It does not disappear after a little while, it just sits there for a long period. When you see one, pick it up and throw it anywhere on the stage and you will pretty much get a kill when someone steps on it (unless he is not high on %). it is also a little hard to see on the ground.
Explosion : Step on it while it is active to receive a 30% damage. It DOES works for the person who threw it so watch out where you place mines or you will blow yourself up! DAMAGE: 30%
Throw it : Throw it on the ground to activate it, if someone gets hit when thrown he receive minimal damage and will usually know where the mine is. So it is not a great idea to throw it at someone. DAMAGE: 10%
Motion Sensor Bomb

Basically a thing that throws back characters, it will usually hit you if you throw it to someone because it will connect then come back to you and go back at him/her until it touches the ground. It does not do much damage and is basiclly useless unless to throw on the ground to annoy fighting people. I do not know from which game it comes from.
Touch it : If you touch it while it sits horizontaly on the ground you will receive a BIG 1% damage and get thrown a little way. Harrassing. DAMAGE: 1%
Throw it: Useless, unless you absolutly want to bombard your opponent by throwing anything you get your hands on. Most of the time, it will hit you after connecting with someone if you throw it. DAMAGE: 6%
Home Run Bat
This is not much in means of a close-range weapon, but it is main strength is the ability to execute homeruns (Think of that as an automatic kill if you connect with it). Because of the delay of the homerun hit, I prefer to use the Beamsword. Nevertheless, if you see an Homerun Bat use it or throw it down the stage. It comes form Earthbound on the SNES, you know, one of Ness's weapons?
A button: Basic swing. Useless. DAMAGE: 6%
Forward, A: Another swing, but stronger this time. Throws them farther than a basic swing, but not much about it anyway. DAMAGE: 9%
Forward + A: The HOMERUN. Simple and easy. Just connect with it and your opponentS (Yes, you can get several at once) will travel to the nearest constellation. However, if your opponents hits a wall or is being hit by someone or something while travelling (HIGHLY improbable) they will NOT go very far. Try to start the move a little earlier so you can do the little charge-up animation and hit when your opponent is in range. DAMAGE: 10%, but you get a kill almost always.
Running Stance, A: Your character will do like with the BeamSword (slide with the Bat in first). Good damage, but useless. DAMAGE: 12%
Throw it: This weapon can be a good throwing weapon, because it sends them flying pretty far and deals a 18% damage when it hits. Careful, because opponents can pick it back up if it does not disapear, but it does not give them a good advantage compared to the BeamSword. DAMAGE: 18%
Fan
it is so weak that you should not even pick it up. Maybe to throw to your oppponents when they're trying to comeback (It kind of pityful when you die because someone threw a PAPER FAN at you.) In 1vs1 matches, you can use it to get your opponent up on damage because it does not sends them flying you just have to hammer on the A button, it is not so useful in 4 player games because other players will usually get rid of you. One of the few advantages of this weapon is the fact that opponent's shields gets broken very easily by rapid A button hits. It comes from Super Mario RPG on the SNES, it is one of Peach's weapons
A button: Paper swing. Could be useful to get opponents up on damage, but this hit actually make them advance toward you so you will probably end up in the hole or something like that if you use it a lot because you will begin to back up when he/she is near you. DAMAGE: 2%
Forward, A: Like a normal swing, but a LITTLE stronger. Useless anyway. DAMAGE: 4%
Forward + A: Wow, a smash hit with a PAPER FAN. It surely does a awful lot of damage and helps you a lot (sarcastic grin here). NO, it does 8% and is not even useful to talk about!! It also breaks a shield in ONE hit. The sole advantage of the Fan. DAMAGE: 8%
Running Stance, A: Like the beamsword, but with the Fan first. Usuless like all the other moves of the Fan. DAMAGE: 6%
Throw it: Yeah!! that is the way to go!! it is the only use to the Fan that is a little useful. Throw it to your opponents. It will harrass and distract them most of the time. that is may be the only good use to it. Also it sends them up when it connects with the throw. I usually start picking it up and throwing it to others until it disappears. DAMAGE: 5%
Poké Ball
Little balls that summon a random Pokèmon when thrown on the ground. Go for them always. Try to throw them at your opponents because they to good damage and throws them like a smash hit. As a general rule, each time YOU get out a Pokèmon know that you are invincible from his effects.
Throw it: Good damage and throws back. You MUST throw it to get a Pokèmon so throw it on opponents. Sometimes they will go over the ledge and enter the Pokèmon range when coming back. DAMAGE: 16%
Beedrills: A bee comes out, makes a buzzing sound and goes into the side (this bee hits opponents on her way too). Seconds after you get a screen of bees passing on the stage to the general area were you threw the Pokèball. Useless on big stages (as you can avoid it by getting on an upper or lower ledge), but dangerous on small stages (Like Kirby's) it is a good Pokèmon to get. DAMAGE: 12% per bee hit
Blastoïse: A big turtle comes out, yells BLASTOISE! and begin shooting water blasts. Each blast makes him go backward, sometimes he can fall off the stage. The water blasts do not do much damage but throws them back a long way. it is usually easy to avoid so it is not the best one to get. DAMAGE: 5% per water blast
Chansey: The little sheep thing comes out, says CHANSEY! and lays 2-4 eggs with items inside. Non-harmful, bad Pokèmon to get. DAMAGE: 0%
Charizard: A dragon comes out and begins spewing flames from left to right, left to right and so on... until it disappear. People will usually get 3-4 hits and then the dragon spews flames the other side so it is not very useful, only annoying. DAMAGE: 3% per flame hit
Clefairy: A fluffy thing comes out and copy one of the other Pokèmon moves. (Swarms of Clefairies and falling HUGE Clefairy, etc...) It can trick opponents because, if they're not attentive to the movement of this Pokèmon, they could get surprised by getting a HUGE Clefairy on them or maybe get caught by the hopping, murderous and extremely dangerous Goldeen move. DAMAGE: Depends on the Pokèmon it copies.
Goldeen: This is the best one, it comes out says something like Goldeen, Goldeen! and begins to hop around. you will want to get the most far of it even if it is near death. Ok, seriously, this guy does nothing, but flopping around so forget it. Maybe fun to yell "GET COVER!" when you get this one. DAMAGE: 0%
Hitmonlee: A sort of Karate Man comes out, yells a Battle Cry and Jumps at one random opponent. Does great damage and throws them back a LONG way. However, it is easy to avoid if you are careful. Also, a tip, DO NOT use your shield against this one because it will break in ONE hit. DAMAGE: 24%
Koffing: A purple ball comes out, yells Koffing! and begin to spews yucky brown gas clouds around him in a circle fashion. Little damage but a good combo is to hit them while they are in the clouds because they will never be able to get out until they disappear so hit them as much as you can. DAMAGE: 3% per gas hit
Meowth: A little cat thingy comes out and throws coins around him in cricle fashion, like Koffing, but DO NOT TOUCH THEM while they're in the because you might send them away from it. It does a hefty 6% damage per coin hit and if you get hit from the beginning, you will easily go over 100% before it disappears. This is very good when strategicly placed. DAMAGE: 6% per coin hit (I did not knew money hurts THAT much!)
Mew: A rare one, appears only sometimes. Does not do anything but fly off the screen. It does basicly nothing in multi-player, but gives you points in single-player, now stop sending messages telling me this. DAMAGE: 0%
Onix: A sort of stone snake comes out and goes straight up. After some time, rocks start falling down. Cover a good area and each rock hit pulls you up so it is quite hard to get out of it when you get caught. DAMAGE: 8% per rock hit
Snorlax: Snorlax comes out and fly off in small form (it can still hit enemies and comes back down at the same place, but in a HUGE form. It will easily clear an area of enemies, but expert players will know how to avoid it. Just stay far, far away from the point were Snorlax emerged. The one who got it out is invincible to it is effects so you can lure opponents to battle with you under the place were Snorlax will fall and try to distract his attention so he does not get away from the area. Kirby can pull a combo with Snorlax, just time a throw (The one that sends Kirby and his opponent flying HIGH into the sky) so that you will hit the Snorlax while it is coming down. If the timing is right, your opponent will be sent in the background, even at 0%. DAMAGE: 22%
Starmie: A star comes out, says OOOH! and goes to a place horizontal to one of your opponents (chosen randomly, usually the highest in the stage). When it gets there it fires little beams of energy that does little damage by themselves but you can do one of your strong moves when he's stuck on the beams. A fact is that it chooses the place were it will fire when it starts moving, so if the opponent he chose was falling he will fire to a useless place. DAMAGE: 3% per beam hit
Star Rod
it is a little strong, but you would better rely on your own moves than this item. It can inflict some high damage. Usually, I throw it to my opponents instead of using it. It comes from Kirby's games, but I do not remember which.
A button: You will swing the Rod. Weak and useless. DAMAGE: 8%
Forward, A: Same swing, but this time, a star will come out of the rod. If you connect with the two hits, you will deal a fair amount of damage, but your opponent will not go too far, considering the damage done. DAMAGE: 12% for the rod hit, 6% for the star hit
Forward + A: This move will deal 26% and is pretty strong, but you cannot do always 26% because the rod sometimes run out of stars to throw. Use it to finish off people as it sends them VERY far. DAMAGE: 20% for the rod hit, 6% for the star hit.
Running Stance, A: Same as the others, slide with Rod in front. Decent rushing move DAMAGE: 14%
Throw it: Good damage and it travels pretty far when thrown. that is usually the best way to use this item. The trick with throwing this weapon is that the enemy that gets hit will be sent in a downward fashion, so it is rather easy to dispose of airborn opponents with this weapon as a projectile. DAMAGE: 11%
Maxim Tomato

A tomato with a big M written on it. In the game, it is written MaximTomato, but it is MaximumTomato. Comes from Kirby games. It heals up to 100% when you pick it up, actually people hitting with VERY good timing can make you drop it without using it (usually happens by hazard) When you have begun healing (Little sparks around you), any hit will deal 0%, but you will still get thrown pretty far if you were high in %. The only advice, pick it up when you see it, regardless of your % so you keep your opponents from getting from 117% to 17%. DAMAGE: It heals 100% and deals nothing.
Heart Container

Same as the Tomato, but heals up ALL damage, even if you are at 500%. Hails from Zelda64. Same as the Tomato, pick it up before your opponents. DAMAGE: It heals damage and deals nothing.
Ray Gun
A ray gun is a ray gun so you know what it is? I call this a coward's weapon because it stuns people it hits and you can just hit them over and over if your timing is right. After 15 or 16 shots, the gun stop shotting and become useless. I throw this down the stage so people do not harrass me with this stupid weapon. It comes from Earthbound, it is one of Jeff's weapons. A button: Basic laser shot. Good for juggling opponents because they get stunned by the laser so you can hit them until your gun runs out or you are hit by someone else. I already said you it is a coward's weapon. DAMAGE: 8% per laser hit Throw it: Simply thrown, it does not do much damage and does not sends them flying so just thrown it down the stage to get rid of it without somebody else picking it up. DAMAGE: 7%
One-player Game Stages
- Stage 1 The player fights Link at Hyrule Castle.
- Stage 2 The player fights a team of 18 Yoshis in Yoshi's Island. The player fights three Yoshis at a time. When one is defeated, another one takes its place, until all are defeated.
- Stage 3 The player fights Fox in Sector Z.
- Bonus Stage 1 Break the Targets! The player has to hit the 10 targets within a time limit of 2 minutes. Each character has a different arena for his target test. Getting KO'd in the target test causes the failure of the test, but not the loss of a life.
- Stage 4 The player fights Mario and Luigi on Peach's Castle. The player also gets a randomly chosen ally.
- Stage 5 The player fights Pikachu in Saffron City.
- Stage 6 The player fights a Giant Donkey Kong in Kongo Jungle. The player gets two randomly chosen allies.
- Bonus Stage 2 Board the Platforms! The player has to land on all 10 platforms within 2 minutes. It is similar to Break the Targets!!; the player can get KO'd and fail the test, but it does not constitute toward the loss of a life.
- Stage 7 The player fights a team of 8 Kirbys in Dream Land. Seven of them already have abilities from the other 7 default characters. The last one is either the regular Kirby or one with an ability of one unlockable character. The player fights two at a time.
- Stage 8 The player fights Samus on Planet Zebes.
- Stage 9 The player fights Metal Mario at Meta Crystal.
- Bonus Stage 3 Race to the Finish! The player has to reach the white door at the end while avoiding three Fighting Polygons, bombs, and bumpers within one minute. Like the two previous bonus stages, failure does not result in the loss of a life.
- Stage 10 The player fights a team of 30 Fighting Polygons on the Battlefield stage. The polygons are fought three at a time.
- Final Stage The player fights Master Hand. Unlike the player, the Master Hand does not have a percentage of damage, but 300 hit points. The battle takes place on Final Destination.
Training mode
Training mode is, as the name suggests, a mode primarily used to practice and simulate battles for improving skills or for beginners to learn controls and moves. There is no time limit or a set number of lives, and whatever happens in Training mode is not recorded.
There are multiple adjustable factors within this mode that are not available in regular VS. mode. Primarily, the computer player's actions can be set to either Stand, Walk, Evade, Jump, or Attack. In any case, if the computer player is about to get knocked off the stage, they make an effort to recover. Another ability available from the pause menu is to be able to make any item spawn. Up to four items can be on the stage at once. The speed of the game is also adjustable. Besides normal speed, it can be set to 2/3, 1/2, or 1/4 speed. Lastly, the camera view can also be changed from normal to close-up; close-up view follows the player at a close angle.
Unlike later Super Smash Bros. games, the computer player cannot be controlled using a controller, and only one computer player can be present at a time.
Bonus Practice
The final mode in single-player mode is Bonus Practice. There are two games, "Board the Platforms" and "Break the Targets". Both games appear as bonus stages in the One-player mode. Unlike other modes, if the player waits after selecting a character, the game automatically starts.
Board the Platforms!
Each character has a unique stage that has ten platforms of various sizes. The objective is to land on each of the ten platforms in the least amount of time possible. Some platforms move while others must be jumped on with the correct timing or the player gets damaged. If the player falls from the stage, it is a Failure, and the player is sent back to the character selection screen.
Break the Targets!
Similarly to Board the Platforms, Break the Targets has a unique stage for each player. The objective in this game is to break ten targets placed throughout the stage by hitting them with an attack. Like Board the Platforms, some targets move, while others are stationary. There are no extra lives, so once a player falls, the trial is a failure, and the player is brought back to the character selection screen.
Versus mode
In VS. mode, the player can pick up to four fighters to fight in a battle. A fighter selection screen is seen, and the players are able to pick which fighter they want. They can also select the costume color for each character. The player is also able to set rules for this match; in a time match, the player can pick the amount of time that can be played, and in a stock match, the players can pick the amount of the lives they and the computers have. Also, after playing a certain number of VS. matches, players can choose which items appear during matches (not in an order, as they are picked randomly). there is also a handicap setting, which allows human players to adjust their attack power and knockback resistance. The damage setting allows players to adjust how quickly fighters can get KO'd at low damage; ranging from a minimum of 50%, to a maximum of 200%.
The next screen is the stage selection screen, where players pick the stage to play on before the battle starts.
Besides the default Free-for-all mode in which players fight each other, there are also team battles. Players can divide into up to three teams and fight against the other team(s). Also, lives are shared, so if one player is eliminated from a team, given that another team mate has 2 or more lives remaining, the eliminated player can recover by borrowing one ally's life by pressing the START Button. Teams are distinguished by costume color of each player, which is either red, green, or blue.
In Super Smash Bros., VS. mode is notably the only multi-player mode in the game.
Options
In the options mode, players can adjust a few game settings. They can adjust the sound to be mono or stereo. Super Smash Bros. is currently the only game in the series where players cannot adjust the music or sound effects volume. The next option is screen adjusting. Super Smash Bros. is also the only game in the series to have this option. The next option is the backup clear, which removes the game's data, which cannot be restored. The European version has an additional option for changing the game's language to English, French or German.
Data
The last menu, the records, shows the profile of each character (and any unlocked characters), which is very similar to trophies in later games in the Super Smash Bros. series. The next part is the VS. Records, where players can see how many KOs, TKOs, and SD's are recorded. By pressing A Button, the player can see how each character is ranked by KOs, SDs, Win Percentage, etc. By pressing the button again, players can view the character's record in detail, showing how much damage was given or taken and the ratio of KOs to TKOs to a certain character. It also shows the character's share of total playtime by percentage.
The last of the records is the unlockable Sound Test. Players can hear sound effects, voices, and/or music from the game. Players can unlock the Sound Test by completing both Break the Targets and Board the Platforms with all characters.
Development and Release
Super Smash Brothers was developed by Hal Laboratory, Inc. in 1998. The game was originally developed by Masahiro Sakurai and Satoru Iwata as a prototype called “Dragon King: The Fighting Game”, but it was changed when Sakurai prompted the change to Nintendo-based characters to provide some familiarity. After this was approved, Super Smash Brothers came into being.
Nintendo formally announced the title in 1998, but only for release in Japan. Nintendo of America was worried about the pugilist nature of the game and about how audiences would react to the franchise characters fighting with each other. To allay those worries, the game was altered for US release, with the fighting sounds for punches and kicks replaced by more cartoonish "bowling" sounds. At the same time, the Star Wars-like lightsaber hum present in the Japanese version was replaced by a more generic audio sample.
Although announced as a playable character early on, neither version featured Wario -- only a costume color scheme based on him. Through GameShark codes, two debug beta stages have been found in the game code, Kirby Beta Stage 1 and Kirby Beta Stage 2.
The game was released in Japan on January 21, 1999; in North America on April 26, 1999 and Australia soon after; and finally in Europe on November 19, 1999.
Masahiro Sakurai was interested in making a fighting game for four players. His initial design for the game was called Kakuto-Geemu Ryuoh (Dragon King: The Fighting Game), which featured simple characters. After presenting the game to co-worker Satoru Iwata, he helped Sakurai continue on with the project. Sakurai understood that many fighting games did not sell well, so he tried to make his game original. His first idea was to include famous Nintendo characters and send them into the fray. Knowing full well that he would not receive permission to do so, Sakurai created a prototype of the game without sanction from Nintendo and did not inform them until he was sure the game was well-balanced. The prototype he presented featured Mario, Donkey Kong, Samus Aran, and Fox McCloud as playable characters. The idea was later approved. Although never acknowledged by Sakurai or any developers behind Super Smash Bros., third party sources have identified Namco's 1995 fighting game The Outfoxies as a possible inspiration, with Sakurai also crediting the idea of making a beginner-friendly fighting game to an experience in which he handily defeated a couple of casual gamers on The King of Fighters '95 in an arcade.
Super Smash Bros. features music from Nintendo's most popular gaming franchises. While many tracks are new arrangements for the game, some songs attempt to directly emulate their sources. The music for Super Smash Bros. was composed by Hirokazu Ando, who later returned as sound and music director for Super Smash Bros. Melee. A complete soundtrack was released on CD in Japan through Teichiku Records in 2001.
