home ➜ Nintendo® ➜ SNES - Super Nintendo® Entertainment System® ➜ Racing ➜ F-Zero
F-Zero #9 Futuristic Formula 1 Racing
Review, tips & tricks, and cheats
F-Zero #9

- Developer: Nintendo
- Publisher: Nintendo
- Release Date:August 13, 1991
- Nintendo Mail Order Deal: $15 • February 18, 1994
- Players 1 - 2
Introduction
15 fast and difficult tracks await you in F-Zero, where you must pilot your futuristic racer through every bump, jump and deadly turn to become the champ. But it is not easy, with plenty of other pilots fighting for position on the track, you can easily be bumped off if you are not careful. Your shields cannot take too much either, so be sure to race down the repair strips on the side of the track near the start/finish line after every lap. And if that is not enough for you, land mines, magnets and holes in the tracks create havoc on your hovercar.
F-Zero (F-ZERO Efu Zero?, F-ZERO) is a futuristic racing video game developed and published by Nintendo for the Super Nintendo Entertainment System. The game was first released in Japan on November 21, 1990 and later in North America on August 13, 1991 and in Europe on June 4, 1992. The title was downloadable over the Nintendo Power peripheral in Japan. It was also released onto the Nintendo Super System. The special edition of the game was released on the Super Famicom's Satellaview attachment.
In late 2006, F-Zero became available over the Wii's Virtual Console and the Wii U's Virtual Console on February 20th of 2013 worldwide. As the first game in the F-Zero series, it was released in Japan as one of the two debut titles for the Super Famicom, the Japanese name for the Super Nintendo Entertainment System. However, in the United States, this launch title was accompanied by more games. F-Zero has been praised for its original scenarios and style of gameplay. As a result, the title has influenced numerous other racing games.
F-Zero features an elimination style race in which the player is given a certain place to be in each lap (1st place, 2nd place, etc.). The player will be knocked out if the player is not in that place or higher at the end of a lap.
Story Line
In the distant future, set during the year 2560, a brand new sport has been created by a group of business-owners who had accumulated a vast fortune throughout their lives thanks to the birth of interplanetary trade among different races and worlds across the galaxy. Through the need for more excitement and stimulation in their overly-relaxed lives, as well as harbouring a deep love for the Formula One races of the ancient past, a futuristic variant of such was spawned which was respectfully given the name: F-Zero.
Through taking advantage of various uninhabitable and desolate planets set across the galaxy which were owned by various wealthy merchants, extremely unique and specialized tracks were constructed for these races to take place on. Unlike typical Earth race tracks that were previously set on solid ground, these new tracks are suspended roughly 300 feet off the ground by way of anti-gravitational guide beams running along every last inch of it is edges. To match this new technology, specialized vehicles obviously had to be crafted as well.
Simply known as "machines", these specialized vehicles boast the very latest in 26th-century electromagnetic-hover technology, being able to suspend themselves exactly one foot off of the ground and reach top speeds of over 500 km/h. With all of this in place, there is no doubt that the F-Zero quickly became the roughest, most dangerous sport that the galaxy has ever encountered, offering up more gnarled courses and deadly obstactles than you could rev a zero-gravity thruster at!
Over the years since this sport's creation, countless contentests and loyal fans of this mobile art have accumulated, demanding more excitement in the form of dangers and unexpected terrain challenges. In not time at all, the title of the "F-Zero Grand Prix Champion" swiftly became one of the most sought-after titles in the Universe.
Gameplay
As with any traditional racing game, the only goal is to make the 1st-4th place spot in every race(which consists of 5 straight laps each) or be disqualified and have to try again, while the courses and fellow racers proceed to increase in difficulty. You only have four different machines to race as: the Blue Falcon, Golden Fox, Wild Goose, and the Fire Stingray (each wielding their own unique strengths and weaknesses). There are 15 race tracks in total set in this game, each with their own twisted designs that vary in challenge, complete with tricky obstacles such as Grit Zones, Slip Zones, Track Mines, and Magnet Strips. The anti-gravitational guide beams set along the edge of each track also inflict damage to your machine should you run into it, and the risk of falling off of the 300-foot high track is also a standing danger.
With all of these obstacles and dangers set into play, power-ups and health-replenishment is occasionally offered during each race. Each machine used in this game has a red power meter that reads how much energy it has left before it breaks down and explodes. Hitting the edges of the tracks, bumping into other racers, and running into Track Mines and Magnet Strips depletes this energy at varying rates, but not completely (while falling off the track results in an instantly-destroyed machine). Furthermore, various on-track items exist to assist your victory during each race such as Boost Arrows, Jump Plates, Health Strips, and Turbo Jets. Use these to your discretion though, as they could potentially increase the existing danger levels rather than ease them.
There are two separate modes of play available in F-Zero: Grand Prix and Practice. "Grand Prix" allows you to compete in one of three League classes: Knight, Queen, and King (with Knight being the easiest and King being the toughest). Each League consists of five separate tracks that you must race in and the points you accumulate through those races (by acheiving a 1st - 4th place victory spot) determines your overall final ranking following the final race's completion. Practice mode allows you to freely choose between 7 different tracks to race on, with the option of racing against a single CPU machine or by yourself in order to properly sharpen your racing skills. The third option available on the Main Menu screen is Records, which allows you to look through all of your best recorded run times in each of the game's 15 playable tracks.
Machines
Blue Falcon
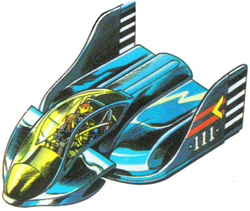 The Blue Falcon is the machine driven (and supposedly built) by Captain Falcon. It is a very sleek and aerodynamic vehicle with the slight appearance of the bird it is named after, with a pair of equalizing fins on it is back end and a strong, pointed nose in the front (together granting wind resistance on and off the track). It is a very well-balanced machine in terms of stats, being able to be driven by even the most unpredictable rookie drivers in the circuit. Even though the Blue Falcon has a moderate amount of body strength and boost power but a below-average grip, Captain Falcon knows this machine inside and out, being the only pilot in existence with the ability to push it beyond it is possible performance statistics while on the track. Captain Falcon also uses this machine on his bounty-hunting assignments, also utilizing the Falcon Flyer to safely and effectively transport him and his machine to any location on any planet.
In the very first installment in which the Blue Falcon machine officially appeared, it wasn't nearly as aerodynamic as the modern-day variant, appearing quite rounded and rather quirky by comparison. it is original number was also '111', rather than the current '07' (this could be due to the fact that '111' is actually binary for '7', but the reason behind the swap was never brought to light). The shape of the front end was much more ovalish and the cockpit hatch had a solid green tint to it. This version also has four individual thrusters in the back.
Golden Fox
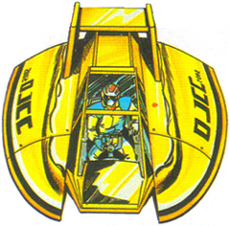 The Golden Fox is the machine driven by Dr. Stewart, which was originally constructed by his late father, Kevin Stewart. Kevin had fashioned the machine in such a way that it completely leaned on acceleration with a remarkable max speed count. However, this greatly cripples the overall handling that the Golden Fox could have possessed and makes it nearly impossible to clear tight corners and handle consistent boosting (unless you have mastered all of the basic racing techniques, as Dr. Stewart has). Ever since it was passed down to him by his father, Stewart has constantly been making upgrades and adjustments to the machine's internal and external structural integrity, upping it is potential and strengthening safety protocol.
In the very first installment in which the Golden Fox machine officially appeared, it was one of the most trickiest machines on the track due to it is maxed-out acceleration always bumping it to the head of the pack almost instantly and in every possible race. The only downside is that this particular machine is terribly easy to knock to one side without your own machine getting too jarred itself.
Wild Goose
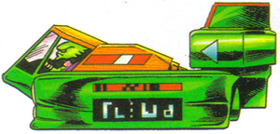 The Wild Goose is the machine of choice for the highly-trained assassin, Pico. It was originally designed to be a machine of war by a high-ranking sergeant in the Polipoto army: Sergeant Lipo. Belonging to the organization known as Death Window, located on the planet Death Wind, Lipo designed this craft to withstand heavy enemy fire and persist against constant attacks with the ability to reach top speeds of over 900 km/h. After the heated battles amongst the Polipoto army had dissolved, the Wild Goose was retired from it is original military duties and enlisted as an F-Zero machine after it is structural and speed potential was recognized by the F-Zero Commitee. Since this machine was designed for Polipotans, it can only be driven by this species and no other, which is how Pico ended up it is official pilot, wishing to enter the F-Zero after becoming a full-time assassin-for-hire following the war's end on his planet. This particular machine has marvelous acceleration and body power, but greatly lacks in the handling and boost departments.
In the very first installment in which the Wild Goose machine officially appeared, it proved itself to be the second-fastest machine on the track in terms of acceleration (leading behind the Fire Stingray) and boasted the strongest body out of all four selectable vehicles. Due to this, the Wild Goose's turbo-boosting power was less than average by comparison with the other three machines.
Fire Stingray
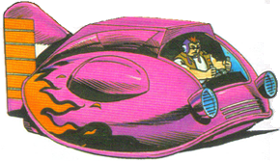 The Fire Stingray is the machine driven by Samurai Goroh. This vehicle was ranked as one of the heaviest of the original four featured in F-Zero SNES yet had the highest maximum speed count out of anyone else as well (although it is acceleration is quite lackluster due to it is weight). It has pretty poor acceleration due to it is awful boost power but makes up for it with an excellent grip and body strength stat. Even though this machine was built especially for Samurai Goroh, there is not much to piloting it effectively, even for a newcomer. Simply boost at a consistent rate and take advantage of this vehicle's sharp cornering abilities and you are all set. The Fire Stingray has a solid pink paint job accented by hotrod flame patterns near it is backside. It has a single fin built near it is dual thrusters, bestowing sharp turning abilities and the slight appearance of a stingray.
In the very first installment in which the Fire Stingray machine officially appeared, it followed the same design-based path as the Blue Falcon and ended up quite rounded and smooth in comparison to it is modern-day counterpart. it is overall shape was similar to that of the top of a mushroom, with the same stingray-esque fin on the back. The twin thrusters that this machine adorns to this day were introduced with this original model. Since there were only four single machines available to select in this installment the Fire Stingray ended up being the heaviest out of each of them.
General Information
The Right Car
The Fire Stingray is your only option. It has the best grip, best boost and highest top speed of the four available vehicles. The three other cars do not even come close to the Stingray's performance. The only downside to the Stingray is the slow acceleration so you'll have to get it at its 478 kph max speed as quickly as possible and make it stay there. This entire strategy is written with the Fire Stingray in mind.
Blast Turning
This is THE most important technique in F-Zero and one that any F-Zero MV veteran will be familiar with. Blast turning simply means tapping the accelerator very quickly while steering through a corner. Without it, the Stingray will have a nasty tendency to under steer and continue going straight, certainly at top speed. Use blast turns constantly; it is the best way to get around the track and speed through those corners like a pro.
Leaning
Using the shoulder buttons will make your car lean over and enable it to get through much sharper corners. Unlike later F-Zero games, drift turning (steering into a corner while holding the opposite shoulder buttons) is not possible so you'll have to do with a combination of leaning and tapping the accelerator to get through the corners. Try and limit leaning as much as you can though as it will slightly decrease your speed when used in a blast turn.
Hugging the corners + rail-cutting
Sticking close to the inside rail and hugging the corners is always important. If you swerve wide you'll lose quite a lot of time when you add the five laps together. While your boost is active you can gain a few hundredths by taking the corners extra sharp and cut through the rails. But watch out that you do not cut too much or you'll bounce back.
Braking
The brakes have little use: tapping the accelerator is a far more efficient way to get through the corners. However, there are a few tracks where you WILL have to brake when boosting through a twisty section to avoid an unfriendly collision with the rails. See the track-strats for more details.
Brake Tapping
Brake tapping is about keeping your average speed higher than normal when using an S-Jet. When an S-Jet is activated, your speed is boosted to 562 km/h and then it slowly decelerates to 478 km/h. When your speed reaches 478 km/h, it immediately (within the next frame) spikes back to 562 km/h, and then slowly decelerates to 478 km/h again. This cycle repeats until the S-Jet burns out. When you brake tap, you are speeding up the rate of deceleration from the 52x-478 part of the S-Jet cycle. When done correctly, brake tapping means you spend more time going 52x-562 km/h, and less time going slow. This technique only saves about 0"01-0"02 per S-Jet and thus makes it one of the last techniques an F-Zero racer should learn when trying to squeeze every last drop of time from from their PR's.
How to do it
You want to brake when your speed hits about 520-523km/h, when you do this, it brings your speed back up to 55x-562. 6 brake taps/ S-Jet is how many brake taps should be done. Now normally your speed starts at 562 when the S-Jet is activated and it takes about 13-15 frames before the first brake tap can be executed. But if your speed happens to be in the 520-529 range when you activate your S-Jet, it is possible to do 7 brake taps/ S-jet. An example of this can be seen in my MCII 2'00"90. I only do it successfully on the end of the second lap. I try for the 7th brake tap on the end of the 3rd lap, but do not have enough S-Jet to get it. This shows how much of a stretch it is to try and go for 7 brake taps/ S-Jet, and why 6 is a good maximum.
Jump plates
These are pretty handy in the opening lap as they give a quick 40 kph boost. Avoid them when you are boosted as they seem to bring your speed back down to 478 kph. Always hold 'down' on the D-pad when landing or you'll lose lots of speed!
Boosting
Use your boost just after the slowest point of the track or use it to travel over dirt patches or other speed-eating obstacles. See the track-stats for more details. When going for a lap record, stock up on boosts until the last lap. Boost just in front of the starting line of the final lap because you can only carry three boosts at the same time.
Rail-bouncing
A more advanced technique when leaning + blast turns just aren't enough. The rails in F-zero have a 'bouncy' quality and on some tracks this can be used to your advantage. Crash into the rail at full speed when the corner is just too tight to clear normally and you'll bounce right back at the same angle. You'll lose less speed this way when compared to braking and trying to avoid the rails.
Turbo start + getting bumped = fast openers
The opening lap is the most important of all. Lots of time can be gained (or lost) by overcoming the Stingray's slow acceleration and getting to the 478 kph top speed as soon as possible. At the start, hold down the accelerator as soon as the countdown for the race begins to make a small boost forward. Take advantage of the small lead and maneuver in front of the other vehicles to get bumped in the back and win valuable time. In Grand Prix mode, first steer in front of the Blue Falcon and have it hit you on your left back side. If you have done it correctly the Stingray will be pushed forward again. Now steer in front of the Wild Goose to get a second bump. Again, have it hit you on the left back side for the best speed gain. In Practice mode, choose the Golden Fox as your rival and have it bump you twice. Depending on where it hits you the first time, it will catch up more quickly to give you a second bump. Just experiment to see what gives the best result on each particular track. The difference between a normal and a 'double-bump' opener can be more than two seconds!
Traffic
Some last words of wisdom on the most frustrating part of F-Zero time trialing. Since there are only seven tracks available in Practice mode, you have no choice but to go for the other records in Grand Prix mode where you have to endure the most annoying and infuriating opposition ever programmed in a racing game. I'm of course talking about those brown anonymous cars that you'll be overtaking right from lap 2 till the finish line. they are extremely slow, always show up in the wrong place and have a nasty habit of getting in your way or blocking the ideal line in a tight corner. Always try to avoid a collision as bumping into the back of one will ruin your speed and your time. Hate these things with all your heart.
Leagues and Tracks
Knight League
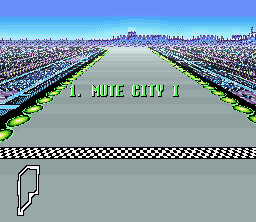
1. Mute City I, Knight League
Size: Medium
Difficulty: Easy
 Mute City is a heavily populated fictional city on Earth in the F-Zero series. The over one billion people living in Mute City consist of all kinds of sentient life. Its original name was Mutant City from which the current name is abbreviated. The city is the most famous stop on the F-Zero Grand Prix and has courses in almost every F-Zero game to date. The only exception being that of the Game Boy Advance game, F-Zero: Maximum Velocity, where it was replaced by Bianca City. A large deposit of pure titanium was discovered at Bianca City forty years prior to its events. As a result, the village became a boomtown overnight. As it grew, it gradually replaced Mute City as the center of economic, political, and cultural activity in the galaxy.
Mute City I is the very first of the fifteen playable tracks featured in F-Zero and the very first to be featured in the Knight League Grand Prix. It is the only track of the trio to be set during the daytime.
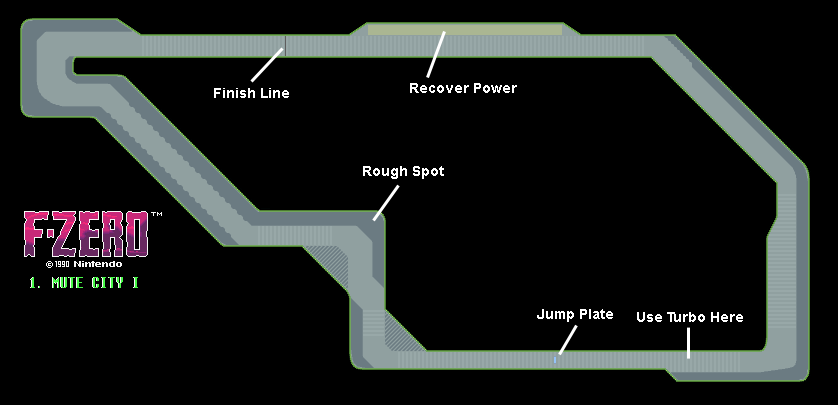
 The track begins on a long straightaway, where the only available Health Strip is located along the far left side. A shallow yet sharp turn to the upper-right will then emerge, sporting a thin Grit Zone on the left side. Go straight for a little while and then another, smaller turn similar to the last one will appear, with the Grit Zone remaining on the left side(only slightly thickened). The track will immediately widen following this turn and then throw a wide, curved turn to the right about halfway down it. Follow this new straightaway for a short while and then the track will thin down again. From this point, follow the long straightaway(which offers a Jump Plate halfway through).
At the end of it, the track will drastically widen(triangually)to another right turn, where a large, triangular Grit Zone will show up to your right. As you move on down this turn, a second triangular Grit Zone will be located to your left(while extra-thick Grit Zones inhabit the right-end corner/entire far-right side). At that point, a second shallow-yet-sharp turn to the right will come up, which will then have you driving down a straightaway with thick Grit Zones on either far side of the track! At the end of that section, the now-thick track will make a shallow-yet-sharp turn to the left and then quickly transition into a smooth, hook-shaped turn(with varying thicknesses of Grit Zones on either side of the track the whole time). After completing the turn, the track will noticably narrow down and lose all of it is Grit Zones. Keep up with the straightaway that will follow and the finish line will soon appear.
Practice Mode + Golden Fox as your rival for a double-bump opener. In the S-corner with the dirt, you can cut off the left patch of dirt by driving on the extremely thin line between the rail and the dirt. (Bianca City anyone?). Very hard to do but it will get a few tenths off the opening lap if you managed to limit your speed loss. On the next laps, stick close to the right rail, ignore the jump plate and use your boost when you get at the S-corner. You can now cross the two dirt sections in a straight line without losing speed. Approach the final hairpin from the left and cut it as close as you can with a blast turn without touching the inside dirt.
 Mute City I is the first and easiest circuit in the game. No real surprises on the way. Go flat out around turns 1, 2 and 3. Use your turbo here just before reaching the jump plate, then hit the plate, hold down to get more air and speed and avoid losing speed when you land, then cut to the right and cut off turns 4 and 5 going over the light rough. This saves quite a bit of time and yout turbo should just run out as you leave turn 5. Finally you have a short left-hander into a right hairpin. Stay as close to the left through turn 7 then slow down a tiny bit and hold Right + R to go around the hairpin. Avoid the thick rough on the exit and try not to hit the barriers. It takes a bit of practice to get right but this circuit is very simple really.
Turbo: Use before hitting the jump plate about half way around the track and save yourself plenty of time by cutting the next two corners!
2. Blue City, Knight League
Practice Mode + Golden Fox as your rival (you get the idea) All corners on this track are pretty easy and can be cleared with just a few taps on the accelerator. Always stick as close as possible to the rails while doing so. Again, boost in front of the dirt sections so you can drive over them and cut the corners a bit sharper without losing speed. If you are good enough, try cutting some rail as well to gain those final tenths of seconds.
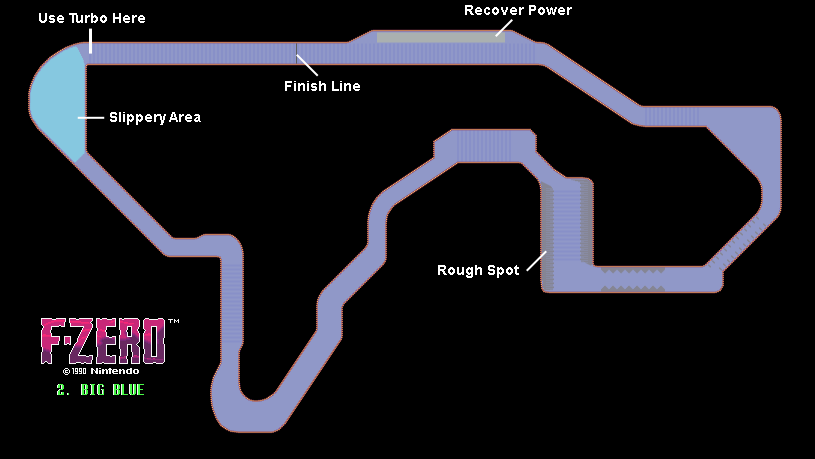
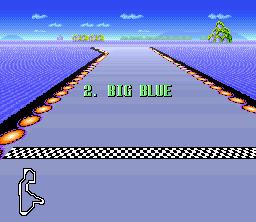 It is set on a planet made up almost entirely of water. It is fairly simple and can be taken, with practice, entirely flat out. The corners are all fairly easy, but through the last 2 corners a new hazard is introduced: the anti-magnetic coating which causes your car to slide out of control. Go flat out through turns 1 to 4. On the exit of turn 4, just before meeting the straight with rough on either side, use your turbo and cut across the rough on the insides of turns 6 and 7. Go flat out around turns 8 to 13, and you should reach a tight-ish right-hand corner. Use Right + R to take it without losing speed, then move to the right of the track for turn 15. This is a 90-degree left hander which has quite a narrow circuit. Use Left + L to take it flat out, and try not to clip the inside of the corner when going around it. Turns 16 and 17 have the anti-magnetic coating on them, so do not turn too sharply and do not use the L or R buttons.
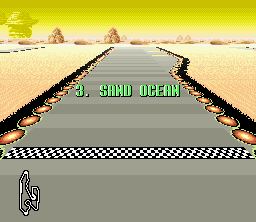
3. Sandy Ocean, Knight League
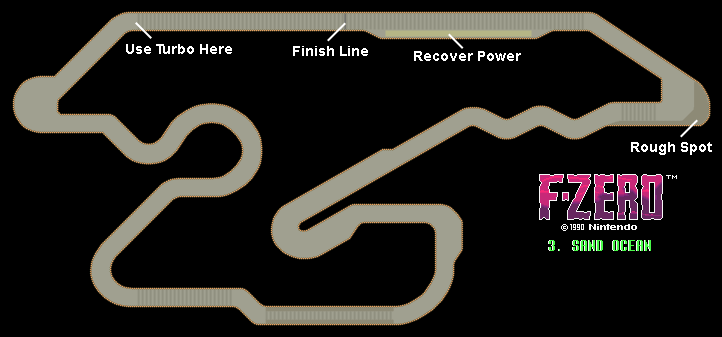
 Practice mode + Golden Fox. Have the Fox hit you the first time on your right back side so it will catch up more quickly. It should give you the second bump just before the first right turn. Use a blast turn after the second bump to regain control and get through this corner. Stay in the center of the short zig-zag section and avoid the rails Approach the tricky hairpin that follows from the right and cut it as close as you can (you may want to let go off the accelerator for half a sec) On later laps, boost immediately after you have cleared it. Take the next right turn as tight as possible (try and cut the inside rail) A short tap on the brake can come in handy here. The rest of the corners are easy enough to clear with just a few taps on the accelerator although the last one might give you some trouble if you are not on the ideal line. Avoid touching the rails here at all times!
Sand Ocean is a tricky circuit. It is extremely narrow in places and has some devilishly tight turns. The pits is on the right-hand side of the circuit on this level, unlike in Mute City and Big Blue. Go flat out rough turn 1, then turn 2 is a hairpin right. Use Right + R to go through it as quickly as possible, but beware as there is some rough on the exit of the corner so turn sharper to avoid it. Go flat out through the twisty corners, then you reach turn 8 - a very tight hairpin left. You need to stick to the far right of the circuit on the way in, then slow down and hold Left + L to get around the corner. Try to use as much of the track as possible to go around quickly. Go flat out through turn 9 then into the double open right-hander of turns 10 and 11 - Count them as two separate corners although they do pretty much form one continous right-hander. The track narrows on the way out so be cautious. Then stick to the middle of the circuit avoiding the rough. Now there are lots of open corners which can be taken at full speed. One to watch out for is turn 16, the long, long left-hander. It can be taken at high speed although you may need to use Left + L if your car is understeering too much. Then you will come up to turn 18 - a tough right-hand hairpin. It is narrow on the way in, then the track widens through the middle, and then it narrows again on the exit Use Right + R to turn sharply, and you may need to use some brake to avoid hitting the barriers at the edge of the circuit. Finally go flat out round turn 19 and you are done.
Turbo: This circuit is not very turbo friendly. You can use it after turn 18 when crossing the finish line, or after turn 2, on the way down to the tight hairpin. If you use it here, make sure it will have run out by the time you reach the hairpin or you hit the barriers without a doubt.
4. Death Wind I, Knight League
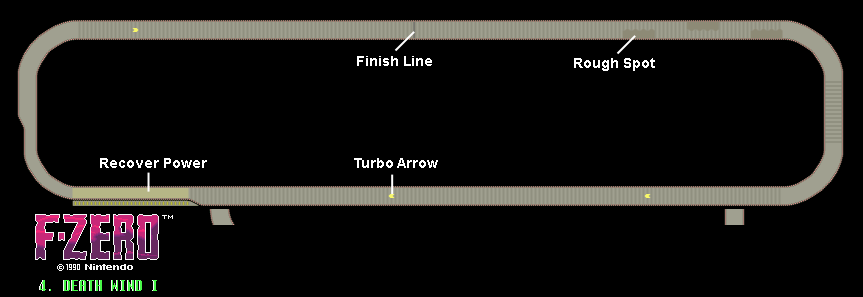
Training Mode + Blue Falcon (works better here than Golden Fox). Pretty hard to get it to work: you have to swerve extremely left after the start and hope the Falcon will hit your right back side. It should then catch up again in between the dirt patches for that time-saving second bump. Hitting the 3 boost arrows on each lap is essential. Beware of the wind gusts which throw you off-line: compensate by steering a little bit into the direction of the gusts to keep straight. Avoid touching the rail after a boost arrow or your speed will drop back much faster than normal Boost past the start line in front of the first right dirt patch: that way you can stay very close to the right side going over the dirt and take the first corner very tight , even cutting the inside rail. Try and hug the other right corners as closely as possible.
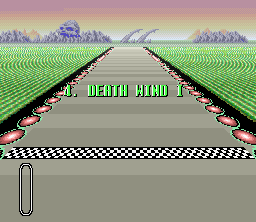 Death Wind I is a great fun circuit. It introduces the speed arrows which when hit launch your car to speeds of over 900km/h. Also however, a strong crosswind blows our car about making it feel unstable. The wind blows from left-to-right as you start, and the other way around when going down the opposite straight. Go forwards from the start, avoid the areas of rough as best as you can (hard with the crosswind) and go around turn 1 and 2. Around here is the first speed arrow to hit. It is placed dead center of the circuit and you must hit it fairly exactly. Near the end of the straight is another speed arrow to hit, then the pits which is put into the middle of the circuit for no good reason. It is narrow here, so try as best to avoid other cars and then press Right + R to go around turn 3. It widens before turn 4. Take this corner flat out then hit the third speed arrow which is just after the exit of turn 4. The speed will carry you through to the finish line and back to the area of rough again. Use your turbo through here and cut across the rough to overtake people. A simple circuit.
Turbo: Use just after crossing the start/finish line to allow you to drive faster over the rough.
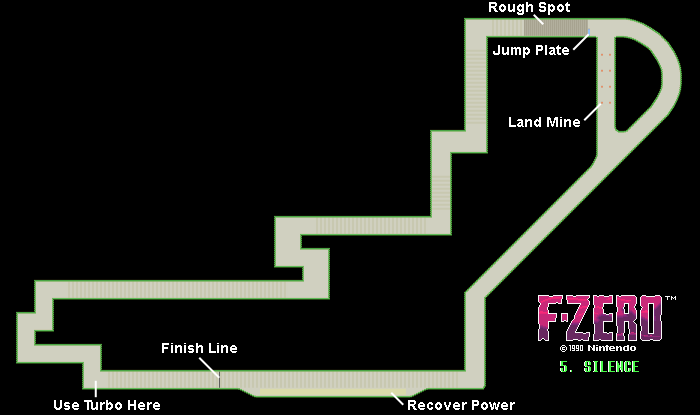
5. Silence, Knight League
Training mode + Golden Fox. Have it hit you on the right side again the first time or it won't catch up quickly enough for a second bump. When the track splits, take the shorter left path between the mines but be very carefull that you do not miss the jump plate when turning left or you'll be forced to drive over the dirt. In the middle of the track you'll be faced with a very tricky hairpin: Steer sharply left into the first part with a well-timed blast turn, then switch to the right and rail bounce into the left rail as you exit the corner. Boost a few seconds after bouncing back on the short straight and speed toward the final hairpin-section. The best way to get through here is to entirely let go off the accelerator. With the accelerator off you can easily guide the Stingray through the corner and there is no need for rail bouncing. Press the accelerator again once you have cleared the hairpin: the boost should still be active for a few seconds and put you back at max speed, ready for the next lap.
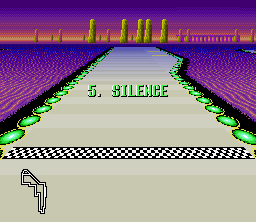 Silence is a bugger of a circuit. It is made up almost entirely of right-angled corners. This is one of the few circuits where the Fire Stingray is not the fastest craft. It has to slow down too much to go around the tight corners. Go through turns 1 and 2 flat out, then you reach a fork in the track. They both lead to the same place so do not worry too much. If you take the right-hand route then you will go around an open left-hander which can be taken flat out. If you take the left route you cut of a bit of the track but there are mines on either side of the road here, and you have to turn sharply left coming out of the corner. Which ever route you take, you come up to a jump plate on the far left of the track, going over some rough. Press down to get more air and clear the rough, or you will slow down considerably. Then use Left + L to go around the next corner. Then slow down a bit to go through the chicane. Then use Right + R to go around turn 7. Next you come up to a horrid, extremely tight, chicane. Go to the far right of the circuit and slow down quite a lot, then use Left + L and Right + R to get around the nasty corner. You will need to take it at about 300km/h or you will crash into the barriers. Then accellarate toward the nasty corner ahead. Go to the far right of the track and then slow down a little bit, to about 350km/h. Turn left, then when you are near the exit of the corner, slow down a bit more as it tightens on the exit. Then accellarate, and go to the left of the track. Finally there is this tricky chicane. It is not too tight so you should be able to take it at fairly high speed. Silence needs a lot of practice to drive well and so I would strongly recommend going for a drive in practice mode before doing a grand prix if you are finding it tough.
Turbo: It best used just after turn 1. There is a long enough section without tight corners for you to use your turbo, but like Sand Ocean, this track is not turbo friendly.
Queen League
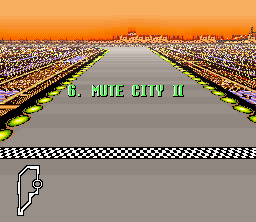
1. Mute City II, Queen League
Mute City II is the sixth of the fifteen playable tracks featured in F-Zero and the very first to be featured in the Queen League Grand Prix. It is the only track in the game to be set during the evening, on the brink of the sunset.
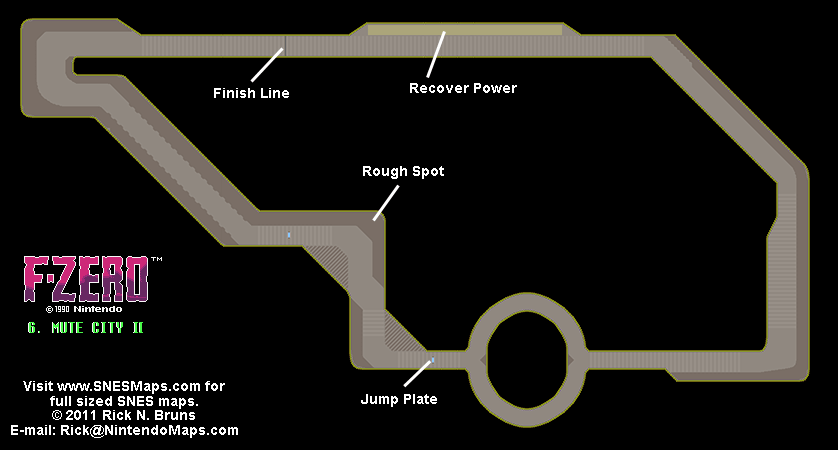
 The track begins on a long, wide straightaway similar to Mute City I, then diverts in an upper-right diagonal direction to another, shorter straightaway. Take another upper-right diagonal turn and the track will slightly widen and carry you on through an even shorter straightaway before taking a sudden sharp, clean turn to the right. Follow a short straightaway from here as the track gradually thins out and then transitions into a perfect circle shape, allowing you to choose two different routes to take: either left or right(both of which will lead you to the same point). After exiting the circle, you'll head straight and into a Jump Plate and take an easy right turn as the entire track gradually balloons in size, making smooth turns a breeze! You'll then take a left turn on this large track, hit another Jump Plate as you momentarily head straight, then make another upper-right diagonal turn onto another lengthy straightaway.
Upcoming from this point will be a sharp, smooth, curved turn to the right at the end of the road(echoing Mute City I again), which will steer you to a final straightaway as the track slightly shaves down again in size, where the finish line will soon follow!
Mute City II is the first circuit in the Queen League, and it is nearly identical to MC1, except that the city below is orange, not blue, and there is a huge loop in the track. After exiting turn 3 you come up to a huge circle on the road. You can go either left or right, both are the same distance and both lead to the same place. After the circle is the jump plate that you used in MC1 to make up time, except it has been shifted furthur down the track. Use your turbo before the jump plate and then use it to jump over the rough at the inside of turn 4. Cut across the rough of turn 5 (like you did before) then hit the jump plate at the exit of this corner and cut off some of turn 6. This is difficult to explain in writing, but when you race on this track it all becomes clearer. Mute City II is great fun.
Turbo: Effectively the same place as MC1. Use after the big oval in the track before hitting the jump plate.
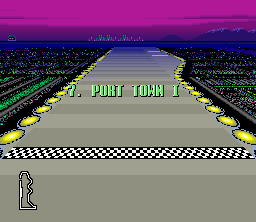
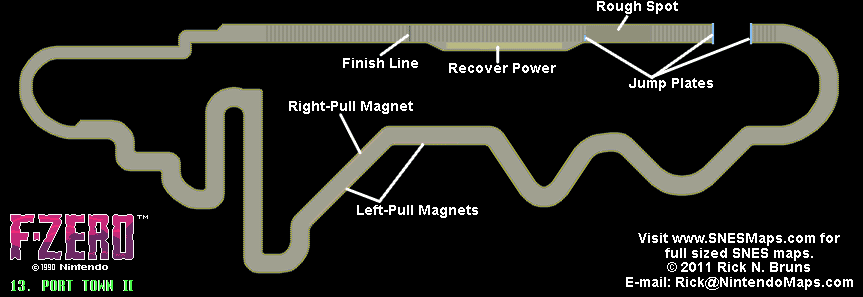
2. Port Town I, Queen League
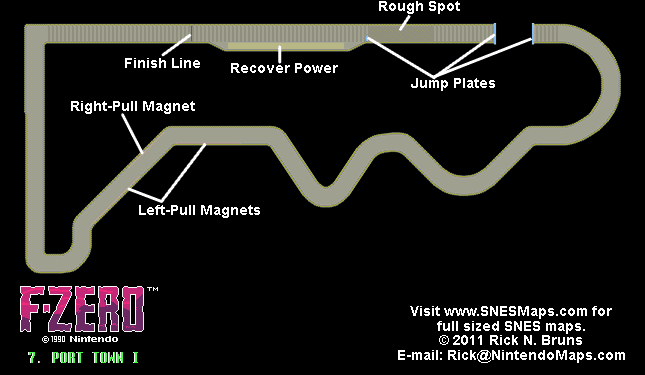
Port Town I is a shortened version of Port Town II which can be raced in practice mode. Race the longer circuit and you should have no problems here as the two are pretty much identical. Use your trubo before the first small jump plate on the right of the track, and hold down whilst going over the two jumps to get extra speed. The first 4 corners of this track aren't too taxing, and can all be taken at full speed. Turn 5 is a tricky right-hander.
 You may need to slow down a touch and use Right + R to get around it. After turn 6, a new hazard is introduced - magnetic beams, which are on one side of the track and they try to pull your craft toward them. If you touch them you lose power and it is hard to escape once drawn in. The first one is on the left side of the track so stick to the right-hand side of the track to avoid being pulled in. Then go around turn 7 - the easy left-hander and you reach a magnetic beam on the right. Stick to the left side of the track on the way out of turn 7 to avoid being dragged about, then there is a third beam on the left hand side of the track, so move to the right-hand side, to avoid being draged in. The beams are a pain, but once you get used to them and the force they have on your craft, they aren't too hard to avoid. Just needs practice. The last three corners can all be taken flat out with the use of the shoulder buttons.
Turbo: Use before hitting the first small jump plate after the 'pits' then hold down to gain more speed off the following two jumps.
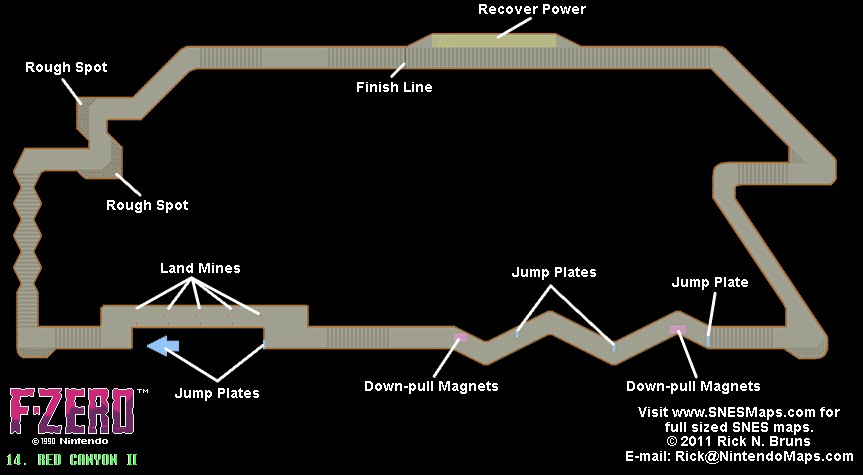
3. Red Canyaon I, Queen League
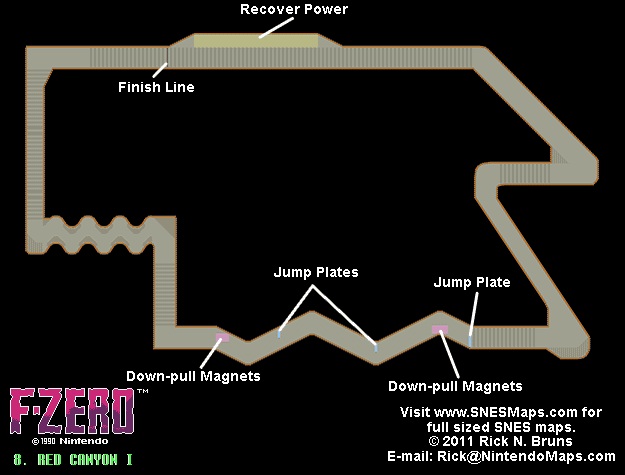
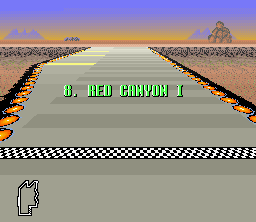 Red Canyon I is a tricky circuit to race on. It is all high speed but has some tough corners to get past, and it all goes along to a funky soundtrack! Take turn 1 flat out, then turn 2 is a tricky hairpin right, which you will need to slow down a bit for. There is some light rough on the inside which you can cut off fairly easily without losing speed. Turns 3 and 4 are also tricky hairpins which you may need to slow down a bit for. The next section introduces down-pull magnets. When flying through the air, if you go over these they pull your car downwards, like the magnetic beams on Port Town I. If you touch them then they do big damage to your craft. Use your turbo here, and hit as many jump plates as possible. Be careful not to fly off the track though. Next comes a tough right turn, followed by a tough left turn. Take these as fast as possible, then you will find a straight with rough on either side. Because the rough is patchy you can safely cut across it without losing much time. Then go around the next two right turns flat out to finish the lap. Red Canyon I is probably the most difficult track in the Queen League (except maybe White Land II) so do not be upset if you do not win first time round.
Turbo: Nowhere in particular stands out on this circuit. The best place is probably on the start/finish straight or when going over the jumps and down-pull magnets. Either way no real gain is made on either.
4. White Land I, Queen League
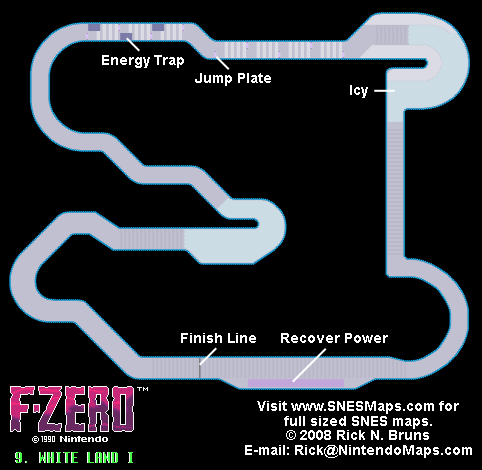
 White Land I is a very easy circuit, mostly flat out and with few tricky corners. You can take turns 1, 2 and 3, flat out and then you come across Turn 4 which is a strange left-hand hairpin. There is rough on the inside and outside and magnetic-block coating on the entire corner, so it is not as wide as it seems. Be sparing with your use of Left+L here as your craft can spin out of control easily. Next comes a straight with patchy rough along the width of the track and lots of jumps and down-pull magnets. Use your turbo here to avoid losing speed but be careful over the jumps as the track is narrow and it is surprisingly easy to fly off the track completely. Next comes turn 5 which is an easy left-hander to be taken flat out and that leads into a series of open corners which is pretty much a bendy straight. That leads into Turn 6 which is a right-hand hairpin with magnetic-block coating. Like Turn 4, be sparing with your use of Right+R and slow down to avoid spinning out and into the barriers. Fortunately there is a wide area on the outside of the corner so it can be taken a little faster than it first seems. Finally there is a series of small corners which can all be taken flat out, leading back to the start line.
Turbo: Use of the straight with all the jumps after Turn 4, just be careful not to jump off the circuit completely.
5. White Land II, Queen League
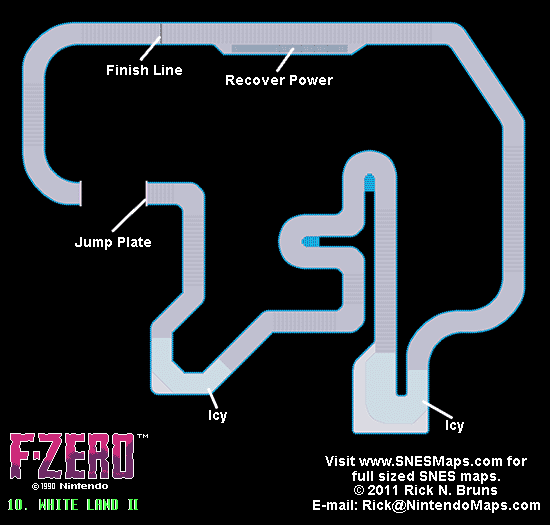
 White Land II bears almost no resembelance to White Land I at all, except for the setting. The first 4 corners are all easy and can be taken flat out. Turn 5 is a tricky hairpin right which has magnetic coating on it and rough on the outside. Slow down and either do not use the R button, or coast around the corner without pressing the accellerator. Either way you should avoid slipping out of control. Next comes up a hairpin left, which you can cut off a bit by going across the 'barriers' at the edge of the track - you will see what I mean when you get there. Next comes a right-hander followed by another left-hand hairpin which you can cut across. After this come 3 corners which can be taken flat out and then a tricky left-hander. Immediately afterwards comes a big jump across the track. You need to be carrying quite a lot of peed when going over here and you will *need* to hold Down to get more flight over the jump otherwise you won't make it. Also I would recommend using your turbo here if you have got one to be doubley sure to make the jump. Next comes two right-handers which lead back to the main straight again. Personally I hate this circuit as the strange corners and big jump I find just strange and do not let the track flow. Oh well.
Turbo: Use just before the huge jump in the track, no doubt about it!
King League
1. Mute City II, King League
Size Medium
Difficulty Normal
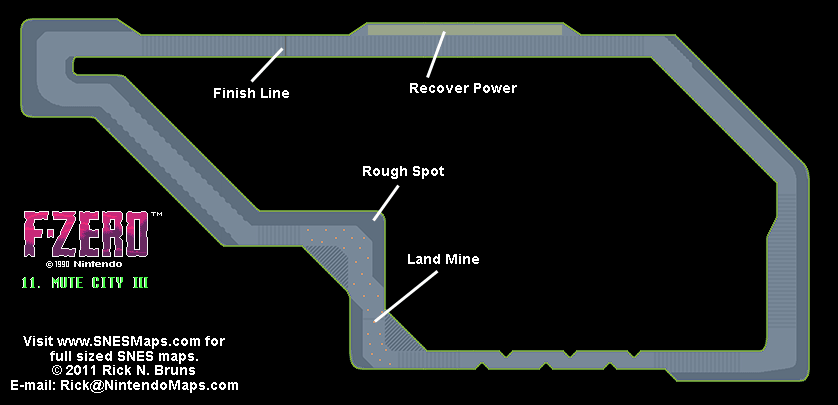
Mute City III is the eleventh of the fifteen playable tracks featured in F-Zero and the very first to be featured in the King-league Grand Prix. It is one of four tracks in the game to be set during total nighttime hours.
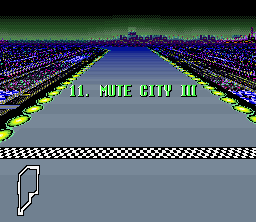 The track begins on a similar straightaway to the previous two Mute City tracks, with the exception of it being the longest of the three, widening out slightly in the middle. The end of this straightaway will turn diagonally toward the upper-right, then lead on down a shorter straightaway before making a repeat of this turn onto a gradually-widened piece of track(with a solid Grit Zone lining the far left side of the track the entire time). You'll then move on for a short ways and then make a shallow, curved turn to the right. With the track at the same length, you'll follow straight for a short ways before the track noticably thins out, offering up obstacles in the forms of large, dents in the track forcing some attentive maneouvering in order to maintain a top speed! After working through this straightaway, you'll enter a wide-open area, with super-thick Grit Zones on either side of the track as you make an easy right turn into a field of hindersome Track Mines.
Successfully swerve through them as you move on and quickly make an equally-easy left turn onto a clear stretch of consistently-thick track, move ahead a short ways, and then make a shallow, upper-right diagonal turn onto a wide straightaway(with the surrounding Grit Zones still remaining). This will eventually lead you into a smooth u-turn that has been seen in every Mute City track so far, which will send you on a final straightaway to the finish line as the track thins out once more and every last trace of the Grit Zones disappear.
Mute City III is just a step harder than Mute City II, although it is probably the easiest in King League. If you follow the advice for Mute City I then you should be fine. Be especisally careful when going through the mines. Stick to the middle of the circuit and make sure you do not hit any flashing cars. When crossing the rough areas that you do not hit any mines here. Try to stick to the same path through this area each lap.
Turbo: Use in the same place as the other two Mute City tracks, just be a little more careful this time when passing the mines.
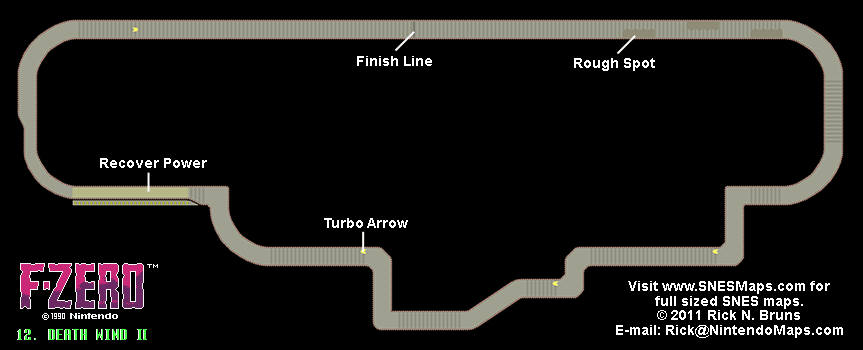
2. Death Wind II, King League
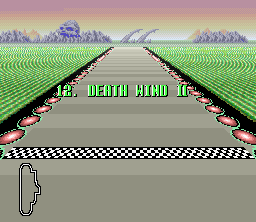 Death Wind II is very similar to the first circuit, except there is a twisty part instead of the second long straight. The cross wind is there too which just makes this circuit just harder still. Avoid the rough areas at the start and use your turbo here to cut down the effect of the cross wind. After the second corner there is a left turn followed by a right turn. You will need to slow down here, and there is a Dash Zone on the inside of the right turn. Because the circuit is so twisting, I would strongly advise you to NOT hit this, as it will send your car into the walls at high speed. There is then another chicane afterwards which is more open, but also has a dash zone on the inside of the right turn, which should also be avoided. Go flat out through the next two corners, and then there is a tight right to-left-chicane. You will need to slow down here, and there is a dash zone on the outside of this chicane too, which I would again advise avoiding. Finally an easier chicane which can be taken flat out, and you rejoin the old circuit just before the 'Pits'. Go around the next two corners flat out and this time hit the final dash zone to go over the start/finish line. This circuit is quite narrow, so be careful. I would say this is the second hardest circuit in the game, behind the awesome Fire Field.
Turbo: Use in the same place as DW1, after the start line so you can drive across the rough faster. Anywhere else would spell d-i-s-a-s-t-e-r.
3. Port Town II, King League
 Follow the guide to PT1 here, as the two circuits are identical apart from the end bit which is more twisting and difficult in PT2. Just before the last right-hand corner in PT1, there is a hairpin left. You will need to slow down and use Left + L to take this. Next is a slightly easier hairpin right, but you will still need to slow down a bit. Next comes a chicane which you can easily take at full speed. Just be careful if you intend to overtake anyone here as it is quite narrow. Then the track tightens into a smooth right-hander. Again this can be taken at full speed. Finally there is a tricky left-right chicane. This CAN be taken at full speed, using L and R to help steer, but it requires quite a bit of practice. Finally the track widens and crosses the start/finish straight. As the different part of the track is so twisting, use your turbo down the straight to help you get over the jump plates at the beginning.
Turbo: Exactly the same place as PT1. Use after the 'pits' to get more speed off the jumps.
NOTE: If you leave the menu screen without touching any buttons for a while, it will show a practice lap of this circuit in the Blue Falcon. It is impressive to see how close they cut to the side of the track without hitting it!
4. Red Canyaon II, King League
 This is one of my favourite circuits. It is not that hard to race on, is nice and wide, and there is an impressive shortcut which means you will win almost every time! The beginning bit of the lap is identical to RC1. When you come to the area of jump plates and down-pull magnets, do NOT use your turbo here. Instead go over the jump plates as usual and then just afterwards there is a short straight. Use your turbo here and then you come to a right-to-left chicane. Instead go straight on, seemingly into the wall and there is a jump plate hidden here. Hold down and you will hit a large blue arrow on the side of the track which will launch your craft safely back onto the track. Hold down when you land to avoid losing speed when you come crashing back to earth. Next there is a right turn which can be taken flat out followed by a straight with jagged edges. Then there is another right turn to take flat out, followed by a tricky left-to-right chicane. You will probably need to slow down here, but with practice it is an easy corner to make. Go flat out round the last two bends and you will rejoin the old track.
NOTE: On the first lap you do not have a turbo therefore you will be unable to make the shortcut. In this case take the corner and pick your way through the mines.
Turbo: Read the guide! Just before the shortcut.
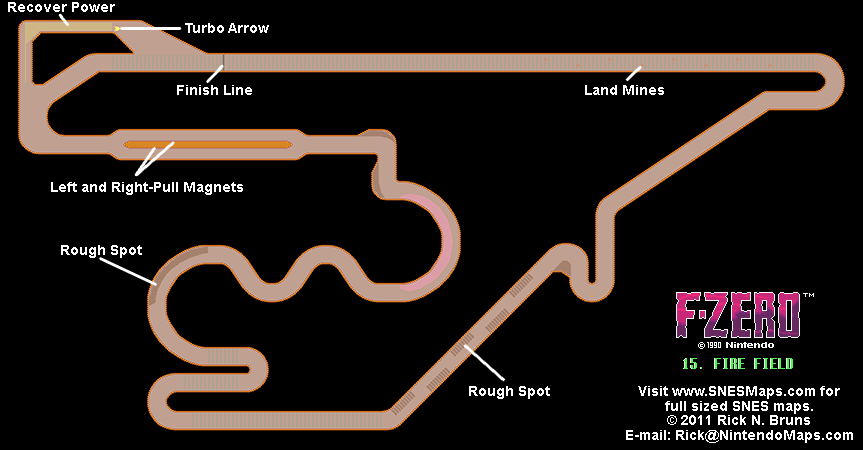
5. Fire Field, King League
 This is the last circuit, and it is the only one you do not race, in some form, in an earlier league. Fire Field is very long. It takes a good 5 minutes to complete a full race, and the pit lane is hidden away in a neat corner, but you will almost certainly have to use it as this track is littered with hazards. Immediately you come across mines on the first straight. I find the easiest way to avoid them is to stick to the far left. This puts you in a good position for the first corner too, a tricky hairpin right. Take this as fast as possible and go through turns 2 and 3 flat out too. Then you come across a tighter hairpin right, followed immediately by a hairpin left with rough on the inside. Getting through these two is very hard, but it helps if you slow down on the way into turn 4, and then stick to the inside of the corner on the exit, getting you in a good position for the tricky turn 5. This is then followed by a straight with patchy rough dotted about on either side. This is probably the best time to use your turbo as you can cut across the rough without losing speed, and the next corner is open and can be taken at speed. Next comes yet another hirpin right, followed by a hairpin left. Both of these you will need to slow down for. Turn 9 is a gradual right turn with rough on the outside of part of it. It is a very easy corner to take at speed. Stick to the inside all the way through to put you in a good position for turn 10. Turns 10 and 11 are open corner which can be taken at speed. Next comes a gradual left corner with Magnetic Block Coating on the inside. Stick to the outside of the corner so you do not slide around on the red stuff! Then turns 13 and 14 are fairly easy and can be taken at high speed. Next is a straight where the road splits in two and there are side-pull magnets on the inside of both. It is quite tight through here so be careful. At the end of this straight is a right turn. If you continue straight on through this corner there is a second part of the track where the pits are hidden away. Try to hit the thin strip of pit on the entrance to maximise the effect of the pits, and after it there is a dash zone which makes up for any lost time you sustained going the long way round the last corner.
This circuit is extremely tough to get round. It will probably take more than one go to finish in one piece. The only advice I can give is to be a little more safe than usual. Take the tight corners slowly and use the start/finish straight to do most of your overtaking. Good luck!
Turbo: Hmm, tricky one this. Fire Field does not really have any places where a Turbo is particularly beneficial. The best time is probably after Turn 5 on the straight as it will allow you to go through the patchy rough quicker.
Items
Pits
areas of the road where you regain lost power when you drive through them
Found: On every circuit, usually to the left/right of the finishing straight
Jump Plate
This launches you a little in the air. It also makes you go a little faster while you are in the air. Hold Down while in the air and you will fly higher and furthur, also hold Down on landing and you will not lose speed when you crash back to Earth (or whatever planet you are on!). The opposite is also true. Hold Up and you will lose lots of speed on landing and not fly very far at all (this is sometimes useful but not very often). These items are definately good.
Found: Mute City I, Silence, Mute City II, Port Town I, Red Canyon I, White Wind I, Mute City III, Port Town II, Red Canyon II, Fire Field.
Big Jump Plate
The same rules apply to this as to the normal Jump Plate except that these stretch the width of the track and allow you to jump over 'missing' sections of track.
Found: Port Town I, White Land II, Port Town II, Red Canyon II (secret).
Dash Zone
A flashing yellow and purple arrow on the track. Hit one of these and you fly to almost 1000km/h for a short time. These are almost always useful except for on Death Wind II where some of them will send you spinning uncontrolably into the barriers. Steering at these sorts of speeds is a definate no.
Found: Death Wind I, Death Wind II, Fire Field (secret).
Hazards
Anti-Gravity Guide-beam
Or as the lazy among us call it, barriers, railing etc. it is that stuff at the side of each track which stops you flying into whatever is below. Avoid these at all costs as they make you lose power.
Found: On every circuit
Rough
Stuff that is grey and slows you down. This is all over the place on every circuit and is not a big disaster. Try to stay out of the thick stuff, however the thin stuff does not slow you down too much (especially if you use a turbo) and can be a useful short cut.
Found: Almost every circuit
Side-Pull Magnets
These drag you to the side of the track and if you hit one it causes you to lose power and also can be very difficult to get out of. Avoid these at all costs by steering away from them, moving to the other side of the track from which they are on (the furthur away you are, the less effect they have on you) or by using L or R to counter the pull. Very nasty hazards these.
Found: Port Town I, Port Town II, Fire Field
Down-Pull Magnets
These are found on the track itself. If you jump over them they pull you down shortening your jump, however you do not lose any power. If you drive into them they cause you to lose power and it can be very difficult to escape from. Avoid these at all costs.
Found: Red Canyon I, White Land I, Red Canyon II
Land Mines
These are not fun things to hit. If you do they take a chunk of power away and throw you away in a random direction. Avoid at all costs, however you can force the other drivers into them which is good.
Found: Silence, Red Canyon I, Red Canyon II, Fire Field
Magnetic Block Coating
These make your car slip wildly out of control if you turn too hard. This frankly is a pretty dorment hazard as it is very rarely actually causes your car to spin out of control unless you try to make it. Anyway if you start to slip turn into the skid (in the opposite direction to which you are spinning) and slow down a bit.
Found: Big Blue, Fire Field
Flashing Crafts
In Grand Prix mode there are some flashing crafts dotted about the place that are racing against you. These cars are a hazard because if you hit them, they blow up, take away a chunk of your power and throw you in a random direction. A bit like landmines but moving. Fun to hit for a while but not nice if you are jostling for the lead.
Found: Any race track in GP mode, lap 2 onwards
Backmarkers
Not exactly a hazard like Flashing Crafts are as they do not so any damage, but still worthy of mention since they are backmarkers for a reason - they cannot drive. These things manage to do their utmost to get in your way, intentionally or otherwise. Take special care on the two Death Wind circuits due to the high speeds involved.
Found: Any race track in GP mode, lap 2 onwards.
Cheats
Boost Start
When you are starting any race the word READY!!! will pop up on the screen and you will hear three beeps. After the third beep and before it says GO!!! hit the accelerator for an extra speed boost.
Unlock Masterclass
If you complete any league on the Expert Class, you can compete in a special Master Class
Red Canyon II Shortcut
When you are at the jumps, hold down while in the air. When you are finished all four or five jumps head directly straight only if you are at top speeds. There will be a jump. If you are not near top speeds you’ll crash out! Hold down while you are in air. While you are in the air you’ll see an arrow with jumps. If you hit it you’ll save some time while the computers are dodging potholes!
White Land II Shortcuts
In White Land II there are 2 turns where at the tip of the wall there is a aqua-blue end. If you have enough power you can cut through the wall. Don’t cut through if you do not have enough power because the wall takes away some power.
Maintain Speed After A Jump
After going over a jump, you will normally hit the track hard and lose about 70 km/h. But, if you hold Down on your jump, you will land and your ship will make a weird noise. You usually reach full speed doing this.
Fly Over Port Town
In Practice mode, at the Port Town race track, you can fly over the city if you use an “S” right before the jump over the gap in the track. You must be at the far right of the track, use the “S” just before you hit the jump, hold down, and turn sharp. You must aim at the middle of the bend that bends away from you, and you must hold down until you land. This might take some practice.
