home ➜ Nintendo® ➜ SNES - Super Nintendo® Entertainment System® ➜ Platform ➜ Mega Man X
Mega Man X #13 ロックマンX, Rockman X
Review, tips & tricks, and cheats
Mega Man X #13

- Developer: Capcom
- Publisher: Capcom
- Release Date:December 16, 1993
- Toys-R-Us · Sacramento: $20 • November 12, 1994
- Players: 1

Introduction
Mega Man X (ロックマンX, Rockman X is the first Mega Man X series game released in 1993 by Capcom, featuring a whole new style of gameplay. The main difference between X and the normal Mega Man series is mobility, setting, and characters, in which Mega Man is given new abilities (like wall jumping) and partnered up with characters like Zero in a different time period. The game was released for the SNES first, and was then ported to MS-DOS in 1995. In 2006, a remake titled Mega Man Maverick Hunter X (イレギュラーハンターX, Irregular Hunter X) (the game's pre-title screen says "Maverick Hunter X: The day of Σ") was released for the PSP. This version features additional voice over cutscenes, 3D graphics, hitbox and timing changes, auto-save, and a hard mode. Mega Man X was also re-released as part of the Mega Man X Collection for the GameCube and PlayStation 2 in 2006. A final remake with higher-resolution graphics was released for the Wii Virtual Console and iOS in 2011. It was later made available to the Wii U Virtual Console.
Story
As his life was ending, Dr. Light was successful in creating the first in a new series of robots that could think and make decisions on their own. Fearing the worst, Dr. Light sealed the robot until all of its systems could be thoroughly tested. Released by Dr. Cain, a new Mega Man was born. When Dr. Cain tries to implement the new systems into a series of Reploids, something goes horribly wrong. Now, the new Mega Man must fight to save humanity in 12 levels of intense action. Will he be successful? Find out with Mega Man X
Dr. Cain, an archaeologist searching in the year 21XX for fossil records relating to Mesozoic plant life, accidentally stumbles upon ruins of a robotics facility used by the great Dr. Thomas Light. Inside, Dr. Cain finds a capsule which contains a highly-advanced robot, Mega Man X, who had human-like intelligence and emotions. Dr. Cain was fascinated, and began to study X. Several months later, he successfully develops the first "robot android" (or Reploid), which can act and think exactly like a human being.

However, with the free will Reploids had caused them to commit crimes, unknown to robots at the time; such rogue Reploids were said to have "gone maverick" and were later referred to as Mavericks. Crimes escalated, and the government stepped in, and under the advice of Dr. Cain, formed an elite military police organization called the Maverick Hunters. The Hunters would capture or disable any Reploids that posed a danger to humans and protect humans at all costs.
Dr. Cain designed a highly-sophisticated robot as the leader of the Maverick Hunters, named Sigma. He headed the force for three years before becoming a Maverick himself; he took many other hunters with him and then took over an island, driving out the humans living there. He believed humans were inferior to Reploids and started a mass extinction effort. Only one other hunter, the mysterious Zero, was willing to fight Sigma; X, ridden with guilt for being the basis of the rogue Reploids, also joined Zero's cause, and together they fight to stop Sigma.
Basics

Controls
- B - Jump/Wall jump
- Y - Shoot (Hold to charge your weapon)
- A - Dash*
- L - Cycle back through weapons
- R - Cycle forward through weapons
- START - Pause/Open pause menu
*It strongly recommended mapping Dash to one of the shoulder buttons. Cycling through your weapons in two directions without pausing is useful, but it is less useful than being able to dash while shooting. If you are playing the Wii U Virtual Console version, you can map Dash to ZL or ZR and leave the weapon cycle buttons alone for the best of both worlds.
Levels Intro
Mega Man X, like its predecessor series, is a largely non-linear platformer. After the first stage Highway, you are given the option to play the eight stages that follow in whatever order you think is best. Each of these stages ends with a boss who will reward you with a new weapon (among other things) that will do extra damage to one other boss. Sometimes a boss' weakness is obvious (such as the penguin boss being weak to fire), and sometimes it is less so (like the beetle boss being weak to a homing torpedo because he can teleport, something you will not discover until you come face-to-face with him). You should Fight as many bosses as possible using the weapon they are weak against, as well as minimizing backtracking for hidden upgrades, but it is certainly not the only way to do things. There are two different strategies for each boss, one assuming you can exploit its weakness and one assuming you cannot. Doing things wrong will not lead to any negative consequences later, so just have fun.
 Mega Man X is separated into stages where the player must run from start to finish in a linear manner. At the end of each level a boss awaits Mega Man. After beating the first stage, the player will have the option of selecting other stages, each of them with different layouts and enemies, as well as a boss (or "Maverick") at the end.
These stages can be beaten in any order, but the order below is recommended. After beating the boss at the end of these stages, X will gain a new weapon; he can also get upgrades, heart tanks (which increases your maximum health), or sub-tanks (which contain energy that restores the player's health) in these stages. Once all of the bosses are beaten in their stages, the player will move on to the final part of the game: Sigma's fortress. The fortress contains four stages, each with a boss at the end. The final stage of Sigma's fortress contains the true final boss, and when beaten, will end the game.
On each guide page, you will find details about key difficulties and peculiarities of the level. Additionally, the level section and the boss section are kept separate. Also, after beating a stage, the player will receive a passcode which they can use to load their previous state. Note that loaded games will not have their extra lives or sub tank levels preserved. Simply select "Start Game" at the main menu to jump right in.
Levels
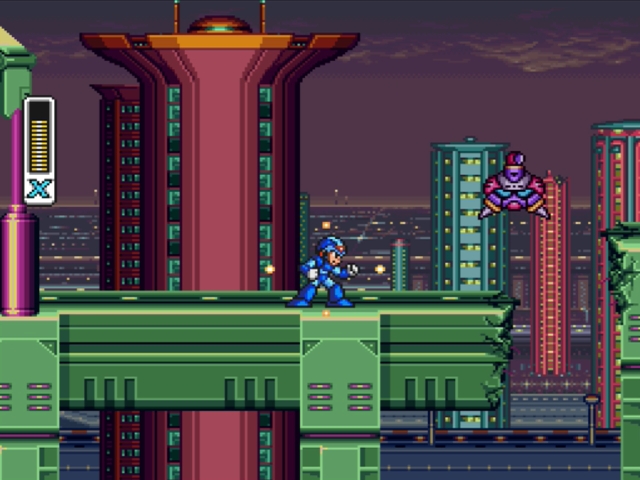
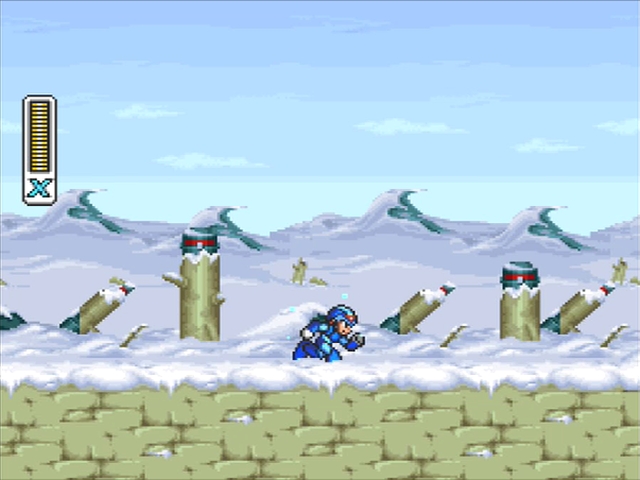
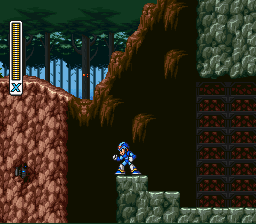
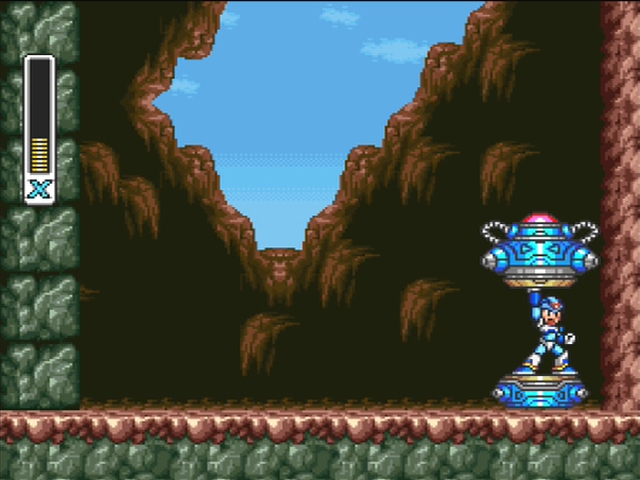
Highway
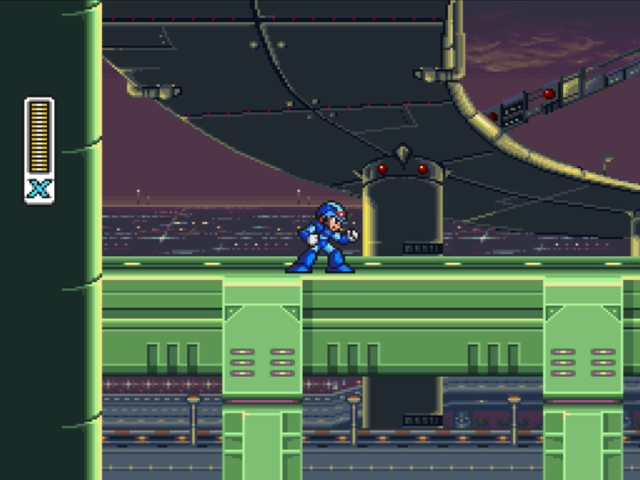

Mega Man X starts you in a specific stage with no real reward for completing it other than the basic skills you will need to survive the rest of the game. It is not very difficult and there are not really any secrets, but there are a few things you might want to watch out for, including a bunch of enemies you will be encountering for the first time. First up you will meet:
Spikey
 These characters are not very tough. If you are quick, you can hit them with three quick blasts from your regular weapon to defeat them. If you only shoot them twice, they will fall over and slide towards you for a moment before stopping and exploding. Ideally, you will have a charged shot ready to go and take them out with one blast. Alternatively, you can just jump over it and it will helplessly roll away.
Now is as good a time as any to talk a bit about the X Buster. Your default weapon does one point of damage with a regular shot, but you can hold your fire and charge your weapon by holding the Y button for a few seconds.
Green Energy
Green Energy
 There are two levels of charge which are shown by the colour of the glow around X's body. If it is green, you will do a small charged shot that does 2 points of damage. A yellow glow means you will fire a bigger shot that does 4 points of damage. Bosses are invincible for a moment after you hit them so it is more efficient to use charged shots when possible, but regular enemies will take more damage per second from rapid uncharged shots, rather than stopping to charge every time. This is handy information to have as we fight our next enemy:
Gun Volt
 Gun Volt has 16 HP and is stationary, but has two different attacks. It will either fire two missiles at two different heights, or a pair of electric spheres that will run along the ground. The simplest way to avoid both of these attacks is to jump over them. Be careful: the missiles will block your shots if you hit them. Try not to waste a charged shot on them.
Progress a bit more and you will run into one of this stage's gimmicks, and the enemy responsible for it.
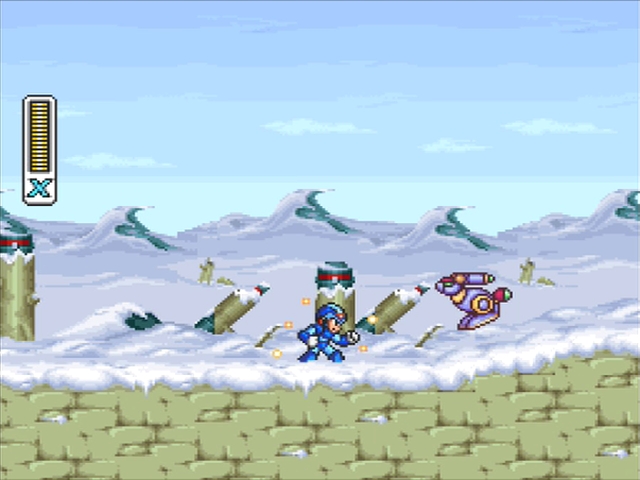
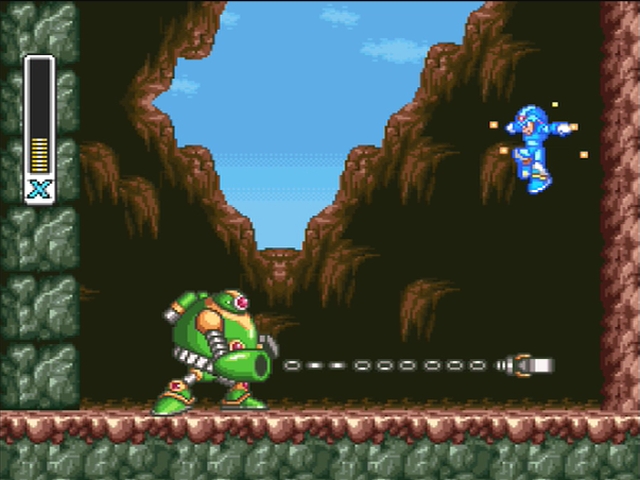
Crusher
 Crushers are not very strong, but their spiked weights can damage parts of the ground. If the ground is damaged enough, a hole will appear, which can lead to death if you are not careful. Once you destroy a crusher, its weight will drop and damage the ground if it lands on a damageable part of the highway instead of a support pillar, so be careful. If you hit them just right, the weight will be destroyed along with the enemy, but that is tricky, so do not count on it. Crushers only appear in this stage.
You will progress forward, dealing with Crushers and the occasional Gun Volt, until eventually running into this bullet sponge:
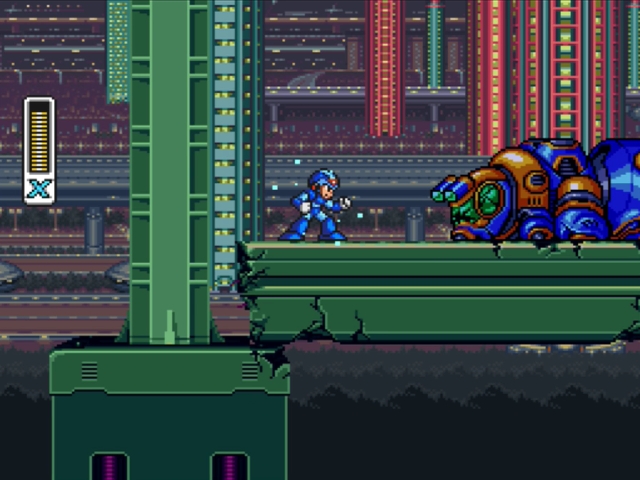
Bee Blader
 Another enemy unique to this stage, Bee Bladers are huge and take 32 regular shots to defeat. As they take damage, they will gradually move towards you, but they look more dangerous than they actually are. They have three ways to attack. they are constantly firing a machine gun at a 45 degree angle, but it is so short range that you would basically have to be going out of your way to get hit by it. What you really need to watch out for are its missiles. Jump over then and to the right when they get close, and be mindful of the fact that they will curve towards you when you do. Finally, they can also drop a certain lesser enemy for you to deal with.
Ball De Voux
 These enemies are as weak as they are common. Just one lightly charged shot or two regular shots are enough to take care of them. They have no special attributes and are pretty much the simplest enemy you will encounter in the game.
After the Bee Blader is defeated, it will land on the bridge and cause it to collapse. But do not worry! you will be fine. This is just an opportunity to introduce you to one of the game's fun new mechanics.
Ball De Voux
 If you dash towards a wall, you will cling to it and slowly slide down. From there, you can jump away from the wall and move back towards it to cling to it again and gain height. This is a simple but important skill to master for both platforming and boss fights. Remember that you can still fire any of your weapons while clinging to a wall.
If you have taken damage, you can use your new wall sliding technique to slide down the next hole and collect a two health pickups. Otherwise, continue on. you will fight some Balls De Voux and another identical Bee Blader before running over some damaged ground that will collapse beneath your feet. Be careful here. Just keep moving or jumping whenever you see ground that does not look 100% stable and you will be fine, since you will move all the way across it before it drops if you do not stop. you will also meet another weak new enemy.
Bee Bomber
 you will run into a lot of these. they are not tough to deal with, with only 2 HP. They might drop tiny little bombs that stop on the ground and explode for a moment to do a tiny amount of damage. (The tiniest amount of damage, really. One point of your life gauge.) they are nothing to worry about. After a few more Bee Bombers and collapsing bridge sections, you will meet yet another new enemy.
Jamminger
 These characters will get right up in your face, but will not hit you right away unless you walk into them. They do not have much health, so when you see one, stop moving and shoot it before it decides to start moving again and fly into you.
Destroy a few more Jammingers and progress. Be careful of the hole that you will probably need to wall jump to get past. Jump as far right as you can and hit the wall just below the ledge and climb up with the wall jump. Then get ready for another new enemy.
Road Attacker
 These characters will drive at you in their cars and occasionally shoot you. They only appear in this stage and if you just destroy the robot in the car and jump over it, it will harmlessly drive away. You can also destroy the car entirely if you want. If you do not destroy the robot, it will eventually turn around and come after you.
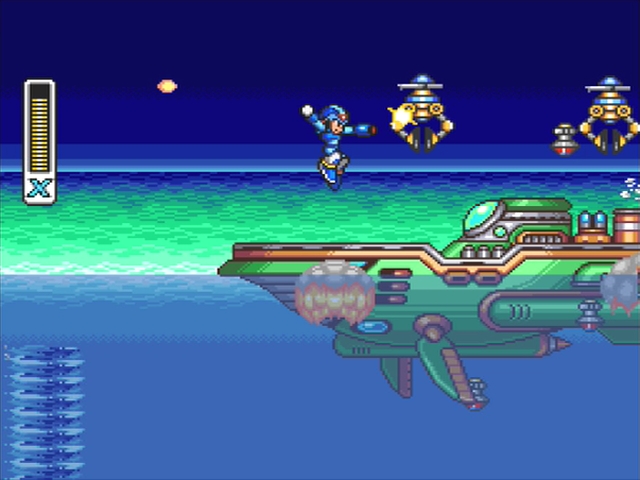
Fight a few more Road Attackers and you will run into an airship that will drop yet more Road Attackers on you, followed by a sort-of boss fight.
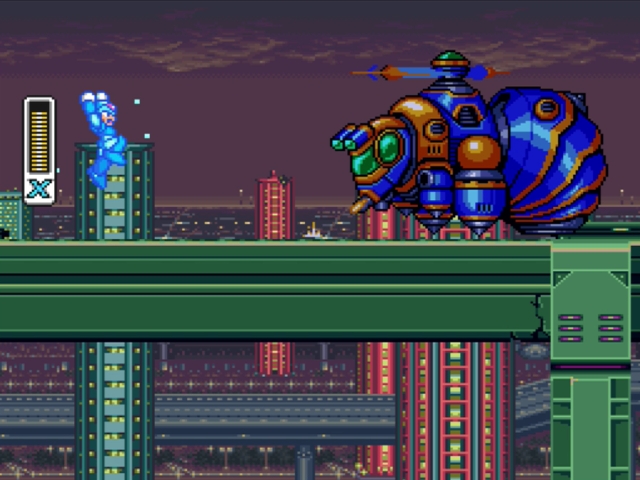
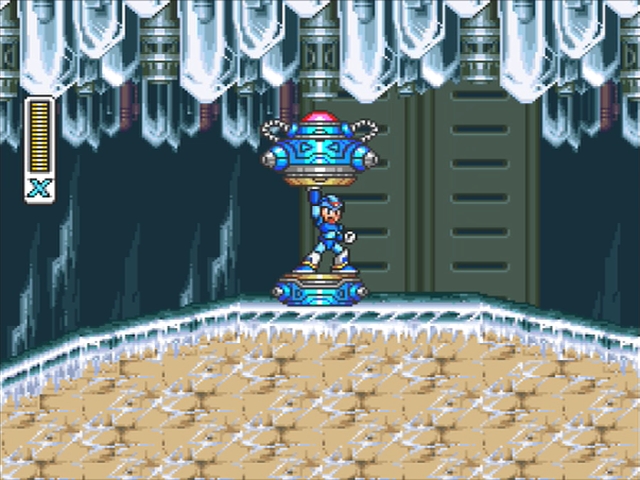
Vile
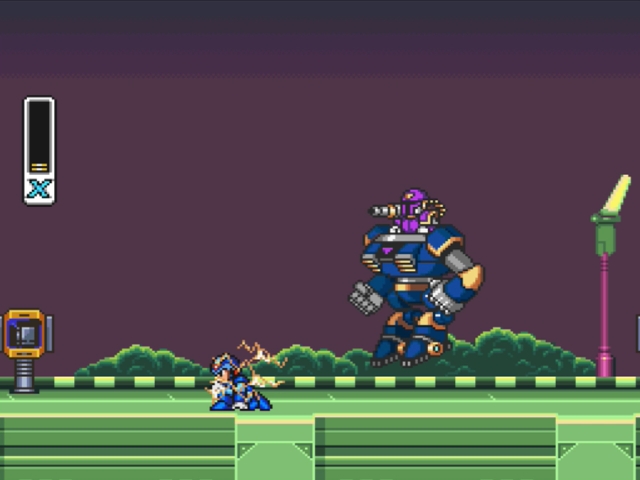 This is a storyline battle, so you cannot win — Vile is invincible. He will race towards you with his Ride Armor treads and throw punches repeatedly. Once your energy meter drops below a certain point (around four energy bars), Vile will start shooting glowing yellow orbs
 ![]() Mega Man X Enemy Vile armor projectile.gif at you that entrap enemies in an energy net. If you get hit by one of these projectiles you will be trapped and both the fight and the level will end with a short cutscene. Keep in mind that if you are hit enough times before being trapped by one of the glowing orbs you can still die; so to fight against this boss safely, throw yourself at one of the orbs to end the battle as soon as possible.
Mega Man X Enemy Vile armor projectile.gif at you that entrap enemies in an energy net. If you get hit by one of these projectiles you will be trapped and both the fight and the level will end with a short cutscene. Keep in mind that if you are hit enough times before being trapped by one of the glowing orbs you can still die; so to fight against this boss safely, throw yourself at one of the orbs to end the battle as soon as possible.
Passcode thus far
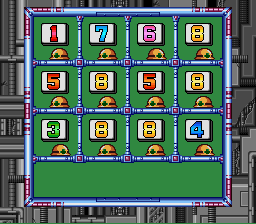
1768 5858 3884
Your reward for finishing the stage is the first passcode of the game, which will let you bypass the Highway Stage if you enter it from the main menu. Each time you complete a level, collect a permanent item, or acquire an upgrade the passcode will change.
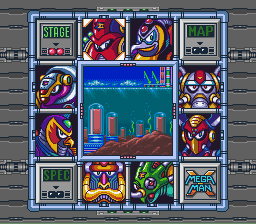
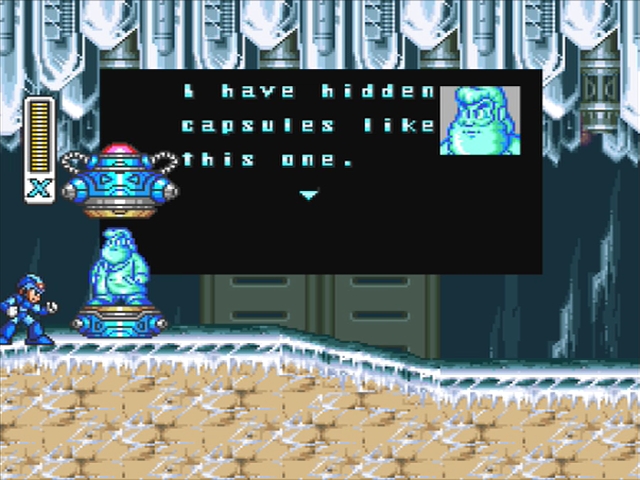
This is where the game opens up and you can pick any of the eight Mavericks to fight. Each Maverick will give you a new weapon which is particularly strong against one other Maverick. Defeating certain Mavericks can also have an effect on other stages, but more on that later. Feel free to do whatever you want, but I strongly suggest visiting Chill Penguin's stage first, because his stage holds something very important that changes the way the game is played.
Chill Penguin
 Chill Penguin is the preferred choice for beginning players. He is the stage boss with the easiest difficulty to defeat, using a simple attack pattern you can memorize and react to with little effort on your end.
Aside from a few slippery patches of ice and floor gaps in the more rundown areas of the base, there is not much danger to behold here. This stage is also ideal to tackle first because it is the only one that houses an armor upgrade capsule out in the open. Since the upgrade is a freebie, you can obtain it without having to go on a manhunt, and it will aid you greatly throughout the later stages. This level is a little soft, but do not worry, you will still probably take a beating somewhere in this stage.

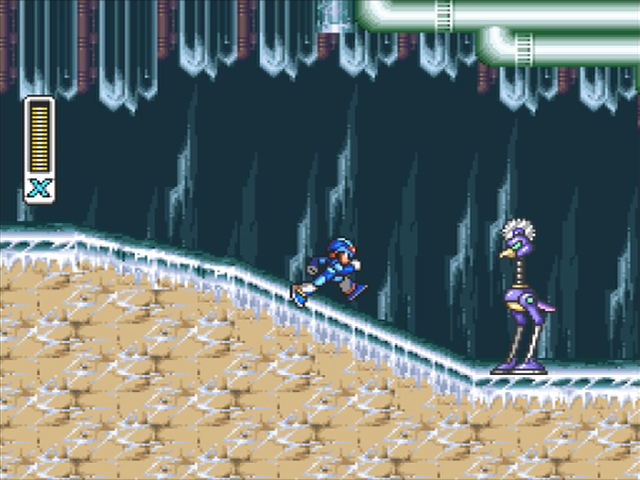
Chill Penguin's stage is the right icon on the top of the stage select screen. It is an ice and snow stage, but it is not slippery, so it is not too much of a pain in the butt. you will immediately meet a weak new enemy.
Ray Bit
 Pfft. Weak. They hop around and shoot you and do the minimum amount of damage before exploding when you hit them with two regular shots. Hardly even worth mentioning. This next character is a bit more complicated.
Axe Max
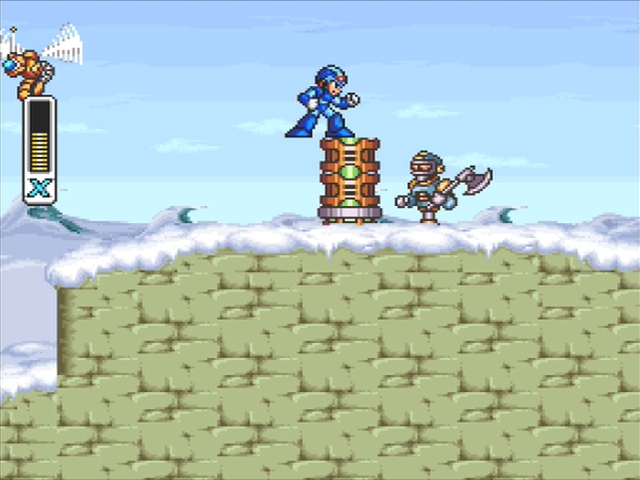 So manly. These characters hide behind robotic trees, hitting them with axes and sending the robotic logs flying towards you. The logs can be destroyed with a few shots but they regrow and will absorb shots meant for Max so fire quickly. Max himself has 8 HP.
you will move to the right for a while and fight more bees and rabbits until eventually entering a cave area. This area is pretty similar to the outdoors except it has a new enemy.
Batton Bone
 Another weakling. It goes down in one shot, has no projectiles, and the only noteworthy thing about it is that it can fly.
Keep going to encounter more Batton Bones and some Spikeys. Take care when you reach an area where you will have to zig zag upwards. This is perhaps the only area in the game where Spikeys can be a bit dangerous. Once you reach the top, you will find the thing we came here first for.
Leg Parts
You might have noticed that you have not been able to dash until now. Here, in plain sight, is a capsule containing a holographic message from your creator, Dr. Light. Hop inside to get the important Leg Parts upgrade, which will finally allow you to dash. This is so important that subsequent Mega Man X games give it to you right from the start. You can double tap the d-pad left or right to dash, or just press A (or a shoulder button if you took my advice and remapped it). you will be able to jump much farther if you jump during a dash. You can also shoot while dashing, and the dash jump even technically works while clinging to walls if you press the dash and jump buttons at the same time! Super secret bonus tip: Regular X Buster shots do double damage if fired during a dash! This is easy to miss, but can come in handy.
Put your sexy new legs to use and continue on. But, uh, be careful, because there are Jammingers waiting for you, as though they just know you will be dashing around with abandon. there is also this weirdo:
Flammingle
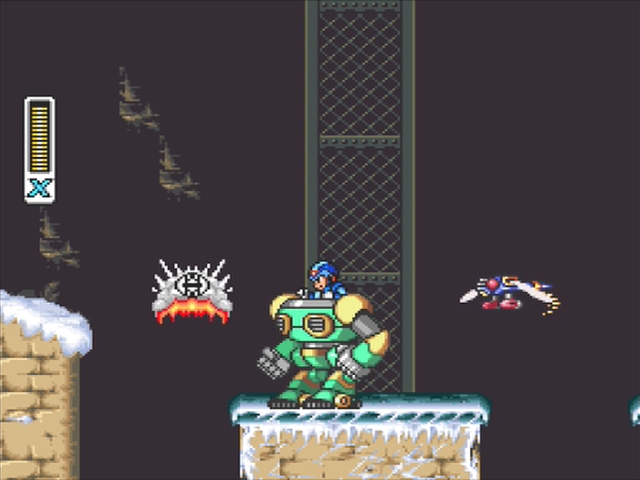
 These are too tall to jump over, so you will have to destroy them if you do not want to take damage. They can throw the buzz saw on the top of their head, which itself can be destroyed with a few shots. Keep going and you will find some Ride Armor of your own!
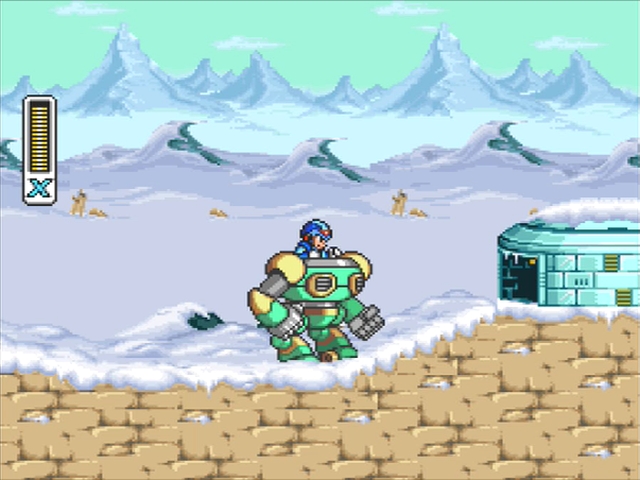 Hop in! The Ride Armor can dash and jump, just like X. It cannot shoot, but it has a whopper of a punch, which you can use to destroy some of the things around there. If you want to get out of the Ride Armor, hold up on the dpad and jump. There are a couple of new enemies in this area.
Tombot
 Another weak enemy that goes down with one hit from any weapon. It can drop weak bombs and fly around but it is not much of a threat.
Armor Soldier
 These characters are a bit more dangerous. Sometimes they start off outside of their Ride Armor, which means you can finish them off quickly. Otherwise, they will hop inside and take significantly more damage. they are easy to defeat if you are in your own Ride Armor but they can be trickier if you are not.
you will eventually reach a wall you cannot pass unless you exit your Ride Armor and go on foot. Shortly after here, you may or may not want to take a quick detour.
Heart Tank
 you will soon reach a spot where you will climb up a bit and be able to backtrack onto the "roof" of the area you rode the Armor through. Up here you will find two domes that you would be able to destroy if you had your Ride Armor, but you do not. Instead, you will have to come back here later with Flame Mammoth's weapon to destroy the one on the left to collect the Heart Tank inside. Be careful of the Tombots that come out of the domes. Heart Tanks slightly increase X's maximum health, so be sure to collect as many as you can. there is one in each Marverick stage.
Snow Shooter
 you will probably see this character's snowball before you see the enemy himself. He will either throw snowballs directly at you, or roll them on the ground so that they will gradually collect snow and grow bigger until they hit you or a wall. You can always jump over them but it might be a bit tricky to do on a slope, where these characters tend to hang out. Continue left and you will reach your first Maverick boss battle.
Chill Penguin
 Chill Penguin is not too difficult to beat with just your X Buster, which is good, because if you are following this guide exactly, that is all you have. As with all Mavericks, there are two ways to beat him.
The Hard Way
you are probably going to have to do this the old fashioned way. that is ok, he is not that tough. Chill Penguin has several attacks. If he stands still and shoots ice at you, alternating between chunks that sail through the air and chunks that slide along the ground, just jump on to a wall and stay there until he is done. The same strategy applies when he throws himself forward and slides along the ground on his belly. (he is bullet proof when he does this.) Charge your weapon while you are on the wall and attack when you have an opening. When he uses his ice breath, stand back. It has a limited range but will freeze you in place if it hits. The ice breath will cause ice statues to appear, which will absorb your shots until they are destroyed, but they will not do that until they are fully formed, so feel free to blast him while he is breathing. they will absorb his own ice chunk shots as well. The statues will be destroyed if you shoot them enough, if he slides into them, or if he jumps to the handle hanging from the ceiling and hangs off of it, causing the wind to blow. If this happens, again, stick to the wall, since the only dangerous thing about the wind attack is that you might get hit by the moving statues. You can also climb up and fire at him while he is hanging if you want. Chill Penguin's attacks are easy to avoid.
The Easy Way
If you have the Fire Wave weapon from Flame Mammoth's stage, you will be able to melt right through his ice statues and do a nice bit of damage to him, complete with a satisfying Street Fighter/Final Fight-esque flaming body animation. Burn, Chilly Willy, burn! You can interrupt all of his attacks except for his body slide, so if you shoot him with the Fire Wave and he does not flinch, jump over him, because that is what is coming out. Either way, you will earn a new weapon for beating him.
Shotgun Ice
Shotgun Ice is a single ice shot that travels in a straight line until it hits something, at which point it breaks into several pieces and bounces back at multiple angles. it is honestly not that useful, especially since you can only fire one at a time. If you have the arm upgrade, you can charge the weapon to create a horizontally moving ice platform that you can ride along the ground. Not a great weapon, but at least, from now on, you will always have a weapon that will totally obliterate one specific boss.
Passcode thus far
4764 8788 8716
After defeating Chill Penguin, Flame mammoth's factory stage will be affected. All floors covered in harmful molten metal will cool down, and will become safe to walk.
what is Next?
there is no backtracking to be done yet since there is nowhere to backtrack to. Clearing Chill Penguin's stage will cause Flame Mammoth's stage to freeze over, making some otherwise-unreachable areas accessible and generally making the stage easier. If you feel like you are taking a lot of damage, it might be worth your time to go to Sting Chameleon's stage and get the Armor upgrade. You do not have to actually beat a stage to keep its upgrade. If you die enough and get a game over, you can return to the character select screen and keep anything you have collected. (it is not pretty, but it works.) The down side of the order in which we are fighting the Marvericks is that we will be going to Flame Mammoth's stage last, which means we will be collecting the arm upgrade last. If you want to just go get it now, feel free to check his section of the guide, but keep in mind that you will need to get the helmet upgrade from Storm Eagle's stage first. Alternatively, just follow along and head to Spark Mandrill's stage next.
Spark Mandrill
 Spark Mandrill's level can be somewhat of a pain. you will be doing a lot of dodging and, if you play the level enough times, learning where to pre-fire to be able to take on some extremely fast enemies.

Spark Mandrill's stage is a power plant. If you come here after beating Storm Eagle's stage, Storm Eagle's air ship has crashed into it, causing some changes, the most notable change being blackouts in places there were no blackouts before. This makes the level a bit tougher, but it also makes the miniboss here significantly easier, so if you are having trouble with him, feel free to fight Storm Eagle first. he is not that tough even if you do not have the weapon he is weak to.
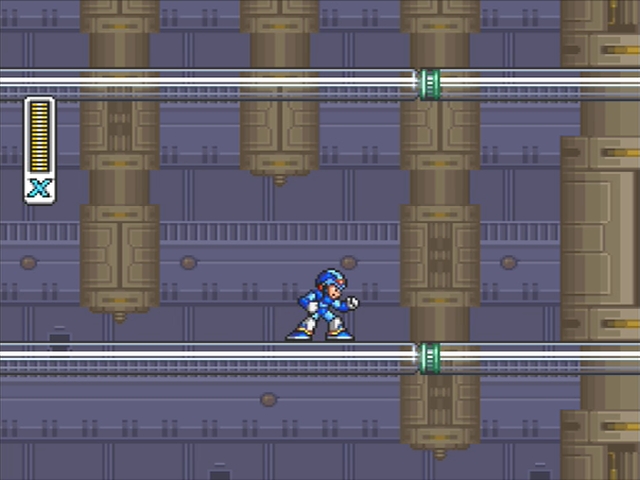
Anyway, proceed to the right, climbing up and down the ladders as necessary. you will fight some Gun Volts while avoiding the currents in the floor. Certain spots will generate sparks that move along the floor and will damage you if you touch them. These do not appear if you have beaten Storm Eagle.
Sub Tank
 If you have the Boomerang Cutter, you can pick up a sub tank in this area. When you reach a point with two ladders, take the low one and continue right until you see a Sub Tank behind a wall, then fire a Boomerang Cutter at it to retrieve it. If you collect health while your health meter is full, it will be stored in the Sub Tank for use later. Handy! do not bother to climb the ladder here. there is nothing there. Afterwards, head back to the spot where the path branches.
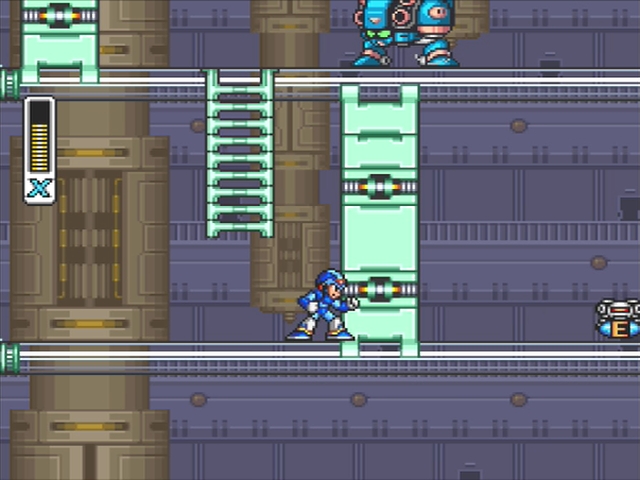
The next area gets dark as soon as you enter, but not so dark that you cannot see the ground unless you have beaten Storm Eagle, in which case you will need to be extra careful. you will also encounter a new enemy.
Hotarion
 These things quickly fly from one side of the screen to the other and will damage you if you touch them. They leave a trail of light behind them making it easier to see where you are going, but it is really not necessary since you have enough light to see the platforms anyway and the enemies are not affected by the lighting. You should continuously be shooting in front of you to be taking these things out as they appear.
Deal with the Hotarions and Flammingles and continue onward. When the light returns, head down the ladder and get ready for a miniboss.
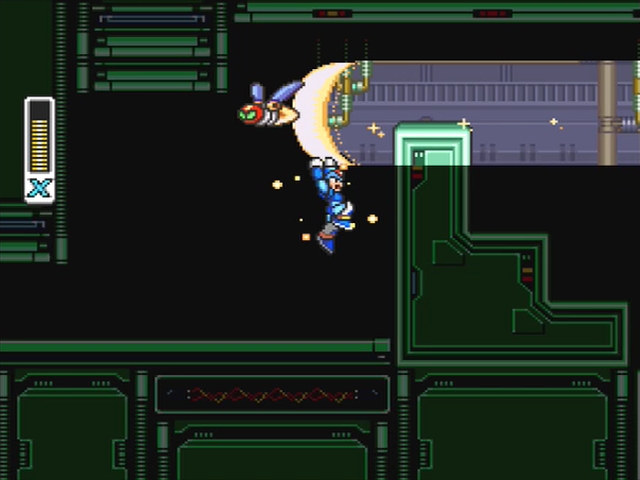
Thunder Slimer
 He moves around the screen in a giant blob of goo, throwing balls of slime that will stick X to the floor. He also has an electrical attack that he will fire straight down, so avoid that. you will know it is coming when he moves to the middle of the ceiling and charges. The range of the attack is smaller if you have already beaten Storm Eagle. Make use of the walls and remember that you can dash jump from them by pressing the dash and jump buttons at the same timing, making it easier to get away from the boss when he gets too close. He has 46 HP so he will take a while to go down. Make use of your charged shots. Storm Eagle's Storm Tornado and Flame Mammoth's Fire Wave are both pretty handy against this boss. After his flashy death scene, keep heading right until you meet a new friend.
Rush Roader
 This character basically just runs back and forth until you put him out of his misery. They take six shots to take down, and they will start freaking out and staying in place after you do enough damage, making them easy to finish off. they are not difficult, but they are quick. you will also meet a certain turret enemy for the first time.
Turn Cannon
 These are stationary and follow the predictable pattern. They fire two shots at a time, alternating firing to their sides and 45 degrees up from their sides. (They can be attached to walls and ceilings so it is relative to whatever is "down" to them.) Once you figure this out, they are very easy to avoid, and can be taken out with a few shots of your own. Continue right and up the steps to meet a giant turtle.
Mega Tortoise
 These characters have a decent amount of HP (16) and take up a lot of horizontal space on the screen. They fire mortars that will land exactly where X is standing at the time, but they are slow and easy to dodge, except for the fact that these characters often appear in areas with little room to move left and right. Mash that attack button to take them out quickly.
Heart Tank


After killing the turtle, but before heading down the ladder, climb up the wall and you will see a Heart Tank sitting there. you will need to have the Leg Enhancement to get it. Simply perform a wall dash while you are scaling the wall, then quickly jump on the ledge with the heart tank on it. Climb up and collect your prize. it is pretty tricky, but there is no penalty for failing so try as many times as you need to. Alternatively, fire a Boomerang Cutter at it.
Now head down the ladders, being careful not to get hit by the enemies. (Charge your shots before dropping off the ladders.) Head right and take out some more Mega Tortoises and head up. Next you will reach another dark area with some Hotarions and Balls De Voux. Remember that if you start backtracking, there is a chance a Hotarion will spawn on the left side of the screen instead of the right. This parts a bit harder than the earlier dark area, but basically similar and the same basic strategy of firing in front of you applies. Next up is the boss!
Spark Mandrill
 he is big and electric and he hits like a ton of bricks. We can beat him, though.
The Hard Way
Be careful of the walls! He has an attack where he dashes across the screen and punches the walls, causing you to detach them from them and land right on Spark Mandrill and take a chunk of damage. He can also cling to the ceiling and drop on top of you from above. If he is standing on the ground, he can punch the ground and cause balls of sparks to come out in either direction, which will crawl along the floor, up the walls, and even along the ceiling. The real kicker is that punch, so do not rely on the walls too much. If you are quick, you can dash jump over him when he starts his dash punch. Spark Mandrill is pretty tough if you are not prepared.
The Easy Way
Fortunately, we are prepared. We have his weakness, and this fight will be over in a few seconds. Shoot him with the Shotgun Ice and he will freeze in place for a moment. When he breaks out of the ice, immediately shoot him again and he will freeze again. Time it right and he will not even get to move! A steady stream of Shotgun Ice blasts and he will be helpless before you. If he does get away from you and jump up to the ceiling, fire at whatever wall is farthest from him and it will reflect back at an upward angle and hit him, dropping him to the ground. Of course, you will get your prize for beating him either way.
Maverick boss: Electric Spark
Fire a slow-moving ball of electricity forward, when it hits a wall, it will split in two and move along the wall in both directions. The energy balls will continue along the same path through the air even if the wall ends. Charge it with the arm upgrade to send a wall of electricity out to either side.
Passcode thus far
2872 1486 7734
This new weapon is not bad for dealing with enemies in certain situations, but it does not do anything special, and clearing Spark Mandrill's stage has no effect on any other stage, so just move on.
 Follow the ladders downwards until you reach a dead end. Run to the far right, against the wall and you will see the Sub Tank lodged inside. Use a midair Boomerang Cutter shot to grab it and the weapon will bring it back to you through the wall.
Passcode thus far
3348 2617 6856
Armored Armadillo
 Armored Armadillo's stage is the upper stage on the left side of the stage select screen. This stage is a mine, and you know what that means! Mine carts! Well, kind of. More like mine spiked platforms but the principle is the same. In fact, there is one right in front of you, so hop on it if you want. do not even worry about shooting any enemies; just let the mine cart obliterate anything that steps in its path, and bounce off any wall it runs into and head in the opposite direction. Be careful, since inertia means that when you jump off of the platform, you will be sent flying in whatever direction it was moving at the time. Ride the platform or do not. it is up to you. The opening area is full of familiar enemies and one special guest.

Batton M-501
 This enemy behaves exactly like the other Battons, but looks a bit different. The key difference is that if Batton M-501 drops anything, it will be a 1up. there is only one in the whole game, but it will respawn if you move off screen for a moment and come back, meaning this is a great place to max out your lives, which is good, because you are going to want to do that late for super special secret reasons.
Keep going to the right until you come to a larger gap: slide down the left side and once you hit the ground, you will be greeted by a friendly (but killer) dig machine.
Mole Borer
 There are two ways to deal with this. Either drop down in front of it and run, or hang on the wall while it passes under you and then follow it from behind. If you are behind it, you can either immediately pick up the Sub Tank behind it (see details below) or shoot the Mole Borer a lot to destroy it. This thing does a lot of damage and has a lot of HP (70, in fact) and you cannot harm him from the front. it will chase you (or you will chase it) through a hallway full of familiar enemies.
Metall C-15
 Metalls! Or Mettaurs! Or Metools! Or whatever! These characters have been recurring Mega Man enemies forever, but there is no time to stop and catch up with that Mole Borer hot on your trail. they are invincible until they peek out from under their helmets, at which point you can shoot them in their ugly tramp faces and defeat them. If the Mole Borer gets too close, just jump over them and do not worry too much if you take a bit of damage.
As you progress through this tunnel, you will see two energy pickups in the ceiling, but you will not be able to get to them without the helmet upgrade to smash through, and if you are behind the Mole Borer and you do not take it out fast enough, it will destroy the platform you will need to reach them. Make it to the other side of the pit of spikes, stand back a bit and stand your ground. The Mole Borer will fall in and that will be the end of him.
Sub Tank
 Backtrack all the way back to where the Mole Borer appeared to find his secret Sub Tank. Easy as pie. Note that the Battons in this stage, especially at the beginning, are a great way to farm for health for your Sub Tanks. Now head back to the right again.
you will deal with more Battons and Metalls and Spikeys as you head right. Hop on the spiked platform to speed forward and right through a new enemy that will not survive the clash.
Dig Labour
 These rugged miners will throw their pickaxes at you and laugh when they hit you. They do not have much health but their pickaxed travel in an arc so watch out for that. Eventually, you will get to another red mine cart, so jump on this one and enjoy the ride (just let the cart do all of the work). Once you get to the end, you will come upon another large gap. Make sure you have Flame Wave equipped and then jump down, where you will land right behind another dig machine.
When your platform is about to smash into the wall, jump off and land on the wall and climb up. do not fall on the spikes. Obviously. Continue right and down to another Mole Borer.
Heart Tank
 you will land directly behind this Mole Borer, meaning it is harmless to you unless you run into it on purpose, but you will still want to shoot it and defeat it as fast as you possibly can. Use the Fire Wave if you have it. If you are not fast enough, it will destroy the wall you need to climb to reach the Heart Tank and you do not want that because then you will have to die or beat the level and return later to get it. Seriously, mash that attack button like you have never mashed anything before.
Keep going right (sense a theme in this game?) through the Battons and over the spikes until you get to another spiked platform. Hop on and meet the last new enemy of the stage.
Metal Wing
 These things fly really fast, but not as fast as a spiked platform, meaning you will catch up with them and run into them if you do not shoot them down. Thankfully, they do not have much health. Be careful. You can only have three shots on the screen at a time and they do not travel much faster than you do, so you will not be able to fire that rapidly.
Stage interactions
If you defeated Boomer Kuwanger already, in this section of the stage there will be many more bird-robots.
Once you make it outside, you can climb above the door to pick up a bit of health, then head through for the next boss.
Maverick boss: Armored Armadillo
 This character is pretty much what you would expect from a boss named Armored Armadillo. he is not as much of a pushover as Spark Mandrill was with the Shotgun Ice, but he is not that tough if you have the Electric Spark. His annoying rolling attack may sometimes cause problems. he will start the fight off by rolling into a ball and crashing around the room, which is one of his two basic attacks.
The Hard Way
Your window of opportunity to actually hurt him is pretty small so make it count. You cannot hurt him while he is rolled up into a ball so do not try. If you shoot his armour, he will absorb it and fire it back at you in six directions. He has a sad little energy weapon that moves slowly and is easy to avoid. His signature move is to roll up into a ball and bounce around the stage at predictable 45 degree angles. he is not super tough but he will not go down without a fight.
The Easy Way
Shoot him with the Electric Spark to make his armour fly off completely. Now he is vulnerable whenever you hit him. Keep laying into him with Electric Sparks to do more damage, even when he is rolling around. This also removes his ability to absorb your shots, so just go nuts until he dies. Enjoy your new weapon for beating him.
Rolling Shield
The Rolling Shield is a pretty big ball that rolls along in front of X and stops shots that hit it. it is not a bad weapon, and it becomes a great one when you have the arm upgrade. This will let you charge it to create a forcefield around you, automatically defeating any enemy that it is strong enough to defeat in one hit, like bats. There are a few spots where this is incredibly useful, including the beginning of the Armored Armadillo stage to grind for lives and health.
Passcode thus far
7752 1532 7654
As useful as it is, the Rolling Shield does not grant you access to any new areas or upgrades, and beating this level did not affect any other level, so just get on with it.
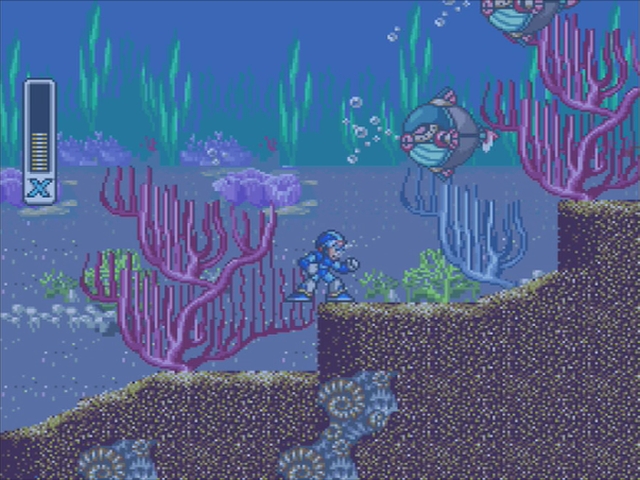
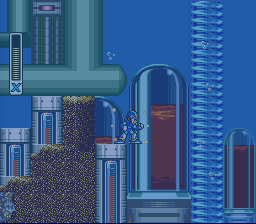
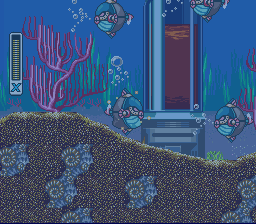
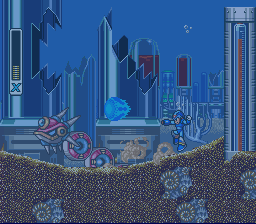
Launch Octopus
 Launch Octopus resides deep underwater, where many deep sea robots will block your path. The stage features four sub-bosses as well as a heart tank (which requires a bit of extra work to get to). Like many other Mega Man games, X jumps much higher underwater than he does on the ground, so you can leap to great heights and lengths once you jump (or dash jump). Because of this, the stage is fairly simple, however the only real obstacles are the miniboss fights and the various pits of spikes. Be careful when jumping long distances.

Amenhopper
 These things mostly just slide along the surface of the water and try to run into you. They only have 2 HP and are not very dangerous. If you are in an area where they can move above you, they might drop a bomb on you, but even that is no big deal.
Fight these characters and some Mega Tortoises and proceed. Keep heading right and you will end up under water. Watch out when you see bubbles rising from the ground. It means these things are near.
Sea Attacker
 These things pop out of the ground in groups of two or three, wait for a moment, then roll into balls and dash forward at you. Shoot them twice to beat them. You only really need to destroy the one directly in front of you. The other ones will pass over or under you. do not rest, though. Once you find one of their spawn points, they keep coming. Continue until you fight one of this level's many minibosses.
Anglerge
 This thing is a pain. The main body has 32 HP and the light bulb has 5. The light is pretty harmless but you can destroy it anyway. This thing is two main attacks are to suck or blow water at you to move you towards or away from it (dash to fight the current), and shoot annoying eel torpedoes at you. These things turn at right angles and are not easy to dodge. Your best bet is to destroy them entirely with charged shots when you see them emerge from Anglerge's body. Shoot it to death and get a move on. you will almost immediately meet another new enemy.
Gulpfer
 These things will inhale you and store you in their bodies, slowly draining your health until you destroy them. it is pretty easy to get out of them without getting hit. They have 10 HP which is nothing to sneeze at but nothing to write home about. Try not to get eaten, but if you do get eaten, do not panic. Just shoot.
Keep the course until you fight another Anglere. This one is more annoying because you are standing on a platform between two spiked pits that it will try to suck or blow you into. Jump and move to avoid the currents while pumping it full of hot X Buster. Dashing might be a bad idea since you will take off in one direction or another after the current stops.
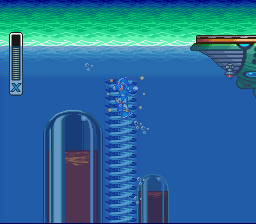
Immediately after this fight you will find a turbine that will create a jet of water that you can ride to the surface. This one leads to a health pickup, which you might need.
Funnels
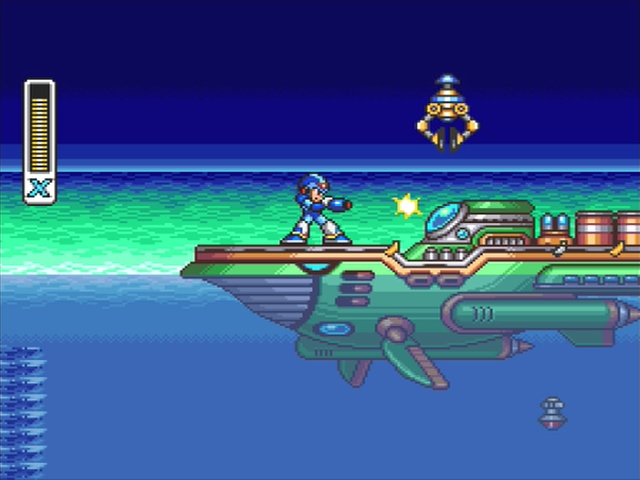
 Proceed forwards and you will notice two large whirlpools. Jump into the second one, and when you get to the top, jump onto the green ship that is on the surface. Destroy the blue orb that is on the ship until it finally goes down (some annoying grabber bots will make your life harder, so destroy them if they get near you). The ship will then create a passage to an underground area: go in and prepare to fight the third sub-boss, a large snake robot called Utuboros. His only weak spots are his head and tail, so aim for those. he is very easy to dodge, but hits very hard, so try your best to avoid him. After the Utuboros is destroyed, go to the right, grab the Heart Tank, and then scale the wall next to the destroyed ship to make it back to the ocean floor.
Cruiziler
 Stand on its "nose" and avoid its bombs. Shoot it in the glowing blue orb 64 times to take it out and find a secret. Also avoid the Sky Claws that come out of it.
Sky Claw
 These things do not attack you directly, but will pick you up and attempt to drop you into a hole if there is one around. The ones in this level will just toss you back into the ocean. They have either 1 or 2 points of health, depending on how lucky they are.
Ride the Cruiziler as it sinks to the ocean floor, avoiding any stray bombs on the way down. it will hit the spiked floor below and keep on falling. Head right for miniboss number a million.
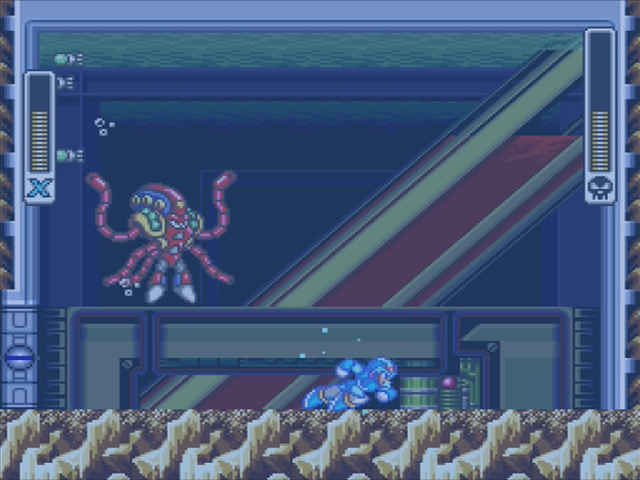
Utuboros
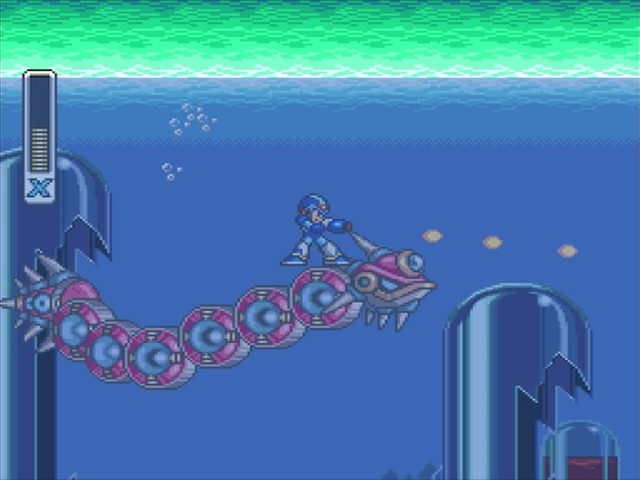 This crazy snake will swim around the room in a predictable pattern. Its only weak points are its head and tail. If you want to feel like a badass, stand on its neck as it swims upward, jumping over it when it turns, and shoot it in the back of the head. You can do the same thing to its tail on the way down. After 70 hits, down it goes.
Heart Tank
 Finally, your prize is the Heart Tank in a small alcove just past this room. Return to the dead Cruiziler and climb back up to continue.
Sub-boss: Utuboros
 that is right: another Utuboros. This one is different than the one guarding the Heart Tank, however, as he can go underground and then back out again. you will know when he is coming out by the dust clouds that emerge from the ground, so avoid these areas. If you have Storm Tornado, use it here. Two well timed hits bring it down. Another alternative is to go all the way to the right and climb to the top of the column, there it will go to you and circle around without touching you allowing you to defeat it easily.
Keep going once he is dead and you will encounter some more puffer fish. After that is the dungeon entrance, so step inside to fight Launch Octopus.
Maverick boss: Launch Octopus
 This fight takes place underwater, meaning you can still jump higher than usual. This is the boss' home turf, though, and he has the advantage.
The Hard Way
Launch Octopus likes to fire two types of torpedoes out of his tentacles. The regular ones are quick, but small. The fish shaped ones will home in on you, so beware of those. If he uses his typhoon attack, dash away to avoid getting sucked in. If you fail, he will grab you and suck the life right out of you and add it to his own. he is vulnerable right after he uses either of these attacks, so take advantage and hit him with a shot or charged shot.
The Easy Way
First of all, you can disable his leeching attack if you happen to have the Boomerang Cutter weapon. Fire it at him to cut off a couple of his tentacles. Your real lifeline here is the Rolling Shield. Fire it to block his torpedoes and do a nice chunk of damage. Other than that, the fight is basically the same. it is just over quicker this way.
Homing Torpedo
True to their name, these fire-and-forget projectiles will home in on enemies. they are more accurate than the ones used by enemies. You can use the arm upgrade to charge these to shoot out a weird fish bomb that splits into several parts that home in on enemies themselves.
Passcode thus far
7234 6578 1631
This is another weapon that does not really do anything other than damage enemies, but clearing this stage will flood Sting Chameleon's stage and mix things up a bit, as well as granting you access to a Heart Tank there. we are not heading there just yet, though. We have a bug to exterminate first.
Boomer Kuwanger
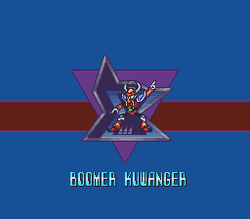 Boomer Kuwanger awaits on the top floor of a huge tower, which you must travel through. It does not feature any difficult enemies or sub-bosses, so it is a rather easy stage. you will also find a heart tank which cannot be taken at first, but after you get Boomer Kuwanger's weapon, the Boomerang Cutter, you will be able to grab it no problem.
Did you ever wonder what does Kuwanger mean? It comes from the Japanese kuwagata, which means stag beetle
Hoganmer
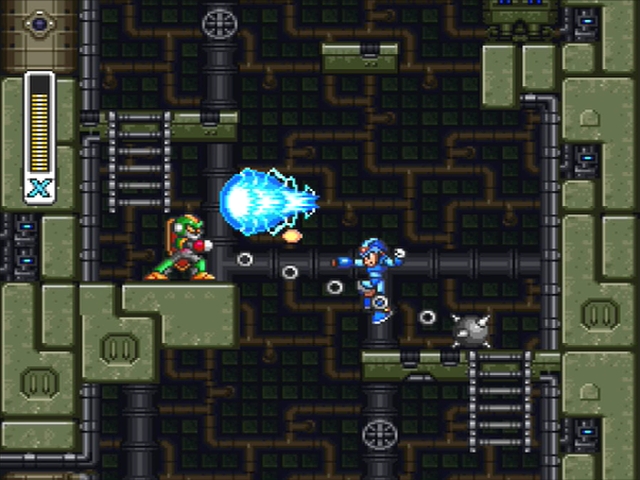 This is one of the trickier regular enemies in the game. He spends most of his time blocking your shots with his shield, only opening himself to attack when he sees you are within range of his ball and chain and drops his shield to throw the spiked ball at you. The ball itself also blocks shots, so aim carefully. He can throw his weapon at an angle or straight in front of him, so be careful. you will also run into another new enemy here.
Dodge Blaster
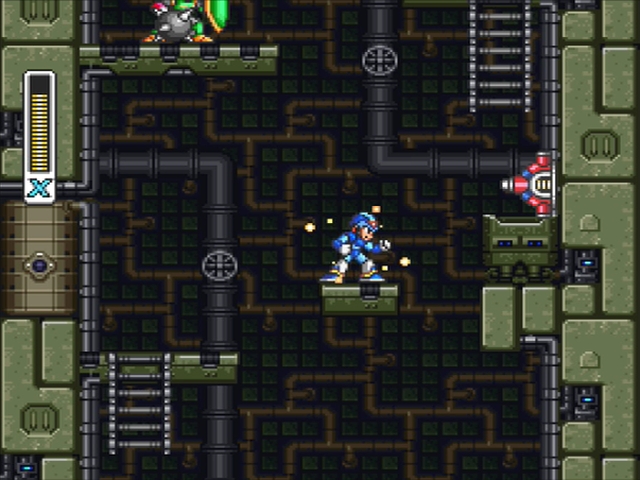 These attach to walls and will fire slow-moving shots at you. they will do their best to dodge your fire, so shoot at them when they are shooting at you. they will have a harder time dodging your large charged shots. Keep moving up until you reach a horizontally scrolling section.
Sine Faller
 This is basically a Jamminger with less interesting behaviour. It will appear from above and zig zag down towards you. It has low health and it is no big deal. Keep going right and you will soon encounter some laser beams. The lasers themselves do not hurt you. they are sensors that will cause the nearby turrets to fire directly at you if you trip them. they are active for a few moments before briefly blinking out. Use that opening to get past without tripping them, or dash jump past the horizontally oriented ones. You can grab on to the turrets without taking damage, so feel free to put them to use as platforms.
After this section, you will reach another section with ladders and some Tortoises. Deal with them as you proceed and you will soon reach an area with an elevator and lots of spikes. This place is dangerous. The spikes on the walls will not necessarily one-shot you, but they will do a lot of damage if you touch them. Your main objective here is to avoid getting crushed between the elevators and the spiked platforms as you move upwards, because that will defeat you no matter how much health you have. You also have some Jammingers to deal with, but you are better off just dodging them rather than shooting them. you will move up past them before they can regroup and come after you. Hang in there.
After the elevator section, you will have to ascend the tower from the outside. Platforms will move in and out of the walls. Use them to make your way up, but beware of the turret enemies on them.
Slide Cannon
 These things are pretty simple. Each of the moving platforms in this area has one. they will shoot you if you are standing on the platform before you defeat them, so take them out quickly. Charged shots work well.
Ladder Yadder
 These characters move up and down ladders. they are not much of a threat but you will have to destroy them if you want to use their ladders. Continue upwards past the platforms and up the ladders and you will find something you cannot get yet.
Heart Tank
 This Heart Tank is unique because you need the weapon of the boss of the level it is in before you can collect it. When you return here with the Boomerang Cutter, simply fire one at it to retrieve it. Head inside to find some Dodge Blasters and Turn Cannons on flying platforms. After you destroy the Turn Cannons, you can ride on their platforms. Put them to use and you will eventually reach the boss' room at the top of the tower.
Maverick boss: Boomer Kuwanger
 This character is sneaky, always dashing and teleporting around. We can beat him, though.
The Hard Way
He can dash left and right as well as teleport. If he runs into you while dashing, he will toss you towards the ceiling to damage you. He throws the boomerang on the top of his head at you, too. It travels at an arc and returns to him, as boomerangs do. Time your shots to hit him after he appears after teleporting, since you cannot hit him in the middle of a teleport. It takes a moment for him to completely appear in a spot so he is easy to avoid direct contact with. Climb the walls and dash jump to land across from him, then turn back at him and release a charged shot and get back on the wall and repeat until he is dead. he is actually not that hard to beat with the X Buster.
The Easy Way
Climb up to the ceiling and keep your distance while firing homing torpedoes. You do not even really have to aim them. they will hit him eventually. If he gets too close and throws his boomerang, dash jump to the other side of the room.
Boomerang Cutter
it is a boomerang! It does not have the longest range but it travels at an arc. (Upwards if you are on the ground or ascending in a jump, or downwards if you are descending from a jump.) It can be used to retrieve items. If a Boomerang Cutter does not hit an enemy, it will return to X and go right back into his weapon energy meter. If you charge it with the arm upgrade, four small boomerangs will fly out at an arc in four directions.
Passcode thus far
3875 3716 5888
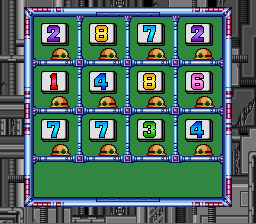
what is Next?
Go back to Boomer Kuwanger's stage and head to the top floor of the outside area. Equip the Boomerang Cutter, stand in the position shown in the picture, and shoot one boomerang. It will grab the heart tank and bring it to you. It can also be obtained with a charged Shotgun Ice platform, if you got the arm cannon upgrade from the Flame Mammoth stage.
Passcode thus far
8344 4347 6751
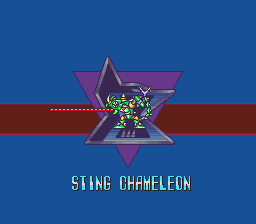
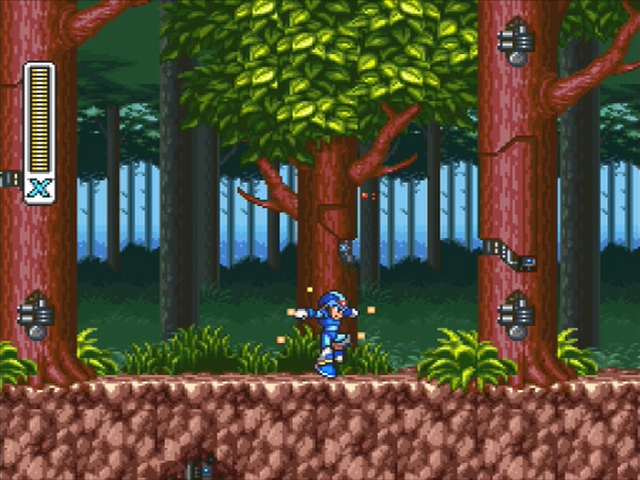
Sting Chameleon
 Sting Chameleon and many other nasty robots preside in a large forest. In this level, you will find a Heart Tank and the awesome Armor Upgrade, which reduces damage taken by 50%. It features one sub-boss, but he is fairly easy.

Planty

Go to the right and you will notice a pit full of water, as well as an Amenhopper (the frog-like robot). Destroy it and jump over the pit (there is also a Planty in the pit... he is disguised as a small bush, but does not pose much threat).
You can destroy the Tombot by simply shooting at him through the ground, or you can completely avoid him by jumping over his platforms. Along the way you will encounter another Tombot and some more Amenhoppers and Planties.
Basically a Metall that has a shrub instead of a helmet and throws worms instead of firing bullets. it is even less intimidating than a Metall. Keep going right past these characters and the Axe Maxes until you reach the entrance to a cave area. Here there are two handy upgrades for you to collect.
Heart Tank
 This heart tank is only reachable if Launch Octopus has been defeated (which he should be, if you followed this guide).
Before going down into the tunnel, jump into the pit right before it (sounds scary but do not worry) and destroy the blocks with your Leg Upgrade. Stand at the edge of the small platform and perform a dash jump (do not dash jump off the wall of breakable bricks, as you will hit the ceiling and fall to your death), which will cause you to land on the platform that is on the other side; pick up the Heart Tank and go back the same way you came.
Slide down the hole here to reach a wall made of rocks. Thanks to your leg upgrade, you can wall jump off of these rocks to break them. Then dash jump all the way to the right to reach a Heart Tank. Keep in mind that this will only work if the level is flooded. Dash jump back the way you came.
Armor Upgrade
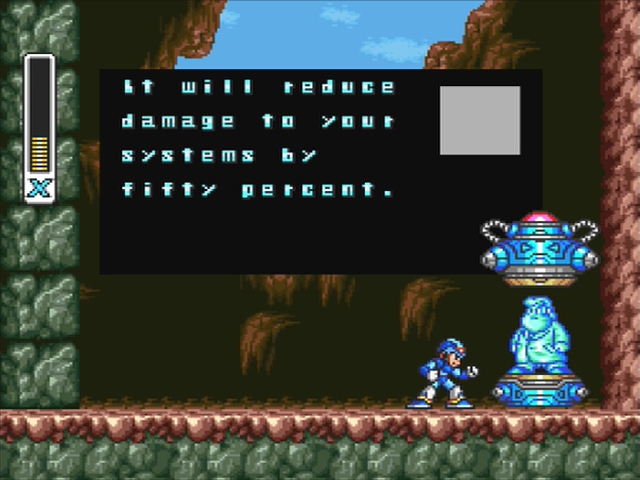
Scale the wall above the tunnel (by dash jumping from the cliff before the pit) and go to the right. Some falling rocks will block your exit, and the sub-boss, RT-55J, will appear. His head and chest are the only vulnerable areas; shooting his claw will only cause your shots to deflect. Just keep jump shooting, and when he tries to jump, simply dash to the other side and keep on firing. He may try to attack you with his claw, so if he does, just jump over it and deliver a fully-charged blast, then jump back out.
RT-55J
This character is annoying, not because he is hard, but because he has a lot of health and a very small weak spot. The only place you can damage him is his head. He has over 60 HP and once you take half of it away, his head will start smoking. Shoot him in the head and dash jump over him from a wall when he jumps over to you, or dash under him if he jumps at you while you are on the ground. His only other attack is a grappling hook on a chain on his arm that he will fire straight out in front of himself. it is easy to dodge. You can do extra damage with the Boomerang Cutter, but you will want to save that for the boss of this stage. Stick with it and he will go down, revealing a new upgrade capsule with the Body Parts. This will cut he damage you take in half! Not too shabby. Head back down to the cave entrance and head into the cave.
Beware the blocks that fall from the ceiling in this area, unless you defeated RT-55J, in which case the only things that will fall from the ceiling are these characters.
Crag Man
 Look out for rocks that fall from the ceiling. they are Crag Men in disguise. Once they hit the ground, they will reveal themselves and get ready to throw a rock at you. Take them out quickly, but keep in mind that you cannot damage them until they are fully revealed. Continue through the cave until you are back outside.
Mad Pecker
 These things hang around trees and peck at them while occasionally throwing worms at you. They only have 6 HP and can be taken out before they have a chance to attack.
Head right and take care of the Planties and Hoganmers. Watch out for the 1up just sitting there in your path, and get into the Ride Armor when you find out. Ride it through the quick sand (do not worry if you sink, you will not die, just jump to get back out) taking out Jammingers and other enemies in your path. Beat up some Armor Soldiers and hop out of your Ride Armor when you reach the entrance to the boss room. Sorry, it cannot come with you.
Maverick boss: Sting Chameleon
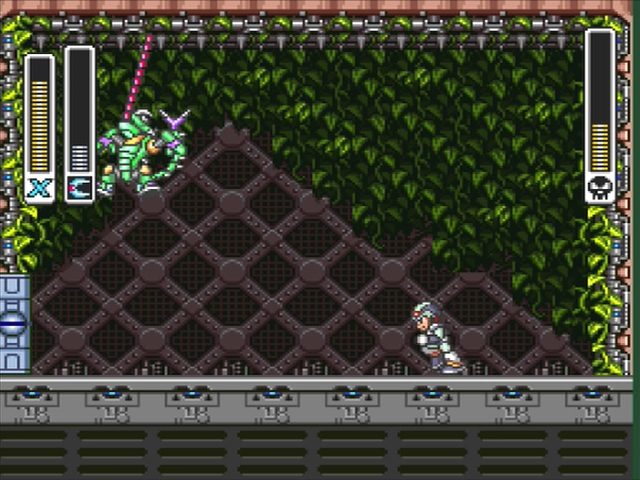 Sting Chameleon can be a challenging and unpredictable opponent, but with his weakness, the Boomerang Cutter, he is merely the opposite.
The Hard Way
The ceiling of this room is spiked, so do not run into it. When Sting Chameleon hangs from the ceiling by his tongue, he will start shaking spikes loose and dropping them on you. they are small but be careful to avoid them. You can shoot him with a charged shot while he is hanging. When he turns invisible, you will be able to see where he is if you look closely. He moves in a straight line while invisible, so he is not too tough to avoid. do not let him run into you. he will reappar hanging from the background and either fire three spikes from his tail or quickly lash at you with his tongue. he is beatable, but it is better to just use his weakness.
The Easy Way
Hit him with Boomerang Cutters. they will always knock him to the ground, and he will always immediately hang from the ceiling or wall afterwards, meaning he is an easy target for another cutter from the ground. Just repeat that until he is dead.
Chameleon Sting
X fires a ball a short distance in front of him, which breaks into three laser beams that fire straight and at an angle up and down. The real appeal of this weapon is that it will make you intangible to enemies when you charge it with the arm parts, so you will temporarily be invincible. The downside is that you will not be able to attack.
Passcode thus far
3872 2147 5614
Storm Eagle
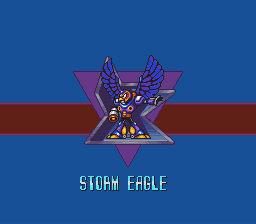 Taking place at a large airport (and in the sky), this stage features a heart tank, sub-tank, and helmet upgrade, which allows you destroy breakable blocks with your helmet. it is also short and features no sub-bosses.
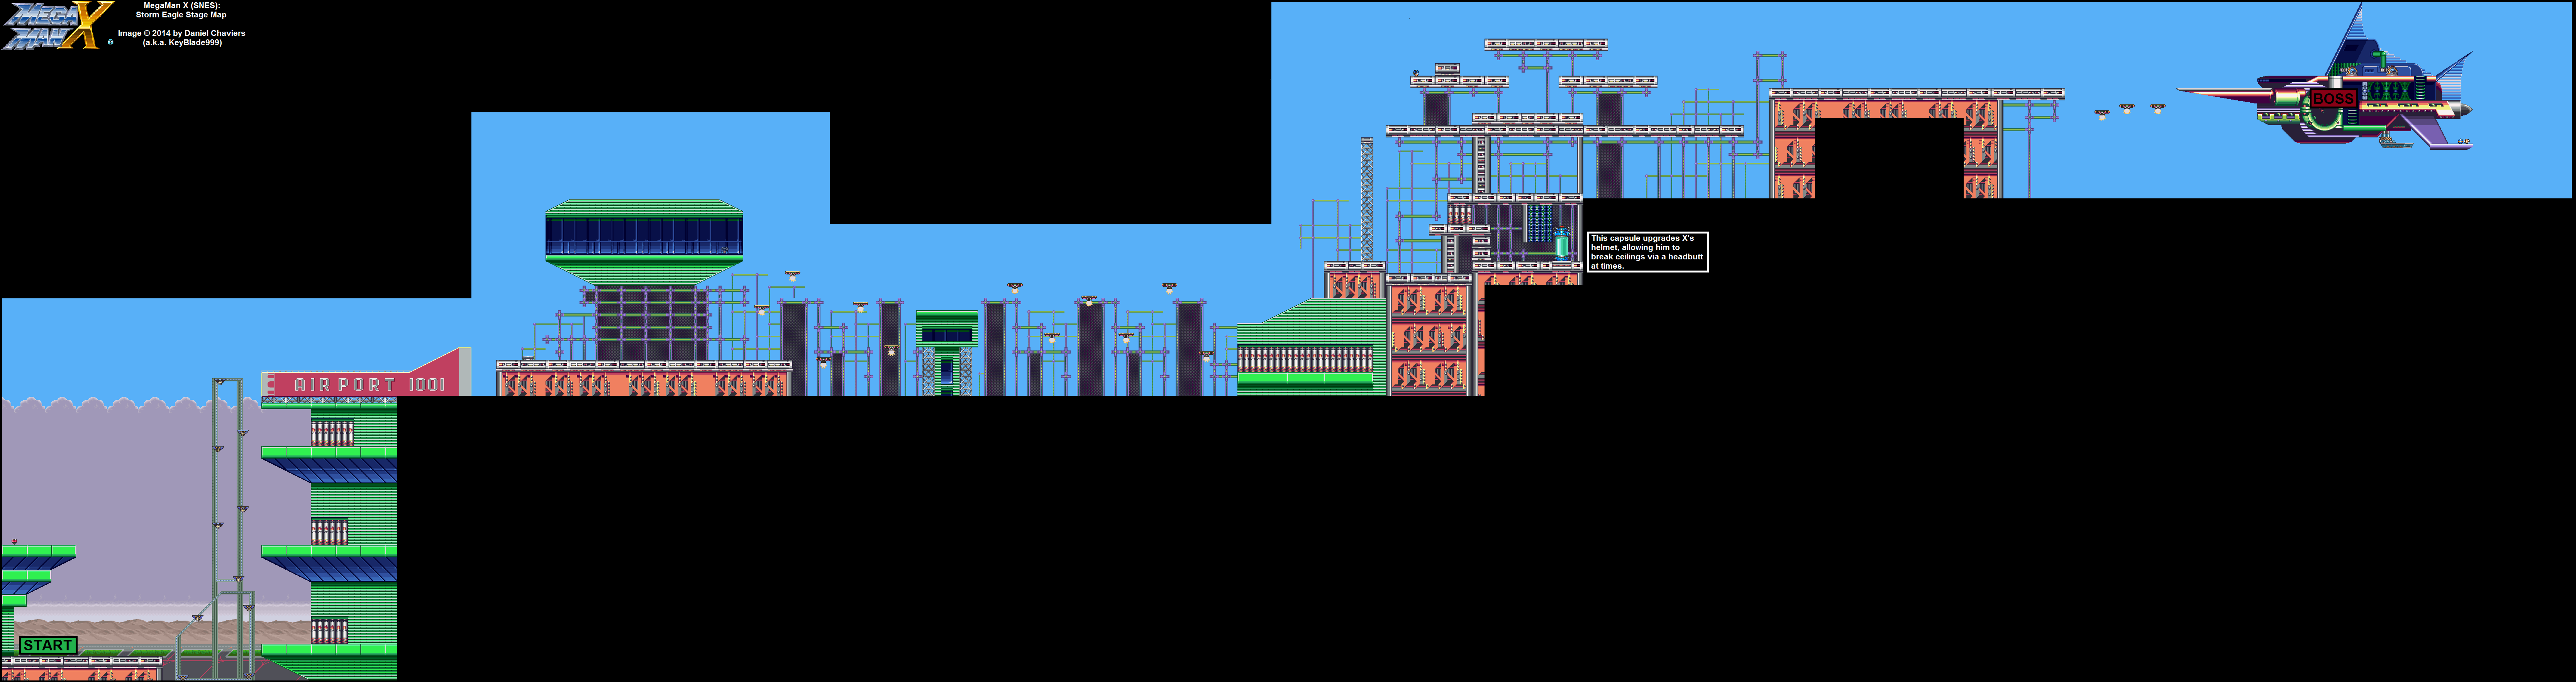
 The lower stage on the right side of the stage select screen. This stage is big and open with lots of places to fall to your death. Watch your step. Head to the right, past the Sky Claws and onto the moving platforms. You can ride these up, but take a detour to the right.
 Next to the enemy is a funny looking wall with flames marked on it and the letters "DA." These walls can be destroyed, and sometimes are hiding helpful items, so if you feel like sinking enough shots into them, they may be worth your while. Head back to the moving platforms.
Heart Tank
you will begin this stage on a large platform at the bottom left of the map. Your goal is to reach the far top right area. First head right and jump on one of the moving platforms, but be wary of the sky claws that will attempt to grab you. When on a moving platform, you are extremely vulnerable to getting caught; and the end result is usually a nasty fall into the pit below. Your best bet is to use some of your tools, like Chameleon Sting or Boomerang Cutter to take them out while they are above and away from you. do not be afraid to bail and jump on another platform, it would be better to waste time on that than to risk dying.
When you get to the very top, dash jump to the left from the moving platform you are currently on; if you jump far enough, you should land on a roof where a heart tank lies. Jump down and go on the moving platforms again, but this time, jump to the right instead of the left once you reach the top.


Go as high as you can go on these platforms and then dash jump all the way to the left to the spot above the start of the stage. there is a Heart Tank here waiting for you.
Head back to the top of the moving platforms and on to the giant "AIRPORT 1001" sign. Feel free to blow up some of those special walls on the way up. you will meet some Gun Volts and Turn Cannons on special pillars that raise and lower to block your path. Destroy the Turn Cannons to drop the pillar into the floor.
Sub-Tank
 When you reach some vertically moving platforms, use them to go left instead of right. Break the glass to reach the Sub Tank inside. You can also defeat the Gun Volt in here for a cool effect. Head back to the right. you will notice a cannon on a large rising elevator: destroy the cannon and then hop on the elevator, which will bring you near a window. Shoot the window and jump inside. Keep going to the right and destroy the Blaster, who is guarding a valuable sub-tank. Take it and destroy the flamethrower on the moving platform, then jump on it. You have to get to the other side of the area by going across these moving platforms: all of them have flamethrowers, so stay on the previous platform in order to destroy the next flamethrower from a safe distance.
Flamer
 Standard short-range flamethrowers that take up valuable platform space. Destroy them with charged shots before you get burned to steal their platforms and proceed. Keep going right and taking out Flamers. When you reach a destructible wall here, blow it up for a 1up. you will have to do it by wall jumping, shooting, and reattaching to the wall, though.
Helmet Upgrade
Once you encounter a large wireframe structure, scale it and jump down on the other side. Destroy the explosive canisters on the platform above, which will create a passage leading to capsule.
When you have to climb a tall pillar and hop into a nearby ledge, go under the ledge and destroy the wall instead to find another upgrade capsule. This one gives you the Head Parts, which let you destroy specific blocks with your head. This is actually not very useful, but you will need it to get a couple of really cool things later, so you might as well grab it and head back to the ledge.
When you see a 1up, you can reach it by going right past it and then up and back to the left. Otherwise, take out the Metalls, Sky Claws, and Balls De Voux and proceed right. you will reach some platforms that will fall when you step on them so do not linger. you will reach the airship and Storm Eagle.
Maverick boss: Storm Eagle
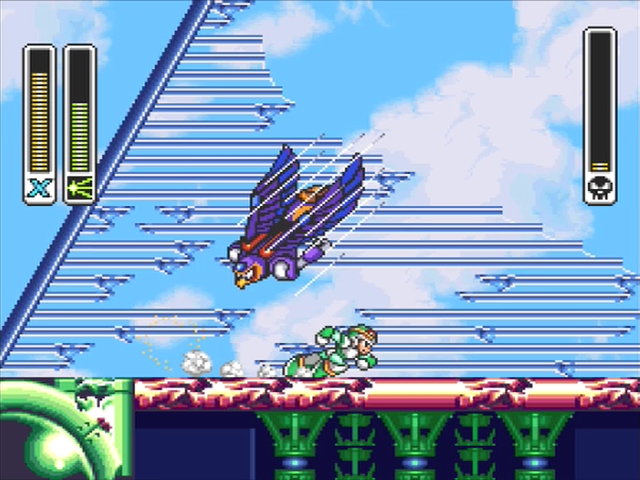 Storm Eagle is probably the easiest boss in the game, since most of his attacks are actually attempts to push you off the edge of the map. he will either flap his wings to push you off or fire a tornado projectile that does the same thing. Storm Eagle's room is big and open and does not have any walls. A bird has to fly free. he is pretty easy to take down with just the X Buster and leg upgrade.
His two damaging attacks are dropping eggs that split into several birds and dive bombing. If he takes to the skies, he is about to divebomb. Simply dash in one direction until you see him coming, then either 1) keep moving in the same direction, 2) switch directions or 3) jump. Alternatively you can use this time to blast him as well; if he dive bombs you, dash in the opposite direction, turn fire and then get out of the way if you need to. You must be very quick to do this without taking a hit.
The Hard Way
Storm Eagle can flap his wings to blow wind to try to push you off the stage. Run towards him to prevent that from happening. You can dash to make things easier. When he flies up into the air to dive bomb you, run (but do not dash) to avoid it and quickly turn and unleash a charged shot to counter it. He can spit out eggs that hatch into four birds that will fly at you. This is another thing easily dealt with using a charged shot. When he fires his giant wave of wind weapon, notice that it does not actually hurt you, it just pushes you like the wind from his wings except faster. Dashing works here, too. he is not a very tough boss since half of his attacks do not actually hurt you.
The Easy Way
Exactly the same as the hard way except shoot him with the Chameleon Sting to do more damage than your regular shots without charging. you will get a pretty handy weapon for winning.
Storm Tornado
Like Storm Eagle's tornado weapon, except it actually does damage. A tunnel of wind moves all the way across the screen, passing through walls and even shields to an extent. It does not take much energy to fire, either. Feel free to just have this equipped all the time. If you charge it with the arm parts, you will create a short-lived vertical pillar of air that can pass through ceilings and floors.
Passcode thus far
8447 6686 4126
Flame Mammoth’s Stage (Factory Stage): Mega Buster Upgrade
Helmet and Legs Upgrade required
- The Buster upgrade is perhaps the most difficult upgrade/heart container/sub tank to acquire in the game. it is located on Flame Mammoth's stage after the initial part of the stage (go rightward until you fall downward at the beginning... from there go rightward slightly). Above you, you will see some blocks that are different than the rest of the ceiling. Go to the high ground to the right of them and jump and dash leftward towards them. Break through them with your boots and helmet as you go upwards towards the capsule. In practice, this sounds easy but we must stress you have patience here. If you fall down after breaking even one of the blocks, you will not be able to reach the rest of them, so you will need to use the Escape Unit and try again. Patience will all you to acquire this most important upgrade!
- Once the level forces the player to head downwards. Head towards the lava, there will be a platform players will need to use the dash upgrade to reach some breakable blocks. Use the helmet or leg upgrades to break through them.
- Alternatively, players can obtain it in Sigma Stage 1 once Vile has been defeated.
Passcode thus far
3348 2617 6856
Flame Mammoth
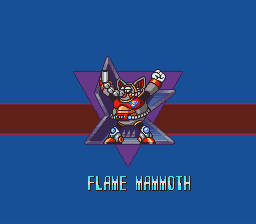 Now that you have defeated Chill Penguin (you have not?!) Flame Mammoth's level will be significantly easier. After defeating Chill Penguin Flame Mammoth's stage gets frozen over. All the pits of lava no longer exist and so you can cruise through this stage faster than any other. The upper stage on the right side of the select screen. This factory is full of fire and lava if you do not beat Chill Penguin first. Otherwise, it is comparatively harmless and frozen over. If you are having trouble with this stage, definitely beat the much simpler Chill Penguin first. Head right to the conveyor belts of junk. Watch out for the occasional enemy.

Flame Mammoth’s Stage (Factory Stage): Mega Buster Upgrade
Helmet and Legs Upgrade required
- The Buster upgrade is perhaps the most difficult upgrade/heart container/sub tank to acquire in the game. it is located on Flame Mammoth's stage after the initial part of the stage (go rightward until you fall downward at the beginning... from there go rightward slightly). Above you, you will see some blocks that are different than the rest of the ceiling. Go to the high ground to the right of them and jump and dash leftward towards them. Break through them with your boots and helmet as you go upwards towards the capsule. In practice, this sounds easy but we must stress you have patience here. If you fall down after breaking even one of the blocks, you will not be able to reach the rest of them, so you will need to use the Escape Unit and try again. Patience will all you to acquire this most important upgrade!
- Once the level forces the player to head downwards. Head towards the lava, there will be a platform players will need to use the dash upgrade to reach some breakable blocks. Use the helmet or leg upgrades to break through them.
- Alternatively, players can obtain it in Sigma Stage 1 once Vile has been defeated.
Scrap Robo
 These pathetic things can shoot lasers at you, but they are missing legs so they cannot move. They only have 4 HP so take them out or just ignore them. If the stage is frozen, you can just dash underneath the conveyor belts until you reach a hole you have to jump down.
Arm Upgrade

Quickly mash that jump button and hold towards the wall to make your way up to the capsule with the Arm Parts. If this is too much trouble, keep in mind that you will actually get this upgrade later as part of the story anyway, so you can just skip this if you want. Still, it will come in handy before that point.


The arm parts add a new level of charge to your basic X Buster, as well as allowing you to charge the weapons you get from bosses for special effects. The new X Buster charge will fire a bunch of purple energy balls at once with a large range that are great for regular enemies. It does 12 damage, but it does it in multiple hits. (The purple flash that appears around X as he fires also does some damage so you can do even more damage by standing close to an enemy before you fire.) Since bosses are invincible after they take damage, it is better to hit them with the yellow shot, rather than the new purple one.
Head right. If the level is hot, watch out for plumes of fire that will crash through the floor. If the level is frozen, hop down into the snow and dash all the way to the right.
Heart Tank

You can technically get this even if the level is still made of fire if you have enough health and sub tanks. it is meant to be collected in the cold version of the stage, though. Simply hope down and go under the platform to pick it up. Watch out for flying pick axes. Head as far up as you can, but instead of proceeding, go left and pick up a 1up.
Sub Tank
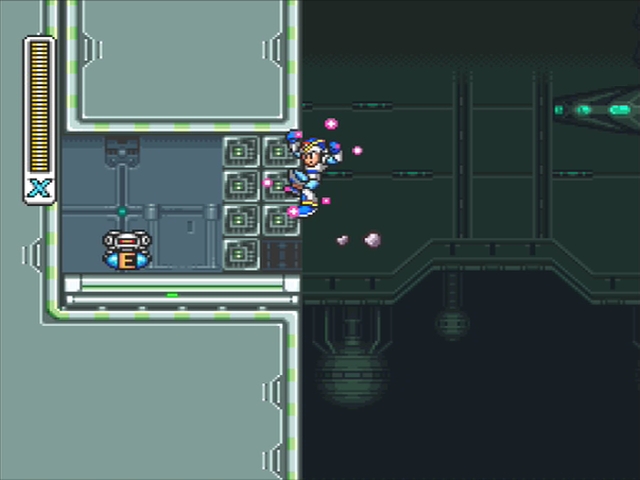
Keep going left until you see the final sub tank behind a breakable wall. You can break this using your leg upgrade by wall jumping. Head back to the right.
This next area has more conveyor belts, this time with the added bonus of a giant crusher thing that will try to flatten you. Dash past it and keep going down the hole to some pipes that are leaking hot liquid. Avoid this liquid, as well as the new enemy.
Rolling Gabyool
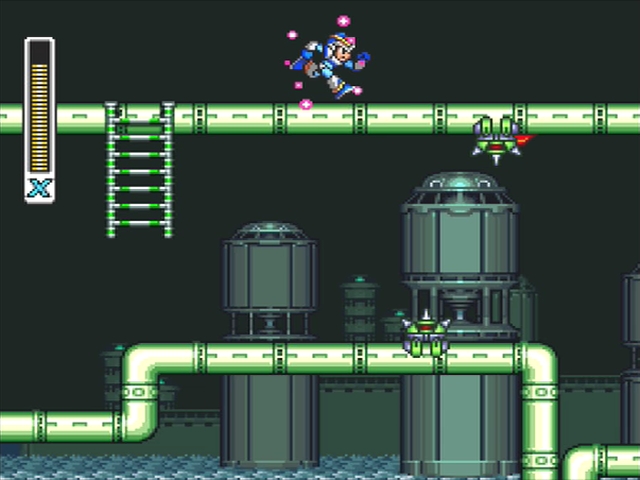
These things cannot be destroyed. They just run along pipes trying to touch you to damage you. they are not hard to avoid. Use the pipes and ladders to make your way to the boss room.
Maverick boss: Flame Mammoth
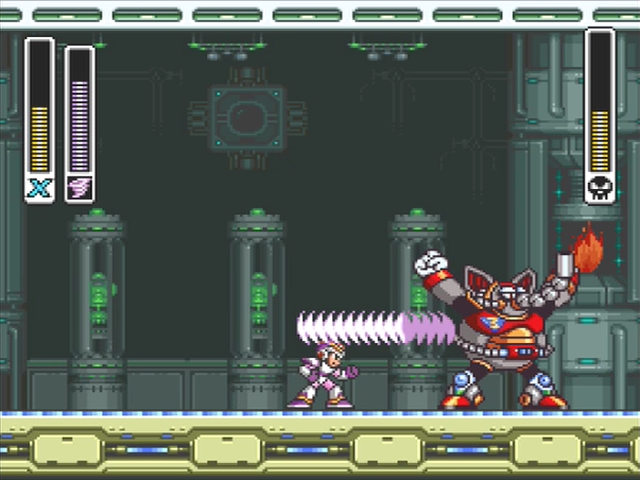
This boss room has a conveyor belt for a floor and is much bigger than most boss rooms. The ability to shake the ground after jumping.
The Hard Way
Flame Mammoth will jump around, and when he lands, you will fall on your butt if you are on the floor or a wall. Try to be in the air when he lands. He can shoot fire from his hand and oil from his trunk. If the fire hits the oil, it will continue to burn for a few seconds. If he cries out, the conveyor belt will change direction. he is not terribly hard if you do not rely on the walls. Avoid his simple attacks and dash under him when he jumps, and be in the air when he lands. do not let him land on you!
The Easy Way
You can cut off his trunk and prevent his oil attack with a Boomerang Cutter. Then switch to Storm Tornado and watch his health drop to nothing.
Fire Wave
This is a pretty cool weapon. it is a flamethrower with short range, but it does a lot of damage. Charge it to unleash a wave of fire that travels along the floor. Since this weapon continues to fire as you hold the button, you might want to charge a different weapon and use the shoulder buttons to switch to Fire Wave to reduce energy consumption.
Passcode thus far
5852 8626 5658
Chill Penguin Heart Tank
After beating Flame Mammoth, but before moving on to Sigma Stage 1, head back to Chill Penguin's stage and get the Heart Tank.
When you get to the part with the Mech Armor, get in it and ride it to the part where there is a cave you have to go through. At the left entrance, you can jump off the ledge straight up, then jump out of the Mech and up onto the ledge. Use Fire Wave to destroy the first mosquito bot generator building up there and you will see the Heart Tank lying inside.
Alternatively, you can go through the cave and then jump up on top from the right side by dash jumping across the small gap.
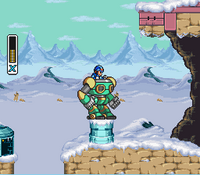
Jump off the ledge
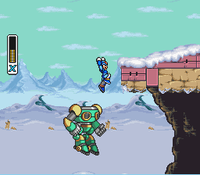
hop out of the armor onto the top of the cave
Blast the generator

You found a hidden Heart Tank!
Passcode thus far
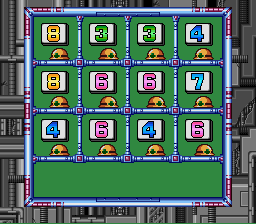
8334 8667 4646
Sigma's Fortress is now unlocked, but there are a couple of loose ends to tie up first. Remember the heart tank in Chill Penguin's stage? You can use the Fire Wave to collect it.
Sigma Fortress
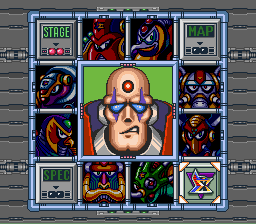 After defeating all of the main bosses, Zero will come to tell you that you need to infiltrate Sigma's fortress. In we go. We start outside of the fortress in an area with some Tortoises and Jammingers.
1. Stage 1, Sigma Fortress


When you reach a spot with floating platforms, charge up your Rolling Shield (if you have the arm upgrade) and hop on. The shield will protect you from the Jammingers, and they are a real pain in the butt without it. it is really easy to fall to your death here. It can be tough to judge when and where you are moving when all you can see is the background. Remember that you can jump farther with dash jumps. Once inside, you will fight a few common enemies and make your way to Vile! he will run off and Zero will chase after him. Follow them.
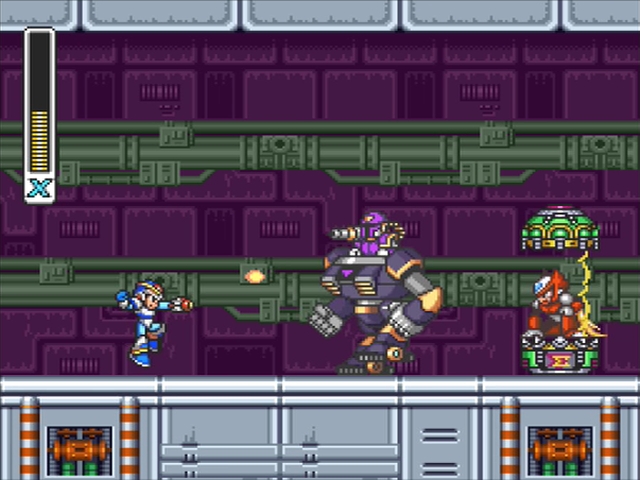 When I was a kid, someone told me that you could beat Vile here by hitting him with eactly 100 hadoukens and then he'd explode and X would die and you would get to play the rest of the game as Zero. I could never quite pull it off but his dad worked at Nintendo so it was definitely true. do not waste your Sub Tanks. After he beats the tar out of you for a while, Zero will make the ultimate sacrifice and die forever and ever until Mega Man X2. Then things get real.
Vile
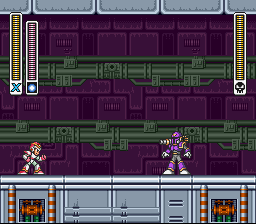 An actual, winnable fight with Vile, without his Ride Armor. Thankfully, your health will refill on its own before the fight starts. His weakness is the Rolling Shield, but it will not completely dominate him on its own. He dashes around and shoots energy balls at different angles. Those can stun you. He can jump pretty high and hover for a moment dropping bombs that send energy along the floor in both directions. There are no walls for you to use so dodge as best you can. The Rolling Shield does enough damage that you will probably defeat him before he kills you no matter what. Vile is also weak to the Homing Torpedo, but you will need that weapon in a little while.
After this fight, you will get a dramatic scene with Zero, where he will give you the arm parts if you did not get them from Flame Mammoth's stage. Proceed onward, through an area with lasers and turrets. Those blue things on the ground and springs that will generally propel you into the lasers if you touch them. If you want to feel cool, dash into the first spring you see and you will harmlessly fly from spring to spring until the end of the area, avoiding all enemies along the way. Try it! it is fun! Next is a vertically scrolling area with all of the enemies that were a pain in your butt in Boomer Kuwanger's stage. At the top of this area is Boomer Kuwanger himself!
Yes, you will have to fight all of the Mavericks again, but they are no tougher than they were the first time, and you definitely have all of their weaknesses this time. Boomer's weakness is still the Homing Torpedo.
Next is a hallway with some Metalls. Spineys, and Jammingers. Nothing you cannot handle at this point. Then you will come up against an actual new boss.
Boomer Kuwanger

Use the same strategy as before: shoot him with his weakness, the Homing Torpedo, while hiding in one of the corners, and then dash to the other corner if he tries to go underneath you.
Bospider

This character will start at the top of the stage and make his way down using the pillars and paths between them. The paths move around from time to time, but Bospider will always take the path to another pillar whenever it comes to one. It never continues in a straight line unless it has to. Use this to predict where it will land and ready a Shotgun Ice blast (his weakness) when he opens his eye. Be quick, it only opens for a moment. If he shoots out tiny spiders, avoid them, but do not bother to defeat them. they are mostly just a distraction and will leave on their own. Your reward for killing him is a big fat nothing.
Passcode thus far
7431 3852 8521
2. Stage 2, Sigma Fortress
You finished off Bosspider and instead of a nice upgrade as your reward all you got was another lousy Sigma stage. If you have not noticed, the Sigma stages are meant to be the hardest by pitting you against a combination of the various challenges that you had encountered in separate stages. By the time you finish the game, you should have little trouble with any of them.
Back to it, then. This are is full of bats, Flammingles, and moving platforms from Storm Eagle's stage. Head up to fight a familiar foe.
Chilly Willy
 it is our old friend Chilly Willy. he is still super flammable so burn him to ashes with the Fire Wave and proceed. The next area has a chump next to his Ride Armor instead of inside of his Ride Armor, so blow him up before they can hop in and steal it for yourself. This hallway is full of more familiar enemies to punch, so get punching. When you reach a ledge you cannot quite jump up to, move back a bit and hop onto the platform to the left, then dash jump. When you reach the ladder, it is time to say goodbye to the Ride Armor and climb up.
This next vertical area has two paths. The left path has rotating turrets on floating platforms. The right path has dodging turrets on walls. Which path you choose is up to you. Just be ready for the next fight.
Mech Armor
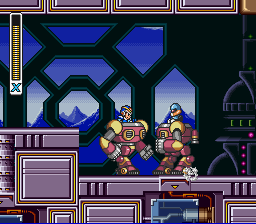 An actual, winnable fight with Vile, without his Ride Armor. Thankfully, your health will refill on its own before the fight starts. His weakness is the Rolling Shield, but it will not completely dominate him on its own. He dashes around and shoots energy balls at different angles. Those can stun you. He can jump pretty high and hover for a moment dropping bombs that send energy along the floor in both directions. There are no walls for you to use so dodge as best you can. The Rolling Shield does enough damage that you will probably defeat him before he kills you no matter what. Vile is also weak to the Homing Torpedo, but you will need that weapon in a little while.
Storm Eagle
 Storm Eagle is still weak to Chameleon Sting, but you might want to save it and just use your X Buster, because the level's boss is also weak to Chameleon Sting. Storm Eagle is about the easiest boss in the game no matter how you fight him.
This next are is short but annoying thanks to having to deal with bats, Jammingers, and Hoganmers in a vertical spot. we are almost there. Make it to the top and head through the boss door.
Rangda Bangda
 Rangda Bangda is weird. it is two eyes and a nose which all share the same HP bar but each have their own allotment of HP, so you can destroy one piece at a time. They also share the same weakness: Chameleon Sting. The eyes will attack you different ways depending on their colour when they open up. Blue will pop out of the socket and fly towards you. Green will shoot a single bullet at you. Red will fly at you and shoot three bullets at the same time. Every now and then, the nose will go into action by pulling the walls together and bouncing around the room. Beware the teeth in the middle of the floor. Once you destroy the nose, the walls will not return to normal, meaning you will have to fight the eyes in a very narrow space, so you might want to save the nose for last. After this fight, the second Sigma stage is over.
Passcode thus far
8447 4666 6156
3. Stage 3, Sigma Fortress
You finished off Bosspider and instead of a nice upgrade as your reward all you got was another lousy Sigma stage. If you have not noticed, the Sigma stages are meant to be the hardest by pitting you against a combination of the various challenges that you had encountered in separate stages. By the time you finish the game, you should have little trouble with any of them.

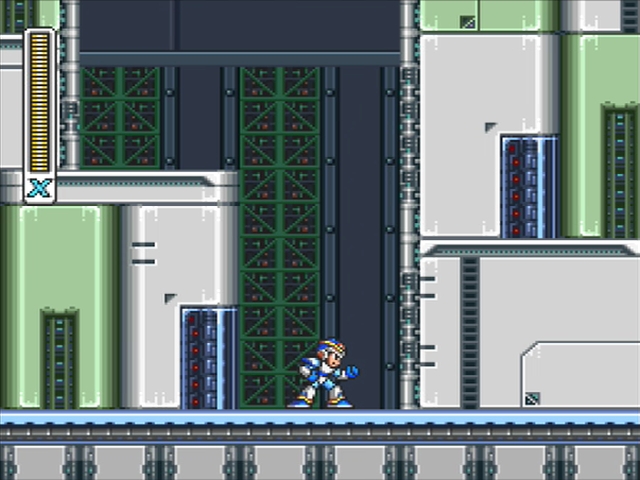
you will be taking out the remaining Mavericks in this stage, so get started. Head up and take out the Mega Tortoise and the turrets before heading right in to the first boss battle.
Armored Armadillo
 it is Armored Armadillo and he is still weak to the Electric Spark so electrocute him and be on your way. Head up past some bats and miners to another Maverick.
Sting Chameleon
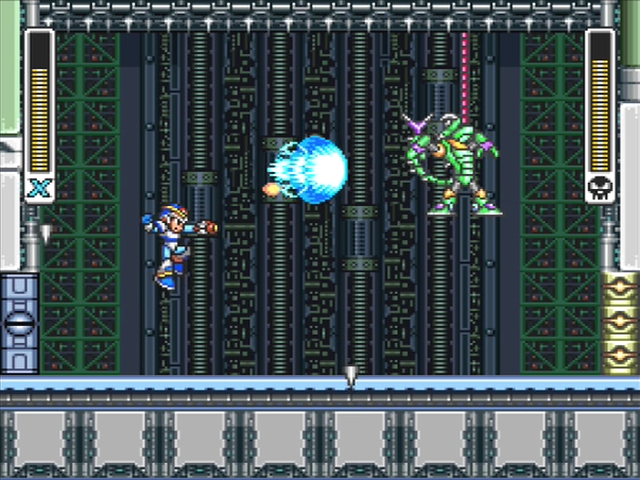 Sting Chameleon is weak to the Boomerang Cutter, but so is this level's boss. it is pretty much impossible to waste them, though, since any time you miss, you will get the energy you spent on the weapon back. Besides, the next short area contains a weapon energy pickup behind a wall that you can only collect using the Boomerang Cutter, so go for it.
Spark Mandrill
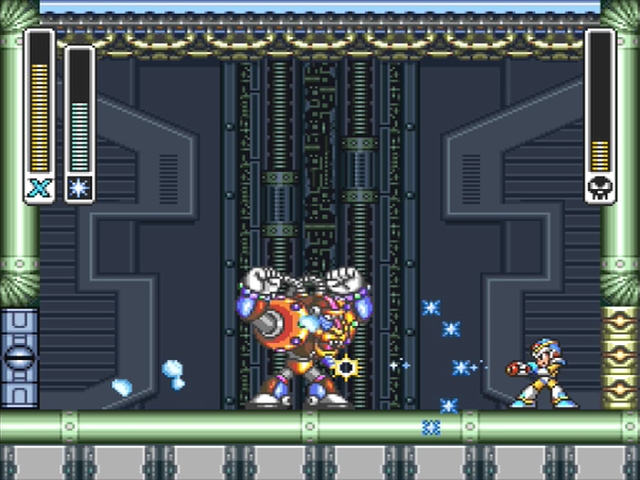 he is still sooooo easy with the Shotgun Ice, and he is also really easy to hadouken if you happen to have full health. Move on. The next area is short and underwater. I wonder who we could possibly be fighting next!
Launch Octopus
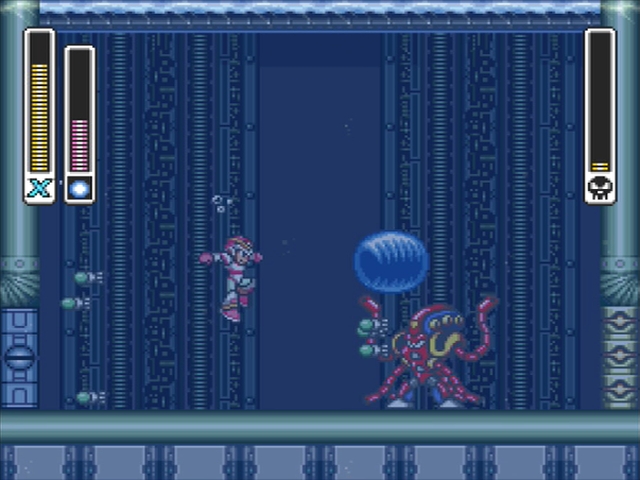 Of course. Rolling Shield is his kryptonite. Remember that you can also chop off a couple of his tentacles with the Boomerang Cutter first if you want, but you really do not need to bother since he probably will not land his life draining attack. Want the items on top of the spikes here? Charge up your Chameleon Sting to walk right over the spikes. Dash and you can make it all the way to the next area while ignoring the enemies.
Flame Mammoth
 it is Flame Mammoth again. he is still vulnerable to the Storm Tornado, and since he is big and heavy, he is pretty easy to hit with a hadouken, too. that is the last of them. Just one more boss until this stage is over. Use the Chameleon Sting's alternate fire to dodge the various enemies in the next area until you get to the dungeon door.
Now that you have Flame Mammoth's weakness, the Storm Tornado, this fight will be cake. Shoot the Storm Tornado in front of Flame Mammoth so it passes through him twice, and remember to dodge his various attacks as you did before. To make the fight easier use Boomerang Cutter to cut off his trunk.
D-Rex
 D-Rex is intimidating. He takes up a ton of space, moves relatively quickly for something its size, splits in two and can attack you with both halves at once. The top half is the only one you can damage. he will ram into the wall to knock you down from it so do not rely on it. Only use the walls to quickly launch yourself off to a good spot to launch a shot at his head. He moves erratically but each half only moves in a straight line at any given time, so it is possible to predict where it will end up. He speeds up after he takes a certain amount of damage. he is weak to the Boomerang Cutter so have that ready. After he is down, the level is over.
Passcode thus far
7431 3852 8521
4. Stage 4, Sigma Fortress
you will begin the stage at the bottom of a pit. About half way up there are two holes, one on either side, that spawn caterpillar bots. You can harvest these to fill up your sub tanks if they are not already full (you will need all four). One effective way is to use the roll shield special, giving you the protection ball and just sitting under the nest. Destroy the bots if you need the energy or extra lives. When ready, simply hop up to the very top.

Velguarder
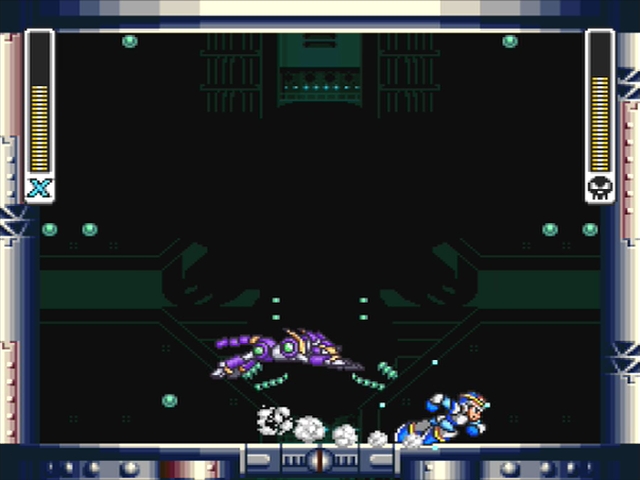 Before attacking you himself, Sigma will send his dog after you. Velguarder is weak to Shotgun Ice. he is pretty quick and can leap from the walls. He breaths fire downwards, which then travels back upwards on a weird arc. He can also shoot a quick flurry of electric balls. Keep your distance and shoot him with Shotgun Ice. Alternatively, you can take him out with a quick hadouken. As soon as the fight starts, immediately dash to the left so the purple pooch hops over your head and clings to the wall before rebounding off. that is your chance to strike.
Sigma (First Form)
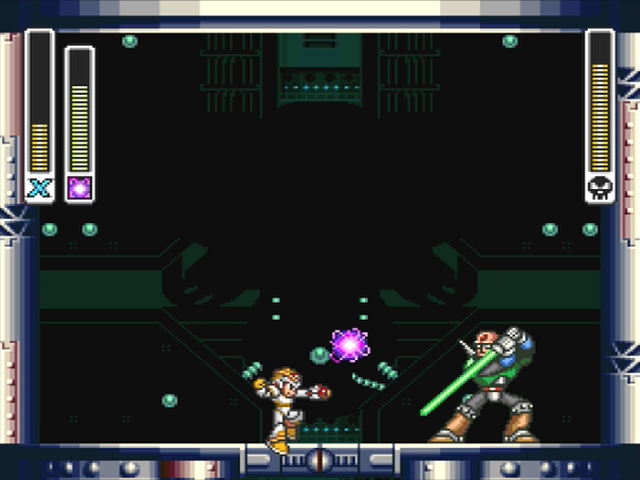 Sigma is fast and he hits like a truck with his plasma sword. Stay far away. He can fire a flurry of shots in your general direction and he will follow you if you climb the walls by doing his own overpowered version of the wall jump. he is weak to Electric Spark. One simple strategy is to climb the walls and have him follow you, then shoot him on your way down, avoid him as he hits the ground, and then climb the walls again. Keep in mind that he drops at a wider angle than he climbs. As with Velguarder, it is possible to open the fight with a hadouken and one-shot him if you are quick enough. You can actually start the quarter circle input for the hadouken before you regain control of X if you time it just right. This is important, because if you are too slow, he will block your hadouken and you very likely will not get another one out without wasting a sub tank
Sigma Velgauder Bot (Second Form)
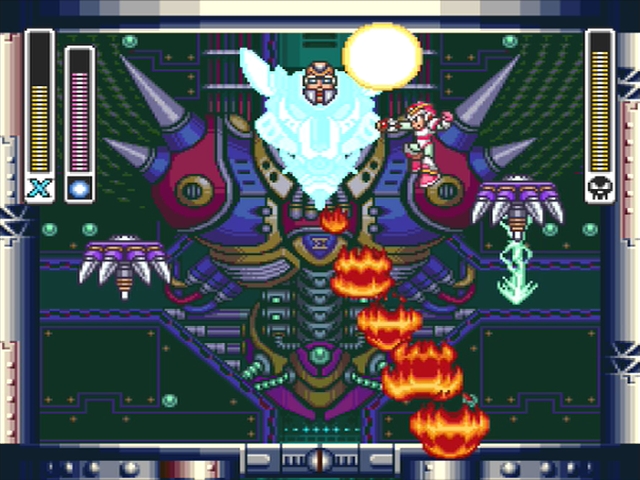 Well, here we are, at the last boss. there is no cheap way out of this one. This is the end, so use your sub tanks if you need them. Die here and you will have to fight the previous two bosses again. His weakness is the Rolling Shield, but his only vulnerability is his head near the top of the screen, so you will have to get close. You can do this by wall climbing or jumping up onto one of his hands when it swoops down to attack you. do not stay on there for two long, though. It can shoot lighting upwards and downwards at the same time. You will not be hit by the lighting if you are grabbing on to the side of the hand instead, but they are pretty small so that is not as easy as it sounds. it is not a great idea to hang around under the hands for that same reason. When a hand opens up and sparks, it will shoot electricity, but if it does not, it is about to swoop down at you. Sigma's head can shoot lighting balls or breathe fire. Remember that you can get close enough to his head to damage him if you dash jump from the wall. This boss honestly isn't that bad if you have most or all of your health tanks.
Victory!
Congratulations on beating the game! you will now be rewarded with a segment about Mega Man's ongoing inner struggle and some good old credits. However, this isn't all you get. When the thanks for playing message comes up with the Capcom logo, wait a few minutes and you will get to see Sigma come back with one last message.
Ending


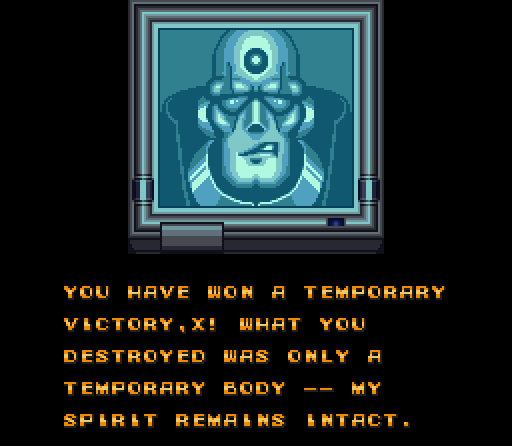

Hadoukan
Before we head to Sigma's fortress, hunt for one more upgrade. To get this super powerful weapon, you will need all 8 Heart Tanks, all 4 Sub Tanks (full), all 4 capsule upgrades (legs, arms, head, and body), a bunch of lives, and all of the Mavericks' weapons. Obtaining the Hadoken is really more of a side quest than anything else, but it is extremely powerful and hence useful to acquire. For those of you who are not familiar with the Hadoken, it is the fireball that Street Fighter II characters (at the time Mega Man X was first released on the SNES) such as Ryu and Ken could fire. By finding the capsule at the very end of Armored Armadillo's stage, X can acquire this fireball and even fire it in the same way (down, diagonal, the way you are facing, then fire very quickly!) In anycase, to acquire this, it takes time and patience and can only be acquired once every Heart Container, Sub Tank, and gear upgrade in the game is acquired.
 Head to Armored Armadillo's stage. If your energy tanks are not full or you do not have maximum lives, this is a great place to hunt for them. Charge up the Rolling Shield weapon to create a forcefield around you. This will make you invincible to the bats, so you can just run into them and steal their delicious life pickups. (The Flammingles will make your barrier disappear, though.) Remember that one bat that looks different from the others? Farm lives from that one.
 Make your way all the way to the giant hole before the boss room. Have maximum health and weapons when you get here. (You can farm them from the bats after the second Mole Borer if you need them.) Jump from the now-airborn platform all the way to the right and land on a small platform with a health pickup on it. Take it if you want, then jump into the hole. Yup, hop right in there and die. you are going to want to do that four times, making sure to stand on the platform above the boss door each time. do not worry if you land below it. Just climb the wall back up, then hop into the pit. After four deaths, make your way back to that ledge one more time.
 Here you will get the super powerful hadouken! Ok, it does not look that impressive, but it does 32 points of damage which is enough to one-shot most enemies, including bosses. The catch is that you can only use it when your health is full and when you are standing on the ground. Use it the same way you use it in Street Fighter, with a quarter circle motion from down to forward, followed by the attack button. You can also release a charged shot in place of pressing the attack button. Remember that the hadouken isn't saved with a password.


Cheats
Each boss in Mega Man X has a weekness from another boss. Here shows whose weapon to use against another maverick.
- Chill Penguin - Use Fire Wave
- Spark Mandrill - Use Shotgun Ice
- Armored Armadillo - Use Electric Spark
- Launch Octopus - Use Rolling Shield
- Boomer Kuwanger - Use Homing Missle
- Sting Chamelion - Use Boomerang Cutter
- Storm Eagle - Use Chamelion Sting
- Flame Mammoth - Use Storm Tornado
Select the password option at the title screen and enter the following in the 3X4 grid, inputting the password from left to right, starting from the top left corner.
- 8441 2176 4423 4 Sub-Tanks, All Turbo Hearts, All Upgrades, All Bosses Defeated
- 5724 8418 3588 All 4 Subtanks, no armor, no weapons, no hearts
- 2653 3858 7584 All 4 Tanks, all heart tanks, and all bosses defeated.
- 8447 4666 6156 All abilities, heart tanks, sub-tanks, all bosses defeated, Zero's buster
- 6624 5468 8588 All armor upgrades, subtanks
- 4723 2486 1324 All Bosses Defeated - No Leg/Body/Helmet/Buster/Heart/SubTank
- 4653 4688 7884 All bosses defeated 2 turbo hearts 2 subtanks
- 2137 3188 8121 All bosses except Boomer Kuwanger and Sting Chameleon dead.
- 2556 2582 7114 All bosses except Sting Chameleon dead.
- 3676 4667 5148 All powerups and armor upgrades, all bosses beaten the first time through.
- 3748 8612 5524 All Subtanks & Hearts, NO Armor & Weapons
- 6485 1146 2321 All Upgrades No bosses Defeated
- 5583 4618 5824 All Upgrades, All bosses defeated, 1 turbo heart.
- 4423 8832 7824 All Upgrades, Chill Penguin Defeated, Storm Eagle Defeated
- 8141 2136 4426 All weapons, sub tanks, hearts, and levels completed
- 4764 8768 7748 Arm Capsule only
- 5147 8437 4536 Armored Armadillo defeated
- 7374 2268 6281 Beat the top half, and have collected the power ups on the top half.
- 4764 5788 3748 Body Capsule only
- 5151 3427 4261 Boomer Kuwanger defeated
- 5286 7136 5124 Chill Penguin and Storm Eagle dead.
- 4768 7258 1871 Chill Penguin Defeated
- 5337 5377 4171 Chill Penguin, Storm Eagle, and Flame Mammoth dead.
- 2147 5277 1281 Chill Penguin, Storm Eagle, Flame Mammoth, and Spark Mandrill dead.
- 6431 5168 8171 Chill Penguin, Storm Eagle, Flame Mammoth, Spark Mandrill, and Armoured Armadillo dead plus slide ability and head capsule.
- 2656 5112 3164 Chill Penguin, Storm Eagle, Flame Mammoth, Spark Mandrill, and Armoured Armadillo dead.
- 7431 3842 8523 Everthing unlocked ecxept no beaten Sigma
- 8437,2788,8161 everyone accept sting chameleon defeated, 6 heart tanks, 3 armor upgrades, and 3 sub-tanks
- 8441 2336 2421 Everything obtained except Leg Capsule
- 3733 6838 8744 Final Sigma Level/Last Battle
- 1764 1488 7748 First mini-level beaten
- 1573 5232 7264 Flame Mammoth defeated
- 1447 1838 1271 Full armor, 2 hearts, 2 sub-tanks, Chill Penguin, Storm Eagle and Flame Mammoth defeated
- 6111 8747 4181 Have Storm Eagle, Flame Mammoth, Chill Penguin,and Boomer Kuwangtang dead w/chest, helmet, arms, leg upgrades, 1 sub-tank, & a turbo heart
- 4664 1718 7748 Head Capsule only
- 1556 6642 7448 Launch Octopus defeated
- 5382 8566 2656 Leg Dash No bosses Defeated
- 4425 7272 3821 Leg Dash, Helmet Enhancement, No Bosses Defeated
- 1422 1412 7756 Leg Dash,Helmet enhancement with no bosses defeated
- 2653 7248 6488 No Leg Dash, Chill Penguin Defeated
- 5385 7136 6321 Opening Stage beat
- 5131 7358 4181 Spark Mandrill defeated
- 5385 7136 6861 Sting Chameleon defeated
- 6483 7376 5124 Storm Eagle defeated
- 3475 5668 2581 To have all Turbo Hearts, all Sub-Tanks, and all Armor Upgrades with no bosses defeated
