home ➜ Original Xbox Game Console ➜ Madden NFL 2004
Madden NFL 2004 - Undisputed leader in authentic NFL football simulation
Information
Madden NFL 2004

- Developer: Tiburon Entertainment
- Publisher: EA Sports
- Game Rating: E (Everyone)
- Release Date:August 12, 2003
- $49.99 / $9.99
- Players: 1 - 4
- Play Modes: SinglePlayer and multi-player
- Custom Soundtracks, Dolby 5.1 Surround, HDTV 480p, Storage Device, Xbox playable on Xbox 360
Introduction
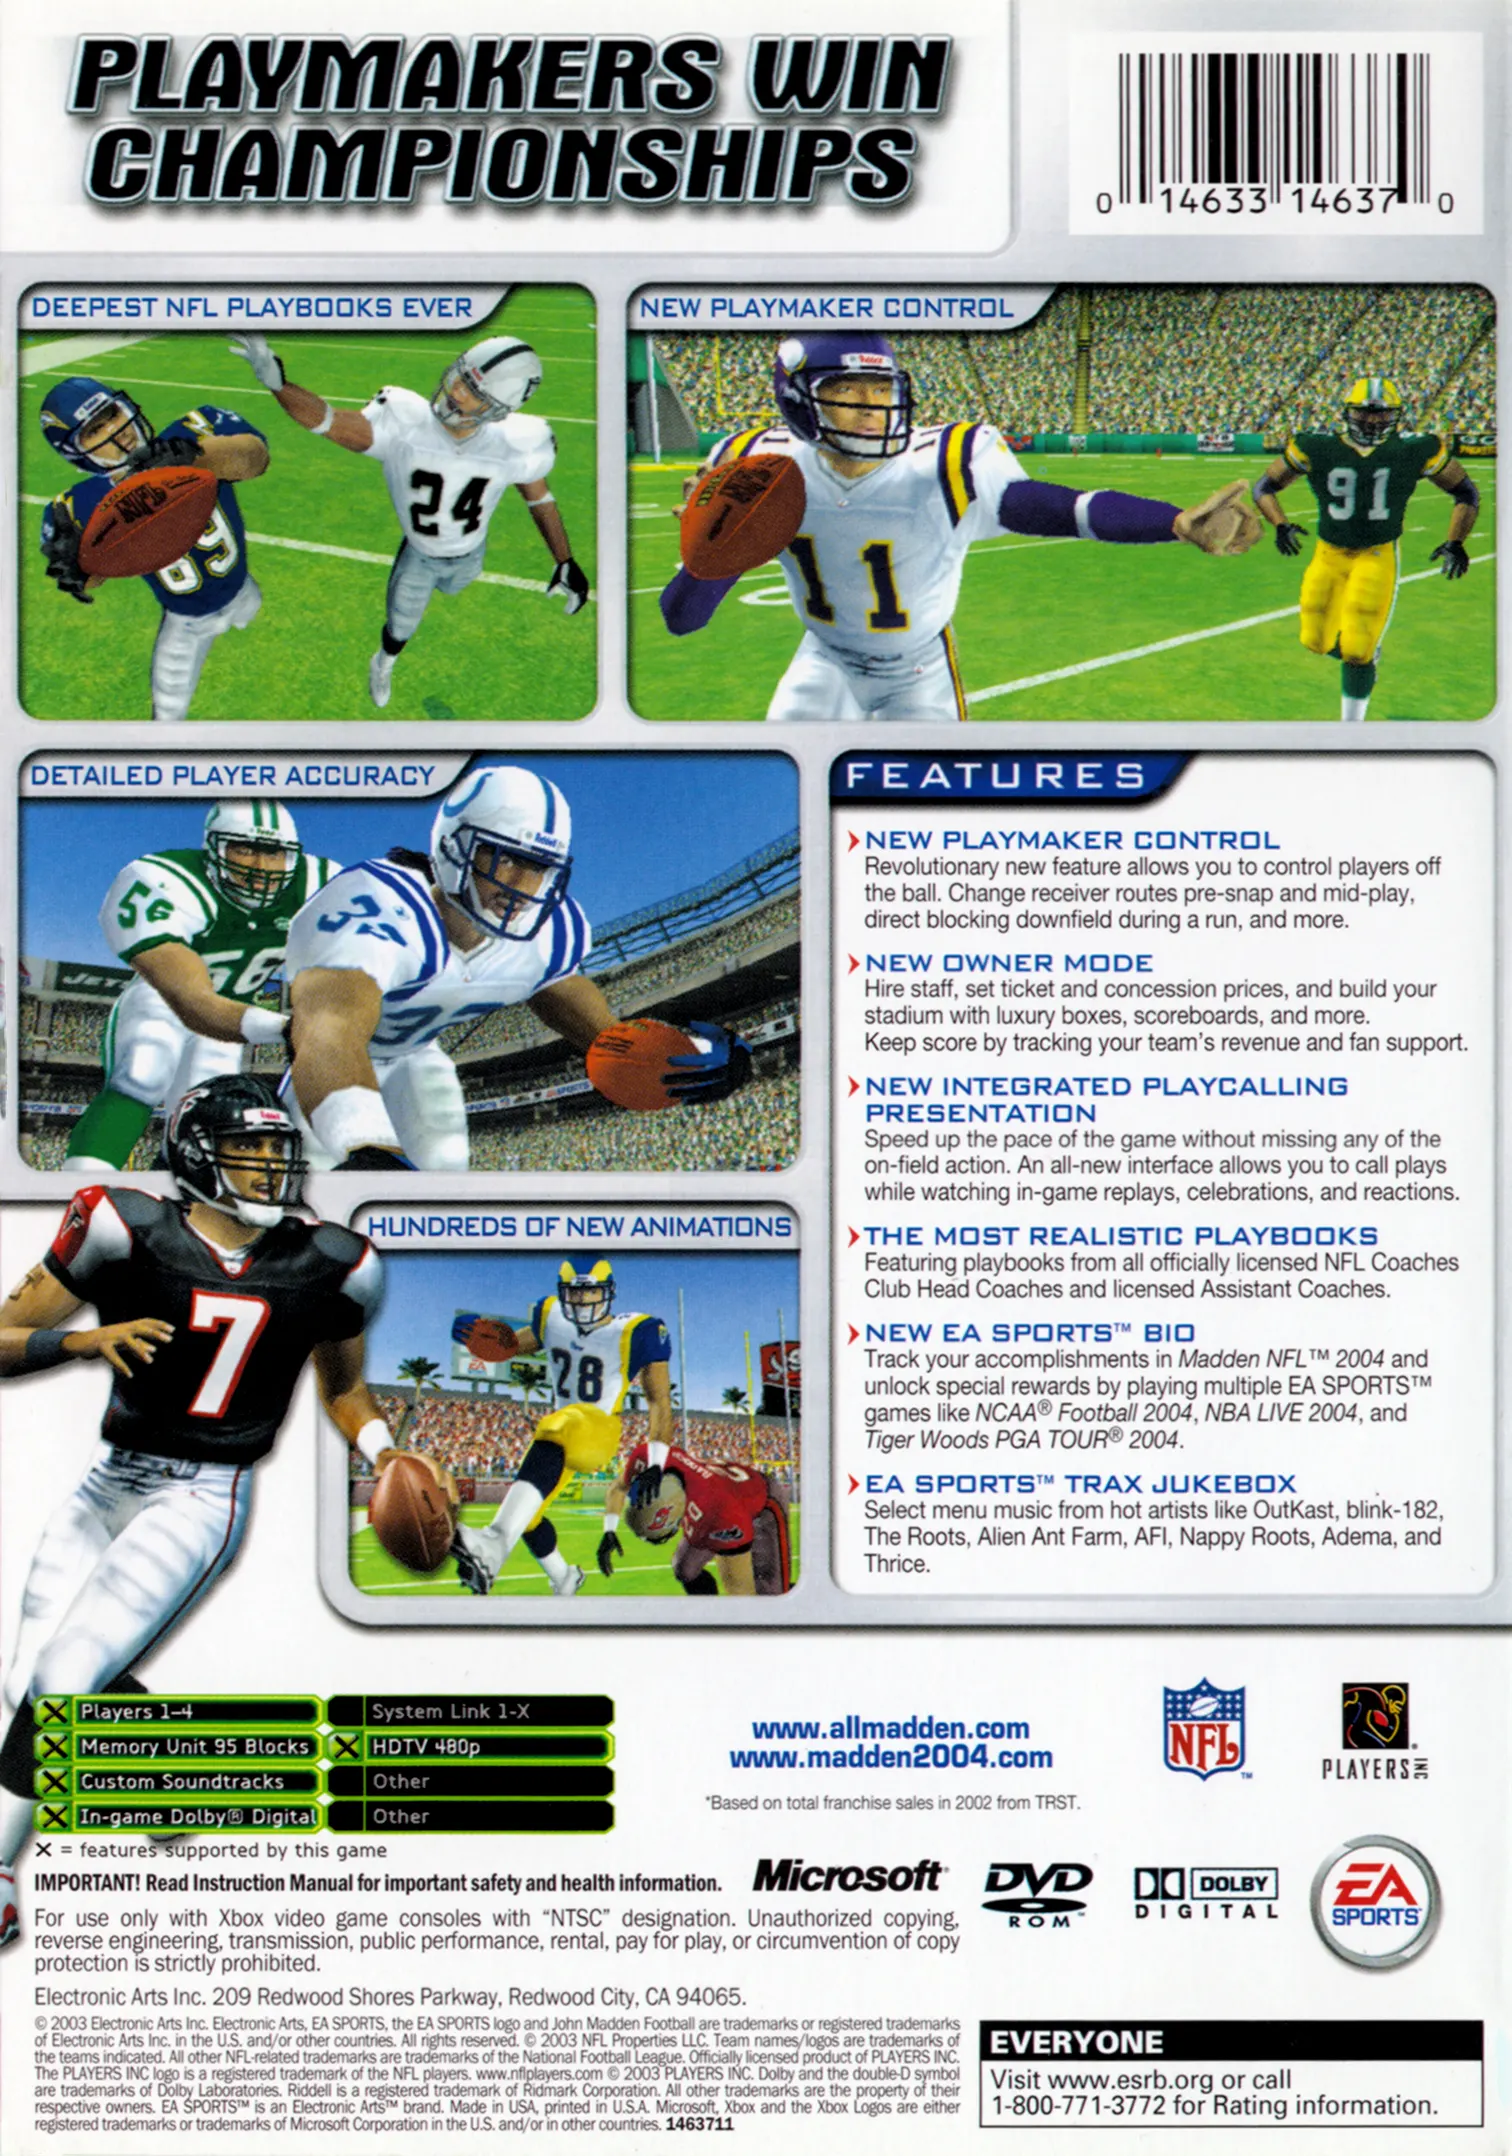
In its fourteenth year and with more than 28 million copies sold to date, Madden NFL Football once again proves its status as the undisputed leader in authentic NFL football simulation. With a primary focus on in-game graphics, incredible depth, visual presentation, and tournament-tested gameplay, this season's Madden NFL 2004 continues to demonstrate why it is the definitive interactive sports gaming experience. New features include revolutionary Playmaker Control (which lets gamers adjust plays on the fly, just like on the real NFL football field) as well as new owner options in Franchise mode.
Players Become Coaches Game Strategy: Great players that retire in franchise mode can come back to be coaches. Wait a couple of years after your favorite star retires, and he shows up in the coaching free agent list to be signed as an assistant or head coach.
Basics/Modes
Franchise
Gone is the season mode, but in its place is a much-improved Franchise Mode. Take your team through one season or twenty, and manage the front office, stadium location, team relocation, and everything else that comes with being an NFL Owner/Coach/General Manger in the league these days. The Franchise Mode section breaks it all down in three easy pieces: before, during and after the season. We explain it all — from setting concession prices to drafting new players.
Tournament
Set up your own tourney with up to sixteen teams. Tournament types include single and double elimination, single and double round robin. You can choose to do a fantasy draft before you begin as well, which allows you to begin with an empty slate and stock your squad with players from the entire NFL pool.
Mini-Camp
Mini-Camp gives you a chance to hone your abilities in a skills competition around the country. Visit each NFL city and complete challenges to earn Madden Cards. Visit the Mini-Camp guide section for more info on how to complete each challenge, and what you unlock.
Two Minute Drill
Earn valuable points to spend on Madden Cards by competing in this two-minute drill mini-game. Score as many touchdowns, field goals and extra points as you can in two minutes to earn Tokens.
Football 101
Football 101 is a tutorial mode that allows you to see the play run through, then run it through yourself. Complete the play successfully, and you earn Tokens that you can use to purchase Madden Cards.
Practice
Practice lets you open up all of the playbooks in the league and take them for a spin, against various defenses. This is a great place to go before you start a Season or Franchise, to get a handle on the playbook you are using. Practice offense, defense or special teams here.
Situation
Set every single parameter in a game situation: score, time left, quarter length, and ball position. play the situation you set up. You can recreate classic scenarios or use this to try to wiggle out of real-game scenarios that you might need help with.
Features
Create-A-Player
Create yourself, Marilyn Manson, your high school science teacher, or Vin Diesel. We do not care. This is the tool that lets you do it. For a superman, set all attributes to 99, then watch him tear apart the league.
Create-A-Team
This option lets you create a new NFL franchise from the ground up, choosing everything from helmet color, climate and logo to home city. You have to start with an existing roster to create them, but you can trade for whoever you want once it comes time to start a Franchise.
Create-A-Playbook
Play offensive coordinator and create a playbook. Modify an existing playbook, including some generalized ones like Balanced, West Coast Offense, and Run Heavy. Create custom formations and custom plays. Pretty much whatever you can imagine can be done.
Rosters
Here you can edit the roster files for Play Now. Trade and Release players, change teams' depth charts, and generally manage all of the rosters in the league.
Historic Teams
New to this year's Madden, this allows you to edit the Rosters of old school teams, adding appropriate names. Some of these teams will have to be locked by earning Madden Cards. Find out which in the Madden Cards section.
Auto-Save
Auto-save is a handy feature that automatically saves (thus the name) each time you complete a game in Franchise, change settings. It is handy for those people who forget to save before turning the machine off, and convenient for everyone else. To turn it on, go to My Madden, Load/Save, then Save. At the save screen, you see the control for Autosave On/Off.
Mini-Camp
Mini-Camp allows you to compete in a series of mini-games and game situations in order to hone your skills, post records, and ultimately, unlock and win Madden Cards. Move around the map in the Madden Cruiser and choose your challenge. Every NFL city is covered on the tour, and you need to complete the challenges with the prescribed team and player to succeed.
There are two challenges to every skill in the game: a drill and a game situation. You must pass them both in order to move up the ladder. There are four levels of difficulty in the Mini-Camp mode: Rookie, Pro, All-Pro and Madden. Finish a skill's challenges at Rookie, and that skill's challenges will be unlocked in Pro, and so on up the chart. Each difficulty has its own parameters to determine victory, and one thing's for sure. You need to get at least a Bronze trophy to move on.
Getting Gold on each challenge unlocks a Madden Card. Either a Cheat Card (on the early levels) or a Player Card (on the higher levels). Finishing each Situation successfully unlocks the Cheerleader/Pump Up Crowd Card for that team.
DB-Swat Ball
- Drill: Go for the pick rather than the swat, as it yields more points. Position yourself in front of the dummy, then time your pick as the ball comes towards you. If you can, get to the pylon, and turn around with your back almost on the dummy when the ball is fired (use the "face front" control to achieve this). The more passes you can defend in a row, the higher the score.
- Game Situation: Prevent the opposing team from scoring a touchdown while only controlling your DBs. Use a safety to best effect, and choose some kind of Nickel package (Cover 2 works well). You can rove with the safety and let the corners pick up the receivers automatically. If you can force a turnover on downs, you complete the challenge much faster.
DL-Trench Fight
- Drill: Using spin and rip moves, capture the flags on the field as quickly as possible. The rip move seems to work best, as it keeps you moving forward. Get up a good head of steam and use the rip move to put your opponent on his can. Press turbo in between the flags to gain momentum.
- Game Situation: Prevent the oppoing team from scoring a TD with 2:00 left, by controlling only your defensive linemen. Again, Cover 2 (4-3) is a good idea. Select your best lineman and try to collapse the pocket with a rip move. If it looks like the QB might get a pass off, leap and try to block it. Stop them short of the end zone to win, and unlock the Card.
K-Clutch Kicking
- Drill: Make sure you take wind and position into account when you line up. The idea is to get it through the red section of the goalpost target. The center is worth 300, the orange 150 and the yellow 75. Set up quickly and kick. In order to score a gold, you need perfection down the center of the goalpost almost every kick. As you move up, the kicks get further away with more wind, so you will have a lot of compensating to do.
- Game Situation: Take one shot at the end zone with your best deep play. If that fails, just line up and kick it (early difficulty only). If you are really far out, be sure to tilt the cursor down slightly to get the most distance out of your kick.
QB-Precision Passing
- Drill: This drill makes you throw through hoops scattered around the field. There are three different plays and six rounds of each play. Each play has three rings: Bronze, Silver and Gold. Complete a pass through every ring in a round for bonus points. To do well at this challenge, especially in the higher difficulties, you will need to complete a bunch of these in a row. Unfortunately, it is virtually impossible to tell you how to throw each ball. Practice at it and the touch will come. This one took us a lot of tries to fully master. However, when you emerge on the other side, you are a great passer.
- Game Situation: The game situation calls for a late charge for a TD. You only need to get into field goal range and kick a FG to win, so you realistically only need to move the ball about twenty or thirty yards. This is just like any game situation. Simply complete passes and move down the field. Make sure you use a timeout whenever the clock is running, or the win may not count.
RB-Ground Attack
- Drill: The object here is to score as many TDs as you can in the minute you are given. The more yards you gain before being tackled, the better. If you do get pulled down, the play will resume from there, and the object is the same: get into the endzone while avoiding two defenders. The spin move is probably your best weapon in this drill. Be sure to use the sprint button as well to gain speed in the open. You can also use the ghost dummies to cross up the defenders.Wind around a couple of times in the backfield to get them stuck on the dummies, then sprint around the corner and get to the end zone!
- Game Situation: In the game situation, you want to find that one running play that consistently eats up yardage and keeps the clock going. The object is to hold the ball and run out the clock on the opposition. Once you blow through the opponent's three timeouts, just kneel it. The more conservative plays up the middle work best.
P-Coffin Corner Punt
- Drill: There are targets at the corners near the end zone, and you have six tries to put the ball in the right spot. On a windless day, you want to point your kick at the front pylon. On the kick meter, hit midway in the red, then midway in the orange in order to strike a bullseye. The number of points accumulated by hitting targets will calculate which trophy you take home. Be sure to adjust for wind conditions, when they arise.
- Game Situation: The goal of this challenge is to bury the opposition deep. You have to get within the 15-yard line to make it count. Use the same skills as in the drill to pin it in the corner. If you do it correctly, you score a Card.
LB-Chase and Tackle
- Drill: You have to take down the halfback with your linebacker or safety by running up to him and tackling. There are moving pylons on the field that represent blockers, but they are easy to get by. Sprint upfield, then dive at the back when you get close. You get extra points for controlling the player who does the tackling, so be assertive.
- Game Situation: The object is to stop the opposing team from getting a first down. Again, be sure to use your timeouts in between plays or the challenge could be voided. Stay in a good base defense (4-3 Cover 2 or Strong Zone) for the best results. If it is 3rd and short, do not be bashful about blitzing the run. Just do not give up that first.
QB-Pocket Presence
- Drill: This one is pretty fun. You have got to stay in a circle while being harassed by projectiles. You have to avoid those or you will be sacked, and you have to stay within the circular pocket or your passes do not count. At the same time, you have to complete passes to the three dummies in the distance. Throw to the one the icon appears on. Do not get too crazy in the pocket. You only have to make slight adjustments (tap the analog) to avoid the projectiles. More importantly your feet are set when you throw so you connect with the target. You earn more points by completing multiple passes in a row.
- Game Situation: The game situation is like any game. Lead your team to victory in the time given (either by scoring a TD or kicking a FG) and you will complete the challenge. As always, use your timeouts. One long pass and a field goal should do it.
Offense
Formations
I-Form
In this formation, the halfback and fullback line up directly behind the quarterback, forming an "I." Normally, there is one wide out on either side and one tight end. The I-Form is great for running inside, as the fullback usually provides a lead block for the halfback.
Single Back
The singleback formation is balanced for the run and pass. One back (usually the halfback) lines up five yards behind the QB. This leaves one tight end and several receivers to catch passes. The singleback formation is versatile, but what you do with it depends on your personnel and the version of it you select. If you have a speedy back, you may want to run sweep and toss running plays out of this formation, because one of its main characteristics is that it spreads the field. If your back does not have the wheels, keep him in the backfield to protect the QB as he passes.
Pro Form
The Pro Form is one of the most versatile sets in the game. Two running backs are in a split formation in the backfield. A receiver lines up in the slot to the right, along with a tight end. One wide out lines up on the left. Run or pass out of this formation, according to your team's strengths. If you have speedy receivers, heave it up top. If you have a quick back, run outside.
Shotgun
The shotgun formation is primarily used for passing. The QB takes a couple of steps back off the line and the ball is snapped back to him. The extra distance gives him a chance to survey the field and read the defense before dishing the ball.
Goal Line
Goal line formations are designed for short yardage. More often than not, you will be running this formation when you need to pick up a couple of inches or maybe a yard. There is massive run support and protection, with two tight ends, a fullback and only one receiver.
Choosing a Play
The possibilities in offensive play-calling are virtually limitless. Still, there are some "traditional" things to do in specific situations, coupled with things to do to play off of these traditions. In addition, once you get used to the playbook of your favorite team, you will find a certain stable of plays that work on each down.
First Down
Since you have three downs to follow, this down is all about testing the waters, and seeing what works. You want to gain some yards on first down so second and third are easier, but first down is also a good place to take a shot downfield, as there is little risk.
In terms of specific plays, we found that loading up the line with I-Jacks or I-Jokers and running outside seems to work really well on first down. Use tosses and counters to mix it up. If you are looking to pass on first down, you might consider running a deep, deep pattern in order to get the defense thinking about you going down the field later. As always, keeping the D off-balance is half the battle.
Second Down
Depending on what you did on first down, this down can mean different things. If you only have a couple of yards left to go, you can try to pound ahead and try to pick up the extra on the ground. Use an I-Form and follow the block of the fullback for best results. Or, to be crafty, on second and short, go deep, because you do not have much left to gain if the pass falls incomplete.
To be really sneaky, line up in something like an Empty Spread formation and call a pass play. If the middle of the line is left open (and it often is), you can snap the ball and manually run your QB up the gut for a nice gain. do not do it too often, as running with the QB this way puts him in danger and results in more fumbles.
If you find yourself in second and long, it is time to get some positive yardage. Usually this is a passing situation, as you want to pick up as many yards as possible to either get a first down or make third down easier. This is a good time to run slants to the center of the field or the sideline.
Third Down
This is do or die time. You have to get past the marker, or you have a grave decision coming up next play. If you have really short yardage to go, load up the line and try to muscle ahead with a run. On inches situations, it is always best to do a QB Sneak to pick up the required yards. You can try to use the Spread tip that we brought up in the second down section, but it works less often in this situation because the Defense expects a run up the gut.
If you have third and medium (5-7 yards), throw a pass to someone slanting or posting partway downfield. Unless you have a guy in single coverage, it is not wise to try to go really deep in this situation. Choose a play with lots of passing options, and make sure that the routes all go beyond the first down yardage marker. Make sure you are taking the appropriate drop (three steps, three seconds). If you release at the wrong time, the ball falls incomplete, and you do not want that.
In third and long, you might just have to drop back and heave it. Try to call a play that spreads the field and puts your squad in single coverage, because you stand a better chance of completing a long pass that way. If you are deep in your own end and not too far behind, you may want to play it safe and not risk interception. You can always punt if you are ahead or it is early in the game.
Fourth Down
Unless you are trailing, or deep in your opponent's territory, you probably want to punt on fourth. If you absolutely, positively need a first down, follow the rules of third down, but be extra careful with where you pass it. If it is fourth and extremely short, you may want to consider a power run or sneak.
Many of the things you learned in previous installments of the series works well here, too. After all, it is the same engine. There is a flow to play-calling which you start to recognize as you play more and more games. You want to mix things up as much as possible, but always have a couple go-to plays in mind to use if you are in trouble. If you use them often, they appear in the Favorites formation, which is an easy place to find them quickly. Note that you can tweak a lot of stuff at the line in order to fix what you might have missed in play calling.
As you get more comfortable calling plays, especially against human opponents, you notice that certain things really help to cross the opposition up. If you continually use the same formation to run, then call a play-action pass from the same set later in the game, the defense gets suckered into playing the run, and you likely be looking at a big gain.
Also, going against expectation is a good way to keep the defense on its toes. For instance, if you have been running to the strong side the whole game, switch one play and run to the weak side. The Defense is not expecting it, and you can rip them for big yards. The same holds true of where you run and pass. Sprinkle the ball around and make the defense cover as much of the field as possible, and lots of things open up (this is called "stretching the defense").
Be creative. Run plays from the Goalline set in the middle of the field. Line up in the Shotgun to run it. Call deep passing plays, with the idea that you are going to pull the ball down and run it with your QB the first chance you get. The more stuff like this you do, the more unpredictable you are, and the more your VIP will reflect that. If you play conventionally all of the time, you eventually get stopped by a team with more skill, so mix it up.
Using Packages
When choosing plays, another way you can cross up the D is by substituting different packages in that change the personnel on the fly. Here's a sampling of some of our favorite packages you can select before choosing a specific play:
HB Slot
The halfback leaves the backfield and heads to the slot. If your wideout is a good receiver, this is not a bad call. Send him on slants across the middle, and watch him chew up yardage downfield.
HB Wideout
Taking it one step further, the halfback lines up as a receiver, creating confusion in the defense. Unless he is faster than your current receiver, he probably is not much of a deep threat, but sent on crossing routes, he can be quite effective.
WR Swap
To mix things up and make match-up problems for the defense, switch your receivers to opposite sides of the field. Switch your tall receiver to run a route on a short corner, or get your marquee guy against a slightly less skilled corner.
TE Slot
Instead of a slot receiver, put your tight end there. This can be helpful in the running game, as he can serve as a solid blocker on outside running plays.
Spell HB
Give your halfback a one-play rest and bring in his backup to give him and opportunity to catch his breath.
Big
On Trips plays, sub in the Big package, then run to that side. The blocking is so much better this way.
All WR
In trips packages, make sure everyone in the cluster has wheels, and look for the fastest one coming out of the scrum.
Before the Snap
Before the ball is snapped, there is plenty to do to assess whether the play you called will be successful. The first thing you should do is zoom out to look at the entire field, as well as how you match up with the defense that is been called. Things to look for:
- Are there receivers lined up with no one covering them? This often happens when a blitz is called, or when the defense has too few people in pass coverage. If you see this, you might want to snap quickly and get the ball to a receiver fast. Or, if you had called a run play, audible to the pass and zip the ball to the uncovered receiver. Another effective thing to do is to call a hot route that will exploit the open area of the field. More on that in the Hot Routes section below.
- Is the defense in zone or single coverage? Zone coverage usually means that not every defender is lined up directly across from an offensive player. If you cannot tell if it is zone or man coverage, send a receiver in motion. If a man follows him across the field, it is likely that man coverage is called.
- Are the defensive backs in press or loose coverage? If they are in press coverage, they will be lined up very close to your receivers. This may screw up timing patterns, so if you are looking for a quick release, you may want to audible to something else, or send the pressed receivers on hot routes.
- Is the defense stacked against the run? This is easy to see. If there are lots of guys along the line, and the linebackers are packed close to the line as well, the defense is keying on the run. If you have something called to go up the middle, you may want to rethink your decision.
Audibles
Audibles create a way out for your offense, in case you notice that the defense is lining up to stop whatever you called once you get to the line. You can set up to three separate audibles for every single formation in the game. To do this, pause the game and go to the Game Plan menu, then select Audible Manager.
You want to pick two completely different plays here: usually an inside run and your favorite pass play in every formation. Save the final slot for an outside run or trick play. Tailor plays to the strengths of your team. For instance, if you run for crap, do not have three running audibles, because that definitely does not get the job done.
Always go with variety, though, or you could find yourself without options when you get to the line of scrimmage. Make sure whatever play you set as an audible can be further tweaked, meaning that you have multiple targets that can be called upon to go in motion, or switch to Hot Routes.
Another good way to fake out the Defense is by faking to call an audible. Press the audible button to bring up the menu, search through the play options, then press it again. Since all of the audibles are formation specific, this may confuse the other team into changing their coverage, and opening something up for your original play.
Hot Routes
Hot Routes are another way to take advantage of a defense. Think of a Hot Route as an audible for an individual player. To call a Hot Route, hit the Hot Route button, then press the button corresponding to the icon of the receiver whose route you want to change. Then press UP for a fly route, RIGHT or LEFT for a an in or out route, and face buttons for slants (check the manual or watch the Advanced Gameplay tutorial for your console's individual controls).
You should use Hot Routes whenever you see either a mismatch or open part of the field, or coverage that you can exploit. For instance, if you notice your opponent has opted for bump and run coverage on your best receiver, and he's currently running a mere hook route, you may to consider changing his route to a fly. If he beats the press coverage, he could be wide open deep. Or, if you see that a defender has lined up on the blitz, and will not be covering a specific receiver, you can change his route to move to the open space that will be vacated by the blitzing player.
If you are looking to toss to someone out of the backfield, you may want to send any receiver on his side of the field on a fly pattern, to clear the defense fully out of the area. This can lead to long gains on passes to your halfback.
You can also use hot routes to set up blocking assignments to give your QB a little extra time to throw. It uses the same button interface to run, which is helpful because it disguises what kind of hot route you are calling. Use blocking routes to pick up blitzing players (usually with your backs). This can give you that extra split second you will need to complete a pass.
Using Playmaker
As on defense, there are two ways to use Playmaker — before or after the snap. Before the snap, you can use it to change where a run goes, or do an automatic hot route for your primary receiver. To determine who your primary receiver is, check out the play calling screen. Whoever's route is in orange is that primary target, and whose route you will affect with a before-the-snap Playmaker tweak. Press UP for a fly route, DOWN for a hook, and LEFT or RIGHT for outs or ins. Use Playmaker in the same situations we discussed using Hot Routes above.
When running, you can use Playmaker to change the direction you'd like to run before the snap. If you notice that the defense has stacked play to one side, just flick the right stick in the opposite direction and your play will now go to a more fortuitous location. Using this in concert with motion can prove to be a tough combination to slow down.
After the snap, Playmaker control can also be used. If you are running the ball, use the right stick to point at a man you'd like blocked, and the nearest logical player will come over and try to spring you for a big gain. This works better in the open field than close to the line.
If you are passing, but no one is open, you can instruct your receivers to run to open spots when the play is breaking down. This is most effectively used on a roll-out type play. It can be the difference between an incomplete or intercepted pass or a long gain.
To make a receiver go deep, press toward the area downfield where you want the receiver (the guy who's looking at you) to go with the right stick. The QB will point, and the receiver will head to that spot. If you want a receiver to come back to the ball, pull back on the right stick to bring him back closer to you. You can also use this for your receiver to cut into space, or to break toward the sideline. Just point where you want him to go, and it will be done.
Rushing
Rushing the ball in Madden is fairly straightforward. You do, however, have a few moves in your arsenal to stretch each run to the limit. For one, there's the Playmaker control that we've already talked about. But there are lot more things you can do to bust the running game wide open. First, though, here are a few general running tips:
Wait for your blocks.
Pulling guards and fullbacks are slower than your halfback, so you have to wait for them to get into position so that you know all of the blocks are being attended to. This is less important on an inside run. However, if you overrun the play, you stand a much greater chance of being tackled.
Know where the play is supposed to go
do not take an inside handoff and try to turn around and run a different way with it, unless you see something wide open. It is almost always best to try to make something happen at the point where the play was designed to go, rather than to freelance and risk taking a loss.
Know how to read your blocks.
You only have a split second to decide which way to go sometimes, and the blockers should be your guide. Field vision takes some practice, but it is the only way you will learn to chew up big yardage on each down. Glance at where your blockers are headed, and try to cut inside or outside depending which way the blocker is taking his defender
Know your back's strengths.
If you are playing as Bettis, you know he's a bowling ball that can go inside and shrug off tacklers. But if you are playing as Warrick Dunn, you know yours is more a speed and finesse game. Tailor your plays to the back's strengths. A good finesse guy will be better at pulling off jukes, and a big, tough guy will be more effective at stiff-arming and over strength moves. Choose plays accordingly.
Punch it in the open.
When you get to space, make sure you hit full throttle by pressing the turbo button. Most defenders are slower than your halfback. Prove it to them.
If it is not broken.
If a certain running play is working, keep using it. Until your opponent proves he can shut that play down, run, run, run it. Run it into the ground. Rush for 300 yards.
In addition to the general guidelines above, there are some special things you can do to make the running game work for you. For one, there's the stiff arm. This is probably the best asset you have to lengthen runs. As the defender is approaching, press the stiff arm button and you could leave him in your wake. Make sure you press the button soon, enough, though — while he's still a couple of yards away. If you attempt it too late, it will have no effect, and you will be tackled. Watch which hand the ball is in, though. If you attempt a stiff arm to the same side you are carrying the ball and get hit at the same time, your rate of fumbling will go up drastically.
You can also utilize the juke move. This works best in open space. The harder you press the juke button, the more you juke. Make sure you push the analog stick in the direction you want to juke. If you are tiptoeing down the sideline, you want to juke to the inside, or the move might carry you out of bounds. The juke move is best used against a single defender just as he's about to dive at you. Time it right and it could go for a huge gain.
Another weapon is the spin move. This also works better if you have a bit of yard to work in. it is also most effective as a changing direction kind of play. For instance, if you are moving to the left, and a defender is angling toward that position, bust a spin to the right, and you could be in open range. Experiment with spin moves in Practice Mode to get uber-good with them.
There is also the hurdle button. Use this to jump over fallen warriors, or to get forward momentum going at the end of a run, so that a tackle from behind carries you forward. The last thing you can utilize in the running game is the dive button. When you need a couple extra yards at the end of the run, use it to dive across the line. This is great when trying to pick up a first down or dive across the goalline.
Running With the QB
Running with the QB is a different animal. For one, running with your QB opens him up to a lot more injuries than staying in the pocket. Also, running on a play that is not designed as a rushing play also exposes the QB to much more fumbling.
But there are serious advantages to running. If everyone drops deep into coverage, it is often easy to pick up 10-15 yards in the open field if your QB is mobile. To run, you first have to drop the passing icons. Refer to the manual or in-game control setup to see how this action is performed on your console). it is a little tougher to run with the QB, but it can happen. Just look for blocks as you do when you are a halfback.
What usually works a little more effectively is rolling out and trying to pick up yardage once you are outside. This also affords you the opportunity to burn the defense with a throw should they come up to play you.
When running with the QB, you are protected by the rules. If you have gained enough yardage, and want to go down, hit the Dive button to do a QB slide, and the defense cannot touch you. If they do, it is 15 yards.
If you want to see what it is like to play with the ultimate running QB, play a game with the Falcons and Michael Vick. This will give you a sense of what's possible from the position. A worrisome side effect is that it might also turn you into a Falcons fan.
Passing
As with the running game, it is good to know exactly what kind of athlete you have playing the quarterback position. Is this a guy who can scramble all over the place and heave a ball off his back foot, and still put some mustard on the ball, or is he the stand in the pocket no matter what kind of guy? You want to play to your quarterback's style, not the other way around.
If you are playing a single player game, always look at the Coach's Cam prior to snapping in order to see how the play you have called matches up with what the defense has called.
When you snap the ball, you have a sense of what is happening. If a blitz is on and players are pouring at you, you have to get rid of the ball quickly. Always have a dump-off option in mind when you come to the line, in case this happens. Or, you can always toss the ball out of bounds if you are in serious danger of being crushed. If you feel pressure, you can also roll and throw, depending on how well your QB does at throwing on the run. To make his roll out faster, pull the ball down as you sprint out. This has the added effect of pulling defenders up to you who think you are about to run.
On the other hand, if you have good protection, quickly scan the field for options. If your best receiver is in single coverage, he is always your first read. Otherwise, just look for the guy that has separated himself from the defenders. do not throw into double and triple coverage just to get the ball to your favorite guy. Take a look at the whole field, then deliver the ball.
Look for backs coming out of the backfield. Madden has always favored receiving backs. They often come out late and be open in the flat or up the sidelines. Tight ends are also crucial to your attack. Really good ones will create mismatches with most linebackers in the league, and can often be found wide open.
Before you pass, you might want to consider pump-faking (only if you have time). This often freezes the defense and allows your receivers to get more open than they otherwise would be.
When it is time to throw, remember that you can put different touch on the ball according to how you press the button. If you know a player is only going to be open for a split second, and need to get it there in a hurry, whale on the button to deliver a laser beam. If you want to lead a receiver deep, or toss over a linebacker, a softer touch is required. Passing touch is a matter of practice and timing. Go to Practice or Mini-camp modes to get a good feel for how passing works in the game.
Protecting a Lead
If you built up a healthy lead, and do not want to see it go away, the name of the game is keeping the ball away from the opposition. This means ball control and milking the clock for all it is worth. If you have a quality halfback, this proposition is much easier. Line up in a run package and pound the ball with a good dose of inside rushing plays. Mix your runs up, sometimes going left, and sometimes heading right. do not always run to the wide side of the field, as that is predictable.
If you do not have a good running back, you can still control the clock with high percentage completions. Pass to the flats (watch out for lurking linebackers) and on short drag and hook routes. Make sure you are always setting your feet and never throw into double coverage. As long as you melt a lot of time off the clock, it does not matter whether you punt or score. Always take as much time off the clock before snapping as possible. Although it might be irksome to a human opponent, it ensures victory. do not snap until the play clock goes under five, and all is golden.
Coming From Behind - The No-Huddle
Coming from behind requires precise management of the clock, coupled with a lot of big plays. When we say precise clock management, that does not mean use your time outs as quickly as possible. Often, it is just the opposite. You need to preserve your timeouts to stop the opposing team from running the clock out on you.
Rather, what you want to do is get used to running the no-huddle, and get comfortable with calling time-saving audibles like the automatic spike. In addition, you need to make adjustments at the line to put your team in better position to win on every play. That means getting to the line, calling a quick audible or hot routes and going from there.
do not think that just because you are behind that you need to score on every play. As long as you are quick at getting to the line of scrimmage and calling a play, you can continue to throw across the middle, rather than always looking to the sidelines. Of course, if you are able to throw consistently and get out of bounds, that is always ideal. Use Hot Routes to change plays to head for the sidelines if you do not have a lot handy in your No-Huddle playbook.
Substitution Suggestions
There are several ways to subsitute players into individual packages to make them a little more successful.
- One way to instantly improve certain plays is to put your fastest player in the slot. It does not matter if it is your number one or number eight receiver. Stick him in the slot, and let him run slant routes, and you will be blazing a trail to victory.
- Another interesting idea is to take a super-fast receiver and stick him in the backfield on a sweep play. Just do not outrun your blockers!
- You can play anybody in any position, so if you are looking for a speedy addition to your receiving corps, check out some of your DBs.
- You can also Fridge it up by lining up a defensive lineman like Warren Sapp as your tight end or running back. You might be surprised how spry some of these big guys are.
- Experiment in Practice Mode to see what guys might work out for you, then surprise your friends by posterizing them with an Orlando Pace touchdown run.
Defense
Formations
4-3
The 4-3 is the standard defense employed by most teams in the NFL. In it, four defensive tackles line up against the offensive front. These guys try to stuff the run and get in on the quarterback on passing plays. They are flanked by three linebackers, who bottle up the running lanes or drop into pass coverage, depending on the play that is called. In the secondary, you have two safeties: a free safety and a strong safety. These players assist with the run, help double cover receivers or pick up tight ends or backs out of the backfield. On the outside are two cornerbacks (on opposite sides of the field). They cover the primary and secondary receivers, and help to shut down the outside run.
The 4-3 offense is very flexible. It is a good running D simply because there are so many players near the line. Four tackles help to collapse the holes in the line, while the linebackers fill any space opened by the offensive line's push. You can apply pressure on the quarterback with linebacker or safety blitzes (these players will explode through the line and attempt to hurry or sack the QB or stop the runner).
The 4-3 is a good first down defense. it is less effective in third and long, and against teams that routinely use three and four wide receiver sets, since linebackers covering wideouts tends to be outmatched.
3-4
The 3-4 is the opposite of the 4-3. Three linemen stack up against the offense, and four linebackers back them up. This is a good defense to use against a team with little running threat, as it provides maximum coverage in the middle of the field. It also allows for different blitzing lanes, simply because the blocking schemes up front are different. A linebacker can blitz in the hole made by a penetrating tackle, or shoot around the outside of the line as it is sealed on the interior.
One significant thing you gain by using a 3-4 is more team speed. Trading up linemen for linebackers improves the quickness of your team. Of course, you give up size, which might not be good on running downs. A 3-4 is perfect on medium passing downs (second or third and 5-8). This is the wrong defense to use in short yardage situations.
4-6
The 4-6 defense was invented by Buddy Ryan, and it took the 1985 Chicago Bears to the Super Bowl. The scheme relies on stacking eight men in the box, and using multiple blitz schemes that attack from every angle, even dropping defensive linemen back into coverage while a linebacker or defensive back blitzes. The key to running a 4-6 is knowing when blitz and how to mix up your blitzes, so the offense does not know who to block on any given play.
The 4-6 is effective against the run, against scrambling quarterbacks, and against third and short situations. It is less effective against a wide-open passing game, and you must have good corners to run it, since they are going to be left in man-to-man coverage a lot. It is a risky defense with a high potential for getting burned, but with the talented players, it can be very disruptive and force some turnovers.
Nickel
Nickel defenses are designed to protect against the pass. Also good on medium range pass plays, Nickel sets allow for great versatility on defense. The reason for the Nickel name is that five DBs patrol in the secondary. Again, this bumps up the team speed, but leaves your defense susceptible to the run. To guard against this, use a safety (or the remaining linebacker) to keep an eye on the rush.
One good thing about the Nickel is that four linemen are still squared off against the O-line. If you have a superior defensive line but weak linebackers, you may want to consider running the Nickel D more often than not.
Dime
The Dime maximizes coverage and should be used on long passing downs or against superior passing teams with little rushing threat. Even more speed in this set assures that you will not be smoked for a big gain. Dime packages work well to double up speedy receivers or guard against the deep ball. Like the 3-4, the Dime is quite versatile. Dime defenses are vulnerable to the run, since you have so many defensive backs on the field and everyone dropping back into coverage.
Quarter
The Quarter is the most extreme pass defense coverage in the game. it is like the dime, except one defensive lineman comes out and is replaced by a third safety, giving you a total of seven defensive backs altogether. This gives you excellent pass defense, but reduces your overall pass rush, giving the quarterback more time to through. This formation should never be used against the run. it is best use is probably late in the half as a Prevent defense formation, when you are willing to give up yardage but trying to prevent the deep score.
Goal Line
Goal Line defense primarily stacks up against the run. The linebackers camp out right behind the D-line and the DBs suck up next to the line. By creating a wall of bodies, the defense is hoping to turn back penetration by the opposing team's offensive line and running backs. If a team has an exceptional back, you might want to consider blitzing to the strong side of the line (or the side they've been running to most). do not commit to a goal line blitz too often, however, as the team could run a pass play. Instead, stay in a Base coverage. This leaves the safeties and an odd linebacker to drop out and cover should they pass.
Calling a Play
The key to calling a play is to know the situation.
First Down
First down is a fresh slate. Your opponent can and do anything, so you need maximum flexibility. This is the down where you want to call something kind of general, and make plays with your individual players.
The 4-3 2 Man is a good play to call. Almost always. In fact, if you have a solid defense, you can get away with calling only this defense the entire game. It covers almost the entire field, it is tough to beat with a deep ball, and it is tough to run against. If you feel confident about the tackling abbilities of your secondary, you can begin with a Nickel 2 Man as well. If you are looking to blitz on first, do something safe like a 4-3 Strong Blast 1. This only commits one blitzer, and will help plug up any runs going to the right side of the line.
Second and Short
Second and short can be problematic. If it is really short, you can almost be certain that a team is going to give the pass a try, because they have nothing to lose. This is what makes second and short the toughest playcalling situation in football. Usually, sticking with some sort of man coverage in a 4-3 is the best bet. But leave a safety back in case the offense decides to go long.
This becomes a broken record, but 4-3 2 Man is a pretty good defense for this situation as well. You might also want to slip into a Bear defense which clogs the line with bodies, but allows for coverage on the inevitable pass play. A Nickel formation that blitzes its linebackers up the middle is not bad, either, because in short yardage situations, it is most attractive to pound the ball up the gut.
Second and Long
This is Nickel or Bear territory. If you want to be conservative, run something like a (guess what?) 2 Man from the Nickel, and if you want to be fancy, try a Strong Blast 1 from this set. Basically, keep Man coverage, make sure you have safeties over the top and keep a guy in the middle to mop up crossing routes.
Third and Short
Third and short calls for a 4-3 or an aggressive Nickel that sends defenders to clog up the holes. As per usual, a 2 Man is a good call (are you getting the sense that this play works?), but you can afford to go with some kind of zone here, too (something like 2 Hard). Just make sure you manage to get some penetration from a lineman or linebacker if this is the case.
Third and Long
Third and long is a passing down. For this, you can feel confident about calling a Dime package. it is usually not wise to send too many folks on the blitz, simply because you A) need them in coverage and B) the linemen usually do a decent job of getting pressure.
Any Down and Very Long
If a team is trying to pick up twenty plus yards, you want to switch to a defense that covers deep. The Dime is definitely the way to go. For max coverage, go for a Cover 12.
When in doubt, use the coach's in-game selection. This is usually a decent option, and always takes into account the situation you are going up against. You do not want to rely on it, though, as there are usually even better plays that you can call. plays that fit your personal style better.
When should you blitz? In Madden it pays to blitz more often than it does in the NFL. Getting to the quarterback disrupts the play, resulting in more turnovers and incompletions. If the QB does not have the time to make decisions, he may make the wrong one. Also, if you get in on the QB right away, there may be no time for the play to develop, and he'll be forced to go to a different option, or throw the ball away.
Blitzing on first down is almost never a bad option, but make sure that most of the rest of the field is covered. Blitz a single linebacker and see if you can disrupt play that way. On running downs, do not feel bashful about bringing a lot of guys on the blitz, either.
Against teams with a lot of speed who like to throw all the time (like the Rams), or late in the game when a team is trying to make huge gains, you might want to switch to the Quarter Defense. If you do this, make sure you collapse the line (Line Shift, then press DOWN) before the snap to take away any possible inside run.
Against teams that are completely committed to the run, you may want to think about going with a Goalline defense, even when they are nowhere near the goalline. Be careful, though. If you do this, and they get through, they'll scorch you for tons of yardage. When facing a running QB, call the 4-3 Double QB Spy or something similar. The idea is containment. There are more tips on facing running QBs further down the page.
If you are absolutely, positively sure your opponent is going to run, calling the Special Teams play Punt Block can often be effective as a massive run blitz. Just make sure you are playing against someone who will not recognize what you are doing and audible out of it, or you could easily be burned for a TD.
Before the Snap
The time before the snap is your only opportunity to make adjustments to the play you called. The very first thing you should do (if playing against the CPU) is zoom out and take a look at the whole field. If you are going against a human opponent, play like you are checking player fatigue.
If you guessed wrong what the defense called, or see something in the offense you can exploit, you can change your Defense to an entirely different play quickly by calling an audible. In your audible arsenal, you should have several standard plays that help cover contingencies.
- 4-3 Strong Blast 1: This puts pressure on the right side of the line without spreading your squad too thin. A good standard blitz.
- Nickel 2 Man: Man coverage, with two deep safeties covering everything behind. This is a decent standard defense.
- Dime Cover 12: This effectively keeps everything in front of you. Not good in anything but a long pass situation, but quite good if that is what you are looking at.
If you notice that you do not have enough defenders to cover all of the receivers in the formation, that can be a problem. If you see that the offense has most of their guys on the line, you are probably looking at an upcoming run. Either use an audible, or adjust other things to cover each situation.
When you are zoomed out, take a look to see if there is a receiver lined up with no one on him. This only really applies to man coverages. Zone coverage is a different story. However, if you notice that a man has too much of a cushion, as no defenders are nearby, go ahead and manually move a free defender (a safety or linebacker) over to cover.
When you are satisfied that you have all receivers covered, work on tweaking things according to positioning on the field. If you are covering the wide side of the field, you may want to line shift over to take away that side. Likewise, if a tight end goes in motion, line shift the direction he goes to take away the strong side run. Be wary, though. Tight end motion can mean that the offense is trying to draw your defense over to make a run to the weak side easier.
If you are confident a run is going to go up the middle, use a line shift and pinch the line by pressing DOWN on the right stick. If a run is probably going to the outside, but you do not know which way, or you want to be prepared to cover passes in the flat, spread the line by pressing UP on the right stick. Doing this may also make is easier for you to play as a defensive end and get around the corner. However, you want to avoid spreading your line if the offense burns you up the middle. And you almost never want to spread out when facing a mobile QB, unless your middle linebacker is a stud.
You can also shift the linbackers around pre-snap. This does not have as drastic an effect, but it can provide a little extra help if you need it. Like the line, backers can be shifted to the left and right. Use this if you are pretty sure play is going to flow to one side of the field. On a left pitch, for instance, you'll want to shift left. To bring the linebackers inside, press the shift button then DOWN. To spread them out (and flatten to the line), press linebacker shift, then UP. The latter maneuver is good if you want a linebacker to blitz from an outside position.
If you are really sure a play is going a specific direction, you can actually cheat both your linebackers and your line in that direction. Or, if you want to gang up on an inside run, but leave some room for error, collapse your linemen and spread out your linebackers. You can also manipulate the DBs, but we'll cover that in the section below.
Coverage Audibles
There is another adjustment you can make on D before the snap. You can instruct your DBs what to do. There are only two ways to go with this: play bump and run or back off. To play bump and run, hit the Coverage Audible button and press DOWN, and to drop back, hit the button, then press UP.
There are advantages to each scenario, depending on the play you already called. If you are in single coverage and fear that the quarterback is going to make a quick release on a crossing pattern, get up and play press coverage. This will (hopefully) disrupt the receivers' patterns off the line, and make it difficult for the QB to complete a pass. This is a good thing to call in concert with a blitz, as the QB will likely feel pressure and need to unload it quickly, but his receivers will not be where they should be.
You do not want to call press coverage against big, physical receivers like Terrell Owens and Keyshawn Johnson, or they might leave your corner out of position and be open for a huge gain. Use discretion when pressing.
If you want to keep play in front of you, back off from the receivers. This is especially effective at the end of the half, when all you need to do is prevent the big play. it is also a decent strategy on third and long, as you can allow the receiver to catch the ball, then move up and attack him as he tries to bring it in and run.
Using Playmaker
As on offense, Playmaker control can be used before and after the snap to further tweak the defense. Before the snap, you can adjust your zone coverage or safeties to cheat to a particularly dangerous side of the field. For instance, if you are facing Marvin Harrison, you may want to cheat the safeties towards him, simply because he is an explosive threat. Or, if you suspect a run is going to the right, cheat your safeties to the right to ensure that they will have less distance to cover should the running back break through the line.
After the snap, you can use Playmaker control to key the defense to a particular style of play. You should be ready with this on every single play from scrimmage. That means if the ball is snapped, and the QB makes a motion to hand off, flick the right stick DOWN to commit to the run. This will make all of your defenders intent on tackling the runner, where previously they may have been focusing on other assignments.
If you sense that a play is going to be a pass, flick the right stick UP, and every player on your team will key to the pass. Playmaker after the snap makes a huge difference in how your players fly to the ball, so be prepapred to use it. If you suspect a certain type of play is coming, cheat that way. Keep your finger on the right stick right before the snap,and be prepared to flick it, so that you can get ready for the next defensive challenge.
Line Play: After the Snap
There are certain situations where it makes sense to control a defensive lineman at the beginning of a play. For instance, if you are sending a linebacker on a blitz, you may want to control a lineman to help create space for the backer to get through. Or, if you are trying to play the inside run, taking charge of a lineman can help collapse the pocket and make getting out of the backfield a challenge.
If you want to penetrate the line to disrupt the play, use the bullrush, spin and rip moves, in addition to the turbo for best results. It also helps to try to pick a direction to go and stick to it. For instance, if you are lined up somewhat left of the offensive lineman, you'd want to move further left while performing a rip move. But do not always expect to get through. Playing as a lineman can be a thankless job, and sometimes will yield no significant play (aside from a few run tackles) all game.
One thing you can do to disrupt plays is jump up to get your hand in the passing lane. When it seems like the QB is going to throw, leap up and try to block the pass. Getting a hand on the ball will likely lead to either an incompletion or interception, both of which are favorable outcomes.
Linebacker Play: After the Snap
Linebackers are the safety valves and playmakers on videogame defense. Using a linebacker effectively can cure even play-calling mistakes, but you have to know what to do with him. Most times, you will want to select the linebacker that does not have an assignment as the one to control (to see who this is, check out the Coach's Cam before the play).
Your primary responsibility is the center of the field, so you do not want to leave it prematurely. Watch for receivers and tight ends cutting across the center, and cover them by getting between them and the QB. Often, especially in multiplayer, you can sit in the middle of the field and wait for an errant pass to swipe. When an offensive player gets locked into a receiver, he/she often will not see a lingering linebacker, and that is your opportunity to jump the route and make a big play.
Linebackers are also good at coming up to stop the run. On running downs, you should concentrate on anything to the outside of the defensive line. The line will usually bottle up inside runs pretty well, but have a tough time getting to some of the outside runs. You have to be able to recognize where a run is going, and then sprint over to stop the back before he gets going.
You can also manually blitz as a linebacker. Just be sure you do not pull your guy too far out of position and leave an easy completion or run open. When blitzing, you have a couple of options. You can take an outside linebacker and try to cruise around the corner, but that is often too time-intensive. What works for us is to blitz between the tackle and the guard and accelerate through the hole. To spread the defense wider, use a defensive line shift, and open everything up. Then head through the open space and try to get in on the quarterback. Even if you do not reach him, often your blitz will draw attention away from other players who can step up and make a play.
Tackling Tips
So the opposition caught the ball and is running with it. No sweat. If you are a good tackling player you can make a lot of other mistakes disappear. Players who are bad at tackling are bad at Madden. They jump too soon, approach at terrible angles, and generally fall weeping at the ankles of the offense.
The number one rule of tackling is be square to the offensive player. That means face him with your whole body and strike him with as much of yourself as possible. To help with this, you can use the "face forward" control as someone is approaching.
Use turbo when tackling to make a bigger hit, but make sure you do not just glance off of the person you are trying to tackle. Again, being square to the guy is most important. You do not want to take a bad angle and try to tackle from the back or side, or he may slough you off.
As you approach, try to think about where the player is going to be rather than where he is. Too many Madden players commit to the spot where the offensive player is at, rather than judging where he's going to end up. This results in haphazard tackling attempts, or, even worse, completely missed tackles.
do not dive! Diving is okay at the line of scrimmage, but after that, you really do not want to give yourself up like that. If you do, you may miss and the opponent could be off to the races. Instead, just power into the guy and let the animation take over.
If you are trailing a player and trying to catch up, stay on the turbo button until you get within a couple of steps, or catch up completely. Again, do not dive. That should be the absolute last resort. It is better to give up ten yards of field catching up to a guy than diving at his ankles and missing while he scampers to the end zone.
Causing Fumbles
One of the big joys of Madden is knowing you created a fumble by hitting the strip button. But the strip button can be a double-edged sword. While it does provide an opportunity to drastically change the game for the good, missing a tackle can be even worse. do not go for the strip when you are the last player back. Since it is a risky play, you may end up giving up the score when a more solid tackle would have stopped the player.
However, there are a few situations where the strip button should be used. If you see that you have one or more other tacklers in position to tackle if you miss, go ahead and use it. Always try to use it on kick and punt returns. Most of your fumble recoveries (and often returns) will come off of these plays. Any time a QB takes off outside of the pocket when a passing play is called, he is more susceptible to fumbling. Hack him like Jim Dougan.
Trying to strip opponents too much will eventually lead to facemasking calls, as the stripping motion often catches a little grill on the way down. do not whale on the strip button, or you will be cited for sure.
Double Coverage
If a particular receiver is giving you fits or you know you are lined up against a David Boston, Randy Moss, or Terrell Owens, you may want to call a lot of double coverage pass defenses against that receiver.
Look for these plays: Double-X, Double-Z, Double-Slot. Found under the 4-3, nickel, and dime sets, these plays offer double coverage on a specific wide receiver on the opposing team. The "X" is the flanker, who generally lines up on the strong (right) side of the ball, while the "Z" receiver is the split end on the opposite side of the formation. The slot receiver is a third receiver who lines up a few yards back from the line of scrimmage, outside the tackles but inside the wide receivers. He replaces a tight end in pro sets or a running back in the single-back set. Double Wide doubles up both wide receivers. There are also coverages under the 4-3 and 3-4 sets that let you double up on the TE.
Picking Off the Ball
Intercepting the ball is an art, and it is a tough art to learn. You may have to suffer several seventy-yard touchdown passes to perfect it. For the most part, it is not a bad idea to leave your DBs to their own coverage if you are consistently missing on pick attempts. But if you absolutely must see the "User Pick" flash on the screen, here are a few tips that might help.
You probably do not want to start each play as a cornerback, as they are often obscured from your view when play begins. Trying to control a guy you cannot see is a recipe for disaster on defense, and will lead to many, many points for the opposition.
Instead, wait until the last moment to take control of the corner. This usually ensures that the DB or LB will be in good position, and all you have to do is come in and leap for the ball. Avoid too much movement to the ball. Jostling the receiver at all usually leads to a penalty.
It also helps to use the "face forward" control to square your shoulders to the quarterback. Doing this will result in quite a few more picks. To get use to these controls, head to the Swat Ball drill in Mini-Camp. This will get you used to the DB controls, and make intercepting a lot easier in the real game.
Facing a Running QB
Facing a running quarterback is a unique problem that occurs in less than 1/3 of the opponents you will face. In fact, there are only a handful of QBs who will routinely run. They are:
- Mike Vick, Atlanta Falcons
- Jeff Garcia, San Francisco 49ers
- Steve McNair, Tennessee Titans
- Daunte Culpepper, Minnesota Vikings
- Donovan McNabb, Philadelphia Eagles
- Aaron Brooks, New Orleans Saints
- Jake Plummer, Denver Broncos
Of these, Vick and McNabb are probably the most dangerous. When taking on any of these teams, make sure you call plays that spy on the QB, like the 4-3: Double QB Spy. This will ensure that a linebacker (or in this case, two), always has his eye on what's going on in the backfield. You might also want to consider doing a line shift that tightens the group (press the line shift button, then DOWN on the left stick). This will pack the middle and make it more difficult for the scrambler to move vertically up the field.
In addition, watch out for any QB who rolls out a lot. You want to leave yourself a cushion in between you and him if you are coming up to make a play on him. If you leave your man and commit to him too soon, he'll heave the ball to the man you left open.
Also, make sure you do not manually move the middle linebacker out of the center of the field when facing a mobile quarterback, or he'll burn you for big yardage up the gut. Quarterbacks who are mobile are usually also good at handling the ball, so you will want to go for the strip against them much less than you would other QBs.
Franchise
Madden 2004 boasts the most involved franchise mode we've seen in a game that is not management-specific. In fact, it combines the best ideas of a front office/sim game with the gridiron action everyone's come to expect from Madden. With so much to do, it is easy to miss features. This section of the guide is dedicated to helping you get the most out of your Franchise. it is separated into four sections: Main Menu, Before the Season, During the Season and Postseason. Check it out!
Main Menu
Training Camp
A new feature in this year's game, this stop on the preseason tour allows you to make your players better before the first game by running them through several drills. This is discussed in the Before the Season section below.
Rosters
Manage everything to do with players. Trade and release players, sign free agents, set your depth chart, view the injury report and more.
Owner's Box
Manage all of the details of your franchise, move your team, set prices of cheeseheads and beverages. We discuss this in-depth below.
Coach Options
Set your gameplan, including defensive philosophy (4-3 or 3-4), determine what you favor on offense and defense, manage players and tell your assistant coaches what aspects of Franchise to handle for you. During the season, you can also check your Coach's ratings and see how he's doing according to the bigwigs.
Stat Book
This becomes available once you have begun the season. As you suspect, it tracks individual and team stats, coach stats and rankings.
League News
Check out how the other teams in the league are doing. Here, you can monitor Coaches, Signings, Re-signings, Holdouts, Releases, Trades, Injured Reserve Lists, and Retirements. Checking this from time to time is a good idea, especially to check releases and trades.
Features
This selection allows you to do three things: Export your Franchise team for use in Exhibition, Create-a-Player to put on your team, or Modify existing uniforms (you junior Karl Lagerfeld, you).
My Madden
Check your Madden Cards, tweak settings (gameplay and system) and save here. And that is about it.
Franchise: Before the Season
There is plenty that needs to be done before the first snap of the ball. Take a look at the main menu and see what's possible in the Franchise this year (listed above).
Training Camp
Training Camp allows you to help turn your zeroes into heroes by running them through several drills. Complete a drill, and that player's attributes will get a boost. Here are the Training Camp rules:
- You are only allowed one player per drill.
- The same player cannot compete in more than one drill.
- You must earn a trophy in each level to advance to the next.
- You will be awarded attribute points for that player based on which trophy you use.
If you earn enough points to qualify for a trophy in one round, you can choose to go to a higher level (it begins at Rookie and goes up to All-Madden). However, by choosing to go to the next level, you are sacrificing any points you may have accumulated in the first round. Therefore, if you cannot complete the higher level, you are out all of your points. If you have trouble with a drill in the first round, but still earn a trophy, it is often best just to keep the points you have earned, and call it a day.
Choose your players carefully. You can only choose one player per drill to improve, and you will not be able to do this again until another season rolls around. If a player is already at a 90 or above in overall rating, do not bother leveling him up. Instead, focus on making the surrounding players stronger. Below, you find a list of all the Training Camp drills and tips on how to approach them.
These are the same drills that you will find in Mini-Camp. Before you attempt them here, head over to Mini-Camp and run through them a feel times until you feel comfortable. This will lead to more points and a much better team.
Pocket Presence
The Pocket Presence Drill should be run by either a starting quarterback who needs better stats, or a lackluster backup, so you have more confidence in him coming off the bench. The idea here is to move around the pocket and avoid the beanbags being fired at you. When a receiver opens (the dummy will flash), get the ball to him to complete the drill. This drill is tougher than it sounds, and you will need to do well to earn an attributes boost. do not try to stand flat-footed and complete this drill. You have to move, then set your feet and fire to be truly effective.
Chase and Tackle
There will be two players on the drill, and the idea is to stop the halfback before he reaches the end zone. If he does reach paydirt, you will be fined heavily points-wise, so make sure that does not happen. There are mechanical blockers and defenders on the field as well, and there's also a safety behind that you may use to stop the back if he gets past your first player. Fight through all of the traffic and try to strip the ball in order to score more points.
Swat Ball
There are two choices here: swat the ball down or go for the pick. There are three potential targets to defend, and the mechanical passer will indicate which one it is going to before the pass happens. Move yourself into position a couple of yards in front of the dummy. In the early levels, you can get away with simply batting everything down. However, on the upper levels, you will need to pick a lot of passes in order to move on.
Trench Fight
The idea behind this drill is to spin, shove and rip your way through the blocks ahead of you and make it to several flags scattered throughout the field. It starts off pretty easy, where any move works, but gets much tougher as you move up. Focus on using push moves first, then mix it up on the subsequent linemen.
Clutch Kicking
Here, you can choose either your punter or kicker and complete a series of kicks for points. Make sure you choose your place kicker for this (unless you are grooming your punter to be a backup). The idea is to get as close as possible to the red stripe at the very center of the uprights. The closer to the red you get, the more points you will earn. Pay attention to the wind and position of the kicker, and move as quickly as you can. This gets much harder in the late going, as the wind picks up and you get further away.
Corner Punt
The idea here is to punt to the corner sidelines and aim for the targets on the field. Obviously, you are aiming for the red spot closest to the one-yard line. Again, wind is a factor, but it is mainly positioning. If you are having problems with the high punts, drop the arrow down straighter to the ground and try to line drive it into the corner.
Precision Passing
This is, like many of these drills, exactly like the one you run in Mini-Camp. The idea is to complete passes while threading the ball through hanging rings that appear above the field. This requires great timing and precise button presses. You would do well to check out the drill in the Mini-Camp before attempting it here, as you only have one shot to make it good in Training Camp.
Ground Attack
You want to take your primary or backup halfback through this drill. The object of it is to score as many TDs as possible in the time given. Use all the special moves in your arsenal, and make sure you rely on your blocker to clear the way. You can also get away with going away from the play, getting the defenders hung up on the mechanical line. As you go up in the drill, more and tougher defenders are added. If you struggle but make it through, stop there.
Catch Ball
Probably not necessary for your primary receiver, but good for third and fourth receivers and running backs. This drill tests your skills at catching passes manually. This can be tough if you are accustomed to having the CPU handle your catching, but there are a couple of things to keep in mind. Whenever possible, try to face the QB when the ball is thrown. If you are out of position, sprint to get there faster. Try not to dive or go down to your knees, as it will make getting to the next catch harder. do not be afraid to press and hold the catch button a little early.
Once you finish the final drill, you finish the Training Camp. Hope you made some quality improvements.
Preseason Games
After Training Camp, a new selection will appear on the main menu: Play Week. This allows you to play through the preseason schedule. If you do not wish to play your preseason games, go to the Team Schedule tab on the Play Week menu and deselect all of the selected games. Then simulate them all. When you finish with the Preseason, it is on to the regular season, and a whole new world of management and sports action.
Franchise: During the Season
During the season, there are many things to manage, in addition to playing games. You have to sign and release players, manage your depth chart, hire coaching staff, and monitor fan interest.
Owner's Box
The Owner's Box is brand new in Madden, and it allows you to be in charge of everything about your football team. The onscreen overview goes like this:
- This new addition to Franchise Mode lets you become the owner of your favorite team.
- Set the prices of tickets, concessions, merchandise and more.
- Hire the best coaching staff possible to improve your player progression.
- Renovate your stadium or work with your city to build a new one.
- Consult your board of advisors for team improvements.
Balance Sheet
This is where you can monitor your monetary progress throughout the year. You always begin the season in the red, as you haven't yet sold any tickets, collected any parking or sold a single foam finger. But all of this will change as the season progresses. Here are all of the areas you can eventually gain income from:
- Ticket sales
- Concessions
- Parking
- Merchandise
- NFL Shared Revenue
- Local Media Contract
On the Expenses side of the coin you have:
- Player salaries
- Staff salaries
- Stadium upgrades
- Stadium maintenance
- Advertising
- Fan Appreciation Day
Keep checking your Balance Sheet to see how you are doing as the season moves along. Consider it a report card of sorts. The more money you make, the better.
Set Prices
Select the Set Prices option to tweak what various things will cost at your stadium. The following prices can be set:
Tickets
If your team is doing well, you can get away with raising ticket prices. However, if your squad is taking a nosedive, do not be afraid to lower prices just to put some behinds in the seats. Pay attention to the default values. You do not want to ever charge more for bleacher seats than club seats, for instance.
Concessions
These choices are different depending what city your stadium is in. Most cities, however, have the standard hamburgers and some variant of the hot dog. You can pretty much always charge the most for beer.
Merchandise
Everything from programs to jerseys are sold here. do not be bashful about raising each of these prices by a couple of dollars right off the bat. I do not know the last time you were at a stadium, but the $15 hat simply does not exist.
Parking
Ranging from grass to valet, this is one of the places you can get away with cranking the prices a bit. Start with valet and garage and pump those prices up.
Advertising
This is the only selection that directly discounts from the Expenses, so be cautious at first. Throw 50K in each slot at first and see how that does, then build it up further in the future.
Information
Access all of the charts and reports that you should use to make Owner's Box decisions going forward.
Fan Support: Week-to-week, or season-to-season, you can gauge how your fans feel about you. Support ranges from very high to very low, and will exert itself in attendance numbers.
Attendance
How many butts you put in the seats, in graph form.
Expectations
What do your fans expect? This stays the same all year, and only changes season-to-season. If you are the Buccaneers, it starts out high. If you are the Lions, it does not.
Income
Tracks how much you are making week-to-week, and season-to-season. it is less helpful than looking at the balance sheet, but kind of fun to check out if you are made your team into a money-grabbing juggernaut.
Expenses
Represented as a pie graph, this is a good place to see where the majority of your money is going. Normally it is player salaries. If it is not you probably have some serious team issues.
Franchise/Team
This is a quick, helpful look at your team, and shows how you rank in several key categories league-wide. Check out your three highest paid atheletes at the bottom. If you can trade for somebody cheaper, maybe you should.
Stadium Info
Find out the capacity, condition and rating of your current stadium. If you are thinking of upgrading or changing stadiums altogether, head here first.
City Info
The most important thing on this mainly informational screen is the Fan Support meter. Make sure it is in the blue, or your team will have trouble filling the stadium.
Advisors
Advisors are your most invaluable tool in determining what needs doing ownership-wise. This board will tell you to raise or lower prices, spend more money on coaches, or get better player personnel. Following their advice almost always results in more Fan Support, and ultimately helps your bottom line. Check your advisors after every full week is complete to see their suggestions, and fix whatever they tell you to, or pay the consequences in cold, hard cash.
Obviously, doing well during the course of the season is the best way to fill the seats and keep your fan base gobbling up tickets, food and merchandise. If your team sucks hard, there be little to nothing that you can do to make the people of your city care about you. Even if you are doing well, but performing below expectations, you may see fan apathy rise. Try dropping prices, having fan appreciation days and generally following everything your advisors tell you to get out of the slump.
Franchise: Post-Season
Owner Mode: Postseason Overview
Just because the season is over does not mean that the fun is. There are a whole slew of possibilities to undertake now that the games have been played. Many of them depend on how well you did during the season. If you didn't run your team poorly, or lose a ton of games, you should be fine.
Lowered Expectations
However, sometimes you are playing as the Bengals or Bears or Cowboys, and things happen. Your team loses. No one comes to your games, and all of your players are overpaid. If you are operating in the red at season's end, you will get a message to this effect:
"Currently, the ______ are operating in the red. You cannot afford the salaries of your players and coaching staff. Without immediate attention, it is possible that you will lose your team. You should look into relocation, or lower your costs."
This sounds pretty scary, and it is. Well, not really. After all, this is make-believe. However, there are several ways to bring a team up out of the red, and we'll discuss them as we take you through each and every step of the process giving an equal nod to the guys who did not do so poorly.
The Sky is the Limit
On the flip side of the coin, perhaps your team was successful. You can start laying a foundation for the future, spend some serious money on free agents, and go after the best coaches and facilities money can buy.
Owner: Staffing
The first leg of your journey is to make front office personnel decisions. This begins with setting up your coaching staff, and includes many stops.
Sign Coach
The first thing you need to determine is which coaches your team needs. To do this, take a look at the upper right corner of the screen. You see several icons. HC = Head Coach, OC = Offensive Coordinator, DC = Defensive Coordinator, and ST = Special Teams. Those marked in red are the ones you need.
If a coach is already being pursued by another team, you will notice an offer next to his name. By clicking on one, you see the coach position he hopes to fill, and his desired salary. You can cycle through the various positions a guy would accept by moving to the Position Offered field and pressing right and left. When looking for an Offensive Coordinator, make sure the Offense rating is high, and for DC, that Defense is. A head coach should be fairly balanced. If you notice the Position Offered is grayed out, that is the only thing they want to do.
The head coach is your first priority. If your head coaching job has been made vacant, look to sign a head coach, then fill in the other positions. If your head coach hasn't been released, but you want him to be, pop out of this menu quickly and go to the Coaching Staff selection. If you are in the red, this really is not an option, as you will have to pay off the remainder of his salary, and you really cannot afford that. But if you are resolute in firing the guy, click on Release Coach (you will see the control in the bottom right corner) and confirm your selection, then head back to the Sign Coach screen.
You can look at the candidates in several ways. You can view them by all Available, those who are Unemployed currently, and those who are In NFL. You can also see those you have made offers to by visiting the Targets selection. We find it is easiest and best just to stick to the All Available screen, which shows everyone. This will give you the overview of everyone and see how all of the proposed salaries are shaking down.There are several top-tier candidates that many teams will be vying for, so unless you want to pay top dollar, stay away from those (this may actually give you the incentive you have been looking for to re-sign your current guy, no matter how pathetic). Still, there are some good bargains among these guys. Some of the better coaches you should pay attention to are:
- J. Fisher
- D. Capers
- J. Fassel
- M. Martz
it is often cheaper, easier, and in the long run, better to hire a former assistant and promote him to head coaching glory. Guys who fit this bill (at least in the first couple of seasons) include:
- M. Kiffin
- M. Trestman
- G. Kubiak
- E. Donatell
No matter who you choose as coach, make sure you look beyond his Motivation ranking and check out Knowledge, Chemistry and how he works with each group of players. Think about the problem areas of your team and what could use improvement. Apply that to the head coach, then fill in his weaknesses with other members of your coaching staff.
No matter who you are hiring, make sure you make a decent sized offer right away, because otherwise you will get into a bidding war with another team, and that can drive the price out of the ballpark. Try to predict what the least you can get away with raising the base salary desired but still sign the man straightaway. This takes a little practice, so if you aren't satisfied, reload the game and try again.
There are a couple of bargain guys masquerading as Special Teams coordinators that make good Offensive Coordinators. Either that, or they are just way undervalued right off the bat. These guys are usually former offensive greats in their own right. Some of the hidden gems include (of course your experience may vary, depending on the year of franchise you are tackling):
- T. Rathman
- S. Lewis
- E. West
- D. Vermeil
it is the same story on the other side of the ball. Grab steals from converted ST coordinators, or take a look at some of the undervalued talent out there. On the defensive side, take a look at:
- C. Cecil
- J. Barry
- J. Mora, Jr.
- L. Smith
- E. Donatell
You can pay the least amount of attention to potential special teams guys, but do not consider them an afterthought. Just sign a strong guy for cheap (it is quite easy) and move on with your life, and the Postseason process.
Coaching Staff
Peruse the men in your employ with this selection. Here, you can check out each coach's ratings, release coaches who aren't working out, or promote guys to higher positions. If your coach leaves, it is often a good move (especially when low on cash), to promote a coordinator from within without having to sign a pricey outsider. If you have made an offer but not yet signed a coach, his stats and other information will not appear here until he's signed.
Training Staff
If you have the money for it, upgrading your training staff is not a bad idea. The higher their recovery and prevention ratings, the less time your players will be injured. Skimping on this is not a good idea, but sometimes it is unavoidable. If you are in the red, you can hardly afford to throw more money into training staff. The default staff is decent, but they relinquish a higher rate of injuries.
Coach Progression
After each season your coaches may get better or worse at certain aspects of their jobs. Here's where you can monitor that and determine if they are worth keeping as a result. Make sure you glance at this before releasing someone. If a coach is improving in a lot of areas, it probably is not the time to let him go. Of course, the inverse is also true.
Change Owners
If you cannot take the heat, and want to jump ship, you can change to owning a different team, or control more than one (so that if your first team fails, you will have a backup plan). Or you can suck it up and finish what you have started.
Owner: Set Prices
This is exactly the same as the in-season menu. If your team is hurting for cash, but doing all right on the field, feel free to up prices to the maximum without turning the arrow red. If your Fan Support is low, you may need to lower prices to get more people interested in the squad. Since you can set all these same prices during the season, you can wait until then to mess with it.
Owner: Stadium Central
Here, you have a few options, but not all of them will be available to you, depending on your financial situation. If you are in the red, for instance, your options will not include renovation, rebuilding or upgrade, as you do not have the fund for it. Still, in the section below, you will find an explanation of exactly how to handle each category.
Rename
If you are looking to be creative, you can choose to rename the stadium whatever you want. That is the No Sponsor option at the top of the list. However, you can make a little scratch off the deal if you choose to sell the naming rights to the stadium. Choose from the deals listed. Usually, these carry some kind of condition. For instance, a company may enter into a contract to get paid $1.75 per year whenever you win at least eight games, or go to the playoffs. Some deals are more ambitious than others. There's really no downside to choosing a name (aside from the icky corporate attachment)--just be sure you choose a deal that you can deliver on. Once you lock in a deal for a specific amount of time, you need to wait the contract length before you can choose another.
Rebuild
If you choose to rebuild, you must discard your old stadium, then gain approval from the city to build a new one. Before attempting this, make sure you have plenty of money in the bank (at least three seasons' healthy earnings). Then follow the steps below to create the ultimate park:
1. Design Stadium
Here, you will be able to design all of the elements of your stadium, including what the field, stands, end zone walls and sidelines look like. Note that every single change you make to the stadium affects both the price of the stadium and how many people will fit in it. You need to keep the capacity high if you need to generate a lot of revenue from tickets. However, you want to keep your costs low, too, so that you are able to drum up enough money to build the stadium in the first place. Make sure you have some press and luxury boxes somewhere in the stadium, so that you can charge top dollar for at least some of your seats. After all, you do not want to take money from only the rabble.
2. Secure Funds
This is where all that money comes in. Make sure you are sitting on a fat piece of bank, then contribute all that you can to the effort. The only way you can personally affect the Likelihood of stadium approval is to commit your own money. Since you are not relocating to a different city, getting money from the city is not an option. The other way you can get money for the effort is by offering Personal Seat Licenses. This will hurt your fan support, but that is not a big deal in the short run. You do not want to set this too high, though, or ticket prices will go up significantly the next season. Tweak the factors until you get a green Likelihood of Approval, then hit Continue to see if you got approved.
3. Submit Proposal
The game will warn you that you can only submot for approval once per year. that is rather immaterial, as this is the only time you can submit. Go ahead and see if the bad boy goes through.
4. Finalize
If you are accepted, you will get a message that the stadium will be ready for the next season (not the one you are about to play). Congratulations.
Relocate
If your team is financially struggling, you might consider relocating to another city in order to generate some revenue. If you are financially strong, but simply desire a move, you may also go through with relocation, but it will be a different process.
If you express interest in relocation, select it from the menu. If there are cities looking for teams, and you are a bargain (presumably because you are in the red), they will make contract offers to you. Usually only a few cities actually make offers, but there are tons of potential cities that will do so, including some in Canada and Mexico. If you are rich and looking for a city to move to, there will be a long list of all potential target cities. Select the one you want to attempt a move to.
If you choose to accept an offer, simply move to the city and select it, then answer yes when prompted, "Are you sure you want to move your team to Anytown?" From here, you will be taken to the Relocation main menu. It contains each of the following options:
1. Select Location
that is already done. You just chose it.
2. Design Stadium
Same as rebuilding. Here, you will be able to design all of the elements of your stadium, including what the field, stands, end zone walls and sidelines look like. Note that every single change you make to the stadium affects both the price of the stadium and how many people will fit in it. You need to keep the capacity high if you need to generate a lot of revenue from tickets. However, you want to keep your costs low, too, so that you are able to drum up enough money to build the stadium in the first place. Make sure you have some press and luxury boxes somewhere in the stadium, so that you can charge top dollar for at least some of your seats. After all, you do not want to take money from only the rabble.
3. Secure Funds
When securing funds, the only thing you should really pay attention to is the Likelihood of Approval Bar. You want to make it go into the green before even attempting to ask for approval. There are three areas where you can affect the Likelihood. They are:
Team Contribution:
If you have leftover funds from the season, use them here. If you do not, try to get the money a different way.
Relocation Package Contribution:
This is what your potential city will pay to have you relocate there. You can pump this up as long as it does not hurt your Likelihood of Approval. Go ahead and set it to the max to save yourself some money, as long as you remain in the green.
Personal Seat Licenses:
These will generate instant cash, but your Fan Support will take a hit as a result. do not worry too much about that now. Set it to the max if it helps your approval rating, and just win the fans over with your stellar play and low stadium prices down the line.
4. Submit Proposal
When you feel you have put a decent package together, submit it to the city. As long as your Approval is in the green, you should have no problem getting accepted. If you get rejected, however, your back-home Fan Support will take a hit, as they will know you have been shopping the team around. If it goes through, though, pack your bags and get out of town. And try not to look like Art Modell doing it.
5. Change Nickname
You can change your team's name, logo, abbreviation and colors here. For the Logos, you can select from Generic choices, Alphabetics, current NFL Teams, and Historic Teams, too.
6. Change Uniform
Here's your chance to become a fashion designer, and choose everything from the helmet to the socks your players will wear. Or stick with the default.
7. Finalize
Lock in your choices and get ready for a rocky year. The stadium will not be ready for a year, and people at your place will not be too happy to see you go.
Upgrade
Upgrading is a way to raise fan support without the drastic move of relocating or completely rebuilding the stadium. Here, you have got choices of things to add to your stadium, including such favorites as an Internet Cafe and English Pub. Decide what's in your price range, and add it. The payments are spread out over several years, so the real cost is at right, where it says "per year." Go ahead and splurge, unless you are in the red.
Owner: Information
This is also available during the season, so it bears little mention here. Check it out if you want an overview of how you are doing as an Owner, and what you need to improve on. Otherwise, prepare to move to the Offseason Menu and start the process of drafting and resigning.
Off-Season Menu
This is where you will do all of your player acquisition and general manager duties in the offseason, now that your ownership issues have been hammered out. If you finished in the red for the last season, this is one place where you can cut some corners. Get rid of some of your big-ticket guys and opt for talented younger guys, or settle for less skilled players. Below, you will find suggestions for each of the sections of the Schedule. Everything else on the Off-Season Menu should have been explained in previous sections at this point.
Schedule
1. Retired Players
See who's ready to call it quits. The menu defaults to everyone in the NFL, but you can toggle through the choices until you reach your particular team. This is a look but do not touch portion of the offseason adventure. Satisfy your curiosity and move on.
2. Re-Sign Players
Your first order of business here is to re-sign the guys who have 0 years left on their contracts. Or, if they haven't been performing up to your standards, release them. Remember, if you are down money in your Franchise, cutting salary will help your bottom line. But you have to weigh what's going to help you. Cutting Brett Favre will not improve your attendance. But dropping an overpaid corner might not be such a bad thing. You clear cap room to sign other players, and might even leave some cash in the bank.
To release a player, pop back out to the main menu, go to rosters and go to Release Player. Get rid of the offender, then head back to re-signing, and see how much it affected the cap. Be aware that releasing players carries a cap penalty. If it is a pittance ($100,000 and below), do not worry about it. But if it is a big number, you have to think hard about your decision.
If there are particular players you really want to hold onto, however, you may want to renegotiate their contracts right away before they explode, turn into megastars and demand much more than you can pay them.
To re-sign a player, click on his name. This will take you to a sub-menu showing you this guy's wanted salary, the contract length he wants, and his signing bonus (spaced out over the entirety of his contract). or the money-crunchers out there, there is a year-by-year breakdown of how exactly the monies will be paid. When manipulating the total salary and signing bonus fields, watch what it does to the Cap Room field above. Since salaries are counted over several years, the change per year is not huge, but remember, you need to keep everyone signed, and bring aboard your pricey draft picks as well.
Most players are willing to come down a bit from what they are asking for, so try to lower the total salary if at all possible. You can always spruce up the signing bonus as an incentive, or play with the years of the contract. Just do not lowball a guy too much, or he may end up asking for a lot more.
When re-signing players (or signing anybody for that matter), think about how long you are going to play or sim Madden. If you aren't going to play past a couple of years, load up on two-year contracts and make your Super Bowl run!
3. Scout Rookies
Take a look at the Breakdown screen in the Roster menu to see what you need to focus your scouting on. Anything in gray on this screen is a need that should be addressed. If you already have four QBs, you probably do not need a fifth. Instead, look for that tight end that would shore up the running game, or an extra CB for the Dime. You may want to write down on a scrap of paper how many of what you need so you do not have to flip back and forth between menus. Then return to the scouting screen and take a look at what the upcoming draft has to offer.
At the Rookie Scouting screen, toggle through the categories of players you are looking for. If you have five positions to fill, select three of each per round to take a look at. You want to spread the Rookies you scout out. Select one from the 1st round, one from the 2nd, and one in the 3rd-4th range. You can scout up to 15 players per round, so make your selections count.
Once you have selected your first fifteen, advance to the Scouting Combine for another chance to look at the young men you picked. The ones you have already looked at will appear as yellow. At this point, check out their Rookie Report (the control for doing so is listed at the bottom of the screen). This will show you your kid's combine stats, as well as some cursory info about the prospect. If you do not like what you are seeing in a player, scout someone else. If you are still interested in one of your Targets, scout him again for more info. Select a new 15 based on the information you have gained and press START again to go to the Scouting Workout.
At the Scouting Workout, it is the same drill. Check out their stats, and be sure to read any Notes on a recruit to see if he's going to fit into your plans. For instance, if you are looking for a big, bruising halfback for your offense, and you read that a kid is terrible at breaking tackles, scout someone else. This scouting info is all you will have to go on when it comes time to draft, so you want to have a broad spectrum of candidates in mind, as well as a couple standouts who you can for sure take early.
Scout one last time, and you are done. Take one last look at your Targets and check out each of their Rokkie Reports. Decide, based on the projected round info, three guys who you might want to take in the first round, three for the second, etc. You want to be somewhat prepared with a list of hopefuls when you go in.
4. NFL Draft
The Draft is not as confusing as it would be if you hadn't done all your homework above. Make sure you take frequent glances at your breakdown to see how well you are filling in the open positions. To begin the festivities, select NFL Draft from the menu.
When you get to the Draft room, you will see everyone else's picks go by at hyper-speed. Then you will be confronted with a screen of all the eligible draftees. The top possible selection will be at the top of this list. However, if you do not need a player at the positions at the top of this list, scroll to the categories that will meet your needs. it is pretty likely that you will have scouted a player at the top of these lists. What you need to determine is which player do you need most — a cover corner or solid backup QB? There's a lot of wisdom in selecting the best possible player among the positions you need.
In the first round, make sure you select someone who is projected to go in the first round, as you will not have another shot at him. Even a guy who is 1st-2nd might be around when you make your second pick. Take the best player. Repeat this in the next round, taking someone 1st-2nd if possible (of the players you need, remember).
If you do not have a pick in a particular round, the CPU will skip you. As you get near the lower rounds, you may be able to pick up some diamonds in the rough... guys who were scouted much higher who slipped to lower rounds. For instance, in the 4th and even 5th rounds, we were sometimes able to grab guys who were projected for the 2nd-3rd. Pick those guys up late and make a steal!
In the dregs of the draft, do not be bashful about picking up guys you haven't scouted. Just look for the top player in a position you need, check out his Rookie Report, and if it satisfies you, draft him. The 6th and 7th rounds are full of enigmatic pickups, but they can turn into great players down the line in your Franchise. Or you do not have to sign them if you do not need to. But the option is always good.
5. Sign Draft Picks
Similar to re-signing your talent, you want to focus on your top draft picks first and spend the most money on them (they'll ask for it anyway). Placate them with nice signing bonuses, and try to drive the total salary down to keep your cap flexible. Once you sign a guy, his overall rating will be revealed. it is pretty rare to pick up anyone much more than an 80, but it happens, and when it does, it is magic.
do not feel bad if you do not sign everyone. But try to fill the vacancies in your roster as best you can. Rookies do not often play, but it is nice to have them on the bench to fill in the required positions, and get better just by experience.
6. Free Agent Signing
This plays out much like signing coaches. The guys you want, you will have to go at with the big guns first. Give someone a big enough offer right off the bat, and they might sign with you right off the bat. Otherwise, you could get into a bidding war and drive their price over its actual value.
Again, make sure you look at the Breakdown to see what you need. This time, though, since you can look at ratings, see if you can improve any of your positions with a good pick-up here. If you have a 90 QB, but backups in the 40-60 range, you might want to sign a pseudo-marquee guy to fill in the backup role.
When you have made all of your offers, you can advance time by pressing START. You can advance any number of days, or zoom through the whole free agent signing period at once. You are alerted to players who sign with you, and they'll begin counting against the cap. If you leave the game sit, it will naturally move through the days.
7. Re-Order Depth Charts
Pit your new rooks into the lineup, shuffle your kick returners and supplant the starting QB with the upcoming hellion. Organize your team to your tastes, and get some new blood into the mix. You'll notice on the Depth Chart that certain stats are yellow. These are the ratings that changed during the offseason.
8. Start New Season
See how you did in the Off-Season, and get to it!
Teams
NFC West
- Arizona Cardinals
- St. Louis Rams
- San Francisco 49ers
- Seattle Seahawks
NFC North
- Chicago Bears
- Detroit Lions
- Green Bay Packers
- Minnesota Vikings
NFC South
- Atlanta Falcons
- Carolina Panthers
- New Orleans Saints
- Tampa Bay Buccaneers
NFC East
- Dallas Cowboys
- NY Giants
- Philadelphia Eagles
- Washington Redskins
AFC West
- Denver Broncos
- Kansas City Chiefs
- Oakland Raiders
- San Diego Chargers
NFC North
- Baltimore Ravens
- Cincinatti Bengals
- Cleveland Browns
- Pittsburgh Steelers
NFC South
- Houston Texans
- Indianapolis Colts
- Jacksonville Jaguars
- Tennessee Titans
NFC East
- Buffalo Bills
- Miami Dolphins
- New England Patriots
- NY Jets
EA Bio/Madden Cards
EA Bio
EA Bio is new to this season's slew of games. It allows you to gain points and levels toward rewards in Madden, as well as other EA titles.
Madden Cards
Each and every year, Madden rolls out a new set of Cards for your collecting pleasure. Generally, the cards do the same things they did last year. Player cards give that player a boost for a specified amount of time (based on the type of card — bronze, silver or gold). Playing a Coach card boosts your team awareness for a specified amount of time. Stadium Cards unlock stadia for exhibition mode. Historic Team cards open those squads for exhibition, and Cheerleader/Pump Up Crowd Cards give your team a temporary boost. Here are the card categories, and how to gain the locked Cards within each:
Player Cards: #1-160
The following cards are unlocked by completing Mini-Camp challenges (the rest can be gotten by purchasing packs of Cards with Tokens):
- #29: Simeon Rice: Get Gold in All-Madden Trench Fight
- #30: Warren Sapp: Get Gold in All-Madden Swat Ball Drill
- #33: Marcell Shipp: Get Gold in All-Madden Coffin Corner Drill
- #44: Priest Holmes: Get Gold in All-Madden Ground Attack Drill
- #49: Peyton Manning: Get Gold in All-Madden Pocket Presence Drill
- #71: Jeff Garcia: Get Gold in All-Madden Precision Passing Drill
- #106: Adam Vinatieri: Get Gold in All-Madden Clutch Kicking Drill
- #123: Ray Lewis: Get Gold in All-Madden Chase and Tackle Drill
Coach Cards: #161-192
These Cards, when used, raise your team's awareness for a specific amount of time.
Kevin Baker: #193
This guy won a contest, and got his own Card. He's also added as a Free Agent when you get the Card.
Cheat Cards: #194-221
Cheat Cards, when played, produce special game conditions for a specific amount of time, based on whether they are Bronze, Silver or Gold. Certain ones need to be unlock via Mini-Camp drills. They are:
- #197: Human Plow: Get a Gold in the Ground Attack Drill
- #199: Da Boot: Get a Gold in the Clutch Kicking Drill
- #201: Lame Duck: Get a Gold in the Swat Ball Drill
- #203: Fumblitis: Get a Gold in the Chase and Tackle Drill
- #210: Pocket Protectors: Get a Gold in the Pocket Presence Drill
- #211: Penetration: Get a Gold in the Trench Fight Drill
- #212: QB on Target: Get a Gold in the Precision Passing Drill
- #213: Coffin Corner: Get a Gold in the Coffin Corner Drill
Stadium Cards: #222-228
Unlock these Cards, and you will unlock the stadiums, and make them available for Play Now games.
Historic Team Cards: #229-253
Unlock these Cards to make the Historic Teams available at the team select screen.
Cheerleader/Pump Up Crowd Cards: #254-285
These are unlocked by completing each team's Situation in Mini-Camp mode.
GameCube Exclusive Cards: #286-297
These Cards are exclusive to the GameCube version of Madden. They include hidden teams, extra cheat cards and stadiums. To get these cards, link your GBA (and version of GBA Madden 2004) with the link cable to your Cube, and the Cards will be unlocked.