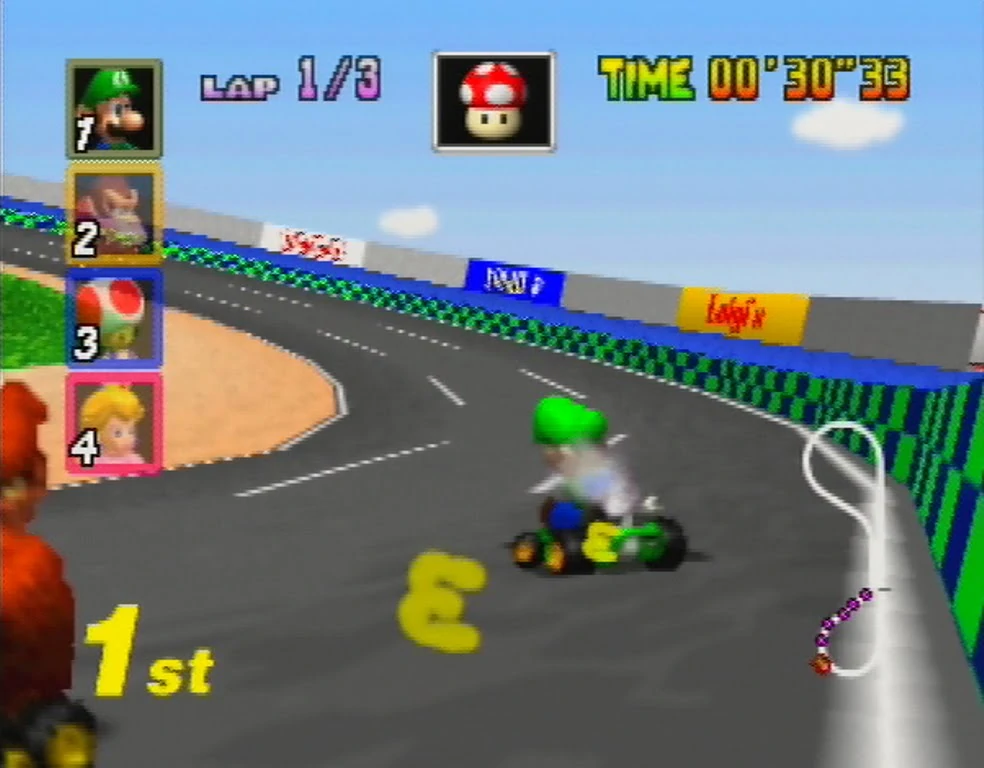
Mario Kart 64 #1 An upgrade of Super Mario Kart
Gameplay & Walkthroughs
Mario Kart 64 #1

- Developer: Nintendo EAD
- Publisher: Nintendo of America Inc.
- Game Rating: E Everyone
- Release Date:February 12, 1997
- Players: 1 - 4
- Multiplayer Options: Same/Split-Screen
- Multiplayer Game Modes: Free-for-all/One-on-one (VS)
- Miscellaneous Attributes: Battery Backed RAM, Controller Pak
Introduction
Mario Kart 64 is a racing game developed and published by Nintendo for the Nintendo 64 (N64) video game console and the second installment in the Mario Kart series. It is an upgrade of Super Mario Kart, featuring a similar base where players can select a character from the Super Mario franchise to drive in a kart, using items to help themselves or hinder the other drivers. Mario Kart 64 also has expanded game play, such as Mini-Turbos, which players can get from drifting, and the ability to play with up to four players.
Due to the game's move from Mode 7 to 3D, Mario Kart 64 is the first game in the series that allows elevation, advanced collision physics, more camera control, walls that obscure views, and increased fidelity. Despite this change, the characters, items, and some course obstacles remain as pre-rendered 2D sprites.
Unlike Super Mario Kart, Mario Kart 64 has more unique track designs instead of having repeats of the same track, as well as introducing tropes that would later become staples of the Mario Kart series, an example being Luigi Circuit as the first track.
For the first time in this game, Wario and Donkey Kong are playable characters and items, such as the Spiny Shell and the Triple Green Shell, were also introduced.
Description

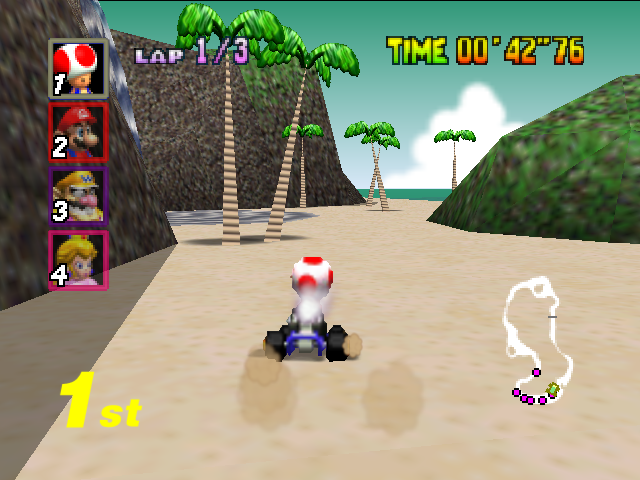
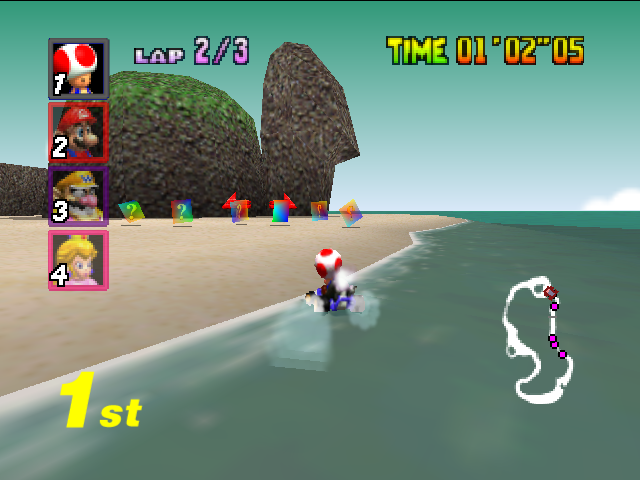
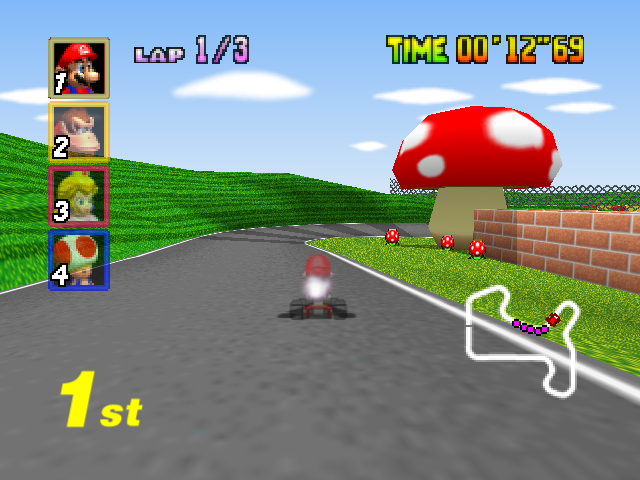
Mario Kart 64 races eight familiar faces, including Mario, Bowser and Yoshi, on four progressively tougher four-track circuits. Wide curves and gentle banks mark the Mushroom Cup tracks. Your commute gets notably tougher on the Flower Cup, though. The player will have to dodge semis rumbling on Toad's Turnpike and bounding boulders on fogbound Choco Mountain! Star Cup tracks range from the icy surfaces of Sherbet Land to the lava lakes of Bowser's Castle. The true test of karting competence, though, comes on the four tracks in Special Cup. Zip through the dark caves and green hillsides of Donkey Kong's Jungle Parkway, cling to the sheer cliffs of Yoshi Valley and hustle over haunted Banshee Boardwalk before tackling the longest track in the game: neon-lit Rainbow Road.
The game offers two camera angles and three engine sizes: 50cc, 100cc and 150cc. You can gain even more speed by mastering the power slide technique or grabbing Super Star power-ups. Each kart has distinctive handling, acceleration and top speed capabilities. Light karts like Princess's smoothly steer through tight corners, but run the constant risk of getting flattened by heavy karts, like Donkey Kong's. Shells that you fire at rival racers, Bananas that make them skid out and Lightning Bolts that make them small and very slow are just a few of the game's unique power-ups.
Gameplay
Players choose from a roster of eight characters that vary in weight, speed, and acceleration. These characters race in a variety of tracks based upon different locations in the Mario world. Each track has a unique shape and can contain various obstacles, hazards, and short cuts. Eight characters participate in each race. Up to four of them can be human characters, while the rest are computer-controlled. Three and four-player races have no computer-controlled racers.
On a track, various actions can be performed to change the flow of a race. Items can be acquired by hitting an item box, a rainbow-colored box with a spinning question mark. The items' uses include acting as projectiles to impede the opponent, speed up the user, or stop opponents through other means. One can earn a small turbo boost by drifting, which one can perform by hopping and tilting the control stick back and forth three times. However, AI-controlled racers do not use any kind of shell.
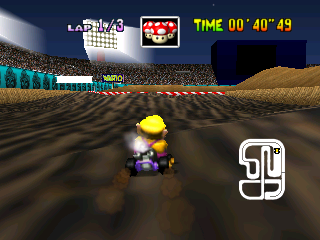
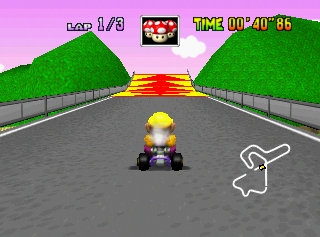
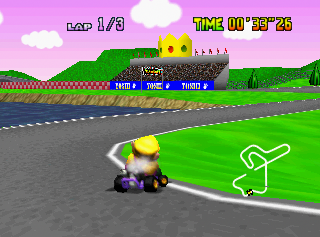
There are various modes of play such as the Mario Grand Prix where one or two human players compete with computer players in a group of eight around a series of four courses per cup - Mushroom Cup, Flower Cup, Star Cup, and Special Cup respectively. A player selects one of the four cups at the beginning of the game as well as a difficulty level, measured by engine size (50cc, 100cc, or 150cc). After a gold trophy has been acquired for each cup on the 150cc level, the Extra difficulty level is playable, where the tracks are mirrored. The player can also race on a track alone while recording a time (Time Trial mode), and trying to beat this time on subsequent races.
There are two modes where players can face each other. The VS. mode allows you to race with each other, and Bob-ombs are thrown in each track. The Battle Mode allows players to compete in one of four special arenas filled with item boxes; each player has three balloons attached to their kart which are lost if any damage is done to the kart, with the winner being the last remaining player. If three or four players are participating, then the first one or two players without balloons transform into bombs on wheels that can crash into the remaining karts.
Basic Controls
Control Stick
This is used to steer the kart. Tilt it in a certain direction to move correspondingly. It is also used to move between options in menus.
A
Press this button to accelerate. You need to hold it (keep it pressed) to keep accelerating. Otherwise, you will slow down. This can also be used to select an option on a menu.
B
When moving, this button causes you to brake (slow down). If you are motionless, though, this can be used to move in reverse. This is useful when you are jammed up against a wall (this happens frequently to lightweights) and need to get back onto the course. Note that to move in reverse, you must also tilt the control stick down. Pressing this on a menu negates a previous choice.
R
This is interesting. It can be used to hop, which can be useful inmaking short jumps over small gaps. Lighter characters tend to have higher jumps. However, R is used for power-sliding and mini-boosting, and that is explained later as an advanced control.
L
You can use this to lower the volume of the background music or mute it. It helps on some stages, I guess.
Z
If you have an item, press this to use it. Using it in combination with the control stick (up or down) can let you throw certain items backward or forward. If you have an item that is launched or dropped, like shells, you can hold Z to keep them behind you without launching them, waiting for the ideal opportunity to use them.
C Up
A handy button, this changes the camera's zoom. Using this can be a lifesaver in some courses, especially when driving uphill; it increases (or decreases) your line of sight.
C Right
This changes the map of the course to the speedometer, which shows how many kilometers per hour you are going.
Driving Techniques
Power-Sliding
This is vital to succeeding in the game, or at least succeeding easily. When you press R, you hop. When turning, press R and hold it. Now turn the control stick in the direction of your turn. You will begin power-sliding, which is the most efficient method of turning. You will not lose speed when turning (this is especially true of heavyweights), and you have the added bonus of facing one direction throughout a turn. However, your mobility is compromised greatly when turning, and any obstacles along the way (banana peels come to mind) will likely hit you. Still, the pros outweigh the cons.
Mini-Boost
Although power-sliding is useful in its own right, it has one other use: starting mini-turbo boosts, which I abbreviate as "mini-boosts". Start off by entering a power-slide. You know that you are power-sliding when white E's of smoke are rising from your engine. Now tilt the control stick in the direction opposite that which you are turning, and then quickly turn back in the correct direction. Yellow E's will start rising from your engine. Repeat this and the smoke will become red. While doing this, you must hold the A and R buttons. Now, when the E's have turned red, release R. You will gain a slight boost of speed momentarily. It is not vital to racing, but it can be useful. Sometimes, it is best just to do normal turns, but particularly wide turns make mini-boosting very natural.
On a side note, something somewhat similar happens when you are driving right next to another driver. If you are driving by someone, a sort of wave of smoke will appear from your engine, giving you a small boost of speed. This is most useful in trying to pass the other player.
Rocket Start
At the beginning of each race, the eight drivers are lined up (you always start in eighth place at the beginning of a new cup) before the finish line. Lakitu drops down with the headlight and it turns red to red to blue. If you press A just as the third light turns blue (or right after the second fades), you will get a Rocket Start. You can begin at maximum speeds, a nifty head start. And if you press A at the exact right moment, right after the second red light fades, you will get a speed boost, about half that provided by a Mushroom. However, press A at the wrong time and you will spin out of control. The same goes for when Lakitu is dropping you onto the track because you fell off; press A as you are set down to take off with a Rocket Start.
The Spin-Turn
This is another way to turn, but this way actually rotates the kart. If you press A and B simultaneously, you will begin to spin. When doing this, release B to drive forward. When mastered, this can be used to straighten yourself after a turn or be facing an opponent before firing a shell or another item. Personally, I like power-sliding more.
Banana Peel Recovery
While driving, hitting a banana peel will cause you to slide out of control. However, if you press B just after hitting it, you will not lose control. A small music note appears above your character to indicate that you successfully avoided a spin-out.
Driving and Item Tips and Tactics
- Coming off the track or hitting a wall slows you down to a literal crawl. So do not do it.
- If you are gonna cut out some of the track, subsidize the slowdown with a drifting mini-boost or better yet, a mushroom.
- Placing fake item boxes or bananas by real item boxes should block them from view of your opponents, meaning there is a chance they could drive in to them. Although the CPU might spot this against people in multiplayer it will work better. it is also good if you want to 'replace' you current item with another by dropping it by the item box so you will collect those in front.
- If you are in first place, then it is a good idea to drag an item behind you (or have a draggable item with you) in case you need to defend against shells and what not. it is a pain to have you lead wiped away by a cheap item at the last minute so try and get used to doing this.
- If you are neck and neck with an opponent and coming up to item boxes, drop back slightly so you are a position behind them and grab an item. As in first place you cannot pick up red shells, doing this method could bag you one so you can take them out and take a substantial lead. Although this is incredibly annoying and cheap its a sure fire winner especially if you are on the final lap.
- Again like the above, if you are in a very close race then drop back a few positions and grab an item box. As items are based on position and not proximity, you could get something like Thunder, a Star or Three Red Shells. And who would not want that, eh?
- Unlike other Mario Kart games, red shells just go straight toward the racer in front, and do not follow the track. Ensure that you can see your opponent, and is in your line of sight, before you fire.
- If you are gonna use a red or blue shell then wait for them to get a slight lead, otherwise the red shell will just fly straight past them and the blue shell likewise and even worse take you out in the impending explosion (if they are in first anyway).
- If you have several (hopefully red) shells, then you can incapacitate a kart ahead. Fire one to spin them out, and then fire another as you go past them (where they've hardly had time to recover). By the time they have started going again proper, you will have speeded ahead.
Game Modes
Grand Prix
The main mode of the game where up to two players race against computer-controlled opponents across four tracks in each of the four cups. They are divided up into three different difficulties depending on the engine size: 50cc, 100cc, and 150cc. 50cc is the slowest, while 150cc is the fastest. When a race is finished, players receive points depending on how well they placed in the race. If players finish in 5th place or worse, they are forced to restart the race. However, in two player mode, if one player finishes in the top rank while the other finishes in a low rank, both players will continue on to the next race.
Unlike Super Mario Kart, players have an infinite amount of tries to retry a race should they fail to qualify. At the end of the Grand Prix, players receive a trophy depending on their overall rank, with bronze for 3rd, silver for 2nd, and gold for 1st. In 50 and 100cc, the trophy is skinny, but in 150cc, the trophy is large and has two handles.
If players place 4th at the end of the Grand Prix, a cutscene will play as their character watches the top three ranked players go to the podium while they drive away. A Mini Bomb Kart will come out of nowhere and attack the player, following with the message; "What A Pity! You placed <4th-8th>. Maybe Next Time!"
If the player gets all Gold trophies in 150cc, a new mode, named Extra, which would later be known as Mirror Mode, is unlocked. Here, players race in horizontally flipped courses in 100cc. Upon unlocking Extra, the title screen changes.
The notable feature of Mario Kart 64 is its rubberbanding AI, meaning that regardless of the weight class, AI drivers can speed up significantly than the human player. There are two rivals per Grand Prix that fight with the player for first place and use a Handicap to situate themselves with them. On an additional note, in the 1500cc and Extra modes, two CPUs are given a large handicap and when they are hit by items such as the Red Shell, they immediately recover. Sometimes, there is one AI racer that gets a huge handicap. When they're far ahead, it is very challenging for them to stop.
Time Trial
In Time Trial, players must race for the fastest time. After setting a record, players can challenge that record and race against themselves, represented by a Ghost of their character-of-choice. The Ghost will be saved only if the player does not crash into an obstacle, does not drive in reverse, or does not fall off the road during the race. The original release of this game uses 123 pages of the Controller Pak to record Ghost Data, which would occupy all the space in the Controller Pak. However, later versions of the game used 121 pages on the Controller Pak, leaving only two pages free. Because none of the available controllers have a Controller Pak Slot, it is impossible to record Ghost Data on the Wii or Wii U Virtual Console versions of the game.
Versus
Versus Mode involves two or more players racing each other on selected racecourses of their choice. After the players finish a selected racecourse, a point is given to the first-place winner as a tally, and players can race again or select another course. There is no set number of races, and the points do not signify anything. When two or more players are racing together, Mini Bomb Karts appear on the courses.
Battle Mode
Available only to two or more players, Battle Mode is a competitive mode where players combat each other in an arena rather than reach the finish line in a race. Each player starts with three balloons, color-coded to the character they are using, and they lose a balloon when hit by any item or if they fall off-track. It is also possible to lose a balloon if a heavier player, such as Bowser, hits a lighter player, such as Toad, with great enough speed (more details below, in the "Drivers" section). When a player has lost all balloons, the player loses and becomes a Mini Bomb Kart. Mini Bomb Karts are controllable, and they can be attacked and stunned by items, though they explode if they run into another player; if they explode, the player is permanently defeated. The last surviving player wins the round.
Multiplayer Mode
In multi-player mode, you and up to three friends (or, up to 3 computer players) get to choose your favorite characters, and fight it out on the stage of your choice. There are many different ways to play in the multiplayer mode. You can choose one-on-one, or team battles; and you can determine the limits of your battles, by time, or by lives.
Time Battles
In a time-battle, the game will last for a predetermined amount of time. In this mode, characters can be killed, or knocked off of the stage, an infinite number of times (as long as it is done within the time limit). The end scores are tallied by subtracting a players falls from their KO’s. In the case of a tie, the tying players must return to the stage and take part in a ‘Sudden Death’ battle. In this type of battle, each player starts off with 300% damage, so the winner is usually determined within a few hits.
Stock-Battles
Instead of a time-battle, you can choose a stock-battle. There is no time-limit in a stock-battle. Instead, each player is given a fixed amount of lives, so there is no score calculation; the last player standing is simply made the winner.
Team Battles
If you would rather play cooperatively, there is also a team battle option, which, like the one-on-one option, can be played in time-battle or stock-battle mode. The rules are the same for the team battle mode, the only difference being the calculation of the final score. In a team battle, the score is calculated by taking the KO’s from each player in the team and adding them up to form a team score.
Attacks
Each character has their own standard attacks, aerial attacks, smash attacks, special attacks, grab moves, and a taunt.
Items
A variety of Nintendo-themed items can also be used to help players fight. These range from projectiles and other weapons, to health boosting items.
Characters
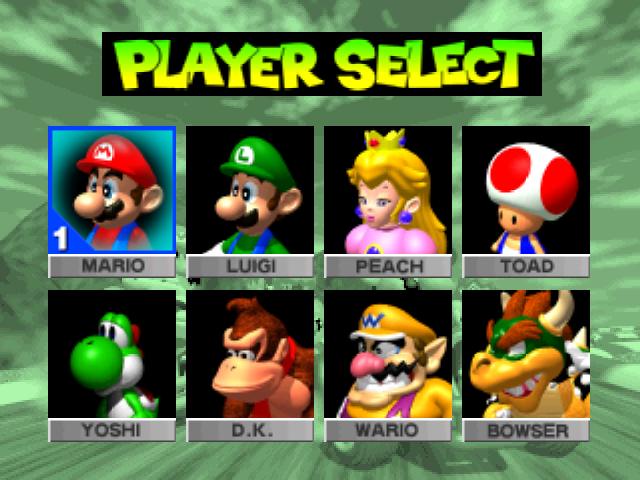
Mario Kart 64 has a total of eight racers, the same number as Super Mario Kart. Six characters from Super Mario Kart return, while Koopa Troopa and Donkey Kong Jr. are replaced by Wario and Donkey Kong. In addition, characters receive voices for the first time in the Mario Kart series. Characters also come with their marked color schemes that color their vehicle icons on the map as well as their balloons in Battle Mode.
Characters are divided into three classes depending on their weight: light, medium, and heavy.
Lightweight drivers have the highest acceleration and highest top speed in the game. They receive the most speed from Mini-Turbos and lose the least amount of speed when off-road. Additionally, lightweights (and the heavyweight character Bowser) get the greatest benefit from the triple-tap A Button acceleration recovery technique (tapping the gas button three times and then holding to accelerate more quickly after spinning out or otherwise losing speed). A major downside to lightweight characters is that they spin out more easily from contact with heavier characters, which puts them at a disadvantage in Battle Mode. Toad, in particular, spins out when "bumped" by any other character. Another downside is that they have the widest turning radius on or off-road and they lose the most speed from turning without drifting, which gives them the worst handling in the game. As with their weight, however, this disadvantage is negligible outside Battle Mode.
Middleweight drivers are described in the instruction booklet as having no "extreme pros or cons," but they actually have the slowest acceleration of all the weight classes and have the same top speed as the heavyweights. Their acceleration diminishes at a constant rate as they approach their top speed, unlike for drivers in the other weight classes, whose speeds change more erratically. They also get the same increase in speed from Mini-Turbos as heavyweights. They are faster off-road than heavyweights, however. They can also turn corners better than the other characters without drifting, losing less speed than lightweights while covering the least ground of all weight groups. This can be useful in Battle Mode or Versus Mode on tracks with hairpin turns, and it allows them the best overall handling in the game. Lastly, Mario is slightly heavier than Luigi and will thus win head-on collisions.
Heavyweight drivers have slower acceleration than the lightweights, and initially have lower acceleration than middleweights, but reach their velocity faster than the latter after 2.8 seconds. Their top speed is tied with the middleweights. They lose the most speed off-road but lose the least when cornering (even when they are not drifting). They also have a tighter turning radius than lightweights. Of the heavyweights, Bowser is the heaviest and largest. As mentioned above, he is also the only non-lightweight that gets a maximum recovery from the triple-tap A Button technique, although his rate of acceleration is slightly different. Donkey Kong is the "smallest" but is slightly heavier than Wario. Donkey Kong and Wario receive the least acceleration from the triple-tap A Button technique, but they still will reach their top speed faster than Mario or Luigi, albeit in a smaller window.
Additionally, players can drive a Mini Bomb Kart when all their balloons disappear in Battle Mode. The Mini Bomb Kart can drive around and explode on other players, but it has only one use for exploding before completely disappearing.
Mario
Medium
The famous hero that everyone loves has returned into another Mario Kart game since Super Mario Kart. He has average stats on everything, explaining his middleweight. His first appearance was in Donkey Kong in 1981. His kart is powered by what appears to be a twin-cylinder two stroke.
Mario is a good driver for beginners as he is very well rounded. He also has his own track, Mario Raceway.
- Cart Color: Red
- Time to get to 30 kmph: 2.10 seconds
- Time to get to 50 kmph: 3.30 seconds
- Top Speed: 68 kmph
- Time to get to Top Speed: 5.10 seconds
Mario has very average stats. His times are very close to Luigi's. Mario's weight class is average meaning he can be very useful in battle mode because he can smash little guys and can still move reasonably fast.
Luigi
Medium
Mario's younger brother has returned in this game as a playable character. He has average stats on everything, explaining his middleweight. His debut was Mario Bros. in 1983. He shares the same kart engine as his brother.
- Cart Color: Green
- Time to get to 30 kmph: 1.80 seconds
- Time to get to 50 kmph: 3.50 seconds
- Top Speed: 68 kmph
- Time to get to Top Speed: 5.30 seconds
Luigi is very close to Mario, the only difference is Luigi is slightly faster at getting to 30 kmph and Mario is slightly faster at getting to 50 kmph. They have the same Top Speed and Weight. Mario also is slightly slower at getting to his top speed, but the difference is very small. I personally think that if you like Mario try Luigi, you will probably like him.
Donkey Kong
Heavy
Mario's first rival. This gorilla is one of the racers in the game and has replaced Donkey Kong Jr. from Super Mario Kart. He has low stats, explaining his heavyweight. His debut was the same as Mario's. He debuted in Donkey Kong in 1981. Much like Toad, his kart is powered by a distinctive engine, but this time it appears to be a V-twin four stroke with deep-sounding exhausts. The engine sound is said to be similar to those heard on 1990's motorcycles.
Donkey Kong is tied for oldest character with Mario. Donkey Kong first appeared in Donkey Kong and later became well known for being in the Mario Kart series, Mario Party series, Donkey Kong World, 1 ,2 ,and 3. He also is the star of Donkey Kong 64. he is a monkey, and older brother to Diddy Kong. Donkey Kong also has his own race track, Dk's Jungle Parkway. This map is set in a Jungle with lots of trees and a river.
- Kart Color: Yellow
- Time to get to 30 kmph: 2.00 seconds
- Time to get to 50 kmph: 2.60 seconds
- Top Speed: 70 kmph
- Time to get to Top Speed: 4.20 seconds
Donkey Kong is a very average character. He is right in the middle for acceleration and top speed within his weight class. Donkey Kong is my personal favorite after Bowser and Luigi.
Princess Peach
Light
This princess of the Mushroom Kingdom reappeared in another Mario Kart game ever since Super Mario Kart. She has high top speed and acceleration, explaining her lightweight. Her debut was Super Mario Bros. in 1985. Her kart is powered by what appear to be high-revving, single-cylinder two stroke. Despite it is smaller than the Mario Brothers, it has surprisingly high torque and power which make it faster than the two.
- Kart Color: Pink
- Time to get to 30 kmph: 1.10 seconds
- Time to get to 50 kmph: 2.00 seconds
- Top Speed: 68 kmph
- Time to get to Top Speed: 3.80 seconds
Peach is very useful because she has a top speed of 68, same as Mario and Luigi and she has better acceleration. Her only flaw is that by going fast and having little weight she can get smashed much easier. This still does not stop her from being one of the best karts.
Wario
Heavy
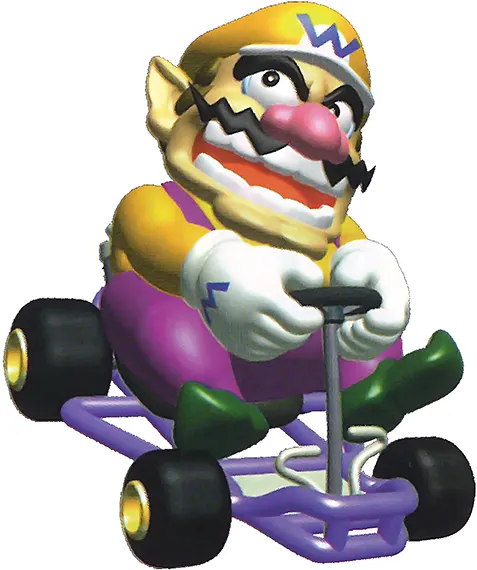
The rival of Mario hits the roads in this game and replaces Koopa Troopa from Super Mario Kart. He has low stats, explaining his heavyweight. He debuted in Super Mario Land 2: 6 Golden Coins in 1992. His kart is powered by a powerful-sounding, high-revving triple-cylinder four stroke.
- Kart Color: Purple
- Time to get to 30 kmph: 2.00 seconds
- Time to get to 50 kmph: 2.70 seconds
- Top Speed: 70 kmph
- Time to get to Top Speed: 4.00 seconds
Wario is very, very, close is stats with D.k. Wario has slightly better accelleration when it comes down to Top Speed time but D.k. is faster at getting to 50 kmph. Overall though they are very similar. Wario is fairly popular, 15% of the votes.
Toad
Light
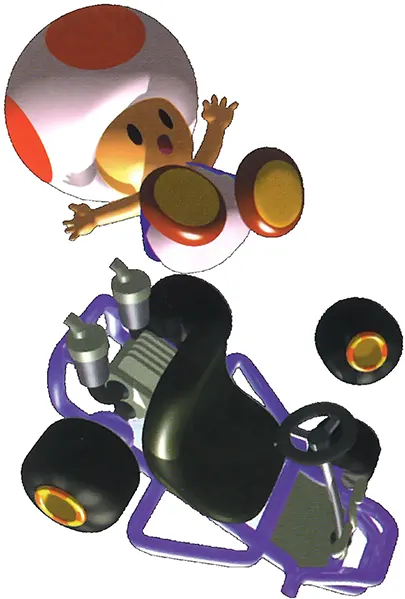
Toad is one of the racers in this game and is considered one of the best racers along with Yoshi. He has top stats on acceleration and top speed, explaining his lightweight. His debut was the same as Peach's. His debut was Super Mario Bros. in 1985. Toad is unique that his kart is powered by a distinctive engine; a smooth-sounding, twin-cylinder four stroke that offers fairly powerful horsepower and torque.
Toad is has been normally thought of as just a villager. He never really gained a role of importance until Mario Kart 64 came out. he is the 2nd most popular and from getting popular in this game he is become a star in even more games, for instance being the host in Mario Party 1, 2, 3, and a board leader in Mario Party 4! Toad is a short stout little guy with his distinguishing mark being a huge mushroom on his head. This character is one of the most threatening despite his size. He also has his own level, Toad's Turnpike, a long level with lots of traffic.
- Kart Color: Blue
- Time to get to 30 kmph: 0.80 seconds
- Time to get to 50 kmph: 2.20 seconds
- Top Speed: 66 kmph
- Time to get to Top Speed: 3.80 seconds
Toad is definitely a speedy little guy. He has the fastest 30 kmph time and 2nd fastest 50 kmph time. He also has a disadvantage with being light and quick but less so than Peach because Toad can get back on his feet much quicker because of high acceleration. Just do not use him for Battle Mode!
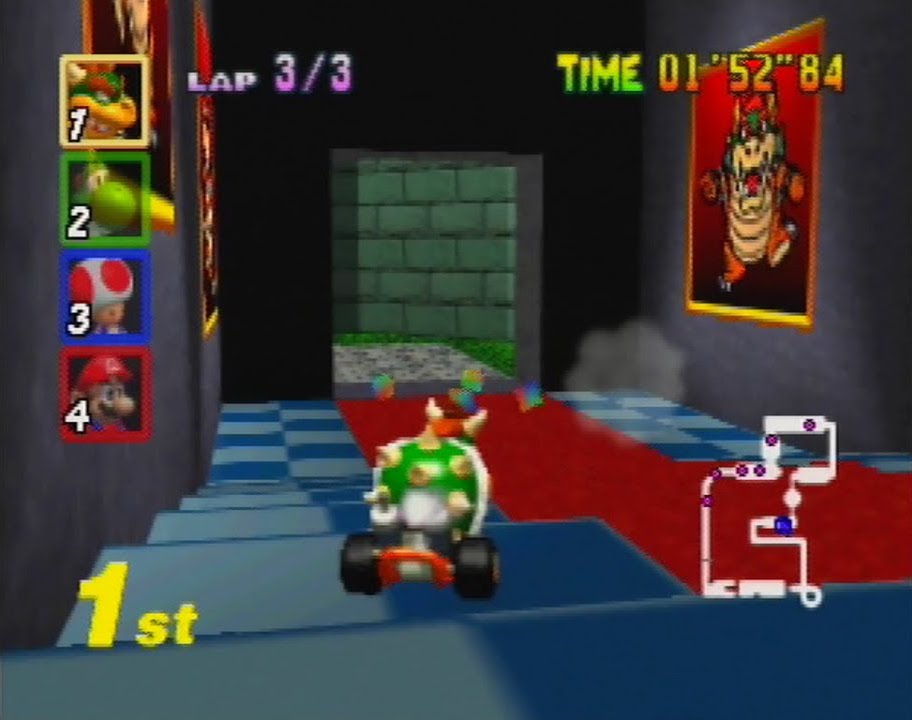
Bowser
Heavy
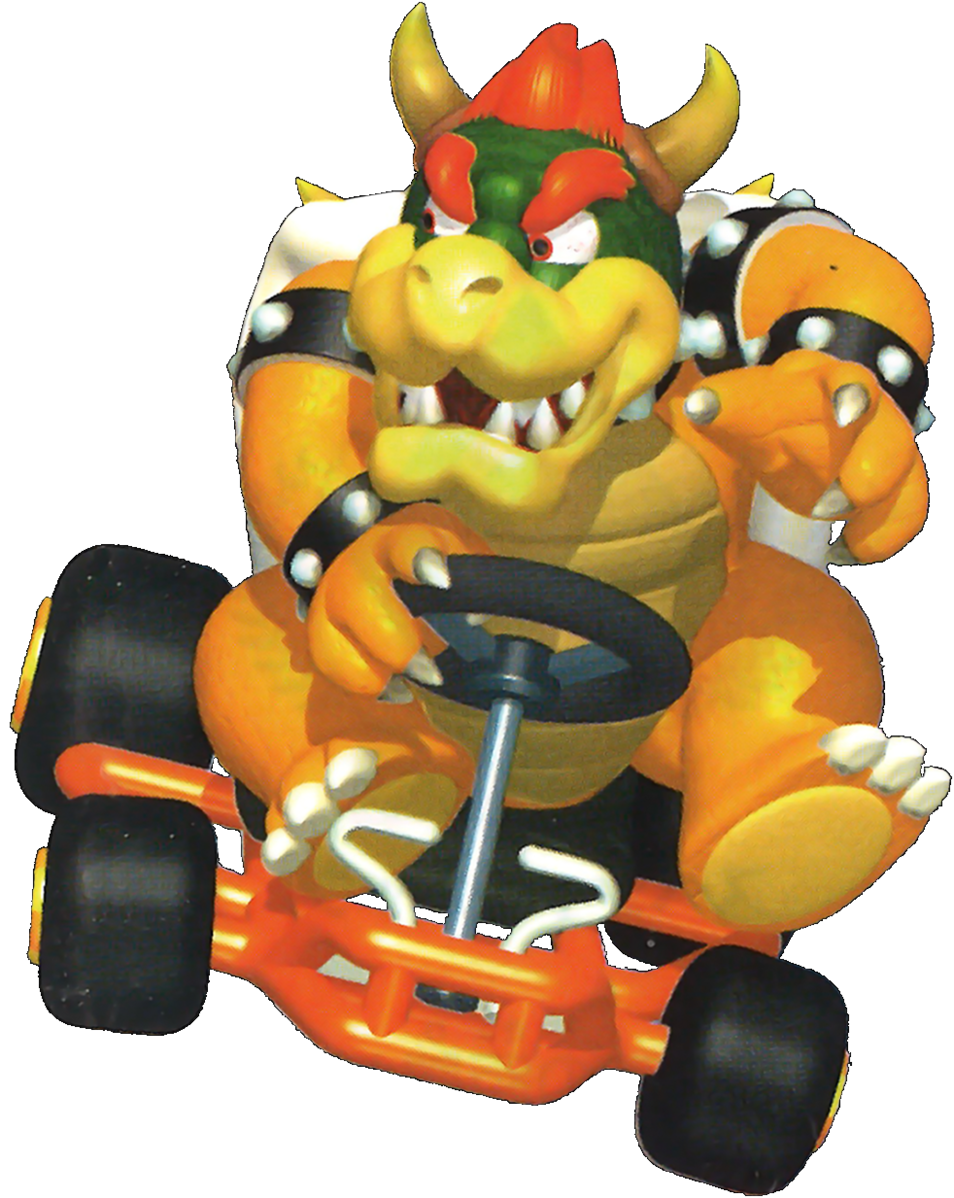
The long time rival of Mario and Luigi appears as a powerful racer in the game. He however has low stats, explaining his heavyweight. His debut was same as Toad and Peach's. His debut was Super Mario Bros. in 1985. He shares the same engine as Wario's.
Bowser, the koopa king, has been the great bad guy, mastermind, kidnapper in most of Mario's games except Mario Land 2, and Super Mario RPG where he joins forces with Mario to destroy Smithy. Bowser is a huge dragon that comes in many sizes. he is largest in Mario 64 and Super Mario Sunshine. In the other games he is about the same size as Mario. Bowser can breathe fire and pound into the ground to smash people. Bowser also has his own racetrack, Bowser's Castle. The track is a huge castle with whomps and lava pits.
- Kart Color: Red
- Time to get to 30 kmph: 2.10 seconds
- Time to get to 50 kmph: 2.50 seconds
- Top Speed: 70 kmph
- Time to get to Top Speed: 3.50 seconds
Bowser is the fastest of all the heavy-weights. He is also very heavy, just like the others, but because of his high speed Bowser's weight is easier to use to his advantage as far as slamming into others. Bowser is my personal favorite. I hugely advise him for all heavy-weight lovers. He truly is the koopa king.
Yoshi
Light
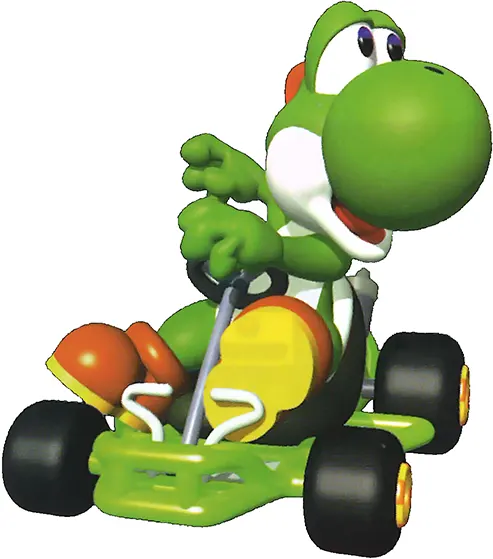
The loyal friend of Mario and Luigi has decided to hit the roads with his incredible racing skills as he is one of the best racers. He has high acceleration and top speed, explaining his lightweight. His debut was in Super Mario World in 1991. He shares the same engine as Peach's.
- Kart Color: Light Green
- Time to get to 30 kmph: 1.00 seconds
- Time to get to 50 kmph: 2.40 seconds
- Top Speed: 66 kmph
- Time to get to Top Speed: 3.20 seconds
Yoshi is second in acceleration only to Toad but Yoshi gets to his high speed the fastest out of anyone. He also has the largest percent of the vote. Also his weight is an ok score for a light-weight because his high acceleration lets him comeback from falls easily.
Items
There are many items throughout the game that help fire up the battle. All items disappear after a period of time it is unused or if it is used to a certain extent. The following is a full list of them.
Mushroom
How to use
Press Z to boost your karts speed for a second or two. This is really handy for gaining a few places, and most of all for skipping sections of the track like corners or tacking advantage or certain shortcuts better. Just remember that you cannot really stop once you've used the boost (say if suddenly realised you were going to go into a banana or off a cliff) so keep an eye out of where you are going to boost into.
Defending Against
Not a lot you can do here. I guess you could time a ghost to steal their mushroom, but others you will have to let them be.
Three Mushrooms
How to use
This is the same as a normal Mushroom, expect you have three. Remember to use them to cut corners of the track and to take full advantages of shortcuts. I would say a very important point is to make them last; on certain tracks there is a great shortcut you can take but only when using a mushroom, so it makes far more sense to save a mushroom for this every lap than to use them on one.
Defending Against
You cannot defend or stop other karts from using mushrooms.
Golden/Super Mushroom
How to use
Tap the Z button while the Gold Mushroom is active to gain several boosts - so it is basically like an extended mushroom. it is based off time and not the amount of boosts you create, so once you've started using it use it to it is full advantage. Like normal mushrooms use them on corners and shortcuts, and not on thin ledges so you boost into a bottomless pit.
Defending Against
You cannot defend or stop other karts from using gold mushrooms.
Green Shell
How to use
Press Z to fire this forward in a rather linear fashion to hit other karts and cause them to spin out of control. Rather handy, but it is quite hard to hit other karts with. Better still is that you can fire them behind you by holding down on the stick, and if they are close enough then chances are they will have little chance of getting out of the way in time. Green shells can bounce off walls a few times before behind destroyed, so if you in a narrow tunnel or area firing one off and escaping could do a spot of damage. Like bananas, you can dangle these behind by holding down the Z button which is ideal for defending against other shells. Also shells can destroy bananas on the track if you need them disposed of, as well as enemies on the track.
Defending Against
Avoid shells hitting you as you will spin out of control. Rivals too can fire shells behind them so if you are tailing them remember this also.
Three Green Shells
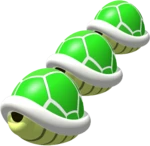
How to use
These are three green shells that rotate around you. The shells themselves act like normal shells respectively, but the rotating aspect is very handy for several reasons. For one, it acts as a defense shield against other items. You can use it as a weapon by just ramming other karts and make them spin - you will lose a shell in the process - and it is great in case you drive into items like bananas as they are automatically taken care of. it is also great as having three shells is pretty sweet anyway. Remember just because you have three shells does not mean you have to waste them in one go. A good tip is when you take someone out with a shell from a reasonable distance, as you go by just before fire another to incapacitate them further. Very annoying for them, but great for you.
Defending Against
For general shell defense see the red and green shell tips above. When you notice another kart having three, avoid touching them for a start or you will naturally spin out. do not try and take all their shells out with shells of your own as that's pretty pointless, you may as well let them fire them off so their defense is down for attacking.
Red Shell
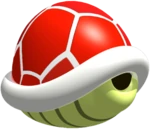
How to use
Press Z to fire it ahead of you, where it will home in on the nearest kart and cause them to spin out. Sadly unlike the other counterparts these do not home down the track, they just go straight toward the next kart, so if they are around the corner they will just smash in to the wall. Make sure the opponent is in your direct line of the sight before hitting the Z button. Do not fire when they are too close as it will just whizz by them, and the shell can hit corners so fire it in a reasonably open area. It can also hit bananas and other shells and get destroyed.. Like green shells, you can fire it backwards (L+Down) and dangle it behind you. It WILL NOT home in if you fire it backward, but rather go in a straight line like a green shell. I advise that you keep a red shell handy at all times for defense and for regaining a position if you've just been taken.
Defending Against
If one is coming your way (you can hear it) then simply dangle an item behind you and it should counter it. However sometimes it can hit you from the side (just after a corner for example) so try and get on a straight before it hits you. If you do not have an item, then just try and race on and hopefully it will hit a corner of the track.
Three Red Shells

How to use
The same as the Three Green Shells with Red Shell homing of the opponent in view.
Defending Against
Same as the Three Green Shells
Blue Spiny Shell
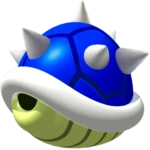
How to use
Fire it with the Z button and it goes after the current leader of the race and take them out. If there are other karts between you and the first placed kart then it may hit the others on the way as it travels in a straight line, then goes down the track in the middle of the road. It will also take out the items they are carrying as well?
Defending Against
If one if coming your way, there is little you can do. Dispose of your items just before as it will destroy them anyway. You can also avoid getting hit by using a Star or a Boo Ghost.
Thunderbolt
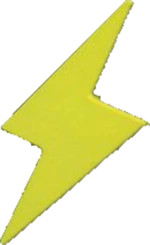
How to use
Press Z to make all other karts shrink in size, causing them to slow down. Not only this you can run over the other karts to squash them and delay them for a few seconds, so if you see any then go out of your way to run them over. Shrinked karts will not make big jumps, even boost ones, so if you can time it around them that's an advantage to you.
Defending Against
If you get shrunk, then avoid jumps, even boost ones, as you will not make it. Instead just wait around before them until you regain your size. Remember that you can still perform mini-boosts when you are small which is a great advantage in the GP modes, as CPU players will not do this when shrunk. You can prevent being shrunk by using a star, ghost, or if you happen to fall off the track at that time. Also if you are shrunk do not touch any other tiny karts as you will both get crushed.
Banana
How To Use
Press Z to drop this banana skin on to the track. When a kart slips on to it they will slide out of control for a second or two. It will remain on the track until someone slips on it or until it is destroyed (by a shell for example). Try and place bananas on parts of the track where most racers will go on to them such as thin ledges, the insides of tracks, in front of boosters and item boxes. You can also use them for defending by holding down Z to dangle it behind you, so it is probably more handy in that respect.
Defending Against
If you see a banana on the track, common sense tells you to avoid it so drive around it if you can. You can also blast them away with a shell. If you see another racer with a banana dragging behind keep out of the way incase they drop it. You can also prevent spinning out sometimes when you hit one - if you do not immediately spin then brake quickly and if a musical note appears then you've succeeded.
Banana Bunch
How To Use
This is basically the same as a single banana (see above) but with three. However unlike triple shells they do not spin around you but instead just dangle behind rather pointlessly. Use them to strategically place on the track and defend with if needed.
Defending Against
Again like normal bananas, avoid driving over them. If you see another player with them (it is visible) then avoid hanging around behind them as chances are they will drop them straight on to your lap. The CPU tends to drop them about three seconds after one another, so remember this if you are playing the GP modes.
Fake Item Box
How to use
Press Z to drop a fake item on the track. When rival karts drive in to it they will spin out. So basically, this is just like a banana but it looks different, and like a banana you can dangle it behind you as well for defending. I advise that you pop this by real item boxes to confuse other players, as well as in front of boosters and on areas of the track that are thin where most karts race over.
Defending Against
You can spot a fake item box via several ways. Firstly, the ? is upside down and the box does not rotate. As you are not bound to notice this in a hurry, you can usually tell if they are fake or not as other players especially the CPU will just place them anywhere on the track, so if you see a box on its own away from normal item box placements then chances are it will be a fake one.
Boo
How to use
Your kart will also turn invisible and impermeable to damage as well. When using the Boo, think what you need it for. For example if you are using it to steal an item, check your opponents screens to see what items each opponent has so you know what possible items are up for grabs. Wait until you get a decent item then use it, and with some luck you should get it. Otherwise using it to stop damage is very helpful as well - such as avoiding red shells, lightning, or if you want to drive through cars on Toad's Turnpike.
Defending Against
You should hear when a ghost is being used, so if you do you *might* not get your stuff taken, but then again you might so decide if you want to use your item in case of the latter.
Star
How to use
Press Z to use the star, making you invincible, giving you extra speed and removing terrain slowdown. So when you have it, run in to other karts and through any obstacles in your way and take advantage of shortcuts and cutting corners as you will not slowdown. A star lasts about eight seconds.
Defending Against
If you see someone using a star then they will be brightly multi-coloured. Avoid touching them otherwise you will get spun out and lose a good few seconds. You cannot use shells or other items against them in this state, so just wait until it is over.
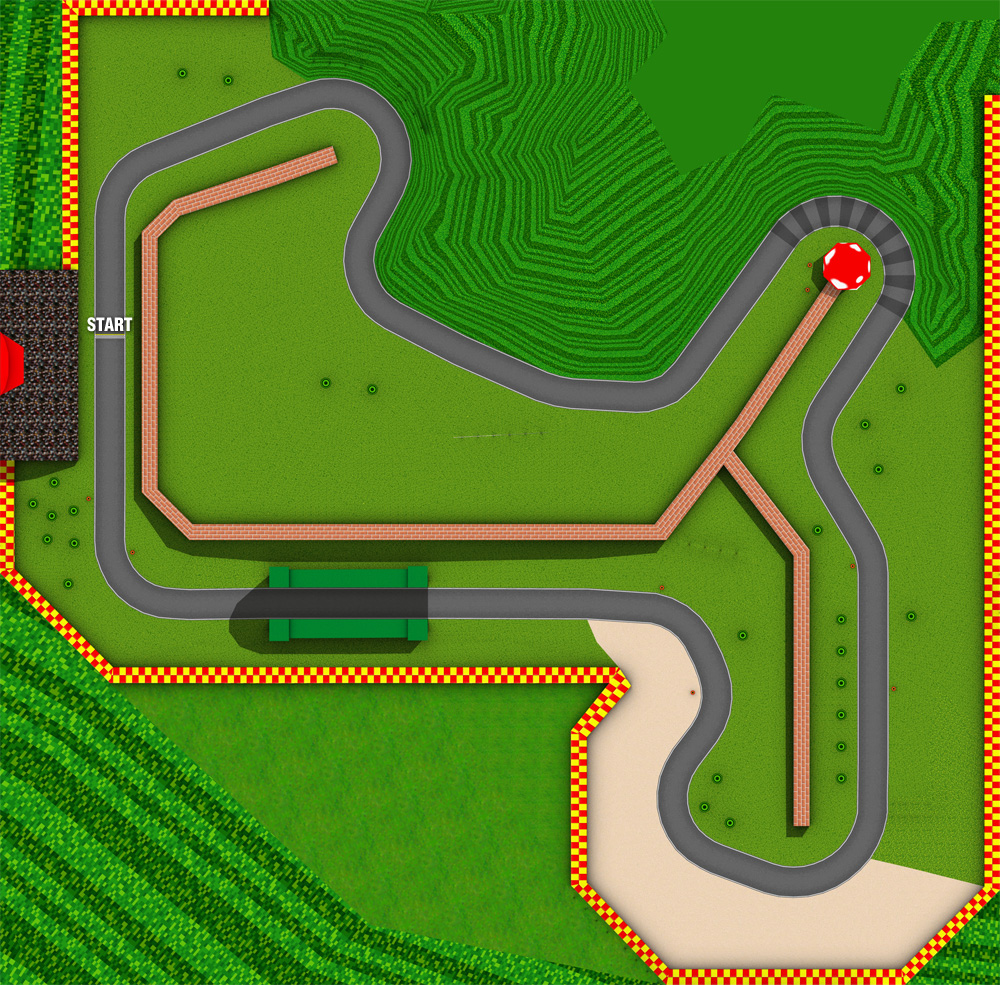
Courses
Mario Kart 64 contains 16 racetracks in total, organized into four cups. While its number of racetracks is less than its predecessor, Super Mario Kart, the tracks are bigger, more detailed, and unique from each other as opposed to being variations of each other. All playable characters in the game have a racetrack assigned to them, making the game the only Mario Kart game where every racer has an assigned racetrack.
Mushroom Cup
Mushroom Cup is the easiest cup in every Mario Kart game, and Mario Kart 64 is no exception. We have easy turns, several routes to the finish lines, and some of the best courses in the game (with the best music in the game.
Mushroom Cup: Tracks
Luigi Raceway
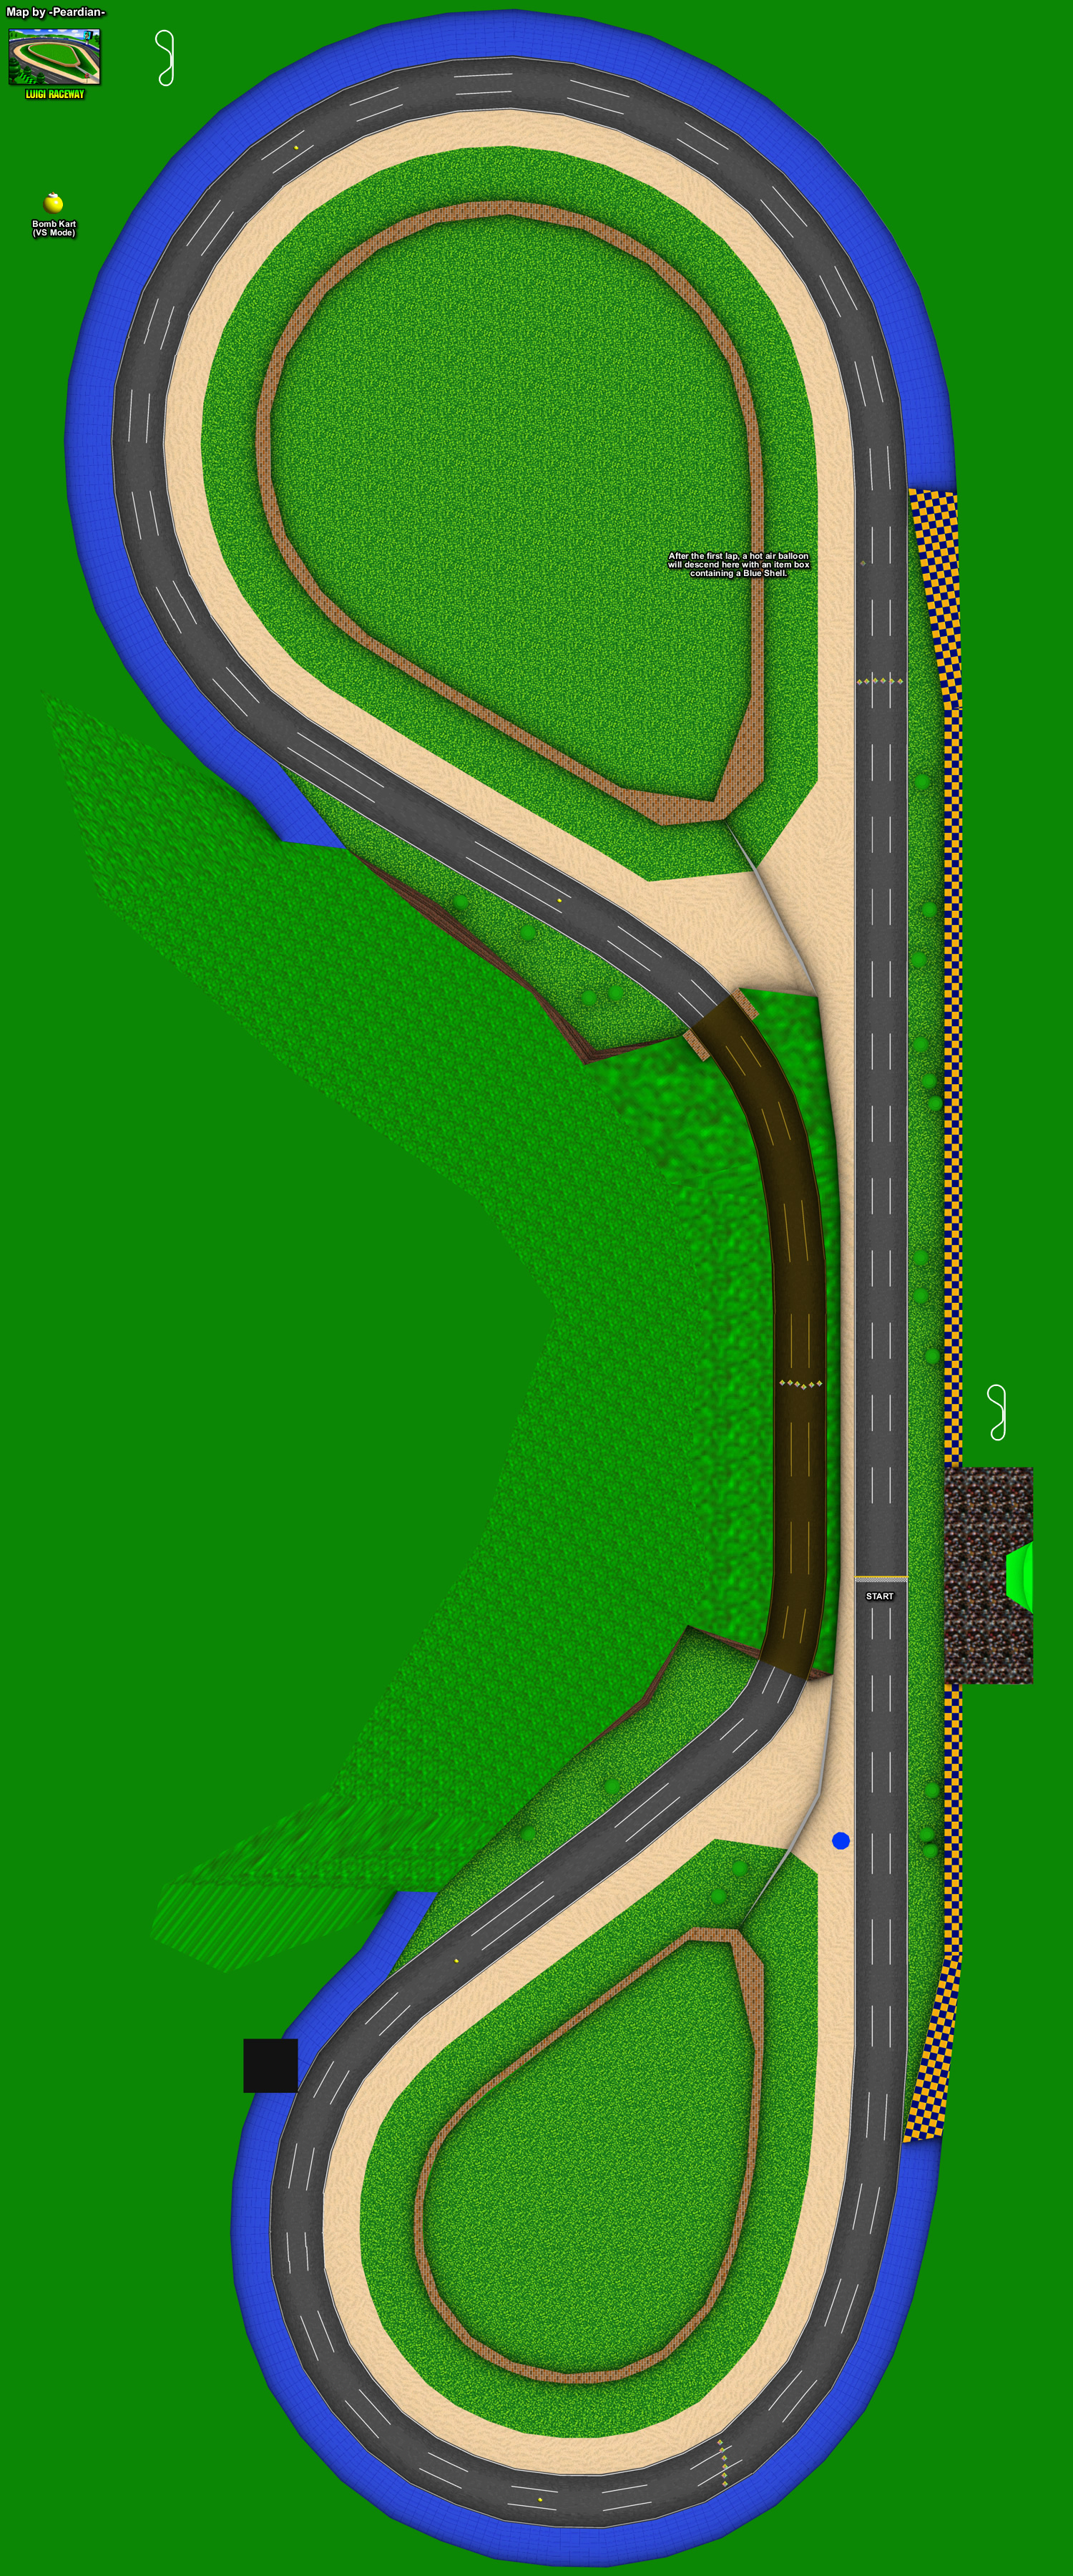
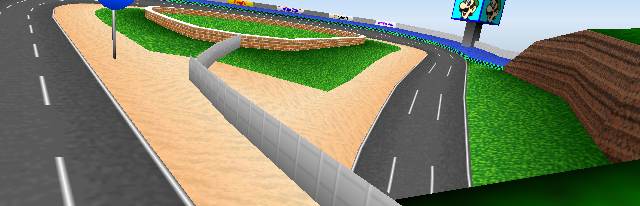
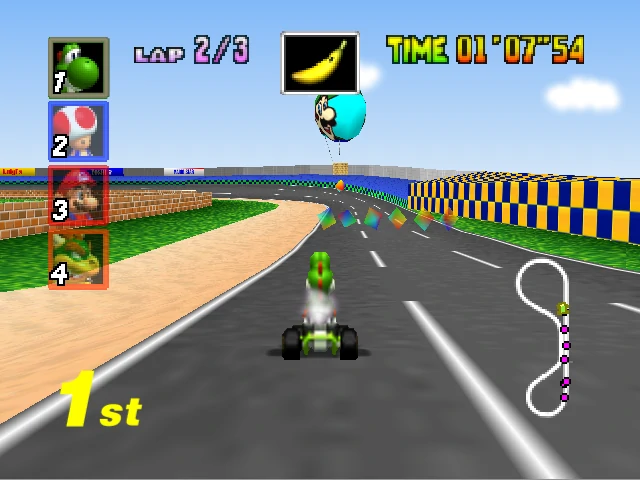
Luigi Raceway it is 717 meters long. The starting line begins near a crowd of fans in a stadium marked with a Luigi hat. It is very straight for a while, offering Item Boxes. A Luigi-decaled hot air balloon also delivers a sole Item Box, but this one is special, as it always carries a Spiny Shell. The trick is hitting it at the right moment. After a while, the track banks inward for a nice place for beginners to practice Power Sliding. Eventually, it narrows out into a tunnel which was previously driven over. Right before tunnels entranceway is an electric screen showing the player driving (although it is really lame with about 4 frames per second) The low-light tunnel finally opens up at the next bend, which is about the same length and curvature as the last. After this, the starting line is within sight.
This is the first course of the Mushroom Cup. The course features no hazards, save for small rough terrain areas that are located all over the track. The course is long and simple, featuring open turns through which the player may employ powersliding to accelerate faster. The race begins near a grand stand full of cheering audience, atop which is a large model of the Luigi Cap. Following a long straightway and a wide banked turn to the left is a long road to a long overhang, followed by another long curve to the left and a short straightway leading back to the starting line, which happens to be part of the longest straightway in the course. During the race, a balloon depicting Luigi's head dips onto the course at the end of the first straightway, hanging an Item Box beneath. The item is always a Spiny Shell and may be obtained if a racer hops at the right time just as the balloon reaches its lowest point of descent. The course does not have any notable shortcut, but it is possible to save few seconds by cutting across the grass and sand on the turns while using a Mushroom or a Star.
Mushroom Cup - Luigi Raceway - Yoshi
Mushroom Cup - Luigi Raceway - Drifting
Mushroom Cup - Luigi Raceway - Yoshi off the track
Shortcut
The best place to use Mushrooms (especially Turbo Mushrooms) is along the turns, which allow you to drive at maximum speed (even on the sand and grassy terrain). Using this technique makes cutting in front of other drivers becomes easy.
Moo Moo Farm

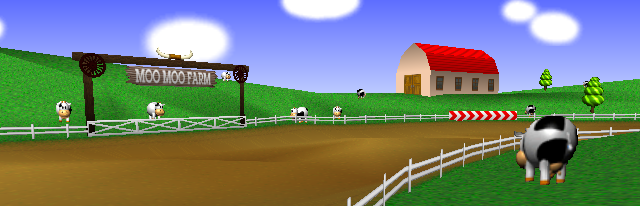
Moo Moo Farm (transliterated as Moh Moh Farm on a few occasions) is the second race course of the Mushroom Cup in Mario Kart 64 and is 527 meters in length. This course takes place in a farmland, with Monty Moles and Moo Moos in it. Just like all Mushroom Cup courses, this course is relatively simple and is the shortest course in the game, measuring at 527 meters. It later reappears as a retro track of the Shell Cup in Mario Kart DS, and the Mario Kart Wii track Moo Moo Meadows bears a strong resemblance to it. A sign reading "Nintendo Moo Moo Farm" can also be found on Moo Moo Meadows. Moo Moo Farm cargo trucks also appear in Mario Kart: Double Dash!!, which reference the name of the course and also feature pictures of the Moo Moos and fences on the sides. This course shares its music with Yoshi Valley.
In Mario Kart 64, Moo Moo Farm is the second course of the Mushroom Cup. In the course, there are many moles. In the N64 version, the moles are named Chubby. The course does not have many obstacles, but it has Moo Moos in the background, and a Nintendo logo printed on it (only in the N64 version). In the N64 version, it is the shortest track in the game. The course shares its music with Yoshi Valley.
Mushroom Cup - Moo Moo Farm - Starting Line
Mushroom Cup - Moo Moo Farm - Chubby mole
Mushroom Cup - Moo Moo Farm - Mole Crash
Mushroom Cup - Moo Moo Farm - Starting Line
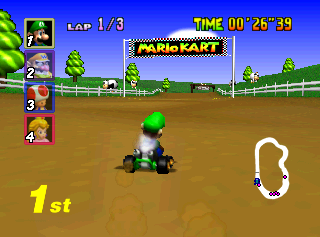
Players start out in the middle of the open fields and work their way through turns avoiding the mole holes littered throughout the course. After going under a small bridge the course becomes wider allowing for racers to pass each other. After passing the large section of the track racers will go under another bridge with pillars which are able to block their paths.
The race course itself is very simple; it is essentially a dirt path through some fields. It is a disjointed oval. The track is very wide and bumpy; players can fly over some of the bumps. There are only groups of Monty Moles as hazards, making this course quite straightforward. They pop up and knock over any karts that drive over them.
Moo Moo Farm, is, well, Moo Moo Farm, where Moo Moos graze along the plains around the track. This course is very easy to race across, since it has wide lanes and smooth turns The only obstacles are the Monty Moles that pop out of holes that jettison a racer upon collision and the support beams holding the bridge across the farm at the end of the track. Hitting one too hard will make a racer lose control.
Shortcut
In Grand Prix mode, you can cut off a few seconds from your lap times by hugging the right side of the course. This is especially useful at the end of the course (right before the starting line) as you go under the bridge (shown below).
Koopa Troopa Beach
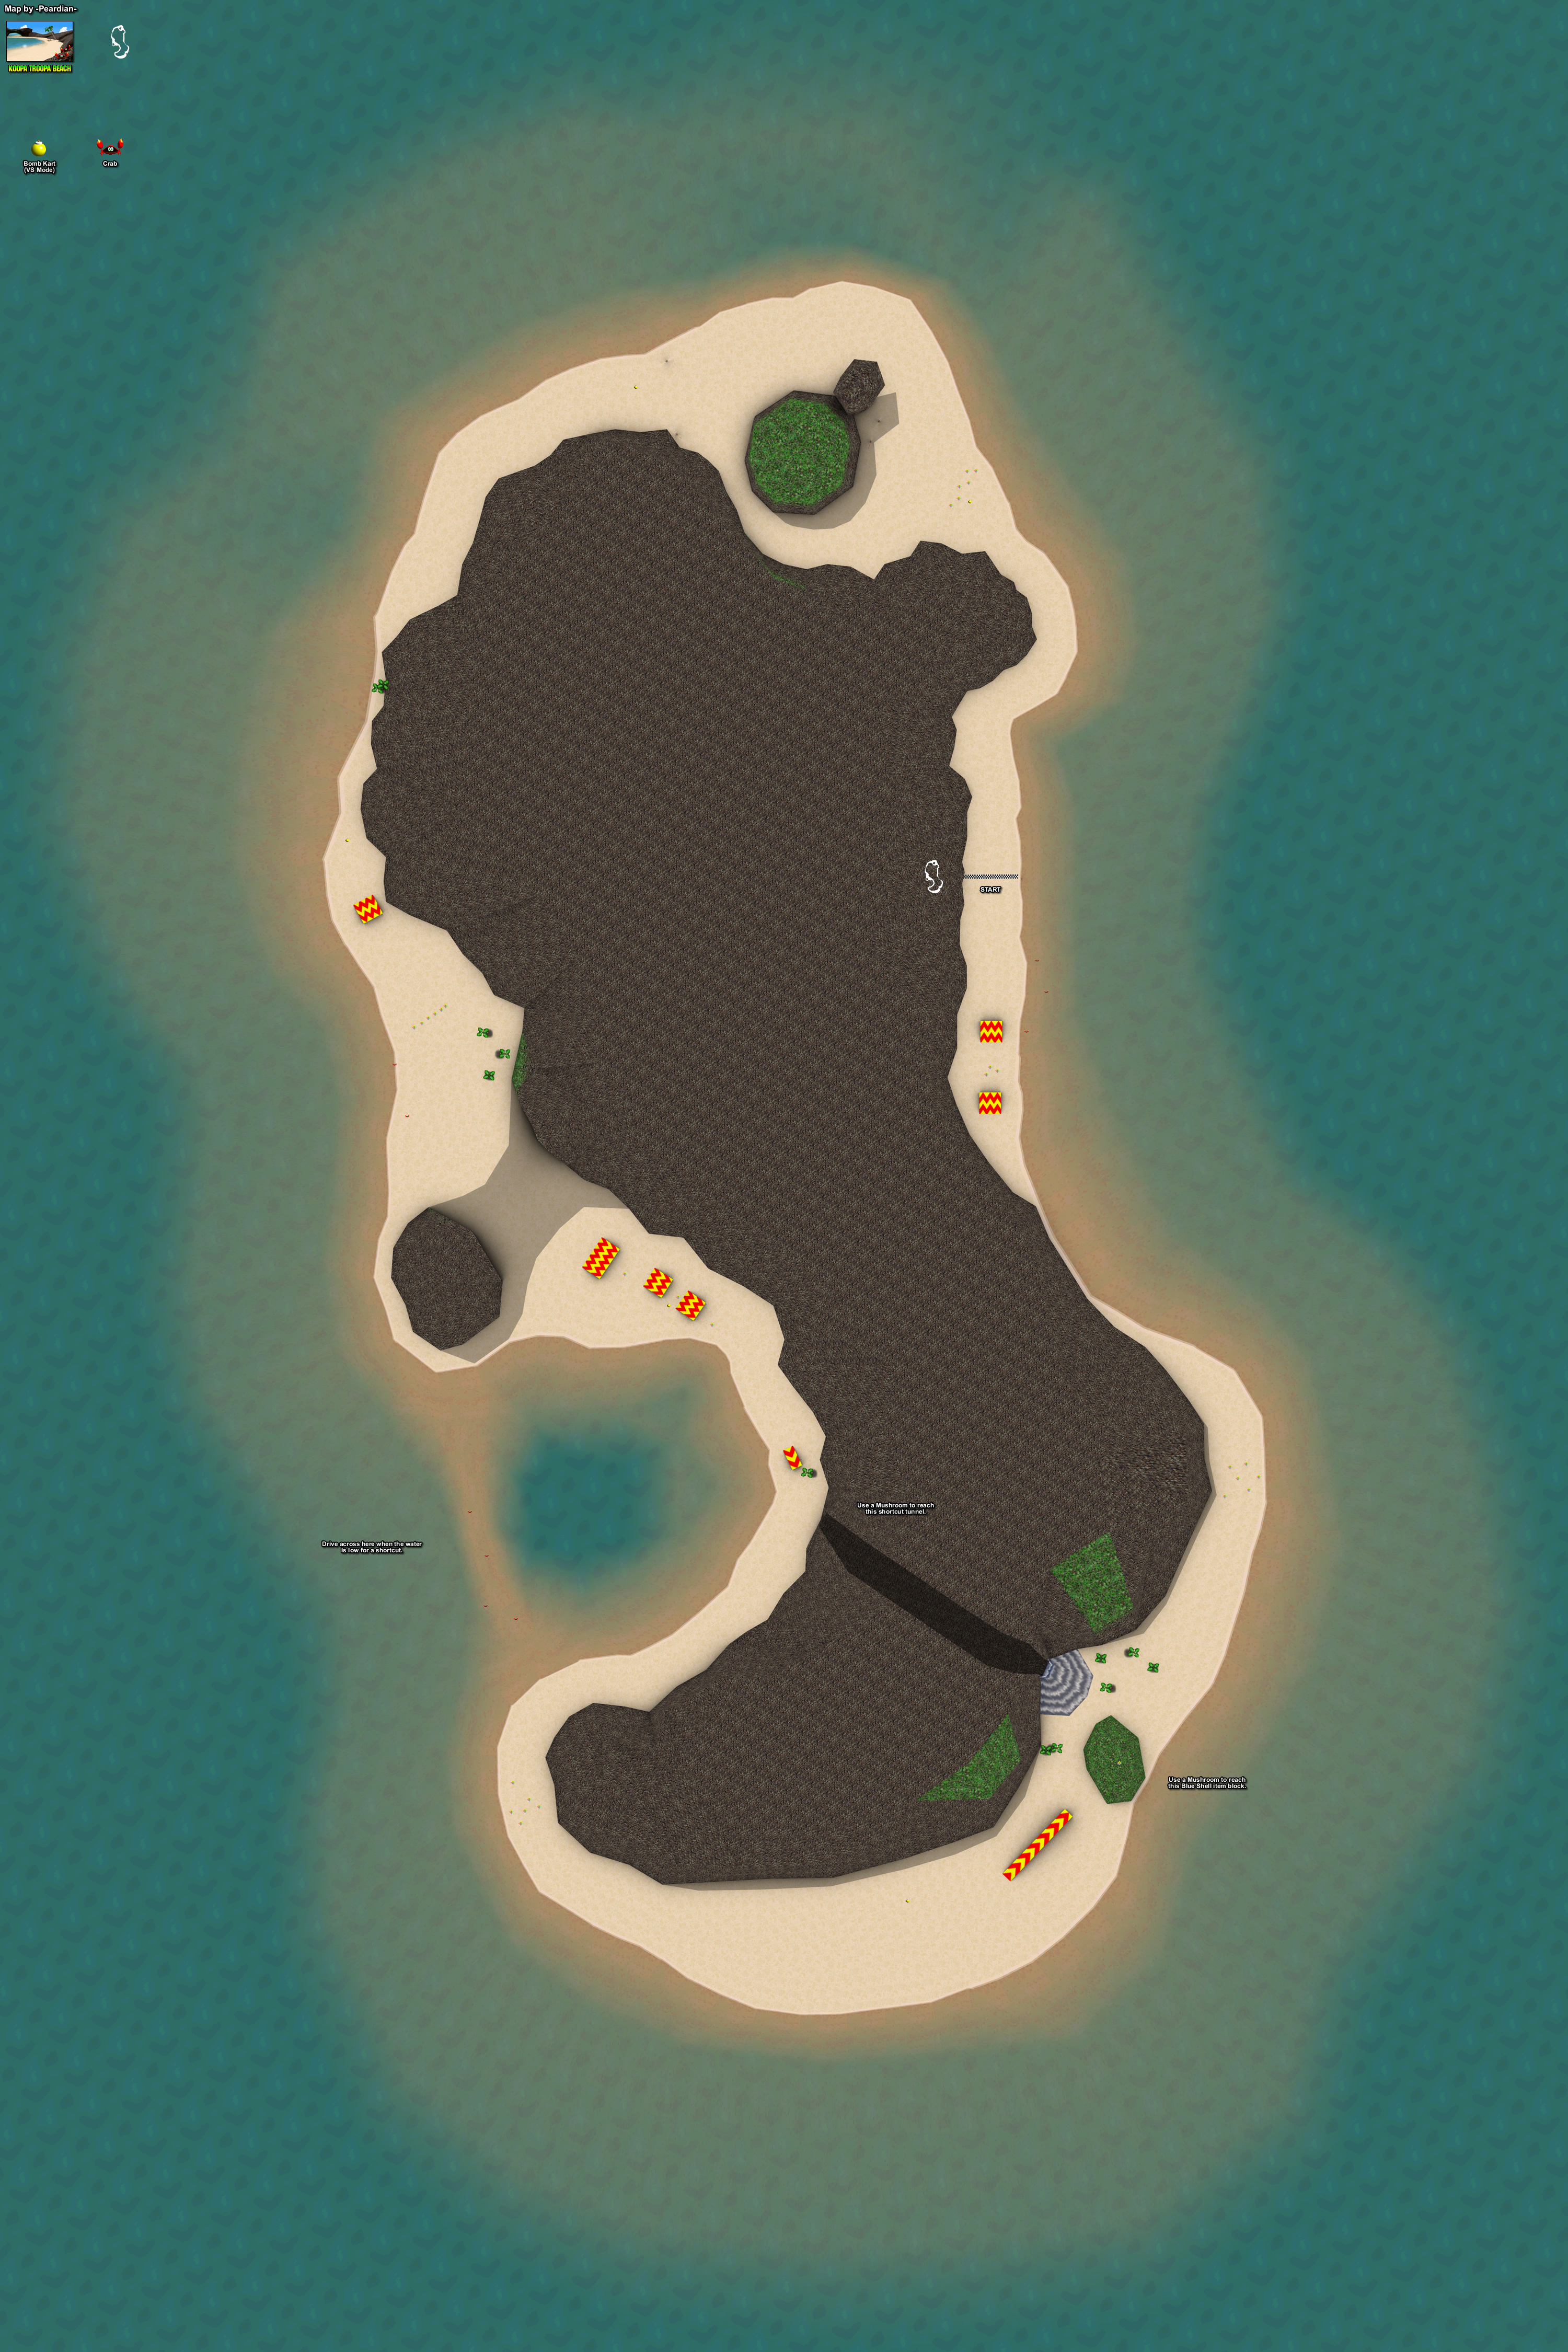
This track is 691 meters long and takes place on the sandy shores of a mostly rocky island. The way racers drive around the middle of the island is reminiscent of Koopa Beach 2. A large Koopa-shaped rock appears near the starting line. There are several ramps near the middle and end of the course. One leads to a tunnel cutting through the island that acts as an effective shortcut; another is taller than the rest and leads to an Item Box perched on a rock that always contains a Spiny Shell.
Crabs are the main obstacles on this track, and touching them causes a spin-out. Palm trees can also cause spin-outs. The tide can cause trouble if trying to take a specific shortcut near the middle of the course.
 Koopa Troopa Beach is a mostly easy track with many jumps and a tunnel that lets you skip a part of the track.
The track starts out next to water. After rounding the first corner racers will pass the giant Koopa shaped rock on one side or the other and follow the water around the next turn. After the turn players will come to the first of many ramps.
After going off the ramp the racers will pass under a rock formation to a group of ramps. On the last ramp a secret cave shortcut exists. Players need to use a Mushroom or hop to gain access to the shortcut, however some can manage to pass without a speed boost. The race track also has another minor shortcut. Before the overheard rock formation and the numerous ramps, the player can take a sharp right to find a small pathway partially submerged by water. After another turn racers will come to a big, narrow ramp which can access an Item Box on top of a large rock. This Item Box also contains only a Spiny Shell. However, racers can also just pass this rock and drive by a waterfall (the exit to the shortcut). In the final stretch, the course is almost completely submerged by water which drivers must go through. Next to the finish line are crabs who serve as obstacles.
Mushroom Cup - Koopa Troopa Beach 1
Mushroom Cup - Koopa Troopa Beach 2
Shortcuts
The Southwest: Mountain Tunnel shortcut

Mushroom Cup - Koopa Troopa Beach - Mountain Tunnel shortcut 1
Mushroom Cup - Koopa Troopa Beach - Mountain Tunnel shortcut 2
Mushroom Cup - Koopa Troopa Beach - Mountain Tunnel shortcut 3
Normally, the trick here is to go under the rock overhang, then hit all three boost ramps for a chance to get an item like a mushroom or star to help with the cave shortcut — a narrow ramp that leads up to an opening in the mountain. To make the jump, you must to build up enough speed and hit the ramp straight on (parallel with the ramp), otherwise the if you are going too slow, or jump too far left or right, you will hit the wall and lose time.
The easiest way to make this jump is by using either a Mushroom or a Star while going up the ramp. Alternatively, you can make the jump without an item by jumping with the [R] button at the tip of the jump. If you are able to make the jump and land inside the opening to the cave, the shortcut cuts off a significant amount portion of the course.
If that does not pan out, you will have to go around the dry sand (get a drift boost here!)
The Southwest: Water Path shortcut
 If you do not have a Mushroom or Star, there is another shortcut you can use. After starting the course, drive until you reach the first ramp. Veer to your right and drive around the outside of the overhang. You will see a very narrow path that takes you straight across to the other side of the crescent beach. If you decide to take this route, beware of crabs that litter the path.
The Giant Ramp
At the south east tip of the island is a giant boost ramp that will send you over the top of a rock with a chance to get another item box that contains a blue shell. Do not chance this jump, as the ramp is thin and it is easy to miss the jump. You will likely see no benefit from accurately making this jump.
Final water path
Before you reach the starting line there are two small ramps and a beach that will have water moving in and out (with crabs walking around, too). Stick to the dry stand unless you have a Mushroom or Star (in which case, cut straight across the wet sand to the finish line).
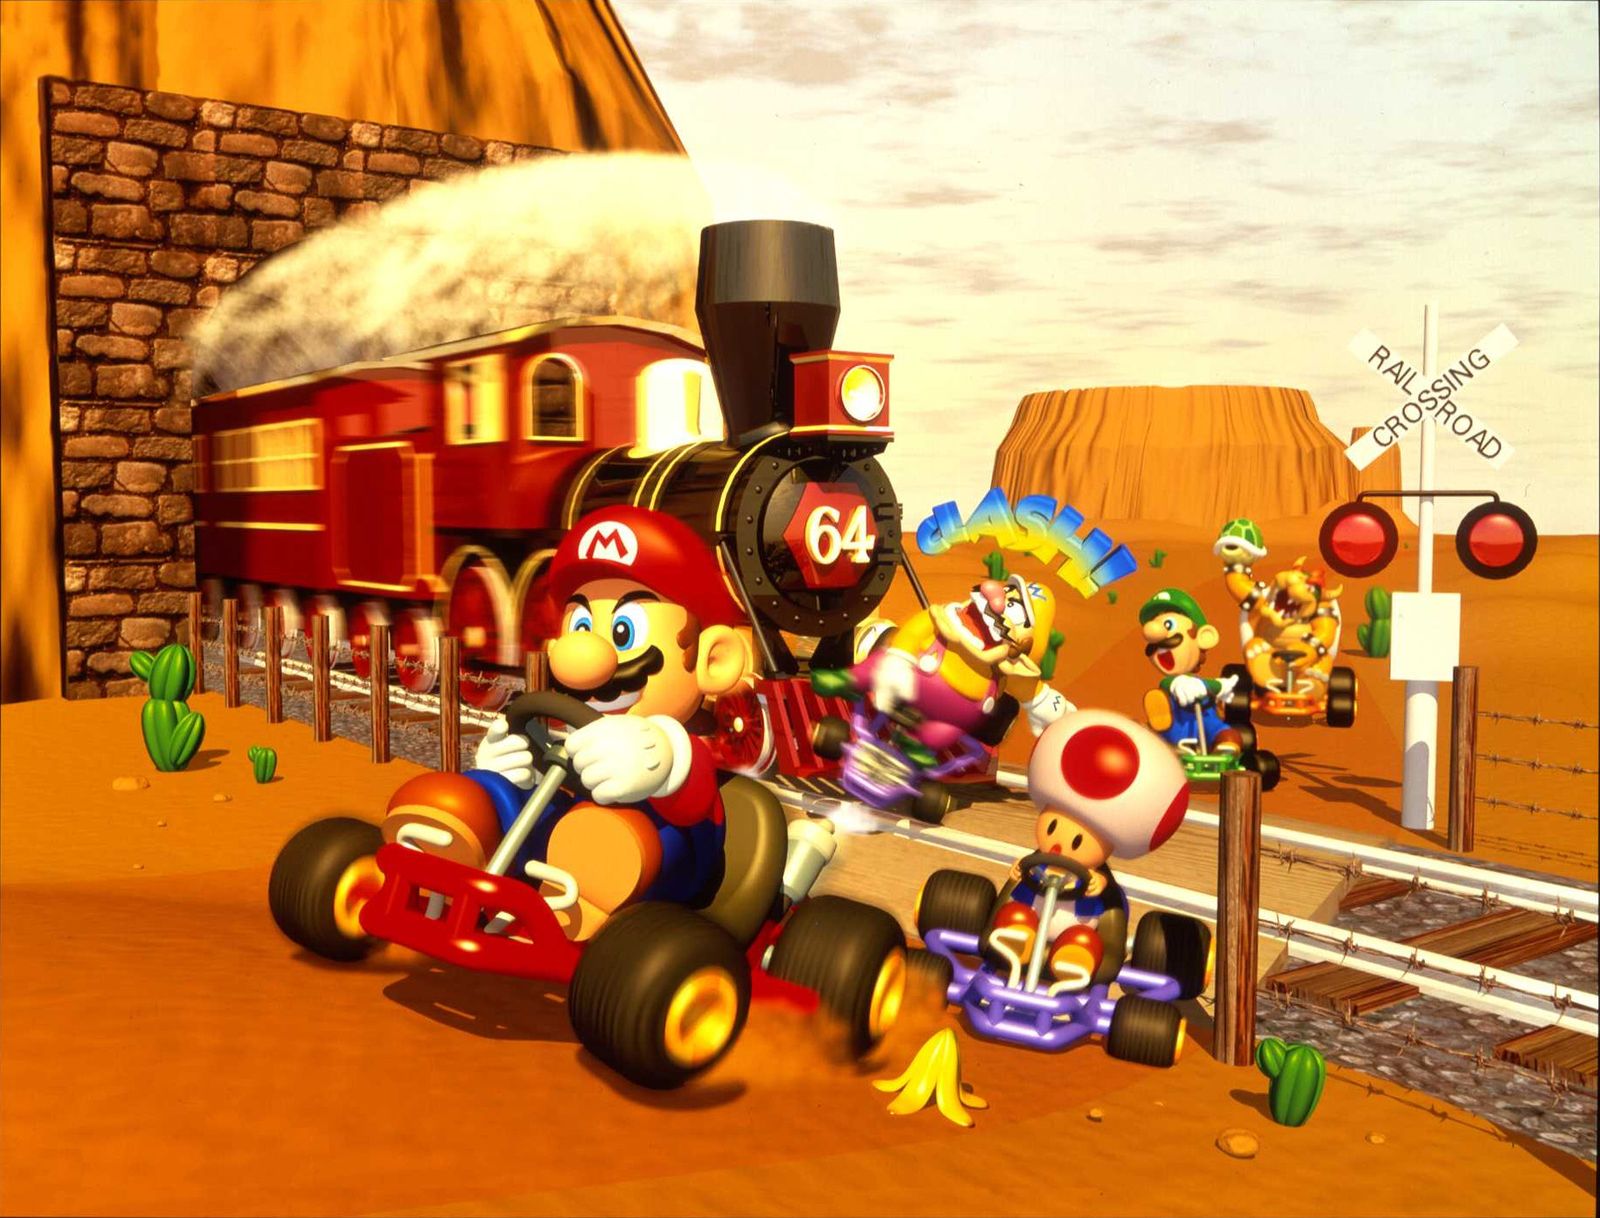
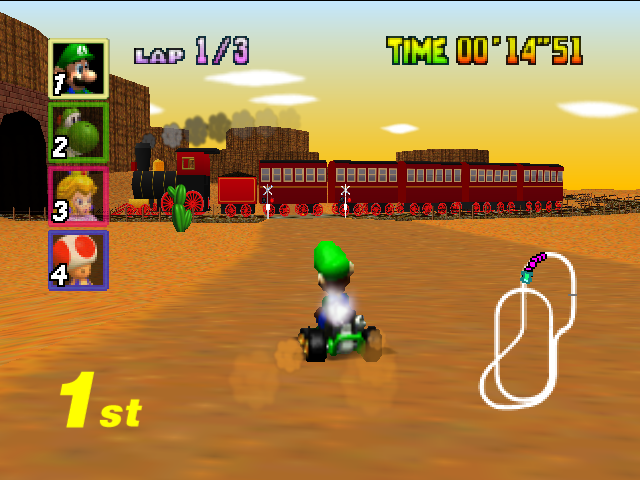
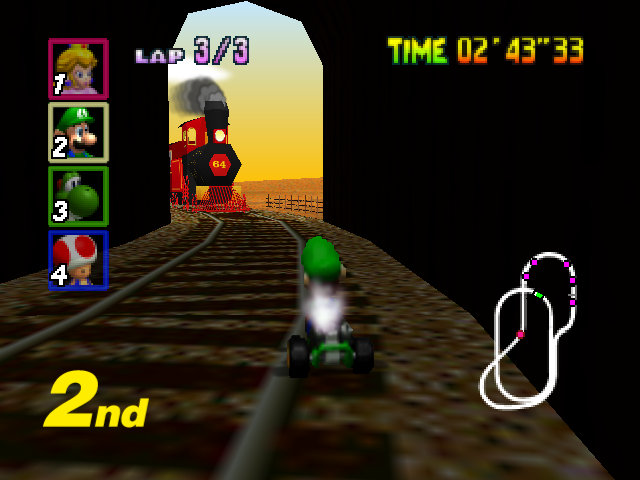
Kalimari Desert

Kalimari Desert is the final race of the Mushroom Cup and is 527 meters long. It is a large desert track with cactus scattered here and there. The course's most notable feature is the two trains that go through a mesa. The trains constantly move around the track, often crossing through the racers' path. Depending on what mode is being played, the trains may or may not have coaches attached to it.
 Racers can wait for it to go by, or they can be daredevils and try to beat it. However, any racers that crash into the train are thrown into the air, and it only gets harder to beat the train when it carries a few extra cars.
When playing in single-player, the train has a tender and passenger cars. When playing in two-player mode, the train's length is halved, having a tender and only one passenger car. In three- or four-player mode, the train consists only of the engine, with no tender or passenger cars present.
Another hazard on the track is the cacti. Crashing into them causes spin-outs. The next hazards are the sand and the out-of-zone areas. If the player goes out into the sand, their kart will become increasingly slower. If they go out too far, they will go out-of-bounds and will be reset back on the main course. Item boxes only appear three times: at the beginning before the first railroad crossing; again right before the second railroad crossing; and finally halfway after the second railroad crossing.
The race starts out next to a large cliff formation. Upon the first turn, racers see how empty the desert really is. At the end of the turn, the racers encounter the train for the first time. After passing the tracks, the players race alongside the track of the train (though it is in a cave and not visible), eventually running into it a second time. After this encounter, the racers race along the edge of the map and eventually advance back to the finish line.
It is possible to drive on the train's track; however, this costs the racer time. It is possible, but very difficult, to cross the train track while the train is there by driving through the gap between the coaches. If a player travels through the train tunnel, they typically bypass the finish line, not moving on to the next lap as the other racers. However, if the player has a Star and activates it just before entering the tunnel, they move on to the next lap, effectively shortcutting ahead of the others. This trick only works during the first two laps.
Mushroom Cup - Kalimari Desert 1
Mushroom Cup - Kalimari Desert 2
Mushroom Cup - Kalimari Desert Train Up Ahead
Shortcuts
Through the Train
If you are lucky and manage to get a Star at the beginning of the course, you can activate while coming up on the railroad crossing and not have to wait for the train to pass by before blowing through.
Inside the Tunnel
 If you are able to get a Star on either the first or second lap, go inside the tunnel by taking a left at the second railroad crossing. Right before you enter the tunnel, activate the Star and the lap counter will increase at some point inside the tunnel.
Flower Cup
Flower Cup is more difficult than the Mushroom Cup, but it is still fundamentally simple. Flower Cup is named after the Fire Flower which Mario used to become Fiery Mario, which let him throw fireballs. There are many obstacles and sharp turns (in Mario Raceway).
Flower Cup: Tracks
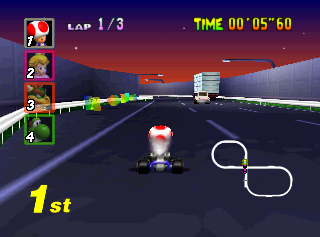
Toad's Turnpike
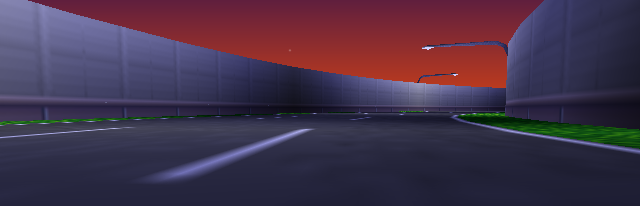
Toad Turnpike is 1036 meters figure-8-esque shape filled with cars, busses, trucks, and 18-wheelers is quite a challenge if you do not have a racer that can handle well. To win, you must be able to swerve and dive in between traffic, all with the risk of exploding if you hit a vehicle. The item boxes are strategically placed on alcoves along the track. At one point in the middle, the track drops slowly so that the bridge can pass over it. It is crowded with traffic, and even just slightly tapping a vehicle will send you into the air. Also, they can be very unmerciful, as you can keep hitting them over and over again.
Even on normal Grand Prix, the cars are a constant nuisance and can turn around races quickly if racers are unfortunate enough to get caught in the traffic, and as such, despite its placement in only the second cup of the game, it is often considered one of the most difficult tracks in the game.
It is named after Toad and pictures of him are seen on the boundaries of the racetrack. The race track takes place on a public road at night. There are vehicles driving on this course which cause the racer's kart to launch into the air if a collision between the two occurs. The overall shape of this course is roughly a figure 8, with some parts of the road with varying lane quantity. All Item Boxes of this track are located in the edge of a concave area.
When you start out, the game places you and the racers on a small section cut off from the main track, so you do not get bombarded with automobiles at the start. If you go to the item lines on the side of the road, be careful not to be trapped by a truck. If you get hit on the track, try to get moving as fast as possible, for both time and the threat of being pummeled by a car.
When you are behind a racer, check behind his kart. If there is a vehicle, try crippling them with a red shell or banana, as this will cause his kart to crash twice. Bananas are a great tool on this course. A thin line of grass borders both sides of the track and is blocked off by a white fence. Should the player be knocked over the fence by items such as a Red Shell, Lakitu will bring the player back to the main road.
In 50cc, 100cc, and 150cc, the vehicles go forward in the direction where karts go. The engine class also affects how fast the vehicles move; traffic moves slowly in 50cc, but it is quite fast in 150cc. The difficulty resides in the fact that the larger vehicles go slowly through the road, sometimes blocking the player (especially at the final section, where the road becomes two-laned until the finish line, and often two vehicles travel side-by-side, making it difficult to steer between them). In the Extra mode, the vehicles instead drive toward the racers at the same speed as 150cc.
Flower Cup - Toad's Turnpike 1 - items on the left
Flower Cup - Toad's Turnpike 2 - dip in road going under bridge
Flower Cup - Toad's Turnpike 3 - clear road, for now
Flower Cup - Toad's Turnpike 4 - in extra mode - oncoming vehicles
Frappe Snowland
This track it is snowing and there are snowmen to serve as obstacles and it is 734 meters long. It looks to be in the middle of the winterlands or snowy fields since the track is placed on a very big snow terrain. There is a wide open area filled with rows of snowmen and a giant ice Mario statue. During the last part of the track, racers drive through a snowy mountain, which appears to be dug out to make way for the track. Also, near the start, there is a giant Yoshi statue to the side of the track.
Players start in a snowy road, which immediately makes a ninety degree turn to the right, and then a turn to the left, which then leads players to a row of Item Boxes. Snowmen appear as obstacles in this point that slow players down if run into. Players then pass a Yoshi statue and then make a U-turn to the left, which leads players into a ramp. Failure to cross the ramp leads players into a river of water.
After the ramp, the road stretches and a large group of snowmen, plus a Mario statue reside there. This makes it a little bit tricky to navigate through without slowing down or getting hit by a snowman. After the large group of snowmen, players make a sharp left turn, then a right while avoiding two more snowmen. When players pass the snowmen, they proceed to a straight road, with cliff walls instead of snow to slow them down. If players try to drive up the cliff, they are returned to the track by Lakitu.
In the cliff area, a bunch of item boxes can be found; they are the last ones before the finish line. Past the item boxes is a U-turn to the left, which leads into a curvier road. The curvier road then makes a right turn, and past the wooden bridge is the finish line where the track repeats itself.
Flower Cup - Frappe Snowland 1

Flower Cup - Frappe Snowland 2
Flower Cup - Frappe Snowland 3
Shortcuts
Start off as usual with a rocket boost.
Go into a right facing MT - hold the MT with the rocketboost while in the position sliding closely to the snow at the right, and a tad after coming parallel to where you see the next curve is, release your mt aiming in that parallel position to the next curve.
This glitch can be used in Time Trial (or regular races). At the start, back up (hold B and tilt the control stick back) before the bridge. Go far enough so that you can drive onto the terrain to the right (you may want to hop onto it). On the snow, drive forward out of the bounds of the checkered finish line (away from the poles, too). Now drive up the snow to go out of bounds. Lakitu appears and brings you before the finish line. Drive over it now. Oddly, it will count this as a lap, even though you did not complete one.
Choco Mountain

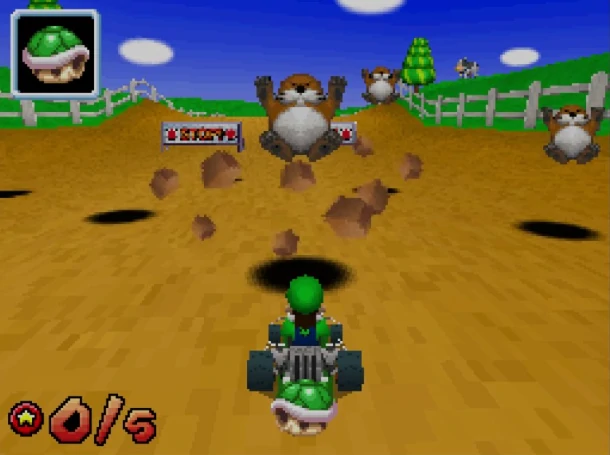
This is a mountainous, hazy course. The haze is not that much of a problem, but this is one of the few courses that you can fall off the tracks to an earlier point in the level. It is already 687 meters long, and you do not want to have to repeat any of it.
It features a chocolate tunnel shaped like a pyramid, and at one point, big chocolate boulders crash down onto the track. If a player is hit by these boulders, it will knock them off the track or flatten them. A lake is shown near the boulders as well. Shortly before the finish line, there is a point where the players can fall to a lower section of the track, losing about 20 seconds. In 50cc mode as well as Time Trials, there are railings along the cliff which prevent you from falling. Meanwhile, in 100cc and 150cc, there is no railing, which makes it possible to fall or knock someone down.
The race starts out on a straight road that eventually leads to a curve to the right. The curve also features a twisty road and a row of Item Boxes for players to use. After the curve and the twist, the road continues curving until a U-turn leads players into a longer straight road. This straight road leads to an overhang, where players originally started.
Past the overhang, another curve to the left takes players to the bottom left part of the course, where the road is somewhat straight, but not as straight as the preceding road. Players then turn left, pass a row of item boxes, and drive over a small hill that makes players fly. After the small hill, there is a somewhat sharp curve to the left. In the 50cc races and the Time Trials mode, banisters are set to prevent players from falling into the water below. However, the banisters are not present in the 100cc, 150cc, and EXTRA modes. Boulders fly out on the sharp curve to flatten and slow down any player that is present in their landing spot.
After the falling boulders, a right curve takes players to a straight road, with the road below them to the left. In Mario Kart 64, if players fall into the road below, they must race the part they were just in, also with the penalty of losing any position if players are behind them. After this dangerous place is a curve to the left, with three sets of hills that also send players flying into the finish line, where they start the track again.
Flower Cup - Choco Mountain Cliff
Flower Cup - Choco Mountain boulders
Flower Cup - Choco Mountain railing
Flower Cup - Choco Mountain Tunnel
Mario Raceway
This course is the hardest one of the Flower Cup. It has tough turns, hitting Bananas can result in whizzing off the course where there are Piranha Plants lining the roads. Luckily, it is pretty short at 567 meters long. Numerous shortcuts are open to you if you have Super Stars or Mushrooms due to the excessive amount of grass and sand on this paved course.
The course features Mario's red cap on the top of the course's terrace, next to the starting line. The road is made of concrete, just like Luigi Raceway and Royal Raceway. Although the course has no pit hazards it is filled in rough grass, and running over them will cause any kart to slow down. However, using a speed booster as a Mushroom or a Star, drivers can make shortcuts through the grass and dust. Piranha Plants are an obstacle found over the grass, and bumping into one causes the Kart to spin around. Many Piranha Plants are located near to the corners.
Upon getting to the first turn, the racers will go near a hill to take a semi-circular turn surrounding a big toadstool. A long stretch of the road will come next, leading the racers to a curl S bend and pass through a Warp Pipe tunnel. The racers end crossing the finish line once they exit out of the pipe.
Flower Cup - Mario Raceway 1
Flower Cup - Mario Raceway 2
Flower Cup - Mario Raceway 3
Star Cup
Star Cup: Tracks
Wario Stadium
The track contains several sharp turns and a series of hills and bumps and is 1591 meters long, this is the second-longest course in the game. Wario Stadium is the only track in the series to include a jump which, if failed to clear, will set the player back a good quarter of the track; the jump on Mario Circuit 2 sets the player back only a fifth of the track. In later Mario Kart titles, failing to make these kinds of jumps will have Lakitu bring the player back to the start of the jump.
The starting line is over to the far right of the course, which in itself is a dense pile of roads scrunched together into a rounded square-shape. Surrounding the stadium completely is are rows of spectators, seats filled to the brim. The outer edge has a repetitious turquoise design of Wario all over it, matching his prideful nature. Towering multi-bulb stadium lights brightly shower the entire arena, and for those seated too far away from the action, a monstrous TV screen displays a close-up of the race near the front end of the crowd. So, at the beginning of the dark brown track, players immediately are met with four large humps, making them hop up into the air and possibly lose control is they aren't ready. A left curve gets players up to an even larger hill of sand, which drops them off at the first row of Item Boxes. Two more left turns and a fork in the road comes into view; however, going left leads to a wall (previously not visible), and if the driver played it smart, they will have followed the red pointing arrow to the right.
A 180 degree turn going left swiftly follows this, with another set of Items provided. 2 more humps in the road succeed, and a 90 degree curve leads straight into a sharp hairpin around a spinning Wario sign- truly, good Drift skills or at least decent Handling are going to be needed for this twisting map. A couple more dirt ramps, these a few feet higher, proceed some more Item Boxes while curving right. The track then spans considerably a lot into a wide open dirt pit, and the giant flat screen can be viewed clearly from this point, showing the player's every action. Small little bumps dot the plain to make it more exciting for viewers (annoying for players) until it narrows back to normal at a right turn. 3 subsequent hills that span the track come next, alternating from medium height to large height. An extremely sharp U-turn follows, but it is not too harsh, as plenty of straight time was given to regain control from hopping.
Directly in line with the mega-screen, a series of six dirt hills along a straightway come up, and afterward, a valley with Item Boxes in it is next. On either side of this long straight path, a section of track drop-off can be seen. A right ninety follows, and then the path slowly starts slanting right. Finally, it takes sharp turn altogether and evens out at a steepening dirt pile. Suddenly, the track falls away while going above the previous straightway. If the racer has not built up enough momentum execute the jump, they will pathetically fall back onto the previous road and have to do over the last 1/4 of the track they had just completed- unacceptable to win, as almost every other character will be in front of you. Landing with a thud on the other side, too small mounds come right before a right corner/hairpin, laden with Item Boxes. A vicious, almost too challenging and abrupt 180-degree U-turn follows. Some people simply crash into the wall and lose all speed. Continuing to curve left, the finish line thankfully comes into view after a tiresome lap. But there is 3.
Star Cup - Wario-Stadium 1
Star Cup - Wario Stadium 2
Star Cup - Wario Stadium 3
Star Cup - Wario Stadium 4
Shortcut
A glitch enables the player to hop over a wall just after the starting line and end up close to the finish line. A different glitch then can be used to jump over the barrier to just before the finish line, enabling players to cross the finish line while still qualifying as a full lap.
This can be done (with great difficulty) in several locations, but the first few ramps are the best. If you have a Mushroom, you can use it while driving up a ramp to fly over the walls! Yes, this saves tons of time and is quite easy to do if you have the proper equipment. It can also work with Super Stars. This is especially easy in Time Trials, in which you start with a Triple Mushroom. To be more specific, drive toward the left wall, power-slide to face the left, and use Mushrooms with the right timing to fly over the wall. you will land about halfway through the course. It is possible, but difficult, to jump the wall again to reach the finish line and get a great time, but it is very hard to do.
Sherbet Land

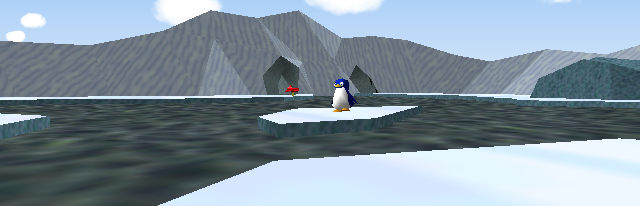
The track is 756 meters long, just barely longer than Frappe Land. However, Sherbet Land is a winter wonderland based around ice more than snow. There is a giant Penguin that players cannot reach. There are three types of Penguins on this track, the Little Penguin Sliders (which slide around), the Big Penguin Waddlers (which waddle around pillars), and a massive Penguin on an iceberg in the middle of the track). The penguins make some very weird noises. After that, there are some cracks that you can either choose to drive around them or jump over them. After the cracks, there is a big boulder that splits the paths. And well, you guessed it — left or right does not matter. Then, you drive straight and into a cave. But there are some penguins blocking the entrance of the cave, so be careful. In the cave, you will start to drive on snow, but not ice. There are some arrows in the cave, telling you which way to go. There are some pillars with penguins walking around them. But they do not slide, they just walk around. When you exit the cave, there are not too many obstacles to worry about but penguins, and after one more left turn, the finish line.
Star Cup - Sherbet-Land 1

Star Cup - Sherbet Land 2
Star Cup - Sherbet Land 3

Star Cup - Sherbet Land 4
Shortcuts
When you reach the first large, open space, you will see a blue rock to the right. If you drive right of it, you will reach a narrow path with a lone item box in it. From there, drive forward to the cave entrance.
Royal Raceway
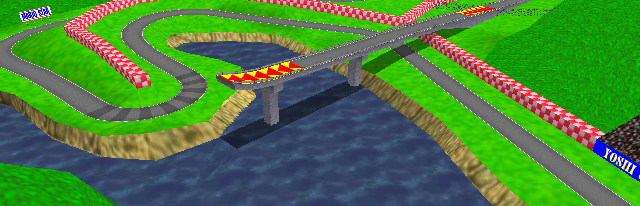
The longest race course at 1025 meters, not nearly as terrible as Mario Raceway, it is no Luigi Raceway, that's for sure. Royal Raceway is Peach's course, and it has two very neat alternate routes. As the name implies, the track is intended as Princess Peach's "home" course. The track features many sharp turns that require precise drifting if the player wishes to post good times.
Many of these turns are highly banked and curve around water hazards. This forces the player to maintain a very disciplined path around the track, as going too high on the turns can lead to the player finding him/herself in deep grass, and going too low can result in falling in the water.
The first little bit of track is not too technical with easy, wide turns. After about 1/4 of the track, the turns get narrower but should not cause too much trouble. Racers then enter a long bridge that leads to a big jump.
If players veer too far to the left or right after the jump, they will hit the two hills and possibly fall into the lake. The second to last turn is rather tight and players should be careful as the banking can easily slide them into the lake, before another S-bend back to the grid.
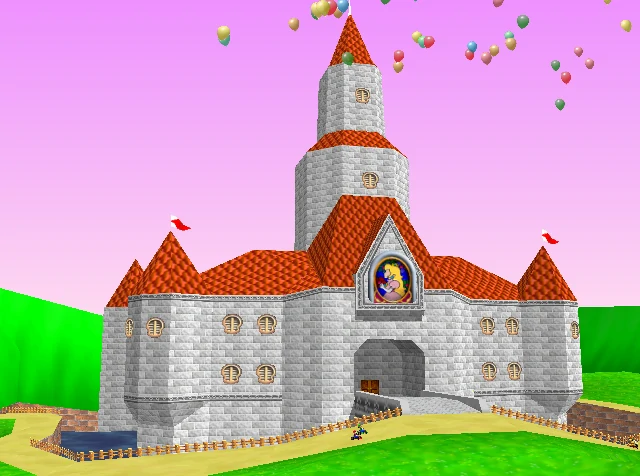
As an easter egg, Princess Peach's castle (as shown in Super Mario 64) and it is gardens can be found by taking a wrong turn on the track. The player can drive around the field, just as it is displayed in Super Mario 64.
However, there is no way to actually enter the castle, except through a glitch. Even then, all that happens is the kart falling through the front door into a pitch black room, before eventually hitting water. The character is then placed back on the main raceway before the "wrong" turn was taken. There is no known shortcut involving the castle. The Award Ceremony also takes place on the track where the top three drivers will receive their trophy.
Star Cup - Royal-Raceway 1

Star Cup - Royal Raceway 2
Star Cup - Royal Raceway 3
Star Cup - Royal Raceway 4
Shortcuts
This only wastes time and really should not qualify as an "shortcut." After landing from the giant boost pad, look right to see a yellow path leading off the track. If you take it, you will find the Mushroom Castle! Yes, it is just like it was in Super Mario 64 (minus the walls that close it off and a few other things, of course), and you can even ram the door (you cannot enter, but it is all very cool). However, this does not connect back to the main track in another way, and so it is a waste of time as far as racing is concerned. it is just nice scenery
Shortcut 2
This is one has many risk-it-all shortcuts. If you pull it off, you are way ahead of the rest. If you fail, you are going to spend the rest of the race catching up with them. I definitely would not try it in Grand Prix unless it was the third lap and you were in a very low rank. Note that this is only possible in 150 cc (or at least, the other cc's are incredibly, impossibly difficult).
This occurs at the large booster ramp. When on it, if you shoot off it to the left, you will be flung toward the finish line. However, not even this boost pad can propel you that far. Your goal is to land on the little patch of dirt as close to the side of the road and the item boxes as possible. If you hit a wall, land in the water, or just plain miss, you have failed. And even if you do land on that long patch of dirt, it can still flop. Lakitu will now come to rescue you. If he sets you down on the boost pad, you have failed. If he sets you down on the nearby road, right in front of the finish line, you have succeeded! This is very handy, and I've used it a few times before in dire straits, but the chances of it succeeding are much slimmer than the chances of it failing.
Bowser's Castle
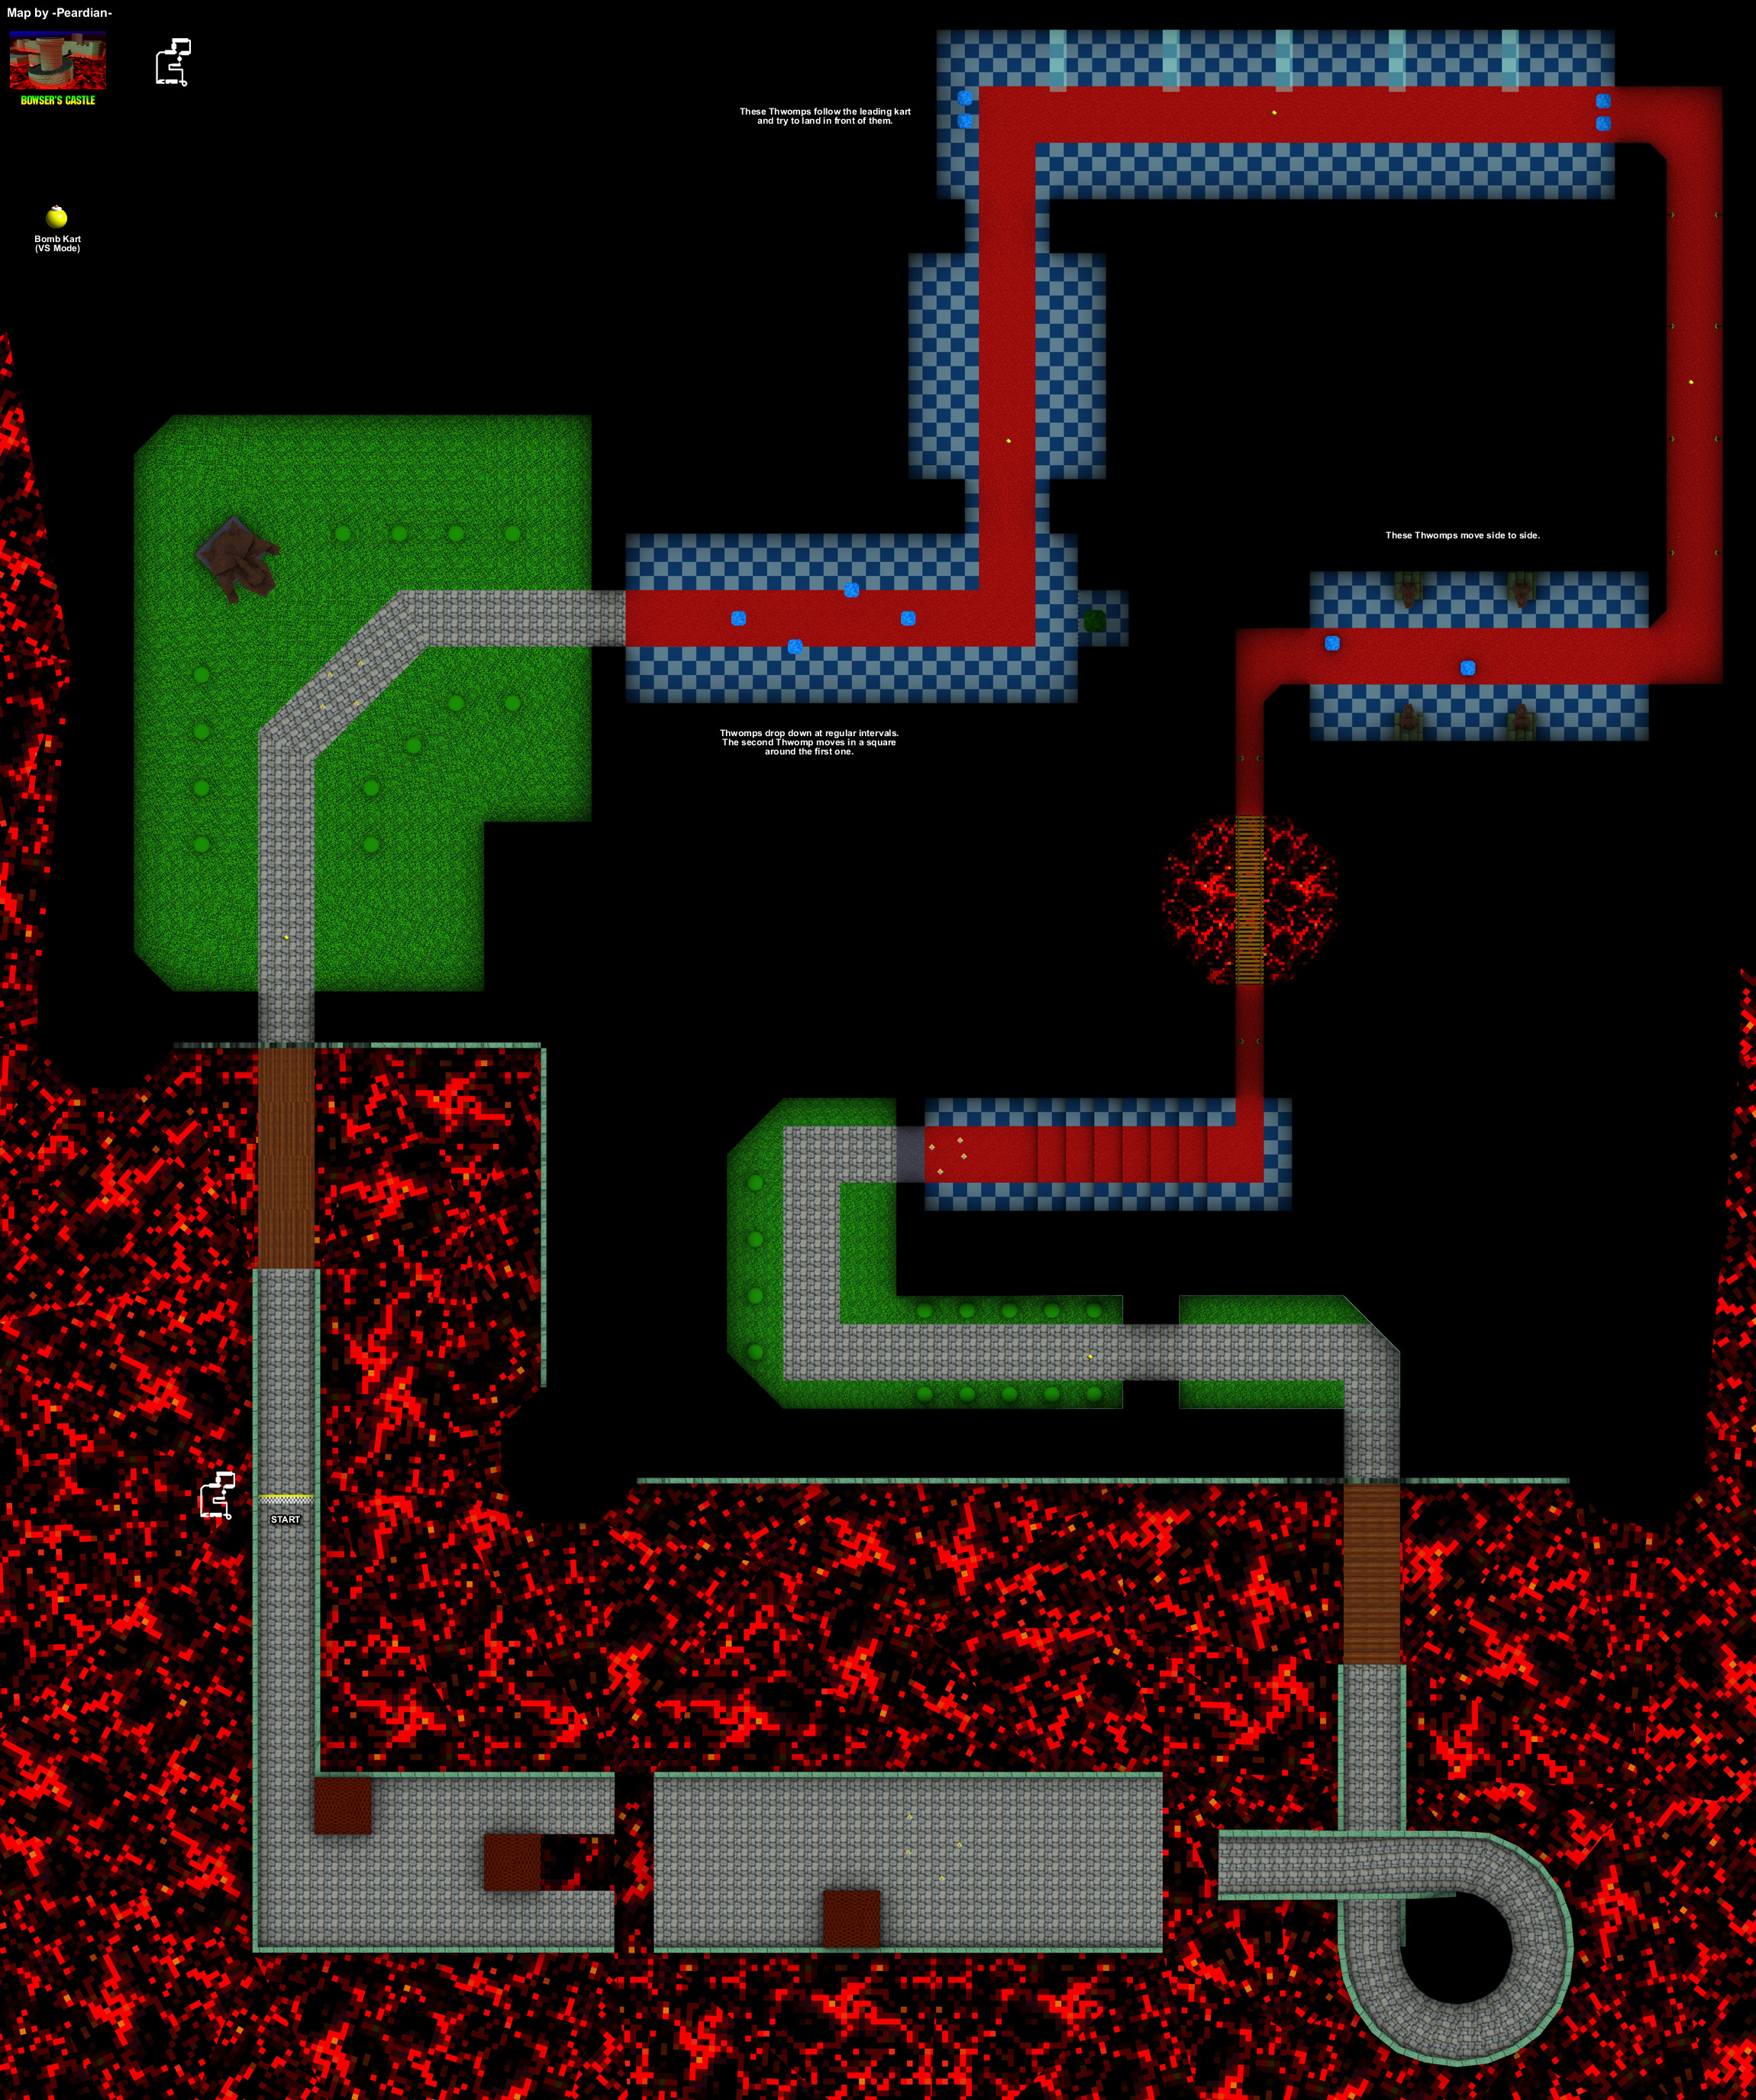
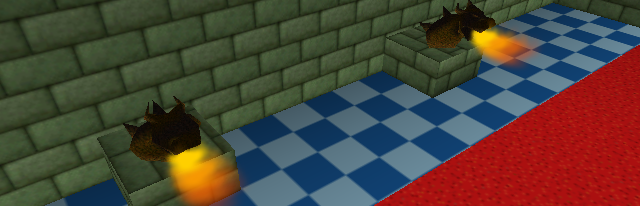
It is only 777 meters, but it feels longer due to traps and sharp turns. It features several Thwomps that try to block drivers from getting to further areas. Near the beginning of the course, there is an imprisoned Thwomp tinted green with yellow teeth due to the lighting, which shakes and laughs if the player goes near it. The laugh can also be heard by the normal Thwomps throughout the course. The Thwomps' laugh is the same as Wario's, only pitched down. Because Bowser's voice changed for the international release, the Thwomps' voices changed with it.
In further corridors, there are pictures of Bowser and large stone statues that shoot flames from their mouths, but they are harmless. At the end of the track racers will race on the roof of the castle. On the last lap, or when the player gets too close to the Bowser statue at the start of the track, Bowser's laugh plays. Thwomps are the main obstacle in this course. Most of them will move around the room and try to crush the racers and some slide across the room. In the hallway where the pair of Thwomps chase down the player, the number of Thwomps at the end of the hall depends on the engine class (one Thwomp for 50cc, two for 100cc, and three for 150cc).
Star Cup - Bowser's Castle 1
Star Cup - Bowser's Castle 2
Star Cup - Bowser's Castle 3
Star Cup - Bowser's Castle 4
Star Cup - Bowser's Castle 5
Star Cup - Bowser's Castle 6
Star Cup - Bowser's Castle 7
Star Cup - Bowser's Castle 8
Special Cup
Star Cup: Tracks
D.K.'s Jungle Parkway
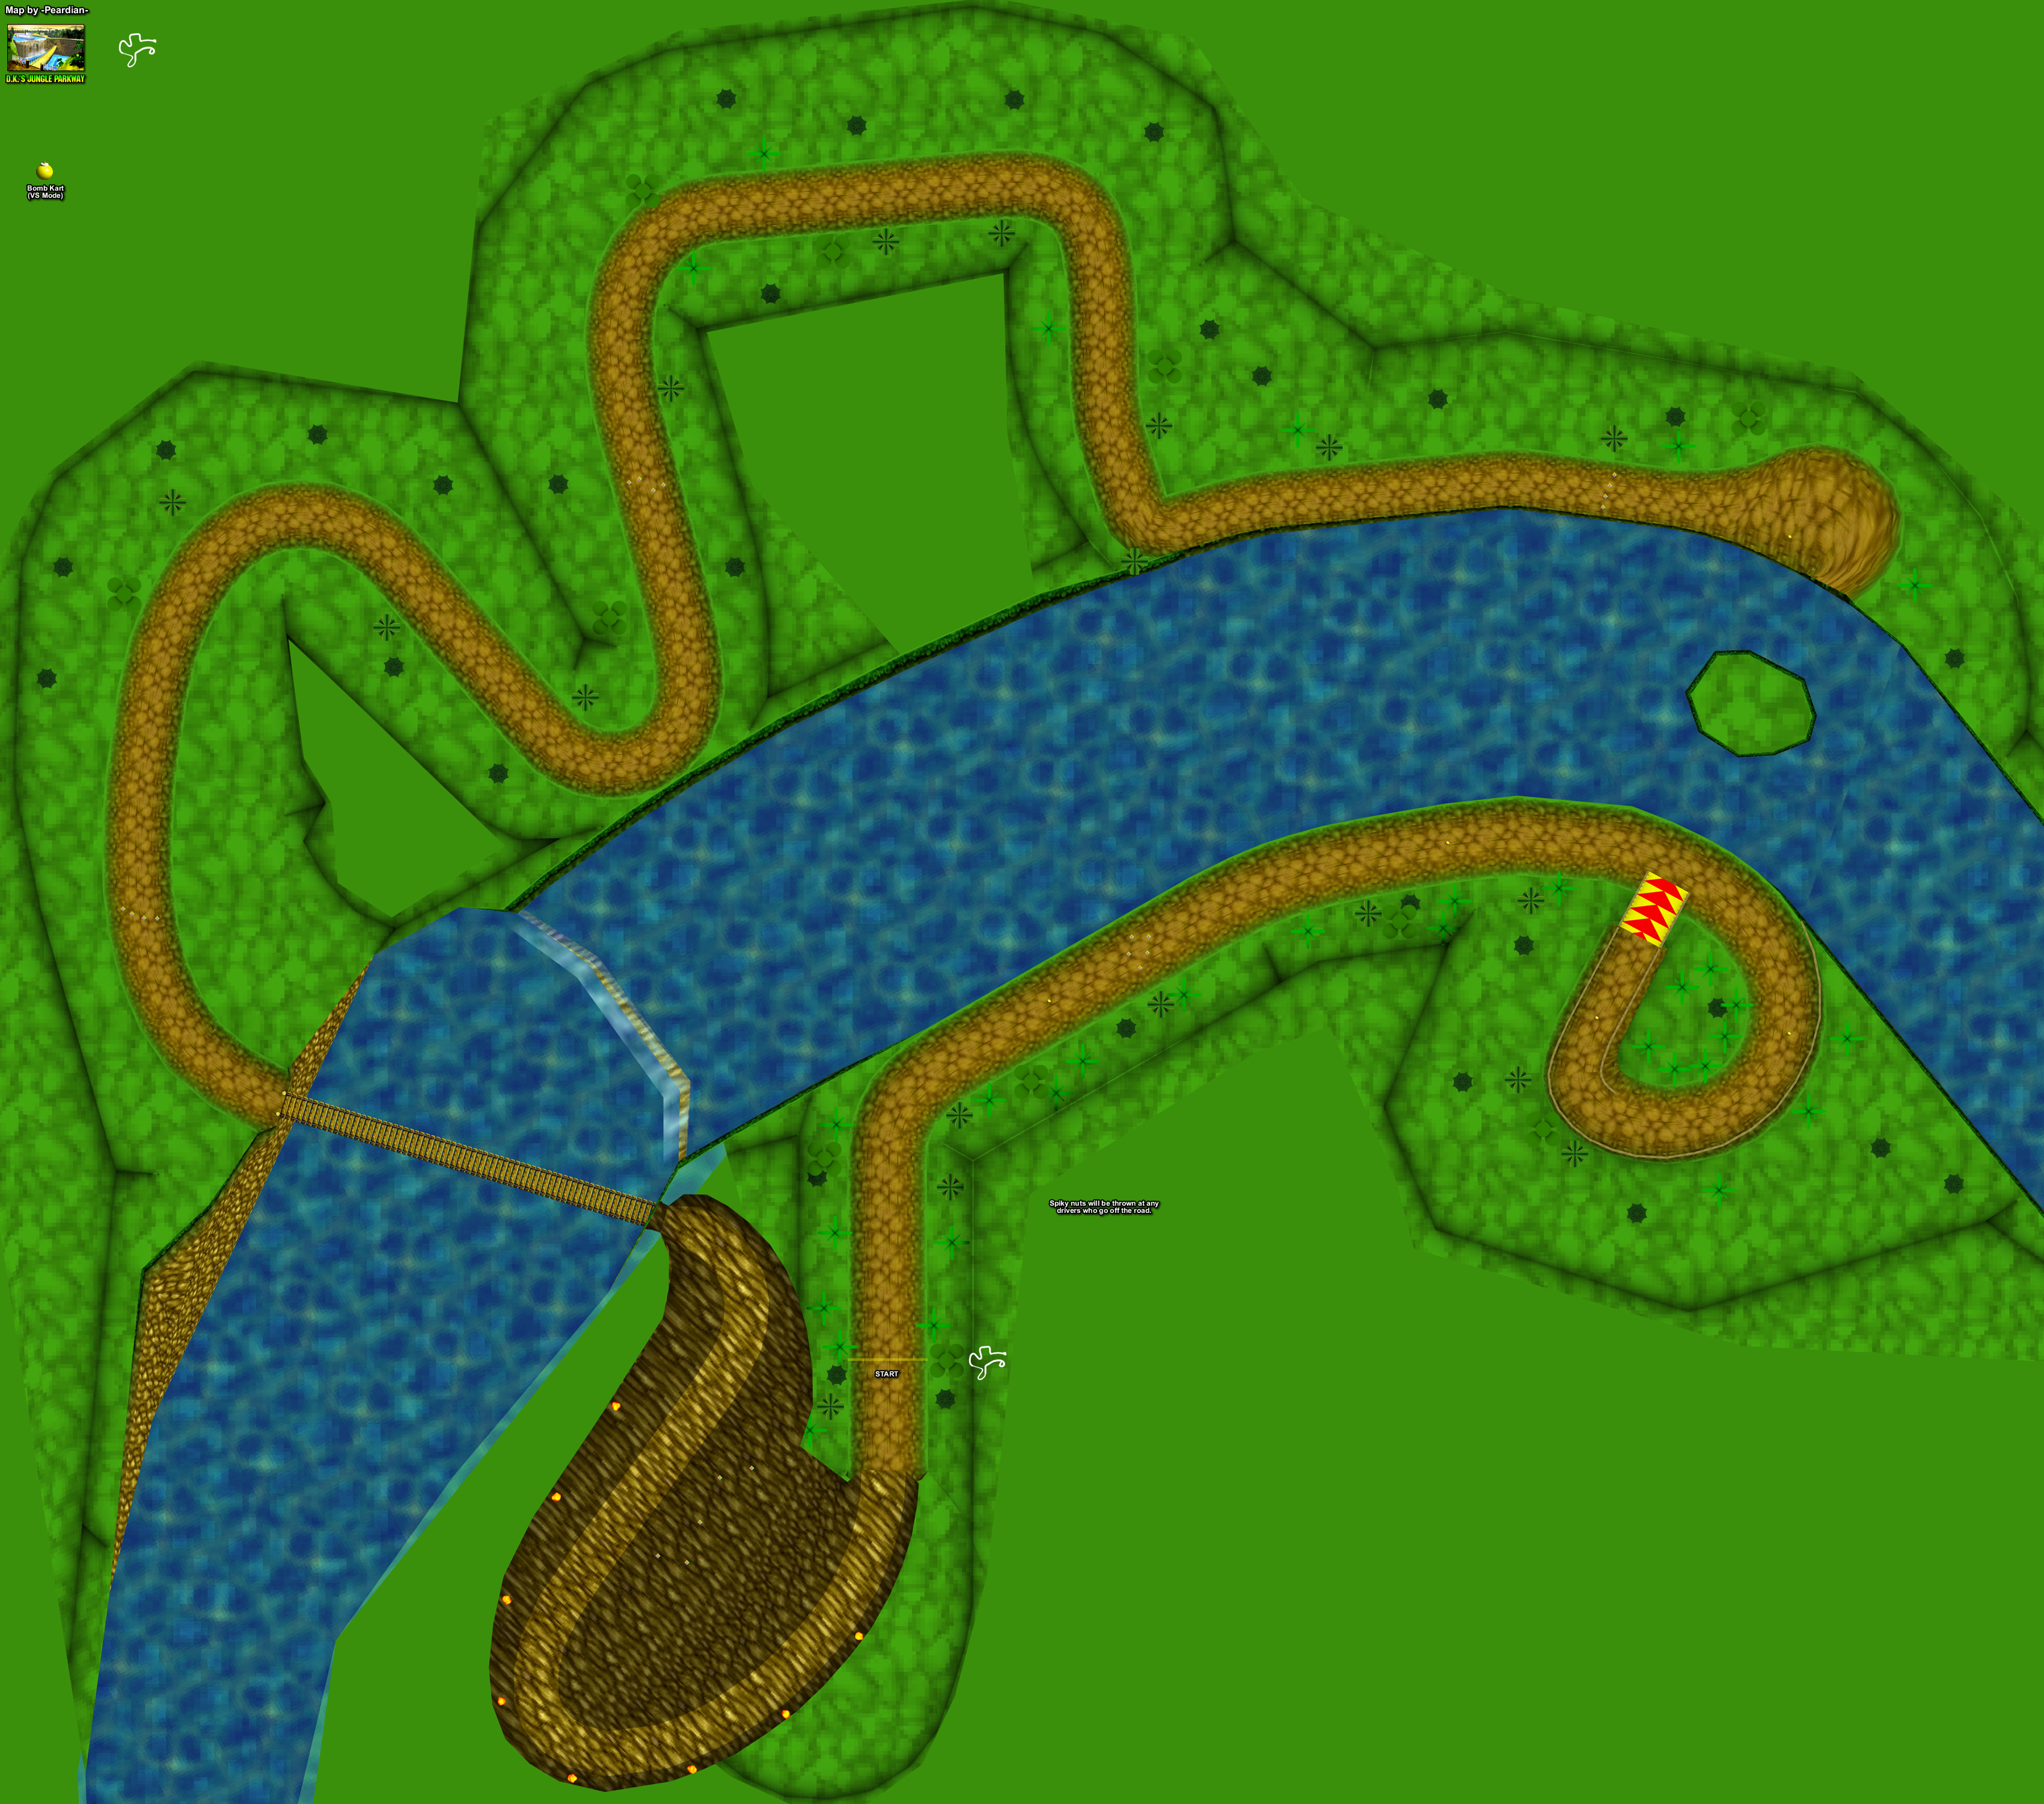
The parkway is quite an intricate course (yes, it is possible to get onto that boat), but it is not particularly DK-related aside from the jungle theme. Generally, this is a mild course that should not give you much trouble. i would say it is the second-easiest course in the cup. it is also the second-longest at 893 meters.
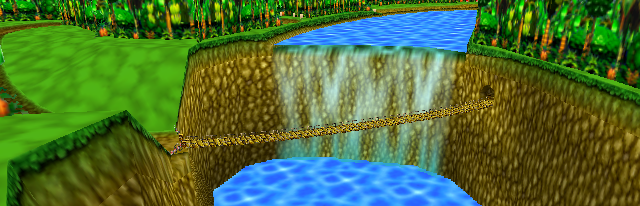
The beginning section starts out with a short straightaway and into a right U-turn. The track then leads onto a riverboat, on which a large dash panel ejects racers to the other side of the river. A sharp left turn must be made so you do not run into a wall. From here, a long section of straight track is righted by the river, which poses a threat to light characters like Toad. After this, the parkway takes several winding turns through a parkway, lined by grass. If a player drives in the grass, spiky fruits come flying out of nowhere and hit the driver, although this is actually kind of helpful, because they bump you back on. However, if you are in Time Trial mode, the coconuts erase your chances of saving a ghost. After this, a waterfall must be passed my traversing a rickety, narrow wood bridge, perfect for laying Banana Bunches and firing Green Shells. The bridge leads to a dark, gloomy cave. Sticking to the track can be safer, but you are not slowed down by the off-road part, so take it. The cave exits just in time for the finish line.
In Mario Kart Wii, the track is basically unchanged--the graphics are better, the big jump now acts like you have entered a cannon, fruits have been removed, the cave now has an off-road part, and the water is now orange (most likely because it is evening). But other than that, it is the same old thing.
When racers go off-course, unseen "restless natives," as the instruction booklet calls them, will throw kiwanos at them. A large boat with "Mario" written on it cruises around the river in the jungle. The race starts off along the shoreline of the river which leads to a massive jump across the river. Players, while jumping, can aim their landing spot. The ferry may be an obstacle during this jump, but players can pass through the ferry most of the time. Players then follow the winding dirt path to a narrow wooden bridge at the edge of a waterfall. The bridge leads to a small cave, which ends at the start of the track.
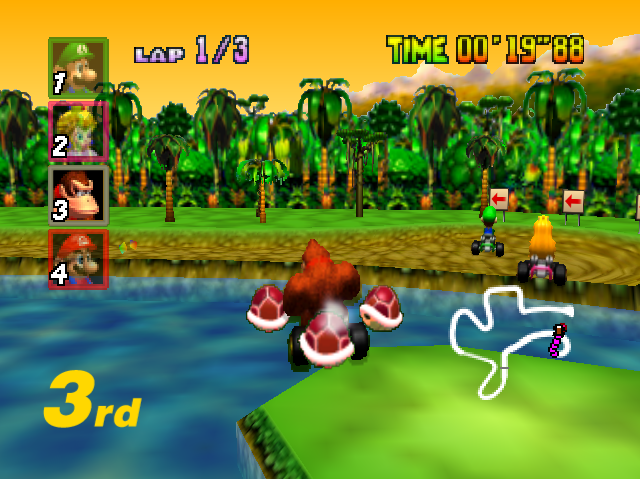
Special Cup - D.K.'s Jungle Parkway 1
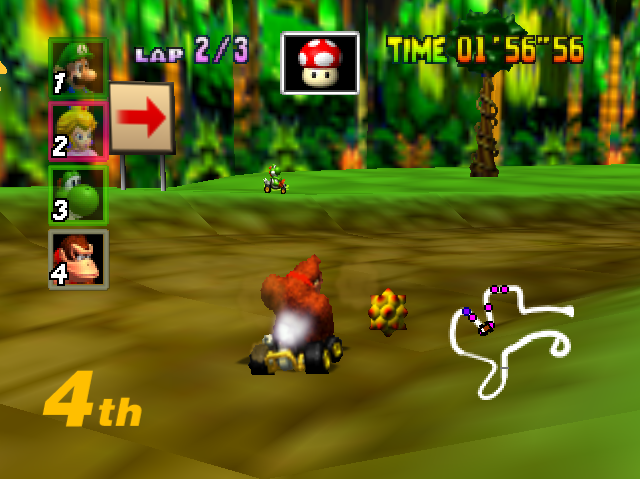
Special Cup - D.K.'s Jungle Parkway 2
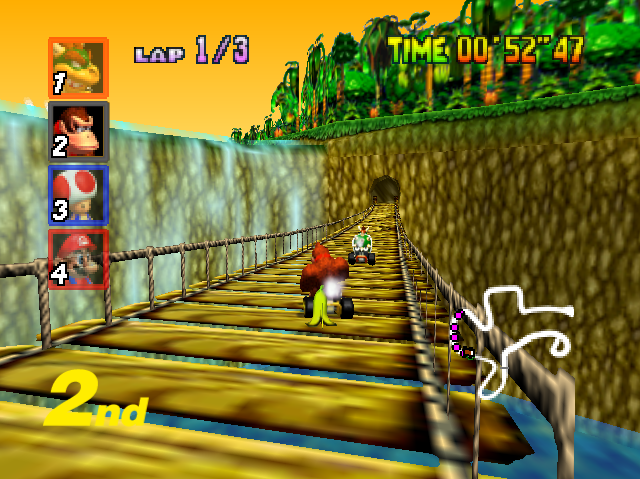
Special Cup - D.K.'s Jungle Parkway 3
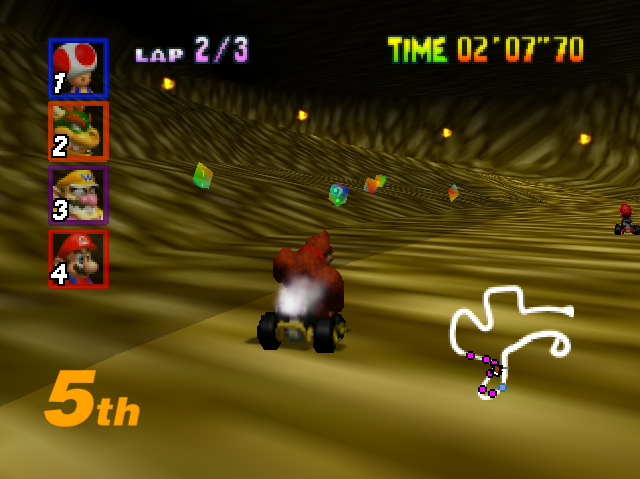
Special Cup - D.K.'s Jungle Parkway 4
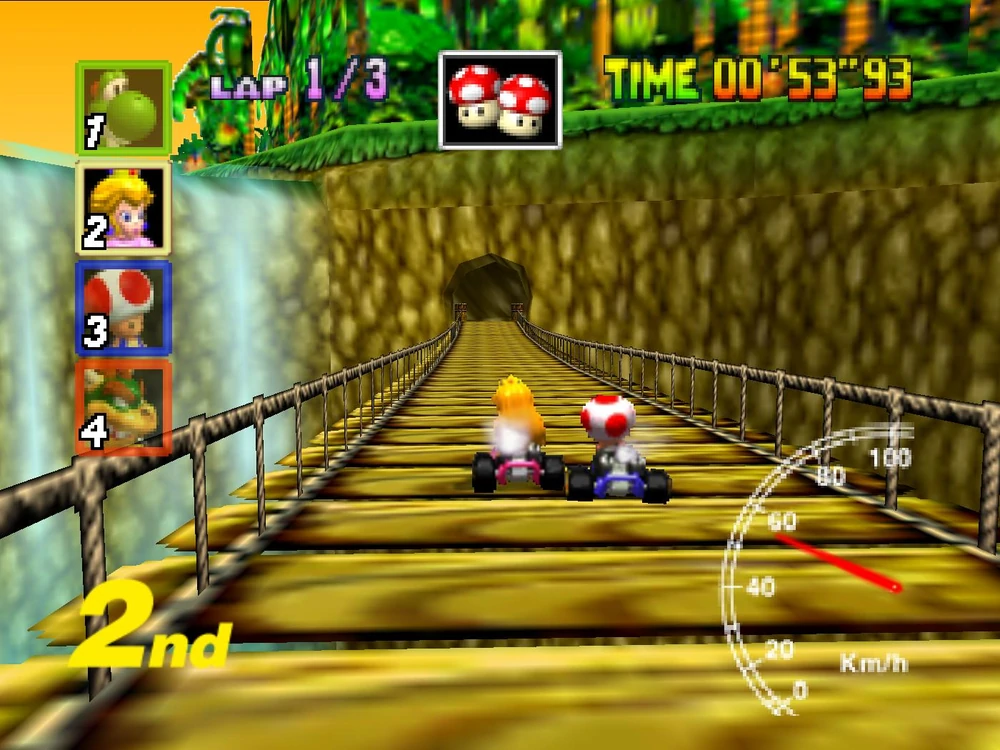
Special Cup - D.K.'s Jungle Parkway 5
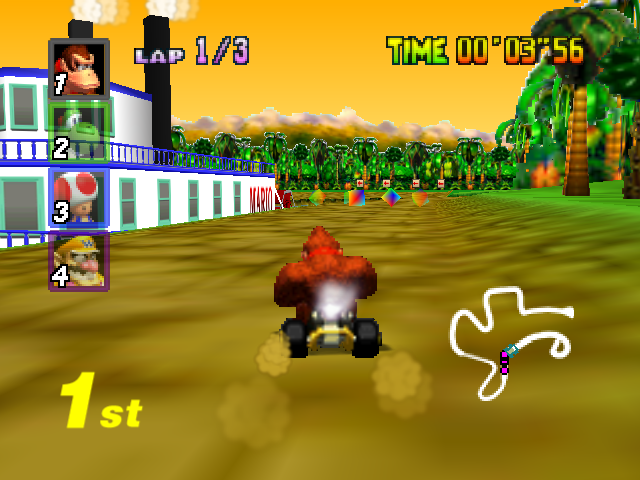
Special Cup - D.K.'s Jungle Parkway 6
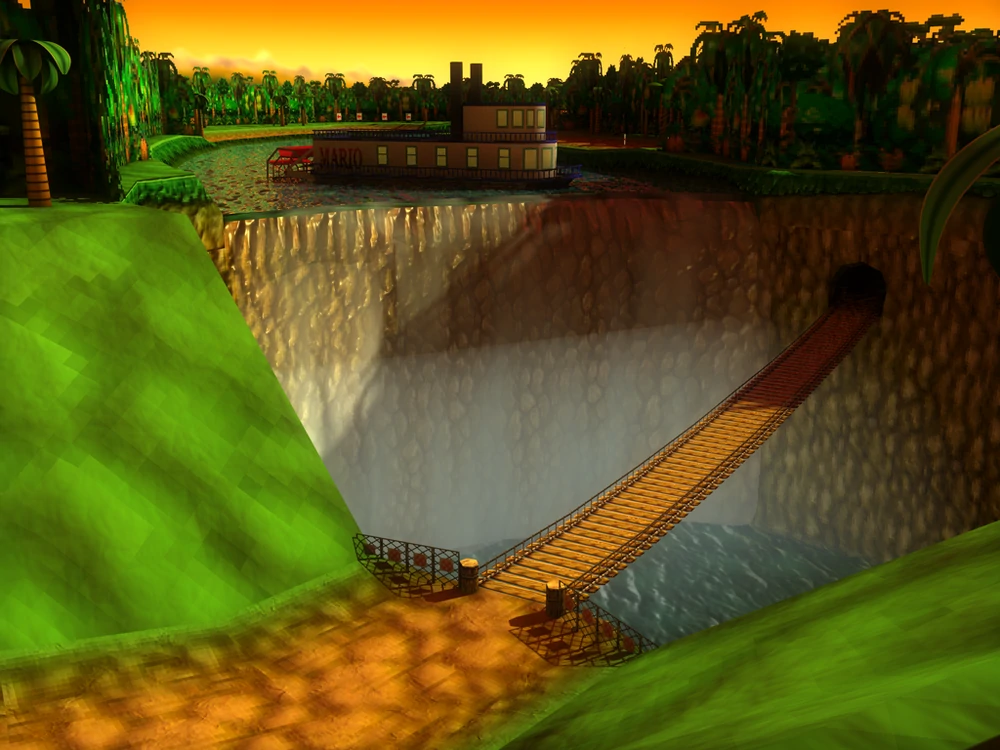
Special Cup - D.K.'s Jungle Parkway 7
Shortcuts
A glitch shortcut is found in the bit after the bridge to the cave. To perform it, a driver should drift through the wall at the right area; they will then fall into the cave. Upon crossing the finish line again, it will be counted as a lap, even though the driver did not go all the way around the course. When it returns in Mario Kart Wii, that shortcut is removed. However, in both games, there is a shortcut over the mud in the same area. Originally, all karts could perform this shortcut. In the Wii version, an item that increases speed (such as a Mushroom or Star) is required for it to be effective.
In "Mario Kart 64," if you boost at the start, drift, and hop off the edge at the beginning of the track, and fall at the right place, lakitu puts you on the bridge in front of the cave, saving you time.
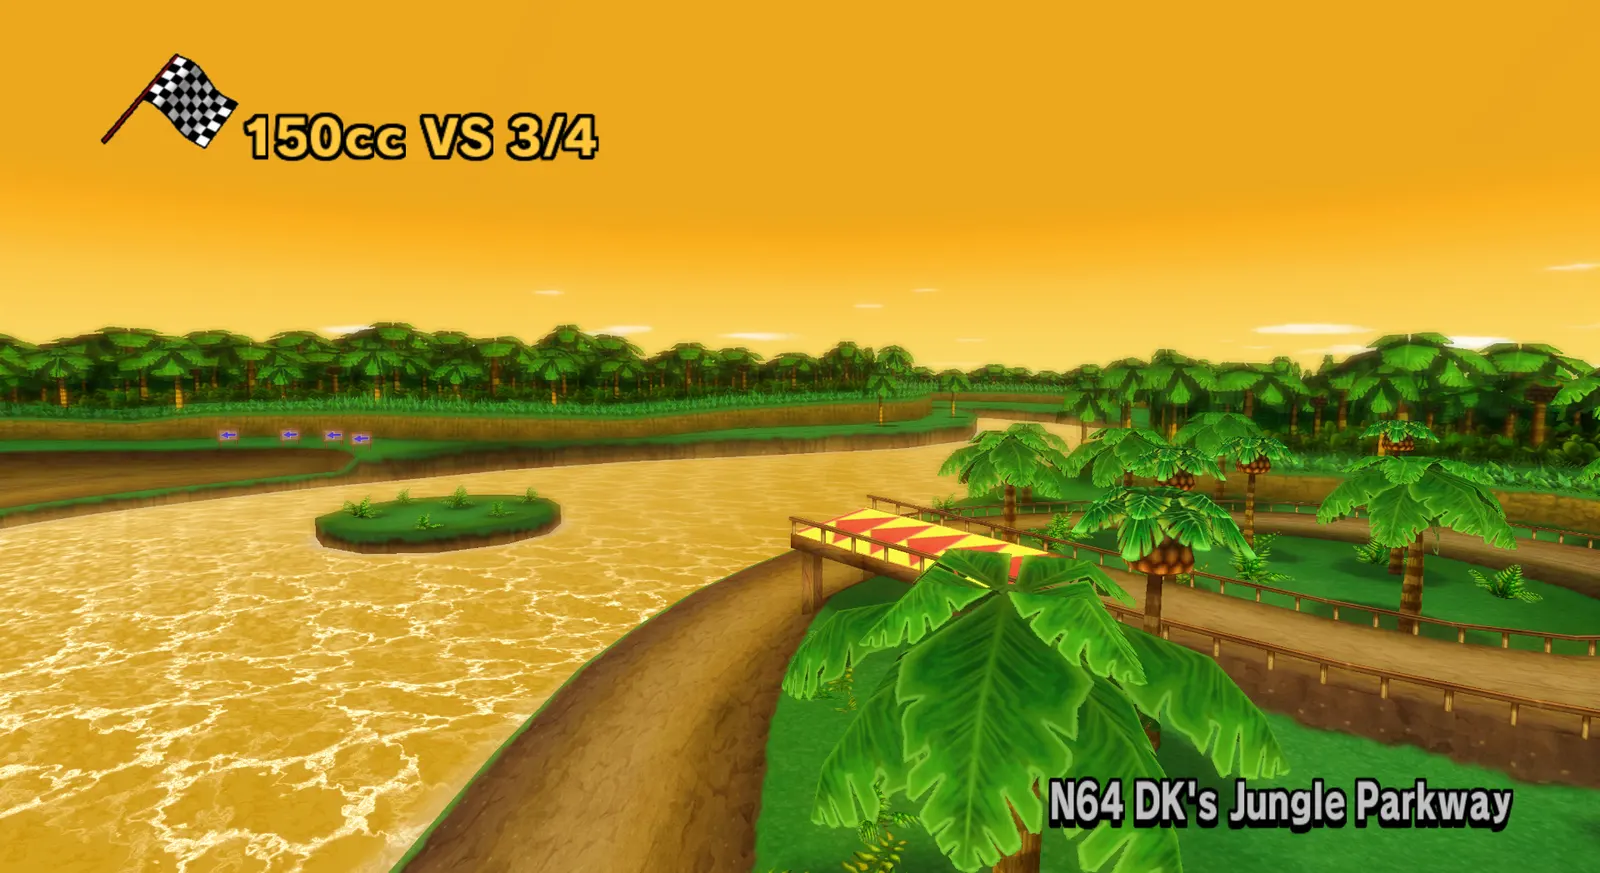
Yoshi Valley
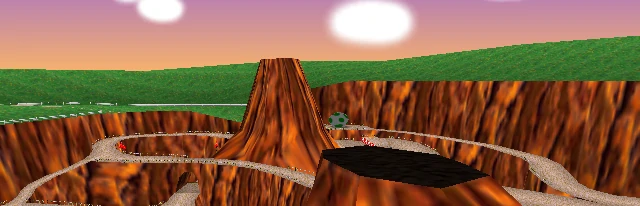
The course it is 772 meters long, but that is only one route. It starts out on a dirt road with grass on the sides, like DK's Jungle Parkway. After a bit, it transitions into a winding maze of roads on cliffs. These paths are very hard to navigate, even if players are with another person. Adding to the difficulty is multiple Porcupines sprawled over sections of the road, and your only option really is to drive through them and hope that you do not get hit. The paths eventually meet, and after a few turns, there is a bridge which takes players back to the dirt road. Shortly after, the finish line is reached. The course itself has few railings. If players fall off a cliff, they will roll down the hill for a long time. Lakitu will pick them up after they roll all the way down to the bottom, making falls more costly than normal.
Before the bridge, there is a giant Yoshi Egg that spins across a small area. If it rolls over a player, he or she will be flattened, like a player run over a Thwomp or a Mega Mushroom. However, AI-controlled characters cannot be flattened by it. Also, there are black porcupines on some paths that will make one spin out if hit.
The confusing part of this track is that there is no telling who is in which place. Because there are so many different pathways that take the player to different parts of the course, the game simply replaces the usual positions with question marks, only revealing the standings for a racer after he or she has crossed the finish line.
Due to the unique design of the course, there are many different routes that can be taken from the beginning of the maze to the end. The maze begins after a right turn over a bridge shortly after the starting line, and the end is where the bridge route connects to the main route, after which is a left hairpin turn that then leads to the Giant Egg, after which is a long narrow bridge that brings the racers to the grassy field with the finish line.
Crazy, nutty, and kooky like Yoshi is, Yoshi Valley is not a pushover course. However, it, unlike other courses in Mario Kart, has multiple paths a driver can take. Along the way are Spinys, which make drivers spin out or launch into the air, steep cliffs where drivers that are unfortunate to fall over have to be rescued by Lakitu, and narrow turns. All paths lead to a spinning Yoshi egg that will spin out a player upon hitting it.
Yoshi Valley is the first course in Mario Kart to keep your current position racewise unknown. Instead, you will be given it once you cross the finish line.
Special Cup - Yoshi Valley 1
Special Cup - Yoshi Valley 2
Special Cup - Yoshi Valley 3
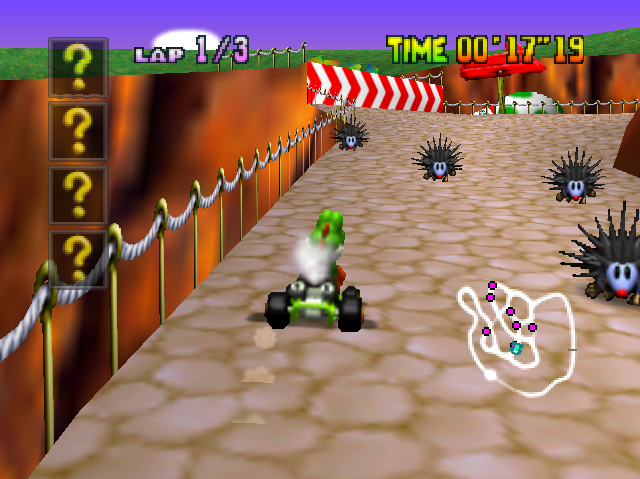
Special Cup - Yoshi Valley 4

Special Cup - Yoshi Valley 5
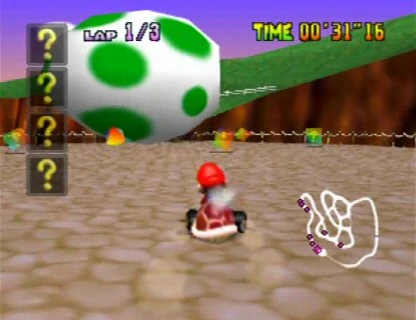
Special Cup - Yoshi Valley 6
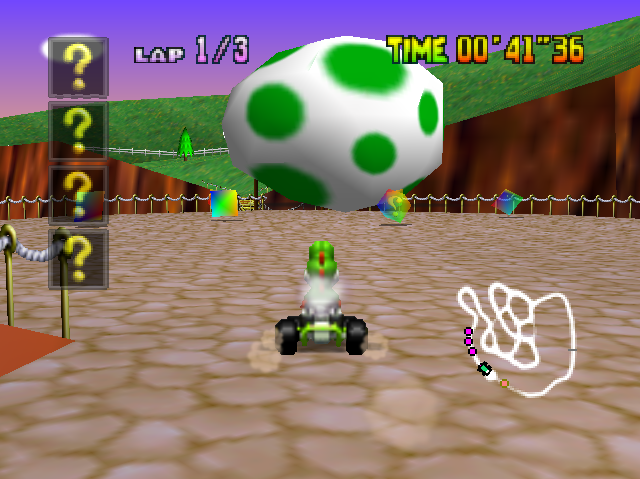
Special Cup - Yoshi Valley 7
Routes
Main route: The main route can be accessed by going either direction at the start of the maze, if the player took a left then the main route will be to the right of the narrow route and if the right was taken then the next two lefts must be taken to the main route. The main route begins in an underpass under the long route and a small jump, where there will be a group of porcupines and then a right turn to the end of the maze.
Bridge route: The bridge route is located to the right of the main route and is found by taking the first right and then a left and the bridge route will be straight ahead, alternatively the player could also drive towards the main route and then hang a right just before passing under the long route. The bridge route passes under both the long route and the final stretch of road, the gap between being connected by a small narrow bridge, afterwards is a horde of porcupines on a steep left turn, which then leads to the end of the maze after a short drop.
Long route: This route can be reached by taking the first two right turns, where the road will make a sharp right turn and a somewhat straight path that passes over both the main and bridge route. After the narrow route joins up to this path there is a comparatively wide right turn that leads to a small drop to the main route shortly before the end of the bridge route.
Narrow route: The narrow route is found by taking the first two lefts from the beginning of the maze, and joins up with the end of the long route. This route can be risky due to how narrow it is and the long fall if racers do not successfully stay on the road, especially if two racers attempt to take this path at the same time.
Banshee Boardwalk
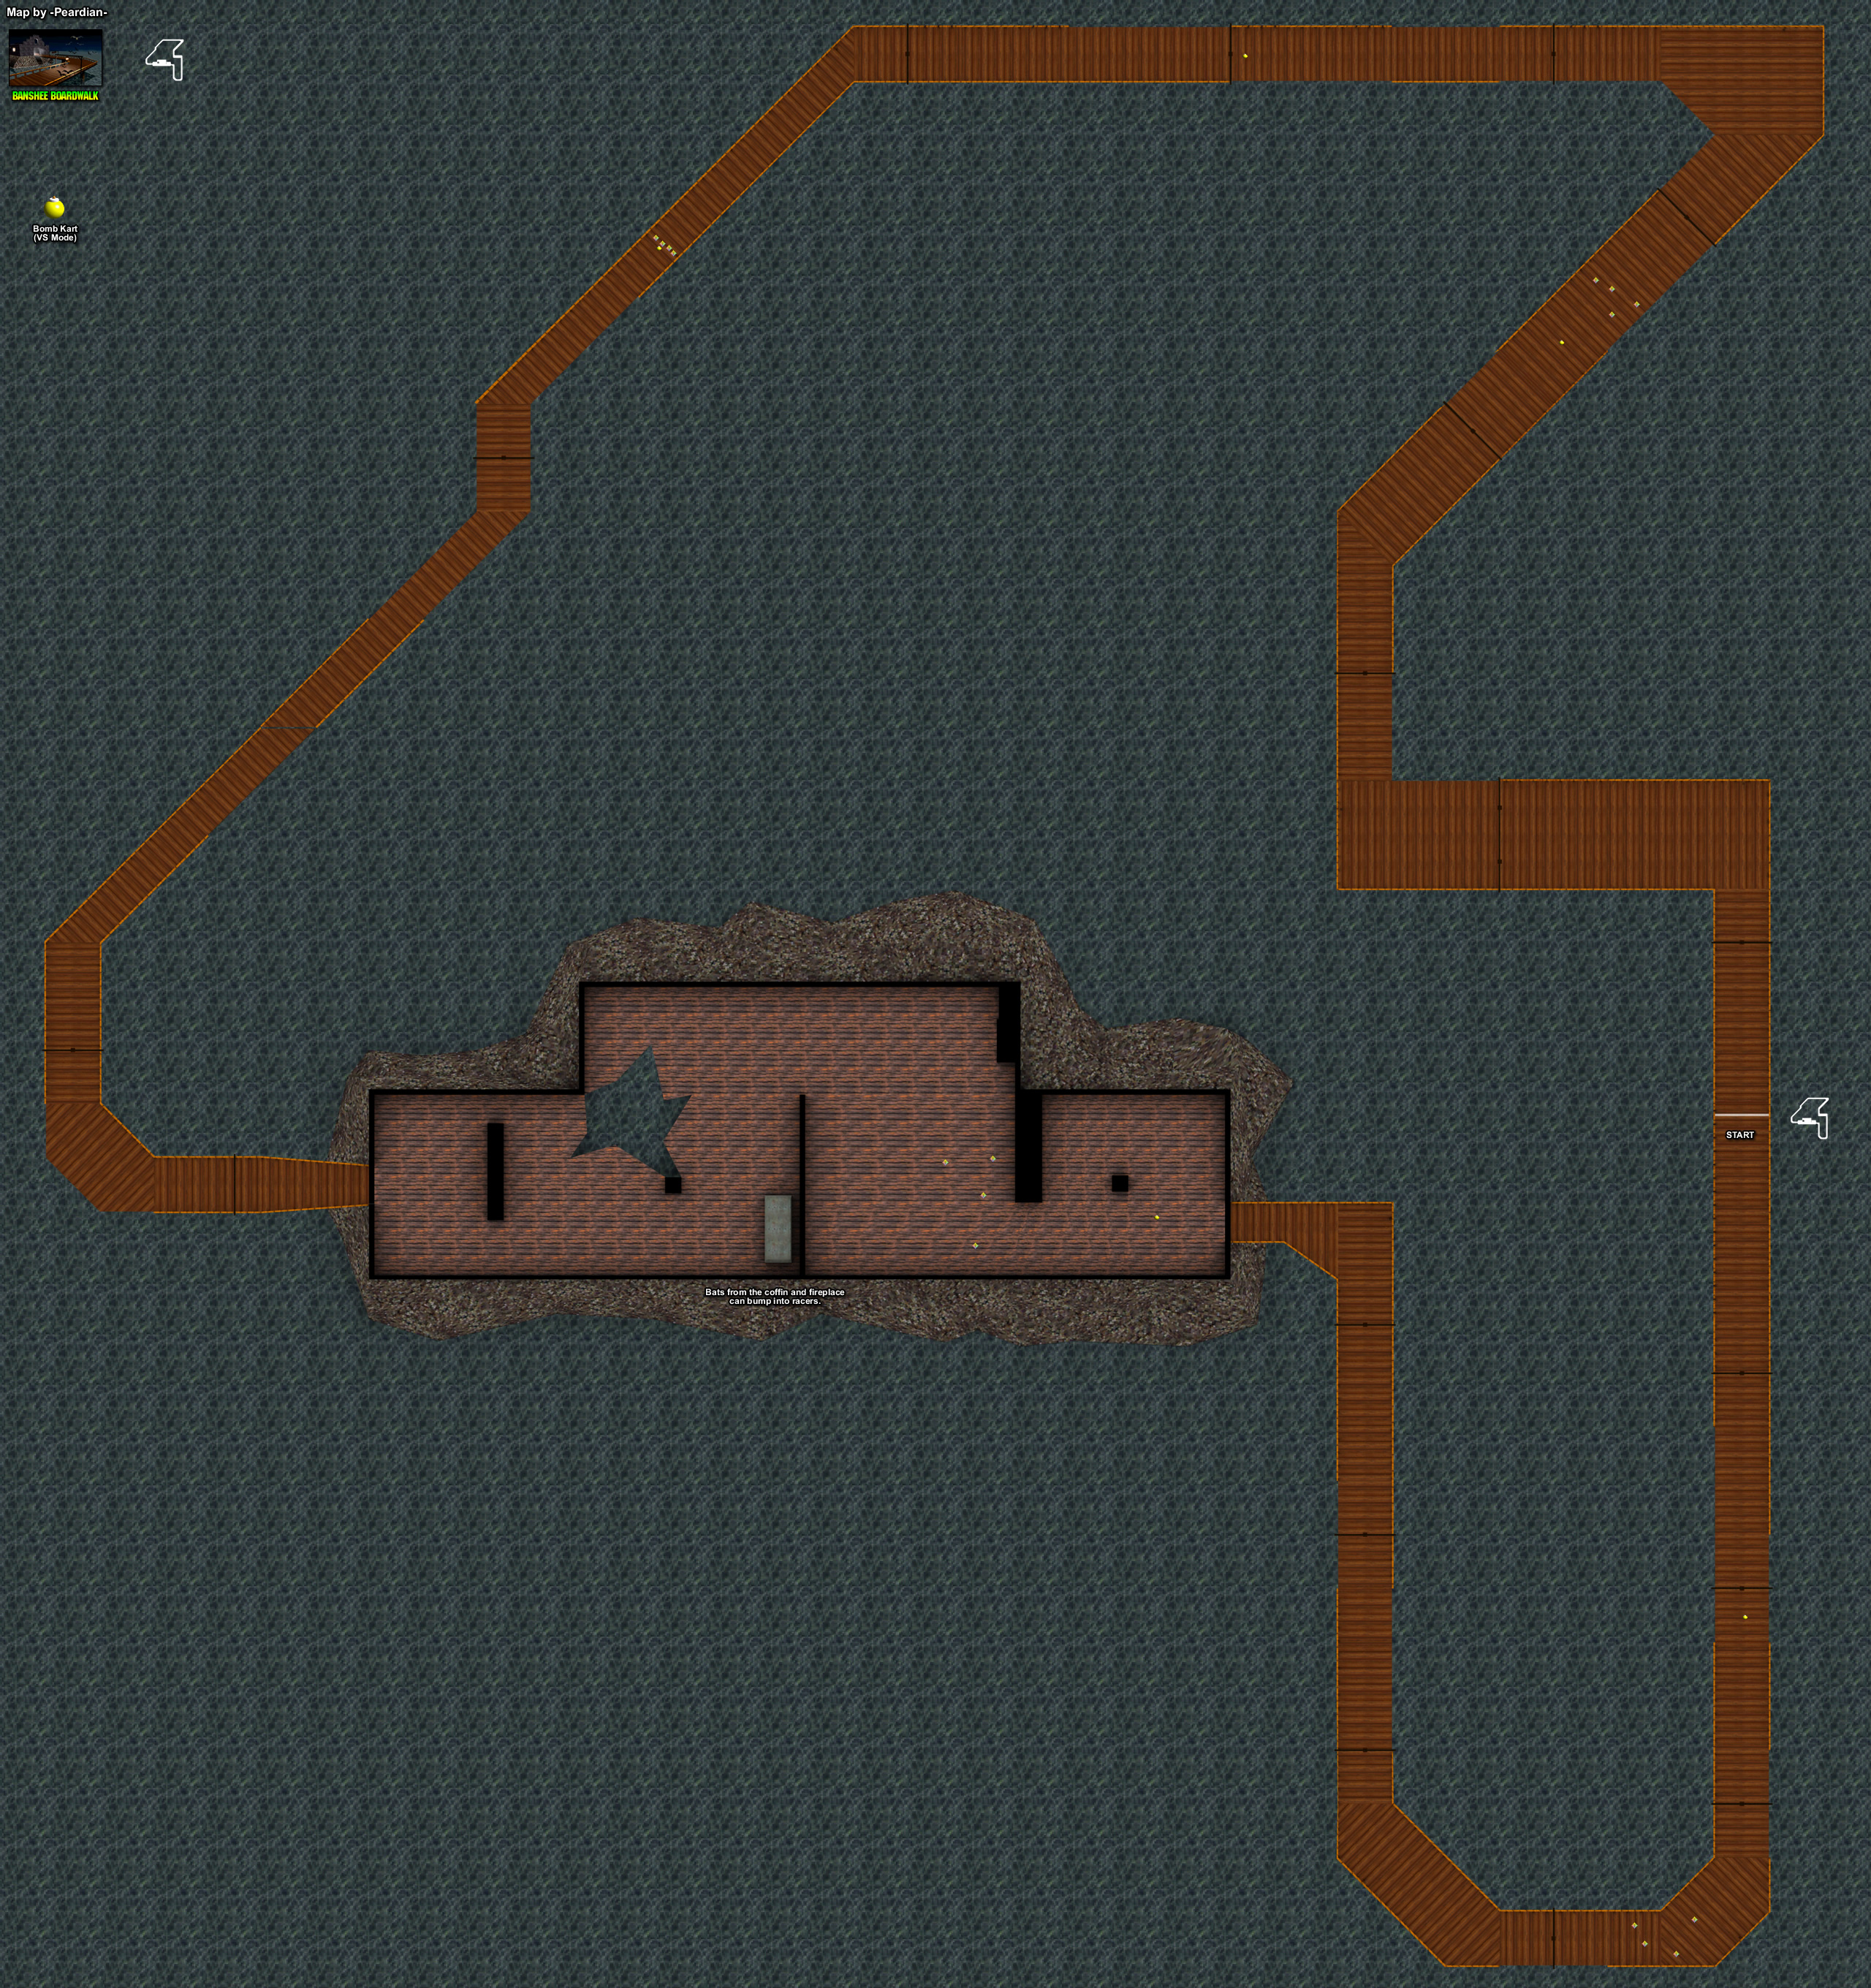
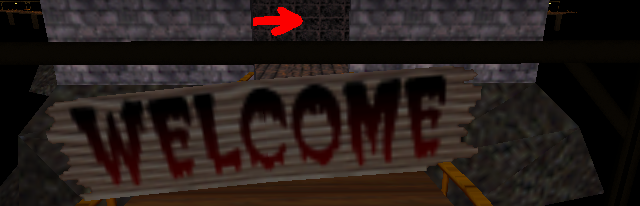
Banshee Boardwalk has sections with no rails, and darkened areas that do not become light until your kart comes to a certain spot. It is 747 meters of wretched, Boo and bat-infested wooden boardwalk track with a crumbling old castle. Occasionally, a giant Cheep Cheep will jump overhead (the Giant Cheep-Cheep cannot harm you). Also, as with most of the haunted tracks, Boos will frequently appear, cackle and then disappear. There are also bats that fly around in two parts in the castle, where they try to rush out at the player. The music creates a very creepy and suspenseful atmosphere.
The race begins on a boardwalk with some guardrails missing. Additionally, a giant Cheep Cheep jumps out of the water, but it cannot harm the player. The second half of the race features an abandoned building where bats fly at the racers, lowering their speed. The bats do not appear in the Time Trial mode. Additionally, in some parts of the track some Boos appear, but they just laugh when the player passes by.
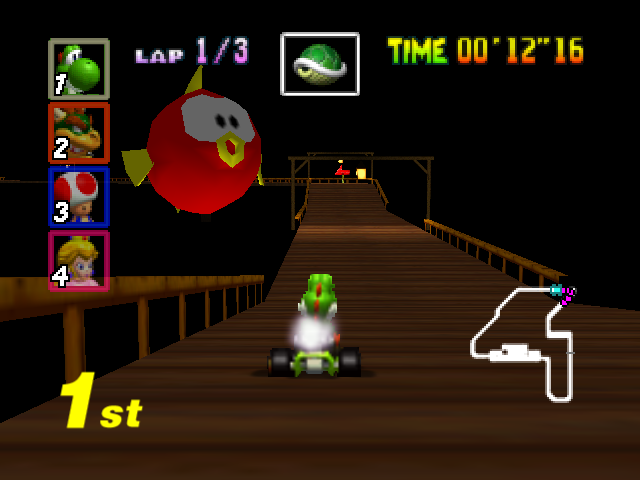
Special Cup - Banshee Boardwalk 1
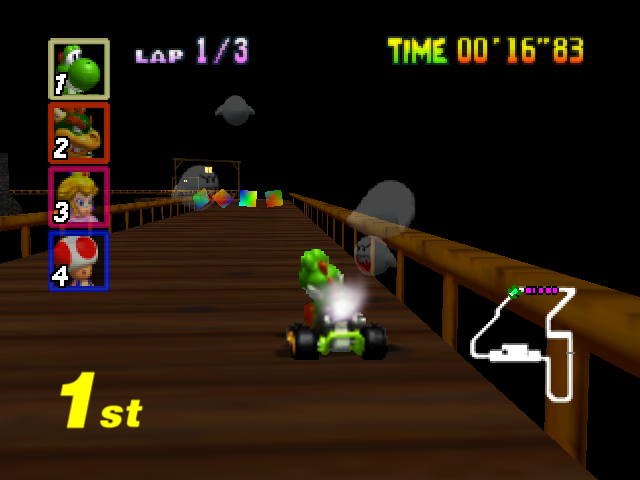
Special Cup - Banshee Boardwalk 2
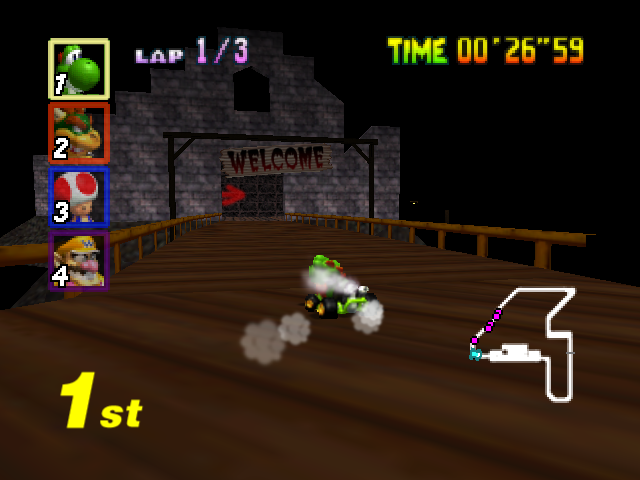
Special Cup - Banshee Boardwalk 3
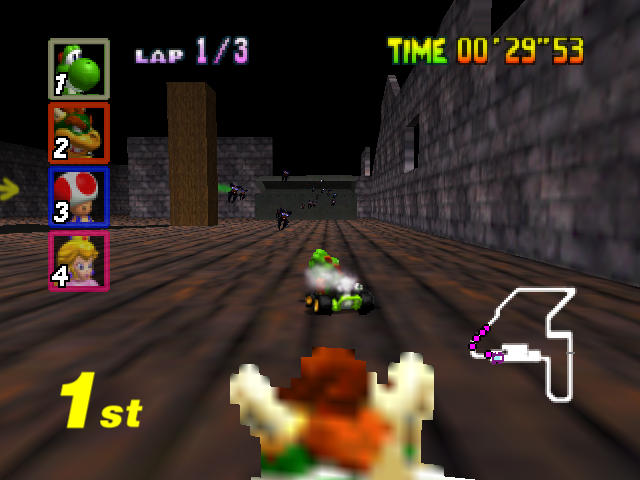
Special Cup - Banshee Boardwalk 4
Hazard and Shortcut
The Cheep Chomp is the main obstacle, and the swoopers and barrier gaps in the bridges are the other hazards. There is a shortcut where you normally go right after entering the shack but instead go left, cutting a few seconds on your time.
Drive forward and power-slide left through this right-angle turn. Now drive forward, waiting to pass the hole (you will fall into the water otherwise) to turn into the narrow strip of track. Make another quick turn ahead to reach a few item boxes.
Head through this U-turn (stick to the right; it has no rail in the center) to pass under a bloated Cheep Cheep. Now drive forward to another right turn and then slowly pass through the next part until the rails return.
Drive forward to make a right turn, but do not power-slide unless you are a pro; you have the potential to fall off this un-railed part of the track. Now you will enter a building. Go right immediately. A dumpster here releases bats intended to keep you back. But, you have to turn ahead (otherwise, you will fall into a well camouflaged ditch) and then make a sharp turn into a new room. Pass a cage with bats pouring out, collect the item boxes, and turn right sharply to exit the building.
Only a few more tricky turns to go. Go forward, making a U-turn (you will not want to power-slide unless you are a seasoned professional; the right rail is missing), and then drive forward to finally reach the finish line. Okay, so maybe I over-exaggerated the difficulty of this course. If you are careful, it is easy.
Rainbow Road
This is the longest track in the game at 2000 meters long. This track is railed off and thus pretty safe, but phantom Chain Chomps will appear on the track to try to bite you infrequently. These Chain Chomps can make things quite hectic with all the Mini Bomb Karts in VS Mode.
The course starts with a huge drop followed by a gentle uphill stretch passing through a rainbow ring. After the ring, there is a wide loop with neon signs of Mario, Peach and Luigi on the loop's outside. Following the loop is a steady downward road that crosses over the steep drop where a Mushroom sign can be seen. After the bridge is a corkscrew loop with a large star in the center and a Boo sign at the corkscrew's outside. Racers turn around a corkscrew to reach a hairpin bend, where signs of Donkey Kong and Yoshi are seen. Shortly after the hairpin bend is a short straightaway followed by a smaller drop and small uphill stretch. A Toad neon sign can be seen after the drop as well as a wide right turn. A straightaway follows with a Wario sign present, then follows a final looping section, where a Bowser sign is seen near the end of the track. After the loop is a final straightaway to the finish.
At 2 kilometers - which engenders laps that are two minutes long each - this course is the longest course in the game. It is a colorful course through the final frontier, while the original Rainbow Road featured a starry purplish sky instead. Its setting may have been switched to the deep space setting in order to help the console manage the track. With some of the most motivational and inspirational music in Mario Kart history, racers swerve past neon-lighted pictures of the eight playable characters, as well as various items from the series. Chain Chomps plague this otherwise peaceful course, traveling inside the road itself and knocking up racers they happen to collide with. Near the middle of the track, the course harbors a large, three-dimensional, smiling star.
This long course starts out with a large drop followed by a gentle uphill stretch, passing through a rainbow ring. From here, the path is mostly level with a few shallow drops here and there. Approaching the end, racers turn around in a corkscrew and then a twisting stretch to finally return to the checkered line.
It is possible to take a shortcut and skip about half of the course at the beginning. Right after the starting line, a racer can jump over the railing on the left while the track starts to slant downhill and land on a different part of the track.
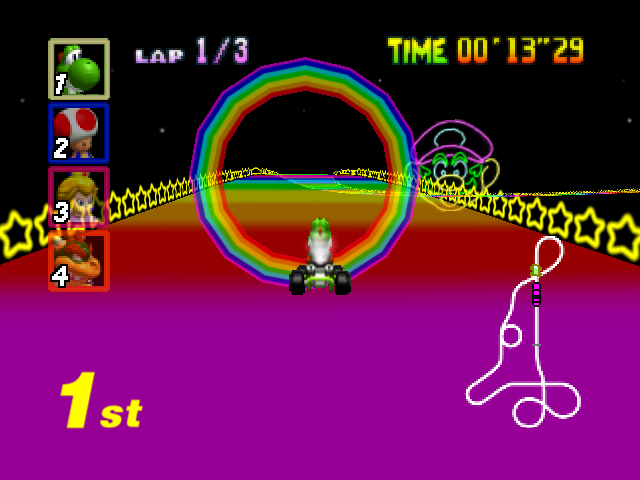
Special Cup - Rainbow Road 1
Special Cup - Rainbow Road 2
Special Cup - Rainbow Road 3
Special Cup - Rainbow Road 4
Special Cup - Rainbow Road 5
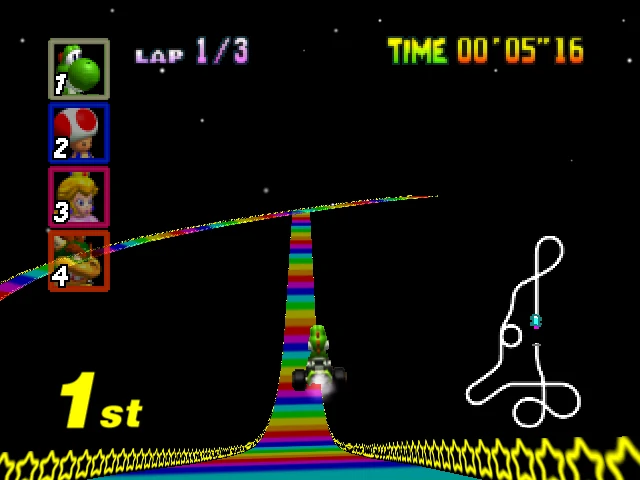
Special Cup - Rainbow Road 6
Shortcut
Despite this track having railings, racers can perform a large shortcut by making a timed hop to the left (or right, during Extra) during the drop at the beginning.
Battle Mode
Whether you're playing against a friend or are having a grudge match, Battle Mode is a fight with items between the Mario Kart drivers. Each human player gets a player (there are no computers) with three balloons attached to their kart. The object of the game is to knock off all the balloons of your opponents' karts (and your opponents are everyone but you).
Doing this is pretty simple, too. Any form of attack will work. You can hit them with shells, tackle them with Super Stars, make them hit a trap (Banana/Fake Item), or use physical attacks (heavyweight driving into lightweight) or course hazards to knock one balloon off. In this mode, all items are available except for Thunder Bolts, Spiny's Shells, Triple Shells (red), Mushrooms, Super Mushrooms, or Triple Mushrooms. If you fall off the course on into lava, you will lose a balloon.
When playing with three to four players, when one player loses, they will turn into Mini Bomb Karts (bombs on wheels). They can control themselves now, and can drive into players (avenging their defeat or aiding their ally). When a Mini Bomb Kart hits you, you lose a balloon as well. But, Mini Bomb Karts can only explode once.
You have a map of the arena on the screen much like you have a map of the course in races. On it is a radar system to tell you where opponents are hiding. Use this to know when to attack and when to flee. Also, if you are about to be hit by a shell, hold Z (if you have this type of item) to hold out a Banana, Fake Item, or shell to block it. This is a very useful technique. There are four arenas in Battle Mode.
Battle Mode Arenas
Big Donut
The stage is made completely out of wooden planks in the shape of a circle, and they slope a little to the center. This gives the Course a donut shape in appearance, in accordance with its name. In the epicenter of the course, a giant pit of lava awaits those who venture to close to the middle (donut hole). If a player falls into it, they will lose a balloon and will have to be returned by a Lakitu. There are four block towers located around the course that provide a means of evasion from opposing racers and their items.
Big Donut is a battle course in Mario Kart 64. As its name implies, the course is in the shape of a large donut. In the center hole of the donut is a pool of lava. If the players fall in it, they lose a balloon, and a Lakitu brings them out. There are also four rectangle-shaped blocks located around the course that provide a means to evade opposing racers and their items. The course is also slightly sloped inwards.
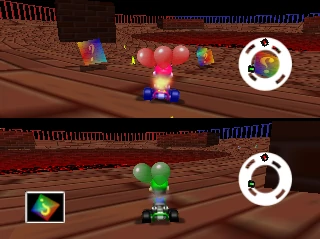
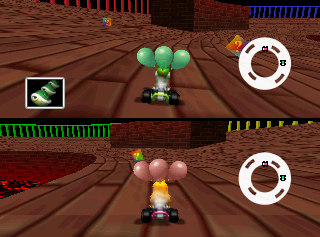
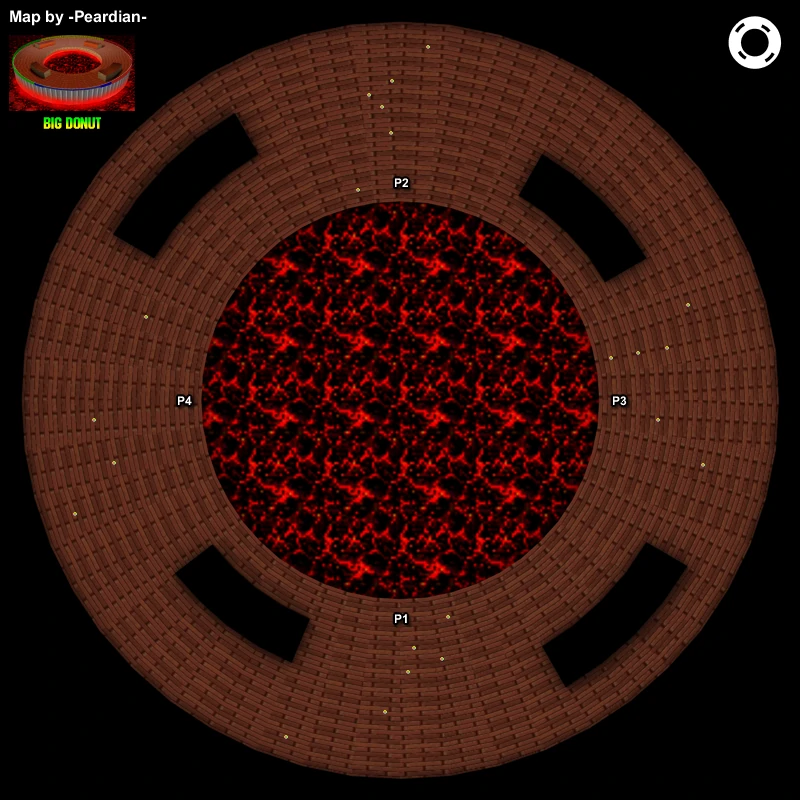
Block Fort
Block Fort is a battle course in the Mario Kart series. It first appeared in Mario Kart 64 with four structures in each corner of the level. Ramps lead up to the first level, where thin bridges lead to the other forts. Another ramp leads to the top level, with longer bridges to the other forts roofs. Item Boxes are on the ground levels edge-wall, and on both of the forts' levels.
Block Fort is one of four battle stages in Mario Kart 64. The stage has four large fortresses, which are red, blue, yellow, and green and are connected by bridges; one on the bottom of the stage and one on the top. The bridges appear to be metal and are gray. The bridge at the top is generally slightly longer than the one at the second level. The floor is blue. In this stage, there are a large number of Item Boxes, especially between the blocks at the lowest level. Green Shells are a nuisance, as they just bounce off of the walls. Red Shells are next to useless since they'll home into a higher enemy and crash, which is not necessarily what is wanted. The music is shared with Choco Mountain and Double Deck.
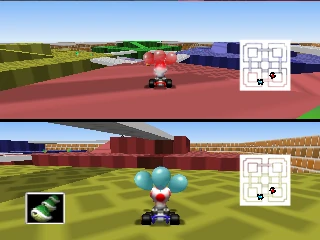
Double Deck
Double Deck is a battle course in Mario Kart 64. It takes place in a labyrinth with decks.
The racers begin the battle on the ground floor and then can go up or down slopes to the upper or lower decks. The lower deck is colored green, while the upper deck is red. All have a wide rectangular path. At the top, there is a large square gap, which allows the racers to fall back down to the ground floor.
As the course's name suggests, it contains two levels, or decks. It is one of the largest battle stages in the series. This track shares the same music as Choco Mountain and Block Fort. Double Deck is the only battle stage from Mario Kart 64 that was not remade as a retro battle course in a later Mario Kart game. This course has a similarity to Block Plaza from Mario Kart Wii. Pipe Plaza from Mario Kart: Double Dash!! and Mario Kart DS is a smaller Version from this course.
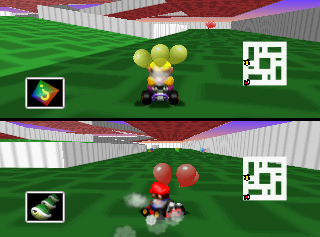
Skyscraper

The stage has many gaps and spaces in it, which makes it possible for players to bump others off the stage. The battle takes place on top of a giant skyscraper, as the name suggests.