Jet Force Gemini #17 An All-New Interstellar Adventure from Rare
Gameplay & Walkthroughs
Jet Force Gemini #17

- Developer: Rare
- Publisher: Rare
- Game Rating: T for Violence, Blood
- Release Date:October 11, 1999
- $25 / $15.00 at half.com • December 20, 2001
- Players: 1 - 4
- Miscellaneous Attributes: Vibration
- Features: three playable characters; fight bugs; mix of shooter and platform elements; two-plyer cooperative mode; 15 worlds

One of the more difficult gaming experiences to be had for Nintendo 64, Rare's Jet Force Gemini is a third-person 3D action-shooter set to the backdrop of an entire galaxy in a war engulfed future. Players control Juno, Vela and Lupus the dog through tons of beautiful 3D environments plugging enemy after bloody enemy in order to save groups of kidnapped "Tribals" and retrieve spaceship parts. Jet Force Gemini also features a semi-cooperative mode for two-players (one player controls a targeting reticule), and various deathmatch battle options for up to four gamers. Developed and published by UK-based Rare.
Introduction
The insect invasion has begun. The galaxy is being infested by the evil Mizar and his horde of Drones. Already, the planet of Goldwood has been subjugated and the peaceful Tribals enslaved. With an arsenal of mega-weapons at their disposal, the Jet Force Gemini team must travel in search of Mizar's lair - rescuing Tribals and splattering Drones all along the way. But can Juno, Vela and their faithful dog, Lupus, exterminate the deadly threat before it is too late?
Basics
The basic goal of each area in Jet Force Gemini (besides getting to the end), is to seek out and rescue a certain number of Tribals per level. The little Ewok-wannabe’s are scattered all over the levels, and they usually are in some form of danger. All you need to do is run up to one and collect it as if it was a coin, ring, or item in a traditional platformer.
There are three different characters that make the trip through the galaxy on the quest to rescue the Tribals. Each one has a strength that the others lack, and thus some can reach areas, items, and Tribals that the others cannot.
The three characters and their special abilities are:
- Juno: Is able to walk on fire.
- Vela: Can swim underwater.
- Lupus: Is able to hover for about five seconds.
At the beginning of the game, you will only be able to play as Juno. As you play through with him, you will find Vela who will then rescue Lupus. Each characters first goal is to reach Mizar’s Palace where they will be upgraded with Jet Packs that will allow each of them to fly for a limited time.
If you through the Tribals where the only thing you had to worry about, think again. Once each of the three characters reach Mizar’s Palace they will be informed that their quest is not over and in addition to the Tribals, they must explore each and every world to find twelve ship parts.
Another one of the items in the game that you need to collect is the ant head. Bugs that you slaughter drop these, and they can be used to unlock three different cheats in the game.
Controls
- D-Pad: Each direction on the D-Pad can be assigned to select a weapon via the Pause Menu, under Weapons.
- Start: Pauses the game.
- Z: Fires weapon
- Control Stick: Controls your characters
- C left and C right: Sidesteps
- C down: Crouch
- C up: Jump
- A: Scrolls forward through weapons.
- B: Scrolls backward through weapons.
- R: By holding R the control switches to Manual Targeting. This is where the C buttons control your movement, and the Control Stick aims your cursor.
Playable Characters
Juno
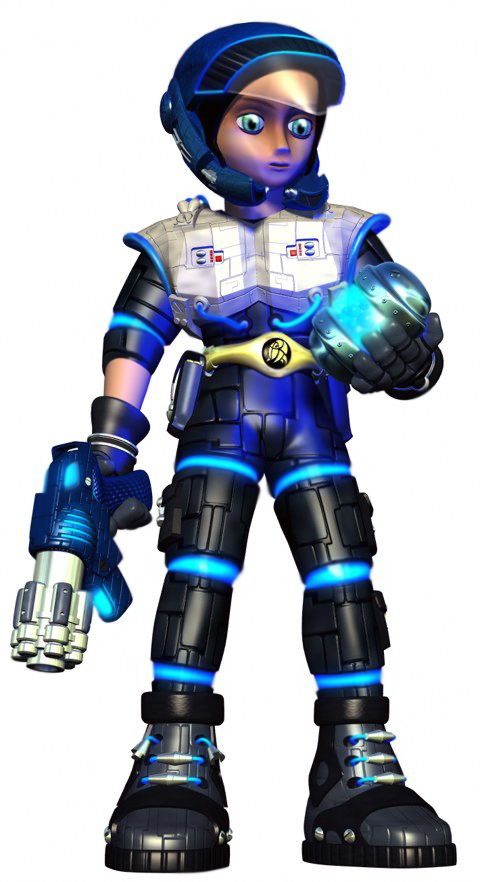
With desire to be part of a Jet Force crack team ever since his trader parents were destroyed by space pirates, Juno has risen among his own ranks as a well-liked, competent, and respected fighter in the Gemini squadron. He is a very thoughtful and deliberate guy who thinks things through and only wishes to keep his side of the galaxy safe. Being part of the Jet Force has its perks, and thanks to its top-notch weaponry and armory, Juno dons a heat-proof suit that enables him to walk in lava and other hot spots with ease. Now if only it could keep him safe from Vela's fiery temper.
Vela
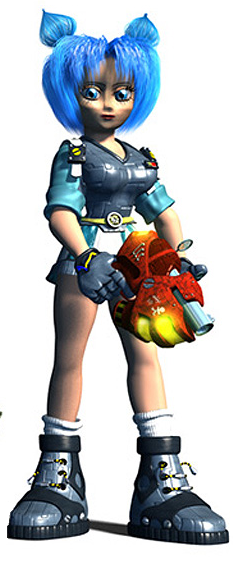
Vela, Juno's twin sister, shares his passion and desire of keeping peace in the galaxy, but she often relies on her quick temper to get her out of tricky situations. Always the feisty one, Vela believes in the Jet Force dream and is determined to prevail, proving that gender is not a question in the skeptical military world. She, like other recruits, is competent in all fighting areas but exceeds everyone else in underwater swimming, thanks to a cybernetic enhancement of the lungs. Her ability of breathing underwater indefinitely makes her the perfect choice when it come to exploring pools of deep water for secrets and access to new locations.
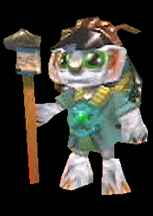
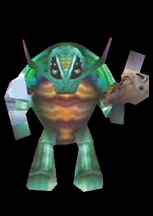
Lupus
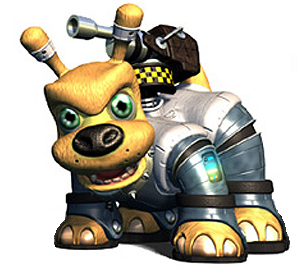
All the Jet Force squadron mascots have been cybernetically enhanced to hold their own as efficient fighting machines should the need arise, and Lupus is no exception. He's a tough, unshakable and totally loyal dog who is a vital member of the Jet Force Gemini team — and the twins' long-time companion. Being a cybernetically enhanced mascot means top-notch weaponry and armory, which includes rocket boosts on each paw to allow Lupus flight albeit for a short amount of time; in other words, the perfect flying machine.
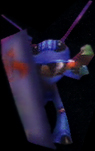
Floyd
In his quest to dominate the entire universe, Mizar has created an Elite Airborne Squadron that is capable of thinking on its own, thanks to its highly advanced AI. Floyd was created among many others in order to help further their master's conquest. Unfortunately, intelligence has its costs: He doubts whether Mizar's methods of conquest are no longer appropriate. Because of his thinking, Floyd was left out in the bogs of Tawfret as a warning to those who wish rebel under Mizar. Ever since then, he's cut off all ties with the Drone Army and has joined Juno, Vela and Lupus in their attempt to stop Mizar.
Other Characters
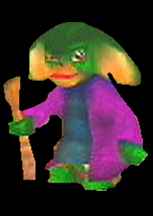
King Jeff
Leader of the Tribals, King Jeff, uses his mighty magical powers to protect the Tribals under his leadership. Every Tribal leader is traditionally chosen from the rare few born with special powers, and Jeff is no exception. He is a fearless king who cares and is concerned with his people ever since the Drones raided Goldwood, but even a powerful king can be powerless to stop a full-on invasion from the most powerful tyrant the galaxy has seen so far.
Magnus
The Goldwood Ambassador for the Jet Force Federeation. He mostly gives you tips on what you are supposed to do, but other than that, he is completely useless and does not appear very often in the game. If you meet him, just be careful not to shoot him.
Tribals

These little critters are everywhere and need saving. And you have got to find every last one of them if you want to save earth.
Enemies
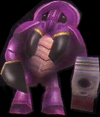
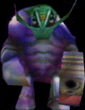
Soldier Drone
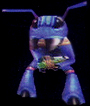
The lowest ranking drones, Soldier Drones are fairly weak and armed with slow firing weapons. While they lack firepower, they make up for it in foot speed. They're you average, run-of-the-mill enemies that are extremely common and very easily defeated. While there are varieties and differences, the blue ones are the basic type. You can take them down with anything: machine gun, pistol, grenades-you name it. Blue Drones, unfortunately, do tend to roam in packs, so be prepared to massacre these bugs with a few hits of your preferred weapon.
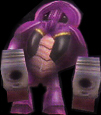
Sniper Drone
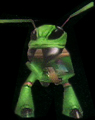
These suckers are green and actually hide in high places like the treetops (Goldwood) and ledges. Unlike their blue counterparts, Sniper Drones will, for the most part, not attack you in groups. There are few exceptions, but again, they are few. Take them down with one hit of your pistol.
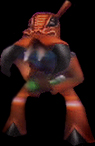
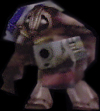
Ninja Drone
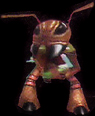
The ever-annoying Ninja Drones. These guys are brown in color and a pain to encounter. If you enter an area with a Ninja Drone in it, whatever you do, do not HESITATE. These guys will start shooting any Tribals in the area, so dispatch of them quickly. Fortunately, they do not appear very often in the entire game. Send them back to where they belong with the help of your trusty machine gun.
Coward Drone
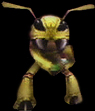
These guys are yellow, and as their name implies, utter cowards. The only difference between these Drones and the others is that these guys put their arms up in surrender and throw away their gun as soon as they see you. However, if you turn your back on them, they will throw grenades at you. Kill them (if you wish) to get a red Gemini AKA full health.
Deflector Drone
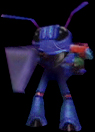
Deflector Drones carry around a small shield. The best time to hit them is when your behind them or when their shooting.
Barricade Drone
These Drones are well protected with their big shields. The easy way to kill them is to use explosives but if you use shurikens it will cut right through the shield and them.
Rhino Drone
Rhino Drones can take more hits than other drones in the ant family. They tend to use a hit and run tactic and they can easily be mistaken for a zombie drone due to their color.
Zombie Drone
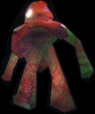
Mutated Drones found on Tawfret that are products of Jeff's magic. Zombie drones are impervius to bullets so use tri-rockets or gernades to exterminate these mutant pests.
Zombie Stag Drone
Zombie Stag Drones are extremly slow. This gives you time to kill them or retreat.
Cyclops Drone
Cyclops Drones are inaccurrate and attack in groups. Once you hear the sound of their engine, look for them and shoot.
Arachno Drone

Arachno-Drones are good shooters at close range. Wait for them to come from the sky or a hole and take them down.
Stinger Drone

These drones appear in great numbers and shoot cannon fire at high speed. Take them down quick with your machine gun.
Stealth Drone

These drones always appear in large numbers and they come with rapid fire. Every time you encounter them there should be some invincability near by. Like all flying drones, the best way to take them out is with your machine gun.
Hornet Drone

Hornet Drones come in great swarms. Take them down with your machine gun until they all die.
Dragon Drone

Dragon Drones like to bounce up and down and fire. The best way to take them out of the Sky is to use homing missles.
Armor Drone

Armor Drones can pack quite a punch. The best time to attack them is when they have to recharge after launching a missle.
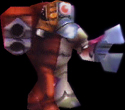
Stag Drone
Although big and intimidating, Stag Drones are armed with nothing more than a machine gun. Shoot in the head for best results.
Sentry Stag Drone
Just a Stag Drone with a promotion. A second machine gun. Beware, these big guys have twice the firepower of the average Stag Drone.
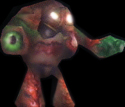
Infantry Weevil
This huge bug has one thing on it is mind-destroying foes into smithereens. Takes alot of ammo for this guy so beware.
Weevil Trooper
Weevil Troopers are committed to staying at their post at the Spawnship. They remain stationary while blasting away anything in their way.
Renegade Drone
Just a Stag Drone with a promotion. A second machine gun. Beware, these big guys have twice the firepower of the average Stag Drone.
Cyborg Drone
Cyborg Drones are one of the most dangerous enimies around. Avoid there blasts and take them down fast.
Rotor Drone

These ariel machines will shoot you from above with lasers. Use homing missles for machine gun for best effect.
Octo Drone
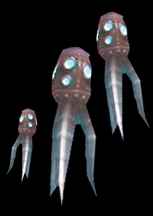
Octo Drones always come in pairs of threes. Slow but lasers are powerful so take them down quickly.
Cockroaches

Cockroaches crawl around and they hurt you by crawling into you. Drop some fishfood down for them and shoot them.
Weapons
So, you want to defeat Mizar - as well as the army of thousands of multi-colored ants that stands in your way, ready to throw their sorry lives away for the bug king...? Know that picking the right weapon for the right enemy is one of the most important abilities of the Jet Force team. With that in mind, we have assembled this weaponry listing with tips and general info for each of JFG's explosive weapons.
But before we give you the full lowdown on the weaponry, read this important tip: You can assign multiple weapons to the D-Pad for quick selection. For example, map your machine gun to D-Down, missiles to D-Up and the Shuriken to D-Right. These three are essentials and you should never have to scroll through your arsenal looking for them.
Pistol
This is your standard issue Jet Force Pistol. This unlimited-ammo gun fires six rapid-fire shots before it needs to recharge for a second. The pistol's initial capacity is 100 shots, with a backup supply of weaker pellets should ammo run out. This gun uses JFG's built-in auto-targeting ability. One of its most effective uses is to run around without pressing the R (targeting) button and let auto-targeting help you align your sights with your enemies. This is an excellent way to take out roaming drones quickly.
The Good
Unlimited ammo and auto-targeting.
The Bad
Back-up pellets are very weak.
The Ugly
Auto-targeting ineffective against airborne drones and snipers.
Pro Tip
The pistol is a decent choice when you run out of machine gun ammo. You can even take out larger enemies with your pistol. Simply aim at the heads of the big bugs and shoot single, timed blasts. The enemy bug will react to the shot and flinch, unable to return fire -- shoot again before it returns to ready position and continue until the bug's terminated.
Sniper Rifle
The Sniper Rifle: The ultimate long range weapon. Comes with an extensive zoom facility and packs a surprising punch, though its rate of fire leaves something to be desired. it is highly important to either stay out of the enemy's sight range when using the rifle, or to take cover behind crates, rocks or walls.
The Good
Pick off far away enemies with the help of your sniper zoom.
The Bad
Remember: If you can see your enemies, they can see you as well. do not get shot while trying to aim.
The Ugly
Clear the area behind you before you try to snipe something. Many snipers get shot from behind.
Pro Tip
do not forget that you can still strafe out of harm's way while you are using the gun's zoom feature. There are also times where you should take cover behind a crate, zoom in and aim at the right angle, then strafe sideways until your target comes into range. A neat little trick when playing with two players: Take cover behind an object so that you cannot get hit by the enemy. Player one should now zoom in and place the target in a way that you get the best viewing angle (regardless of whether you can hit the enemy or not). While you are zoomed in, Floyd (ie player two) can now easily pick off far away enemies - and you are not wasting valuable sniper ammo.
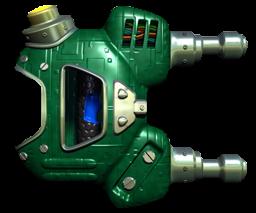
Homing Missile
Now we're talking! According to JFG lore, Homing Missiles combine formidable impact strength with deadly accuracy. Well, if you have got good aim, that is. Moving the sight over a target in manual mode allows you to lock on and seal your opponent's fate. This weapon is especially powerful against bosses and larger enemies.
The Good
Powerful blasts splatter drones instantly. Homing warheads make sure your missiles reach their target.
The Bad
Ammo is limited and hard to come by.
The Ugly
it is all too easy to hurt yourself by causing explosions too close to your character.
Pro Tip
Unlike regular ammo crates, ammo backpacks do not respawn after one character picks them up. If you want to have an easy game blasting Mizar out of the sky at the end of JFG, you should concentrate on picking up as many Homing Missile backpacks with Juno as possible. These backpacks will increase the maximum number of missiles he can carry - and since he's the one who will square off with Mizar, he should be the one to get the most. Skip them with Vela and Lupus whenever possible.
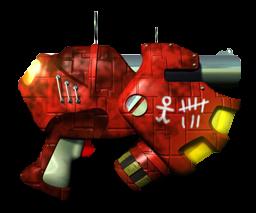
Machine Gun
Relatively weak but boasting a rate of fire to die for, the machine gun is unparalleled when it comes to close quarter fighting. However, its large spray reduces long range efficiency. The machine gun should be your weapon of choice against most foot soldiers and flying probe droids. When fighting drones, we recommend running around with guns blazing without L targeting. Be careful though, running out of ammo in the middle of a battle can be disastrous for your JFG soldier, so be sure to pick up ammo crates at all times. Note that the machine gun is also needed to open certain door locks in this game.
The Good
Rapid fire makes this one the best weapon against almost every enemy in the game.
The Bad
Large spray reduces your chance to pick off single enemies.
The Ugly
This gun runs out of ammo quickly in the early stages of the game. Collect backpacks to carry more ammo as soon as possible.
Pro Tip
The machine gun is the most important gun in the game, hands down. You should keep it loaded at all times. It is most effective against large numbers of enemies, such as swarms of flying drones or a group of ants. In case you did not notice: ammo dropped by enemies is automatically loaded into the weapon you have currently selected (this only applies to the pistol, machine gun and shotgun). Be sure to select your machine gun after you take out a few bugs - even (and especially) when it is empty.
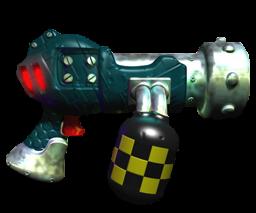
Plasma Shotgun
The Plasma Shotgun delivers a powerful shot with a wide impact area when charged, but only a wimpy blast when fired quickly. The charge time requires team members to plan ahead when using it. When fully charged, plasma shots can blast through multiple enemies and can be very effective on close formations of flying probes.
The Good
Charged blasts have plenty of splatter power.
The Bad
Charging takes up too much time and gives your enemies the time to shoot or retreat.
The Ugly
Regular shots are useless and much too weak.
Pro Tip
No question about it, the plasma shotgun is the least favored weapon in the game. JFG pros will avoid it most of the time, but the gun does have a few merits. For one, shooting switches and taking out stationary targets with the shotgun is a great way to preserve machine gun ammo - but the charged blasts can also be very effective against big guardian bugs and will also harm zombies.
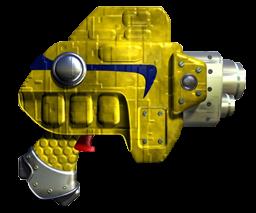
Tri-Rocket Launcher
The JFG weapons profile reads: When you absolutely positively have to kill every last drone in the room, the Tri-Rocket Launcher is for you. Three spiraling warheads create a blast of magnificent proportions. That about sums it up. The rockets may lack the ability to home in on your foes, but it does not really matter since the resulting blast is often powerful enough to take out ants hiding close to the impact area.
The Good
Immense destructive powers.
The Bad
Ammo is hard to come by and the missiles are relatively slow moving.
The Ugly
do not use it in rooms with Tribals - unless you are ready for some pink goo.
Pro Tip
Unless ammo crates are plentiful, tri-rockets should be used sparingly in most levels and kept for the big boss battles. Trying to take down a boss with the machine gun or pistol can be a tedious endeavor. Tri-rockets reduce the battle time to a minimum. The rockets are also great against larger termite enemies or for blasting through doors and obstacles, but be careful when firing them in a room with Tribals.
Flame Thrower
Fueled by gas canisters, this lightweight flame thrower is a frighteningly effective close-range weapon guaranteed to wreak havoc amidst the enemy ranks. But as fun as it is to play with fire, you should limit your use of the flame thrower in the game to wide-open areas. A burning enemy can still inflict damage on you and Tribals standing around waiting to be rescued.
The Good
Setting ants on fire is sick fun.
The Bad
Only works at close range.
The Ugly
Burning enemies run around aimlessly and can easily bump into you (or a Tribal) and inflict damage.
Pro Tip
Be careful when using the flame thrower in small corridors as they do not offer much room for you to dodge burning enemies. If you cannot help yourself and you have to do it, remember to walk backwards after setting your foe on fire. Also, if you are running low on ammo and you are desperately in need for some flame thrower fuel, look for a Tribal carrying a small lantern (there are some in almost every level). Shoot that Tribal once with a weak gun (do not kill it, unless you are feeling evil). The Tribal will drop his lantern and you can pick it up to replenish your flame thrower ammo.
Shocker
Affectionately referred to as the "Shocker," this is an experimental device receiving its first field test. It incapacitates the enemy with a raw electrical discharge. The shocker is more of a novelty item than an integral part of the JFG team's arsenal. Still, it can be used to great effect on Tribal rescue missions.
The Good
Freezes foes instantly.
The Bad
Other than that, it does not cause your enemies much harm.
The Ugly
You will not find it until late in the game. By then you have got bigger guns to fry your enemies with.
Pro Tip
The shocker will not get much use from most players, but it is a good choice when you are trying to rescue all Tribals in a level since you can incapacitate dangerous bugs and quickly save all Tribals in the area before they wake up. The shocker can also be of use when destruction of enemies is not necessary to advance to a new area and you do not want to waste any precious ammo.
Shuriken
A traditional weapon that still holds its own in the hi-tech Jet Force armory: The simplistic appearance of today's Shuriken disguises its potential as a heat-seeking killer. You can lock on to several enemies at the time and take them all out with one throw.
The Good
Cuts through everything and kills almost instantly.
The Bad
Tends to get stuck in obstacles because of curved flight pattern.
The Ugly
Throw Shuriken at zombie drones and they will continue to stalk you without their heads.
Pro Tip
Shuriken may not be effective against undead warriors, but the ninja star is the weapon of choice against drones carrying blast shields. Most drones will be killed instantly by a Shuriken and you can even take out multiple enemies with the help of its multi-lock feature. Remember also that you can retrieve your weapon after you have thrown it.
Grenade
The looping trajectory and powerful blast of these grenades make them ideal ambush weapons. Try not to leave your target too much time to run for cover. Grenades are great for taking out enemies on different levels. Whenever you'are standing on a walkway above another room, toss a few grenades down to decimate the enemy's numbers. Watch out for Tribals, please.
The Good
Great crowd control weapon.
The Bad
do not hit walls or obstacles. Grenades can bounce right back at you.
The Ugly
Next to rockets, grenades are the most notorious Tribal killers.
Pro Tip
Practice shooting grenades close to a grenade ammo crate. Expert players can bounce grenades off walls to shoot around corners and aim high to take out enemies hiding behind crates or blast shields. Resist the temptation to use grenades when the enemy is close to you. You will hurt yourself.
Fish Food
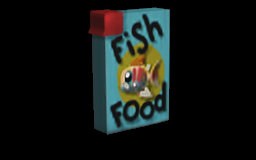
Believe it, or not, but fish food is actually included in the characters' weapons lists. Although it does not really have any attack value, it does have a few alternative uses.
The Good
Nothing, really.
The Bad
The fact that it is listed as a weapon.
The Ugly
you are facing a squadron of 30 flying drones and the only weapon with ammo left is the fish food.
Pro Tip
Fish food can be used to distract hungry creatures, such as maggots. You can also use it to get Flopsy the dog off your back. During combat, you can throw fish food at stag drones to distract them. Finally, if you are trying to preserve ammo and you are looking for an easy way to get rid of proximity mines, toss a little bit of fish food to set them off. If you run out, you have to return to the fish pond to get more.
Remote Mine
Once thrown into the fray, Remote Mines are triggered by the handheld control box on the next press of the Z Button. Use these destructive explosives while luring drones in your direction for best effect. Remote Mines can also be an excellent weapon in multiplayer battles.
The Good
will not blow up till you hit the button.
The Bad
Tend to blow up after the enemy has passed by
The Ugly
it is easy to lose track of where you placed your mines. do not trigger them if you are not sure where they are.
Pro Tip
Remote Mines aren't too effective in large, wide-open areas because there's a good chance your enemies will run around them. However, there are plenty of narrow tunnels and caves in this game that are tailor-made for mine use. Simply throw a mine into a tunnel ahead of you and lure enemy drones your way. Hit the button at the right time and you can cause some serious damage.
Cluster Bomb
One of the most devastating anti-personnel weapons available to Jet Force. An initial explosion releases three more bombs to maximize the impact zone. Use them like Grenades to take out larger forces of drones. Thanks to the parachute bombs it contains, it is very effective against drones spreading out to take cover from your attacks.
The Good
Powerful blast, wide radius.
The Bad
Delay time before parachute bombs explode.
The Ugly
You, if you do not clear the blast area quickly enough.
Pro Tip
Use Cluster Bombs whenever you encounter a group of drones entrenched behind crates or using shields to protect themselves from your bullets. do not waste them on single targets, unless you are out of other power weapons.
Flares
Unlike in Turok: Rage Wars, Jet Force Gemini's flares do not have any attack potential. However, they do prove invaluable in darkened areas as they let you see hidden areas. Press the Z Button once to ignite a flare, and again to send it hurtling into the distance.
The Good
Flares make pretty red light.
The Bad
Pretty red light does not do much.
The Ugly
The red light often blinds more than it lights up.
Pro Tip
There really aren't any areas in this game that REQUIRE the use of flares, but it is always a good idea to throw one and look around when you happen upon a particularly black wall or ceiling texture. Look for clues, such as flare ammo crates to let you know that there's something hidden in the dark.
Proximity Mine
This less complicated mine variation is easily thrown by the quick tap of the Z Button. There's no need to trigger this weapon after it is deployed. Proximity Mines detonate as soon as an enemy stumbles into range. Although mostly a weapon of choice for the multiplayer modes, the mines can be valuable for protecting your back from ambushes.
The Good
Powerful blast, wide radius.
The Bad
Delay time before parachute bombs explode.
The Ugly
You, if you do not clear the blast area quickly enough.
Pro Tip
Like Remote Mines, Proximity Mines are most effective in narrow tunnels and caves. Toss a mine into a tunnel ahead of you and lure enemy drones your way for some fireworks. Keeping the Z Button pressed sets the fuse length for a delayed explosion. Pro gamers will want to familiarize themselves with the delayed detonation option. The longer you keep the Z Button pressed when you deploy a mine, the longer the fuse length and the later the explosion will occur once the mine is armed.
Items and Keys
Special Item Locations
Jet Force Gemini contains a number of special items in addition to the regular power-ups such as gems, backpacks and Gemini Holders. This listing tells you what the items can be used for and where to find them.
Fish Food
Where: Goldwood, first area after landing pad (treasure chest)
One of the first secrets in the game can be accessed right from the Goldwood entry area, even before you enter the Outset zone. Look for a secret passage near the right rock wall. Behind it, you will find the fishpond and a treasure box that contains fish food. Although it is listed among your weapons, the fish food is hardly lethal. You can use the fish food to feed the fishes (duh) or other hungry creatures, such as the creepy maggots or Flopsy the dog (which keeps them from attacking you). The food can also be used to distract your enemy or to detonate proximity mines without wasting any ammo.
Ear Plugs
Where: SS Anubis, Hold (Floyd Mission)
The ear plugs are the perfect protection for sensitive ears, especially when around noisy Tribals – but the Jet Force team cannot use them. To get the ear plugs, get a Gold or Expert rating in the Floyd mission in the Hold area of the SS Anubis. Once you have access to the Water Ruin stage, bring the Ear Plugs to Ivana the Bear.
Pants
Where: Tawfret, Bridge (on top of a tree)
What a charming place to forget one's shorts... In this desolate swamp haunted by zombie drones and giant bettles, a pair of shorts hangs from a tree. Bring them to their rightful owner, Gimlet, who awaits in the same stage.
Crowbar
?Where: Tawfret, Bridge (from Gimlet)
This handy tool lets you open the heavy trap doors on Tawfret and Walkway. To get it, bring the pants back to Gimlet.
Jeff & Barry II Arcade Chip
Where: Ichor, Military Base (Floyd Mission)
Only if you have found this circuit board can you play the Jeff & Barry II racing game in the nightclub arcade on Ichor (Jeff & Barry I can be played without it). Get a Gold rating in the Ichor Military Base Floyd Mission.
Specialist Magazine
Where: Eschebone, Cortex
Cough. Specialist magazine, eh? We know where you can find it – if you want it... Go to Eschebone's Cortex stage to find it, then bring it to Fernando who is hanging out on Rith Essa (Bluff). Fernando will give you the Mine Key in return for the... uh... inspiration literature.
Mine Key
Where: Rith Essa, Bluff
You need this key in order to get into the Rith Essa mines. Once you have got the Specialist Magazine from Eschebone, visit Fernando and trade it against the key.
Gold Bars
Where: Celulean, Dune
Look for three gold bars in the Cerulean outdoor area. You can use them as payment for Fish Face's Tri-Rocket Launcher in the same level.
Key Locations
Juno
- Yellow Key: Goldwood, Outset (hidden in a box in the caves)
- Red Key: Goldwood, Outset (receive from Magnus)
- Blue Key: Sekhmet, Battle Cruiser (lava pit, through pipe)
- Green Key: Sekhmet, Battle Cruiser (jetpack room)
- Magenta Key: Eschebone, Thorax (left intestine)
Vela
- Yellow Key: Cerulean, Dune (holding room)
- Red Key: Sekhmet, Battle Cruiser (receive from mole)
- Blue Key: Eschebone, Thorax (underwater)
- Green Key: Sekhmet, Battle Cruiser (jetpack room)
- Magenta Key: Eschebone, Thorax (left intestine)
Lupus
- Yellow Key: Spawn Ship, Troop Carrier (sewer pipe)
- Red Key: Spawn Ship, Troop Carrier (cargo sewer)
- Green Key: Sekhmet, Battle Cruiser (jetpack room)
- Magenta Key: Eschebone, Thorax (left intestine)
Note: Lupus cannot acquire the Blue Key.
Tribal Locations
You have to find all of the Tribals in the game if you are to have any hope of beating JFG. A brief list of each world with all of its sublevels (if applied), characters needed to rescue all of the Tribals, requirements needed and overall Tribal account. If you want more detailed info for each world, simply click on the links for each world.
Levels
- Goldwood
- SS Anubis
- Tawfret
- Sekhmet
- Cerulean
- Ichor
- Spawn Ship
- Rith Essa
- Eschebone
- Mizar's Palace
- Walkway
- Gem Quarry
- Space Station
- Water Ruin
- Asteroid
Goldwood

Entry Area
There are no Tribals in this area, but you can get some weapons and capacity crates. The one weapon here is the Shuriken, which you can get once you get the Yellow Key in the next area (it is behind the door that requires the key). Inside the hut is a Gemini Holder. Also, off to the right as you enter the area is a passageway that will lead to a fishpond where you can get the Fish Food and some capacity crates.
After all the characters have been powered-up at Mizar’s Palace, you can return here with Vela for a bonus token that will unlock the Yellow Ant in the multiplayer mode. Once you talk to Magnus, and defeat the flying enemies, you can continue on to the next area, Outset.
This is also the level where Juno starts out the game.
Outset
Total Tribals: 7
- 1: Right next to the tree stomp near the entrance
- 2 - 3: Both are near the huts in the large clearing
- 4 - 7: The final Tribals are in the cave, follow the left tunnel to find them in a room. Also, in the same room the yellow key is hidden in a crate.
This is the first are in which you must rescue Tribals. The Yellow Key is here along with a Gemini Holder, and the very useful Machine Gun.
In order to get the Yellow Key, defeat the enemies in the area with the two Life Force Doors, and then go into the one on the right. In the underground tunnel, near where the Tribals are is a box. Blow up the box to get the Yellow Key.
To get the Machine Gun, you must first get the Red Key from Magnus. Simply follow the path until you come to a Floyd Door and you will find him. Then, take the Red Key up the mountain path to the red door, and enter it to find the Machine Gun guarded by a large bug.
Once you have the Machine Gun, you can go over to the locked door, and use it on the panel to enter the next area and end the area.
Also in this area is a Floyd mission. Later in the game you will re-assemble the robot helper Floyd, and you will then want to return here to do this mission. The objectives for this one are:
Primary
- Collect four cases of ore.
- Disable four power cells.
- Finish within the time limit.
Secondary
- Collect all cases of ore (there are 16).
- Disable all of the power cells (there are 10).
When you get the Gold Rating for this mission you will unlock the Goldwood Target Range in the multi-player mode.
Interior
Total Tribals: 9
- 1: Hiding behind a tree right near the entrance to the area.
- 2: On top of a ruined hut is the second Tribal. This is just to the left of the first one.
- 3 through 6: There is a clearing with boxes, and an ant chasing Tribals around. There are a total of four in this area.
- 7 - 9: Right at the exit is a stack of crates. The final three Tribals are hiding behind them.
The Interior area doesn’t have any special weapons, but there is a capacity crate and gemini holder here. Later, Lupus will need to return here to access the Rim area.
Take this area slowly, as using manual targeting will really help with the flying enemies. Other than that, the area is pretty straightforward all the way to the end.
Lodge
Total Tribals: 15
- 1 - 4: In the entrance hall, there is a doorway to the left. Inside are the first four Tribals.
- 5 - 7: In the clearing area there are three stone pillars, each one with a Tribal on it. You need to be careful as when you step on a pillar, all three will begin to fall.
- 8 - 9: In the small village, the next two Tribals are outside in the rain.
- 10 - 11: Also in the village, the first hut on the left contains these guys.
- 12 - 13: Again in the village, the second hut to the right has two more Tribals.
- 14 - 15: The final two Tribals are near the bottomless pit that is near your ship.
Ledge is a rather large level with tons of enemies, try to take it slowly and aim your shots well, and you should do fine. The only major item here is Vela’s Hatch Key, which is a ship part. It is located where there is a large cliff, by jumping down it you can enter a door where the ship part is.
After completing this Stage, you will gain access to the Spacestation level.
Rim
Total Tribals: 11
- 1 - 2: The first two Tribals are in the tunnels, behind some boxes and flying enemies. You should try to grab them before fighting the flying enemies since then they go down they can possibly hit and kill the little Tribals.
- 3: In the area where you need to jump from platform to platform, there is a Tribal on a small ledge. Grab him as soon as possible since the ants will be throwing grenades at you, and one can possibly hit the Tribal.
- 4: In the room with the lake, there is a Tribal on a platform.
- 5 - 6: In the same room where you find the Shocker, there are two Tribals.
- 7: In the large hall is a Tribal on a ledge that you need to hover across to.
- 8: When you come to a small room with barrels DO NOT FIRE. There is a helpless Tribal in the middle of them and a stray bullet could cause the barrels to explode killing the little fur ball.
- 9 - 10: After the canyon, take the left tunnel into a room with proximity mines and two Tribals. Just be sure not to set off the mines.
- 11: The final Tribal is in the large room with the giant steps.
Rim is Lupus’ own area of Goldwood, as only he can access it. To get to this area, Lupus must first make his way through Outset and then Interior. In that area is a huge gap that only Lupus can cross.
There are numerous capacity crates in this area, but the big prize is the Shocker weapon. To get it, go to the room with the raised platforms and then hover across to the life force door. Not only will you find the weapon, but also two scared Tribals.
SS Anubis
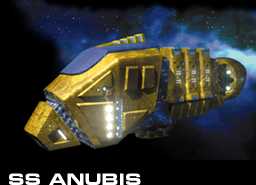
After escaping the bug-infested forest world of Goldwood, Juno arrives at the large colony ship, the S. S. Anubis. It is here that the second member of the Jet Force Team, Vela, is held captive. The level has both large open areas, and tight, confined passageways. Juno must both rescue all the Tribals as well as free Vela to complete his portion of the level.
Later on when they are powered-up, Vela and Lupus can return here to help in the rescue of all the Tribals.
Landing Zone
The Landing Zone is the central hub area of the S. S. Anubis. In this area are three doors that lead to different areas of the level. They are:
- The exit behind Magnus leads to the Hold
- On the second floor there is an entrance to the Depository that requires the Yellow Key to enter.
- Once your characters are upgraded, you can use the jetpack fuel pad to reach the entrance to the Passageway.
Also in this area is a capacity crate, a gemini holder, and the Plasma Shotgun. These are all right out in the open, and not hidden. Once you collect those items, exit through the door behind Magnus to enter the Hold.
Hold
Total Tribals: 10
- 1 - 2: In the first large area are two Tibals between a bug and explosive barrels. The best thing to do is to jump down, rescue them, and then take out of bugs.
- 3: The third Tribal is in the room with the moving platforms, next to a crate.
- 4 through 10: The final bunch of fur balls is located in the prison. You must shoot and destroy access panels to rescue them (and Vela).
In the Hold is where Juno will rescue Vela at which point she will then be playable. To free her (and all of the Tribals), Juno must shoot and destroy eight tiny access panels scattered throughout the level. The locations are:
- Up high close to a corner in the first room.
- Right to the left of the entrance door in the generator room.
- In the room with the moving platforms.
- Again, in the same room, but near the bottom of the pit.
- Underneath the large window in the conveyor belt room.
- In the same room up high next to a cell door.
- On the upper level of the electricity beams room, near toe totem pole.
- In the prison room.
Once you destroy each panel, all the cells will be open and you will be able to rescue the final Tribals and Vela. There is also a Floyd mission in this level, and again you need to first re-assemble Floyd in the Tawfret level before you can play any of his missions, and then return here. This Floyd mission scores you the earplugs, and it is the only one that you absolutely must complete with a Gold rating in order to finish the game. The objectives are:
Primary
- Collect four boards.
- Destroy two switch boxes.
- Finish within the time limit.
Secondary
- Collect every circuit board.
- Destroy all switch boxes.
- Destroy the reactor.
- Finish the level.
Once Juno completes the Hold area, he will head to Tawfret.
Passageway
NOTE: While all three characters can play through this area, they must be upgraded with their jetpacks to do so.
Total Tribals: 8
- 1 – 2: Right past the electric beams is a door on the wall. Fly through it for the first two Tribals.
- 3 – 8: In the last room at the very end of the area are the final six Tribals along with a ship part.
Aside from one capacity crate, the only major item in this area is the Fin Ship Part. To get it, fly until you enter a very large area, where you will run into Midge. He will then give you a Ship Part. Once you get that (and rescue all the Tribals), the only way out of the area is to fly back to the entrance.
Depository
Total Tribals: 14
- 1 - 5: In a room adjacent to the maze.
- 6 - 14: There are two exits in the maze. The second one leads to a room where the last nine Tribals are located.
Depository is basically a giant maze. There are no special weapons in here, but there are a ton of Tribals. Be sure to watch out for snipers, and use manual targeting to take them out. When you reach the end of the level, you will find your ship. If you exit that way you will gain access to the Walkway level.
Tawfret

Tawfret is a swampy world, and is also Juno’s final stop before Mizars Palace. It is also the level where you will finally find Floyd. You will bump into him in the Bridge area, and then you will have to locate his three missing pieces. Juno is able to collect all the Tribals in this level his first time through, but you will want to return here later to get the Bonus Totems as both Vela and Lupus.
This is also the first level where you will run into Undead Bugs. The easiest way to take down the small guys is with the plasma shotgun, while the tri-rockets are needed for the big bullies.
Bog
NOTE: Juno needs the Crowbar to rescue all the Tribals in this area. He receives it in the next area (Bridge) so you will want to return here once you have it.
Total Tribals: 10
- 1-2: Behind the life force door in the second area of the level.
- 3: Near the remains of the cathedral in the Tribal Colony ruins.
- 4-5: In the first bunker to the right in the Tribal Colony ruins. You need to blow up the door with the Tri-Rockets to get in.
- 6: This is the first one where you have to have the crowbar to get. It is right in the middle of the cathedral ruins under a trap door.
- 7-9: In the same area as Tribal # 6 are ten doors. On the right side of the room is a Tribal behind the 4th door, and on the left doors 1 and 3 hold Tribals.
- 10: The final Tribal is behind a life force door. As always you need to defeat all the enemies in the area to get open it.
In addition to ten Tribals, Bog also has quite a few items for Juno. First, and most crucial is the crowbar. This is obtained by first getting the pair of pants in the next area (Bridge) and taking them to Gimlet in the abandoned town area of Bridge. Once you have the crowbar, you can return to the Bog and free all the Tribals.
Also in the area is the Tri-Rockets Launcher. To get this extremely useful weapon, make your way to the ruined colony. It is there where you will find it. The Tri-Rockets will turn out to be Juno’s most useful weapon in the entire game. When you finally reach Mizar, you will want to be fully stocked on ammo for this devastating weapon, so be sure to grab any and all capacity crates that you find in the game.
Bridge
NOTE: Once again, only Juno with the Crowbar can rescue all the Tribals in this level.
Total Tribals: 12
- 1-4: The first four Tribals are all on the Bridge platforms.
- 5: When you reach the abandoned town the fifth Tribal is in the building to the right of the church.
- 6-9: The next four Tribals are located in the dungeons under to town. To get there jump into the chimney of the church. The first two are pretty much out in the open, while the next two are a bit tougher to find. You need to blow up the coffins in the area to find hidden areas. Inside one of those areas are two Tribals.
- 10-11: Inside the small tower are two Tribals hiding in the dark. You need to use the Flares to see them.
- 12: The final Tribal is in a tunnel under that same tower.
Bridge is yet another level where you will need to return with both Vela and Lupus in order to find all the secrets. Lupus is able to hover to a platform at the beginning of the level for capacity crates and a bonus totem. Vela is able to swim in the large lake into a cave under the small island for another bonus totem.
As for Juno, he has the bulk of the adventure in this area. There are 14 Tribals, as well as the Crowbar, Sniper Rifle, Flares, and Remote Mines. Most importantly, this is the area where Floyd is found and you must go on a small quest to find all three of his parts.
Floyd is found on top of the small tower in the abandoned town. He has three parts missing, and you must find all three before he can be rescued and become part of the team. The locations of the parts are:
- In the same area as Tribals 6-9. Drop down the chimney to get there.
- Right outside from the church, go past the chimney on the left side, and then climb to the top of the wall.
- In the same tunnel as Tribal #12.
Once you have all three pieces, return to Floyd to re-assemble him and add him to your team. Floyd becomes a helper character that will detect nearby enemies by flashing his lights red. Also, a second player can take control of Floyd at any time and fight off enemies with the added bonus of infinite ammo.
To get the Crowbar, first get the pair of pants in the next area (Bridge) and take them to Gimlet in the abandoned town area of Bridge. Once you have the crowbar, you can return to the Bog and free all the Tribals. The Sniper Rifle is in the same room as Tribal #5, and the Flares are in the same dark room where you need to use them to locate Tribals #10 and 11. For the Remote Mines, go to the underground dungeon to find them behind yet another coffin.
Castle
Total Tribals: 6
- 1: Tribal number one is right inside the castle in the large hall.
- 2: Near the life force door to the right of the hall.
- 3: Right around the corner from the second Tribal.
- 4-5: Later in the area, you’ll find two more Tribals in a small niche.
- 6: The final Tribal is in a moat right near the end of the level.
The Castle is Juno’s final area right before Mizar’s Palace. Getting in here can be tough, but not impossible. There are two massive ants in each tower, but one or two Tri-Rocket shots can squash them easily. Also, each tower will launch a squad of flying enemies at you, which should be taken down using the machine gun. As for the drawbridge, it is guarded by a group of red ants. This is your chance to put that new sniper rifle to use. Simply target them and fire.
Once inside, the rest of the level is basically straightforward. You got the six poor little Tribals, some Capacity Crates, a Gemini Holder, and a whole army of nasty bugs just waiting to make you their lunch. Blast your way through them and the Life Force Door will open revealing the first boss of the game, and Juno’s final obstacle before Mizar’s Palace.
To defeat the boss, simply dodge his attacks from left to right, and attack him in the following ways:
- Shoot each of his teeth until they are destroyed. It should only take a couple shots with rockets.
- Once the teeth are gone, focus on the antennae until they are destroyed.
- Finally (when the antennae are gone), shoot the head.
When the Giant Beetle is destroyed, Jun will board his ship and head to Mizar’s Palace.
Sekhmet
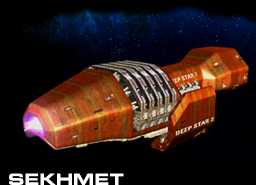
Sekhmet is Vela’s first mission after being rescued by Juno. As with all other levels, the other two characters can return here once they have all reached Mizar’s Palace. Sekhmet is a massive level with only one area, the Battle Cruiser. It is from here that the powered-up Juno will access the final level (Water Ruin), making this area a crucial one to complete.
Battle Cruiser
NOTE: Only a powered-up Juno can collect all the Tribals in this area.
Total Tribals: 15
- 1-4: In the first area (the landing pad) behind some crates.
- 5-6: These two need the Jetpack as you need to fly up to the ledge in the second large hall and follow the tunnels to find two Tribals.
- 7-8: In the Blue Key area Juno needs to drop down into the lava to find these two guys.
- 9-10: Again with the Jetpack, go past the lava room and fly up to the platform with 2 Tribals.
- 11: In the same area, again use the Jetpack to get him.
- 12: Three rooms past the lava area is where you can find this one.
- 13-15: In the room with the Green Key, fly up through the hole in the roof using the Jetpack to find the final three Tirbals.
The Battle Cruiser is a massive level. It’s best to hurry through it the first time as Vela, and then return later with a powered-up Juno to collect all the Tribals.
You can find a Grenade crate right at the level entrance. To get the Machine gun in this level, go into the first Large Hall and kill all the enemies to open a Life Force door. Follow the short hall to the Machine Gun crate and Gemini Holder. After you have the Machine Gun as Vela you can return to the second Large Hall to enter the Machine Gun-activated door to get the red key and the Plasma Shotgun.
In order to reach the Water Ruin level, you need to use a powered-up character and fly to the ledge where you found Tribals 5 and 6. Follow the tunnels until you find your ship. Enter it to fly to Water Ruin.
Cerulean
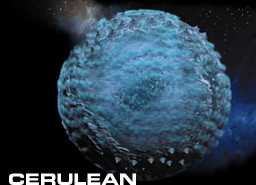
Cerulean is another level with only one area, and any character can easily complete this level without the Jetpack. There are three Gold Bars hidden in the area, which need to be collected in order to complete the level. You will most likely be playing this level a Vela, as she comes here right after completing the Battle Cruiser.
Dune
Total Tribals: 8
- 1-6: Enter the door that you need to destroy with the Tri-Rockets.
- 7-8: Right nest to a pillar near your ship at the end of the level.
There are three Gold Bars needed in this level. Here are their locations:
- 1. Right next to your ship at the start of the level.
- 2 and 3. Turn right immediately upon entering the large field to go to a small pond where you will find the 2nd Gold Bar. Continue a little farther to find the 3rd one on top of a pipe.
Once you have all three bars, you can then get the Tri-Rocket Launcher (which is needed to get a majority of the Tribals in this level). To do so, go through the Life Force door at the start of the level to talk to Fishface. He will give you the Launcher in exchange for three Gold Bars.
Now that you have the Tri-Rocket Launcher you can enter the blocked door at the opposite end of the field to get the six Tribals inside. A little farther into this cave brings you to three doors. The unmarked door leads to a Gemini Holder and the Homing Missile Launcher. The Yellow Key door leads to a capacity crate, and the Life Force door leads to the final stretch of tunnels to the end of the level.
Ichor

This is the third planet that Vela visits, and it is also one of the more challenging areas in the game due to the sheer number of bugs infesting the military complex here. This is also the level where Vela will free Lupus, and a Ship Part can be found by the little pup.
In the Military Base, only a powered up Lupus can rescue all the Tribals, while only Juno or Vela (powered-up) can catch them all in the Perimeter.
Military Base
Total Tribals: 16
- 1-2: In the area with the flying octopuses behind some barrels.
- 3-4: In the same area right behind the flying octopuses, down the ramp.
- 5-7: Two of the three Tribals in this group require the Jetpack to obtain. They are in the room with the sniper ants (right before the room with the moving pistons). Two of them are on the Black/Yello striped walls while the third is in a corner.
- 8-9: Only Lupus can rescue these. In the room with the moving pistons, Lupus must over across the gap to reach them.
- 10-12: In the room with the moving platforms, use Lupus to hover over to them. You can also get them by positioning the green platform halfway between the middle and far-left pillars, but Lupus is much easier to use.
- 13-16: In the large room after the colored platform room. Be sure to kill the ants first, as they will go after the Tribals. Two of the Tribals in this room require the Jetpack to get.
The Military Base can be pretty tough, but as long as you aim your shots well (manual targeting helps) you should do OK.
In the first area is a walkway that you can jump to and pull yourself up. There are two exits on this walkway, and the first leads you the Flares and Sniper Rifle. The other way leads to a Blue Key door that can only be accessed by Juno or Vela (powered-up). So, head back to the ground floor and slaughter the bugs to enter the Life Force Door.
Inside the next area, you can shoot out the glass to access a Floyd Mission Pad. The objectives for this one are:
Primary
- Collect 15 oil cans
- Finish within the time limit.
Secondary
- Collect 50 oil cans
By getting a Gold rating or better, you will receive the Jeff and Barry II Arcade Chip to use in the Perimeter area to play in the arcade. As Vela play through the level until the end where you will fight her boss (after which she will go to Mizar’s Palace). As with Junos, this one can be pretty easy:
- Shoot the antenna first.
- Then the body.
- Then the Guns.
- Finally the Head.
When the bug is dead, Vela will have completed the level and rescued Lupus. To get the Ship Part (as the Jetpack Lupus), make your way through the level until you get to the large room after the colored platform room. Up at the top of the room are two pipes, one has lava and leads to a Bonus Totem, but the other has water and leads to the Ship Part.
The Perimeter
NOTE: Only powered-up Vela and Juno can access this area and they need the Blue Key.
Total Tribals: 8
- 1-2: In the secret crawl space that you used to sneak up on the ants manning the cannons.
- 3-6: In the barricaded area. Some are behind walls, while others are on top of them.
- 7-8: In the dance club, right next to the bartender.
This is a very fun level toward the end, since you get to turn into an ant and go dancing with the bugs.The first six Tribals are pretty straightforward to get, but the last two require a little trickery on your part. Right outside the barricade area is an ant transformation pad that will turn your into an ant. Stand on that and get into costume. Then, run around the corner to find a row of bugs lined up to enter the dance club and rescue the final two Tribals.
Spawn Ship
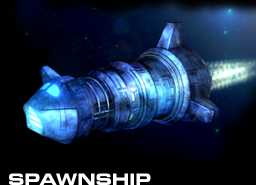
The Spawn Ship is Lupus’ first mission, and is really tailored to his hovering skills. However, despite this only Vela with the Jetpack can rescue all the Tribals in this level.
Troop Carrier
Total Tribals: 16
- 1: Under the first walkway at the beginning of the level, on top of a door.
- 2: In the room with the first big gap and a giant ant.
- 3: In the room below the second Tribal
- 4: In the room to the right of the steps.
- 5-6: In the room to the left of the steps.
- 7-9: Through the underwater passage in the room to the far right of the steps. These are the Tribals that only Vela can rescue.
- 10-13: In the room past the green key door.
- 14-16: In the room past the red key door.
There is only one weapon here (in two locations), and one ship part. Other than that, only Vela can rescue all the Tribals in this level, since she is the only one who can swim underwater.
In the same area where Vela swims to the Tribals, she can also find the Shocker Weapon. If you want the Shocker for another character, go to the lava room and find the passage in the wall (Lupus can hover there and Juno can just walk), to find a passage to the weapon. To get the ship part in this level, use Juno to walk through that passage in the lava room, which will also lead you to the ship part.
Rith Essa

Rith Essa is one of the larger planets in the game. There are four different areas here, and all characters need to be used (once they reach Mizar’s Palace), to completely clear out the levels. Even so, Lupus is the first to arrive here as this planet is right along his route to Mizar’s Palace. There are many flying enemies here, as well as several large bugs, so you will want to be careful.
Bluff
NOTE: Only Juno or Vela with the blue key can rescue all the Tribals in this area.
Total Tribals: 8
- 1-4: Next to the waterfall (beyond the blue key door).
- 5-6: Go through the blue key door to get these two above the waterfall.
- 7-8: On the path near the end of the level behind two giant bugs. Grab the Tribals before attacking the bugs.
Right as you land on Rith Essa, Lupus can find a Homing Missile launcher near the landing pad. There are only a couple Tribals that Lupus can actually grab in this level (since many are behind the blue key door, and only Vela and Juno can get the blue key). So, quickly make your way through a Lupus (be sure to grab the Tri-Rocket launcher on your way through the falls).
One "puzzle" in this area involves Vela. She needs a mine key to get into the mine area, but the guy holding the key won’t give it to here unless she gives him a magazine. Well, you can only get the magazine on Eschebone, so once again you will want to return here after Mizar’s Palace.
Ascent
NOTE: Only Juno or Vela with the blue key and their jetpacks can rescue all the Tribals here.
Total Tribals: 6
- 1-2: On the path at the beginning of the level.
- 3-6: In the last room before the end of the level.
The only really tricky part of this level is when you come to a field of pillars over the clouds. What you need to do, is fuel up at the fuel pads and then fly to the pillar right in front of you. Repeat that with the next pillar, and so on to reach the end of that area.
Interior
Total Tribals: 4
- 1-2: On ledges at the start of the level.
- 3: Right before the pond, on a ledge.
- 4: Near the steps.
Interior is an extremely short and very easy level. There are only four Tribals, and no weapons to find. There are numerous capacity crates scattered around, but other than that the level is pretty much a straight shot to the end.
Mine
NOTE: Only Vela with the Jetpack can rescue all the Tribals here.
Total Tribals: 16
- 1-4: Lower level in entrance area.
- 5-6: Elevator room, past the bridge.
- 7: Ride the elevator to Tribal #7.
- 8-9:In the next area, past the left tunnel, cross the bridges.
- 10: Same area as the last 2, but behind a pillar.
- 11: Again, in the same area, drop down to find him at the foot of the elevator.
- 12-13: In a massive cave next to a Tribal transformation pad.
- 14: Exit that cave and take the tunnel down to find it.
- 15-16: Fly up the elevator shaft with the jetpack to the third floor.
The Mine is one of the levels that you need to return to after completing Mizar’s Palace and your characters are powered up. Only Vela can access this level, and she can only get the mine key after going to Eschebone to get a magazine. When you have it return it to the guy in the Bluff area to get the Mine Key and enter this level.
There is also a Ship Part here, but the character holding it will only give it to a Tribal. How do you get it? Well, there is a Tribal transformation pad here that will turn you into a Tribal in the same way the Ant transformation pad turned you into an ant earlier in the game. Use that and then walk up to the guy to get your ship part.
Eschebone

This is Lupus’ final stop before Mizar’s Palace, and it also features the most annoying boss any of the Jet Force team must battle. Lets just say you will throw your controller to the ground, and curse the names of the gaming gods many times before ending this planet. There is a lot of lava in this planet, but there are many rewards. It is here where you will get a ship part, and the magazine that Vela needs to access the Mines on Rith Essa.
Approach
Total Tribals: 6
- 1-2: In the first area with the stepping stones.
- 3-4: In the collapsing bridge area.
- 5-6: One is on each side of the center platform in the giant mouth area.
Approach is an extremely easy area. All you need to do is collect six Tribals, all of which are along the way to your destination, and enter the next area. The only things you really need to grab here are the grenades, which are right near the giant mouth. Once you have them, lob a few into the mouth to make the bridge form a bridge to lead you inside.
Thorax
NOTE: Vela is needed to rescue all the Tribals here.
Total Tribals: 12
- 1-2: Use the jetpack to launch yourself up to the monoliths in the first room
- 3-4: In the volcano room.
- 5-10: Vela has a short underwater quest in this level, and these Tribals are in her underwater tunnels.
- 11-12: In the same room where you get the Magenta Key.
This is another level where Vela is needed for her swimming abilities. Lupus still needs to pass through here to get to his boss and then Mizar’s Palace, but only Vela can rescue all the Tribals in this level. When you come to the water area with Vela, dive on in to access her short quest where Tribals 5-10 will be found. Also, Vela will find the Specialist Magazine in this short quest, which Vela will trade for the Mine Key in Rith Essa. There is also a Floyd Mission here:
Primary
- Collect 8 DNA strands
- Complete within the time limit.
Primary
- Collect 25 DNA strands
- Complete within the time limit.
Completing the Floyd Mission with a gold rating gets you the Rith Essa Target Range level in the Multiplayer Mode.
Cortex
NOTE: Again, Vela is needed for this level.
Total Tribals: 5
- 1: Down the first right branch.
- 2: Down that same path, right past an electricity beam.
- 3: Stay to the right at the next fork.
- 4-5: In the left path right before the exit.
The Cortex serves one purpose: To get a ship part. It is a long, branching, tunnel that leads to a giant brain, where the ship part waits for you on top of all the floating platforms. The level is kind of hidden. To find it, enter the Thorax level, and walk out of the ribs in the monolith area. Then, use the jetpack to rocket to the top of the rib cage to find the entrance to the thorax.
Lupus Boss:
Twin Mantis
As was stated at the beginning of this section, Eschebone features what probably is the most annoying boss in the entire game (even more so than the Final Battle with Mizar). As with all other bosses, these pests have a set pattern and weaknesses. To defeat them:
- Shoot the guns out of their hands first.
- Then go for the claws.
- When the claws are gone, shoot the tail.
- Finally get rid of the head and torso.
Now, since there are two of these guys, you will need to repeat the same steps for each Mantis. Once they are dead Lupus will head to Mizar’s Palace where all three members of the team will meet up, get powered up, and face Mizar for the first time.
Mizar's Palace

Well, you’ve finally done it. You have made it all the way to Mizar’s Palace with all three characters. Each team member must go through one level each, and then enter the pyramid in the center of the palace.
Lobby (Juno)
Total Tribals: 14
- 1-3: Go through the right door from the main hall.
- 4-5: Through the left door from the main hall.
- 6-7: Underground through the right fork, first doorway.
- 8-10: Second door from the same right fork.
- 11-12: Left fork, through the first door.
- 13-14: Same fork, second door.
Juno’s first level in Mizar’s Palace is one of the larger of the Palace levels, but it is also a little easier to navigate than Lupus’. After entering the building from the large entrance area, head down each hallway to collect the Tribals there. Then, return to the main room and loot at the map near the two doors. This will show you how to get underground. Facing away from the two doors, the middle torch on the right side will drop you underground.
Once you complete the underground portion, you will be one step closer to the Pyramid. To get there, you need to do another Floyd Mission. This one is pretty easy you just need to collect three items and then fly into a small shaft.
The three objects are located:
- In the middle of the giant rings.
- In the gap of the wall to the left of the pillars.
- Just before the exit of the level in a small window to the right.
When you collect the third piece, continue through the window to access the generator and end the level. Once you do that, the Pyramid will appear. Enter the Pyramid to go into stasis until the other two members arrive. Also, you will want to return to this area when you have the jetpack to use the Ant transformation pad that is opposite of the entrance. This will give you access to the racing mini-game that will reward you with a required ship part.
Flume (Vela)
Total Tribals: 6
- 1-4: Right after the underwater tunnel, inside the room.
- 5-6: Outside from the temple near the waterfall.
Vela’s trip to the pyramid is much shorter and easier when compared to Juno’s. All you have to do is swim through an underwater tunnel, and then rescue six Tribals right as you exit. When you do, enter the Pyramid to go into stasis and wait for Lupus.
Chasm (Lupus)
Total Tribals: 10
- 1-2: In the starting area.
- 3-6: Right near the exit from the Night Vision Goggles area.
- 7: In the sunny area after the darkened passage on a platform.
- 8: In the same area, behind the waterfall.
- 9-10: Right next to the exit from the area.
Lupus actually gets to go through a pretty unique adventure. He must make his way through a completely dark area, while using Night Vision Goggles to find his way around. You’ll find this extremely useful item very early in the level, and it will be use automatically upon entering the dark area. Once you make it to the exit, enter Mizar’s Pyramid where Lupus will be re-united with the rest of the team. When that happens, you will finally face Mizar…for the first time at least.
This fight with Mizar is mainly here just to expand the story, as it is not much of a challenge at all. Mizar will put a limited force field up, so only Lupus (using his hover ability) can get to him for this battle. The battle is extremely easy. You can basically stand in one spot and fire everything you got at him to win. After that limited skirmish, Mizar will be very ticked off and decides that he will destroy Earth. So, he does what any super powerful space being would do, and tosses an Asteroid right toward the planet.
As if collecting Tribals wasn’t enough, now you must save the world! The Tribal Leader King Jeff explains to the team that he has a ship that can stop the Asteroid, but it is missing 12 pieces that you must find (those are the ship pieces that have been mentioned in this guide). He holds the final piece, but will only give it to you once every single Tribal in the universe has been found.
So, to help you out the King will upgrade all three of you with Jetpacks so you can now return to nearly every level in the game to locate the ship parts. If you don’t want to read through each planet’s guide again, you can just look at the Ship Parts section.
Walkway

This is a small level that the team can access once they complete the Depository area of the S. S. Anubis. It is very straightforward, with only six Tribals and no Ship Parts. You will want to use Juno here, as his crowbar is required to get all Tribals.
Peak
Total Tribals: 6
- 1-2: Use your crowbar (inside the station) to access the underground ducts and find these two Tribals.
- 3-4: Fly to the roof of the station with the jetpack.
- 5-6: Each of the last two Tribals are on ledges right below the rear of the station.
Gem Quarry

Gem Quarry is the level that Lupus accesses after completing the Goldwood Rim level. This is an easy area in that there are no enemies, only Tribals and a small task to perform. When you land, Magnus will tell you about the asteroids that are about to destroy the world. They have a means of deflecting them, but the machine is in need of power. So, you need to run to the clearing and shoot crystals at the front of the machine until the beam is strong enough to deflect the asteroids. Once you succeed return to Magnus to a ship part. Of course, there are some Tribals here so here we go with the locations:
Total Tribals: 5
- 1-2: At the beginning of the level near your ship
- 3: Near the middle of the stage.
- 4-5: Near the far door.
Space Station

Just as Lupus accessed a stage upon completing Goldwood, as does Vela. Her stage is Space station, although anyone can come here via the map screen. One good reason to come here is the Flamethrower weapon that can be found here. To get it, there is a hole near where your ship is docked with the station. Drop down in there to find the crate. Besides that weapon, the big thing in the level is the large amount of Tribals here. There are twelve total, and they can be tricky to get:
Total Tribals: 12
- 1:To get the first Tribal, you need to make a leap of faith from your landing zone into a secret room.
- 2: Jump on the box in the same area as your ship to access #2.
- 3: From there, go through the hole to find #3 next to the Flamethrower crate.
- 4: Go through yet another hole next to the crate to get Tribal #4.
- 5: From the landing zone, go straight and then right to a small chamber.
- 6: On the lower level of the two-story room.
- 7: From the Bonus Totem, turn right twice.
- 8: Under the first walkway you come to.
- 9-10: In the lowest level of the station, quickly take out the ants and then find two more Tribals.
- 11-12: Follow the right tunnel and then turn left two times.
Water Ruin

The final stage before Mizar’s Asteroid is Water Ruin. You can access this stage via the Battle Cruiser, and flying up to the hidden walkway in the second large hall. Follow the walkway until you find your ship, which will then bring you to Water Ruin. While all characters can access Water Ruin, only Lupus (with his hovering ability) can rescue all the Tribals. Also, there are two ship parts here, one of which only Vela can get (by swimming into the small save under the main island). The other one is for Juno. Remember the Floyd Mission in the Hold of the S. S. Anubis that I said was absolutely necessary to complete the game? Well it is now that those earplugs will come into use. Find Ivana in the middle of the ruin and give her the earplugs. She will be so happy that she will reward you with the ship part.
Total Tribals: 8
- 1: Right behind your ship hiding behind a rock.
- 2: On a rock slab to the right.
- 3: On another rock in the water.
- 4-6: Along the top of the ruin wall.
- 7: On a pillar near the wall (hover from the top of the wall to get it.
- 8: On the ground to the right of the ruin.
Asteroid
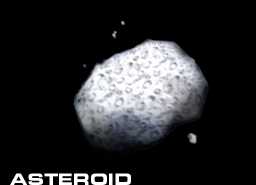
Once you have collected every last Tribal in the game (and all the ship parts), return to Mizar’s Palace and see the King. If you did indeed find all the Tribals, he will give you the 12th ship part and send you on your way to the asteroid for your final battle with Mizar. Upon the approach to the asteroid, your ship will crash and Juno will be separated from the rest of the team. It will be up to him to defeat Mizar and save Earth. The majority of the level tosses a ton of bugs at you. The key is, you DO NOT need to fight each and every one. As a matter of fact, the only ones you will really have to defeat are the ones in the small area were there is a Life Force door. Of course, you must defeat all of them to open the door and continue. You will when you are close to Mizar when you come to a room with a bright opening and two rows of capacity crates. Grab each and every crate and then exit through the opening to face Mizar.
Ok, here it goes. The final battle with the big bad bug. Mizar has multiple attacks, but he can end up being easier than the twin mantis boss, if you keep your cool. His attacks are: Meteors: Mizar will launch multiple small meteors at you, and you are only able to shoot the gray ones. Use the machine gun for this phase of his attacks (he does this about three or four times in the battle).
Radioactive Breath
This is an easy attack to avoid. When he starts breathing this green mist at you, simply move to the left or right out of the way. Also, it doesn’t do much damage.
Claws
Sometimes Mizar will rear back and try to strike you with his claws. To avoid damage, move out of the way, and then jump over the shockwave.
Lasers
This is the easiest attack to avoid. Mizar will shoot small purple lasers at your from his eyes. Just move out of the way to avoid them.
Electricity
This is the most dangerous attack Mizar tosses at you, as well as one of the hardest to avoid without taking damage. When you see Mizar begin this attack, look at where the beam hits the ground, and keep an eye on that "ball" of energy. Move toward it when it is moving in your direction, and then jump over it right before it hits you.
Defeating Mizar is actually not too tough if you are patient and manage to dodge his attacks. Arm the Homing Missiles and then wait until his back is to you. Get a lock on the backpack and fire away. You should be able to get off three, MAYBE four, shots each time you have a clear shot. Only shoot him when his back is turned to you, as front-on shots will not damage him. Continue this until he can no longer fly (if you run out of Homing Missiles, use Tri Rockets), and then unload everything you have left at his face until he is destroyed.
Even with Mizar defeated your mission is not complete yet. You still have to stop the asteroid from hitting earth. The only way to do this is to blow it up form the inside and the only Floyd can fit inside the cave to the core. So you have one very easy Floyd Mission to complete. Simply fly to the end of the cave before time runs out to destroy the asteroid and complete the game.
Congratulations! You have completed Jet Force Gemini! Now, sit back and enjoy the ending. You’ve earned it.
Ship Parts
Part: Fuse
Character: Juno, Vela, Lupus
Location: Mizar's Palace Race
Where: Win the Mizar Race when disguised as a soldier drone. To get to the race, use the Ant Transformation pad near the large pyramid, then get on the round platform to reach the race.
Part: Radar Dish
Character: Juno, Vela, Lupus
Location: Gem Quarry
Where: Beat the Gem Quarry and talk to Magnus. In order to beat the Gem Quarry, you must continually fire crystals at the machine until the colony is saved.
Part: Vela's Hatch Key
Character: Vela
Location: Goldwood Lodge
Where: At the end of the Goldwood Lodge area, there is a large cliff, but jumping down it you can enter a door where the ship part is.
Part: Juno's Hatch Key
Character: Juno
Location: Spawn Ship Where: In the lava tunnel towards the end of the Spawn Ship is a small opening. If you enter that and follow it to the end, you can find the part.
Part: Lupus' Hatch Key
Character: Lupus
Location: Ichor Military Base
Where: Hover across to an open tube in the base's large floating platform room. In the pipe with the water, you can find the ship part.
Part: Nitrogen Tank
Character: Vela
Location: Water Ruin
Where: In a cave underneath the main island. It is just sitting in the middle of the room.
Part: Cargo Bay Key
Character: Vela
Location: Tawfret
Where: Underneath the tree in the swamp where you found the pants.
Part: Deflector Shield
Character: Tribal
Location: Rith Essa Mine
Where: As a Tribal (use the transformation pad to become one), talk to the mole miner named Farmer.
Part: Fin
Character: Juno, Vela, Lupus
Location: SS Anubis Passageway
Where: Receive it from Midge at the end of the Passageway area. Midge is in the door to the right as you enter the large room at the end.
Part: Power Cell
Character: Juno, Vela, Lupus
Location: Water Ruin
Where: Give Ivana the Bear the Ear Plugs (from the SS Anubis Floyd Mission). She is on the middle island in a small crevice in the wall.
Part: Oxygen Tank
Character: Juno, Vela, Lupus
Location: Eschebone Cortex
Where: Near the alien brain. Use the platforms to reach it.
Part: Stabilizer
Character: Juno, Vela, Lupus
Location: Mizar's Palace
Where: Get it inside Mizar's Palace once you have rescued all Tribals. Then talk to the head tribal again to reach the final level.
Review - Nelson Taruc
October 12, 1999 4:58PM PDT
Nintendo 64 fans should pick up this title without delay and hope that Rareware's team of top-notch talent will continue to churn out even more games like this one for years to come.
Some teams just keep finding ways to win time and time again. It is no different for video-game developers, especially if the developer's name is Rareware Its latest endeavor, the 3D space adventure Jet Force Gemini, has such a wide variety of awesome gameplay that it could be broken up into four separate games - and still get strong reviews. That said, Jet Force Gemini easily joins Rareware's already impressive stable of hits, which includes GoldenEye 007 and Banjo-Kazooie.
At first glance, Jet Force Gemini seems like a chemical compound that incorporates the best elements from several successful franchises: Take Turok's enemies, add in Banjo-Kazooie's gameplay, include GoldenEye's sniping action, then throw in a Star Wars-like theme complete with sidekick droids and furry Ewok-like creatures known as Tribals - and mix. The game's basic goal is to search for and rescue the Tribals, who've been attacked and enslaved by alien insects. To do this, you assume the role of three main characters (unlocked eventually as the game progresses): the fraternal twins Juno and Vela, plus their canine mascot, Lupus. Once they are unlocked, you can play any of those characters' unique, moderately sized quests in whatever order you please. There's also a wealth of multiplayer modes (more on that later).
Since finding Tribals is the name of the game, its multipart levels offer plenty of exploration. However, it is possible to go an entire level without finding a single one, since many levels have branching paths and optional locations to visit. You may also find multiple exits in a level that lead to optional secret levels. The game's free-flowing nature gives virtually no hints, so you must figure things out on your own (a prospect that may frustrate novices; it is easy to get "stuck" in a few levels). Many of the levels offer simple puzzles that you can solve to save Tribals, such as one in which you move color-coded platforms to get across a room.
However, most of the fun is reserved for killing baddies. In terms of AI, enemies have basic common sense: They can run for cover, dodge, weave, and they have weak points and defenses. Some enemies use different attacks, depending on whether they've spotted you or not. Others are mindless drones who use sheer numbers to overwhelm.
This AI lets you develop your own playing style in response, which is highly rewarding for a game of this nature. You might prefer to snipe from afar and use available cover (such as boxes and walls) to avoid return fire. Or you might just want to pull a Rambo and go in guns a-blazin'. Each strategy has its drawbacks (losing time vs. losing life). You can also play from a third-person perspective, which is harder but necessary for jumping. You can always revert to first-person view on the fly, which makes targeting enemies much easier.
The game's control scheme actually flip-flops between two views, depending on how the game's being played. In the default third-person view, the player uses the analog joystick to move around, the C buttons to strafe, jump and crawl, and the A, B and Z buttons to select weapons and fire. In this view, it is rather difficult to shoot enemies (especially at close range), which may prove frustrating to some gamers. To help alleviate this problem, the game uses the R button to switch to a first-person view more akin to Turok's. The C buttons become movement buttons, while the joystick becomes the crosshair target. Mastering this mode becomes essential, since you must aim directly at certain weak points to kill tougher enemies and bosses. This flip-flop in control can get confusing - and the confusion is only compounded by the lack of a jump button in first-person view. Those who've played Turok-type games may prefer to play most of the game in first-person view, which is OK except for the chore of keeping the R button down throughout the entire game. Overall, the control remains responsive at all times - but the awkwardness in using two very different control styles in the same game might prove distasteful to some.
What makes Jet Force Gemini work is a philosophy that is prevalent throughout Rareware's games: Make it easy to beat, but difficult (and rewarding) to complete 100 percent. Since you will find new power-ups along the way (such as robot droids, keys, weapons and jet packs), you will want to backtrack through the levels to explore previously unreachable areas and find secrets - this boosts the game's replay value immensely. It is in this area of the game that Jet Force Gemini really shines. One of the best secrets is a robot named Floyd; after you have found all his hidden parts and put him together, he'll becomes your sidekick. What makes Floyd so innovative is that a second player can take control of Floyd's targeting scope and turn the one-player game into a two-player co-op mode. Plus, Floyd acts as a special "key" to areas that lead to special mini-missions (yet another new type of game), in which the robot must fly through courses within a certain time limit.
Plus, there's always the reward for rescuing every single Tribal (and yes, you Ewok-clone haters will have the ability to kill every single one, as well). You can also find secrets to unlock hidden characters and modes for the multiplayer games. Plus, with tons of hidden areas in each level, where you can find weapons and weapon upgrades, there's seemingly no end to things to look out for. The four-player multiplayer mode, for the most part, follows the conventions of GoldenEye, Turok, and other similar titles. You can set weapons parameters, enable radar, and choose from a variety of levels. It is certainly fun and plays well, mainly because multiplayer games where killing is involved seem inherently fun. However, this game adds even more to the mix by offering a target-shooting game, and even a racing game (which can be unlocked by finding the corresponding secret in the adventure mode). In any case, the the variety of multiplayer modes alone makes the game worth your money.
Of course, the great gameplay in the multiplayer and adventure modes looks and sounds highly impressive, no doubt due to the developers' knack for knowing the ins and outs of the Nintendo 64 hardware. Smooth animation and slick, sharp graphics reign throughout, with never any slowdown or choppiness. There is not enough bandwidth online to catalog every example of stellar graphics (even without the expansion memory pak, it looks great), but here are a few highlights. As in Turok, enemies splatter with great gusto and die differently depending on how they're killed. The immense full-screen bosses and their massive attacks let players put their first-person targeting skills to the test. The explosions for grenades and missiles give off a radial glow that seems wholly convincing coupled with a Rumble Pak shake.
Furthermore, each of the sprawling levels has a unique theme and colorful landscapes, accentuating the feeling that you are traveling from planet to planet - not just from level to level. In addition, the music and sound effects really inject the proper mood for each level: foreboding music in dark, rainy levels, or bleeps and bloops for those high-tech missions. Rare even added many great visual touches (such as flies over an enemy's carcass), and impressive effects in night-vision levels (where everything turns shades of green) and in levels where you are swimming. Ranting and raving aside, the game is not without its minor flaws. As with almost any 3D adventure game, certain areas play havoc on the third-person camera angles. This becomes a slight problem when you are negotiating jumps - especially those that fall short, resulting in death or tedious backtracking. In isolated instances, enemies glitch up by running into boxes and sticking to them, making them easy targets. The other problems seem more a fault of system limitations than of the game itself. First, some of the backgrounds and textures look a little flat, such as in the forest stages. Second, it would've been nice in cinema scenes to have voices for the characters rather than sound effects coupled with text boxes.
However, these nitpicky complaints do little to spoil Jet Force Gemini's bottom line: It is chock-full of gameplay variety. Nintendo 64 fans should pick up this title without delay and hope that Rareware's team of top-notch talent will continue to churn out even more games like this one for years to come.
Review - Matt Casamassina
8 Oct 1999 5:00 pm
If you own a Nintendo 64, chances are you have heard of Jet Force Gemini. The game, more than two years in the making, is a 3D third-person action-shooter developed by British software house Rare, a company that is undeniably one of Nintendo 64's best contributors. Created by Rare's Blast Corps team, Jet Force Gemini follows the quest of intergalactic policing agents Juno, Vela and Lupus the Dog, as they battle to restore peace to the universe. The original shooter is absolutely epic, incorporating huge, stretching worlds, a seemingly endless amount of enemies and a virtual scroll of tasks that need to be accomplished. As if this weren't enough, the title also features a two-player cooperative mode of sorts, a four-player battle mode and enough secrets to enhance replay value through next year. Jet Force Gemini is easily one of Rare's most ambitious endeavors to date.
Too ambitious, perhaps, for its own.
Rare aficionados may be discouraged to learn that Jet Force Gemini has more than a few dents in its shiny armor. The game's visuals, while grand, are often hampered by an irritating framerate that jerks and hitches at every turn and wide-open area. Meanwhile, game design issues that serve to extend replay value also double as a tedious annoyance. Additionally, control mechanics feel clumsy at times, often transforming what should be a relatively simple task into a lesson in frustration.
If you are expecting a perfect game, you are in for a disappointment. With that said, Jet Force Gemini still comes highly recommended. Considering all of the aforementioned shortcomings you might be wondering how this can be. Simple, really. It is a matter of the good outweighing the bad, and this is exactly the case with Rare's unique shooter.
The Facts
- Third-person 3D action-shooter.
- Epic quest promising 30+ hours of gameplay for first-time explorers.
- Play as multiple different characters throughout the adventure.
- 15 gargantuan worlds to explore with multiple sub-levels each.
- Two-player cooperative mode.
- Four-player battle mode.
- Multiple seemingly indestructible bosses.
- More than 15 available weapons and items.
- Real-time cut-scenes highlight the action.
- Cute style combined with grotesque death animations and bloody leftovers.
- Dolby Surround Sound enhanced.
- Wide-screen mode available.
- Save games to cartridge (multiple save slots available).
- Rumble Pak support. (Note: Despite what the box indicates, JFG does not support the 4MB Expansion Pak.)
Gameplay
If Rare is a company known for improving upon existing genres and ideas, then it is safe to conclude that the developer's Blast Corps team is the pioneering unit of the firm. After all, in a mix of Banjo-Kazooies and GoldenEyes — brilliant titles that based their foundations on previously established genres — it was Blast Corps that delivered a completely new, refreshing experience to Nintendo 64 owners. And among planned sequels to Banjo-Kazooie and GoldenEye, it is once again the Blast Corps team that has dug deep into its videogame roots for yet another original concept in Jet Force Gemini.
In the game, players control one of three main characters, Juno, Vela, and Lupus the dog. As the title begins, each character is forced to play through three huge, though entirely unique worlds before finally travelling to Mizar's Palace — a meeting point. Only when all three characters have met each other at Mizar's Palace can they explore each other's previous worlds, which become unlocked. So, players go through these levels the first time around and find that they cannot access everything they see; some doors remained locked, some Tribals (little bear-like creatures you need to rescue) sit too far out of reach and there are fuel pads on the ground that seem to be useless.
There are three important character traits to remember:
- Juno can walk on fire and lava. Fire does not hurt the character.
- Vela can swim underwater.
- Lupus can hover for extended periods of time.
Players must figure out when to use a specific character to access an area. In one of Lupus' stages, for example, the dog might find a door that cannot be accessed because it is on the other side of a giant lava pit. Players will quickly realize that while Lupus cannot cross lava, Juno possesses the ability to do just that. The idea is to return to the stage later in the game with Juno, who can cross the lava with ease and discover hidden — necessary — goodies on the other side. To make matters worse, most levels in the game feature items that require visits from all three characters to retrieve them all.
It is nearly impossible to fully complete a level the first time through it. There is almost always something that cannot be reached or retrieved without the help of another character. To complete the game, players must rescue every Tribal in every level. Rescuing Tribals is not an optional side quest — it is mandatory. This is a time-consuming task that is going to take an immeasurable amount of dedication on a player's part.
The IF after incredible IF of rescuing Tribals in Jet Force Gemini:
If gamers do not complete the level after rescuing all the Tribals in it, none of their hard work is saved. Not bad enough yet? Well, what if Rare decided to hide Tribals in hard to find areas and in-between explosive barrels to make the quest more difficult? Still here? Alright, what if enemy drones were made to try and gun down the Tribals as they were being rescued? Still up for the task? Okay then, how about if, like the Jinjos in Banjo-Kazooie, players had to rescue all the Tribals in a level before exiting, or had to start over from scratch if they were to accidentally miss or kill one?
It is fairly obvious that Rare has done everything possible to extend the replay value and longevity of the game by forcing players to go through level after level hunting down Tribals. Perhaps we could live with this horrible injustice if, every time we re-entered a level, all of its enemies weren't fully respawned and ready for action again. And perhaps we could even make due with that if, in order to progress through the levels again and again with different characters, we could freely run through them avoiding enemies. Instead, a good portion of the doors in each world remain locked until every enemy in the immediate area has been killed.
Bottom line, expect to play through levels multiple times, with enemies respawned and doors re-locked. Frustration, we guarantee you, will kick in — and it will kick in hard. And this, mind you, is to say nothing of retrieving all of the spaceship parts and items. The word tedious comes to mind.
Control
The setup borrows a bit from the Turok franchise in that the left and right camera (C) buttons are used to strafe left and right. C-Up and C-Down, meanwhile, are used to jump and crouch. The characters are maneuvered with the analog stick. If players are using the standard pistol, an automatic targeting system is utilized so very little precision aiming is required. All it takes to gun down a few ant drones is to position a character in their direction and hold the Z-trigger down. However, if a more advanced weapon is employed, such as the sniper rifle, players will need to use the R button to activate manual targeting. Once the R button is held down, the analog stick ceases to control the main character and instead works to move the gun target around for precision killing. It is possible play the game this way, using all four C buttons to move forward, backward, left and right. The A button is used to scroll weapons, talk and open chests, while the B button is more or less used to scroll backward and generally back out of conversation. Finally, the D-Pad acts as an instant weapon selector, as players can assign four of their favorite guns to the up, down, left and right positions on it.
There is a steep learning curve. When IGN64 first played JFG, we died almost immediately. We clumsily ran through a level, bumping into walls while struggling to come to grips with the manual targeting system. Only after practice and a decent amount of time with the game did we come to appreciate the control scheme, which allows for an amazing amount of different procedures to be accomplished with the Nintendo 64 controller. And yet, we wish Rare would have spent a little more time with it. The targeting system, in particular, is extremely difficult to master. We have beaten the game, rescued everything, uncovered all of its secrets; we have put more than 45 hours into the title. And when we try to snipe an enemy down from a tree in the distance, we still cannot help but struggle with the aiming system. It is just not very intuitive.
Additionally, characters move at a sluggish, sometimes catch-up speed. Press to the left and a character will move to the left. Stop pressing to the left and the character will still continue moving for a split second longer. This, coupled with Jet Force's framerate (which we will get to in a moment), actually damages any tight sense of control one might be hoping for.
The Good
In spite of all the drawbacks we have listed thus far, Jet Force Gemini still offers vintage Rare mechanics and challenge. Smart level design, coupled with lots of things to find, always gives players something to do in addition to blasting away at enemy after enemy (which is fun in itself). For example, during the course of the game players meet up with Floyd, a hovering robot sidekick. Unfortunately, before Floyd can be of any use, the robot must be reassembled by players; his body parts have been blown apart and scattered by Mizar's troops. Gamers must find the robot's pieces and bring them back to a stationary Floyd, who eagerly awaits the chance to be his old self again. Once this task is accomplished, Floyd becomes a playable character in the game. There are many similar objectives in the game, which work to dish out lots of small, but no less important sub-quests.
The game features five major boss encounters as well. We are not going to give too much away here, but we will note that each giant enemy has its own characteristics, strengths and weaknesses. Players will have to pinpoint these weaknesses and unleash an entire arsenal of weapons on them in order to succeed. These battles are brutal, difficult and very, very rewarding. We spent 45 minutes alone trying to beat the final boss in the game, and each time we thought we had bested the creature it would get back up again and begin fighting. However, once it was all over, we really felt like we had accomplished something. It is old-school gameplay brought into 3D and it is all extremely satisfying.
The action is non-stop. JFG features its share of exploration and puzzle-solving, but the game is a shooter at its core. In any given level, there are literally dozens and dozens of drones to kill and each weapon will take them out in a different way. Launch the tri-rockets into a room with tens of ants and players will be treated to a gory explosion of guts and blood, accompanied by some of the greatest sound effects in a Nintendo 64 game yet. It is twisted to be sure.
And it grows on you. We have mentioned the game's sometimes frustrating framerate. We have talked about Rare's insistence to reroute gamers through the same levels over and over again. We have noted the control issues in the title. If you are anything like us, though, none of the above will really matter in the same way that the sluggish framerate in GoldenEye really does not matter. If you are looking for a huge, epic quest, then be happy. If you want lots of action, then be happy. If you want some seriously deep gameplay mechanics, then be happy. Jet Force Gemini has you covered... and then some.
Arsenal, Ants and AI
Jet Force Gemini is a shooter at heart and therefore it makes sense that the game features more than 14 different weapons and a few damaging items to boot. The arsenal includes, but is not limited to the standard pistol, a machine gun, tri rockets, cluster bombs, shurikens, a plasma shotgun, grenades, a shocker (shoots lightning bolts), homing missiles and more. Each weapon, save for possibly the plasma shotgun (which is virtually useless), works in different ways. The pistol, as we have mentioned, features an auto target and never runs out of ammo. The machine gun sprays gunfire everywhere and is perfect for taking out air drones up-close, but does very little for long-range firing. Tri rockets kill just about everything in sight, but can also damage the player if they are too close to the blast and not careful. Shurikens — throwing stars — chop off the heads of shielding ants, thereby eliminating the pesky drones in one quick swipe. Almost every weapon really does serve a significant purpose.
The drones in the game are relatively smart. They do not run out into wide-open areas and wait for a player to blast away. They hide behind objects, use their shields to block bullets and run. Some, sensing they've got no chance, will even throw down their weapons and surrender. Specific enemies require the use of a specific weapon in order to be killed. Zombie ants — a walking, undead drone — for example, cannot be killed by a mere pistol or machine gun. But a strong blast from the tri rockets will rip the enemy to bloody pieces. Minor additions such as this add a bit more strategy to what is already an incredibly difficult adventure.
Multiplayer
Easily one of Jet Force Gemini's biggest drawbacks is its less than impressive multiplayer mode, a feature that almost feels as if it were thrown in during the last stretch of development to satisfy the masses. While Rare has admittedly implemented a lot in terms of options for the mode, including different battle types like straightforward deathmatch, target practice, a Diddy Kong-esque racer, none of it comes together as planned. The standard deathmatch mode, in particular, is slow and clunky. It wants to be a first-person shooter and would probably work fine as such, but the third-person view simply makes it too difficult to accurately aim, or, for that matter, even find other opponents. Meanwhile, the target practice mode, which relies heavily on the analog stick for aiming, also fails to pan out as planned. This is because the manual targeting system in Jet Force Gemini is flawed from the start; it is too difficult to accurately aim. An entire multiplayer mode centered around the manual aim is more frustrating than anything else.
On a brighter note, one of the multiplayer modes unlocked further into the game, that of the arcade Sprint Championship-esque racer, is a lot of fun. Simplistic in design, gamers race around a 2D track over and over again, avoiding obstacles and trying to outperform opponents. Long-time gamers will recognize the racer immediately and will likely appreciate Rare's perfect take of the classic title.
Finally, we should note that the cooperative two-player mode is excellent. One player controls the main character and the other maneuvers Floyd the Robot. All Floyd can do, of course, is target enemies and shoot them. He has no special weapons and has no say in what direction the main character walks. He is just an added gun for a second player to control. It is ingenious for a few reasons. First, it enables a second-player to really help out in the game. More importantly though, Floyd can be used very strategically. It is possible to situate the main character behind a crate and have Floyd fire away at a group of snipers sitting on a ledge in the distance, killing them all without the help of the main character. In fact, it is recommended that players use this strategy when battling endless armies of air drones. It is really very well done.
Graphics
 Jet Force Gemini has changed a lot since we first saw it more than two years ago. The three main characters were originally to be much more child-like in appearance. They were shorter and chubbier. However, after the game was previewed at E3 '99 in Los Angeles to crowds that were, shall we say, not so fond of the character design, Rare went back to the drawing board and whipped up the more grown-up Jet Force team we see before us.
Even with redesigned characters, though, Jet Force Gemini can still be described as “cute” looking, but only at first glance. For if gamers spend any amount of time with the title, they are more likely to describe it glowingly as, “bloody as hell!” The game offers an off-the-wall visual combination of cartoon-like graphics mixed with over-the-top cartoon gore. It is a bit strange, really, and we like it that way.
Example: Playing as Juno, gamers may walk into a tunnel area where a few blue ants await near an explosive barrel or two. Shooting the ants directly will result in them falling to the ground, and perhaps a body part or two breaking off before death. This is pretty gory in itself. Shooting the barrels, however, will cause an explosion that rips their bodies into pieces and sends gobs of gooey blood splattering over the tunnel walls in every direction. It is nasty.
Rare seems to have no issues about harming the innocent either. It is perfectly alright to accidentally (or otherwise) shoot the head off a kidnapped Tribal. The bear-like being's noggin will fly right off its shoulders, spraying out a pinkish glob of blood. As if this weren't bad enough, it is also possible to collect the heads of the Tribals (this can be done for ants as well. After a number of ant heads are collected, secrets will be unlocked). Perhaps the best demonstration of Rare's viciousness, though, can be seen in the design of the levels and the situation of ants. Certain doors remain locked until all enemies have been killed. One area in the title forces players to shoot a group of surrendered, helpless ants in order to advance to the next area. This sort of behavior is typical Rare, and we'd slap the developer on the wrist for it if we weren't too busy laughing.
Meanwhile, the levels themselves are absolutely huge and stretch forever. It is incredibly easy to get lost. Rare has chosen some, well, interesting color schemes for some of the stages in the game. Goldwood, for example, is spotted with rainbow colors of pink, green, yellow and brown. The effect is a bit hard on the eyes at times. Another good chunk of the game can be described as “blue.” None of the backgrounds immediately impress one as a visually striking title like Banjo-Kazooie does, but they will grow on players to be sure.
Unfortunately, Jet Force Gemini's framerate is its Achilles' heel. It is slow. It is jerky. It is downright annoying in certain areas. It is so inconsistent with multiple enemies on screen in wide-open stages that it really does damage control and the overall gaming experience. Without fluidity, precision aiming in manual targeting mode is extremely difficult and tedious and this is definitely one of the title's biggest and most important flaws. Because the manual targeting system is often a disaster waiting to happen, it is often easier to forgo it for automatic targeting. This, too, presents a problem as the camera angles work against the player, letting enemies escape the field of view with ease. So, many times a player is forced to fire blindly behind their self and hope that the spray of bullets kills whatever it is they cannot fully see.
One final gripe. Rare has done an excellent job of creating some breathtaking in-game cut-scenes. We are treated to these as players travel between levels. We see beautiful ships flying through space, avoiding asteroids, and landing on planets. Each scene can take 30 seconds or more. And we cannot skip them! After 200 trips between planets, this is unbelievable frustrating.
Sound
Jet Force Gemini boots and proudly displays the logo Dolby Surround Sound. All future Rare games will have it, and we could not be happier. JFG features some of the very best music and sound effects ever put into a Nintendo 64 game. Every new piece will have gamers humming along with it whether they like it or not. One level in particular, Tawfret, features music that is obviously inspired by the movies Alien and The Empire Strikes Back. Listen to it and we think you will agree. And if you are like us, you will turn it up as loud as it will go and enjoy.
The sound effects are dead-on and crystal clear. Bullets whiz by in full stereo sound. They can even be heard bouncing off walls. Enemies scream in pain before dying. Giant drones growl deeply before attacking. Allies speak in Banjo-Kazooie-esque rhythm, babbling out incoherent garble as text is displayed. One might think this is not effective, but it does the job perfectly. Perhaps our favorite sound effect in the game is that of blood, though. It can literally be heard splattering on walls in globs, just as body parts can be heard flying in every direction after a big explosion. It is gross.
The Verdict
Having played through every inch of Jet Force Gemini, I can honestly say that I enjoyed the experience very much. I never thought I would complain that a game is too big, but this is exactly the case for Rare's 3D action-shooter. The developer has created huge levels that stretch forever, implemented an epic quest that also stretches forever, and topped it all off by forcing players to rescue every Tribal in the game — a task that is far too tedious to truly be enjoyed. The graphics are beautiful and wonderfully stylized, but it seems Rare has tried to push the Nintendo 64 too far and as a result the title has suffered. A smooth framerate is something Jet Force Gemini simply does not possess, which is really a shame considering how much better the title might have played with one. And while the two-player cooperative quest is definitely worth checking out, the four-player deathmatch mode is too slow and too clunky to bother with.
With everything said and done, though, this is still one of Nintendo 64's most original games and it has much more good going for it than it does bad. Never-ending action, tons of enemies, loads of worlds to explore and Rare's unique brand of humor work to make this a good title that could have been a classic with a little more polish.
Cheats
Debug Mode
At the Title Screen (where Juno and the others run towards the screen) enter, Once entered you will see it appear in the bottom-right corner of the screen! To turn the code off you need to, Enter the code again on the same screen to turn Debug mode off.
C-Left, C-Right, C-Up, C-Down, R, L, L, R, C-Up, R, C-Down, R, L, C-Right.
Activates Debug Mode/Shows debug level names. If game freezes, the Console debug will display.
Glitches
Ammunition Trick
When you are out of machine gun ammo, kill an enemy with a pistol. Switch weapons to the one that is empty or low. Next pick up his gun. The bullets will now be compatible with the machine gun! As long as the equipped weapon is not the pistol or the shotgun, this will work.
Ant Head Unlockable
Jet Force Kids
200 Ant Heads
Mr Pants Enemies
300 Ant Heads
Rainbow Blood
100 Ant Heads
Hidden Worlds
Abandoned Space Station
Finish Goldwood: Lodge
Gem Quarry
Finish Goldwood: Rim
Walkway
Finish S.S. Anubis: Depository
Water Ruins
Find hidden Launch pad in the Sekhmet Battlecruiser
Unlock All Deathmatch Characters and Levels
Armored Juno
Reach Mizar's Lair with all 3 characters and beat him once.
Armored Lupus
Reach Mizar's Lair with all 3 characters and beat him once.
Armored Vela
Reach Mizar's Lair with all 3 characters and beat him once.
Beetle Termite
Find the Totem Pole in Tawfret (Tomb) with Vela.
Blue Ant
Find the Totem Pole SS Anubis (Generator Room 2F).
Cyborg Ant
Obtain an expert rank on all Floyd levels.
Female Tribal
Find the Totem Pole as in Rith Essa (Mine) with Vela after collecting the mine key.
Green Ant
Find the Totem Pole in Spawn Ship (Cargo Sewer).
King of the Hill Level
Find the Totem Pole in Cerulean Holding Room.
Male Tribal
Find the Totem Pole in Sekhmet (Channel Area) With Lupus after collecting the Magenta Key in Eschebone (Thorax. left intestine).
Metallic Termite
Find the Totem Pole in Sekhmet, (hover across the Spiral Walkway) as Lupus.
Purple Termite
Find the Totem Pole in Mizar's Palace as Juno.
Red Ant
Find the Totem Pole in Ichor (Military Base) as Juno.
Rith Essa Mine Level
Find the Totem Pole in Walkway Station (After getting Jetpacks).
Space Station Level
Find the Totem Pole in Space Station Basement.
Tunnels Level
Find the Totem Pole in Rith Essa Waterfalls as Vela.
Yellow Ant
Find the Totem pole in Goldwood with Vela.
Zombie Termite
Find the Totem Pole in Tawfret (Treehut) with Lupus.
Unlock Jeff & Barry Arcade Racing I and II in Multiplayer
To unlock Jeff & Barry Arcade Racing in Multiplayer, you must win first place playing Jeff & Barry Arcade Racing as Juno, Vela, or Lupus in the Ichor Arcade in single player mode. To unlcok Jeff & Barry Arcade Racing II in Multiplayer, you must win first place playing Jeff & Barry Arcade Racing II as Juno, Vela, or Lupus in the Ichor Arcade in single player mode.
Unlock Racing Mode
Go to the Mizar Palace center (after beating one of the levels in it) and get your Jetpack power ups after beating Mizar for the first time. Find the pyramid with 3 Mizar tokens and a Jetpack fuel pad. Use the jetpack to find a drone pad to turn into an ant. Now open the door that was previously locked to you and you will find the racetracks. Win the race to unlock Racing mode in Multiplayer.
Fish Food Tactics
The Fish Food is treated like a joke item. Aside from its obvious use, however, it actually has two practical applications in combat. It can feed and distract enemies, which can be useful in large crowds. It can also be thrown to detonate proximity mines without having to waste more important ammo.
